Gas Laws When looking at how gas particles


 vs. Pressure")
 LAB")


 vs. Pressure")

 vs. Pressure")
")
 vs. Pressure")


- Slides: 46
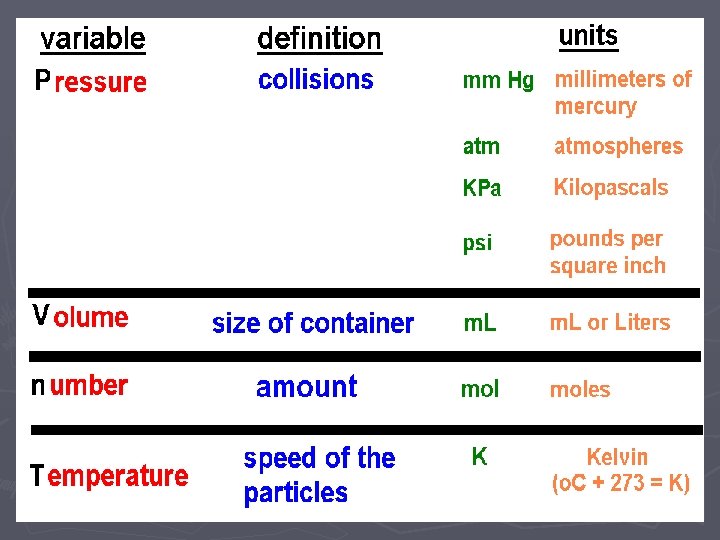
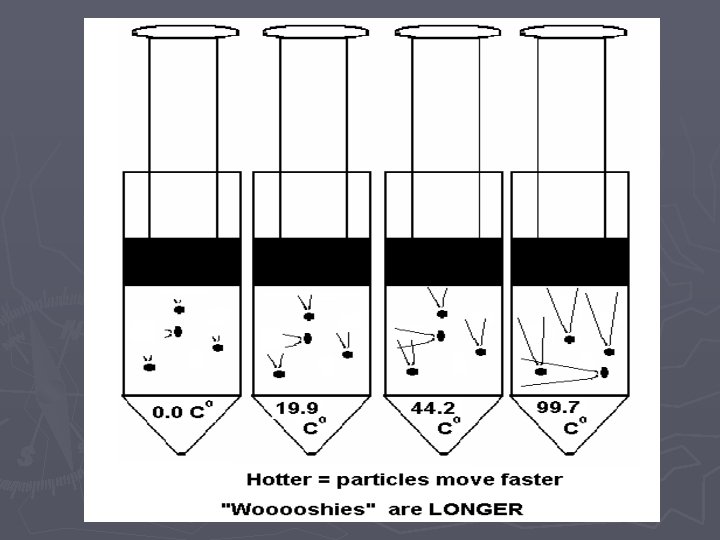
Gas Laws ► When looking at how gas particles react in different situations, we want to look at four different variables and how they affect each other: ► Temperature (Speed of the particles) ► Number of Particles ► Pressure (number of collisions of the particles) ► Volume (size of the container holding the gas)
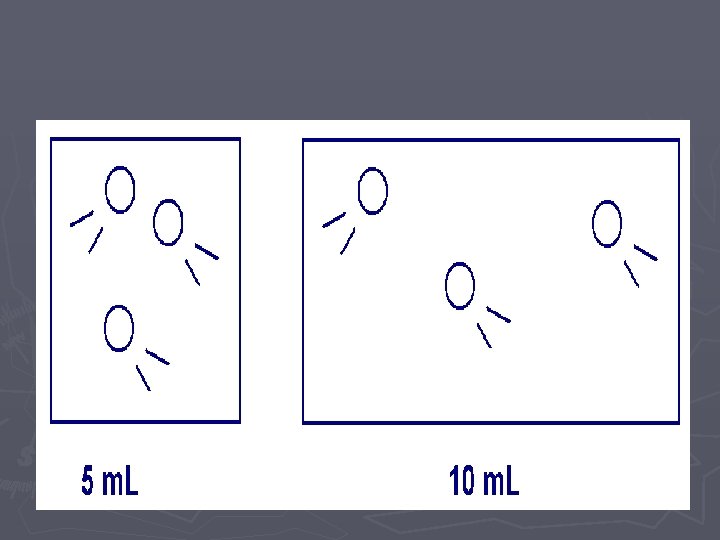
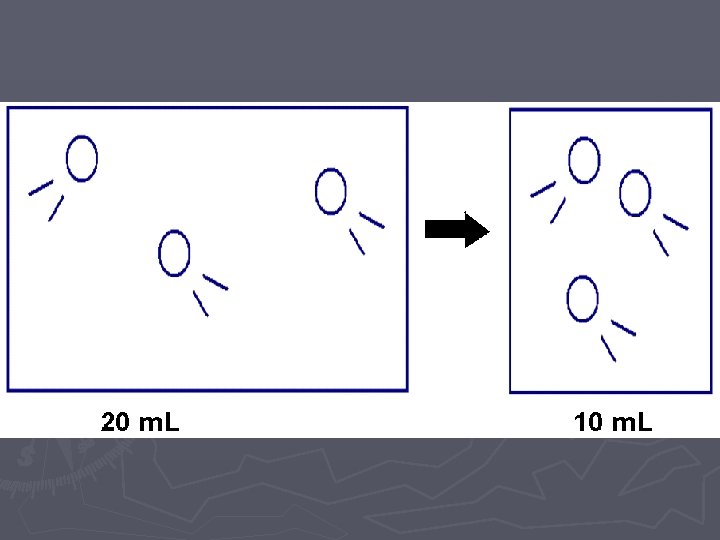
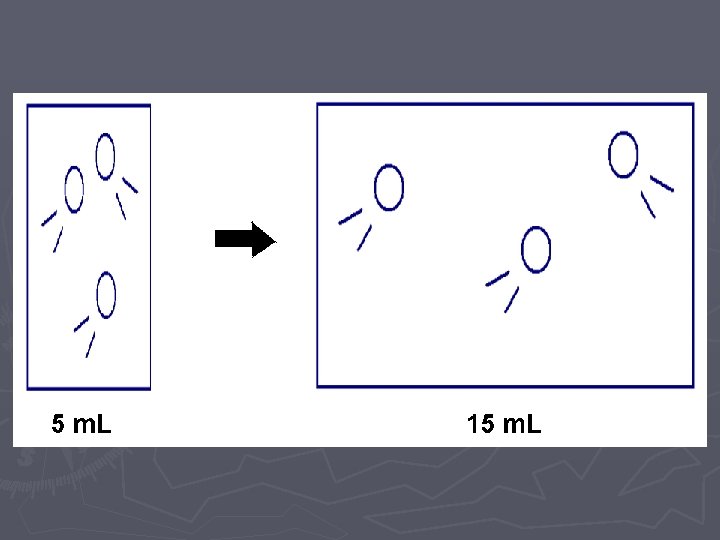
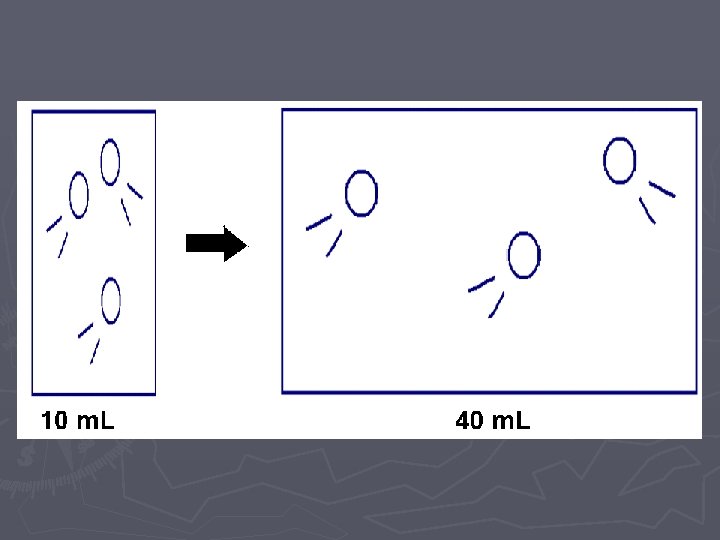
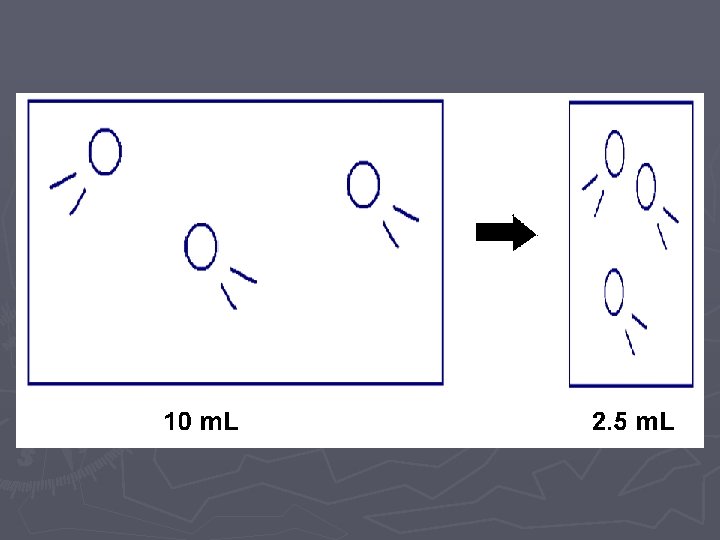
LAB ► In these two labs, we will look at how VOLUME affects the PRESSURE ► and how the NUMBER OF PARTICLES affects the PRESSURE. ► Of course when we do this comparison, we need to hold the other variables CONSTANT (cannot change them)
Pressure vs. Volume LAB
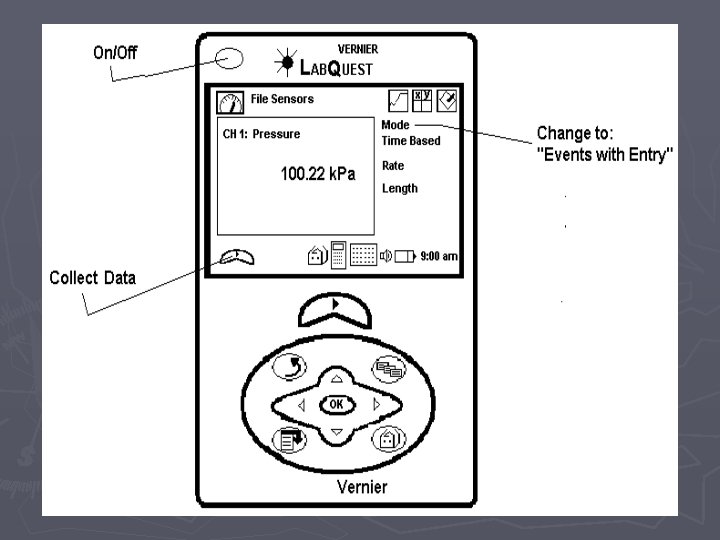
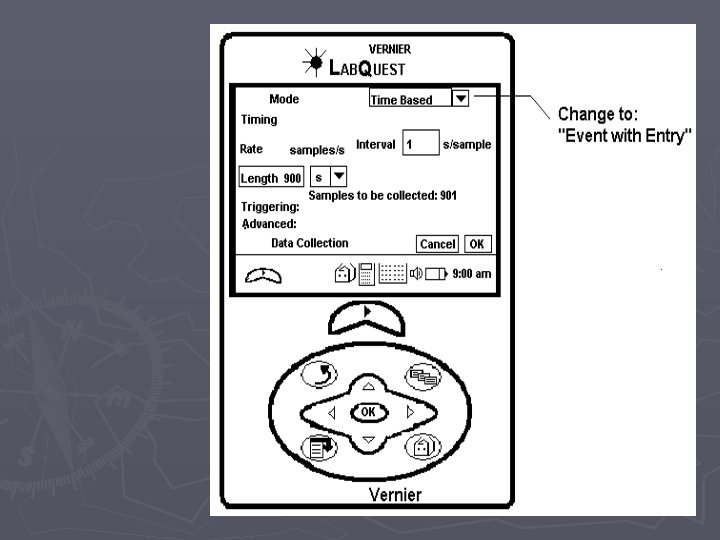
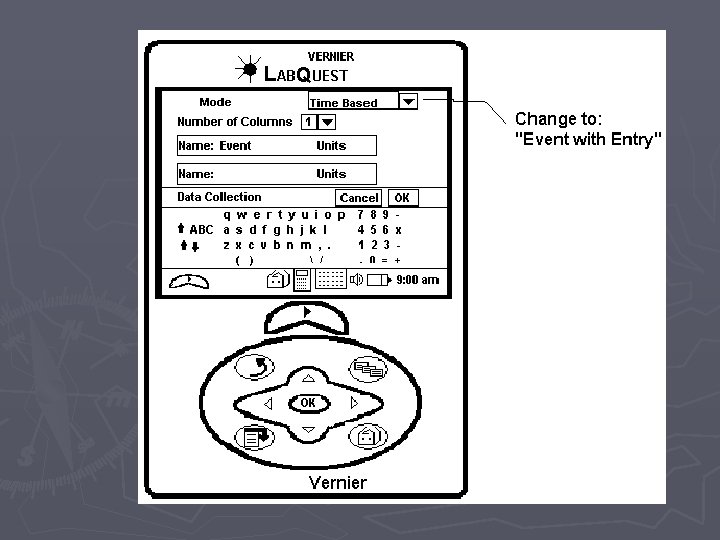
Pressure vs. Volume if you are the first group to use the Lab. Quest ► ► ► 1. Attach the power cord to the Lab. Quest and plug it in. 2. Turn the power on 3. Attach the Gas Pressure Sensor to the Lab. Quest in the Channel 1 port. 4. Pull the plunger of the syringe out to the 10 m. L mark and then attach the syringe to the Gas Pressure Sensor. DO NOT TIGHTEN THE SYRINGE TOO MUCH. To make sure that the seal is created but that the syringe does not “strip” the connection, twist the syringe only until you feel resistance and then stop. 5. On the upper right-hand corner of the screen, there is a box labeled “Mode” which reads “Time Based”. Press this with the stylus. 6. When the screen changes, look for the box, labeled “Time Based” at the top of the screen and press the down arrow with the stylus. Choose “Events with Entry” ► 7. When the screen changes, look for the box labeled “Name: Event” and press the word “Event” with the stylus. A keyboard should pop up on the bottom half of the screen. Use the keyboard to erase “Event” and type in “Volume”. In the box labeled “Units”, type in m. L and click OK. When the screen changes, begin the experiment.
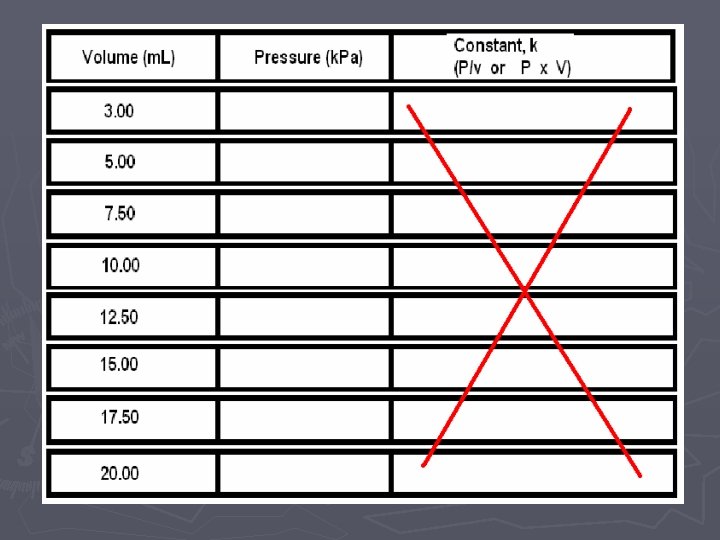
When you are ready to collect data: ► ► ► 8. Use the stylus to press button (f) on the lower left-hand side of the screen. The screen will change and you will see a blank graph. 9. Move the plunger of the syringe to 4 m. L and then press the button labeled (g) or KEEP on the bottom left-hand side of the screen. The screen will change and you will be prompted to enter a volume. Using the stylus, enter 4 and then hit OK and the point will be plotted. DO NOT remove the plunger 10. Move the plunger of the syringe to 6 m. L and repeat the process from step 9. 11. Move the plunger of the syringe to 8 m. L and repeat the process from step 9.
► 12. Move the plunger of the syringe to 10 m. L and repeat the process from step 9. ► 13. Move the plunger of the syringe to 12 m. L and repeat the process from step 9. ► 14. Move the plunger of the syringe to 14 m. L and repeat the process from step 9. ► 15. Move to 16 m. L ► 16. Move to 18 m. L ► 17. data collection is over ► 18. Use the stylus to press the (little square— stop)
► Use the stylus to press the button that looks like a picture of a table in the upper right hand side of the screen on the tool bar. This will bring up a data table. Copy this table down onto a sheet of paper. ► After you have copied down your data, hit “file” then “new”. It will ask you if you want to save or discard your data. Choose to discard it.
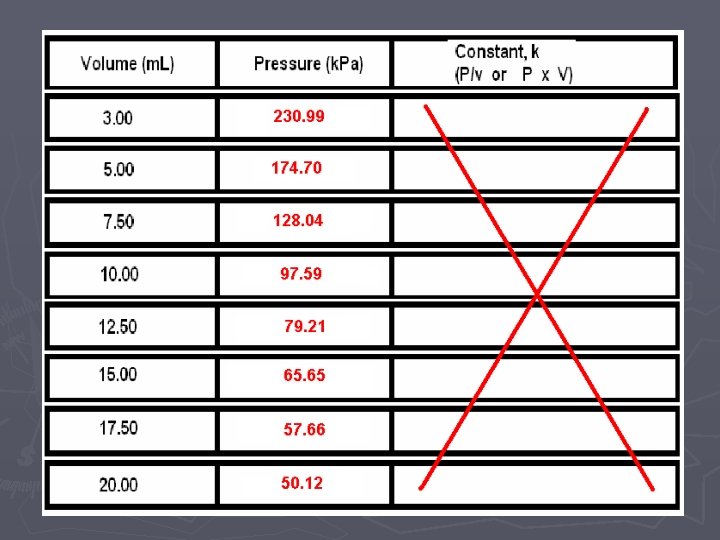
Volume vs. Pressure
Graphing P vs. 1/V
Graphing P vs. 1/V
Volume (inverse— 1/V) vs. Pressure
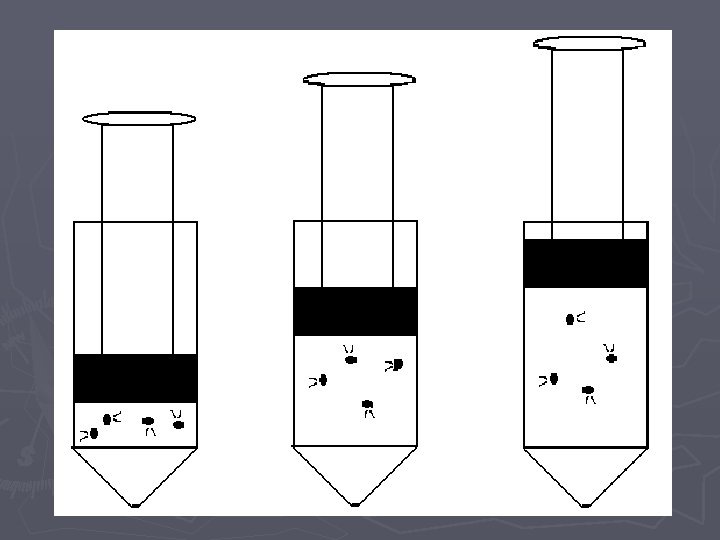
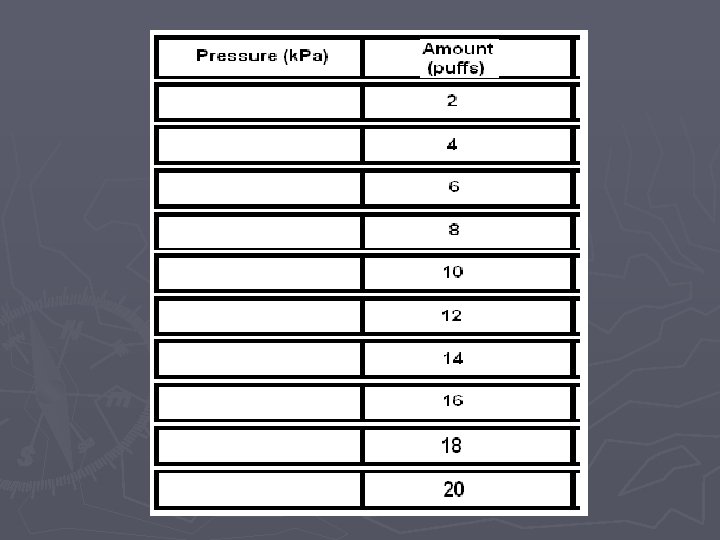
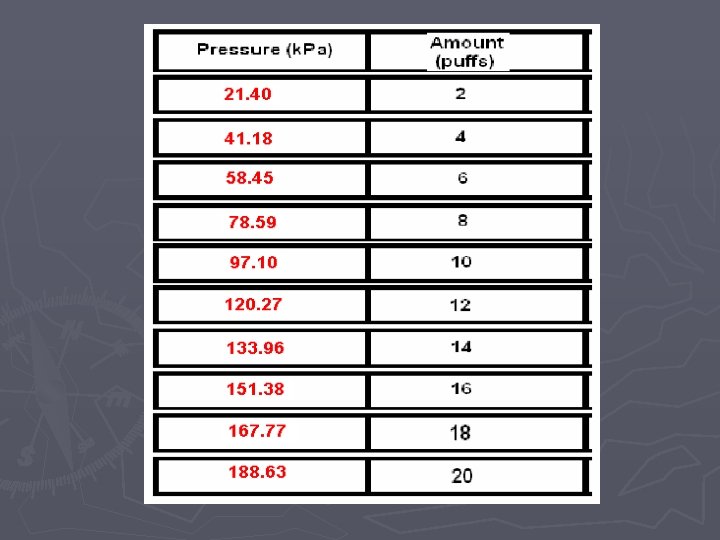
Pressure vs. Amount (Number of Particles) LAB
Pressure vs. Amount Lab. Quest Directions ► 1. Attach the power cord to the Lab. Quest and plug it in ► 2. Turn the power on ► 3. Attach the Gas Pressure Sensor the Lab. Quest in the channel 1 port. ► 4. On the upper right hand corner of the screen, there is a box labeled Mode which reads Time Based. Press this with the stylus. ► 5. When the screen changes, look for the box labeled Time Based at the top of the screen and press the down arrow with the stylus. Choose Events with Entry. ► 6. When the screen changes, look for the box labeled Name: Event and press the word Event with the stylus. A keyboard should pop up on the bottom half of the screen. Use the keyboard to erase Event and type in Amount. In the box labeled Units, type in Puffs (this is just a nickname…we will use the appropriate name later in this course).
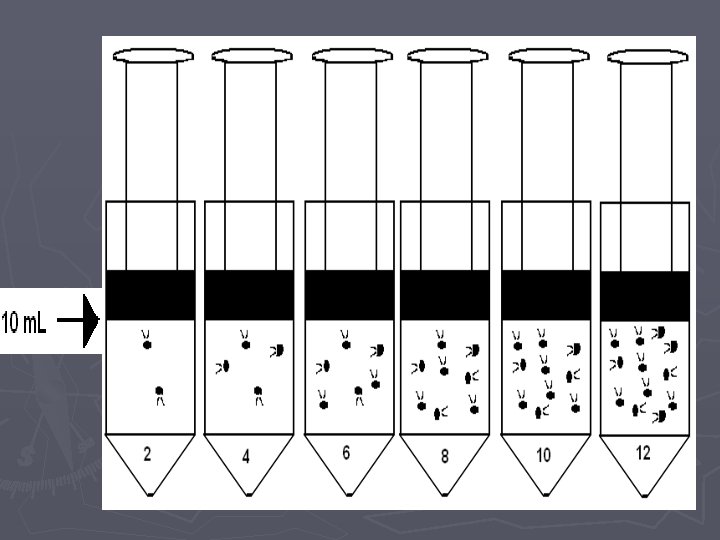
When you are ready to collect data: ► ► ► ► 7. Use the stylus to press button (f) on the lower left-hand side of the screen. The screen will change and you will see a blank graph. 8. Detach syringe and set to 2 m. L (i. e. 2 “puffs”), reattach the syringe and pull plunger to 10 m. L. 9. Press the button labeled (g) or KEEP on the bottom left-hand side of the screen. The screen will change and you will be prompted to enter an amount (n). Using the stylus, enter 2 and then hit OK and the point will be plotted. 10. Detach the syringe and set to 4 m. L (i. e. 4 “puffs”), reattach the syringe and pull the plunger to 10 m. L (volume) and repeat the process from step 9. 11. Detach the syringe and set to 6 m. L (6 “puffs”), reattach the syringe and pull the plunger to 10 m. L (volume) and repeat the process from step 9. 12. Repeat above step for 8, 10, 12, 14, 16, 18, 20 m. L 13. Use the stylus to press button ©/ DATA TABLE, in the upper right hand side of the screen. This will bring up a data table. Copy this table down onto a sheet of paper and then press the button labeled (n) to store your run and switch to a blank run for the next group. If you are the last group to use the Lab. Quest during your class period, turn it off instead of moving on to a blank run.
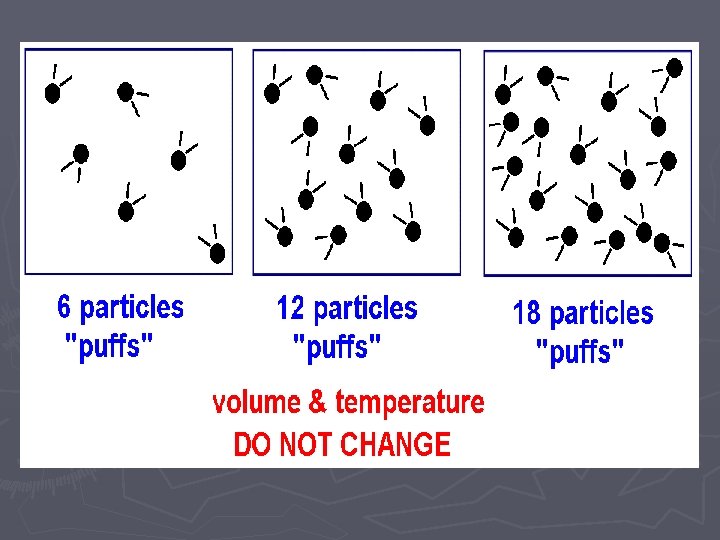
Amount (“puffs”) vs. Pressure
Pressure-Temperature Relationship in Gases
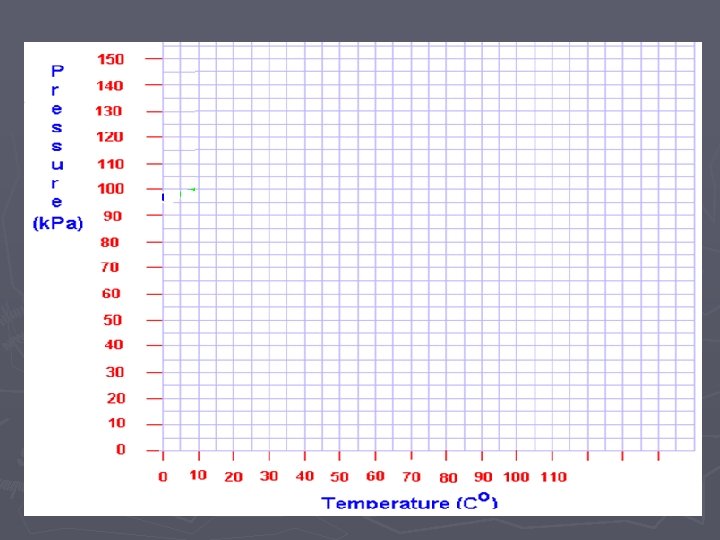
Temp. (Co) vs. Pressure
Projecting P vs. T (o. C)
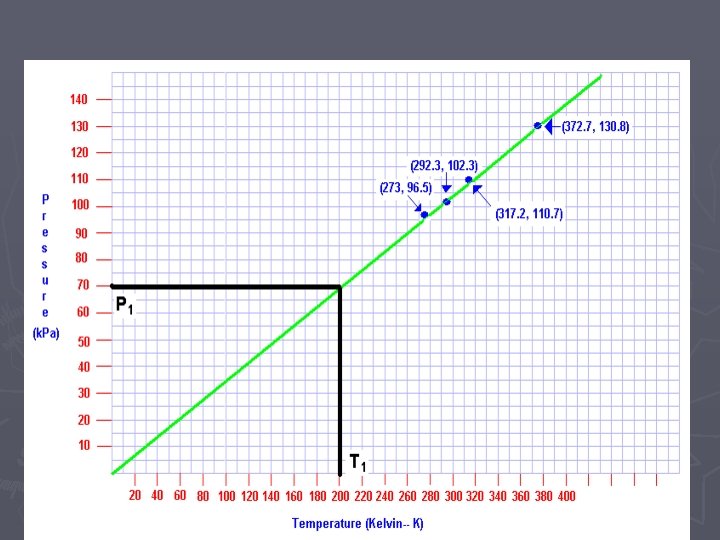
Temperature (Kelvin) vs. Pressure
As the Temp. goes from 200 K to 400 K the pressure goes from 70 k. Pa to 140 k. Pa If the TEMPERATURE DOUBLES, the PRESSURE DOUBLES……but only when TEMPERATURE is in KELVIN
Absolute Zero
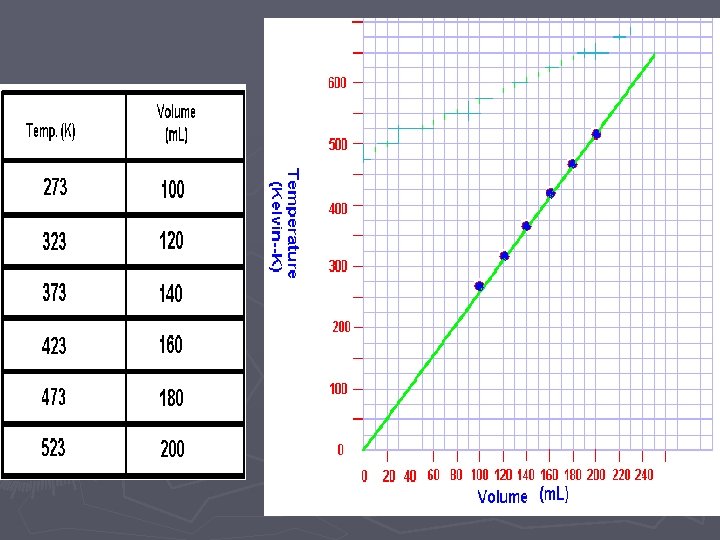
Temperature vs. Volume