Chapter 17 Dimensioning and Tolerancing Copyright The Mc

- Slides: 44

Chapter 17 Dimensioning and Tolerancing Copyright © The Mc. Graw-Hill Companies, Inc. Permission required for reproduction or display.

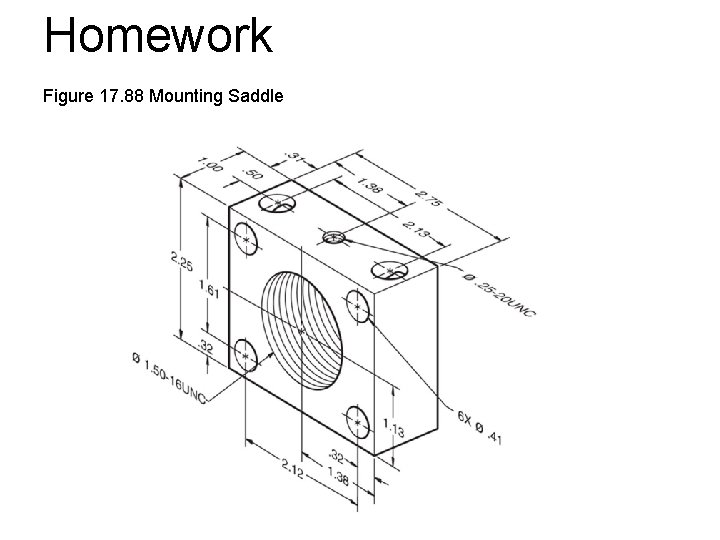
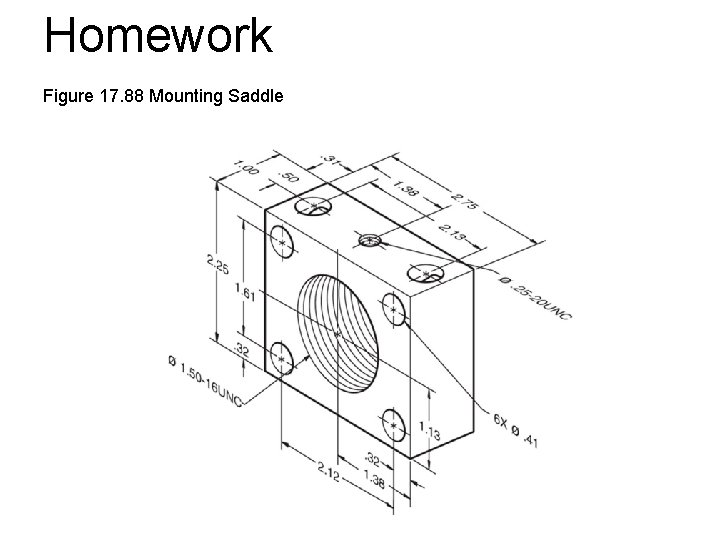
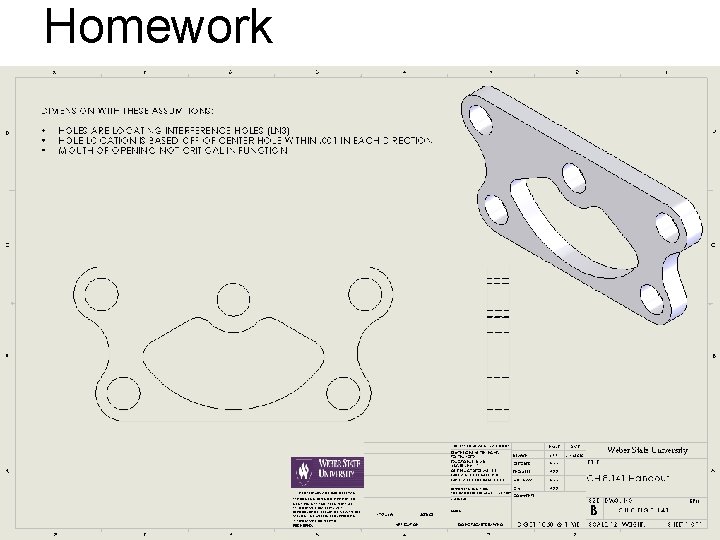
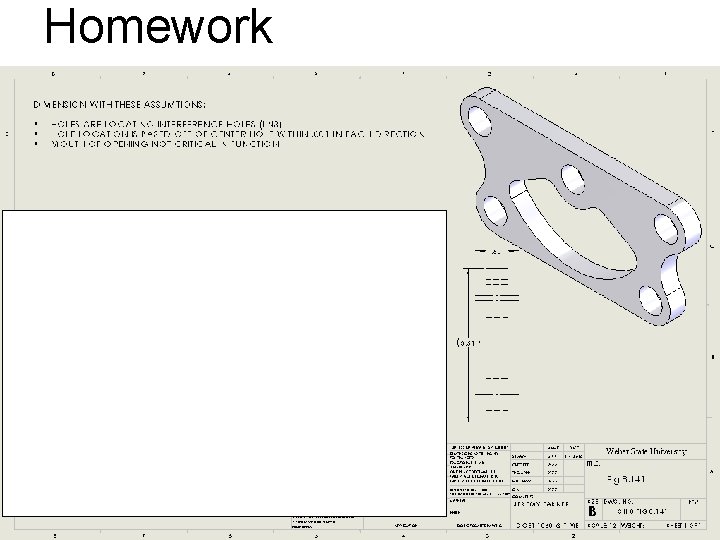
Homework Figure 17. 88 Mounting Saddle

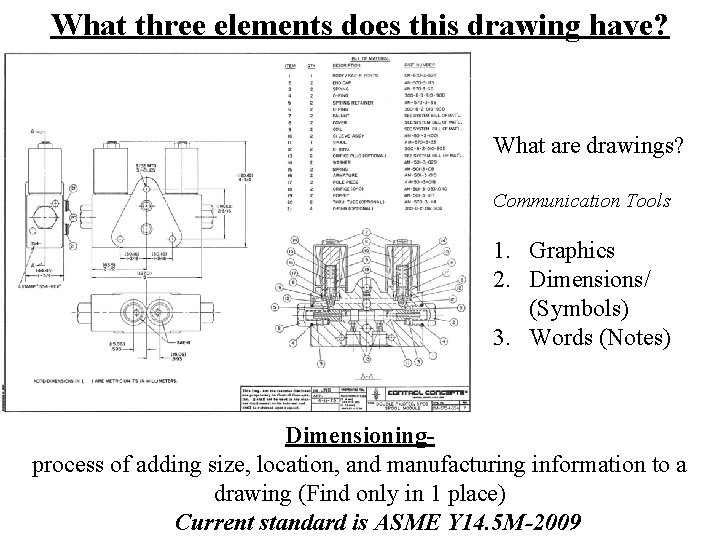
What three elements does this drawing have? What are drawings? Communication Tools 1. Graphics 2. Dimensions/ (Symbols) 3. Words (Notes) Dimensioningprocess of adding size, location, and manufacturing information to a drawing (Find only in 1 place) Current standard is ASME Y 14. 5 M-2009

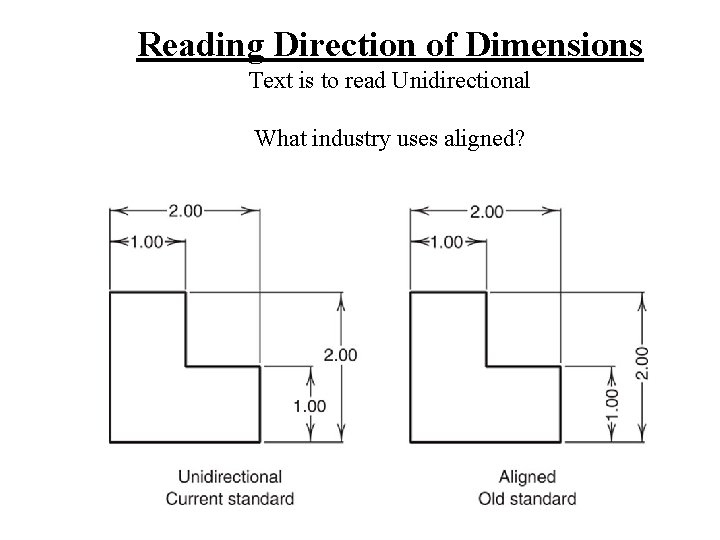
Reading Direction of Dimensions Text is to read Unidirectional What industry uses aligned?

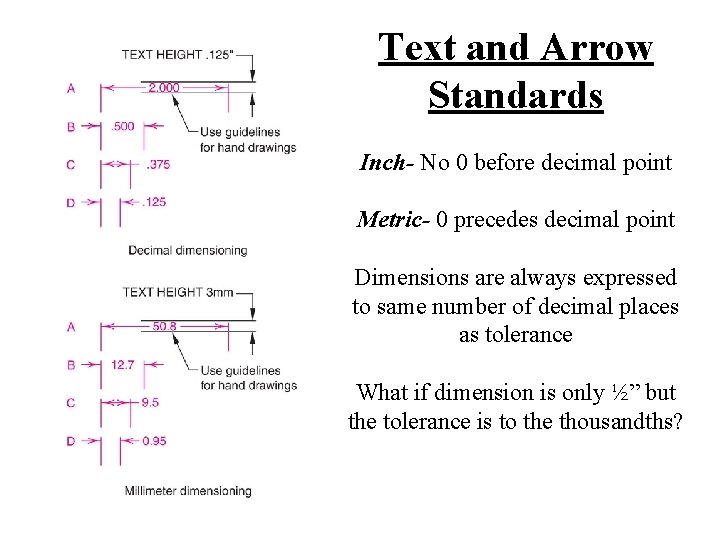
Text and Arrow Standards Inch- No 0 before decimal point Metric- 0 precedes decimal point Dimensions are always expressed to same number of decimal places as tolerance What if dimension is only ½” but the tolerance is to the thousandths?

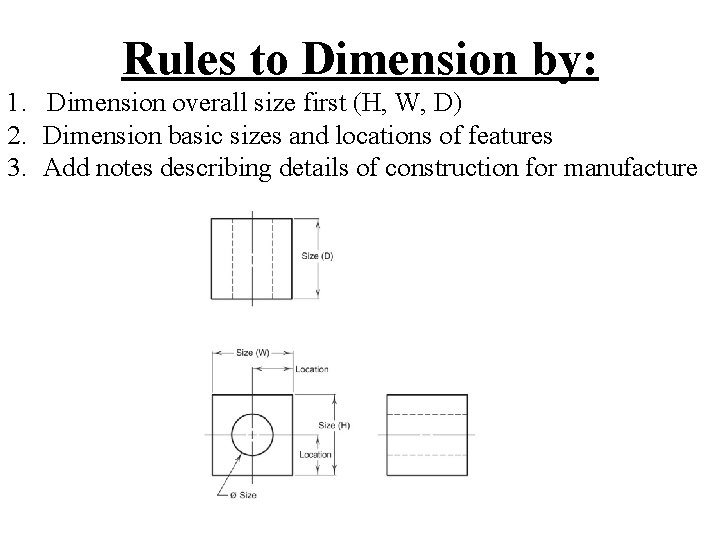
Rules to Dimension by: 1. Dimension overall size first (H, W, D) 2. Dimension basic sizes and locations of features 3. Add notes describing details of construction for manufacture

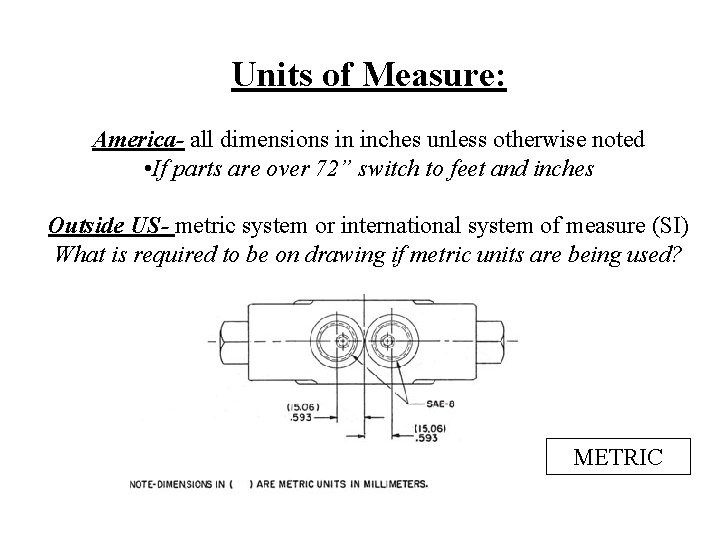
Units of Measure: America- all dimensions in inches unless otherwise noted • If parts are over 72” switch to feet and inches Outside US- metric system or international system of measure (SI) What is required to be on drawing if metric units are being used? METRIC

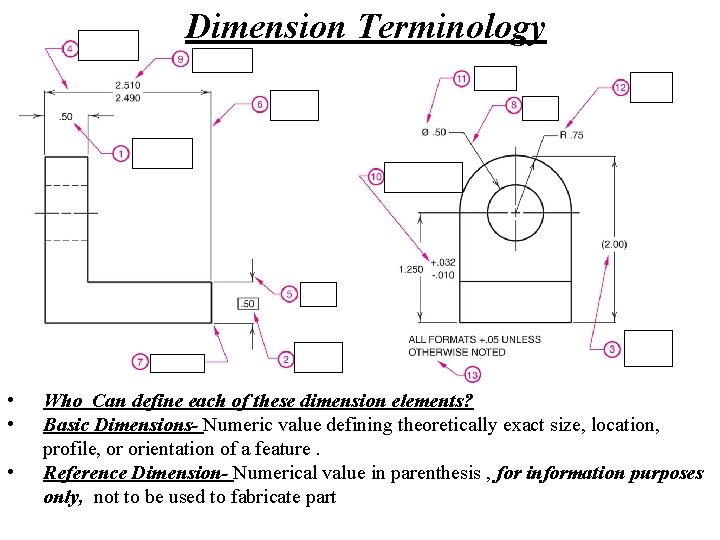
Dimension Terminology • • • Who Can define each of these dimension elements? Basic Dimensions- Numeric value defining theoretically exact size, location, profile, or orientation of a feature. Reference Dimension- Numerical value in parenthesis , for information purposes only, not to be used to fabricate part

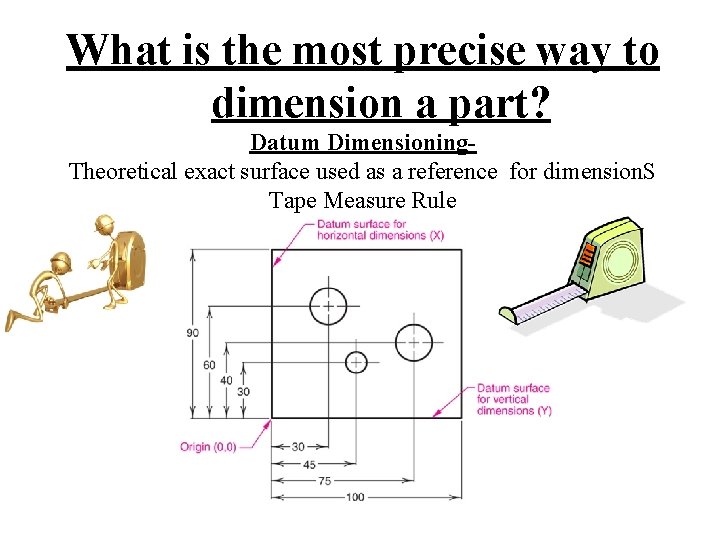
What is the most precise way to dimension a part? Datum Dimensioning. Theoretical exact surface used as a reference for dimension. S Tape Measure Rule

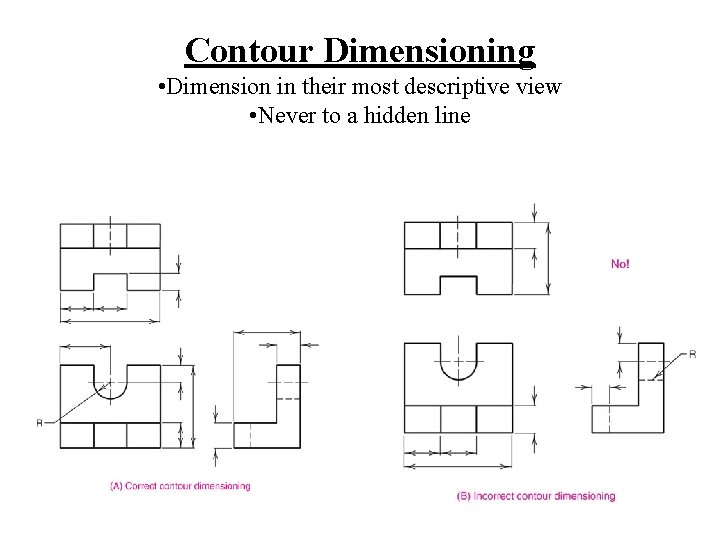
Contour Dimensioning • Dimension in their most descriptive view • Never to a hidden line

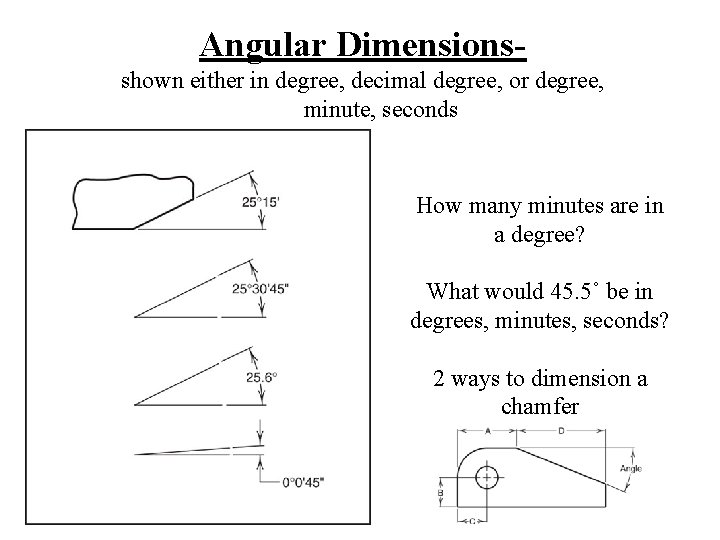
Angular Dimensionsshown either in degree, decimal degree, or degree, minute, seconds How many minutes are in a degree? What would 45. 5˚ be in degrees, minutes, seconds? 2 ways to dimension a chamfer

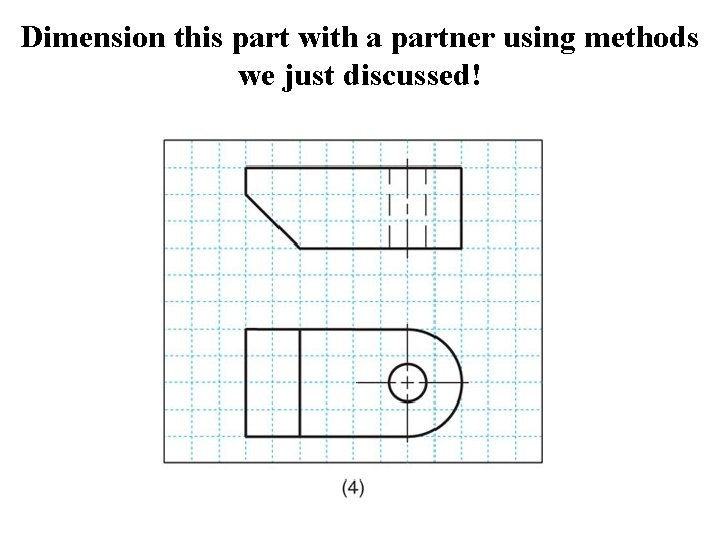
Dimension this part with a partner using methods we just discussed!

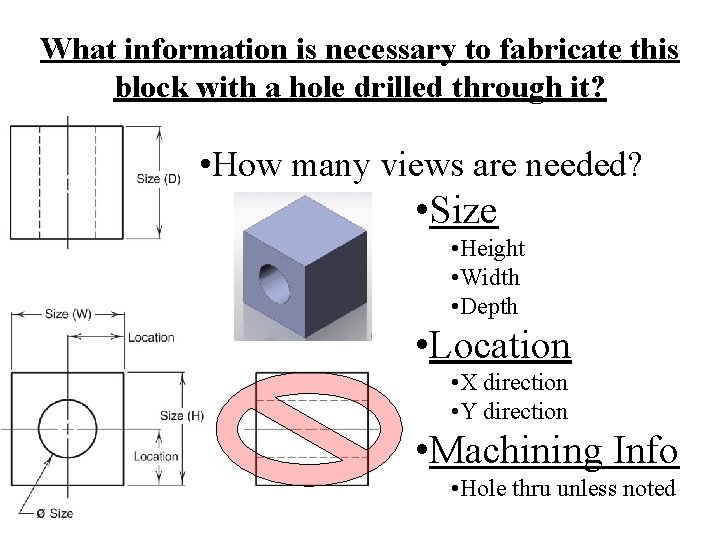
What information is necessary to fabricate this block with a hole drilled through it? • How many views are needed? • Size • Height • Width • Depth • Location • X direction • Y direction • Machining Info • Hole thru unless noted

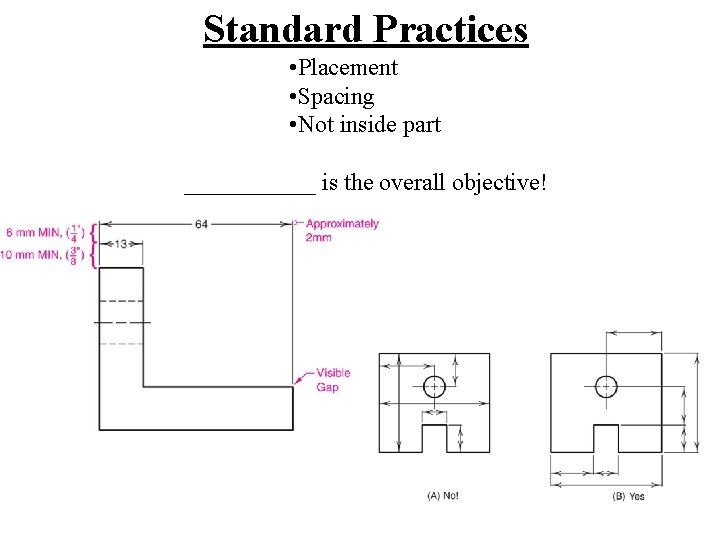
Standard Practices • Placement • Spacing • Not inside part ______ is the overall objective!

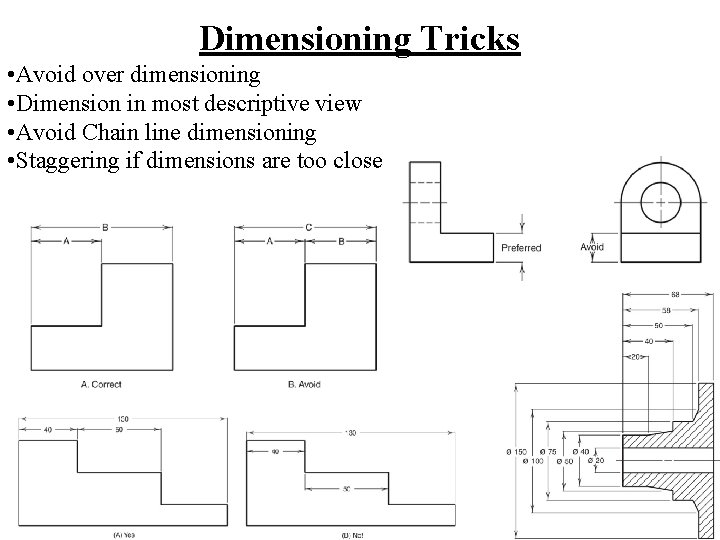
Dimensioning Tricks • Avoid over dimensioning • Dimension in most descriptive view • Avoid Chain line dimensioning • Staggering if dimensions are too close

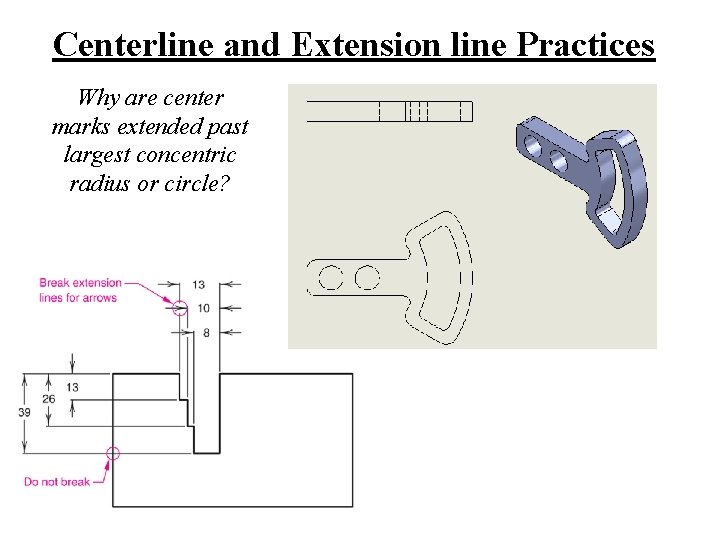
Centerline and Extension line Practices Why are center marks extended past largest concentric radius or circle?

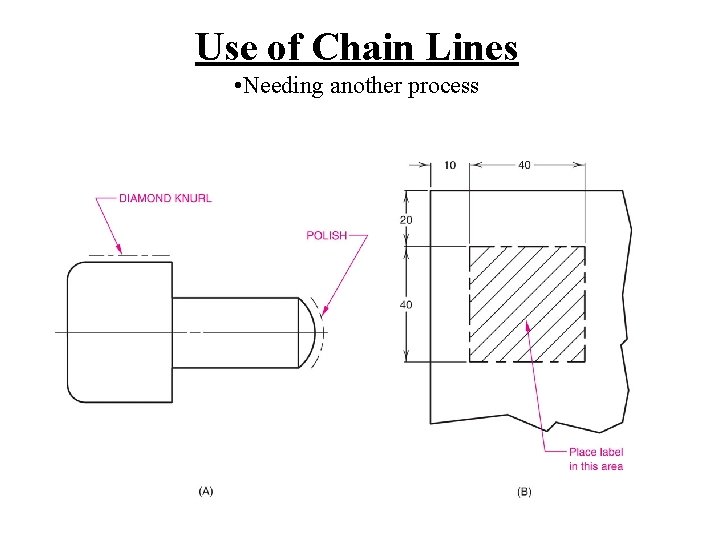
Use of Chain Lines • Needing another process

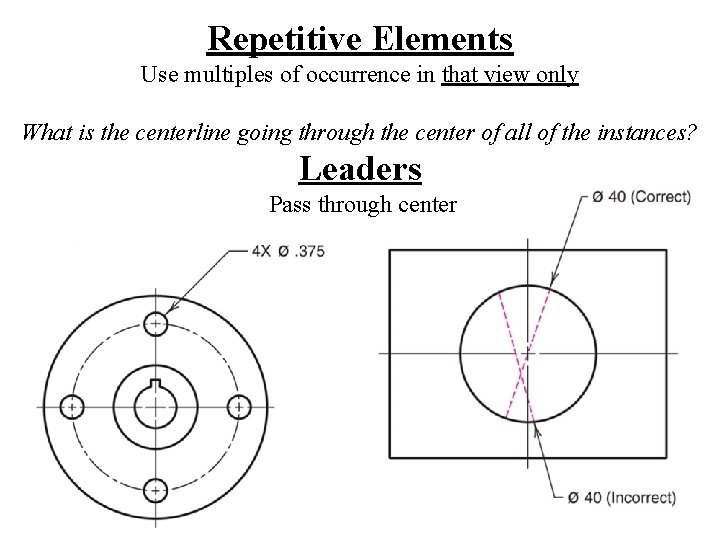
Repetitive Elements Use multiples of occurrence in that view only What is the centerline going through the center of all of the instances? Leaders Pass through center

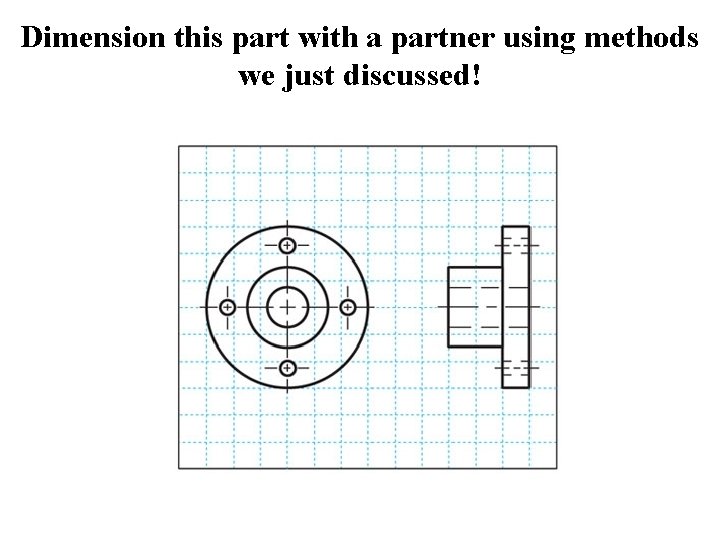
Dimension this part with a partner using methods we just discussed!

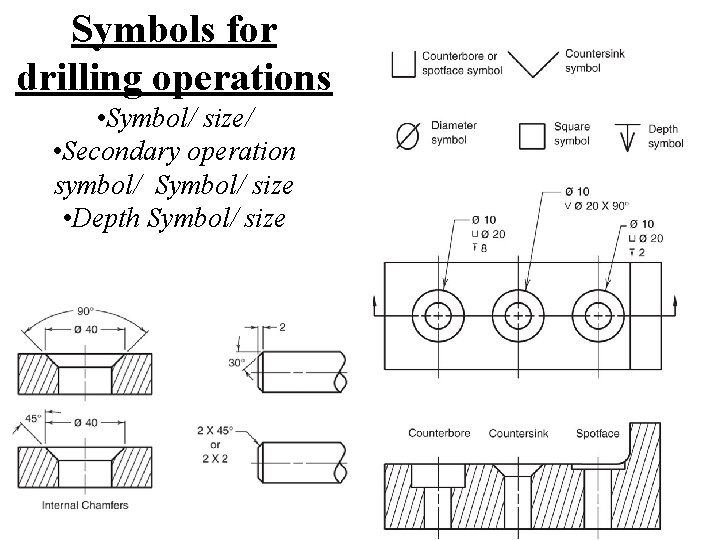
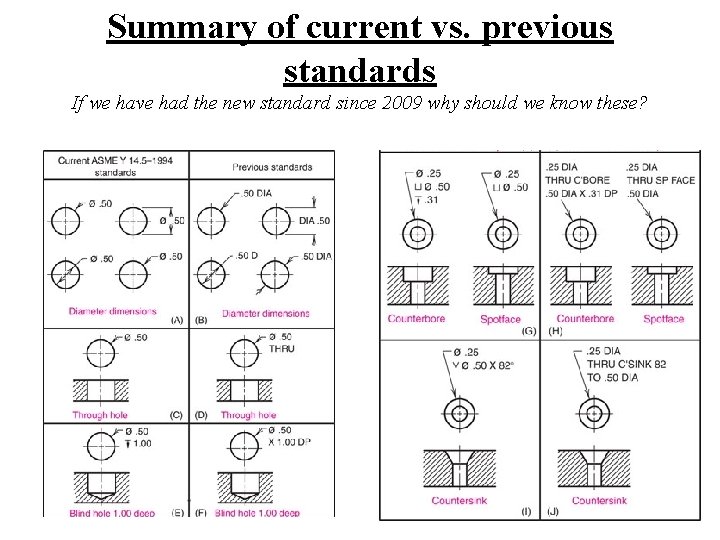
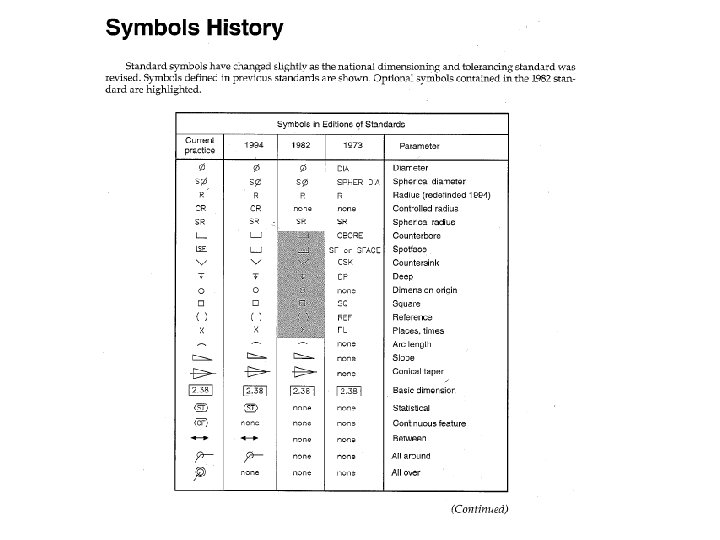
Symbols for drilling operations • Symbol/ size/ • Secondary operation symbol/ Symbol/ size • Depth Symbol/ size

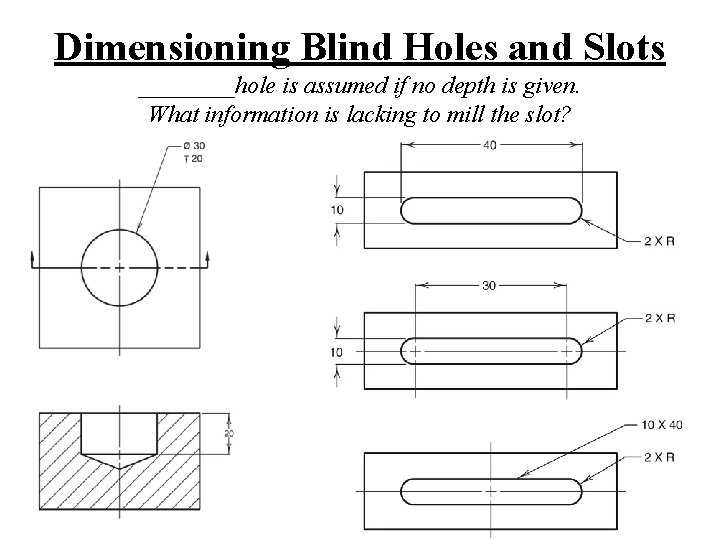
Dimensioning Blind Holes and Slots ____hole is assumed if no depth is given. What information is lacking to mill the slot?

Summary of current vs. previous standards If we have had the new standard since 2009 why should we know these?


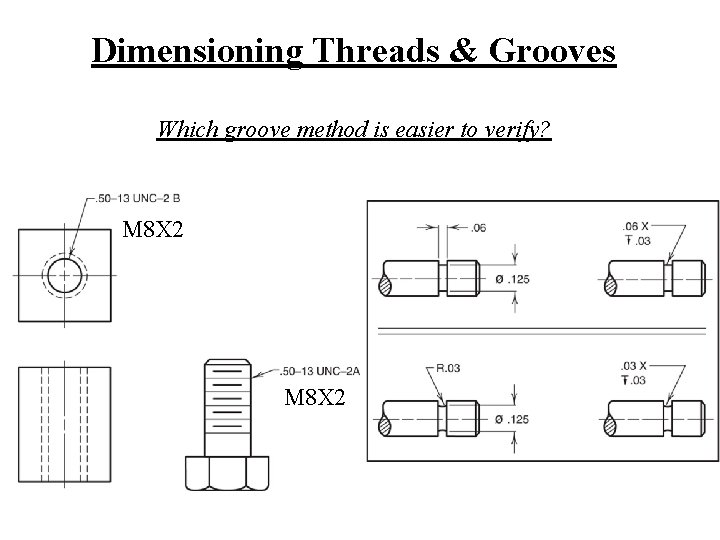
Dimensioning Threads & Grooves Which groove method is easier to verify? M 8 X 2

Homework Figure 17. 88 Mounting Saddle

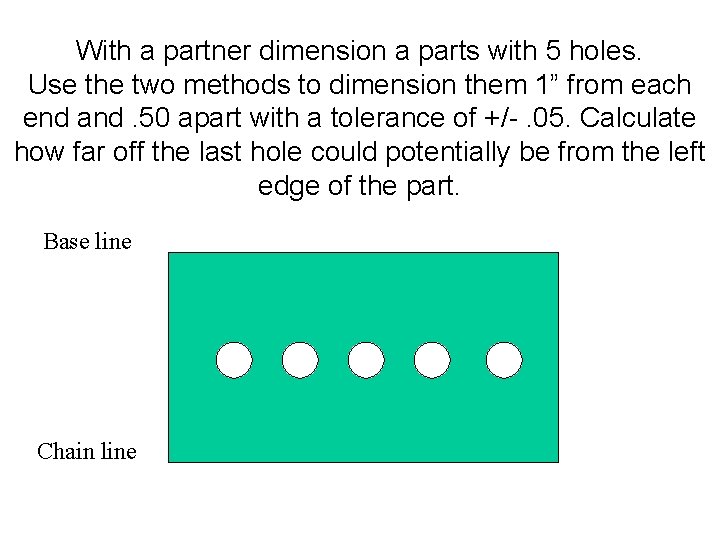
With a partner dimension a parts with 5 holes. Use the two methods to dimension them 1” from each end and. 50 apart with a tolerance of +/-. 05. Calculate how far off the last hole could potentially be from the left edge of the part. Base line Chain line

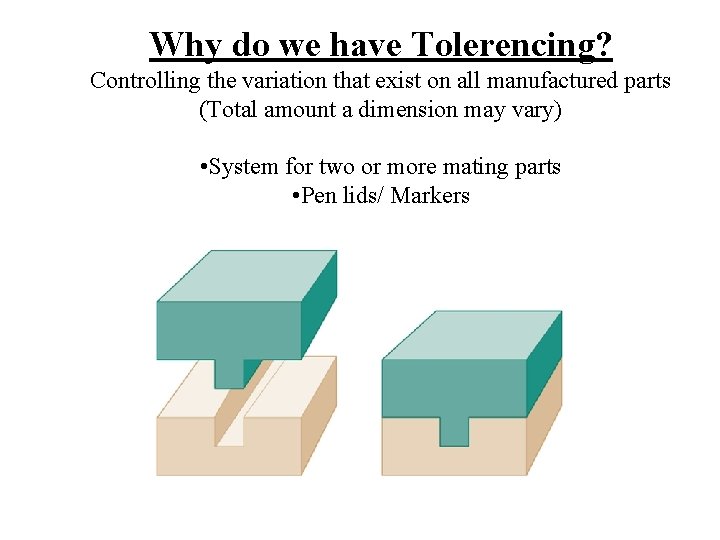
Why do we have Tolerencing? Controlling the variation that exist on all manufactured parts (Total amount a dimension may vary) • System for two or more mating parts • Pen lids/ Markers

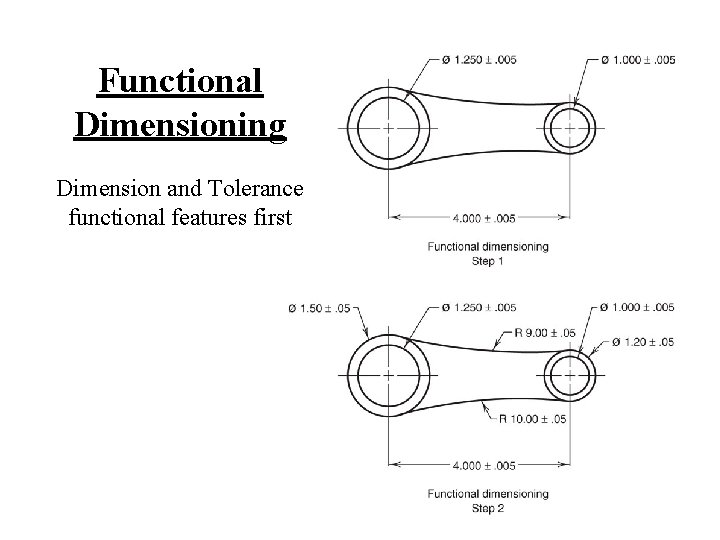
Functional Dimensioning Dimension and Tolerance functional features first

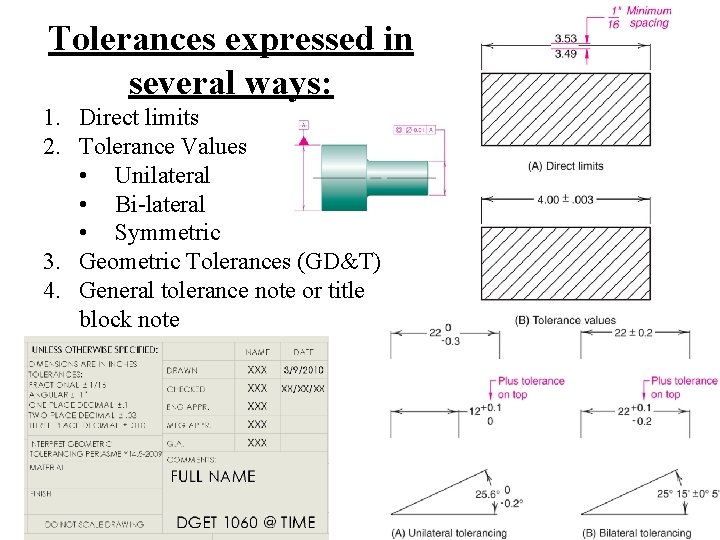
Tolerances expressed in several ways: 1. Direct limits 2. Tolerance Values • Unilateral • Bi-lateral • Symmetric 3. Geometric Tolerances (GD&T) 4. General tolerance note or title block note

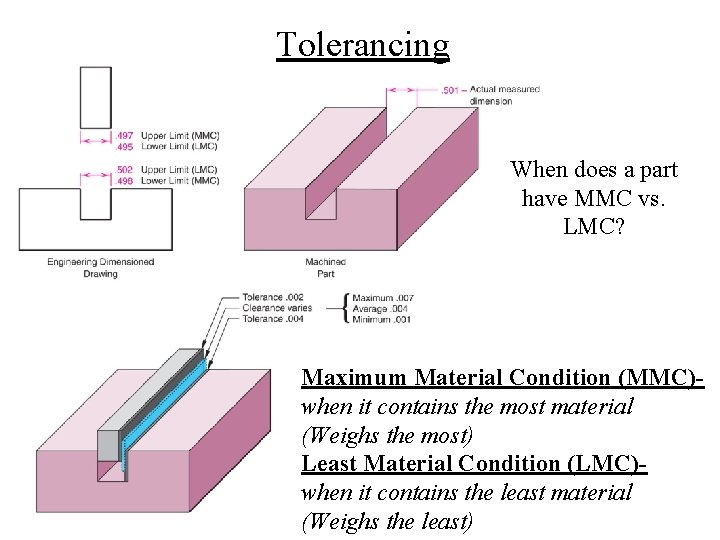
Tolerancing When does a part have MMC vs. LMC? Maximum Material Condition (MMC)when it contains the most material (Weighs the most) Least Material Condition (LMC)when it contains the least material (Weighs the least)

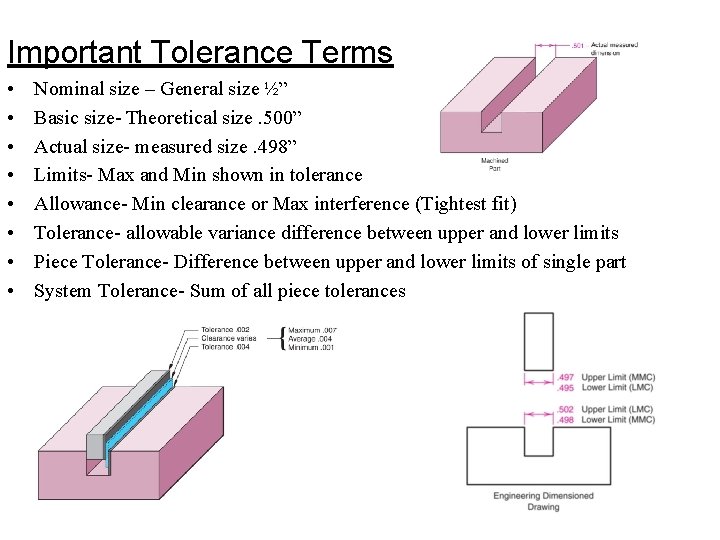
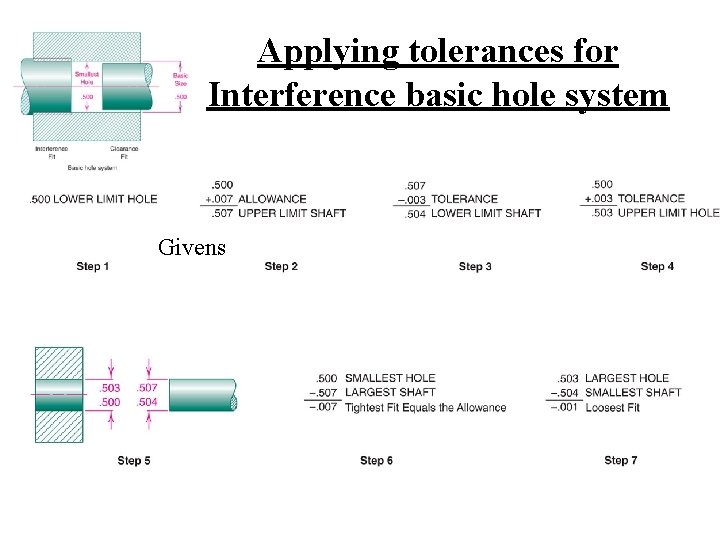
Important Tolerance Terms • • Nominal size – General size ½” Basic size- Theoretical size. 500” Actual size- measured size. 498” Limits- Max and Min shown in tolerance Allowance- Min clearance or Max interference (Tightest fit) Tolerance- allowable variance difference between upper and lower limits Piece Tolerance- Difference between upper and lower limits of single part System Tolerance- Sum of all piece tolerances

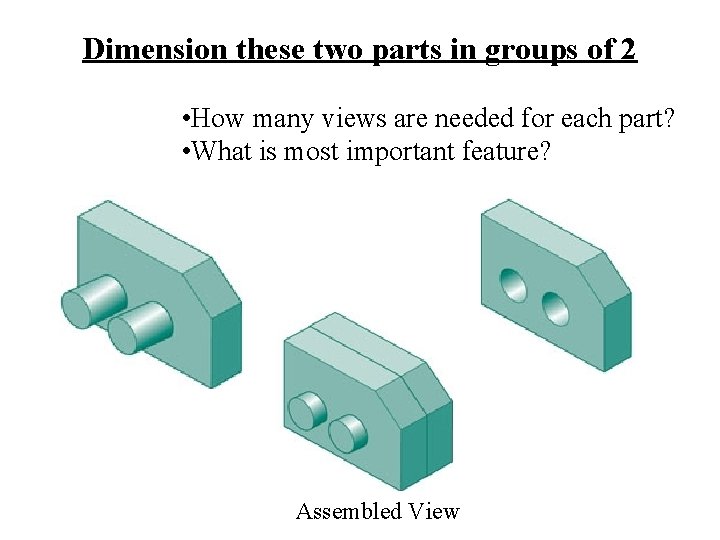
Dimension these two parts in groups of 2 • How many views are needed for each part? • What is most important feature? Assembled View

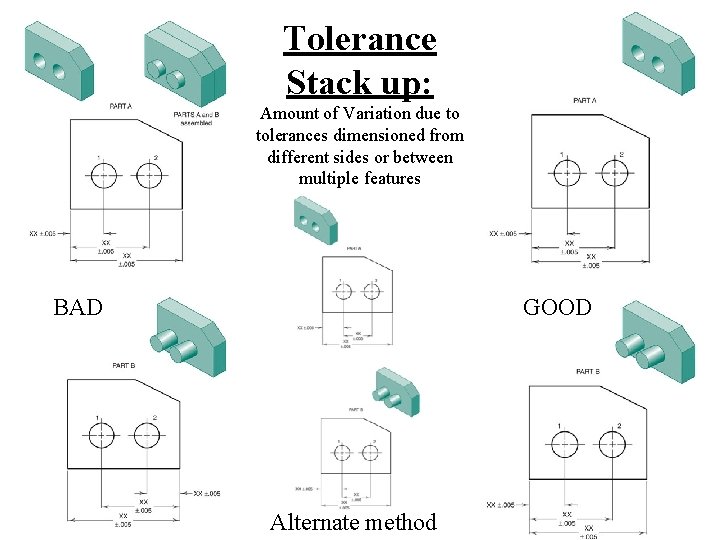
Tolerance Stack up: Amount of Variation due to tolerances dimensioned from different sides or between multiple features BAD GOOD Alternate method

Homework

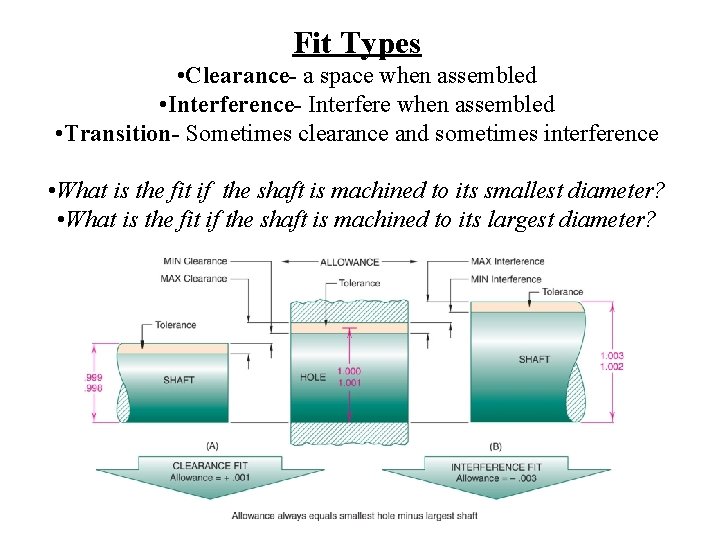
Fit Types • Clearance- a space when assembled • Interference- Interfere when assembled • Transition- Sometimes clearance and sometimes interference • What is the fit if the shaft is machined to its smallest diameter? • What is the fit if the shaft is machined to its largest diameter?

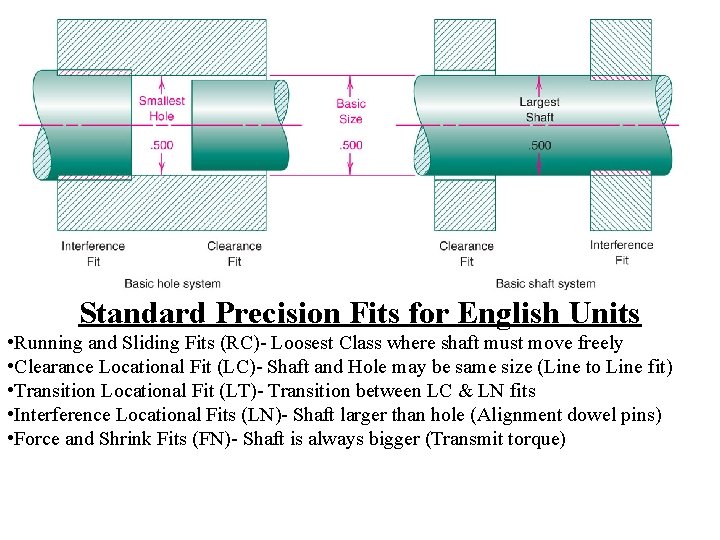
Standard Precision Fits for English Units • Running and Sliding Fits (RC)- Loosest Class where shaft must move freely • Clearance Locational Fit (LC)- Shaft and Hole may be same size (Line to Line fit) • Transition Locational Fit (LT)- Transition between LC & LN fits • Interference Locational Fits (LN)- Shaft larger than hole (Alignment dowel pins) • Force and Shrink Fits (FN)- Shaft is always bigger (Transmit torque)

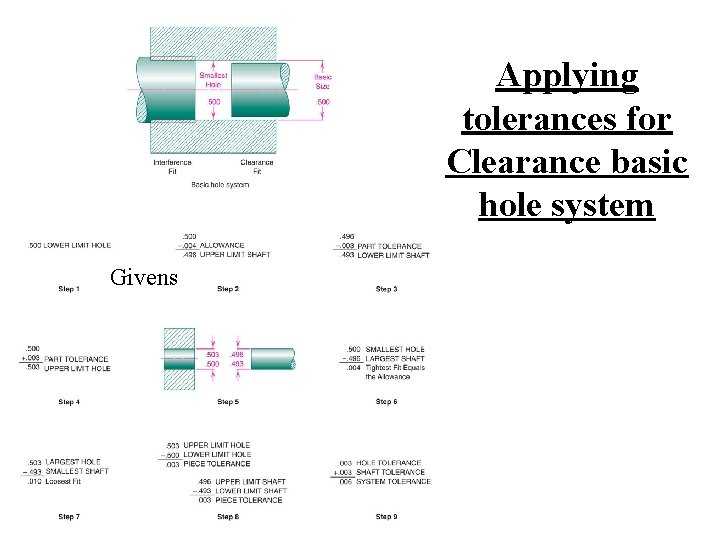
Applying tolerances for Clearance basic hole system Givens

Applying tolerances for Interference basic hole system Givens

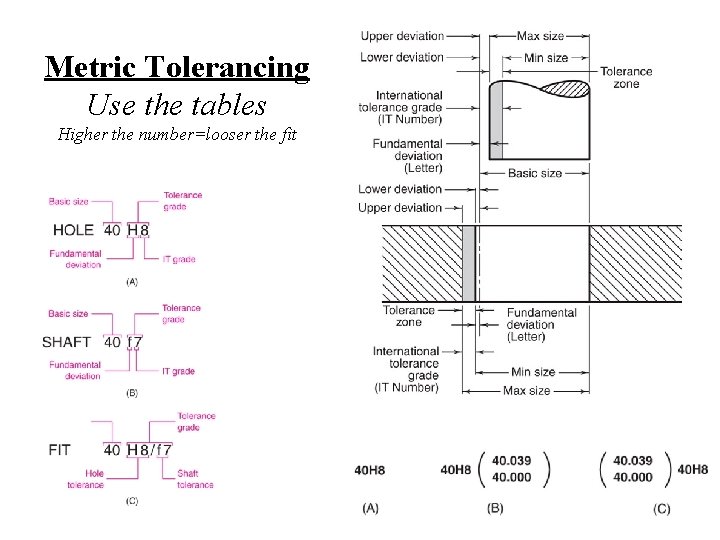
Metric Tolerancing Use the tables Higher the number=looser the fit

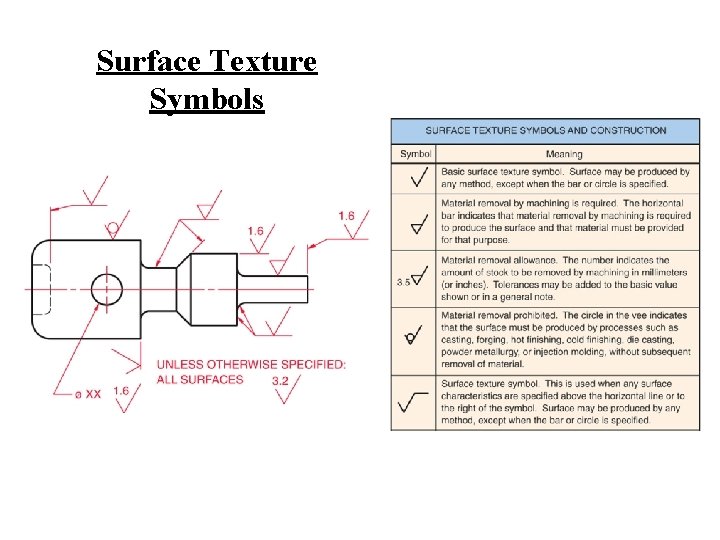
Surface Texture Symbols

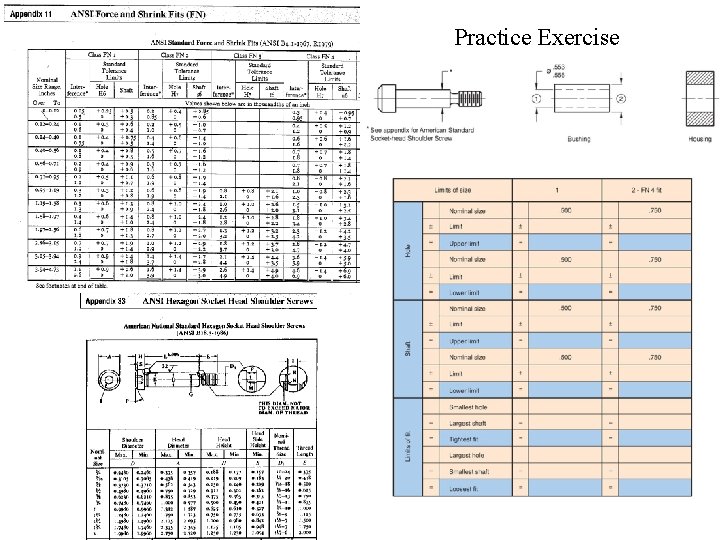
Practice Exercise

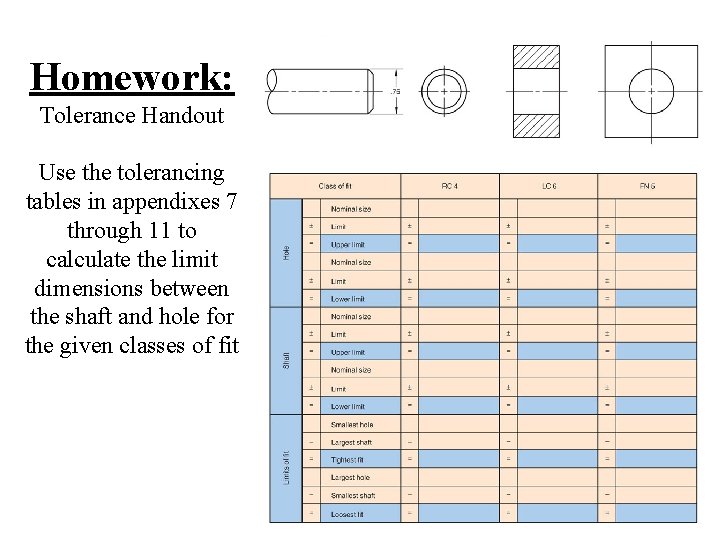
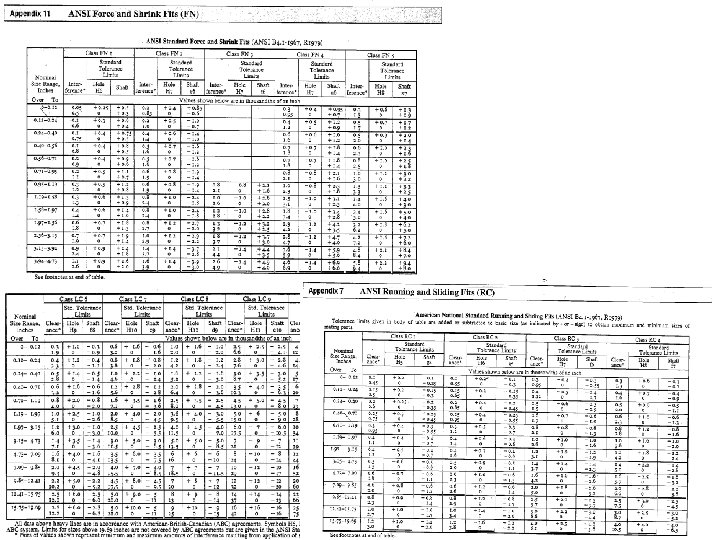
Homework: Tolerance Handout Use the tolerancing tables in appendixes 7 through 11 to calculate the limit dimensions between the shaft and hole for the given classes of fit


Homework