Geometric Dimensioning and Tolerancing Unit 4 Position Verification





- Slides: 33

Geometric Dimensioning and Tolerancing Unit 4 – Position Verification

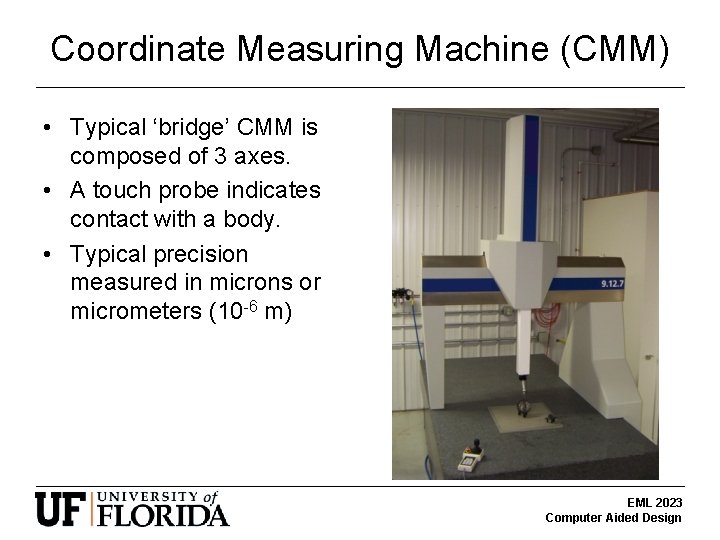
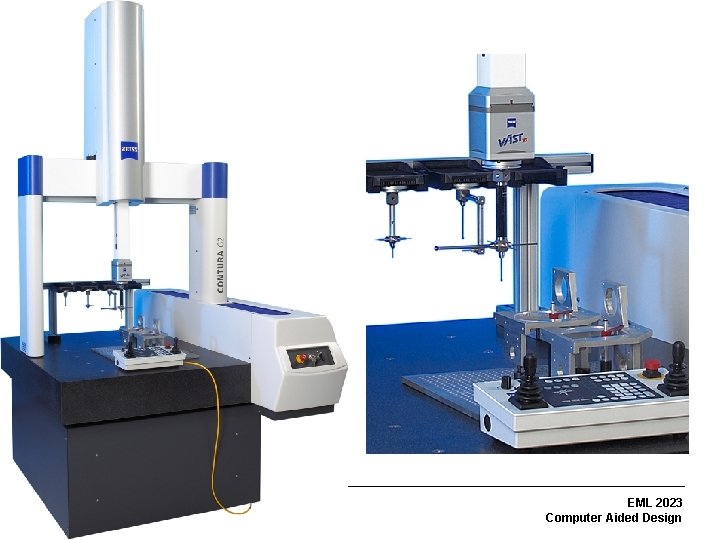
Coordinate Measuring Machine (CMM) • Typical ‘bridge’ CMM is composed of 3 axes. • A touch probe indicates contact with a body. • Typical precision measured in microns or micrometers (10 -6 m) EML 2023 Computer Aided Design

EML 2023 Computer Aided Design

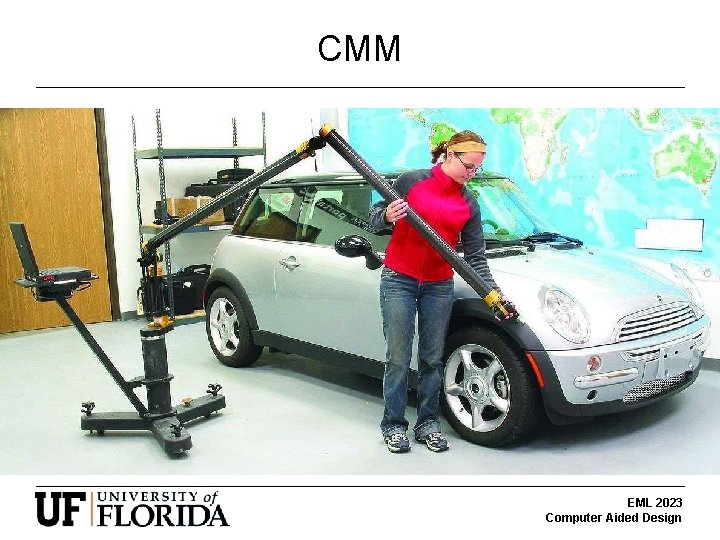
CMM EML 2023 Computer Aided Design

EML 2023 Computer Aided Design

EML 2023 Computer Aided Design

Position Tolerance Verification • This unit covers some simple verification techniques for position tolerancing. EML 2023 Computer Aided Design

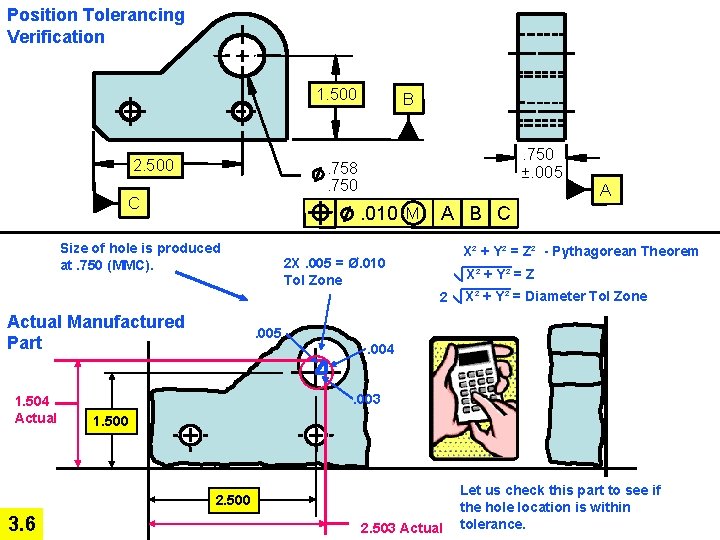
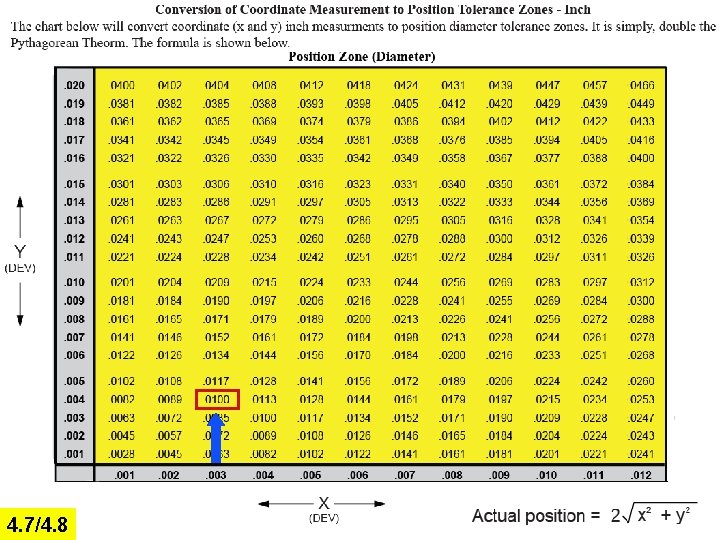
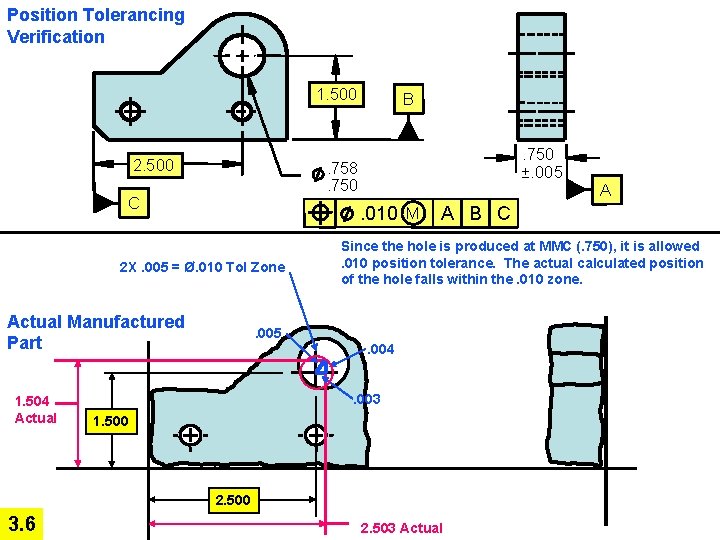
Position Tolerancing Verification 1. 500 2. 500 B. 750 ±. 005 . 758. 750 C . 010 M Size of hole is produced at. 750 (MMC). A B C X² + Y² = Z² - Pythagorean Theorem 2 X. 005 = Ø. 010 Tol Zone X² + Y² = Z 2 Actual Manufactured Part 1. 504 Actual X² + Y² = Diameter Tol Zone . 005. 004. 003 1. 500 2. 500 3. 6 A 2. 503 Actual Let us check this part to see if the hole location is within tolerance.

4. 7/4. 8

Position Tolerancing Verification 1. 500 2. 500 . 750 ±. 005 . 758. 750 C . 010 M 2 X. 005 = Ø. 010 Tol Zone Actual Manufactured Part 1. 504 Actual B A B C Since the hole is produced at MMC (. 750), it is allowed. 010 position tolerance. The actual calculated position of the hole falls within the. 010 zone. . 005. 004. 003 1. 500 2. 500 3. 6 A 2. 503 Actual

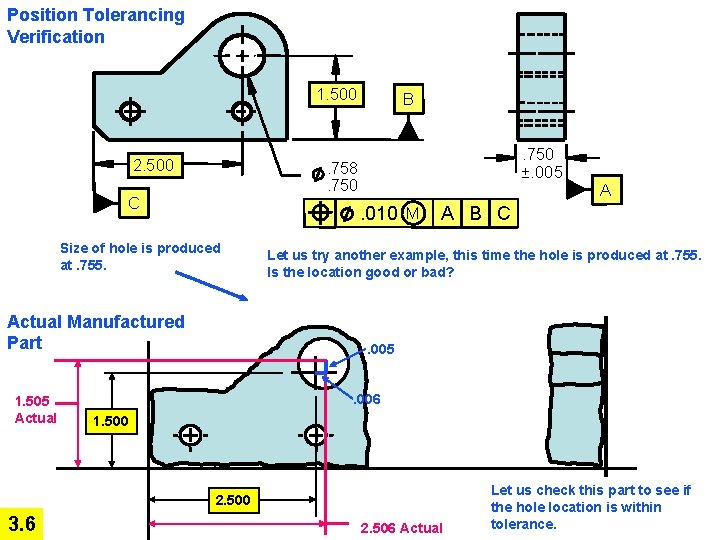
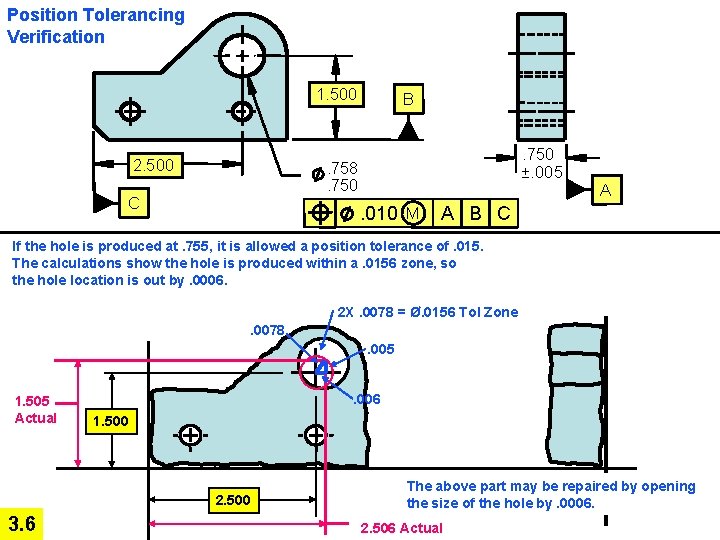
Position Tolerancing Verification 1. 500 2. 500 . 750 ±. 005 . 758. 750 C . 010 M Size of hole is produced at. 755. Actual Manufactured Part 1. 505 Actual B A B C Let us try another example, this time the hole is produced at. 755. Is the location good or bad? . 005. 006 1. 500 2. 500 3. 6 A 2. 506 Actual Let us check this part to see if the hole location is within tolerance.

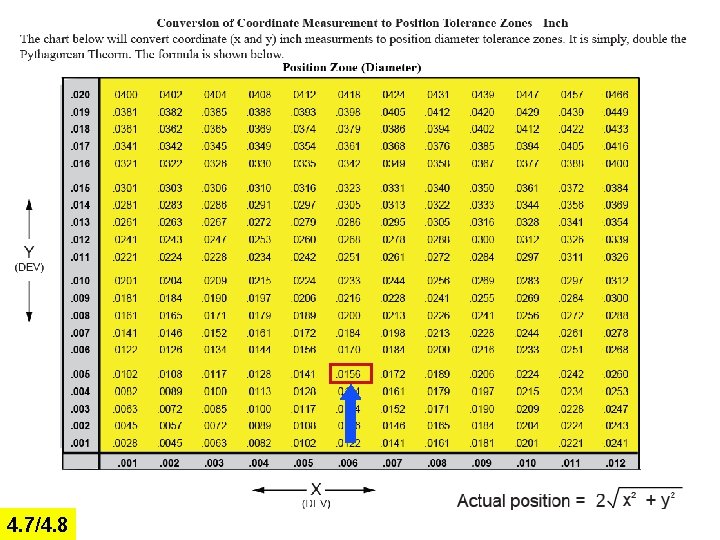
4. 7/4. 8

Position Tolerancing Verification 1. 500 2. 500 B. 750 ±. 005 . 758. 750 C . 010 M A A B C If the hole is produced at. 755, it is allowed a position tolerance of. 015. The calculations show the hole is produced within a. 0156 zone, so the hole location is out by. 0006. 2 X. 0078 = Ø. 0156 Tol Zone. 0078. 005 1. 505 Actual . 006 1. 500 2. 500 3. 6 The above part may be repaired by opening the size of the hole by. 0006. 2. 506 Actual

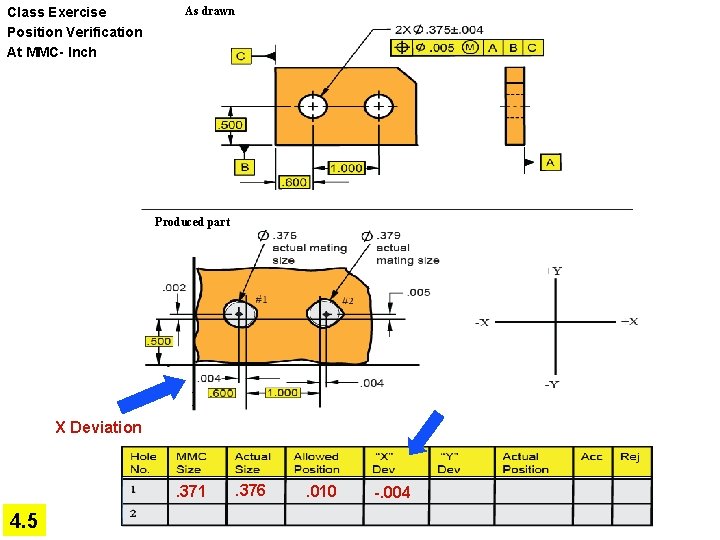
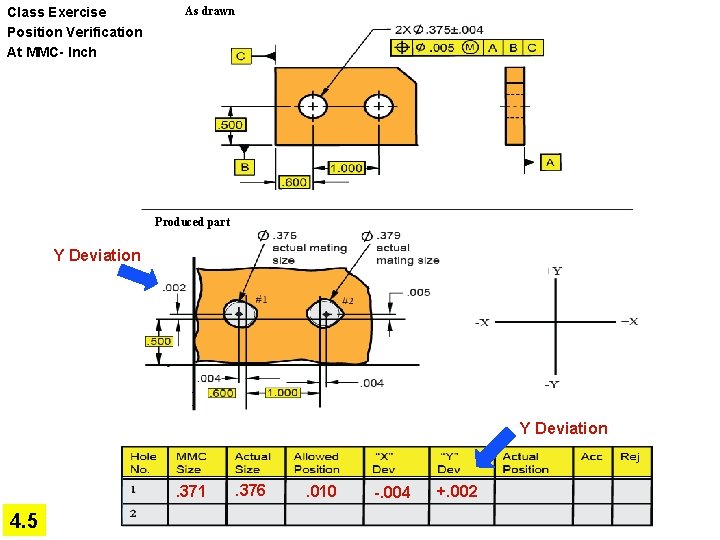
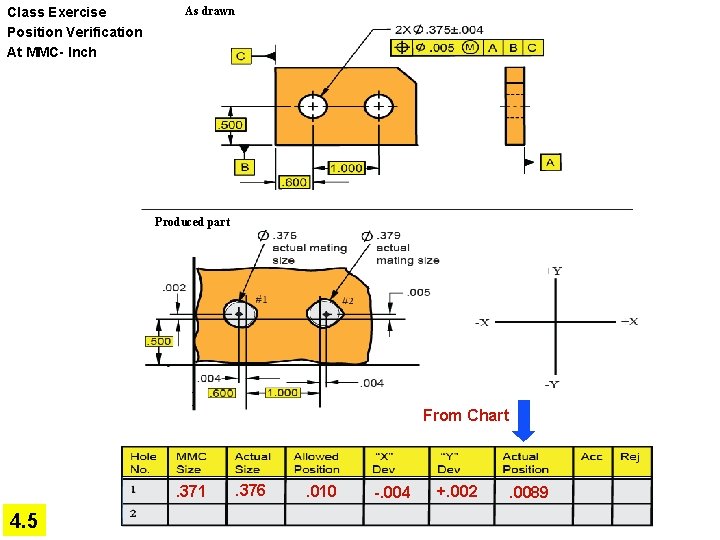
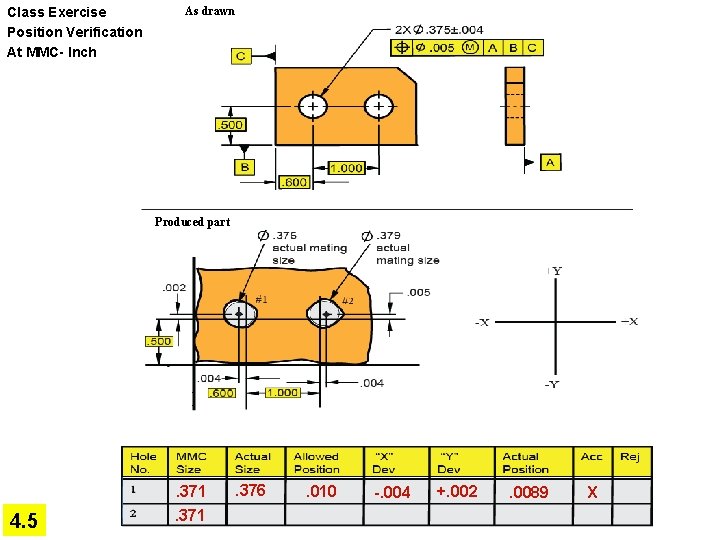
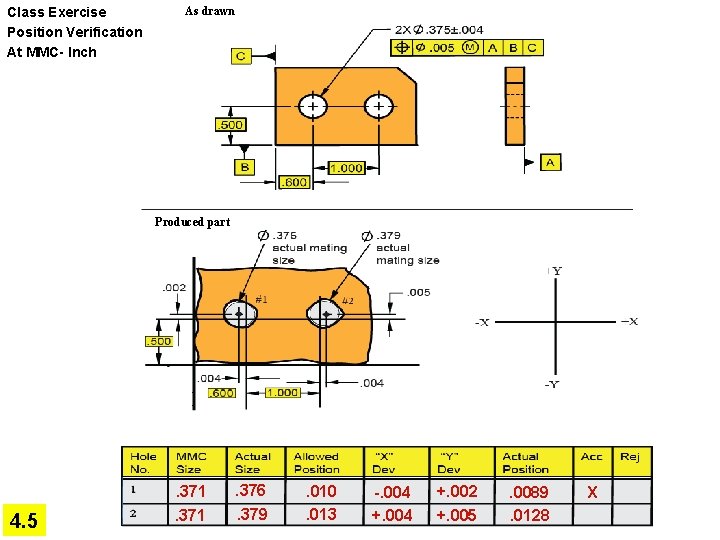
Class Exercise Position Verification At MMC- Inch As drawn Produced part 4. 5

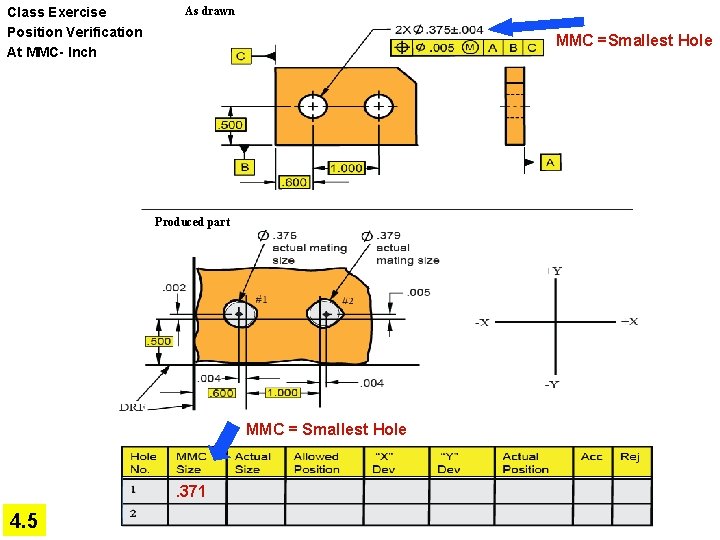
Class Exercise Position Verification At MMC- Inch As drawn MMC =Smallest Hole Produced part MMC = Smallest Hole . 371 4. 5

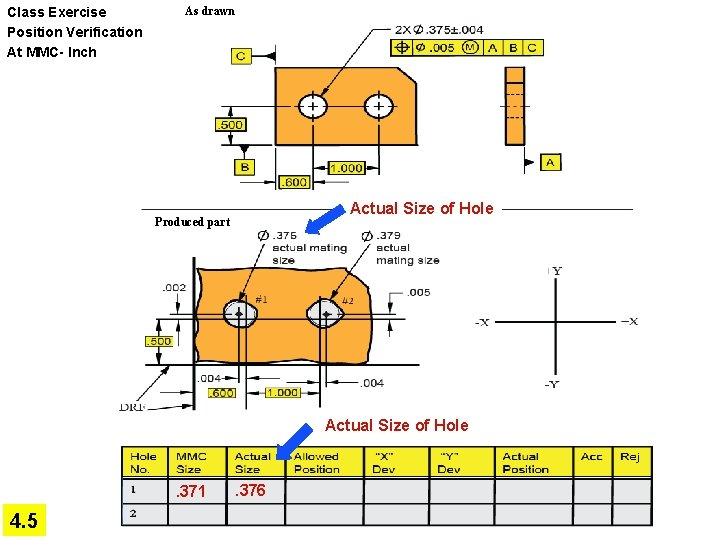
Class Exercise Position Verification At MMC- Inch As drawn Actual Size of Hole Produced part Actual Size of Hole . 371 4. 5 . 376

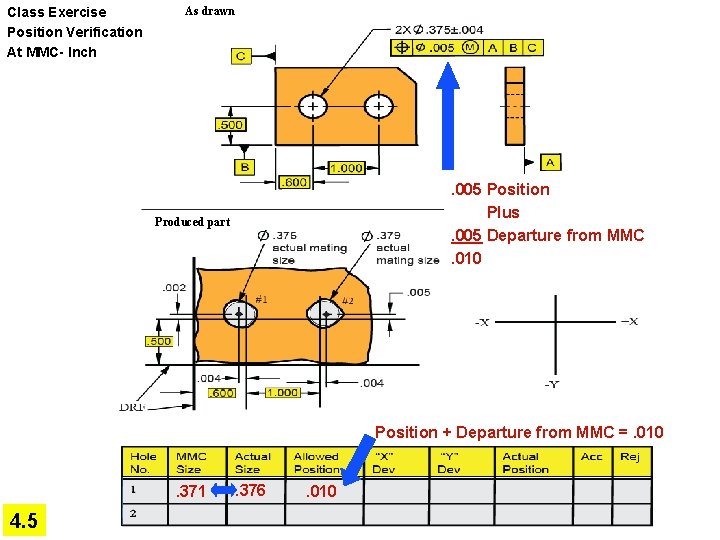
Class Exercise Position Verification At MMC- Inch As drawn . 005 Position Plus. 005 Departure from MMC. 010 Produced part Position + Departure from MMC =. 010 . 371 4. 5 . 376 . 010

Class Exercise Position Verification At MMC- Inch As drawn Produced part X Deviation . 371 4. 5 . 376 . 010 -. 004

Class Exercise Position Verification At MMC- Inch As drawn Produced part Y Deviation . 371 4. 5 . 376 . 010 -. 004 +. 002

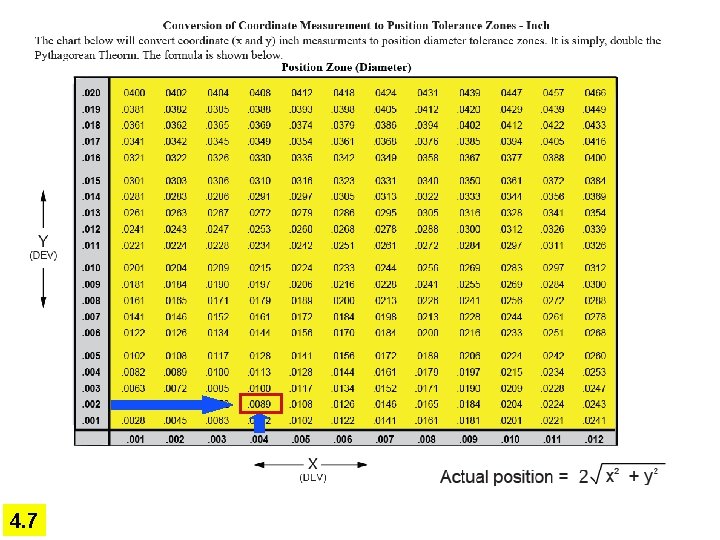
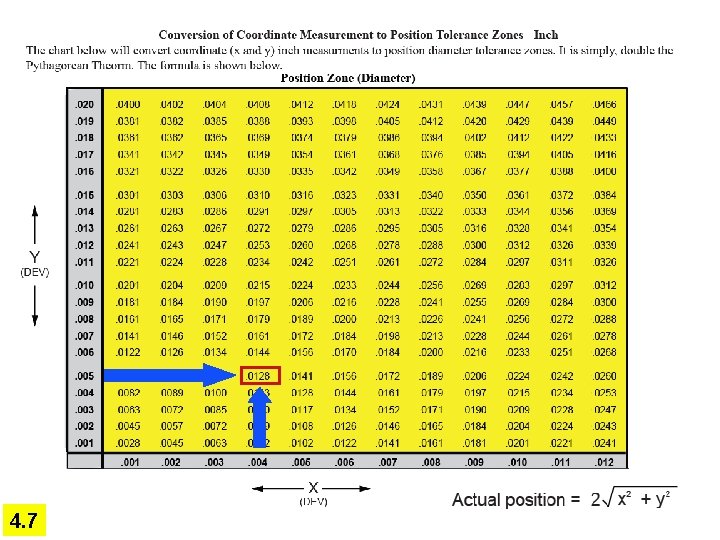
4. 7

Class Exercise Position Verification At MMC- Inch As drawn Produced part From Chart . 371 4. 5 . 376 . 010 -. 004 +. 002 . 0089

Class Exercise Position Verification At MMC- Inch As drawn Produced part From Chart . 371 4. 5 . 376 . 010 -. 004 +. 002 . 0089 X

Class Exercise Position Verification At MMC- Inch As drawn Produced part 4. 5 . 371 . 376 . 010 -. 004 +. 002 . 0089 X

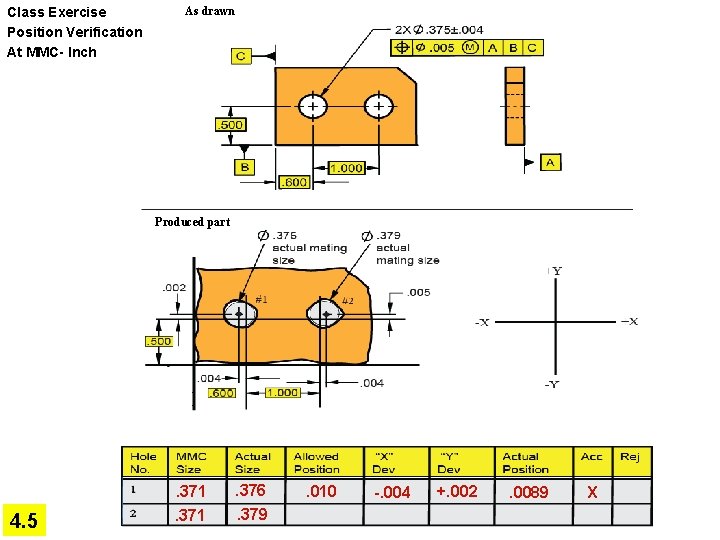
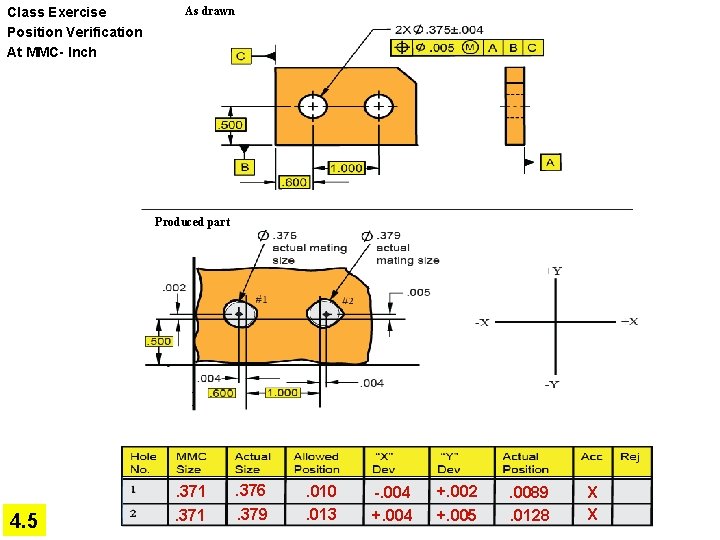
Class Exercise Position Verification At MMC- Inch As drawn Produced part 4. 5 . 371 . 376. 379 . 010 -. 004 +. 002 . 0089 X

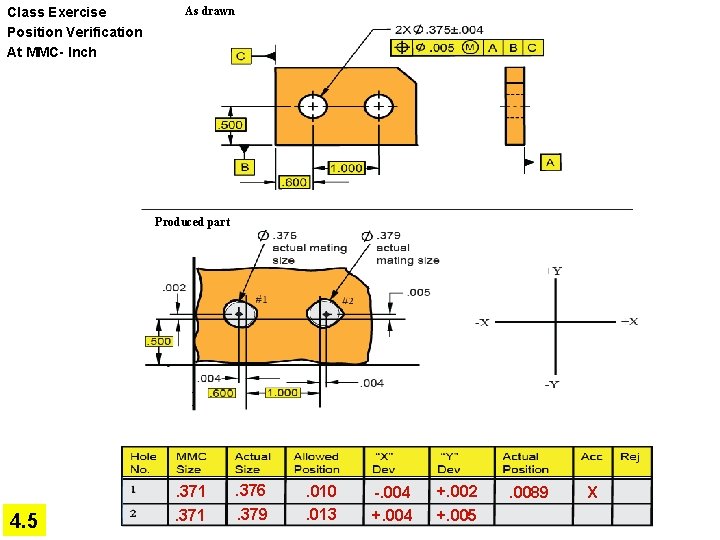
Class Exercise Position Verification At MMC- Inch As drawn Produced part 4. 5 . 371 . 376. 379 . 010. 013 -. 004 +. 002 . 0089 X

Class Exercise Position Verification At MMC- Inch As drawn Produced part 4. 5 . 371 . 376. 379 . 010. 013 -. 004 +. 002 . 0089 X

Class Exercise Position Verification At MMC- Inch As drawn Produced part 4. 5 . 371 . 376. 379 . 010. 013 -. 004 +. 002 +. 005 . 0089 X

4. 7

Class Exercise Position Verification At MMC- Inch As drawn Produced part 4. 5 . 371 . 376. 379 . 010. 013 -. 004 +. 002 +. 005 . 0089. 0128 X

Class Exercise Position Verification At MMC- Inch As drawn Produced part 4. 5 . 371 . 376. 379 . 010. 013 -. 004 +. 002 +. 005 . 0089. 0128 X X

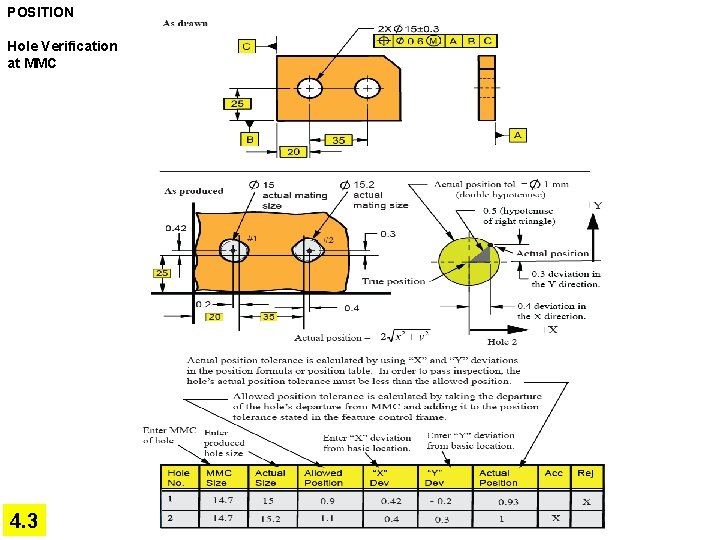
POSITION Hole Verification at MMC 4. 3

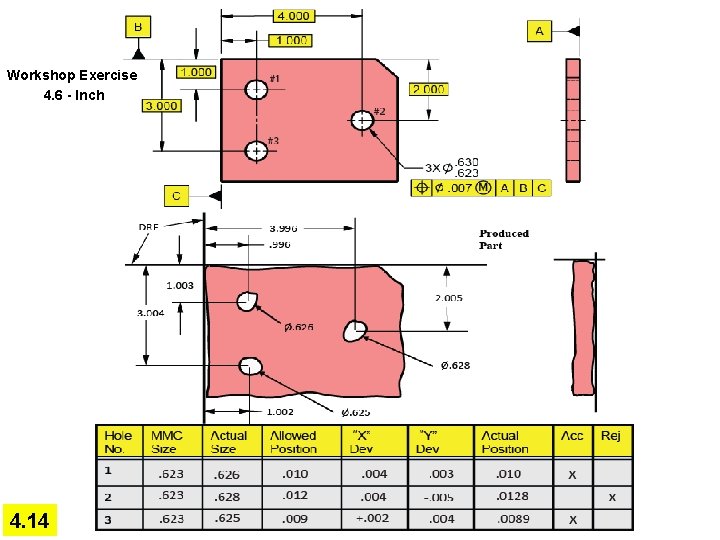
Workshop Exercise 4. 6 - Inch 4. 14

Workshop Exercise 4. 6 - Inch 4. 14