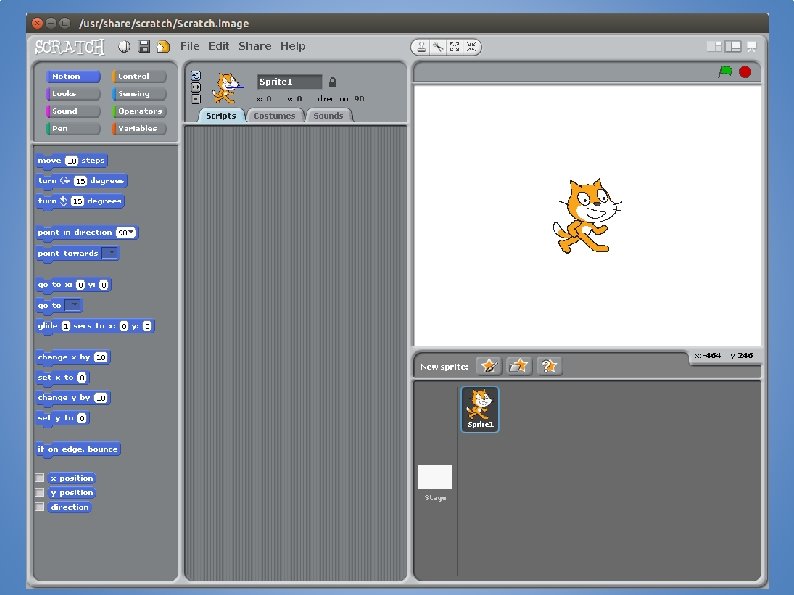
Install Scratch Go to http scratch mit eduscratch1


 pick up ‘pick random 1 to 10’ and drop")


")
")


 we need to add some code to the big")


 We just have to get the time bit working… On the")
. Add in this code to make")
 and")


- Slides: 73
Install Scratch Go to => http: //scratch. mit. edu/scratch_1. 4/
Today we will work on changing costumes. Start by clicking on ‘costumes’. We only need the top one so click on the ‘X’ next to the bottom cat to delete it. Please note - The design and idea for this game are borrowed from Al Sweigart http: //scratch. mit. edu/projects/11629018/ (big thank you)
Click on ‘edit’ and move the cat up to the top of the screen using the scroll bar on the right.
Select the circle and draw a flat circle under the cat. Start by the arrow on the left and press and hold the left mouse button. Move down to the arrow on the right and let go. If you get it wrong click ‘undo’ and try again.
Click ‘Copy’ 4 times so we end up with 5 cats. If you do it too many times click the ‘X’ to remove the spare ones.
It is a good idea to save your game now and then so you can always go back if it gets messed up or even goes wrong and crashes. Click ‘save’ icon and type in a name. Lets call this one Whack-a-Cat
Click on the top cat and click ‘edit’. Click on the ‘select tool’. This will allow us to draw a box round an area we are interested in changing.
Draw a box round all of the cat but NOT round the circle. If it goes wrong - click on the tool again and you can try again. If it really goes wrong click ‘undo’.
Press the DEL key on your keyboard. If it goes right and looks like this press OK. If it goes wrong - hit cancel and then try again.
Select the 2 nd cat and click edit. This time start your selection a little lower - just below the ears. Hit delete again so we just have his ears left.
Now click the select tool again and drop a box round the ears. Do not press delete this time - we want to keep the ears
When you put the mouse over the middle it turns into a little hand. When it looks like that hold down the left mouse button now you can move the ears.
Drop the ears inside the black circle and click OK
Lets Save it again
Edit the 3 rd cat and start a bit lower. Delete the bottom part - myabe just above his neck. and then highlight the top part of the head and drag it downwards.
You should end up with something like this. Click OK when you are done. Click cancel if it goes wrong.
Edit cat 4 and repeat the process again. This time cut him in half somewhere round his waist. After you move it, he should look like this :
Edit cat 5 and make it look like this :
Your 5 costumes should now look like this :
Click on ‘copy’ next to cat 4 and it will make a new one called number ‘ 6’ Next copy number 3 and then number 2. You do not need to do number 1’ You should end up with 8 costumes.
Lets Save it again
Lets start coding. Click on scripts and then on the control button. You now start picking up commands on the left and dropping them on the blank script area in the middle. Start with ‘When green flag is clicked’
Next select the ‘looks’ button and add ‘switch to costume 8’ After you add it, click on the little arrow next to to costume 8 and pick costume 1 from the drop down list.
Next we are going to add a forever loop. You will find this in the ‘control’ section. A Loop means repeat the commands inside the gap over and over again….
Now click on the ‘looks’ button and add in 8 ‘next costume’ command. Drag them inside the forever loop.
Lets test. Click on the green arrow to start and the red blob to stop. What does it do ?
Back to control again. Drop in a ‘wait 1 sec’ commands in above each ‘next costume command’ You will need 8 of them.
Test again. Is it right this time ?
I think the cat is moving a bit slow. Click on the ‘ 1’ and change it to ‘ 0. 2’ work down the list changing all of them.
Test again. Is it right this time ?
In Operators (the green button) pick up ‘pick random 1 to 10’ and drop it on the top wait so it goes over the number. You only need this on the top one.
Lets add a new sprite - this time we will draw it.
Pick the square tool and pick a colour. I’ve done the hammer handle brown and then done the other black :
Now we need to add some code to make out hammer work :
and another bit of code to make the hammer move when you press the SPACE bar
It goes down…. but we need it to go back up again. Lets add some moves in the other direction.
Test it. Hmmmm - now it is so fast you cannot even see it. lets slow it down a bit. make sure the number for each ‘wait’ command say 0. 05
and to finish it off lets add a noise. You will find the noises under the ‘sound’ section on the left. It goes in right under the third ‘turn’ command.
Test it again. Maybe we need something to happen when the hammer hits the cat ?
Break time… take 5 minutes. Rest your eyes, legs, fingers and all that. Have a drink and a snack - keep up the energy levels - we have a LOT more work to do. . .
We need to add some Variables. You find these by clicking on the ‘Variables’ button and then ‘make a variable’
Lets add one called ‘score’ (with the dot in ‘for all sprites’)
. . and another called ‘time’ (again with the dot in ‘for all sprites’)
Make sure the cat is selected in the bottom right corner and then add another variable called cat-up. This time change the dot to ‘for this sprite only’
Untick the cat-up variable so it does not show up on the screen. (click it on and off a few times so you can see what this does)
Last one… Click on the hammer and then make a variable again. Call this one ‘hammer-time’ and leave the dot on ‘for all sprites’ Untick this one so it does not show up on the screen.
You should currently have something like this :
Now lets build up the main game ‘loop’. This will control what happens in the game. Click on Sprite 1 - The cat. Start by building this (all from the control area) :
Go to the ‘operators’ area and get an ‘and’ command. Now get another one - we will need two of them for this. ‘and’ does exactly what it sounds like. Do something if this AND that happen.
Now go to ‘sensing’ and find ‘touching’ command at the top of the list. Drag it out and then click the drop down arrow and pick ‘sprite 2’ (which should be the hammer) When you have it set drop it in the first ‘and’ box
We need another couple of bits to make this all work. Go to ‘operators’ and drag out two of the ‘=’ signs. This is a bit complex - it will make sense in a few minutes (honest)
Click on the Variables button on the left and make sure the cat is selected on the right. Now pick up the names of the new variables you made ‘cat-up’ and ‘hammer-time’ and drop them in these boxes :
click on each white box and add the word ‘yes’
Pick up both of them (put the mouse on the ‘=’ sign and grab there. It makes it easier). Drop them into the two holes on the second green thing. Wait until you see a glowing white things in the right place and then drop.
Now drop this into the hole in the first one. Pick up by clicking on the ‘and’ and the left hand side is the bit that will get the white glow so aim the very left hand side into the box and then drop.
And we drop all of that ‘thing’ we just made into the ‘if’ loop What does it mean ? If we are touching the hammer and cat is up and It is hammer time (the hammer is swinging). . . then. . . . what would happen ?
What happens ? The cat says ‘Ouch !’ and the score goes up by 1 (‘say’ is in looks and ‘change’ is in variables or data)
In Sprite 1 (the cat) we need to add some code to the big loop so we know when the cat is up or down You’ll find them in ‘variables’ (or data). Drag them to just under the ‘wait line’ and to the bottom of the loop and set the name to ‘cat-up’ and the values to ‘yes’ and ‘no’
and in the hammer sprite code area we do the same for ‘hammer time’ get them in the right places :
Still under the hammer sprite - lets make it move. You already have a small bit of code - add this to the bottom of it : (the goto x: y: bit is in ‘motion’)
get ‘mouse x’ and ‘mouse y’ from ‘sensing’ and put them into the holes. and then stick it all together :
Last step (honest) We just have to get the time bit working… On the cat (sprite 1) get a ‘greater than’ (>) sign in the operations area and add ‘time’ into it from variables. Make the other box say zero and put it in place in the forever loop
Click on the stage icon (the white box). Add in this code to make the time count down
Right click on the cat sprite (on a mac press CTRL and click) and select duplicate sprite. Make 7 or 8 of them and move them on the screen :
What have we used today ? Loops Variables ‘If’
Thats it - you have just coded your first game. Does that make you a Coder. Dojo Ninja ?
No.
A Coder. Dojo Ninja is someone who takes it further and makes it into their own unique game. Some ideas : * Different graphics for the cat ? * Sound FX - make better NOISE !!! * How about a background ? * Better hammer ? * What about moving the holes ? * and most important… add your own ideas. . .
Did you miss any steps ? This presentation is available on our website : www. donabate. Dojo. com Click on ‘lessons’
Please note - The design and idea for this game are borrowed from Al Sweigart http: //scratch. mit. edu/projects/11629018/ (big thank you) Also a big thank you to The Donabate Dojo Mentor team. The Community Centre for the room and setting it up. The mums and dads and adults for transport and help and most of all - Thank you to our new Ninjas (thats you) Comments, suggestions, donations, questions to : email : team@donabate. Dojo. com Facebook : www. facebook. com/Donabate. Dojo Twitter : @Donabate. Dojo Website : www. donabate. Dojo. com