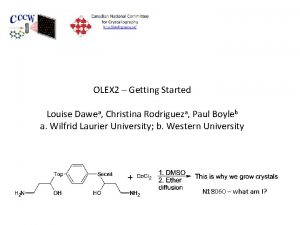
OLEX 2 Getting Started Louise Dawea Christina Rodrigueza


- Slides: 23

OLEX 2 – Getting Started Louise Dawea, Christina Rodrigueza, Paul Boyleb a. Wilfrid Laurier University; b. Western University N 18060 – what am I?

Need a file with basic information and a reflection file. Hkl Navigate to your data folder and select your. ins (sometimes. p 4 p) Careful about putting your data in the subfolder of a subfolder with a long pathname

Reaction Scheme

Hit this dropdown arrow, NOT the word “Solve”! Reaction Scheme

Select the program that you want to use to solve your structure. Shelx. T has become very popular, and we will use it today, but there are other powerful ways to solve structures, especially if you are encountering problems. Sometimes you may want to look at other possible spacegroups (you won’t have Rigaku’s Explain as a possibility; Bruker users could also do this in XPREP) Once you have selected your method for solving the structure, hit “Solve”

Shelx. T results Reaction Scheme But where is my solution? Mouse: Hold down the right click button and drag your mouse forward (up); do not scroll

Does this solution make sense? Go back to your reaction. A few things to try: Fn F 4 Ctrl T Does this solution make sense? Type “grow” Type “fuse” Go to “Refine” arrow (Don’t hit “Refine” yet!

Disagree with the preliminary atom assignments? Click on atoms you would like to reassign, and click on the identity that you think they should be. (The “…” option will allow you to select atom types that were not included in your original formula. ) Do you see atoms that shouldn’t be there? Click on them and hit “Delete” on your keyboard. Note: Sometimes it can be tricky to select atoms (like in this case. ) You can also select bonds and delete those (this makes selecting the atom easier. ) You can also hold down Shift and your left mouse button to draw a box around the atoms you want to select. IN OLEX 2 THERE ARE MANY, MANY WAYS TO ACHIEVE THE SAME GOAL! SHARE YOUR TIPS! : -D

Select your refinement program (Shelx. L) Note that it has selected the reflection file with the same file name; if you have other reflection files in this folder, you can select the one you want to use. If you feel like you are in a good place to get started with your refinement, hit “Refine”

How are things looking? Ctrl T Ctrl Q Hover a Q peak. Scroll down on your mouse and the smallest peaks will start to be hidden. If you would like to find your largest Q peak without hiding the others: 1. Intensity of the Q peak colour corresponds to size 2. Hitting this will highlight the maximum peak. 3. “Fn F 3” will label everything What’s up with that largest peak? Also, those labels are terrible.

When you feel confident that all non-hydrogen atoms are in your model, but before you attempt to treat any disorder, you should give your atoms sensible names. “Ctrl Q” to hide your Q peaks Click on your cobalt atoms in the order that you would like to number them At the prompt, type “Name 1” Repeat for all atom types Note: You don’t have to start with 1 as your first number. For example, if you want to switch just part of a numbering sequence, select the atoms that are involved, and the number you want to start with. If I suspect an atom, or group, to be involved in disorder, and if it makes sense to do so, I leave it for the last number.

Names okay? “Refine” So far we’ve been refining everything isotropically, but we’ll want to switch to anisotropic refinement. But first! Make sure this button is NOT selected. Then, hit the anisotropic ellipsoid to change how each atom is refined. Everything okay so far? Hit “Refine”

Now how do things look? How are your refinement values? Where is that max peak? Look at your Q peaks; do they make you think about hydrogen? You can add hydrogen atoms into calculated positions by hitting the “Add H” button. If your data is good enough, and especially if you have hydrogen atoms involved in H-bonds, you will likely want to introduce them in their difference map positions, and refine them (possibly with the use of restraints. ) “Refine”

I see problems 1. Should all those hydrogens be there? Go back to your reaction conditions and think about charge balance. 2. Hydrogen atoms can “mask” disorder by mopping up electron density. Go back and delete any hydrogen atoms that are relevant to these two points (click on them and hit “Delete” on your keyboard. ) “Refine” My refinement values improved. Did yours? This wasn’t a sure thing since points 1 and 2 were likely to off-set each other (ie. Point 1 meant that there were H-atoms introduced where none existed, but point 2 meant that some H-atoms might have been used to account for electron density associated with disorder. ) Before we start dealing with disorder, let’s do a few routine “things”.

At the prompt type “edit lst” First, the atoms are not in a sensible order. Close the. lst and sort your atoms First, click on “Sorting” (if this menu isn’t open) Next, decide on your sort order (I’ll just use the default) and hit “Sort’ “Refine”

Is “ACTA” selected? (This will generate a. cif) Are you up-dating your weighting? (I’ve been waiting up until I deal with my disorder, because I know I don’t yet have my best model. What will “Info” reveal? More info in our. lst!

At the prompt type “edit lst” In the text file, search for “disagreeable” “split” “Highest peak” There is so much great information in this file! Okay, at this point, we can either model this disorder, or leave that to someone else… What time is it?

Go back to your Work menu Open Toolbox Work by clicking on it In your main screen “Ctrl T” until your have a blank background and “Ctrl Q” to show your Q-peaks, but scroll down on your mouse so that only the two highest ones are displayed. Now, select the C and S that are involved in disorder, and hit “m. Split” Hover your mouse over the group you want to split, and hold “Ctrl” and your left mouse button while moving your mouse around until the second component fits the two highest Q peaks Seem okay? Even if it doesn’t, hit “Esc” on your keyboard.

If you aren’t happy about how these two atoms were split, you can always go back in history to an earlier model. Just click on any of the “Histo”gram bars, and the model that corresponded to that round of least squares will pop back up on your screen! If you just don’t like how you split your atoms, and want a second try at it, hit the last bar.

You should notice that after you split your atoms they now look like they are being refined isotropically (because they are; anisotropic refinement can also “mop up” electron density, so we refine disorder isotropically first. ) Notice the nice work OLEX 2 did naming the second disorder component? You should also notice that the H-atoms on the “not disordered” carbon disappeared. Why do you think that is? Peter Mueller (who taught me many things) would tell you than you will never refine disorder without restraints. Let’s add some. First, open up the “Tools” menu Then, open up “Shelx Compatible “Restraints” Peter says it here: https: //www. tandfonline. com/doi /pdf/10. 1080/0889311080254724 0? need. Access=true

There are many restraints to choose from. You can read about them in more detail in the shelx manual. Conveniently, OLEX 2 also offers a short description of some of them, when selected. Shelx instructions! http: //shelx. unigoettingen. de/shelxl_html. php Let’s pick “SADI” I would like the outgoing S-C bonds in this disordered group to be the same, so I’m going to click on the bonds, and then hit “Go”! WHAT HAVE YOU DONE? ? ? (Just kidding; at the prompt type “edit ins” to see how this restraint was introduced. ) From the same menu, select “RIGU”, and select all of the atoms in the S-C bonds, then hit “Go” (This is ignored for isotropic atoms, until we make them anisotropic) “Refine” – Have things exploded? Hover the atoms in the disordered group to see their occupancies. RIGU! http: //journals. iucr. org/a/issue s/2012/04/00/pc 5011. pdf

If everything looked stable, hit your anisotropic button again, and “Refine”. If things still look good, you will want to add H-atoms. This time, just select the carbon atoms in the disordered group (if you hit “Add H” before doing this, it will add back in the O-H hydrogen atoms that you already deleted. ) Notice how the carbon atom that was not split now has six hydrogens on it? Let’s see how this makes sense by selecting to view only one “part” at a time. You can also select to update your weights now. TADA! That’s it until we start thinking about Structure Finalization (nope…you aren’t done!) One adjacent thought: Is this a known compound? Should you have spent time on this?

In this tutorial I have deliberately not included screenshots of my model because I didn’t want to give away the answer! I’ve posted this as a file that you can edit. Why don’t you go back, work through it again, and add your own notes and screenshots? You can start from scratch by going to Model Reset
 The secret of getting ahead is getting started
 Olex 2
 Mru library
 Counter code
 Android development getting started
 Find these things in unit 1
 Rancher slack channel
 English 9 unit 3
 Getting started with lua
 Getting started with vivado ip integrator
 Tipos de habilidades del pensamiento
 Hi3ms
Hi3ms Linkedin getting started
 Getting started with excel
 Unit 1 getting started
 English 7 unit 1 getting started
 Getting started with eclipse
 Unix for bioinformatics
 Dr jeffrey roach
 Outlook 2010 tutorial
 Getting started with poll everywhere
 Unit 1 local environment getting started
 Mathematica getting started
 Education splunk


