RMI From OReilly RMI text and internet tutorials


- Slides: 127

RMI From O’Reilly RMI text and internet tutorials

Other rmi tutorials • http: //java. sun. com/developer/online. Traini ng/rmi/RMI. html • And • http: //java. sun. com/docs/books/tutorial/rmi/

RMI • The Java Remote Method Invocation (RMI) system allows an object running in one Java Virtual Machine (VM) to invoke methods on an object running in another Java VM. RMI provides for remote communication between programs written in the Java programming language.

Java Remote Object Invocation (RMI) • Overview of RMI • Java RMI allows programmer to execute remote function class using the same semantics as local functions calls. Local Machine (Client) Sample. Server remote. Object; int s; … s = remote. Object. sum(1, 2); Remote Machine (Server) 1, 2 3 System. out. println(s); public int sum(int a, int b) { return a + b; }

The General RMI Architecture • The server must first bind its name to the registry • The client looks up the server name in the registry to establish remote references. • The Stub serializes the parameters to the skeleton, the skeleton invokes the remote method and seriales the result back to the stub.

The Stub and Skeleton • A client invokes a remote method, the call is first forwarded to stub. • The stub is responsible for sending the remote call over to the server-side skeleton • The stub opening a socket to the remote server, marshaling the object parameters and forwarding the data stream to the skeleton. • A skeleton contains a method that receives the remote calls, unmarshals the parameters, and invokes the actual remote object implementation.

Steps for Developing an RMI System 1. Define the remote interface 2. Develop the remote object by implementing the remote interface. 3. Develop the client program. 4. Compile the Java source files. 5. Generate the client stubs and server skeletons. 6. Start the RMI registry. 7. Start the remote server objects. 8. Run the client

Step 1: Defining the Remote Interface • To create an RMI application, the first step is the defining of a remote interface between the client and server objects. /* Sample. Server. java */ import java. rmi. *; public interface Sample. Server extends Remote { public int sum(int a, int b) throws Remote. Exception; }

Step 2: Develop the remote object and its interface • The server is a simple unicast remote server. • Create server by extending java. rmi. server. Unicast. Remote. Object. • The server uses the RMISecurity. Manager to protect its resources while engaging in remote communication. /* Sample. Server. Impl. java */ import java. rmi. *; import java. rmi. server. *; import java. rmi. registry. *; public class Sample. Server. Impl extends Unicast. Remote. Object implements Sample. Server { Sample. Server. Impl() throws Remote. Exception { super(); }

Step 2: Develop the remote object and its interface • Implement the remote methods /* Sample. Server. Impl. java */ public int sum(int a, int b) throws Remote. Exception { return a + b; } } • The server must bind its name to the registry, the client will look up the server name. • Use java. rmi. Naming class to bind the server name to registry. In this example the name call “SAMPLE-SERVER”. • In the main method of your server object, the RMI security manager is created and installed.

Step 2: Develop the remote object and its interface /* Sample. Server. Impl. java */ public static void main(String args[]) { try { System. set. Security. Manager(new RMISecurity. Manager()); //set the security manager //create a local instance of the object Sample. Server. Impl Server = new Sample. Server. Impl(); //put the local instance in the registry Naming. rebind("SAMPLE-SERVER" , Server); System. out. println("Server waiting. . . "); } catch (java. net. Malformed. URLException me) { System. out. println("Malformed URL: " + me. to. String()); } catch (Remote. Exception re) { System. out. println("Remote exception: " + re. to. String()); } }

Step 3: Develop the client program • In order for the client object to invoke methods on the server, it must first look up the name of server in the registry. You use the java. rmi. Naming class to lookup the server name. • The server name is specified as URL in the from ( rmi: //host: port/name ) • Default RMI port is 1099. • The name specified in the URL must exactly match the name that the server has bound to the registry. In this example, the name is “SAMPLE-SERVER” • The remote method invocation is programmed using the remote interface name (remote. Object) as prefix and the remote method name (sum) as suffix.

Step 3: Develop the client program import java. rmi. *; import java. rmi. server. *; public class Sample. Client { public static void main(String[] args) { // set the security manager for the client System. set. Security. Manager(new RMISecurity. Manager()); //get the remote object from the registry { System. out. println("Security Manager loaded"); String url = "//localhost/SAMPLE-SERVER"; Sample. Server remote. Object = (Sample. Server)Naming. lookup(url) ; System. out. println("Got remote object"); System. out. println(" 1 + 2 = " + remote. Object. sum(1, 2) ); } catch (Remote. Exception exc) { System. out. println("Error in lookup: " + exc. to. String()); } catch (java. net. Malformed. URLException exc) { System. out. println("Malformed URL: " + exc. to. String()); } catch (java. rmi. Not. Bound. Exception exc) { System. out. println("Not. Bound: " + exc. to. String()); } } }

Step 4 & 5: Compile the Java source files & Generate the client stubs and server skeletons • Assume the program needs to compile and execute at home • Once the interface is completed, you need to generate stubs and skeleton code. The RMI system provides an RMI compiler (rmic) that takes your generated interface class and procedures stub code on its self. prompt> set CLASSPATH=”home” javac Sample. Server. Impl. java rmic Sample. Server. Impl prompt> javac Sample. Client. java

A little background • Since the client needs to know the name of, and signature of, the method she invokes, a method “stub” file needs to be available to the client (in the class path for client) showing how to “marshal” and “unmarshal” parameters and return types. • The rmi compiler (rmic in your java directory) creates someclass_stub. class files which are provided to your client.

Windows rmi info • A remote object registry is a bootstrap naming service that is used by RMI servers on the same host to bind remote objects to names. Clients on local and remote hosts can then look up remote objects and make remote method invocations. • The registry is typically used to locate the first remote object on which an application needs to invoke methods. That object in turn will provide application-specific support for finding other objects.

Windows rmi info • The methods of the java. rmi. registry. Locate. Registry class are used to get a registry operating on the local host or local host and port. • The URL-based methods of the java. rmi. Naming class operate on a registry and can be used to look up a remote object on any host, and on the local host: bind a simple (string) name to a remote object, rebind a new name to a remote object (overriding the old binding), unbind a remote object, and list the URLs bound in the registry. • OPTIONS • -J – Used in conjunction with any java option, it passes the option following the -J (no spaces between the -J and the option) on to the java interpreter. • SEE ALSO • java, java. rmi. registry. Locate. Registry and java. rmi. Naming

Step 6: Start the RMI registry in its own command window • Open an ‘extra’ command window: • The RMI applications need install in the Registry. And the Registry must be started manually by calling rmiregisty. • The rmiregistry uses port 1099 by default. You can also bind rmiregistry to a different port by indicating the new port number as : rmiregistry <new port> • On Windows, you have to type on the command line: > start rmiregistry

Port for rmi • To run registry on Windows platforms: Prompt>start rmiregistry • By default, the registry runs on TCP port 1099. To start a registry on a different port, specify the port number from the command line. For example, to start the registry on port 2001 on a Windows platform: Prompt>start rmiregistry 2001

Steps 7 & 8: Start the remote server objects & Run the client • Once the Registry is started, the server can be started and will be able to store itself in the Registry. • Because of the grained security model in Java 2. 0, you must set up a security policy for RMI by set java. security. policy to a file, for example, policy. all prompt> java –Djava. security. policy=policy. all Sample. Server. Impl prompt> java –Djava. security. policy=policy. all Sample. Client

Java Policy File • In Java 2, the java application must first obtain information regarding its privileges. It can obtain the security policy through a policy file. If, in above example, we allow the Java code to have all permissions, the contents of the policy file policy. all would be: grant { permission java. security. All. Permission; }; • Now, we given an example for assigning resource permissions: grant { permission java. io. file. Permission “/tmp/*”, “read”, “write”; permission java. net. Socket. Permission “somehost. somedomain. com: 999”, ”connect”; permission java. net. Socket. Permission “*: 102465535”, ”connect, request”; permission java. net. Socket. Permission “*: 80”, ”connect”; };

Comment for the Java Policy File 1. allow the Java code to read/write any files only under the /tmp directory, includes any subdirectories 2. allow all java classes to establish a network connection with the host “somehost. somedomain. com” on port 999 3. allows classes to connection to or accept connections on unprivileged ports greater than 1024 , on any host 4. allows all classes to connect to the HTTP port 80 on any host. • You can obtain complete details by following links: http: //java. sun. com/products//jdk/1. 2/docs/guide/security/spec /security-spec. doc 3. html

First a tutorial example • http: //java. sun. com/j 2 se/1. 5. 0/docs/guide/r mi/hello-world. html#51 • A VERY simple working rmi example

Hello interface(extends remote) package example. hello; import java. rmi. Remote. Exception; public interface Hello extends Remote { String say. Hello() throws Remote. Exception; }

Client package example. hello; import java. rmi. registry. Locate. Registry; //usual RMI imports import java. rmi. registry. Registry; public class Client { private Client() {} public static void main(String[] args) { String host = (args. length < 1) ? null : args[0]; try { Registry registry = Locate. Registry. get. Registry(host); Hello stub = (Hello) registry. lookup("Hello"); String response = stub. say. Hello(); System. out. println("response: " + response); } catch (Exception e) { System. err. println("Client exception: " + e. to. String()); e. print. Stack. Trace(); } } }

The RMI Server (sometimes called Service. Impl…like Hello. Impl in this case) package example. hello; import java. rmi. registry. Registry; import java. rmi. registry. Locate. Registry; import java. rmi. Remote. Exception; import java. rmi. server. Unicast. Remote. Object; public class Server implements Hello { public Server() {} public String say. Hello() { return "Hello, world!"; } public static void main(String args[]) { try { Server obj = new Server(); Hello stub = (Hello) Unicast. Remote. Object. export. Object(obj, 0); // Bind the remote object's stub in the registry Registry registry = Locate. Registry. get. Registry(); registry. bind("Hello", stub); System. err. println("Server ready"); } catch (Exception e) { System. err. println("Server exception: " + e. to. String()); e. print. Stack. Trace(); } }}

Compile then run • First compile Hello. java, then the other two files. • Start rmiregistry • Run server: C: PROGRA~1JAVAJDK 15~1. 0_0BIN>java example/hello/Server • Response is: Server ready • Run client: • C: PROGRA~1JAVAJDK 15~1. 0_0BIN>java example/hello/Client response: Hello, world!

Don’t forget to run rmic on the interface C: rmi_hello_world>rmic Hello C: rmi_hello_world>java Hello. Server Hello Server is ready. C: rmi_hello_world>java Hello. Client Hello, world!

Same interface…but using an applet The impl file: import java. rmi. Naming; import java. rmi. Remote. Exception; import java. rmi. RMISecurity. Manager; import java. rmi. server. Unicast. Remote. Object; public class Hello. Impl extends Unicast. Remote. Object implements Hello { public Hello. Impl() throws Remote. Exception { super(); } public String say. Hello() { return "Hello World!"; } public static void main(String args[]) { // Create and install a security manager if (System. get. Security. Manager() == null) { System. set. Security. Manager(new RMISecurity. Manager()); } try { Hello. Impl obj = new Hello. Impl(); // Bind this object instance to the name "Hello. Server" Naming. rebind("Hello. Server", obj); System. out. println("Hello. Server bound in registry"); } catch (Exception e) { System. out. println("Hello. Impl err: " + e. get. Message()); e. print. Stack. Trace(); } } }

The policy file JRE did not seem to look at the jre/lib/security/java. policy file in the JRE directory so I used my own policy file grant { //to handle rmi connection issues permission java. net. Socket. Permission "localhost: 1024 -", "listen, connect, resolve"; };

Run the impl file specifying policy at runtime c: PROGRA~1JavaJDK 15~1. 0_0bin>java -Djava. security. manager Djava. security. policy=policy. all Hello. Impl Hello. Server bound in registry (you get this message when it is bound)

Hello applet rmi example: files • Hello. html…usual file points to applet. class, I put it in webapps/ROOT • Hello. Applet… a jdk 1. 1 applet that gets a Hello. Int object bound in the registry • Hello. Impl …remote thingy implementing the hello interface. • Remember to javac and rmic the Hello. Impl file and put both the class and the stub class files in the directory with your applet code • I did not use packages from the example and had to modify a few other minor items.

RMI • I started RMI registry from my java directory, not from tomcat. • I did not use a policy file for the application program. • I ran the example in Firefox not IE • A batchfile to set classpath to some webapp and then start rmi: Set classpath=C: PROGRA~1TOMCAT~1. 5WEBAPPSROOT; C: PROGRA~1TOMCAT~1. 5WEBAPPSROOTWEB-INFclasses rmiregistry

The tutorial url for this example • http: //java. sun. com/j 2 se/1. 3/docs/guide/rmi /getstart. doc. html#5238

Run the applet (the little hello world is the message)

The calculator project: interface file public interface Calculator extends java. rmi. Remote { public long add(long a, long b) throws java. rmi. Remote. Exception; public long sub(long a, long b) throws java. rmi. Remote. Exception; public long mul(long a, long b) throws java. rmi. Remote. Exception; public long div(long a, long b) throws java. rmi. Remote. Exception; }

The calculator project: implementation class Calculator. Impl public class Calculator. Impl extends java. rmi. server. Unicast. Remote. Object implements Calculator { // Implementations must have an //explicit constructor // in order to declare the //Remote. Exception exception public Calculator. Impl() throws java. rmi. Remote. Exception { super(); } public long add(long a, long b) throws java. rmi. Remote. Exception { return a + b; } public long sub(long a, long b) throws java. rmi. Remote. Exception { return a - b; } public long mul(long a, long b) throws java. rmi. Remote. Exception { return a * b; } public long div(long a, long b) throws java. rmi. Remote. Exception { return a / b; }}

The calculator project: run rmic on Calculator. Impl to generate stub file C: PROGRA~1JAVAJDK 15~1. 0_0BIN>dir Calculator*. * Volume in drive C has no label. Volume Serial Number is 84 F 7 -99 D 3 Directory of c: PROGRA~1JavaJDK 15~1. 0_0bin 10/24/2006 01: 33 PM 271 Calculator. class 10/24/2006 01: 33 PM 405 Calculator. java 10/24/2006 01: 35 PM 536 Calculator. Impl. class 10/24/2006 01: 35 PM 815 Calculator. Impl. java 10/24/2006 01: 37 PM 2, 476 Calculator. Impl_Stub. class 5 File(s) 4, 503 bytes 0 Dir(s) 142, 396, 870, 656 bytes free C: PROGRA~1JAVAJDK 15~1. 0_0BIN>

The calculator project: the server for the rmi import java. rmi. Naming; public class Calculator. Server { public Calculator. Server() { try { Calculator c = new Calculator. Impl(); Naming. rebind("rmi: //localhost: 1099/Calculator. Service", c); } catch (Exception e) { System. out. println("Trouble: " + e); } } public static void main(String args[]) { new Calculator. Server(); }}

Calculator client class…. import java. rmi. Not. Bound. Exception; public class Calculator. Client { public static void main(String[] args) { try { Calculator c = (Calculator) Naming. lookup("rmi: //localhost/Calculator. Service"); System. out. println( c. sub(4, 3) ); System. out. println( c. add(4, 5) ); System. out. println( c. mul(3, 6) ); System. out. println( c. div(9, 3) ); } catch (Malformed. URLException murle) { System. out. println(); System. out. println( "Malformed. URLException"); System. out. println(murle); } catch (Remote. Exception re) { System. out. println(); System. out. println("Remote. Exception"); System. out. println(re); } catch (Not. Bound. Exception nbe) { System. out. println(); System. out. println("Not. Bound. Exception"); System. out. println(nbe); } catch ( java. lang. Arithmetic. Exception ae) { System. out. println(); System. out. println("java. lang. Arithmetic. Exception"); System. out. println(ae); } }}

Running the calculator project • You are now ready to run the system! You need to start three consoles, one for the server, one for the client, and one for the RMIRegistry. • Start with the Registry. You must be in the directory that contains the classes you have written. From there, enter the following: >rmiregistry • If all goes well, the registry will start running and you can switch to the next console. • In the second console. To start the server hosting the Calculator. Service enter the following: >java Calculator. Server • It will start, load the implementation into memory and wait for a client connection. • In the last console, start the client program. >java Calculator. Client • If all goes well you will see the following output: 1 9 18 3 • That's it; you have created a working RMI system. Even though you ran the three consoles on the same computer, RMI uses your network stack and TCP/IP to communicate between the three separate JVMs. This is a full-fledged RMI system.

Screenshot of calculator C: PROGRA~1JAVAJDK 15~1. 0_0BIN>java Calculator. Client 1 9 18 3 C: PROGRA~1JAVAJDK 15~1. 0_0BIN>

A note • This simple example is redone at the end using the simplifiedservlethandler and loggingservletforwarder implementing rmi through http tunneling

Computing something…like pi • http: //java. sun. com/docs/books/tutorial/rmi/ overview. html

Compiling compute. java and task. java and creating a jar file in compute directory C: PROGRA~1JAVAJDK 15~1. 0_0BIN>javac computecompute. java C: PROGRA~1JAVAJDK 15~1. 0_0BIN>javac computetask. java C: PROGRA~1JAVAJDK 15~1. 0_0BIN>jar cvf compute. jar compute*. class added manifest adding: compute/Compute. class(in = 238) (out= 169)(deflated 28%) adding: compute/Task. class(in = 166) (out= 139)(deflated 16%)

Jar files C: PROGRA~1JAVAJDK 15~1. 0_0BINPUBLIC~1CLAS SES>jar xvf compute. jar created: META-INF/ inflated: META-INF/MANIFEST. MF inflated: compute/Compute. class inflated: compute/Task. class C: PROGRA~1JAVAJDK 15~1. 0_0BINPUBLIC~1CLAS SES>

Compile client files C: PROGRA~1JAVAJDK 15~1. 0_0BINPUBLIC~1CLASSES>javac c: progra~1javajdk 15~1. 0_0binclientCompute. Pi. java C: PROGRA~1JAVAJDK 15~1. 0_0BINPUBLIC~1CLAS SES>javac c: progra~1javajdk 15~1. 0_0binclientPi. java

The Compute example • At the heart of the compute engine is a protocol that allows jobs to be submitted to the compute engine, the compute engine to run those jobs, and the results of the job to be returned to the client. This protocol is expressed in interfaces supported by the compute engine and by the objects that are submitted to the compute engine, as shown in the following figure. • Each of the interfaces contains a single method.

About the example • The return value for the Compute's execute. Task and Task's execute methods is declared to be of type Object. This means that any task that wants to return a value of one of the primitive types, such as an int or a float, needs to create an instance of the equivalent wrapper class for that type, such as an Integer or a Float, and return that object instead.

About the example • Note that the Task interface extends the java. io. Serializable interface. RMI uses the object serialization mechanism to transport objects by value between Java virtual machines. Implementing Serializable marks the class as being capable of conversion into a self-describing byte stream that can be used to reconstruct an exact copy of the serialized object when the object is read back from the stream.

About the example • Different kinds of tasks can be run by a Compute object as long as they are implementations of the Task type. The classes that implement this interface can contain any data needed for the computation of the task and any other methods needed for the computation.

About the example • Here is how RMI makes this simple compute engine possible. • Since RMI can assume that the Task objects are written in the Java programming language, implementations of the Task object that were previously unknown to the compute engine are downloaded by RMI into the compute engine's virtual machine as needed. • This allows clients of the compute engine to define new kinds of tasks to be run on the server machine without needing the code to be explicitly installed on that machine. In addition, because the execute. Task method returns a java. lang. Object, any type of object can be passed as a return value in the remote call.

About the example • The compute engine, implemented by the Compute. Engine class, implements the Compute interface, allowing different tasks to be submitted to it by calls to its execute. Task method. These tasks are run using the task's implementation of the execute method. The compute engine reports results to the caller through its return value: an Object.

compute. Compute • The compute. Compute interface defines the remotely accessible part--the compute engine itself. Here is the remote interface with its single method: package compute; import java. rmi. Remote. Exception; public interface Compute extends Remote { Object execute. Task(Task t) throws Remote. Exception; } • By extending the interface java. rmi. Remote, this interface marks itself as one whose methods can be called from any virtual machine. Any object that implements this interface becomes a remote object.

compute. Task • The compute. Task interface defines the interface between the compute engine and the work that it needs to do, providing the way to start the work. package compute; import java. io. Serializable; public interface Task extends Serializable { Object execute(); } • The Task interface defines a single method, execute, which returns an Object, has no parameters, and throws no exceptions. Since the interface does not extend Remote, the method in this interface doesn't need to list

the implementation class of a remote interface • general the implementation class of a remote interface should at least • Declare the remote interfaces being implemented • Define the constructor for the remote object • Provide an implementation for each remote method in the remote interfaces • The server needs to create and to install the remote objects. This setup procedure can be encapsulated in a main method in the remote object implementation class itself, or it can be included in another class entirely. The setup procedure should • Create and install a security manager • Create one or more instances of a remote object • Register at least one of the remote objects with the RMI remote object registry (or another naming service such as one that uses JNDI), for bootstrapping purposes

The complete implementation of the compute engine • The complete implementation of the compute engine follows. The engine. Compute. Engine class implements the remote interface Compute and also includes the main method for setting up the compute engine.

Compute. Engine package engine; import java. rmi. *; import java. rmi. server. *; import compute. *; public class Compute. Engine extends Unicast. Remote. Object implements Compute { public Compute. Engine() throws Remote. Exception { super(); } public Object execute. Task(Task t) { return t. execute(); } public static void main(String[] args) { if (System. get. Security. Manager() == null) { System. set. Security. Manager(new RMISecurity. Manager()); } String name = "//host/Compute"; //change to localhost try { Compute engine = new Compute. Engine(); Naming. rebind(name, engine); System. out. println("Compute. Engine bound"); } catch (Exception e) { System. err. println("Compute. Engine exception: " + e. get. Message()); e. print. Stack. Trace(); } } }

Client files: class Pi implements Task, slide 1 package client; import compute. *; import java. math. *; public class Pi implements Task { /** constants used in pi computation */ private static final Big. Decimal ZERO = Big. Decimal. value. Of(0); private static final Big. Decimal ONE = Big. Decimal. value. Of(1); private static final Big. Decimal FOUR = Big. Decimal. value. Of(4); /** rounding mode to use during pi computation */ private static final int rounding. Mode = Big. Decimal. ROUND_HALF_EVEN; /** digits of precision after the decimal point */ private int digits; /*Construct a task to calculate pi to the specified precision. */ public Pi(int digits) { this. digits = digits; }

Client files: class Pi implements Task, slide 2 /** * Calculate pi. */ public Object execute() { return compute. Pi(digits); } /** * Compute the value of pi to the specified number of * digits after the decimal point. The value is * computed using Machin's formula: * pi/4 = 4*arctan(1/5) - arctan(1/239) * and a power series expansion of arctan(x) to * sufficient precision. */ public static Big. Decimal compute. Pi(int digits) { int scale = digits + 5; Big. Decimal arctan 1_5 = arctan(5, scale); Big. Decimal arctan 1_239 = arctan(239, scale); Big. Decimal pi = arctan 1_5. multiply(FOUR). subtract( arctan 1_239). multiply(FOUR); return pi. set. Scale(digits, Big. Decimal. ROUND_HALF_UP); }

Client files: class Pi implements Task, slide 3 public static Big. Decimal arctan(int inverse. X, int scale) { Big. Decimal result, numer, term; Big. Decimal inv. X = Big. Decimal. value. Of(inverse. X); Big. Decimal inv. X 2 = Big. Decimal. value. Of(inverse. X * inverse. X); numer = ONE. divide(inv. X, scale, rounding. Mode); result = numer; int i = 1; do { numer = numer. divide(inv. X 2, scale, rounding. Mode); int denom = 2 * i + 1; term = numer. divide(Big. Decimal. value. Of(denom), scale, rounding. Mode); if ((i % 2) != 0) {result = result. subtract(term); } else { result = result. add(term); } i++; } while (term. compare. To(ZERO) != 0); return result; }}

Compute client files in client directory: Compute. Pi package client; import java. rmi. *; import java. math. *; import compute. *; public class Compute. Pi { public static void main(String args[]) { if (System. get. Security. Manager() == null) { System. set. Security. Manager(new RMISecurity. Manager()); } try { String name = "//" + args[0] + "/Compute"; Compute comp = (Compute) Naming. lookup(name); Pi task = new Pi(Integer. parse. Int(args[1])); Big. Decimal pi = (Big. Decimal) (comp. execute. Task(task)); System. out. println(pi); } catch (Exception e) { System. err. println("Compute. Pi exception: " + e. get. Message()); e. print. Stack. Trace(); } } }

Rmiregistry (run) and run engine (server) – I used a batch file • >rmiregistry • >java -Djava. security. policy=java. policy engine. Compute. Engine • Compute. Engine bound

Run client- you may want a batch file • Client expects server name to be passed as well as how many digits of pi are required. Output: • C: PROGRA~1JAVAJDK 15~1. 0_0BIN>runclient • c: PROGRA~1JavaJDK 15~1. 0_0bin>java Djava. security. policy=java. policy client. Compute. Pi localhost 20 3. 14159265358979323846

More remarks • You’ll need to change minor code in the engine and client where it specifies the host url. I used localhost.

Unicast. Remote. Object • A remote object implementation does not have to extend Unicast. Remote. Object, but any implementation that does not must supply appropriate implementations of the java. lang. Object methods. Furthermore, a remote object implementation must make an explicit call to one of Unicast. Remote. Object's export. Object methods to make the RMI runtime aware of the remote object so that the object can accept incoming calls. By extending Unicast. Remote. Object, the Compute. Engine class can be used to create a simple remote object that supports unicast (point-to-point) remote communication and that uses RMI's default sockets-based transport for communication.

• If you choose to extend a remote object from any class other than Unicast-Remote. Object or, alternatively, extend from the new JDK 1. 2 class java. rmi. activation. Activatable (used to construct remote objects that can execute on demand), you need to export the remote object by calling either the Unicast. Remote. Object. export. Object or Activatable. export. Object method explicitly from your class's constructor (or another initialization method, as appropriate).

Define the Constructor • The Compute. Engine class has a single constructor that takes no arguments. • The code for the constructor is public Compute. Engine() throws Remote. Exception { super(); } • This constructor simply calls the superclass constructor, which is the no-argument constructor of the Unicast. Remote. Object class. Although the superclass constructor gets called even if omitted from the Compute. Engine constructor, we include it for clarity. During construction, a Unicast. Remote. Object is exported, meaning that it is available to accept incoming requests by listening for incoming calls from clients on an anonymous port.

Passing Objects in RMI • Arguments to or return values from remote methods can be of almost any type, including local objects, remote objects, and primitive types. More precisely, any entity of any type can be passed to or from a remote method as long as the entity is an instance of a type that is a primitive data type, a remote object, or a serializable object, which means that it implements the interface java. io. Serializable. • A few object types do not meet any of these criteria and thus cannot be passed to or returned from a remote method. Most of these objects, such as a file descriptor, encapsulate information that makes sense only within a single address space. Many of the core classes, including those in the packages java. lang and java. util, implement the Serializable interface.

The rules governing how arguments and return values are passed • Remote objects are essentially passed by reference. A remote object reference is a stub, which is a client-side proxy that implements the complete set of remote interfaces that the remote object implements. • Local objects are passed by copy, using object serialization. By default all fields are copied, except those that are marked static or transient. Default serialization behavior can be overridden on a class -by-class basis. • Passing an object by reference (as is done with remote objects) means that any changes made to the state of the object by remote method calls are reflected in the original remote object. When passing a remote object, only those interfaces that are remote interfaces are available to the receiver; any methods defined in the implementation class or defined in nonremote interfaces implemented by the class are not available to that receiver.

Implement the Server's main Method • The most involved method of the Compute. Engine implementation is the main method. The main method is used to start the Compute. Engine and therefore needs to do the necessary initialization and housekeeping to prepare the server for accepting calls from clients. This method is not a remote method, which means that it cannot be called from a different virtual machine. Since the main method is declared static, the method is not associated with an object at all but rather with the class Compute. Engine.

Create and Install a Security Manager • The first thing that the main method does is to create and to install a security manager, which protects access to system resources from untrusted downloaded code running within the virtual machine. The security manager determines whether downloaded code has access to the local file system or can perform any other privileged operations. All programs using RMI must install a security manager, or RMI will not download classes (other than from the local class path) for objects received as parameters, return values, or exceptions in remote method calls. This restriction ensures that the operations performed by downloaded code go through a set of security checks. • The Compute. Engine uses a security manager supplied as part of the RMI system, the RMISecurity. Manager. This security manager enforces a similar security policy as the typical security manager for applets; that is to say, it is very conservative as to what access it allows. An RMI application could define and use another Security. Manager class that gave more liberal access to system resources or, in JDK 1. 2, use a policy file that grants more permissions.

Security. Manager • Here's the code that creates and installs the security manager: if (System. get. Security. Manager() == null) { System. set. Security. Manager(new RMISecurity. Manager()); }

Build a JAR File of Interface Classes • C: PROGRA~1JAVAJDK 15~1. 0_0BIN>Compute • c: PROGRA~1JavaJDK 15~1. 0_0bin>javac computeCompute. java • c: PROGRA~1JavaJDK 15~1. 0_0bin>javac computeTask. java • c: PROGRA~1JavaJDK 15~1. 0_0bin>jar cvf compute. jar compute*. class • added manifest • adding: compute/Compute. class(in = 238) (out= 169)(deflated 28%) • adding: compute/Task. class(in = 166) (out= 138)(deflated 16%)

Server batch file • C: PROGRA~1JAVAJDK 15~1. 0_0BIN>server • c: PROGRA~1JavaJDK 15~1. 0_0bin>javac engineCompute. Engine. java • c: PROGRA~1JavaJDK 15~1. 0_0bin>rmic -d. engine. Compute. Engine

About the batch file • The -d option tells the rmic compiler to place the generated class files, Compute. Engine_Stub. class and Compute. Engine_Skel. class, in the directory c: homeannsrcengine. You also need to make the stubs and the skeletons network accessible, so you must copy the stub and the skeleton class to the area: public_htmlclasses. • Since the Compute. Engine's stub implements the Compute interface, which refers to the Task interface, you need to make these two interface class files network accessible along with the stub. So the final step is to unpack the compute. jar file in the directory c: homeannpublic_htmlclasses to make the Compute and the Task interfaces available for downloading.

unpack the compute. jar file in the directory • C: PROGRA~1JAVAJDK 15~1. 0_0BIN>jar xvf compute. jar • created: META-INF/ • inflated: META-INF/MANIFEST. MF • inflated: compute/Compute. class • inflated: compute/Task. class

Create client classes • C: PROGRA~1JAVAJDK 15~1. 0_0BIN>client. bat • c: PROGRA~1JavaJDK 15~1. 0_0bin>javac clientCompute. Pi. java • c: PROGRA~1JavaJDK 15~1. 0_0bin>javac clientPi. java

distribute the compute. jar file to developers of server and client applications so that they can make use of the interfaces. • • When you build either server- or client-side classes with the javac and rmic compilers, you generally need to specify where the resulting class files should reside so that they are network accessible. In this example this location is, for UNIX, /home/user/public_html/classes, because some web servers allow accessing a user's public_html directory via an HTTP URL constructed as http: //host/~user/. If your web server does not support this convention, you could use a file URL instead. The file URLs take the form file: /home/user/public_html/classes/ on UNIX or, on the Microsoft Windows platform, file: /c: /home/user/public_html/classes/. You may also select another type of URL, as appropriate. The network accessibility of the class files allows the RMI runtime to download code when needed. Rather than defining its own protocol for code downloading, RMI uses URL protocols supported by the Java platform (for example, HTTP) to download code. Note that a full, heavyweight web server is not needed to accomplish this downloading of class files. In fact, a simple HTTP server that provides all of the functionality needed to make classes available for downloading in RMI via HTTP can be found at ftp: //ftp. javasoft. com/pub/jdk 1. 1/rmi/class-server. zip.

Build the Server Classes • The engine package contains only one server-side implementation class, Compute. Engine, the remote object implementation of the Compute interface. Since Compute. Engine is an implementation of a remote interface, you need to generate a stub for the remote object so that clients can contact the remote object. Let's say that ann, the developer of the Compute. Engine class, has placed Compute. Engine. java in the c: homeannsrcengine directory and is deploying the class files for clients to use in a subdirectory of her public_html directory, c: homeannpublic_htmlclasses (on UNIX that would be /home/ann/public_html/classes, accessible via some web servers as http: //host/~ann/classes/). • Now let's assume that the compute. jar file is located in the directory c: homeannpublic_htmlclasses. To compile the Compute. Engine class, your class path must include the compute. jar file and the source directory itself.

RMI with a form for client which calls a “client servlet” to access a remote method

Html to access servlet • • • <HTML> <BODY> <H 1>RMI AND SERVLETS</H 1> <FORM METHOD="get" action ="http: //localhost: 8080/rmi/Client. Servlet"> <INPUT TYPE="Text" name="username"> <INPUT TYPE="submit" value="Click me"> </FORM> </BODY> </HTML>

Client servlet accesses remote method

The files: Client. Servlet import javax. servlet. *; import javax. servlet. http. *; import java. io. *; import java. rmi. *; //client implementation public class Client. Servlet extends Http. Servlet{ //reference to the remote server private Server. Handler. Interface obj; //Initialize the servlet and log the initialization. public void init(Servlet. Config c) throws Servlet. Exception{ super. init(c); try{ //get a remote reference obj = (Server. Handler. Interface)Naming. lookup("Server"); }catch(Exception ex) { System. out. println("Error: " + ex. get. Message()); } } //Perform the HTTP GET operation public void do. Get(Http. Servlet. Request req, Http. Servlet. Response res) throws Servlet. Exception, IOException{ //get the name of the user String name = req. get. Parameter("username"); String result = null; try{ //Call remote method result = obj. servlet. Test(name); }catch(Exception ex){ result = "Error : " +ex. get. Message(); } //Set the content type for this response object. res. set. Content. Type("text/html"); //get a print writer for writing formatted text responses Print. Writer out = res. get. Writer(); //Print a String and then terminate the line out. println("<Html><Body><H 1>RMI AND SERVLETS</H 1>"); out. println(result+"</Body></Html>"); }}

Server. Handler. Impl (need to do both javac and rmic) import java. rmi. *; import java. rmi. server. *; import java. rmi. registry. *; // server class public class Server. Handler. Impl extends Unicast. Remote. Object implements Server. Handler. Interface { //constructor public Server. Handler. Impl() throws Remote. Exception{ System. out. println("Creating server object"); } //remote method called by the servlet public String servlet. Test(String name) throws Remote. Exception { String res = "Your name is: "+name+"n" +"nn Returned by RMI Server"; return res; } //main method creates an instance of the remote object //and binds it with the registry service public static void main(String args[]) { try{ Server. Handler. Impl obj = new Server. Handler. Impl(); Registry reg = Locate. Registry. create. Registry(1099); reg. rebind("Server", obj); }catch(Exception ex) { System. out. println(ex. get. Message()); } //catch }//main }

Remote method interface file import java. rmi. *; public interface Server. Handler. Interface extends Remote{ public String servlet. Test(String name) throws Remote. Exception; }

You need to run this application – note path • C: PROGRA~1TOMCAT~1. 5WEBAPPSRMIWEBINFCLASSES>java Server. Handler. Impl • Creating server object

remarks • Need to add the servlet and mapping to web. xml • Need to put stub and class files for the three java classes into your web app. • Need to run the application over in the webapp directory--- seems like a tedious superfluity… so we’d like an example without this.

Generalizing the example to route requests: choose one method

Or another

The classes: Router servlet import javax. servlet. *; import javax. servlet. http. *; import java. io. *; import java. rmi. *; //client implementation public class Router. Servlet extends Http. Servlet{ //reference to the remote server private Generalized. Server. Interface obj 1, obj 2; //Initialize the servlet and log the initialization. public void init(Servlet. Config c) throws Servlet. Exception{ super. init(c); try{ //get a remote reference obj 1 = (Generalized. Server. Interface)Naming. lookup("Name"); obj 2 = (Generalized. Server. Interface)Naming. lookup("Number"); }catch(Exception ex) { System. out. println("Error: " + ex. get. Message()); } } //Perform the HTTP GET operation public void do. Get(Http. Servlet. Request req, Http. Servlet. Response res) throws Servlet. Exception, IOException{ //get the name of the user String name = req. get. Parameter("methodname"); String value=req. get. Parameter("valuename"); String result = null; try{ //Call remote method if(name. equals("name. Test"))result = obj 1. servlet. Test(value); else if(name. equals("value. Test"))result = " " +obj 2. value. Test(Integer. parse. Int(value)); }catch(Exception ex){ result = "Error : " +ex. get. Message(); } //Set the content type for this response object. res. set. Content. Type("text/html"); //get a print writer for writing formatted text responses Print. Writer out = res. get. Writer(); //Print a String and then terminate the line out. println("<Html><Body><H 1>RMI AND SERVLETS</H 1>"); out. println("you chose method"+ name+ " your result is. . " +result+"</Body></Html>"); }}

Implementation (needs class file but also stub file from rmic in classes directory) import java. rmi. *; import java. rmi. server. *; import java. rmi. registry. *; // a server class. . . provides various methods public class Generalized. Server. Impl extends Unicast. Remote. Object implements Generalized. Server. Interface { //constructor public Generalized. Server. Impl() throws Remote. Exception{ System. out. println("Creating server object"); } //remote method called by the servlet public String servlet. Test(String name) throws Remote. Exception { String res = "Your name is: "+name+"n" +"nn Returned by RMI Server"; return res; } //main method creates an instance of the remote object //and binds it with the registry service public int value. Test(int num) throws Remote. Exception {int res=num*10; return res; } public static void main(String args[]){ try{ Generalized. Server. Impl obj 1 = new Generalized. Server. Impl(); Generalized. Server. Impl obj 2 = new Generalized. Server. Impl(); Registry reg = Locate. Registry. create. Registry(1099); reg. rebind("Name", obj 1); reg. rebind("Number", obj 2); } catch(Exception ex) { System. out. println(ex. get. Message()); } //catch }//main }

A list of services might appear in the remote interface file import java. rmi. *; //maybe a whole list of services? public interface Generalized. Server. Interface extends Remote{ public String servlet. Test(String name) throws Remote. Exception; public int value. Test(int num) throws Remote. Exception; }

remarks • The Generalized. Server. Impl file is compiled using javac, then the class file is compiled using rmic. Both output files (class and stub. class) go in classes directory of webapps • Using this rmi model we need to run the application impl which logs the methods into a registry: C: PROGRA~1TOMCAT~1. 5WEBAPPSRMIWEBINFCLASSES>java Generalized. Server. Impl Creating server object

A process can use registry. list() to see bound “remote” interfaces

Remote. Http. Servlet binds servlet to registry try{ registry. rebind(get. Registry. Name(), this); catch(…){…}

Some links for tutorials and examples • http: //java. sun. com/developer/JDCTech. Tip s/2001/tt 0227. html • http: //java. sun. com/developer/online. Traini ng/rmi/RMI. html • http: //www. javacommerce. com/displaypag e. jsp? name=security. sql&id=18224

Tunneling • Tunneling can be used to access RMI through a firewall. The client connects (requests a service) via http to a remote server and a servlet routes the client to the running rmi server. • The servlet must have mapping to /cgi-bin/java-rmi. cgi

SUN java web server

Requires creating war file • http: //www. hccfl. edu/pollock/AJava/WAR/my. Servlet. WAR. htm C: PROGRA~1JAVAJDK 15~1. 0_0BINTMPSESSION>C: PROGRA ~1JAVAJDK 15~1. 0_0BINjar -cvf session. war. added manifest adding: WEB_INF/(in = 0) (out= 0)(stored 0%) adding: WEB_INF/classes/Session. Info. class(in = 1926) (out= 1051)(deflated 45%) adding: WEB_INF/classes/Session. Snoop. class(in = 3446) (out= 1755)(deflated 49%) adding: WEB_INF/web. xml(in = 1002) (out= 332)(deflated 66%)

Deploy a webapp (war)

Editing webapps in sun web server

Configuring tomcat to listen at port 80 • You can configure tomcat to listen at port 80 instead of port 8080 • The file tomcatconfserver. xml controls the port where tomcat listens…line 77 in my tomcat 5. 5 container: • <!-- Define a non-SSL HTTP/1. 1 Connector on port 8080 modified to read port 80 11/28/06 --> • <Connector port="80" max. Http. Header. Size="8192"

Tunneling • Tunneling is not a “trick” but is specifically provided for by RMI which automatically tries this avenue if other efforts to locate the method fail. • To “force” tunneling for development purposes when there is no firewall you add a couple of lines to your client: try {RMISocket. Factory. set. Socket. Factory(new sun. rmi. transport. proxy. RMIHttp. To. CGISocket. Factory ()); } Catch(IOException x){…}

Converting ANY rmi client/server into a tunneler • No change needed to the server. • You’ll need to put the Impl and Impl_Stub class files in the classes directory of ROOT/WEB-INF • Remember, the stub file is created by using the rmi compiler on the impl class file. • You’ll need to get the tunneler servlet files off the network, or from me, and deploy into Tomcat/webapps/Root with mapping as above (/cgibin/…) I think it’s at http: //java. sun. com/j 2 se/1. 3/docs/guide/rmi/archives/rmi servlethandler. zip • The unzipped contents also has a readme with some explanation.

Example: Hello client and server…modified client import java. rmi. *; import java. rmi. server. *; //////note additional imports import java. io. *; import java. rmi. registry. Locate. Registry; import java. rmi. registry. Registry; public class Hello. Client 2 { private Hello. Client 2() {} public static void main(String[] args) { String host = (args. length < 1) ? null : args[0]; try {/////note this addition RMISocket. Factory. set. Socket. Factory(new sun. rmi. transport. proxy. RMIHttp. To. CGISocket. Factory()); Registry registry = Locate. Registry. get. Registry(host); Hello stub = (Hello) registry. lookup("Hello. Server"); String response = stub. say. Hello(); System. out. println("response: " + response); } catch (Exception e) { System. err. println("Client exception: " + e. to. String()); e. print. Stack. Trace(); } }}

Get the server running • You might want to use a policy file and a batch file • Here’s a java. policy file grant { permission java. security. All. Permission; permission java. net. Socket. Permission "localhost: 1024 -", "connect, listen, accept, resolve"; };

Get the server running • Put the impl and impl stub files in ROOT/WEB-INF/classes • Make sure you’ve got that tunneler servlet working • Startup tomcat • Startup rmi registry • Run the server

Batch file for server & run client java -Djava. security. manager Djava. security. policy="java. policy" Hello. Impl • Note--- in my version I bind “Hello. Server” to the registry, not “Hello” so I modified the client to look for this • Output: C: PROGRA~1JAVAJDK 15~1. 0_0BIN>java Hello. Client 2 response: Hello World!

A second tunneling example • The calculator example from above can be easily modified to go through http

Calculator modified to go through rmi tunneling: output C: PROGRA~1JAVAJDK 15~1. 0_0BIN>java Calculator. Client 2 1 9 18 3

Calc. Client 2 forced to go through http tunnel import java. net. Malformed. URLException; import java. rmi. *; import java. rmi. server. *; import java. io. *; public class Calculator. Client 2 { public static void main(String[] args) { try {RMISocket. Factory. set. Socket. Factory(new sun. rmi. transport. proxy. RMIHttp. To. CGISocket. Factory()); Calculator c = (Calculator) Naming. lookup("Calculator. Service"); System. out. println( c. sub(4, 3) ); System. out. println( c. add(4, 5) ); System. out. println( c. mul(3, 6) ); System. out. println( c. div(9, 3) ); } catch (Malformed. URLException murle) { System. out. println(); System. out. println( "Malformed. URLException"); System. out. println(murle); }

And more catches catch (Remote. Exception re) { System. out. println(); System. out. println("Remote. Exception"); System. out. println(re); } catch (IOException io) { System. out. println(); System. out. println( "IOException"); System. out. println(io. to. String()); catch (Not. Bound. Exception nbe) { System. out. println(); System. out. println("Not. Bound. Exception"); System. out. println(nbe); } catch ( java. lang. Arithmetic. Exception ae) { System. out. println(); System. out. println("java. lang. Arithmetic. Exception"); System. out. println(ae); } }} }

No changes to calculator server • Need to move copy of impl and stub files to your server classes directory.

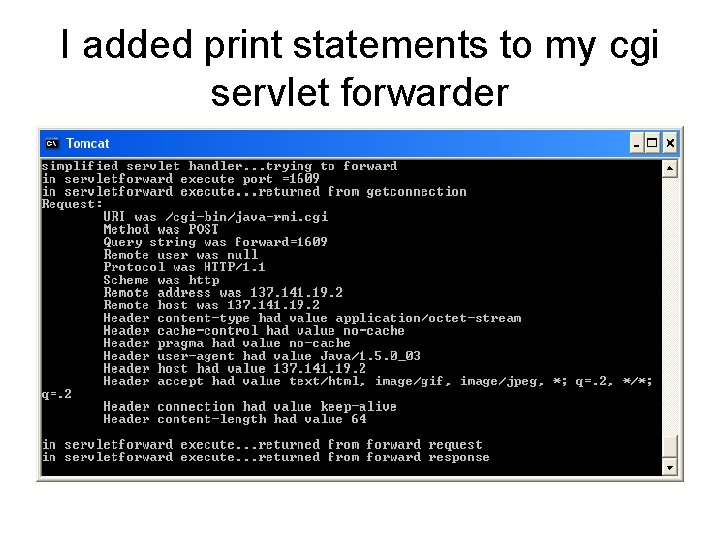
I added print statements to my cgi servlet forwarder

Related (RMI) project • Maybe not too hard after all. • Make changes to the task/compute (PI) RMI example to effect RMI tunneling.

Third example from Grosso’s RMI text, chapter 22. It is much more involved than the previous two • You can get the code off the internet… look for Grosso RMI text

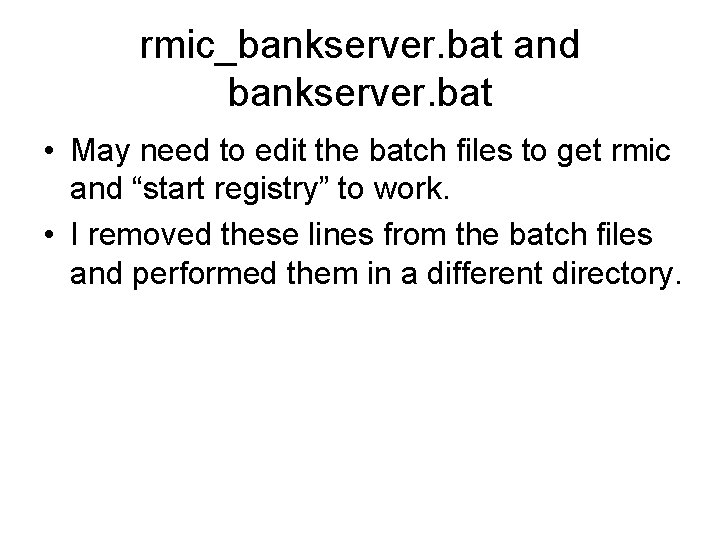
rmic_bankserver. bat and bankserver. bat • May need to edit the batch files to get rmic and “start registry” to work. • I removed these lines from the batch files and performed them in a different directory.

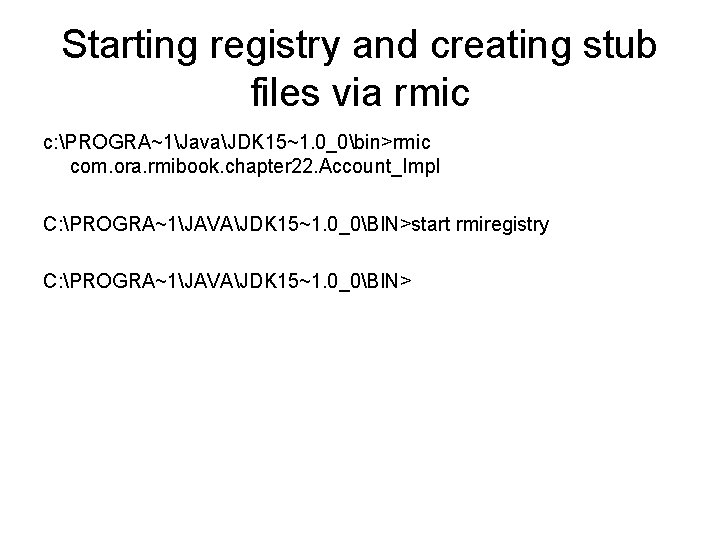
Starting registry and creating stub files via rmic c: PROGRA~1JavaJDK 15~1. 0_0bin>rmic com. ora. rmibook. chapter 22. Account_Impl C: PROGRA~1JAVAJDK 15~1. 0_0BIN>start rmiregistry C: PROGRA~1JAVAJDK 15~1. 0_0BIN>

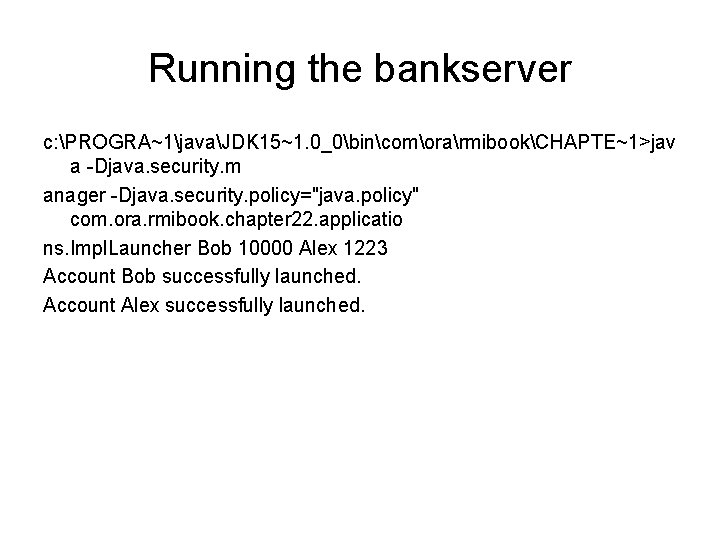
Running the bankserver c: PROGRA~1javaJDK 15~1. 0_0bincomorarmibookCHAPTE~1>jav a -Djava. security. m anager -Djava. security. policy="java. policy" com. ora. rmibook. chapter 22. applicatio ns. Impl. Launcher Bob 10000 Alex 1223 Account Bob successfully launched. Account Alex successfully launched.

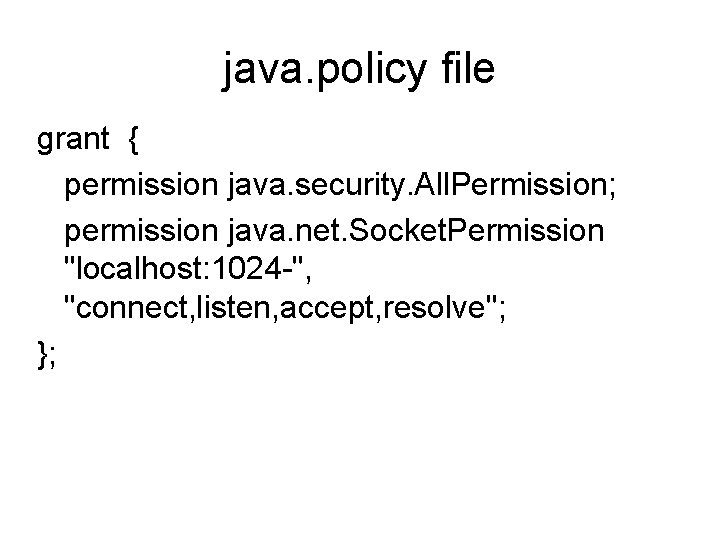
java. policy file grant { permission java. security. All. Permission; permission java. net. Socket. Permission "localhost: 1024 -", "connect, listen, accept, resolve"; };

Tunneling …problems • The rmi client goes makes a request for a servlet on port 80 (not port 8080) • You’ll need to modify the server. xml in conf directory of tomcat, or use another container. • I installed the sun webserver on my machine. It listens on port 80 and servlet deployment is fairly simple. (Though I never got it working)

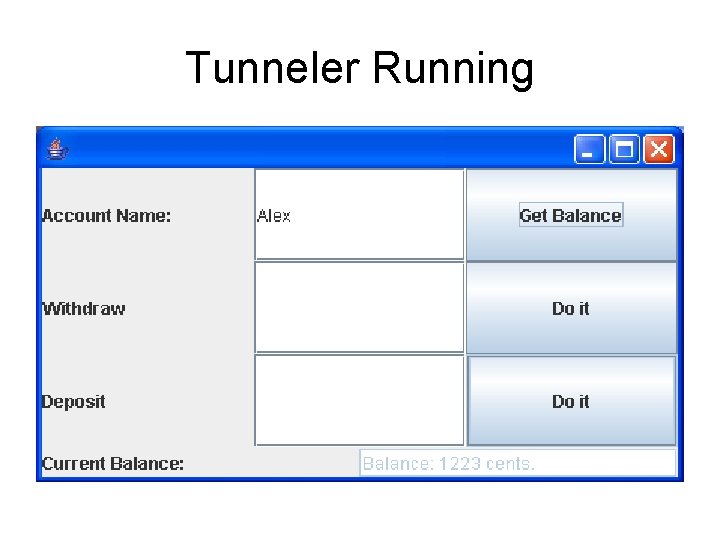
Tunneler Running

I had to make some changes • It doesn’t completely work • There is some error - possibly in the text code (to write objects)

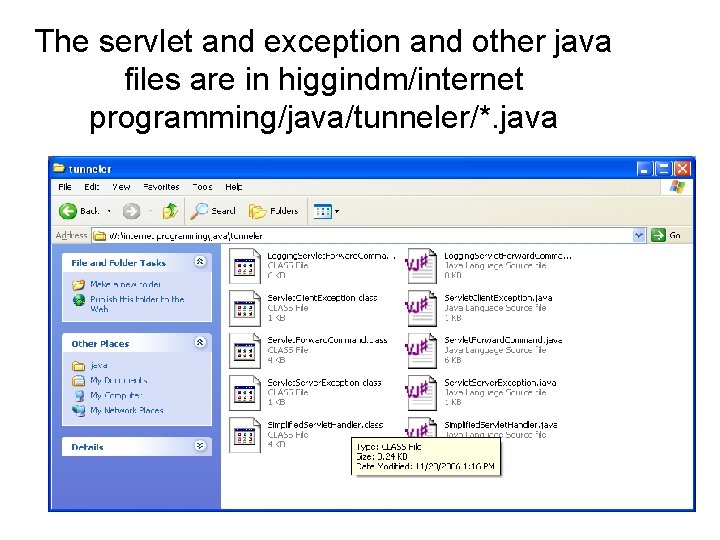
The servlet and exception and other java files are in higgindm/internet programming/java/tunneler/*. java

modifications • I removed the package code… though it probably wasn’t necessary

Tunneling with tomcat • • Background: Tunneling Remote Method Invocation (RMI) in Java gives a clean way to build distributed applications in java. If you are on an Intranet with no firewalls, RMI just works. But on the Internet, where firewalls abound, RMI can be blocked because it tries to connect to server hosts using arbitrary port numbers. Typical firewalls on the server side don't allow this. To alleviate this problem, Sun built in to the RMI implementation a fall back to HTTP tunnelling to provide a way for RMI to get through firewalls. See the RMI FAQ for details. The best short tutorial I have found is is at http: //developer. java. sun. com/developer/online. Training/rmi/RMI. html. Read this first if you have any questions about how RMI HTTP Tunnelling works. The bottom line is that if a direct connection is blocked by a firewall on the server side, the RMI client side will create an HTTP request of the form http: //hostname: 80/cgi-bin/java-rmi. cgi? port=n and try to get to the server that way. The catch is there has to be a web server running at hostname: 80 on the same machine that is running the RMI server task. The web server needs to know how to forward RMI requests to the local RMI server. Sun provides two implementations of programs that will forward the request properly. The default method is a CGI script called java-rmi. cgi which you can just drop in to the cgi-bin directory of Apache and it will work. This script is included in the Unix/Linux JDK distributions. But this script has the performance limitation of all CGI scripts plus it has to spawn a java VM to do the work. So it is noticeably slow. Sun also provides an example servlet implementation that has to run in a servlet container. The servlet implementation needs a servlet container to run in. Once set up, the servlet implementation is substantially faster than the cgi script version. Unfortunately, the Sun servlet implementation comes with a readme. txt file that describes how to get it working in the old Java Web Server environment and it has nothing about getting it to work in Apache+Tomcat other than the description of the general approach. The setup for the old JWS is way different from Apache +Tomcat. This how-to attempts to give a step by step approach to getting the Sun RMI servlet handler to work in Apache+Tomcat. There a lot of network architecture, security and performance considerations that come into play when using RMI on the internet. I don't answer those questions here. I just describe how to get a particular setup to work. In particular, this HOW-TO addresses setup on the SERVER side only. The above references tell you what a client will need to do to get through a client-side firewall. http: //www. geocities. com/dmh 2000/Apache. Tomcat. RMI. htm