Igea Care Systems Inc igeacom Technical Training Igea


- Slides: 126

Igea. Care Systems Inc. igeacom Technical Training

Igea. Care Systems Inc. 1. Company/Solution Overview 2. igeacom Units & Peripherals 3. Installation of the igeacom & Peripherals 4. Configuring your PBX & igeacoms 5. Troubleshooting 6. igeacom Technical Information 7. e. Call Unit 8. Apolo. DS

Igea. Care Systems Inc. 1. COMPANY / SOLUTION OVERVIEW

Company Overview v. Igea. Care focuses on providing a complete communication solution and marketing its unique engineering, design, and capabilities to the global healthcare market. v. Complete corporation offering includes: Engineering, R&D, Manufacturing, Project Management and a wide array of Financial Services.

Company Overview Positioning: v Retirement Residences & Independent Congregate Living (ICL) v Assisted Living Facilities v Nursing Homes & Long Term Care facilities (LTC) v Clinical and Acute care

Company Overview Positioning Retirement Residences/ Independent Congregate Living igeacom 300/500 Assisted Living Facilities Nursing Homes & Long Term Care Clinical and Acute Care igeacom 300/500 igeacom 600/700

Company Overview Positioning Retirement / Independent Living v. Residential complexes that provides services that typically are not found in apartment buildings, like an on site activities program, van services, etc. v. Amenities and security aspects are left to individual owners to attract the desired clientele. v. Most residents have phone services provided by various carriers

Company Overview Positioning Assisted Living Facilities (ALF) v There are many Assisted Living facilities which have comprehensive programs designed specifically for the elderly who cannot live on their own. These facilities are specially constructed for the purpose of caring for seniors. They are laid out apartment style with special amenities such as walk in showers, wide doors for wheelchair access, emergency call pull cords, etc. v Facility size can vary from less than 20 beds to over 200 beds.

Company Overview Positioning Nursing Homes / LTC v Nursing homes are considered health care facilities and as such are licensed and scrutinized by the appropriate Department of Health Services. As medical facilities they are allowed to provide services that cannot be dispensed in assisted living or retirement residences. v Typically these services involve managing complex and potentially serious medical problems. They offer both short and long term care options for those with serious problems and disabilities such as quadriplegics, MS patients, ALS patients and others who are bedridden and are unable to do anything on their own.

Company Overview Positioning Clinical / Acute Care v Provides specialized acute hospital care for medically complex patients who are critically ill, have multi-system complications and/or failures, require a facility offering specialized treatment programs and aggressive clinical and therapeutic intervention on a 24 hour/7 -day-a-week basis. v Many of the patients are admitted directly from a short-stay hospital intensive care unit with respiratory or ventilator-dependent conditions or other complex medical conditions requiring intensive and continuous acute care services.

Solution Overview A different way to look at nurse call systems and integrated communication…

Solution Overview continued PLAY FLASH v Traditional emergency / nurse call solutions have one system for staff / residents, another system for wireless communication / security, another for reporting and invoicing and yet another for local and long distance telephone services. v The Igea. Care system is a revolutionary, PBX based technology that integrates features and functions of emergency / nurse call, security, wireless communication and telephone services into one solution.

Solution overview continued v The heart of the solution is the PBX. It links the various functions and systems together. Dial tone, provided by the PBX, handles the nurse call functions. v Emergency calls are placed from the resident’s suite by means of a red colored momentary push button, red emergency button located directly on main unit, hard wired pull cords or wireless peripherals including a pendant and a pull cord.

Solution overview continued v These emergency calls are then routed using the PBX’s flexible programming to one, two, three or more desks, wireless telephones or wireless devices ringing in sequence or together with embedded escalation. v During the call process the room number, priority and name of resident if desired, is displayed on the display of all telephones/wireless devices programmed to receive emergency calls from that room. Ella Smith 120 Bathroom

Solution overview continued v The Igea. Care solution uses telephone cable – great for retrofits. v Easy to use. Igea. Care uses telephone for all nurse call functions. v Reliability v The PBX is so flexible. v Each unit is individually programmed. Ella Smith 120 Bathroom

Igea. Care Systems Inc. 2. Units and Peripherals

Units & Peripherals Resident Unit / Patient Unit v Resident Units – These are units that are built to service Residential & Assisted Living Homes. v Patient Units – These are units that are built to service LTC and Acute Care facilities.

Units & Peripherals Unit Wireless Enabled PA Board 300 Optional Dome Light Module X 301 X 500 X 501 X X 600 X X 601 X X 700 X X 701 X X X MP 501 X X X

Resident Unit igeacom 300/301/500/501 unit Resident Unit

Resident Unit description PHYSICAL APPEARANCE: Standard 3 gang resident / patient unit § Heat curved silicon rubber push buttons § Polycarbonate LEXAN® • • Flame retardant UV-light resistant Water resistant 260 ft-lb/in² tensile impact strength

Resident Unit description Red push button Cancellation button Speaker volume control Speaker Menu & activity buttons Infrared port Microphone ¼” jack used for additional call points

Patient Unit igeacom 600/601/700/701 unit Patient Unit

Patient Unit description PHYSICAL APPEARANCE: Standard 3 gang resident / patient unit § Heat curved silicon rubber push buttons § Polycarbonate LEXAN® • • Flame retardant UV-light resistant Water resistant 260 ft-lb/in² tensile impact strength

Patient Unit description Red push button Cancellation button Nurse In Nurse Out Code Blue Speaker Staff Assist Infrared port Microphone Supervised ¼” jack used for additional call points

Resident / Patient Unit Circuit Board Overview v The circuit board is the same for both units. It is the firmware that is different.

Resident Units description igeacom 300/600 & igeacom 500/700 TAV 012 (Panel/Keypad Board) TAV 112 (PA Panel/Keypad Board 301/501/601/701) TAV 011 (Main Board)

Resident Units description igeacom 500/700 (or upgraded igeacom 300/600) TAV 014 (Wireless Receiver Board) Additional Boards for peripheral devices: v TAV 020 (Pendant Board) v TAV 030 (Wireless Pull Station Board)

Resident Units description igeacom 300/600 & igeacom 500/700 (OPTIONAL) TAV 013 (Relay Output Module / Dome light Board)

Resident Units description Connector Use: v. CN 1 One telephone input line cord (40 m. A-50 m. A) with standard modular telephone plug. v. CN 2 One telephone output line cord (40 m. A-50 m. A) with standard modular telephone plug.

Resident Units description Connector Use: v. CN 3 Two pin header is used for the connection of the Ni-Cd 3. 6 V battery pack assembly. v TB 301 Terminal block hook up is for normally open momentary short contacts such as wall mount pull cords.

Resident Units description Connector Use: v. CN 302 8 or 12 pin socket is used for the connection of the Panel/Keypad board. v. CN 303 Three pin header is for the phone jack connection, which is a normally open contact

Resident Units description Connector Use: v CN 306 Six pin socket is used for the connection of the Output Relay Module board TAV 013 v CN 305 Eight pin socket is used for the connection of the Receiver board TAV 014.

Resident Units description Connector Use: v CN 202 Two pin header is used for the connection of the microphone assembly. v CN 201 Two pin header is used for the connection of the speaker assembly.

Resident Units description Software Features: v v v v Line power (1. 5 m. A on hook and 28 m. A off hook) Modular conception 6 levels of priority for each individual call point. Full Duplex audio quality with hands free communication Imbedded escalation procedure and retry attempts Automatic line capture Fully supervised with fault line detection

Resident Units description v Unit individually programmed • Infrared technology • Non-volatile flash memory • Additional EPROM memory up to 4 KB v Programmable audible tone • Call Placed • Call Acknowledged • Call Canceled

Peripherals

Peripherals Call cords • • Molded plastic Momentary contact 6 feet (standard) Optional 8’ 10’ 12’ 20’ ¼ inch jack Flexible waterproof PVC Possibility of dual call cord configuration or other types of bed side cords (blow tubes/pressure mats)

Peripherals Dome light • 4 bulb dome light (only 3 can be used) • Requires Dome Light Module • Flame retardant construction with high visibility • • • lens Requires a 2 gang electrical box Dome light color scheme determined by the resident / patient unit’s programming LED or 100 Ma bulb (only 3 can be used) § Red § Amber (fire alarm) § White § Green

Peripherals Dome light module • • • 1 dome light module required per igeacom if dome lights are to be used (existing or new) Supports both AC and DC power. Ability to activate a maximum of 3 different bulbs.

Peripherals description Wireless pull cord • • • Can mount on one-gang surface bracket 41” nylon cord with ABS ends Manually resets at the resident / patient unit / on the pull station or through voice communication (programmable) LED and audible activity indicator for instant confirmation (wireless station only) Peer to peer technology using 433. 92 MHz frequency

Peripherals Wireless pendant • • Wireless water resistant ABS RF pendant with heated curved rubber silicon activation button and red activation LED. Manually resets at the resident / patient unit or through voice communication (programmable) Peer to peer technology using 433. 92 MHz frequency No battery substitution

Peripherals RF 3 Sensor • • Single input (Momentary Short) No local cancel Single terminal block Peer to peer technology using 433. 92 MHz frequency

Peripherals • Wireless Board is required for a unit to work with a wireless device. • igeacom 500 Unit includes a wireless board • igeacom units without wireless boards can be upgraded using the “Wireless upgrade kit” • Guarantee within Suite or 50 ft from unit programmed to. • A maximum of 12 wireless devices can be programmed to one wireless board. (4 pendants and 4 wireless pull stations, 4 RF 3 Sensors) • 30 hours of continuous usage; or 22 560 occurrences; or 15 years with an average of 4 calls / day.

Peripherals description Hard wired pull cord • • • Mount to one-gang surface bracket 41” nylon cord with ABS ends Momentary Short Connects to TB 301 using 2 wires No LED Call must be canceled on corresponding igeacom. X

Peripherals Additional Call Points using TB 301: v Dry contact input may be used for additional call points (normally open, momentary short) - Fire alarm integration - Security

MP 501 Unit The igeacom Multi. Pendant Unit - Unlimited pendants 4 Wireless Pull Station

Igea. Care Systems Inc. 3. Installation

Installation = Step 1: Powering up the igeacom NOTE: The unit is permanently fixed to a wall and installed into a standard three gang box 2. 5” deep. Plug the battery into the CN 3 connector. The igeacom will perform the following diagnostics procedures on boot up: a). An audio beep and the 4 front LED's flash then another 3 audio beeps. b) The unit will check for dial tone, no dial tone has been provided so the installer will hear a chirp

Installation Step 2: Plug in the telephone line. Plug the telephone line from the PBX into CN 1. If the dial tone from the igeacom is being shared with a telephone within the suite, plug the cable running to the jack on the wall in CN 2.

Installation Step 3: Adding peripheral devices HARD WIRED DEVICE Install the momentary short device into dry contact TB 301. (2 Wires) Note: In order to avoid interference on the line cabling used for the TB 301 device should not be nestled with any cable carrying dial tone. The device connecting to TB 301 should be no more than 50 FT from the unit and should be a direct connection.

Installation WIRELESS MODULE UNPLUG TELEPHONE LINES & BATTERY WHEN UPGRADING igeacom’s HARDWARE. Using the wireless board upgrade kit, remove the two screws located on the board between the ¼” jack and the battery pack. Plug the wireless module onto the main board and use the spacers and screws provided in the wireless upgrade kit to affix to main board.

Installation Programming a wireless device: Note: Ensure igeacom is plugged in and mounted in the wall securely. 1. Press and hold the Cancel and Menu button together for 5 sec (the unit will sound a constant beep. When it stops the unit is ready to learn a new wireless device. It will continue to beep softly every 10 sec to notify the installer that it is in programming mode. 2. Press the red button on the pendant, Pull the cord on the pull station or press activated device attached to RF 3 Sensor, within 50 ft of the unit and listen for confirmation tone on the igeacom. 3. TEST

Installation Adding a dome light module UNPLUG TELEPHONE LINES & BATTERY WHEN UPGRADING igeacom’s HARDWARE. Using the dome light module kit, plug the dome light module into the main board and use the screws provided to affix to main board.

Installation Adding a dome light UNPLUG TELEPHONE LINES & BATTERY WHEN INSTALLING A DOME LIGHT. 1. Install a 20 -22 AWG wire from each dome light bulb to the dome light module (TB 2) 2. Install a common (ground) 20 -22 AWG wire from the dome light to the dome light module 3. Note: Dome light module supports both AC and DC dome lights

Installation Power Supply 3. Install a 18 AWG from power supply to each dome light module (TB 1). See manufacturer specification for power supply cable requirements.

Installation – Dome Light Wiring Diagram Power Supply 24 VAC Relay output module 2 X 18 AWG Wires for Power Relay output module

Installation Installing PA Feature: v Power requirement per igeacom is 200 m. WATT v PA Amplifier is 25 V maximum v RECOMMENDED WIRING IS 20 AWG STRANDED CABLE. (for direct hook-up). Dependant on wire length a higher AWG may be required. v Unit should be wired directly to PA amplifier channel output when PA transmission are constant such as music v 2 nd pair from telephone line can be used. NOTE: By using this twisted pair the PA signaling will be induced on the telephone line. Insure that PA operation is specifically for emergency announcements only.

Installation – PA Amplifier Wiring Diagram 25 VAC Amplifier 25 V to Red (2) Ground to Black (1)

Installation Two Different Scenarios: 1. igeacom + PBX (standalone nurse call) 2. igeacom + PBX + Resident telephone (full solution)

Installation igeacom in suite Wiring for a stand alone nurse call: PBX Existing cabling BELL Suite telephone jack Resident’s own telephone using own service provider (Bell)

Installation igeacom in suite Wiring for a full solution with residential telephone services included: PBX Existing cabling Suite telephone jack Resident’s own telephone using PBX dial tone

Igea. Care Systems Inc. 4. Configuration

Configuration What Igea product do i need? The type of product is determined by the type of facility, government regulation, staff requirements and suite size. Retirement Residences/ Independent Congregate Living Assisted Living Facilities Nursing Homes & Long Term Care Clinical and Acute Care Resident Unit Patient Unit igeacom 300/500 igeacom 600/700

Configuration 101 102 103 104 105 106 100 107 Elec. Living room Rm 130 Utility Room 120 108 Lunch Room 115 114 113 112 111 Showers 110 109 Configuration

Optional Other Options OR 112 Pull station igeacom Single Room Configuration, Option 1

Optional Other Options OR 112 Pull station igeacom Pull station Single Room Configuration, Option 2

Optional Other Options OR 112 Pull station igeacom Pull station Suite Configuration Option 1

Optional Other Options OR 112 Pull station igeacom Pull station Suite Configuration Option 2

Configuration How do i configure the PBX? v 1 analog port per resident / patient unit required v At least 1 digital/IP display set to receive emergency calls v It is recommended that the staff use the PBX as their administrative telephone system. v Voicemail system/announcement board is required to use the menu/activity buttons on the resident unit

Configuration How is the nursecall function preformed? v When a emergency call is placed the igeacom will go off-hook and dial a pre-programmed number in the unit. This number is a DN on the PBX. v Each call point on a single igeacom can be programmed to dial a different DN on the PBX. This is used for the following: v distinguish between different types of calls (bathroom, bedside etc) v to route a call point that has a higher priority to a different set or group of sets.

Configuration How the Nursecall Function Preforms: Caller line ID (analog) provides the caller’s information Unit PBX The unit dials a extension number in the PBX sends unit call to end destination (nurse, reception, resident aid etc) NOTE: Once a call point has been activated the unit will continue to try to contact a telephone extension until it has been cancelled properly by the called party.

Configuration igeacom COMMANDS Acknowledge: *4 or *3 Description: Reminder Function. This will stop the delay timer for a preprogrammed amount of time allowing a staff member to response to the call. *4 – releasing the line. *3 – keeps the call active. * 4 is not available on the Patient Unit. *3 has a built in 5 minute timer. Cancel by Telephone: *9 Description: When a staff member wishes to cancel an igeacom emergency call they can press the *9 code. The called party will hear a confirmation tone notifying them that the unit heard the DTMF tones. The cancel code can be used before or after the acknowledge code.

Configuration Programming the igeacom unit

Programming software kit Step 1: Install software on PC. • • • One license per site Allows to manage all units Comes with infrared / ¼ jack tool.

Configuration Step 2: Press and hold the volume buttons (or nurse in/out) together for 5 sec. The unit will beep every 10 seconds notifying the installer that it is in programming mode. Activation Serial COM port Licenced Software Infrared ¼ inch jack

Configuration There are five peripheral devices that can be programmed using this software, one device specific button and three activity buttons. They are as follows: Row 1: Row 2: Row 3: Row 4: Row 5: Row 6: Row 7: Row 8: Row 9: Row 10: Red call button 1/4 “ Jack Traditional wired pull cord Wireless pendant Wireless pull cord TBA Menu Button / Code Blue Activities Button / Staff Assist Maintenance Cancel Button - Firmware

Configuration STEP 3: Program the extension you want the trigger to call In the Phone # field: For each peripheral device you can set the phone number that will be contacted if the item is triggered. Enter the phone number that the device should dial if the device is triggered. You can enter up to two extensions for each device. The first extension is the primary contact and the second extension is the secondary contact.

Configuration STEP 4: Program the delay In the Delay field: Enter the amount of time in minutes that the igeacom device should wait before dialing the secondary extension. A delay time can be administered for each peripheral device.

Configuration STEP 5: Redial field In the redial field: Click on the button to toggle the redial button on/off. The default setting is Y(es) for on for both numbers. If the primary number is set to Y the unit WILL dial the secondary number after the delay time. If the secondary number is set to Y the unit WILL redial the secondary number continuously after the delay time has recycled. NOTE: It is strongly recommended that redial is set to Y.

Configuration STEP 6: Silent Field In the silent field: Click on the button to toggle the silent on and off. The default setting is N(ot silent) for on for both numbers. The silent feature will lower the volume during the dialing process. Note, the dialing is not completely silent.

Configuration STEP 7: Dome Light In the light field: Click on the button to determine the colour of the light you would like to turn on when that call point is triggered. The default is no dome light (blank). Options: R = Red on igeacom Dome Light W = White on igeacom Dome Light B = Green on igeacom Dome Light

Configuration STEP 8: Priority In the priority field: Enter in the priority of the device on a scale of 1 to 6. The number 1 signifies the highest priority and the number 6 signifies the lowest priority. When a call from a device with a higher priority is activated the unit will call the higher priority extension number and ignore any existing emergency calls.

Configuration STEP 9: Unit Information Tracking (reference only) Name: Enter the name of the installer or site location. Room #: Enter he room or wing the particular igeacom is to be installed. Serial #: Enter the S/N of the unit Inst. (Installation) Date: Select the installation date or programmed date of the igeacom device

Configuration STEP 10: Activity Buttons Activity buttons do not have secondary extensions. If escalation is required it must be preformed by the PBX. The maintenance will notify an extension of a malfunctioning unit. The cancel button only needs to be programmed if the Igea. Trak reporting software has been purchased.

Configuration STEP 11: Cancel at Source/ By Telephone Toggle between Y(es) and N(o) by pressing this button to set the ability for the staff to cancel a nurse call from the telephone. If N(o) is activated then the staff must go to the resident unit to cancel the nurse call. If Y(es) is activated a nurse call can be cancelled both on the resident/patient unit as well by the telephone.

Configuration STEP 12: Insert the Delay Timers for the Reminder Function. Enter in a Value in Minutes. Values do not have to match. Not recommended to leave at 1 minute. Reminder Timers should be greater than delay timers.

Configuration STEP 13: Telephone System Parameters In the following fields you may adjust the following actions according to the PBX you are attaching to. The following characters may be used in any of the dial strings. Digits: 0 -9 Characters: A, B, C, D, * and # Switch Hook Flash: F Pause: ,

Configuration STEP 14: Storing/Reading the data When you have completed entering your programming use the “STORE IN PALETTE” to save the programming on your computer. To read the data stored from a previous install press the “READ FROM PALATTE”

Configuration STEP 14: Writing the data to the igeacom Once you have determined all the parameters use the “STORE IN DEVICE” button. During the transfer of data the green and yellow bars at the top of the page will flash. A screen pop up will notify the installer that the command was completed successfully.

Configuration Other available options: “READ FROM DEVICE”: This will read the parameters programmed on the igeacom unit. This data will display in the “yellow area”. “VERIFY”: To verify that both the “yellow area and the “green area” are the same press this button and any discrepancies will immediately be identified. “CANCEL YELLOW AREA” & “CANCEL GREEN AREA”: This will cancel all data on their corresponding color area’s.

Configuration TIPS

Configuration - TIPS • • • **IMPORTANT** Program each igeacom call point to dial a phantom DN Divide the location into WINGS, FLOORS, UNITS etc. NEVER send an emergency call to a extension with a voicemail box. You must send all emergency calls to internal extension. The igeacom relies on the station to station callerline. ID function. When programming each igeacom unit analog port ensure that the location of the igeacom is located somewhere in the extension number and description.

Configuration - TIPS Program each igeacom call point to dial a phantom DN Do NOT program the igeacom to dial a physical extension in the switch. If there are routing changes to be made in the future you would have to either re-program all the igeacom units or take the extension away from that staff member. In order to ensure easy escalation changes in the future program the igeacom to dial PHANTOM DN’s. These DN’s can then be administered to ring to physical extensions. For example: DN 555 igeacom dials phantom DN 555

Configuration - TIPS Program each igeacom call point to dial a phantom DN Program each igeacom call point to dial a different phantom DN. This is so you may label that phantom DN with the type of call and that information may be forwarded to the destination party’s call display. Bathroom pull station dials phantom DN 444 Bed button dials phantom DN 555 DN 444 bath DN 555 bed Rm 101 Bath

Configuration - TIPS Program each igeacom call point to dial a phantom DN Once you’ve programmed each call point separately you can then route the call to multiple locations (based on PBX capabilities): • • • Multiple phones at one time Telephones in sequence Groups of telephones in sequence Time of Day covering And more…

Configuration - TIPS Divide the location into WINGS, FLOORS, UNITS etc. Do NOT program the all the units in a building to dial one extension. Divide the building up based on care level, floors or wings. This will allow you to make call routing changes in the telephone system remotely. For example: Mapleview Lodge has 3 floors with 20 igeacom units on each floor. Right now all nurse calls are answered by the front desk. However, they are planning to make the 3 rd floor assisted living. In the next year, there will be two resident aids on this floor at all hours of the day. They will most likely divide the floor into two parts. Rm 301 to 310 and Rm 311 to 320. In this scenario you would have 4 different groups of igeacom’s dialing 4 different extensions. THINK AHEAD - EVEN IF THE CUSTOMER ISN’T.

Configuration - TIPS Divide the location into WINGS, FLOORS, UNITS etc. 3333 Bath Floor 2 5555 Bed 6666 Bath 7777 Bed Floor 3 2222 Bath 4444 Bed 8888 Bath 1111 Bed Floor 1

Configuration - TIPS When programming each igeacom unit analog port ensure that the location of the igeacom is located somewhere in the extension number and description. Ext. x 1108 x 1101 x 1102 x 1103 x 1104 x 1105 x 1106 x 1107 Name 1 st Fl. Lounge Rm 101 Rm 102 Rm 103 Rm 104 Rm 105 Rm 106 Rm 107

Configuration - TIPS • • • Ext. Name ROOM TO ROOM DIALING x 1108 1 st Fl. Lounge x 1101 Rm 101 STAFF x 1102 TO RESIDENT DIALING Rm 102 x 1103 Rm 103 x 1104 TO STAFF Rm 104 RESIDENT DIALING x 1105 Rm 105 x 1106 x 1107 Rm 106 Rm 107

Igea. Care Systems Inc. 5. Troubleshooting

Troubleshooting Diagnostic Procedures To perform a unit diagnostic press and hold the Menu & Activities & two volume buttons simultaneously. During this procedure the unit will: a) Check for the line; b) Check for a battery warning; c) Check to see if the battery voltage is low; d) Check to see if the keypad has a seized button.

Troubleshooting b) Check for the line; The unit continuously checks for dial tone. If the unit does not see dial tone it will beep every 30 seconds as well as turn on both the fault & line LED.

Troubleshooting b) Check for a battery warning; c) Check to see if the battery voltage is low; If the fault light appears on the unit, simultaneously followed by the sound of 2 short chirps 90 ms each, then this indicates: i. The battery is below operating voltage; ii. The battery is not plugged in, or iii. The battery is damaged

Troubleshooting Indicator Lights Warning Chart: Line Indicator Light Condition Solution Fault in keypad. When a keypad error occurs a short chirp will sound for 70 ms in duration. Call Operator immediately Fault with unit Call Operator immediately Line & Fault in line. When a no line fault occurs a short chirp will sound of 70 ms in duration Call Operator immediately Activities & Fault Battery warning. The device will chirp (2 beeps) for a duration of 160 ms. Call Operator immediately. Battery should be recharged. Activities, Line & Fault Battery life is low a long chirp will sound for 560 ms. Call Operator immediately. Replace Battery

troubleshooting LED Guide when Unit in use: The Line LED will turn on when the call button is pressed.

Troubleshooting LED Guide when Unit in use: The Line LED will turn on when an igeacom device has been triggered (example: a pendant call)

Troubleshooting LED Guide when Unit in use: The activities (staff assist) LED will turn on when the button is pressed.

Troubleshooting LED Guide when Unit in use: The menu (code blue) LED will turn on when the button is pressed.

Igea. Care Systems Inc. 6. Documentation

WARRANTY v 1 year warranty against manufacturer defect. v 5 year warranty on Wireless Pendant / Wireless Pull Station battery FOR A COMPLETE OVERVIEW OF THE WARRANTY PROGRAM PLEASE SEE THE “igeacom Software User Guide”

CSA / UL Certification The igeacom units are CSA certified: v Class 481205: CSA Std C 22. 2 No. 205 m 1983 signal equipment; CAN/CSA - 22. 2 No. 60950 -1 -03; Bi-national standard with UL 60950 -1 v CSA-US: Class 481284 Class 481204, CSA Std C 22. 2 No 205 -m 1983; UL Std No. 464, Eight ed 2003 CAN/CSA 22. 2 No. 60950 -1 -03; Bi-National standard with UL 60950 -1 v igeacom 300 & igeacom 500: FCC ID: SEDigeacom; IC: 5263 A-igeacom

Guideline Specifications All software releases are accompanied by a guideline specification. It is recommended that you read the guideline before installation.

igeacom Technical Information v Location: Encased in a standard electrical aluminum or plastic 3 gang box. v Internal Hardwire Input Connections: -1 X Telephone input line cord (40 m. A-50 m. A) with standard modular plug. -1 X Telephone output line cord (40 m. A-50 m. A) with standard modular plug. -1 X Rear terminal block hook up for normally open contacts. v External Hardwire Input Connections: -1/4” Phone plug with Cordette Nurse Call Switch. v Radio Frequency Inputs (optional): -Set for 2 wireless radio frequency inputs. v Standards: -CSA 22. 2 #205, UL 1637, FCC Part #68 / FCC Part #15, Class "B“, CS-03

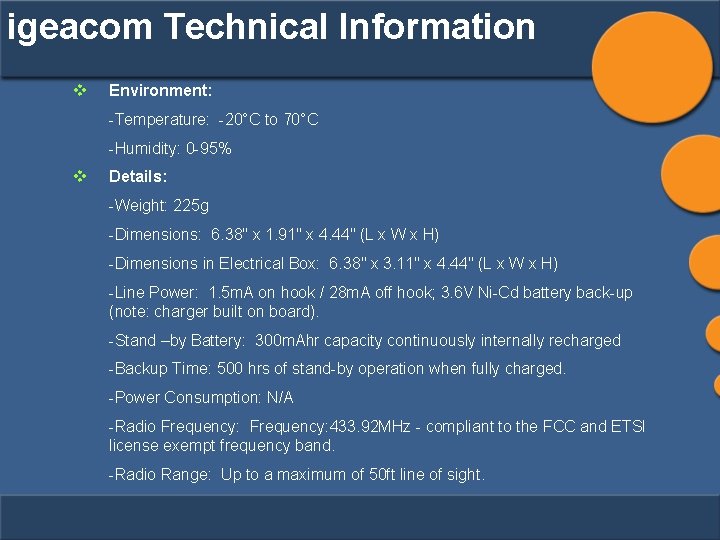
igeacom Technical Information v Environment: -Temperature: -20°C to 70°C -Humidity: 0 -95% v Details: -Weight: 225 g -Dimensions: 6. 38" x 1. 91" x 4. 44" (L x W x H) -Dimensions in Electrical Box: 6. 38" x 3. 11" x 4. 44" (L x W x H) -Line Power: 1. 5 m. A on hook / 28 m. A off hook; 3. 6 V Ni-Cd battery back-up (note: charger built on board). -Stand –by Battery: 300 m. Ahr capacity continuously internally recharged -Backup Time: 500 hrs of stand-by operation when fully charged. -Power Consumption: N/A -Radio Frequency: 433. 92 MHz - compliant to the FCC and ETSI license exempt frequency band. -Radio Range: Up to a maximum of 50 ft line of sight.

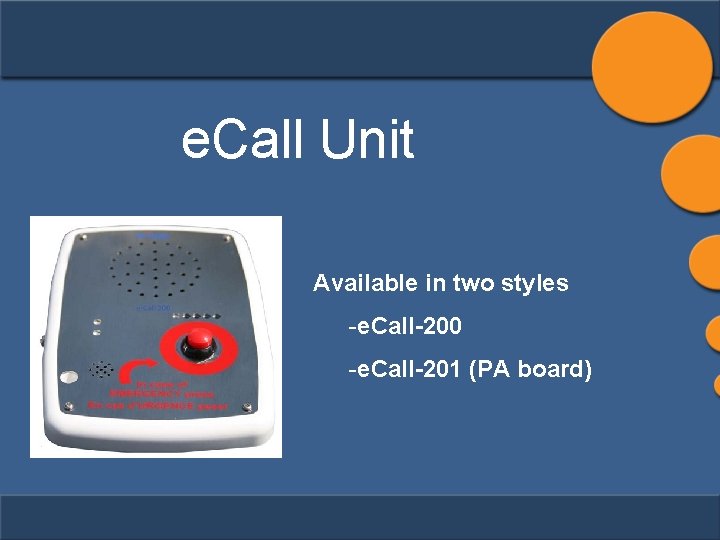
e. Call Unit Available in two styles -e. Call-200 -e. Call-201 (PA board)

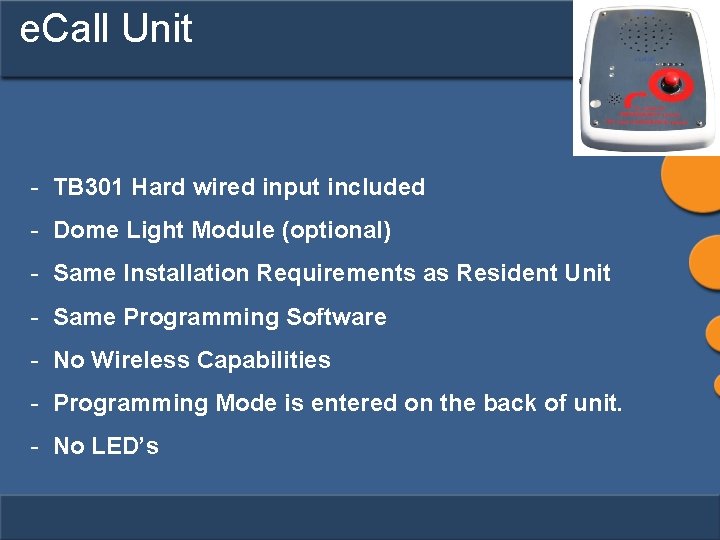
e. Call Unit - TB 301 Hard wired input included - Dome Light Module (optional) - Same Installation Requirements as Resident Unit - Same Programming Software - No Wireless Capabilities - Programming Mode is entered on the back of unit. - No LED’s

Apolo. DS Overview

What are Igea. Care ENS solutions? The ability to receive notifications from a device or system and provide that event information to another device or system. - Provides links between systems Allows for you to use new technology with old technology Manages Real Time Events Centralizes monitoring of communication systems. Scalable User Friendly

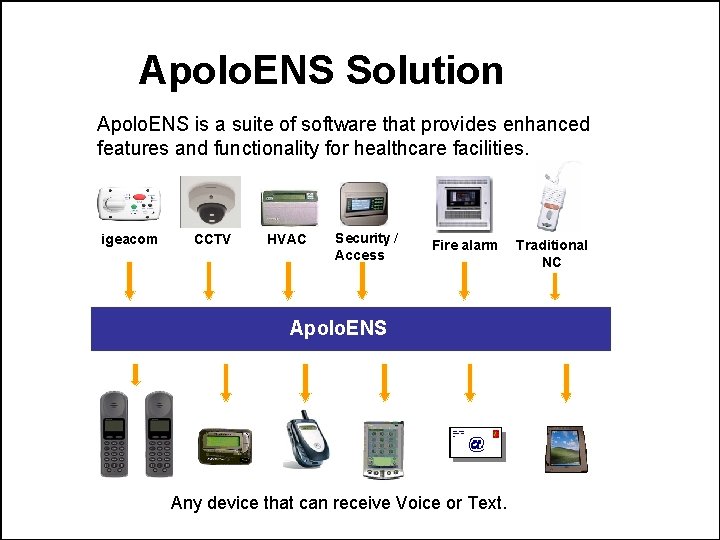
Apolo. ENS Solution Apolo. ENS is a suite of software that provides enhanced features and functionality for healthcare facilities. igeacom CCTV HVAC Security / Access Fire alarm Apolo. ENS Any device that can receive Voice or Text. Traditional NC

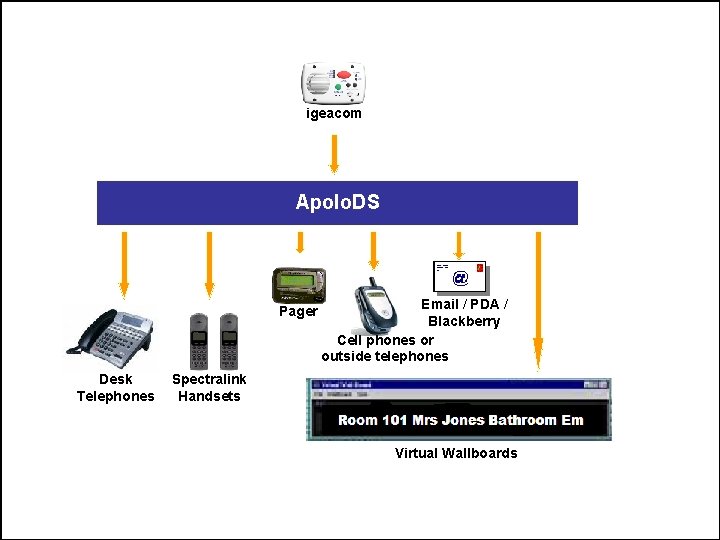
igeacom Apolo. DS Pager Desk Telephones Email / PDA / Blackberry Cell phones or outside telephones Spectralink Handsets Virtual Wallboards

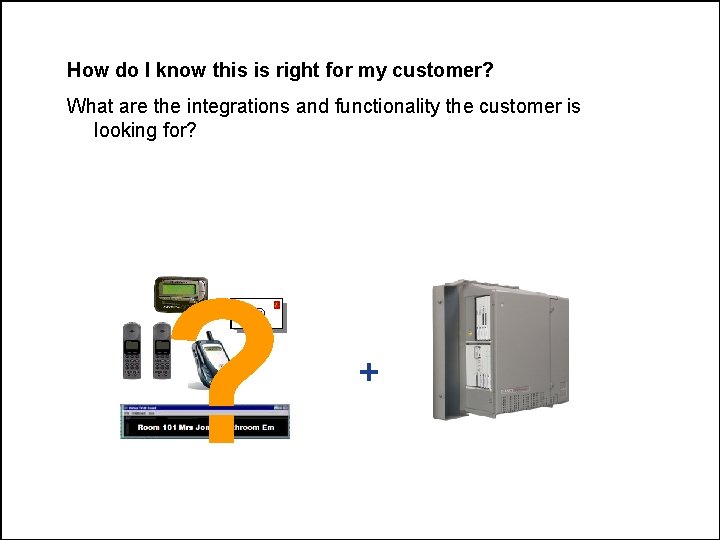
How do I know this is right for my customer? What are the integrations and functionality the customer is looking for? ? +

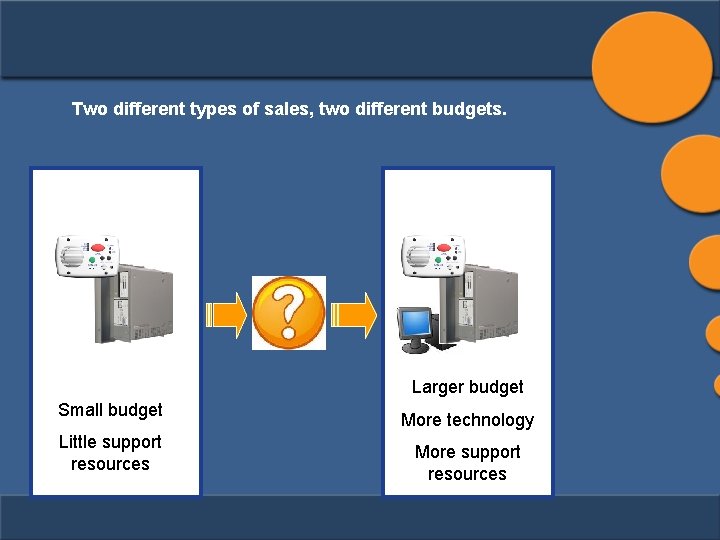
Two different types of sales, two different budgets. Larger budget Small budget Little support resources More technology More support resources

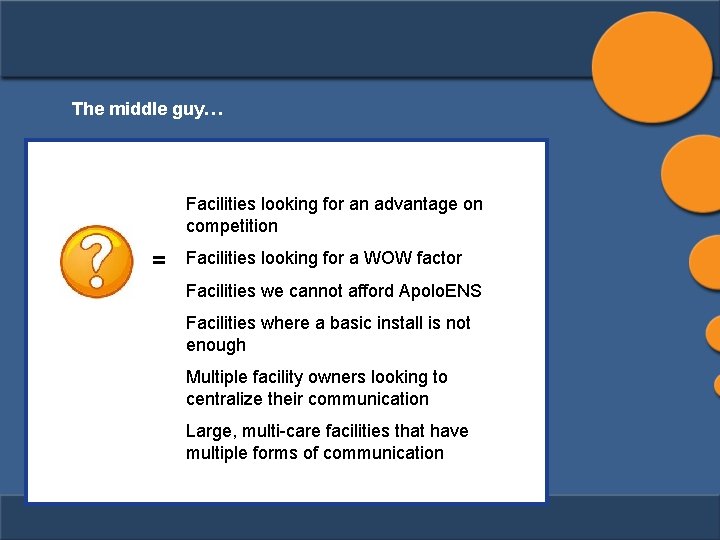
The middle guy… Facilities looking for an advantage on competition = Facilities looking for a WOW factor Facilities we cannot afford Apolo. ENS Facilities where a basic install is not enough Multiple facility owners looking to centralize their communication Large, multi-care facilities that have multiple forms of communication

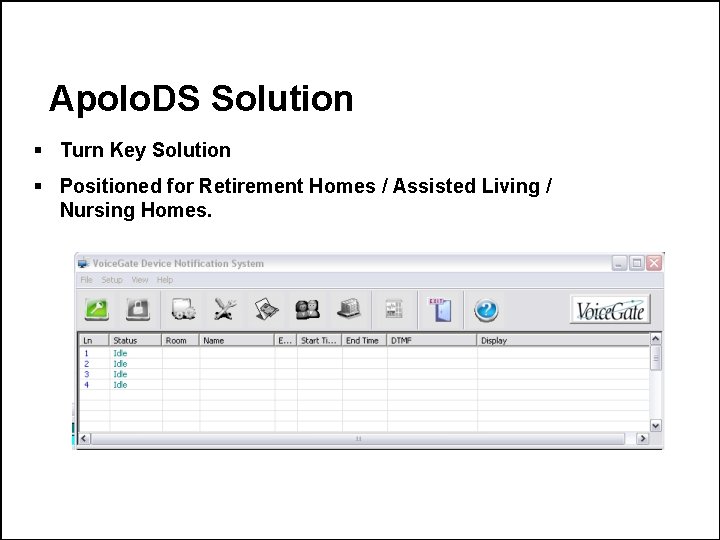
Apolo. DS Solution § Turn Key Solution § Positioned for Retirement Homes / Assisted Living / Nursing Homes.

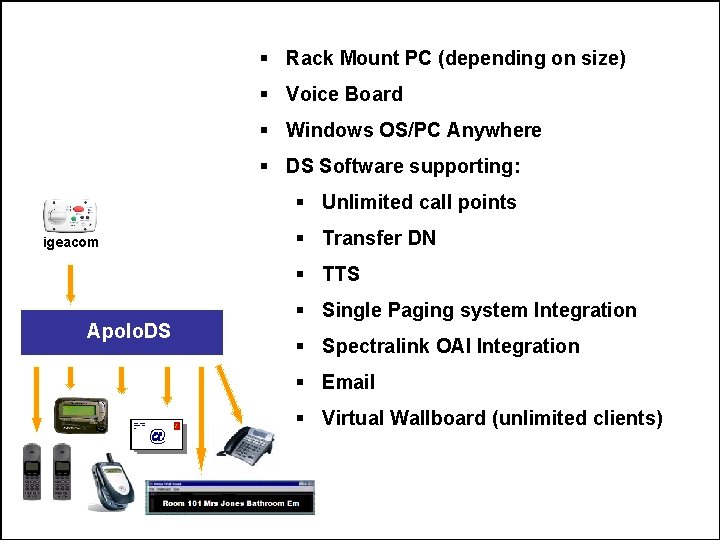
§ Rack Mount PC (depending on size) § Voice Board § Windows OS/PC Anywhere § DS Software supporting: § Unlimited call points igeacom § Transfer DN § TTS Apolo. DS § Single Paging system Integration § Spectralink OAI Integration § Email § Virtual Wallboard (unlimited clients)

Igea. Care Systems Inc. 1 -866 -361 -6225 www. igeacare. com/downloads. htm www. igeacare. com/support 6. htm Username: Technical Password: igea 403 (case sensitive)