Tolerancing Chapter 11 1 Need for Tolerance n
- Slides: 35

Tolerancing Chapter 11 1

Need for Tolerance. n n n Exact size is difficult to manufacture. Exact size is not required. The replacement of parts should be easy. 2

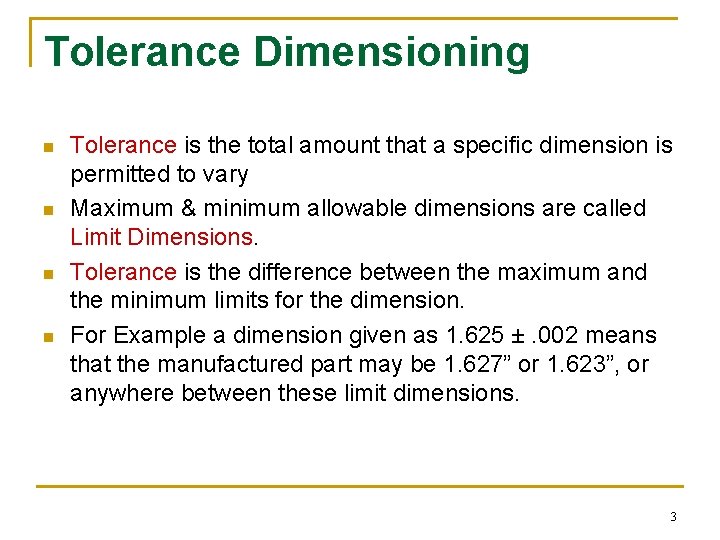
Tolerance Dimensioning n n Tolerance is the total amount that a specific dimension is permitted to vary Maximum & minimum allowable dimensions are called Limit Dimensions. Tolerance is the difference between the maximum and the minimum limits for the dimension. For Example a dimension given as 1. 625 ±. 002 means that the manufactured part may be 1. 627” or 1. 623”, or anywhere between these limit dimensions. 3

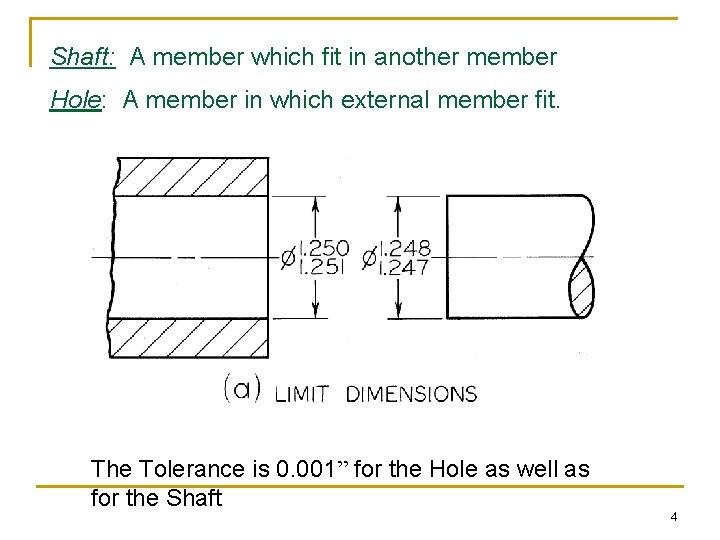
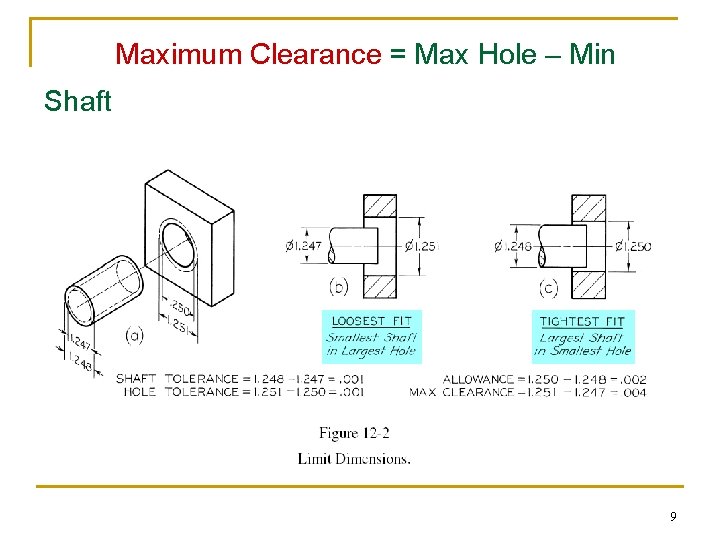
Shaft: A member which fit in another member Hole: A member in which external member fit. The Tolerance is 0. 001” for the Hole as well as for the Shaft 4

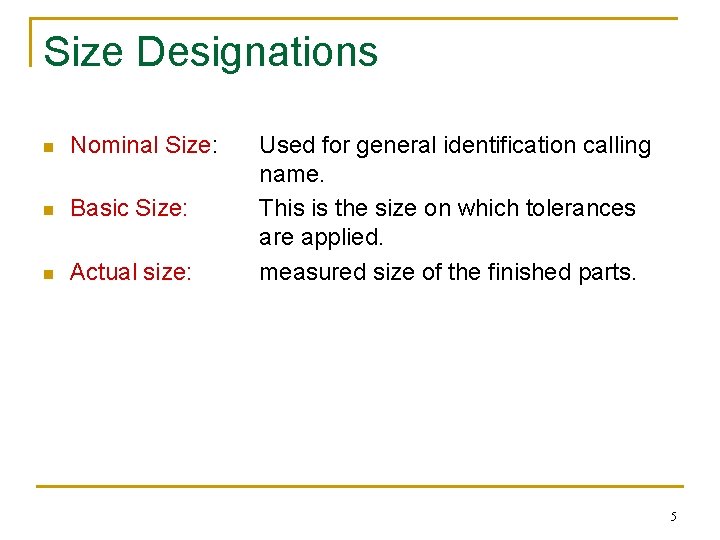
Size Designations n Nominal Size: n Basic Size: n Actual size: Used for general identification calling name. This is the size on which tolerances are applied. measured size of the finished parts. 5

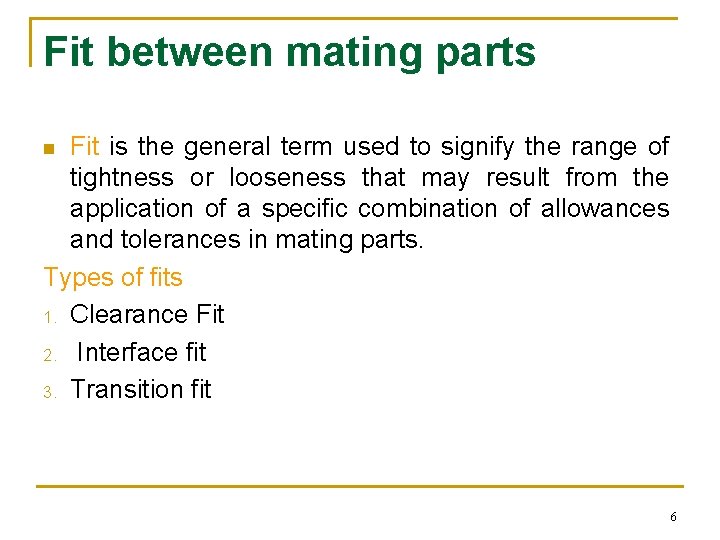
Fit between mating parts Fit is the general term used to signify the range of tightness or looseness that may result from the application of a specific combination of allowances and tolerances in mating parts. Types of fits 1. Clearance Fit 2. Interface fit 3. Transition fit n 6

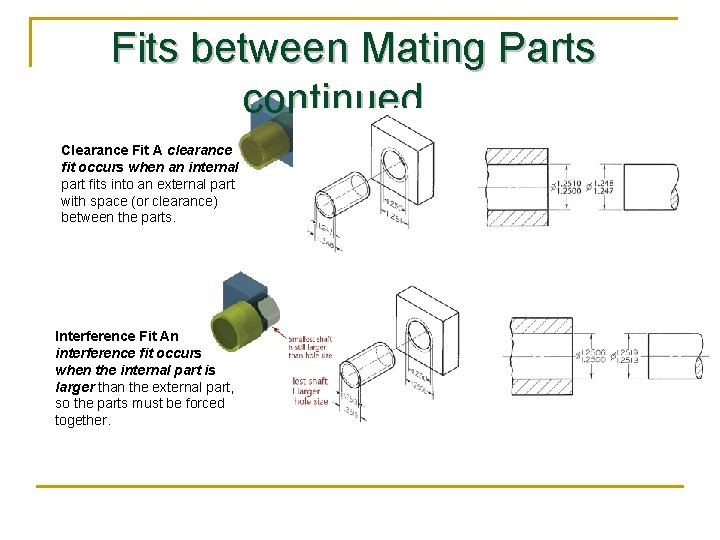
Fits between Mating Parts continued… Clearance Fit A clearance fit occurs when an internal part fits into an external part with space (or clearance) between the parts. Interference Fit An interference fit occurs when the internal part is larger than the external part, so the parts must be forced together.

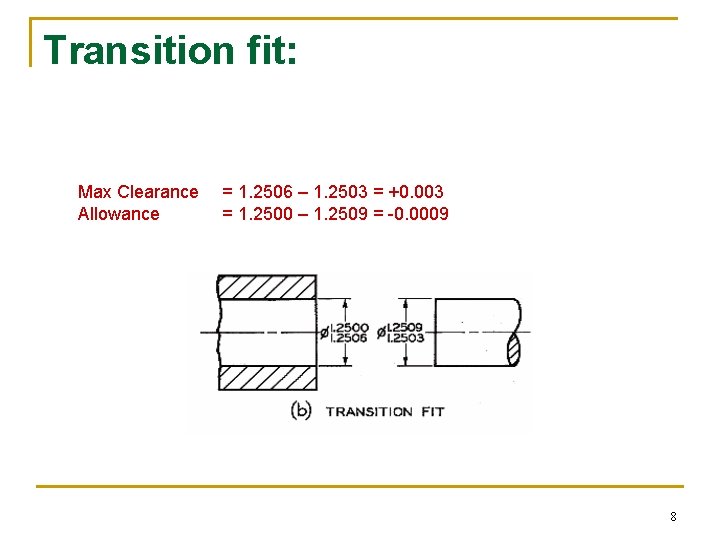
Transition fit: Max Clearance Allowance = 1. 2506 – 1. 2503 = +0. 003 = 1. 2500 – 1. 2509 = -0. 0009 8

Maximum Clearance = Max Hole – Min Shaft Allowance (Minimum Clearance) = Min Hole – Max Shaft 9

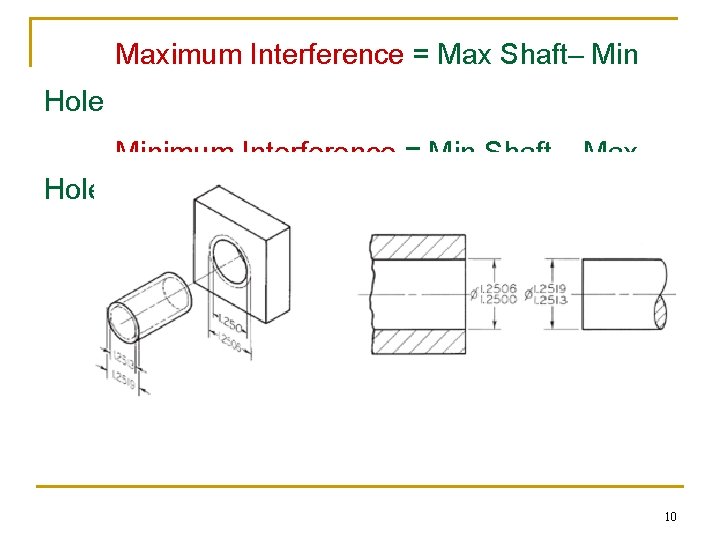
Maximum Interference = Max Shaft– Min Hole Minimum Interference = Min Shaft – Max Hole 10

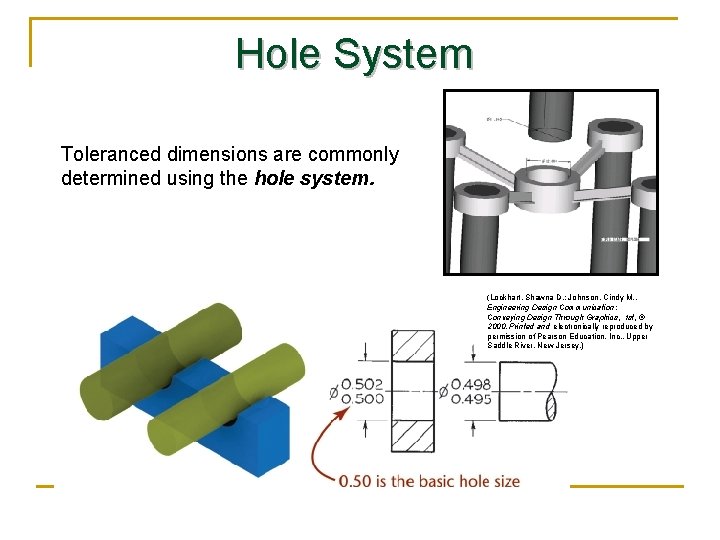
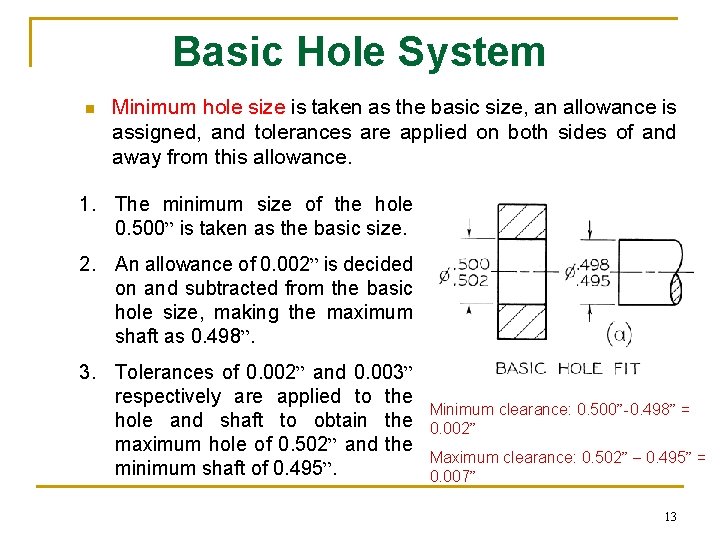
Hole System Toleranced dimensions are commonly determined using the hole system. (Lockhart, Shawna D. ; Johnson, Cindy M. , Engineering Design Communication: Conveying Design Through Graphics, 1 st, © 2000. Printed and electronically reproduced by permission of Pearson Education, Inc. , Upper Saddle River, New Jersey. )

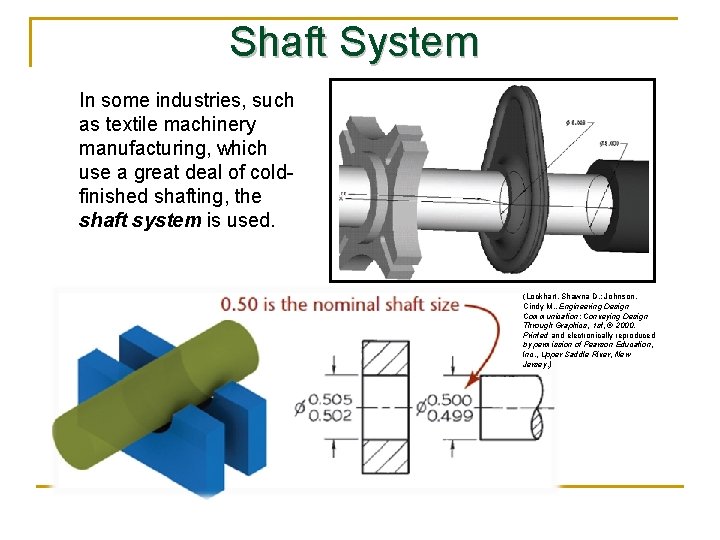
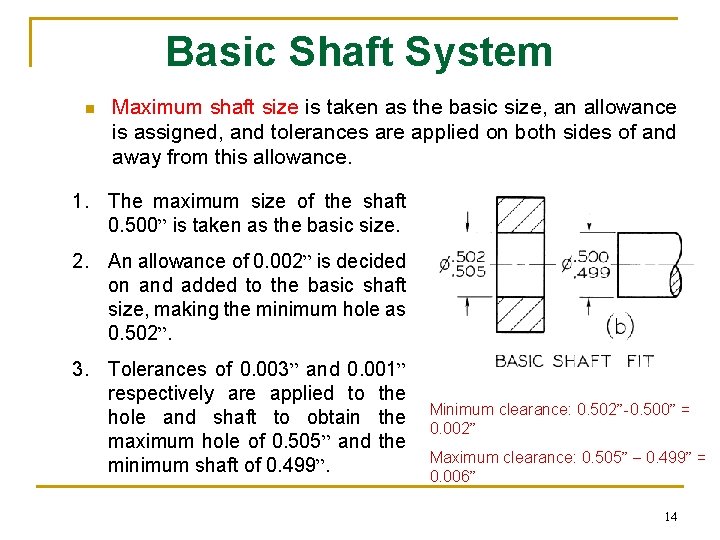
Shaft System In some industries, such as textile machinery manufacturing, which use a great deal of coldfinished shafting, the shaft system is used. (Lockhart, Shawna D. : Johnson, Cindy M. , Engineering Design Communication: Conveying Design Through Graphics, 1 st, © 2000. Printed and electronically reproduced by permission of Pearson Education, Inc. , Upper Saddle River, New Jersey. )

Basic Hole System n Minimum hole size is taken as the basic size, an allowance is assigned, and tolerances are applied on both sides of and away from this allowance. 1. The minimum size of the hole 0. 500” is taken as the basic size. 2. An allowance of 0. 002” is decided on and subtracted from the basic hole size, making the maximum shaft as 0. 498”. 3. Tolerances of 0. 002” and 0. 003” respectively are applied to the hole and shaft to obtain the maximum hole of 0. 502” and the minimum shaft of 0. 495”. Minimum clearance: 0. 500”-0. 498” = 0. 002” Maximum clearance: 0. 502” – 0. 495” = 0. 007” 13

Basic Shaft System n Maximum shaft size is taken as the basic size, an allowance is assigned, and tolerances are applied on both sides of and away from this allowance. 1. The maximum size of the shaft 0. 500” is taken as the basic size. 2. An allowance of 0. 002” is decided on and added to the basic shaft size, making the minimum hole as 0. 502”. 3. Tolerances of 0. 003” and 0. 001” respectively are applied to the hole and shaft to obtain the maximum hole of 0. 505” and the minimum shaft of 0. 499”. Minimum clearance: 0. 502”-0. 500” = 0. 002” Maximum clearance: 0. 505” – 0. 499” = 0. 006” 14

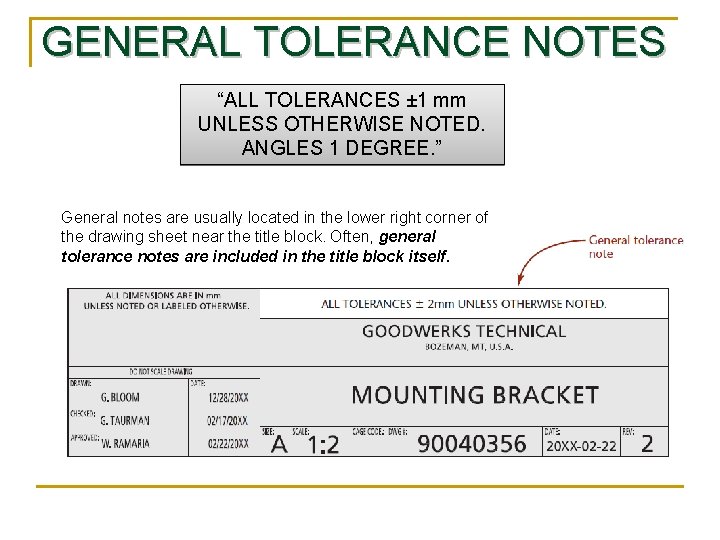
GENERAL TOLERANCE NOTES “ALL TOLERANCES ± 1 mm UNLESS OTHERWISE NOTED. ANGLES 1 DEGREE. ” General notes are usually located in the lower right corner of the drawing sheet near the title block. Often, general tolerance notes are included in the title block itself.

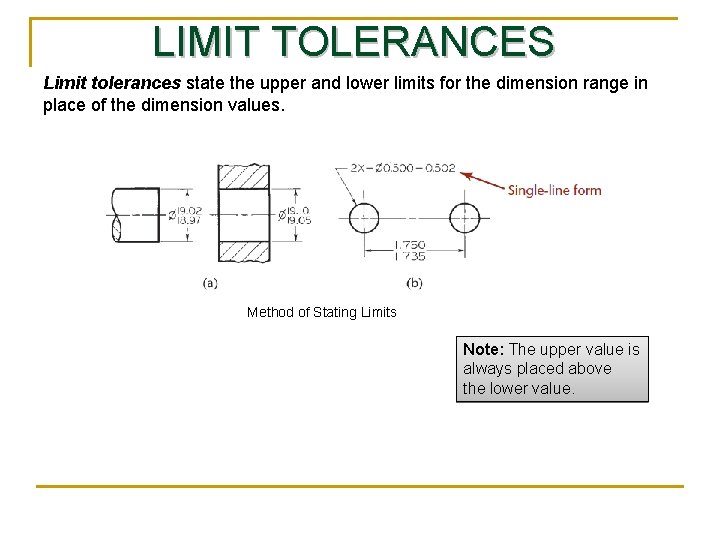
LIMIT TOLERANCES Limit tolerances state the upper and lower limits for the dimension range in place of the dimension values. Method of Stating Limits Note: The upper value is always placed above the lower value.

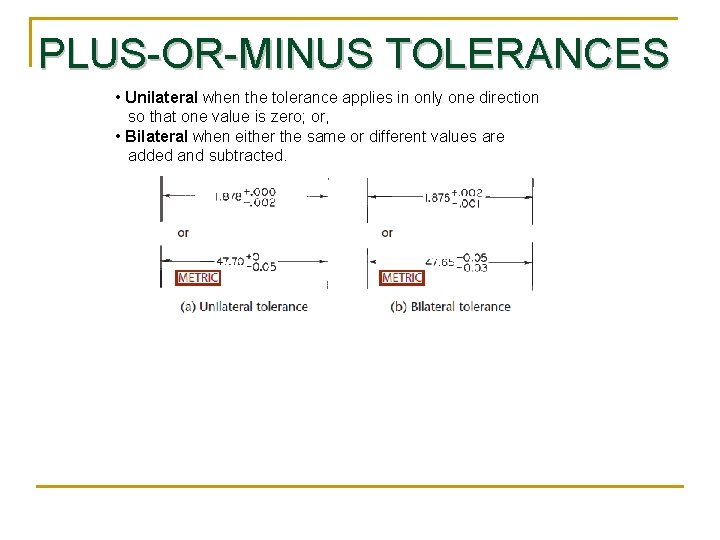
PLUS-OR-MINUS TOLERANCES • Unilateral when the tolerance applies in only one direction so that one value is zero; or, • Bilateral when either the same or different values are added and subtracted.

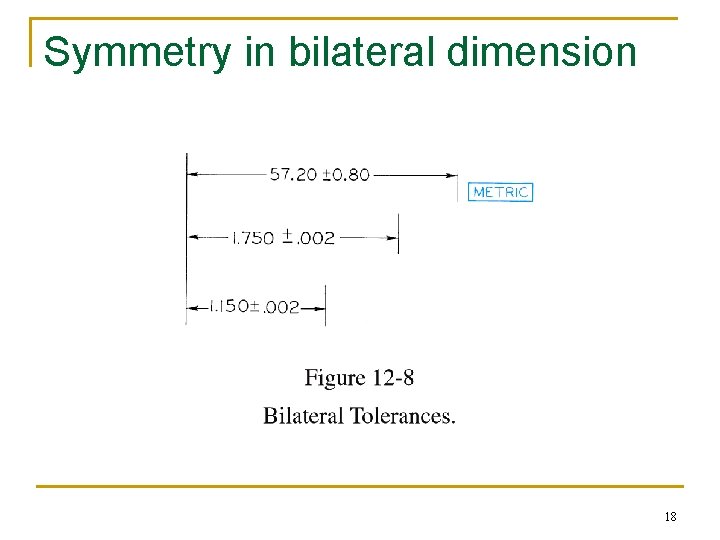
Symmetry in bilateral dimension 18

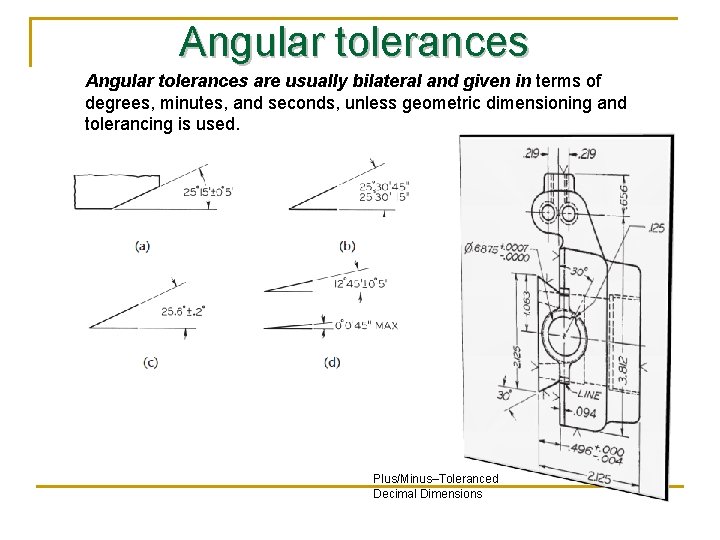
Angular tolerances are usually bilateral and given in terms of degrees, minutes, and seconds, unless geometric dimensioning and tolerancing is used. Plus/Minus–Toleranced Decimal Dimensions

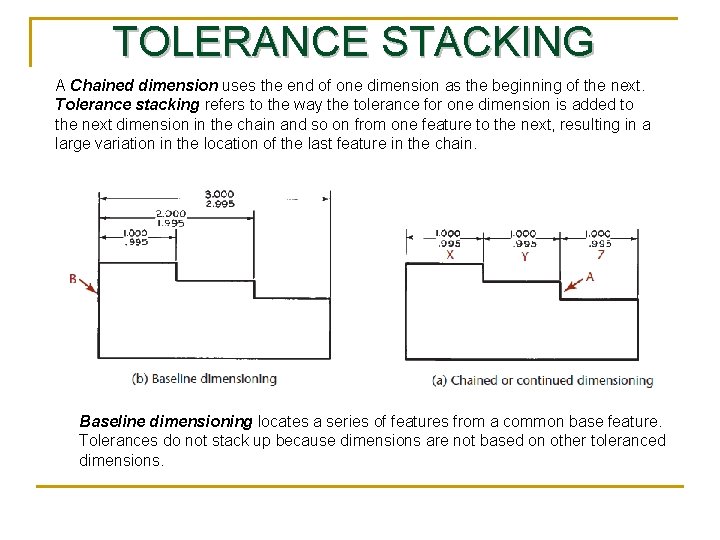
TOLERANCE STACKING A Chained dimension uses the end of one dimension as the beginning of the next. Tolerance stacking refers to the way the tolerance for one dimension is added to the next dimension in the chain and so on from one feature to the next, resulting in a large variation in the location of the last feature in the chain. Baseline dimensioning locates a series of features from a common base feature. Tolerances do not stack up because dimensions are not based on other toleranced dimensions.

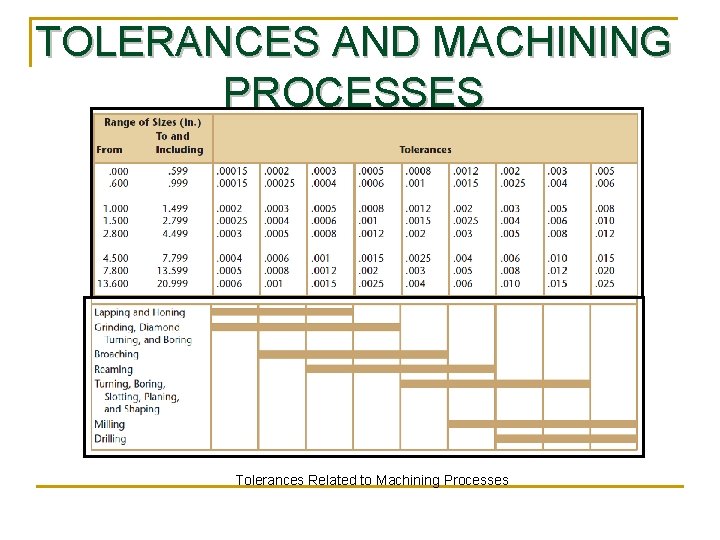
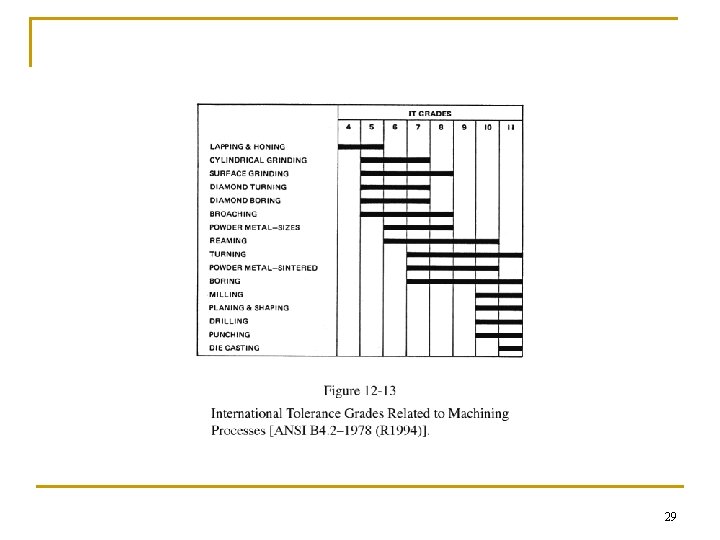
TOLERANCES AND MACHINING PROCESSES Tolerances Related to Machining Processes

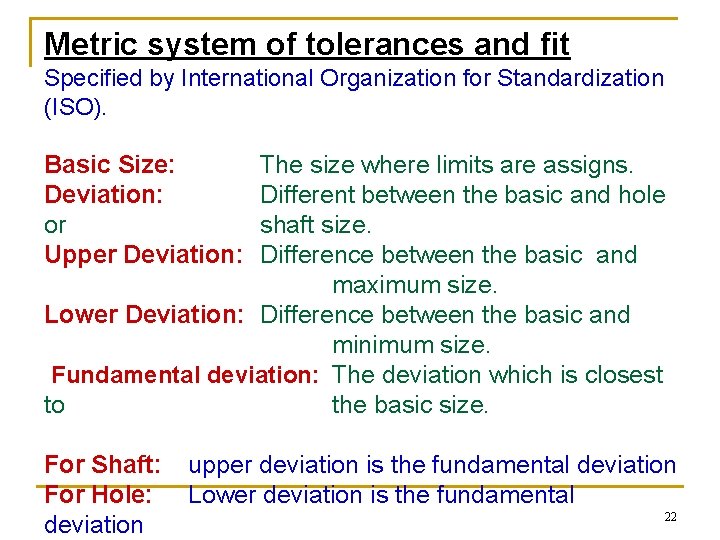
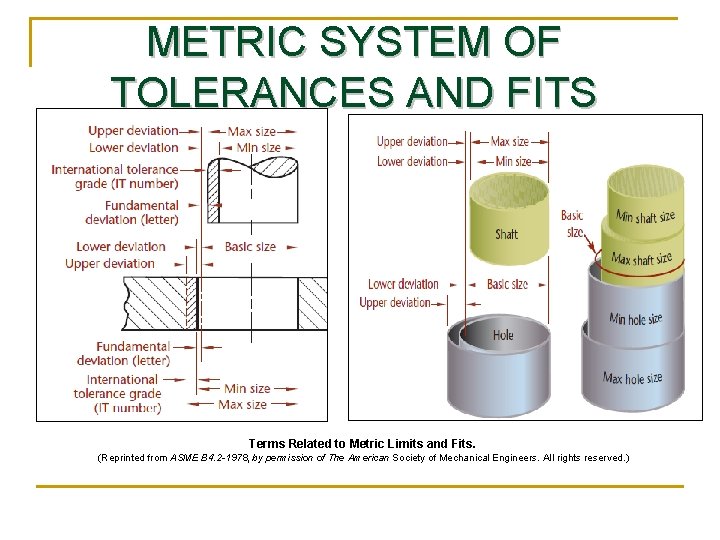
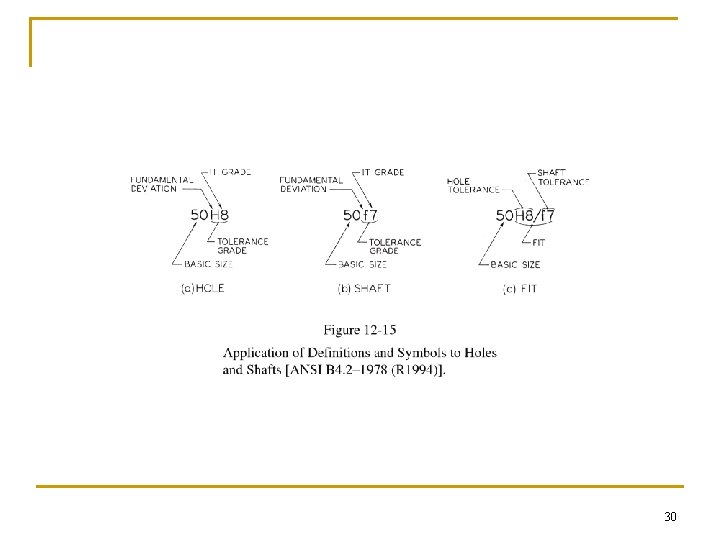
Metric system of tolerances and fit Specified by International Organization for Standardization (ISO). Basic Size: Deviation: or Upper Deviation: The size where limits are assigns. Different between the basic and hole shaft size. Difference between the basic and maximum size. Lower Deviation: Difference between the basic and minimum size. Fundamental deviation: The deviation which is closest to the basic size. For Shaft: For Hole: deviation upper deviation is the fundamental deviation Lower deviation is the fundamental 22

METRIC SYSTEM OF TOLERANCES AND FITS Terms Related to Metric Limits and Fits. (Reprinted from ASME B 4. 2 -1978, by permission of The American Society of Mechanical Engineers. All rights reserved. )

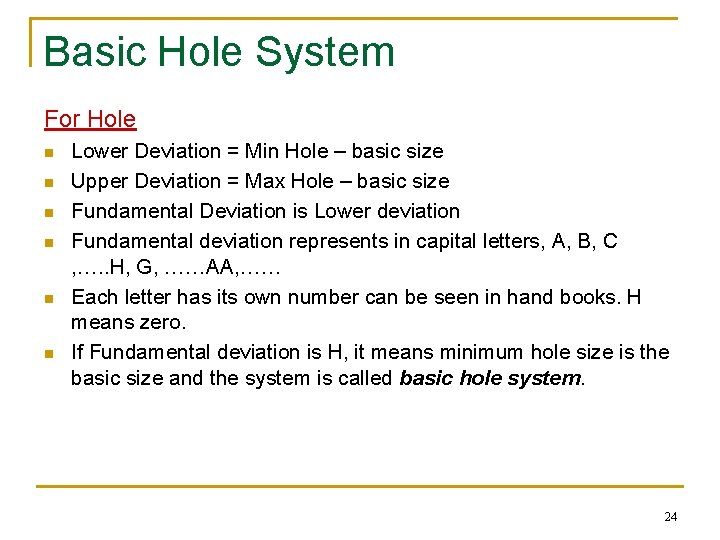
Basic Hole System For Hole n n n Lower Deviation = Min Hole – basic size Upper Deviation = Max Hole – basic size Fundamental Deviation is Lower deviation Fundamental deviation represents in capital letters, A, B, C , …. . H, G, ……AA, …… Each letter has its own number can be seen in hand books. H means zero. If Fundamental deviation is H, it means minimum hole size is the basic size and the system is called basic hole system. 24

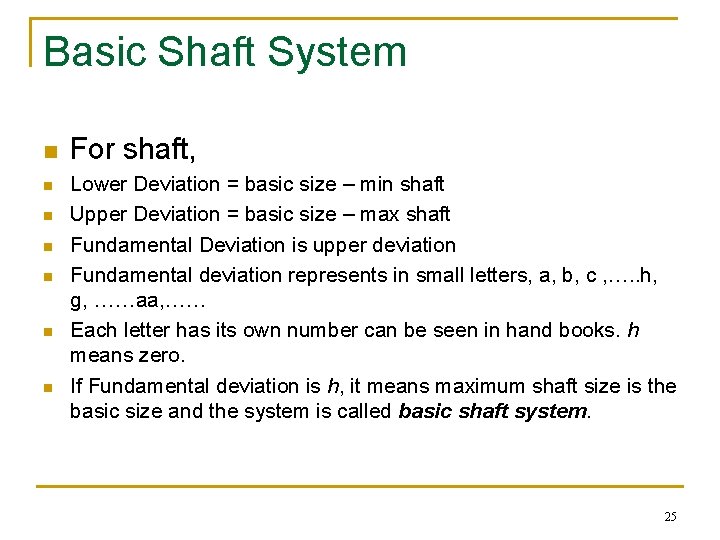
Basic Shaft System n n n n For shaft, Lower Deviation = basic size – min shaft Upper Deviation = basic size – max shaft Fundamental Deviation is upper deviation Fundamental deviation represents in small letters, a, b, c , …. . h, g, ……aa, …… Each letter has its own number can be seen in hand books. h means zero. If Fundamental deviation is h, it means maximum shaft size is the basic size and the system is called basic shaft system. 25

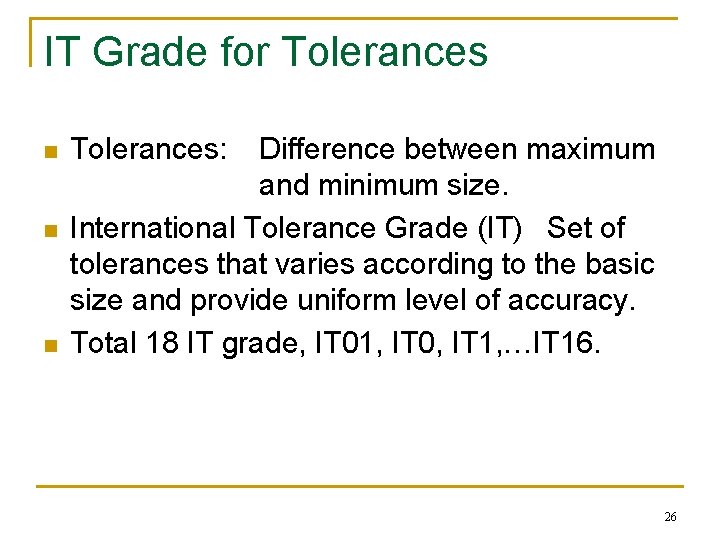
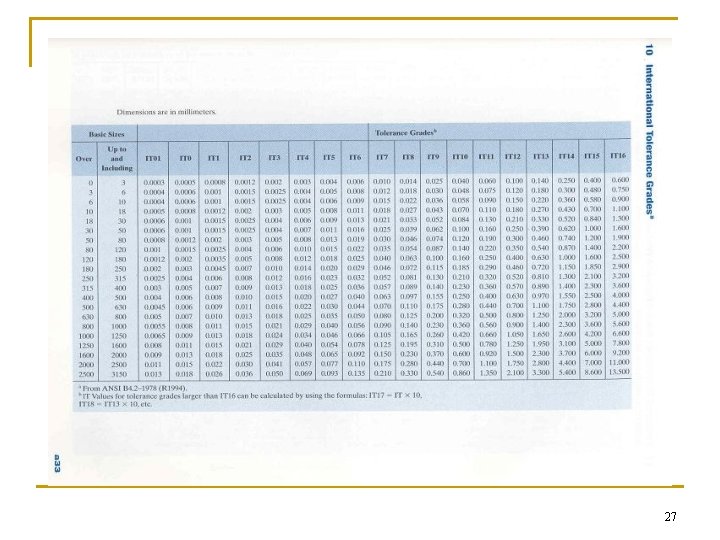
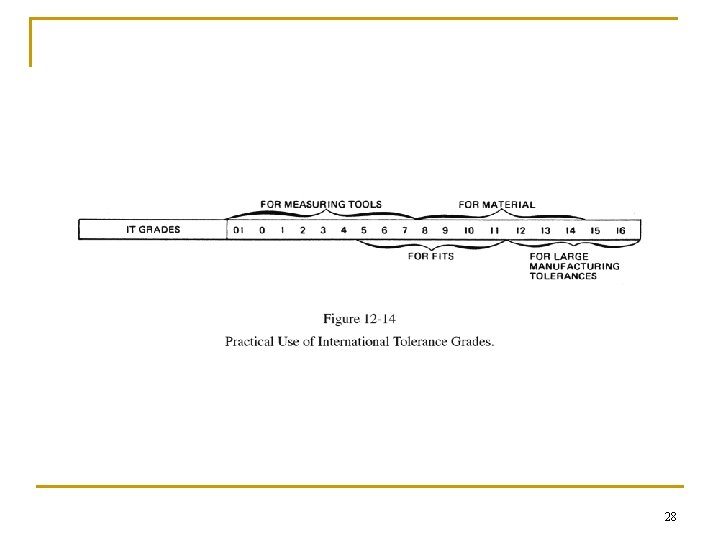
IT Grade for Tolerances n n n Tolerances: Difference between maximum and minimum size. International Tolerance Grade (IT) Set of tolerances that varies according to the basic size and provide uniform level of accuracy. Total 18 IT grade, IT 01, IT 0, IT 1, …IT 16. 26

27

28

29

30

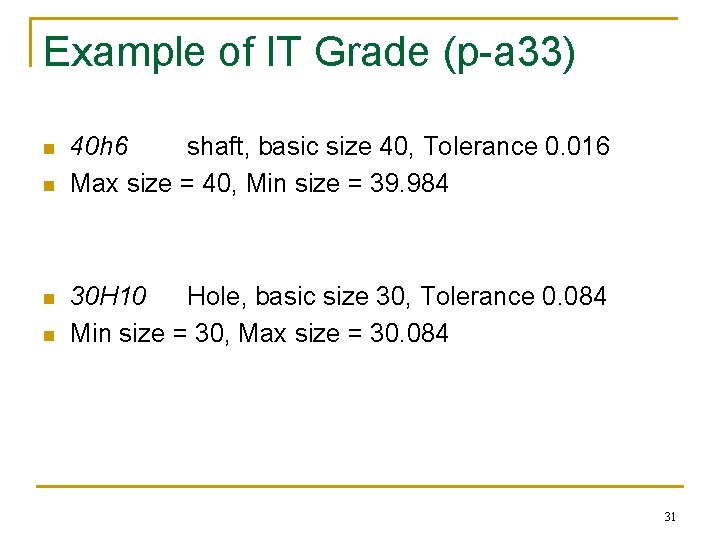
Example of IT Grade (p-a 33) n n 40 h 6 shaft, basic size 40, Tolerance 0. 016 Max size = 40, Min size = 39. 984 30 H 10 Hole, basic size 30, Tolerance 0. 084 Min size = 30, Max size = 30. 084 31

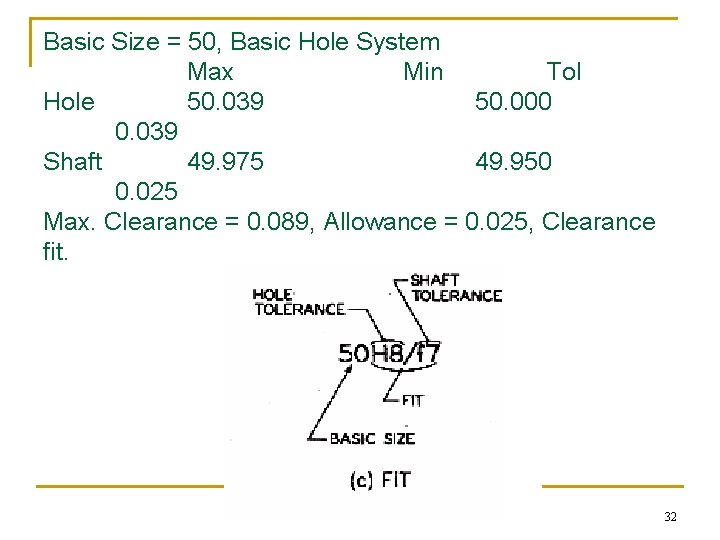
Basic Size = 50, Basic Hole System Max Min Tol Hole 50. 039 50. 000 0. 039 Shaft 49. 975 49. 950 0. 025 Max. Clearance = 0. 089, Allowance = 0. 025, Clearance fit. 32

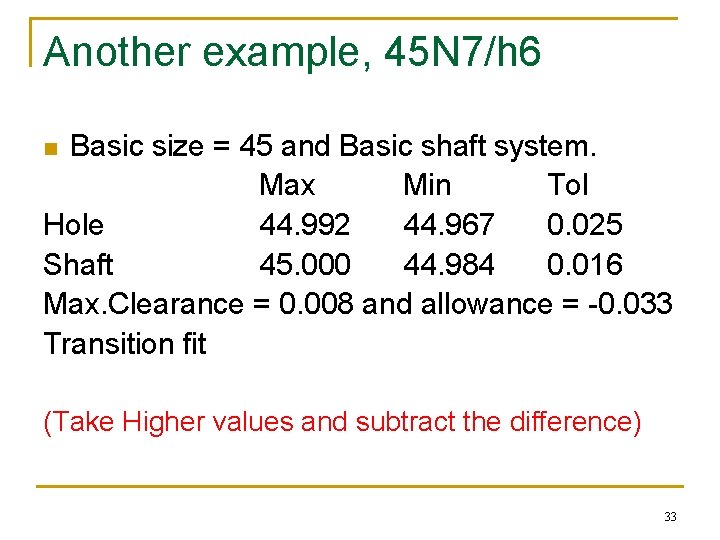
Another example, 45 N 7/h 6 Basic size = 45 and Basic shaft system. Max Min Tol Hole 44. 992 44. 967 0. 025 Shaft 45. 000 44. 984 0. 016 Max. Clearance = 0. 008 and allowance = -0. 033 Transition fit n (Take Higher values and subtract the difference) 33

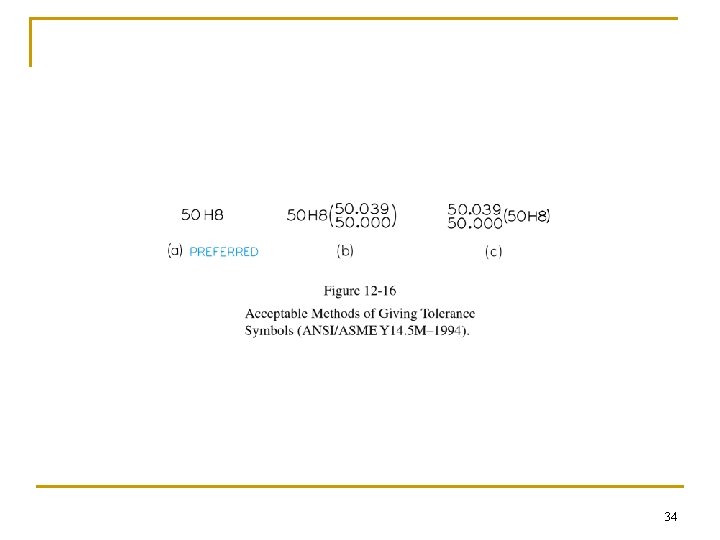
34

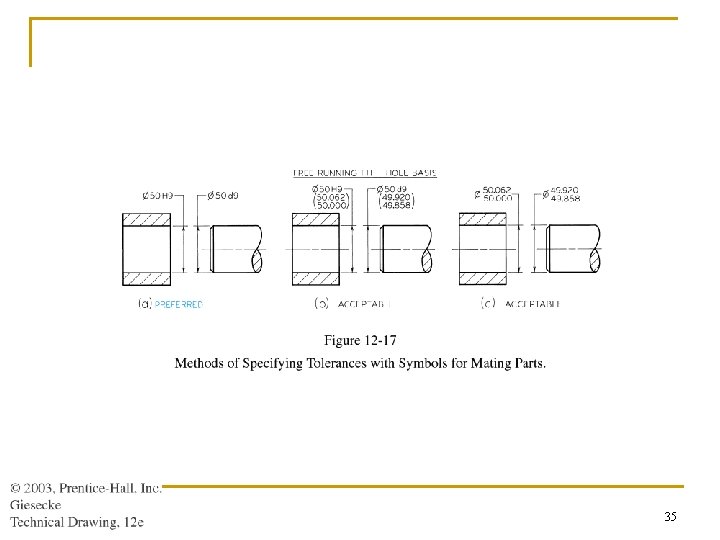
35