Tolerance Deviation Identify and use Dimensional Tolerancing in

- Slides: 23

Tolerance Deviation Identify and use Dimensional Tolerancing in Engineering US 4438

Contents • • • Hole Or Shaft Based Fit Tolerance : Recap Upper – Lower Deviation Examples • Fully Describing A Fit Fundamental Deviation • 40 H 6 f 6 Deviations : Diagram • H 6 Limits Describing a Fit • f 6 Limits • Calculation Fit Class Deviation Notation • Drawing Limits H 6 Hole Deviations • Drawing Limits f 6 Shaft deviations

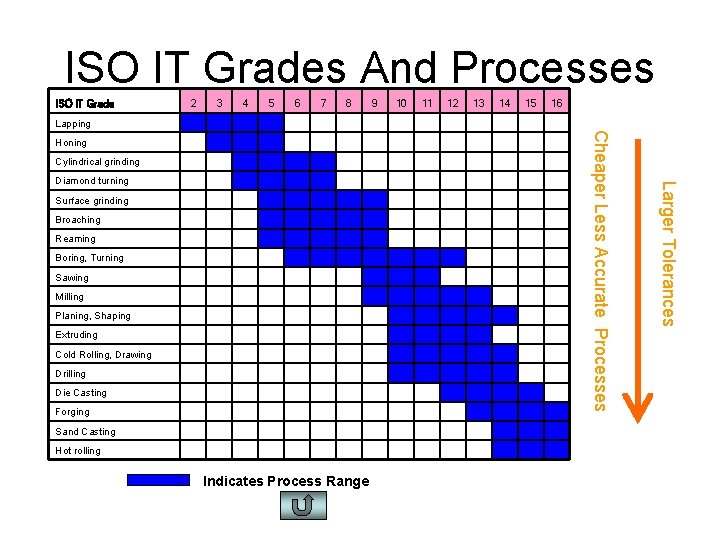
Tolerance • Tolerance is the difference between the high and the low limits of a size • Size of tolerance is determined by – The accuracy required for end use – The machining process used – The overall size ISO Tolerance sizes (Grades) from 01 to 18

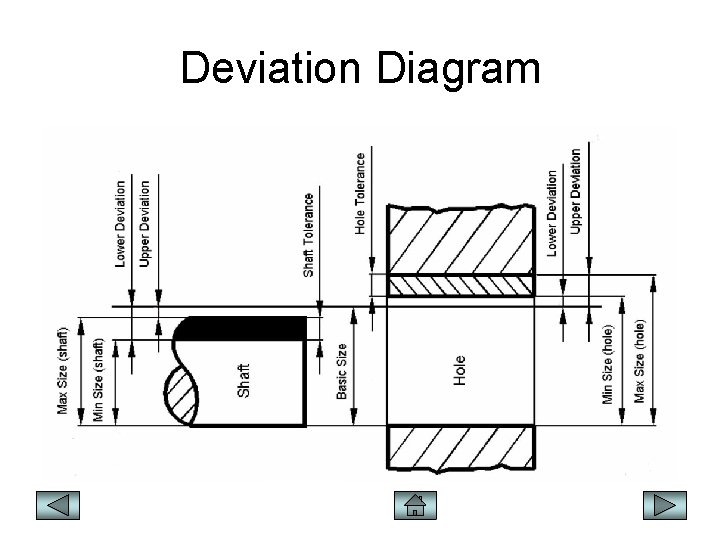
Upper – Lower Deviations • The position of the tolerance is always in relation to the basic size • The distance from the basic size to the upper limit of size is called the upper deviation • The distance from the basic size to the lower limit of size is called the lower deviation

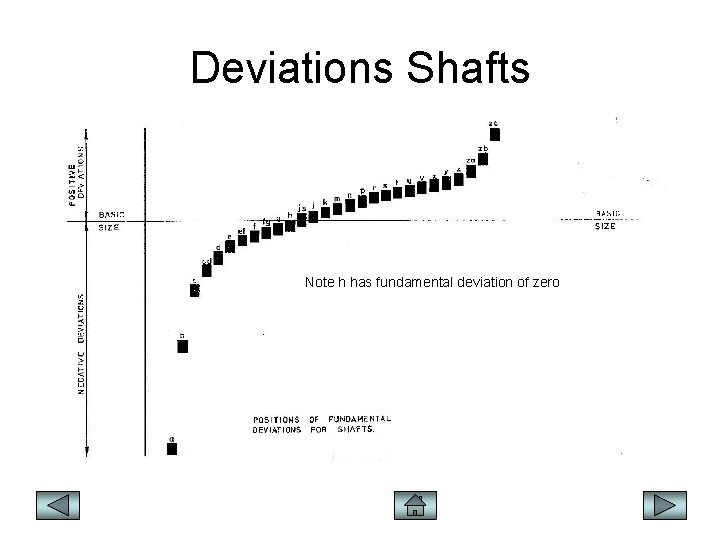
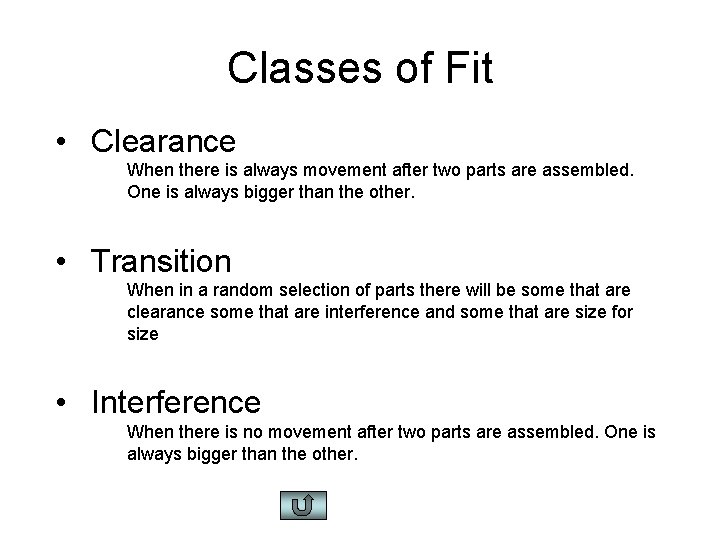
Fundamental Deviation • Is the deviation which is closest to the basic size and is used to locate the tolerance zone in relation to the basic size. • It could be an upper deviation or a lower deviation depending on the type of fit and if it is a hole or shaft • Determines the fit between parts – Clearance – Transition – Interference

Deviation Diagram

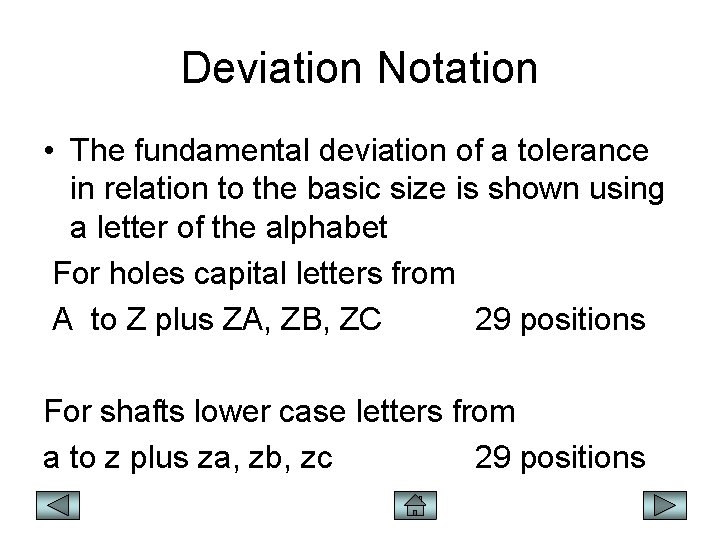
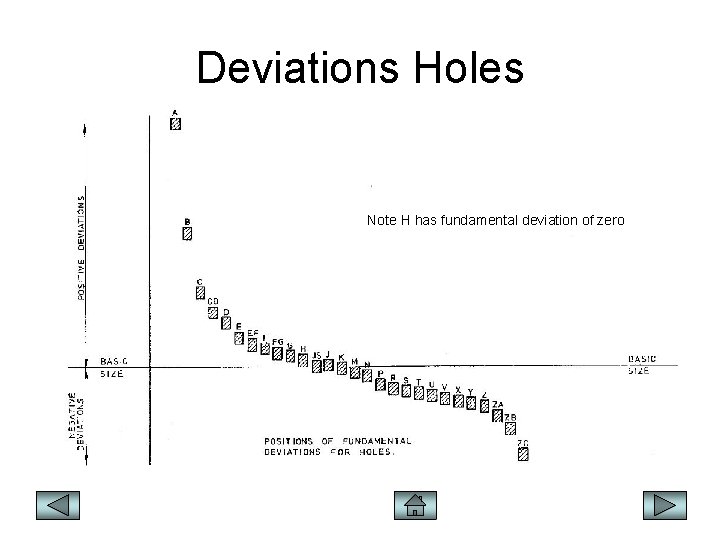
Deviation Notation • The fundamental deviation of a tolerance in relation to the basic size is shown using a letter of the alphabet For holes capital letters from A to Z plus ZA, ZB, ZC 29 positions For shafts lower case letters from a to z plus za, zb, zc 29 positions

Deviations Holes Note H has fundamental deviation of zero

Deviations Shafts Note h has fundamental deviation of zero

Hole – Shaft Based Fit • A Hole based fit uses a fixed zero fundamental deviation on the hole ( H ) and the shaft deviation is varied • A Shaft based fit uses a fixed zero fundamental deviation on the shaft ( h ) and the hole deviation is varied

Describing a Fit To fully describe a fit requires • Basic size • The fundamental deviation • The tolerance size For each of the mating parts

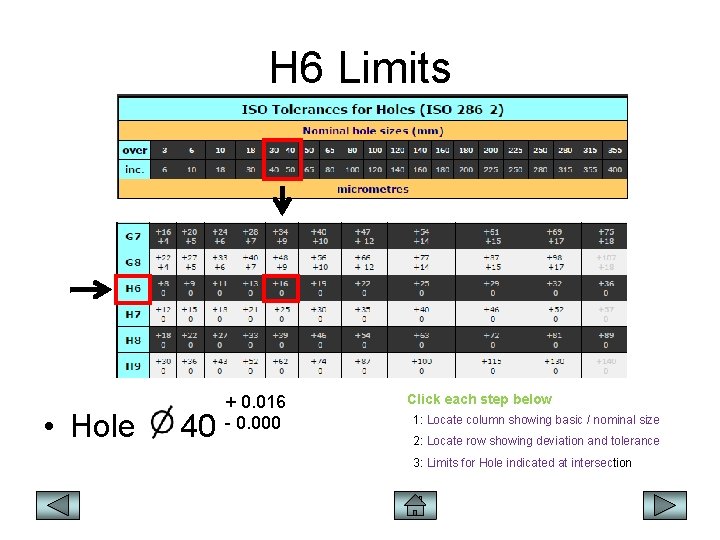
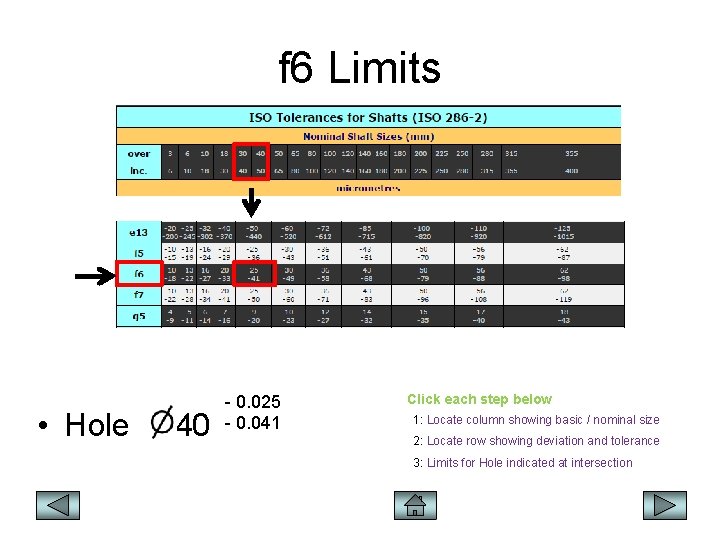
Example 40 H 6 f 6 – A basic size : 40 mm – A hole deviation : H – Hole Fundamental Deviation 0 (Hole Based) – A shaft deviation : f – A Hole tolerance : 7 – A Shaft Tolerance : 6 Calculation using the limits will indicate fit class

H 6 Limits ` • Hole 40 + 0. 016 - 0. 000 Click each step below 1: Locate column showing basic / nominal size 2: Locate row showing deviation and tolerance 3: Limits for Hole indicated at intersection

f 6 Limits ` • Hole 40 - 0. 025 - 0. 041 Click each step below 1: Locate column showing basic / nominal size 2: Locate row showing deviation and tolerance 3: Limits for Hole indicated at intersection

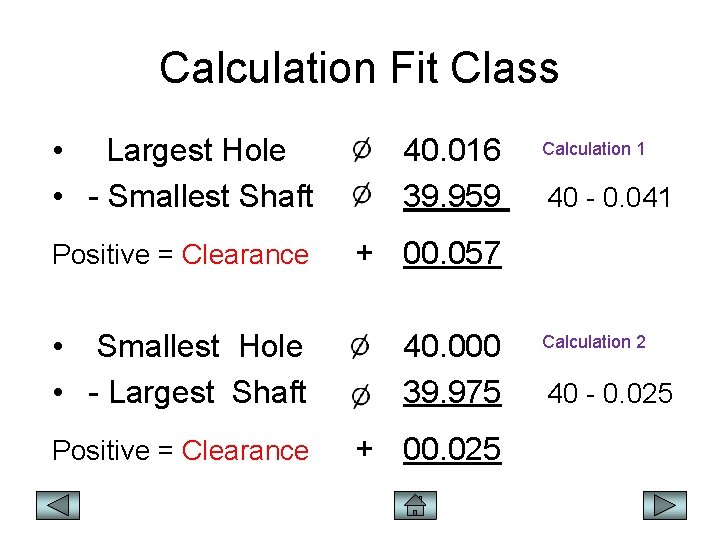
Calculation Fit Class • Largest Hole • - Smallest Shaft 40. 016 Calculation 1 39. 959 40 - 0. 041 Positive = Clearance + 00. 057 • Smallest Hole • - Largest Shaft 40. 000 Calculation 2 39. 975 40 - 0. 025 Positive = Clearance + 00. 025

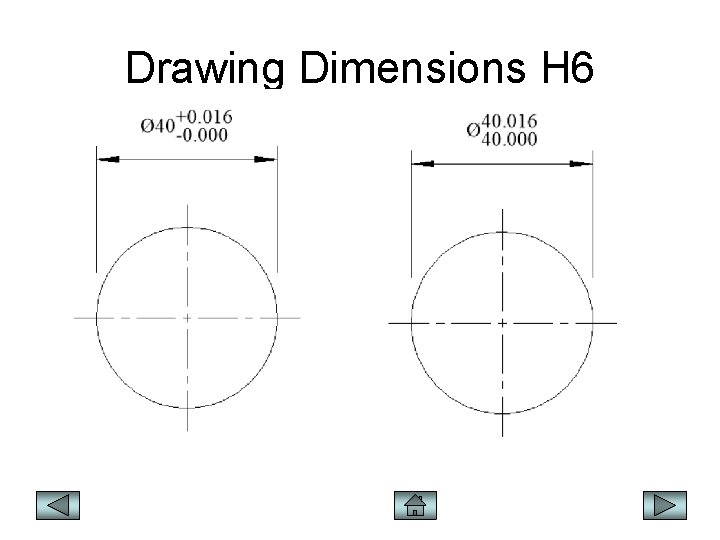
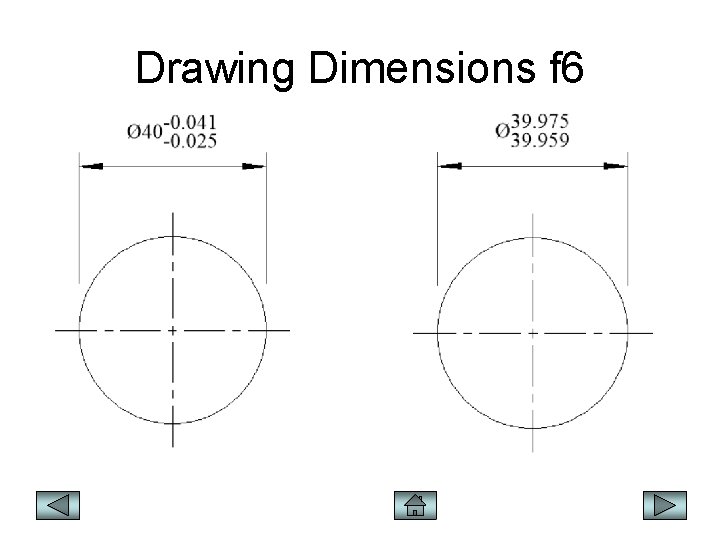
Drawing Dimensions H 6

Drawing Dimensions f 6

Giles Lancaster Marlborough Boys College 5 Stephenson Street Blenheim 03 578 0119 Ext 209 gilesl@mbc. school. nz

The Three Sizes • Nominal Size – A size without specific limits of accuracy • Basic Size – Is the size about which the limits are set – It is the same for the hole and shaft • Actual Size – The size of the hole or shaft as measured – Note the measuring equipment has limits of accuracy as well

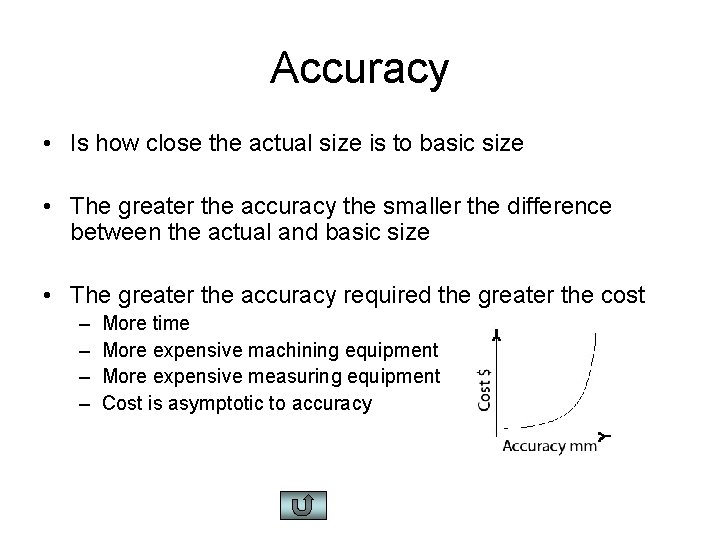
Accuracy • Is how close the actual size is to basic size • The greater the accuracy the smaller the difference between the actual and basic size • The greater the accuracy required the greater the cost – – More time More expensive machining equipment More expensive measuring equipment Cost is asymptotic to accuracy

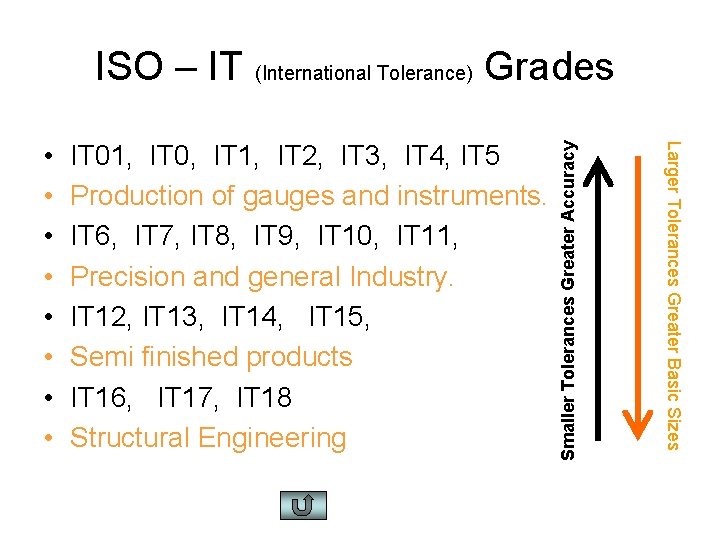
IT 01, IT 0, IT 1, IT 2, IT 3, IT 4, IT 5 Production of gauges and instruments. IT 6, IT 7, IT 8, IT 9, IT 10, IT 11, Precision and general Industry. IT 12, IT 13, IT 14, IT 15, Semi finished products IT 16, IT 17, IT 18 Structural Engineering Larger Tolerances Greater Basic Sizes • • Smaller Tolerances Greater Accuracy ISO – IT (International Tolerance) Grades

ISO IT Grades And Processes 2 3 4 5 6 7 8 Lapping 9 10 11 12 13 14 15 16 Cylindrical grinding Diamond turning Surface grinding Broaching Reaming Boring, Turning Sawing Milling Planing, Shaping Extruding Cold Rolling, Drawing Drilling Die Casting Forging Sand Casting Hot rolling Indicates Process Range Larger Tolerances Honing Cheaper Less Accurate Processes ISO IT Grade

Classes of Fit • Clearance When there is always movement after two parts are assembled. One is always bigger than the other. • Transition When in a random selection of parts there will be some that are clearance some that are interference and some that are size for size • Interference When there is no movement after two parts are assembled. One is always bigger than the other.