Chapter 7 Airway Management National EMS Education Standard


- Slides: 92

Chapter 7: Airway Management

National EMS Education Standard Competencies (1 of 7) Airway Management, Respiration, and Artificial Ventilation Applies knowledge (fundamental depth, foundational breadth) of general anatomy and physiology to assure a patent airway, adequate mechanical ventilation, and respiration while awaiting additional emergency medical services (EMS) response for patients of all ages.

National EMS Education Standard Competencies (2 of 7) Airway Management Within the scope of practice of the emergency medical responder (EMR): • Airway anatomy • Airway assessment • Techniques of ensuring a patent airway Respiration • Anatomy of the respiratory system

National EMS Education Standard Competencies (3 of 7) Respiration (cont’d) • Physiology and pathophysiology of respiration – Pulmonary ventilation – Oxygenation – Respiration • External • Internal • Cellular

National EMS Education Standard Competencies (4 of 7) Respiration (cont’d) • Assessment and management of adequate and inadequate respiration • Supplemental oxygen therapy Artificial Ventilation • Assessment and management of adequate and inadequate ventilation • Artificial ventilation

National EMS Education Standard Competencies (5 of 7) Artificial Ventilation (cont’d) • Minute ventilation • Alveolar ventilation • Effect of artificial ventilation on cardiac output Pathophysiology Uses simple knowledge of shock and respiratory compromise to respond to life threats.

National EMS Education Standard Competencies (6 of 7) Medicine Recognizes and manages life threats based on assessment findings of a patient with a medical emergency while awaiting additional emergency response.

National EMS Education Standard Competencies (7 of 7) Respiratory Anatomy, signs, symptoms, and management of respiratory emergencies including those that affect the • Upper airway • Lower airway

Introduction • Two most important lifesaving skills: – Airway care – Rescue breathing • The ABCs of lifesaving skills: – Airway – Breathing – Circulation

Anatomy and Function of the Respiratory System (1 of 9) • To maintain life, all humans must have food, water, and oxygen. – Lack of oxygen, even for a few minutes, can result in irreversible damage and death. • The main purpose of the respiratory system is to provide oxygen and to remove carbon dioxide from the red blood cells.

Anatomy and Function of the Respiratory System (2 of 9) © Jones & Bartlett Learning.

Anatomy and Function of the Respiratory System (3 of 9) • In an unconscious patient lying on his or her back, the passage of air through both nose and mouth may be blocked by the tongue. – The tongue is attached to the lower jaw. – A partially blocked airway often produces a snoring sound.

Anatomy and Function of the Respiratory System (4 of 9) © Jones & Bartlett Learning.

Anatomy and Function of the Respiratory System (5 of 9) • Other parts of the respiratory system – At the back of the throat are two passages: • The esophagus • The trachea – The epiglottis helps prevent food or water from entering the airway. – The airway divides into the bronchi. – The lungs are located on either side of the heart.

Anatomy and Function of the Respiratory System (6 of 9) • Other parts of the respiratory system (cont’d) – The smaller airways that branch from the bronchi are called bronchioles. – The bronchioles end as tiny air sacs called alveoli. – The exchange of oxygen and carbon dioxide that occurs in the alveoli is called alveolar ventilation.

Anatomy and Function of the Respiratory System (7 of 9) © Jones & Bartlett Learning.

Anatomy and Function of the Respiratory System (8 of 9) • The lungs consist of soft, spongy tissue with no muscles. – Movement of air into the lungs depends on movement of the rib cage and the diaphragm. – When the diaphragm contracts during inhalation, it flattens and moves downward. – On exhalation, the diaphragm relaxes and once again becomes dome shaped.

Anatomy and Function of the Respiratory System (9 of 9) © Jones & Bartlett Learning.

“A” Is for Airway • In healthy individuals, the airway automatically stays open. • An injured or seriously ill person is not able to protect the airway and it may become blocked. – You must take steps to check the airway and correct the problem.

Check for Responsiveness (1 of 2) • Ask the patient, “Are you okay? Can you hear me? ” – If you get a response, assume that the patient is conscious and has an open airway. © Jones & Bartlett Learning. Courtesy of MIEMSS. – If there is no response, gently shake the patient’s shoulder and repeat your questions.

Check for Responsiveness (2 of 2) • If the patient is unresponsive, call 9 -1 -1 first before doing anything. • Then, position the patient by supporting the head and neck and placing the patient on his or her back. • Quickly scan the patient’s chest for breathing and check for a pulse. • If the patient has a pulse but is not breathing, you need to correct the airway.

Correct the Blocked Airway (1 of 3) • Head tilt–chin lift maneuver – Place the patient on his or her back. – Place one hand on the patient’s forehead and apply firm pressure backward. © Jones & Bartlett Learning. – Place the tips of your fingers under the bony part of the lower jaw. – Lift the chin forward and tilt the head back.

Correct the Blocked Airway (2 of 3) • Jaw-thrust maneuver – Use if you suspect a neck injury. – Place the patient on his or her back. – Place your fingers behind the lower jaw and move the jaw forward. – Tilt the head back to a neutral or slight sniffing position. – Use your thumbs to pull down the lower jaw, opening the mouth enough to allow breathing.

Correct the Blocked Airway (3 of 3) © Jones & Bartlett Learning. Courtesy of MIEMSS.

Check for Fluids, Foreign Bodies, or Dentures • Potential blocks include – Secretions such as vomitus, mucus, or blood – Foreign objects such as candy, food, or dirt – Dentures or false teeth • If you find anything in the patient’s mouth, remove it. • If the mouth is clear, consider using an airway device.

Correct the Airway Using Finger Sweeps or Suction (1 of 4) • Finger sweeps – Can be done quickly and require no special equipment except a set of medical gloves – Follow the steps in Skill Drill 7 -1. • Suctioning – Suction machines can be helpful in removing secretions.

Correct the Airway Using Finger Sweeps or Suction (2 of 4) • Suctioning (cont’d) – Manual suction devices © Jones & Bartlett Learning. Courtesy of MIEMSS. • Relatively inexpensive • Compact enough to fit into EMR life support kits • Insert the end of the suction tip into the patient’s mouth and squeeze or pump the hand-powered pump.

Correct the Airway Using Finger Sweeps or Suction (3 of 4) • Suctioning (cont’d) – Mechanical suction devices • Clear the patient’s mouth with your gloved finger. • Turn on the suction device and use the rigid tip to remove the rest of the material. • Do not suction for more than 15 seconds at a time. • Change to the flexible tip and clear out the deeper parts of the patient’s throat.

Correct the Airway Using Finger Sweeps or Suction (4 of 4) © Jones & Bartlett Learning.

Maintain the Airway • For unconscious patients, continue holding the head to maintain the head tilt–chin lift or the jaw-thrust position. • If the patient is breathing adequately, place him or her in the recovery position.

Recovery Position (1 of 2) • If an unconscious patient is breathing and has not suffered trauma, place the patient in the recovery position. – Helps keep the patient’s airway open – Allows secretions to drain out of the mouth – Uses gravity to help keep the patient’s tongue and lower jaw from blocking the airway

Recovery Position (2 of 2) • To place a patient in the recovery position – Roll the patient onto one side, as you support the patient’s head. – Place the patient’s face on his or her side so any secretions drain out of the mouth. © Jones & Bartlett Learning. Courtesy of MIEMSS.

Airway Adjuncts (1 of 5) • Oral airway – Two primary purposes • To maintain the patient’s airway • To function as a pathway for suctioning – Used for unconscious patients who • Are breathing • Are in respiratory arrest • Do not have a gag reflex

Airway Adjuncts (2 of 5) © Jones & Bartlett Learning. Courtesy of MIEMSS.

Airway Adjuncts (3 of 5) • Oral airway (cont’d) – Can be used with mechanical breathing devices – Select the proper size airway by measuring from the earlobe to the corner of the mouth. – Follow the steps in Skill Drill 7 -2 to insert an oral airway.

Airway Adjuncts (4 of 5) • Nasal airway – Used in both unconscious and conscious patients who are not able to maintain an open airway © Jones & Bartlett Learning. Courtesy of MIEMSS. – Not as likely to cause vomiting – You cannot suction through a nasal airway.

Airway Adjuncts (5 of 5) • Nasal airway (cont’d) – Select the proper size by measuring from the earlobe to the tip of the patient’s nose. – Coat the airway with a water-soluble lubricant. – The airway is fully inserted when the flange or trumpet rests against the patient’s nostril. – Follow the steps in Skill Drill 7 -3 to insert a nasal airway.

“B” Is for Breathing • You can use the look, listen, and feel technique to assess adequacy of breathing. – Look for the rise and fall of the patient’s chest. – Listen for the sounds of air passing into and out of the patient’s nose or mouth. – Feel the air moving on the side of your face. • Normal adults have a resting breathing rate of 12 to 20 breaths per minute.

Signs of Inadequate Breathing (1 of 3) • Noisy respirations, wheezing, or gurgling • Rapid or gasping respirations • Pale or blue skin • The most critical sign is respiratory arrest, which is characterized by – Lack of chest movements – Lack of breath sounds – Lack of air against the side of your face

Signs of Inadequate Breathing (2 of 3) • Causes of respiratory arrest – Heart attacks – Mechanical blockage or obstruction caused by the tongue – Vomitus, particularly in a patient weakened by a condition such as a stroke – Foreign objects – Illness or disease

Signs of Inadequate Breathing (3 of 3) • Causes of respiratory arrest (cont’d) – Drug overdose – Poisoning – Severe loss of blood – Electrocution by electrical current or lightning

Check for the Presence of Breathing • Assessment of any motionless patient begins by checking for responsiveness and signs of breathing. • If a patient is unresponsive (unconscious), quickly scan the chest to see if the patient is breathing.

Correct the Breathing (1 of 6) • As you perform rescue breathing, keep the patient’s airway open. – Pinch the nose, take a deep breath, and blow slowly into the mouth for 1 second. – Remove your mouth and let the lungs deflate. – Breathe for the patient a second time. – After the first two breaths, breathe once into the mouth every 5 to 6 seconds.

Correct the Breathing (2 of 6) • Mouth-to-mask rescue breathing – Enables you to perform rescue breathing without mouth-to-mouth contact © Jones & Bartlett Learning. Courtesy of MIEMSS. – Reduces the risk of transmitting infectious diseases – To use a mouth-to-mask ventilation device, follow the steps in Skill Drill 7 -4

Correct the Breathing (3 of 6) • Mouth-to-barrier rescue breathing – Devices are small enough to carry in your pocket and consist of a port or hole you breathe into and a mask or plastic film that covers the patient’s face – Provide variable degrees of infection control – To perform mouth-to-barrier rescue breathing, follow the steps in Skill Drill 7 -5.

Correct the Breathing (4 of 6) • Mouth-to-mouth rescue breathing – Requires no equipment © Jones & Bartlett Learning. Courtesy of MIEMSS. – Carries a somewhat higher risk of contracting a disease

Correct the Breathing (5 of 6) • Bag-valve mask (BVM) – Place the mask over the face of the patient and make a tight seal. – Squeezing the bag pushes air through a oneway valve, through the mask, and into the patient’s mouth and nose. – As the patient exhales, a second one-way valve releases the air.

Correct the Breathing (6 of 6) • Bag-valve mask (cont’d) – The specific steps for using a bag-valve mask are shown in Skill Drill 7 -6. © Jones & Bartlett Learning. Courtesy of MIEMSS. – Use of a bag-valve mask is best accomplished as a two-person operation.

Airway and Breathing Review (1 of 3) • Airway – Check for responsiveness by shouting, “Are you okay? ”, and shaking the patient’s shoulder. – If the patient is unresponsive, activate EMS. – Place the patient on his or her back. – Quickly scan the patient for signs of breathing and check for a pulse. – If a pulse is present, correct a blocked airway with the head tilt–chin lift or jaw-thrust maneuver.

Airway and Breathing Review (2 of 3) • Airway (cont’d) – Check the mouth for any secretions, vomiting, or solid objects. If anything is found, clear the mouth. – Correct a blocked airway with finger sweeps or suctioning. – Maintain the airway by holding it open or by using an oral or nasal airway.

Airway and Breathing Review (3 of 3) • Breathing – Check for the presence of breathing while determining responsiveness. – Correct the lack of breathing by performing rescue breathing using a mouth-to-mask, or mouth-to-barrier device, if available.

Performing Rescue Breathing on Children and Infants (1 of 2) • Rescue breathing for children – Children are smaller and you will not have to use as much force to open their airways and tilt their heads. – Give 1 rescue breath every 3 to 5 seconds (about 12 to 20 rescue breaths per minute).

Performing Rescue Breathing on Children and Infants (2 of 2) • Rescue breathing for infants – An infant is tiny and must be treated extremely gently. – The steps in rescue breathing for an infant are shown in Skill Drill 7 -7.

Causes of Airway Obstruction (1 of 2) • The most common airway obstruction is the tongue. – If the tongue is blocking the airway, the head tilt –chin lift maneuver or jaw-thrust maneuver should open the airway. • Food is the most common foreign object that causes an airway obstruction. – If a foreign body is lodged in the air passage, you must use other techniques to remove it.

Causes of Airway Obstruction (2 of 2) © Jones & Bartlett Learning.

Types of Airway Obstruction (1 of 3) • Ask the patient, “Are you choking? ” – If the patient can reply, the airway is not completely blocked. – If the patient cannot speak or cough, the airway is completely blocked. • Mild airway obstruction – The patient coughs and gags. – The patient may be able to speak, but with difficulty.

Types of Airway Obstruction (2 of 3) • Mild airway obstruction (cont’d) – Encourage the patient to cough. – If the patient cannot expel the object, arrange for prompt transport.

Types of Airway Obstruction (3 of 3) • Severe airway obstruction – The patient is unable to breathe in or out and speech is impossible. – Other symptoms may include • Poor air exchange • Increased breathing difficulty • A silent cough • Loss of consciousness in 3 to 4 minutes – Treatment involves abdominal thrusts.

Management of Foreign Body Airway Obstructions (1 of 3) • Airway obstruction in an adult – If the patient is conscious, stand behind him or her and perform abdominal thrusts. – To assist a patient with a complete airway obstruction, follow the steps in Skill Drill 7 -8. – Perform cardiopulmonary resuscitation (CPR) on a patient who has become unresponsive.

Management of Foreign Body Airway Obstructions (2 of 3) • Airway obstruction in a child – Tilt the head back just past the neutral position. – If the child becomes unresponsive, perform CPR for five cycles before activating the EMS system. • Airway obstruction in an infant – If the infant has an audible cry, the airway is not completely obstructed.

Management of Foreign Body Airway Obstructions (3 of 3) • Airway obstruction in an infant (cont’d) – Use a combination of back slaps and chest thrusts. – If the infant becomes unresponsive • Ensure that the EMS system has been activated. • Begin CPR. • Continue CPR until more advanced EMS personnel arrive.

Oxygen Equipment (1 of 3) • Oxygen cylinders – Oxygen is compressed to 2, 000 psi and stored in portable cylinders. © Jones & Bartlett Learning. Courtesy of MIEMSS. – The portable oxygen cylinders used by most EMS systems are either D or E size. – Depending on the flow rate, each cylinder should last for at least 20 minutes.

Oxygen Equipment (2 of 3) • Pressure regulator/flowmeter – Single unit attached to the outlet of the oxygen cylinder © American Academy of Orthopaedic Surgeons. – Can be adjusted to deliver oxygen at a rate of 2 to 15 L/min – A gasket ensures a tight seal.

Oxygen Equipment (3 of 3) • Nasal cannulas and face masks – Ensures the oxygen is delivered to the patient and is not lost in the air – Nasal cannulas are used to deliver medium concentrations of oxygen. – A face mask is placed over the patient’s nose and mouth to deliver oxygen. – Nonrebreathing masks are most commonly used by EMRs.

Safety Considerations • Oxygen actively supports combustion and can quickly turn a small spark or flame into a serious fire. – All sparks, heat, flames, and oily substances must be kept away. • The pressure in an oxygen cylinder can cause an explosion if it is damaged. – Oxygen cylinders should be kept inside sturdy carrying cases.

Administering Supplemental Oxygen (1 of 5) • Place the regulator/flowmeter over the stem of the oxygen cylinder and line up the pins on the pin-indexing system. • Tighten the securing screw firmly by hand. © Jones & Bartlett Learning. Courtesy of MIEMSS. • Turn the cylinder valve two turns counterclockwise.

Administering Supplemental Oxygen (2 of 5) • Check the gauge on the pressure regulator/flowmeter. • You will need to adjust the flowmeter to deliver the desired liter-per-minute flow. • When the oxygen flow begins, place the face mask or nasal cannula onto the patient’s face.

Administering Supplemental Oxygen (3 of 5) • Nasal cannula – Delivers low-flow oxygen at 1 to 6 L/min and in concentration of 24% to 44% oxygen © Jones & Bartlett Learning. Courtesy of MIEMSS. – Adjust the liter flow to 1 to 6 L/min and then apply the cannula to the patient.

Administering Supplemental Oxygen (4 of 5) • Nonrebreathing mask – Used to deliver a high flow of oxygen at 8 to 15 L/min © Jones & Bartlett Learning. Courtesy of MIEMSS. – Can deliver concentrations of oxygen as high as 90%

Administering Supplemental Oxygen (5 of 5) • Nonrebreathing mask (cont’d) – Should be used for patients who require higher flows of oxygen, including those experiencing • Shortness of breath • Severe chest pain • Carbon monoxide poisoning • Congestive heart failure • Signs and symptoms of shock

Hazards of Supplemental Oxygen • Supplemental oxygen must be used carefully so that you, your team, and the patient remain safe. • You will need additional class work and practical training before you are ready to administer oxygen in emergency situations.

Pulse Oximetry (1 of 3) • Pulse oximetry is used to assess the amount of oxygen saturated in the red blood cells. • Pulse oximeter – Consists of a sensor probe and a monitor © Jones & Bartlett Learning. – The monitor displays the percent saturation of the patient’s blood.

Pulse Oximetry (2 of 3) • Pulse oximeter (cont’d) – In a healthy patient, the oxygen saturation should be between 95% and 100%. – The pulse oximeter cannot tell you what is wrong with the patient, but it can help you • Recognize that the patient is having a problem • Determine whether your treatment is helping the patient

Pulse Oximetry (3 of 3) • A pulse oximeter has certain limitations. – It will not give an accurate reading if the patient • Is wearing nail polish or has dirty fingers • Is cold • Has lost a lot of blood • Has experienced carbon monoxide poisoning • There is no machine that can replace a careful patient assessment.

Rescue Breathing for Patients With Stomas (1 of 2) • Check every patient for the presence of a stoma. • If you locate a stoma, keep the patient’s neck straight. • Examine the stoma and clean away any mucus in it. • If there is a breathing tube, remove it.

Rescue Breathing for Patients With Stomas (2 of 2) • Place your mouth directly over the stoma and use the same procedures as in mouthto-mouth breathing. • If the patient’s chest does not rise, seal the mouth and nose with one hand then breathe through the stoma. • A bag-valve mask or pocket-mask device can also be used to ventilate the patient.

Gastric Distention • Occurs when air is forced into the stomach instead of the lungs • Increases the chance that the patient will vomit • Breathe slowly into the patient’s mouth, just enough to make the chest rise.

Dental Appliances • Do not remove dental appliances that are firmly attached. – They may help keep the patient’s mouth full so you can make a better seal. • Loose dental appliances cause problems. – Partial dentures may become dislodged. – Remove the dentures and put them in a safe place.

Airway Management in a Vehicle (1 of 4) • Use the jaw-thrust maneuver if – The patient is lying on the floor or seat – There is any possibility that the crash could have caused a head or spine injury • When the patient is in a sitting or semireclining position – Approach the patient from the side by leaning in through the window or across the seat.

Airway Management in a Vehicle (2 of 4) • When the patient is in a sitting or semireclining position: (cont’d) – Grasp the patient’s head with both hands. – Put one hand over the patient’s chin and the other hand on the back of the patient’s head. – Maintain a slight upward pressure to support the head and cervical spine.

Airway Management in a Vehicle (3 of 4) © Jones & Bartlett Learning. Courtesy of MIEMSS.

Airway Management in a Vehicle (4 of 4) • This technique has several advantages: – You do not have to enter the automobile. – You can easily monitor the patient’s carotid pulse and breathing patterns by using your fingers. – This technique stabilizes the patient’s cervical spine. – It opens the patient’s airway.

Summary (1 of 4) • The main purpose of the respiratory system is to provide oxygen and to remove carbon dioxide from the red blood cells as they pass through the lungs.

Summary (2 of 4) • When a patient experiences possible respiratory arrest, check for responsiveness; open the blocked airway using the head tilt– chin lift or jaw-thrust maneuver; check for fluids, solids, or dentures in the mouth; and correct the airway, if needed, using finger sweeps or suction.

Summary (3 of 4) • Maintain the airway by continuing to manually hold the airway open, by placing the patient in the recovery position, or by inserting an oral or a nasal airway. • If the airway is obstructed in a conscious adult or child, kneel or stand behind the patient and perform the Heimlich maneuver.

Summary (4 of 4) • Administering supplemental oxygen to patients showing signs and symptoms of shock increases the amount of oxygen delivered to the cells. • Pulse oximetry is used to assess the amount of oxygen saturated in the red blood cells.

Review 1. After opening the airway of a patient who has a pulse but is unconscious, you should A. perform a blind finger sweep. B. immediately attempt to insert an oral airway. C. check for secretions, foreign bodies, or dentures. D. perform CPR.

Review Answer: C. check for secretions, foreign bodies, or dentures.

Review 2. You should place a patient in the recovery position to A. prevent the patient from going into respiratory arrest. B. allow secretions to drain out of the mouth. C. protect the patient’s spine from injury. D. facilitate the administration of supplemental oxygen.

Review Answer: B. allow secretions to drain out of the mouth.

Review 3. Pulse oximetry is used to A. assess the amount of oxygen saturated in the red blood cells. B. provide supplemental oxygen to the patient. C. assess how much oxygen the patient requires. D. eliminate carbon dioxide from the bloodstream.

Review Answer: A. assess the amount of oxygen saturated in the red blood cells.
 Epiglottic
 National ems education standards
 Tracheostomy stoma
 Chapter 9 airway management
 Indikasi nasopharyngeal airway
 Supraglotal
 Airway abcde
 Sandwich manuver
 Stepwise approach to airway management
 National ems advisory council
 Introduction to ems systems chapter 1
 Ems systems chapter 1
 Lemon moans airway
 Lower respiratory tract
 Breathing mechanism
 Respiratory airway secretary
 Soap me airway
 Cormack lehane score
 Persiapan intubasi statics
 Servo pressure on jet ventilator
 Anesthesia airway anatomy
 Mean airway pressure
 Airway numaraları
 Arytenoid edema
 Retroglottic airway
 Pharyngo-tracheal lumen airway
 Mean airway pressure formula
 Automatic positive airway pressure
 Asp medical clinic
 Airway numaraları
 Asa airway classification
 Aprv
Aprv What is this picture from
 Ztechnique
 Head tilt chin lift jaw thrust
 Thyromental distance
 Seeking consensual validation
 Indications for artificial airway
 Emergency action step
 Airway gym
 Airway breathing c
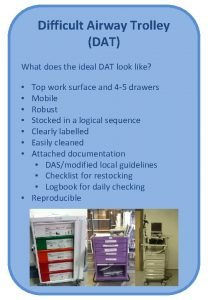
 Ideal dat
 Norwich terrier upper airway syndrome
 Moans airway
 Silverstein fire risk assessment tool
 Generations of supraglottic airway devices
 Nasopharyngeal airway
 Nasopharyngeal airway
 Lung airway anatomy
 Difficult airway algorithm asa
 Mouth gag airway
 How will you open the casualty's airway
 Abcde ehbo
 Thyromental distance of 7cm
 Difficult airway ppt
 Constricted airway
 Lethal triad
 Formula for standard error
 Power dynamics of standard language as school language
 Standard cost
 Standard kandungan dan standard pembelajaran
 6 key priorities
 Nqs assessment and rating
 Dsmith
 National standard 1
 Nfpa 1600
 Nsmc audit
 Line & catheter label - intravenous burette
 National healthy housing standard
 Nfpa 1600
 Universal principles
 National unification and the national state
 Classification of education
 Career education standard
 National forum on education statistics
 What is malaysia education blueprint
 National environmental education action plan
 National education foundation nef
 National council for special education
 National consortium of interpreter education centers
 451 fahrenheit to celsius
 Early national period education
 National forum on education statistics
 Social factors national 5 pe
 Ministry of national education morocco
 National education policy 1998-2010
 Uae national agenda for schools
 Pacret
 Nceac curriculum
 National forum on education statistics
 National research center for career and technical education
 National science education standards inquiry
 National higher education strategic plan

