Chapter 3 Taking action Emergency Action Steps 1


 1. Observe before touching 2. If parents")


 1. Anatomical- airway blocked by tongue or swollen tissues of")

- Slides: 39
Chapter 3 Taking action
Emergency Action Steps: 1. Size up the Scene 2. Perform and initial assessment 3. Summon advanced medical personnel
Size up the scene. • Look the scene over and ask yourself the following questions
Size up the scene • Is it safe? – Check for anything unsafe – Are there spilled chemicals, traffic, smoke, bad weather, and or fire? Can you think of anything else that would cause a scene to be unsafe? If there any dangers- call 9 -1 -1 from a safe distance.
Size up the scene • What happened? – Look for clues to cause what happened? – Look at nearby objects, fallen ladders, broken glass or a spilled bottled of medicine.
Size up the scene • How many people are involved? • Is there immediate danger involved? • Is anyone else available to help? • What is wrong?
Perform an initial assessment Check the victim for consciousness and obtain consent of the victim is conscious. Check for signs of life- any observable evidence if injury and symptoms- things the victim can tell you about his/her condition. • Check for pulse • Check for severe bleeding
Summon advanced medical personnel A. When to call 1. Unconscious/altered consciousness 2. Breathing problems 3. Persistent chest pain/abdominal pain 4. No pulse 5. Severe bleeding 6. Vomiting/passing blood 7. Poisoning/suspected planning 8. Seizures, severe headaches 9. Injuries to the head, neck or back 10. Broken Bones
Also for these situations 1. Fire/explosion 2. Presence of gas 3. Downed electrical wires 4. Rising water 5. Accidents 6. Victims who cannot be moved easily
B. Making the Call 1. Give address and exact location 2. Telephone # from where you are calling 3. Caller’s name 4. What happened 5. How many people are involved 6. Condition of victim 7. Help/care being given 8. Don’t hang up until they tell you to do so
Checking a conscious person • If you determine that an ill or injured person is conscious and has no immediate life threatening conditions, you can begin checking for other conditions. • Interview the person • Check the person from head to toe.
Conducting Interviews • Ask the following questions: – What happened? – Do you feel pain or discomfort anywhere? – Do you have allergies? – Do you have any other medical conditions?
Checking head to toe AHHHHHHH • Check the persons head- look for blood • Look for cuts, scrapes and bruises or depressions. • Watch for change of consciousness • Look for changes in the persons breathing Ouch!
Checking Head to toe A. Keep the victim comfortable, don’t move unless you need to B. Before you check, tell them what you are doing C. Avoid touching or moving a painful area D. Look for signs of a serious injury E. Start at the head F. Monitor their appearance G. Ask to move body parts if you don’t suspect a head or neck injury. H. Move one extremity at a time I. If any problems develop, stop and give immediate care
Checking an Unconscious Person • Always check to see if an unconscious person had the following: – Has an open Airway – Shows signs of life – Is bleeding severely These 3 steps are known as the ABC’s Airway, Breathing, Circulation
1. Unconsciousness- Leave the person in the position you 2. find them. Tap and shout, if they respond, they are breathing 3. conscious, and have a pulse. 2. Breathing/Airway- Check the victim in the position you 3. find them. If impossible to check for breathing, roll the victi 4. their side as a unit-avoid twisting the spine. 5. To open the airway-The airway is open if the victim can cou 6. speak, breath. 7. Head-Tilt and Chin-Lift to open the airway 8. To check for breathing- Look, listen, and feel. 9. If the victim is not breathing, give 2 slow breaths- enough to 10. Make the victim’s chest gently rise.
Moving a victim • Do not move the victim unless nesessary. • Only move a victim if: – The scene is unsafe – You have to reach another victim – You need to provide proper care
Drags • Clothes drag- to move a clothed victim who you think may have a head or back injury. • Two-Person Seat Carry- To carry a conscious person who cannot walk and has no suspected head, neck or back injury
Drags • Walking assist- to help a victim who needs assistance to walk to safety. • Pack strap carry- To help move an unconscious or conscious victim • Foot drag- To move a victim too large to carry. • Blanked drag- to move an unconscious person when rescue equipment is limited.
Pulse/Heartbeat – Adult/Child The pulse is in the carotid artery on the neck or the radial artery in the wrist. Infant- The pulse is in the brachial artery on the inside of the elbow, midway between the shoulder and elbow. **** Take the pulse for 5 -10 seconds, if there is no pulse, begin CPR. Normal Range for pulse- Adult 60 -80 bpm Child 80 -100 bpm
Severe Bleeding Look over the body from head to toe. It usually looks worse than it is.
Checking Infants and Children (ages 0 -8) 1. Observe before touching 2. If parents are there, ask them to keep them calm and ask them about medical conditions 3. Talk to the parent and explain what you are doing Providing Care Guidelines 1. Don’t harm 2. Monitor breathing and consciousness 3. Keep them comfortable 4. Keep them from getting chilled or overheated 5. Reassure the victim 6. Provide any specific care needed
Airway • To open and airway – use the head-tilt/chin lift
Breathing • To check for breathing: – Look – Listen – Feel
Circulation • Check for a pulse in the following areas:
Circulation • Brachial Artery. For infants
Respiratory Distress- Condition in which breathing becomes difficult. Signs & Symptoms 1. Abnormal breathing 2. Slow or rapid breathing 3. Unusually deep or shallow 4. Gasping for breath 5. Wheezing or gurgling (high pitched noises) 6. Skin moist or cool 7. Flushed, pale, ashen or bluish (cyanotic) 8. Victim feels short of breath 9. Dizzy/light headed 10. Feels pain in chest/tingling hands, feet, lips 11. Feels apprehensive/fearful
Breathing emergencies • Hypoxia is a condition in which insufficient oxygen reaches the cells. • Signs and symptoms are: – Increased breathing – Increased heart rate – Cyanosis- lips and nails turn blue
0 min. : Breathing stops. Heart will soon stop beating 4 -6 min. : Brain damage possible/cells begin to die 6 -10 min. : Brain damage likely Over 10 min. : Irreversible brain damage certain Breathing Emergencies can be caused by: 1. Obstructed airway (choking) 2. Illness 3. Emphysema/asthma 4. Electrocution 5. Shock 6. Drowning 7. Heart Attack 8. Injury to head, chest, or lungs 9. Allergic reaction to foods and bites 10. Drugs 11. Inhaling/ingesting toxic substances
Respiratory Distress in Children 1. Agitation 2. Fast/slow breathing 3. Drowsiness 4. Noisy breathing 5. Pale, ashen, bluish skin 6. Increased difficulty breathing 7. Altered consciousness 8. Increased HR & breathing
Rescue Breathing- Adults If a person is not breathing, tilt the head back & lift the chin. Give 1 slow breath every 5 seconds. Continue for 1 minutes- 12 breaths per minute. *Recheck pulse & breathing every minute. *Feel for pulse for about 5 seconds
Rescue Breathing- Children/Infant Give 1 slow breath every 3 seconds Continue for 1 minute- 20 breaths per minute When to Stop: 1. Victim begins to breath on their own 2. Victim has no pulse. . Move to CPR 3. Another trained person takes over 4. EMS arrives on the scene 5. You are too exhausted 6. Scene becomes unsafe Breathing Devices Resuscitation masks & face shields- barriers to protect you
Special Considerations Air in Stomach- air normally enters through the stomach however, if you breathe longer than 1 ½ sec. It will cause the extra air to fill the stomach. Stop the breath when the chest rises. Gastric Distention- is air in the stomach that can make the victim vomit. Aspiration- sucking or taking blood Vomiting- If the victim vomits, roll them on their side, avoid twisting the neck. Wipe the mouth clean, reposition, reopen airway & continue rescue breathing. Mouth to Nose- If you can’t make a good seal 1. Maintain head tilt w/ one hand on forehead, close the mouth by pushing on chin. 2. Seal mouth over their nose- open mouth in between if possible.
Special Considerations Mouth to Stoma- Breathing in the front of the throat. Look, listen and feel for breathing over stoma instead of mouth. Dentures- Leave in place, they provide support for the mouth & cheeks. Only remove if they are blocking the airway. Suspected Head, Neck, or Back- Lift chin without tilting the head.
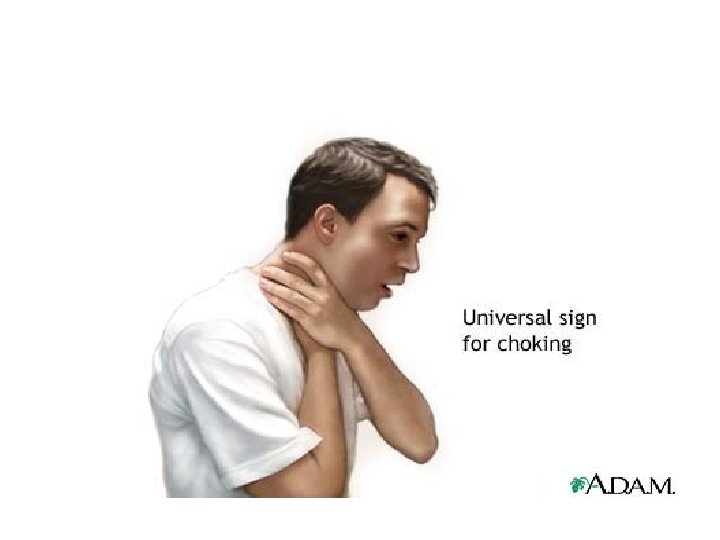
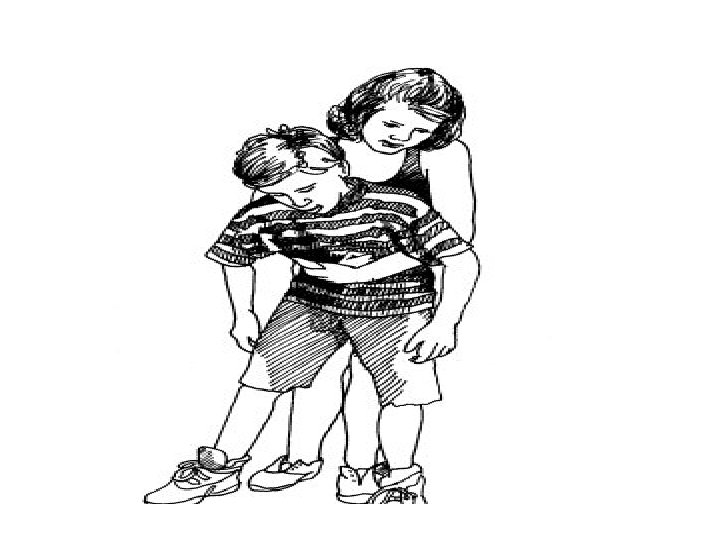
Choking-Airway Obstruction (2 Types) 1. Anatomical- airway blocked by tongue or swollen tissues of mouth & throat. 2. Mechanical- Blocked by a foreign object food/toy Causes of Choking 1. Trying to swallow large pieces of poorly chewed food 2. Drinking alcohol before or during (dulls swallowing nerves) 3. Wearing dentures 4. Eating while talking excitingly or laughing 5. Walking, playing or running w/ food in your mouth.
Care for Respiratory Distress n Help victim rest in comfortable position n Provide fresh air (open doors/windows) n Call 911 n If conscious, check for non-threatening injuries n Reduce anxiety/comfort n Monitor n Maintain body temperature n If available, assist in taking medications (inhaler, bronchial dilator & anaphylaxis kit)