Open Journal Systems Asst Prof Dr Ahmed Hashim


- Slides: 100
Open Journal Systems Asst. Prof. Dr. Ahmed Hashim Mohammed 16/04/2018
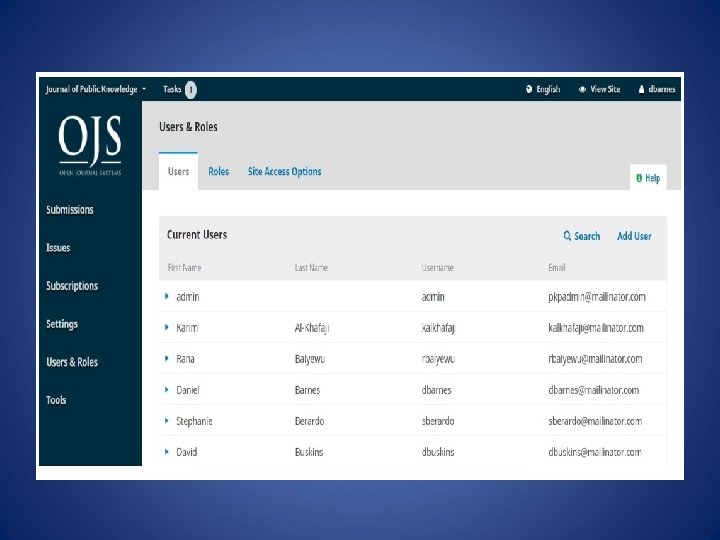
Users • In addition to managing the journal web site, the Journal Manager is also responsible for all of the user accounts in the system. • To view the user accounts, select Users & Roles from the left menu.
You can edit a user account by selecting the blue arrow to the left of an entry. This opens the options to Email, Edit User, Disable, Remove, Login As, Merge User.
Email opens a window allowing you to quickly send a message to that user.
Edit User allows you to make changes to that user's account.
Search When you have a large number of users, you will want to take advantage of the search feature. This can help you quickly find a user by first name, last name, or email address, or to see all users in a particular role. Note: If you leave the Search field blank, select a Role, and hit Search, you will get a list of all users in that role (e. g. , all copyeditors).
Add User To add a new user to your journal, select the Add User link. This will open a new window with a set of fields to fill in
Once these fields are completed and you hit Save, you will then be asked to assign roles to the new account. Use the Add Role link to open the role selector. Once you have added all of the roles, hit the Save button.
Roles • Users in the system must have one or more roles. Roles define what a user can do within the system. • An Author can make submissions and little else. • An Editor can manage submissions. • A Journal Manager can configure the journal's settings. • One user can have more than one role, for example, being a Journal Manager, Editor, and Author in the same journal. OJS 3 has multiple roles available, each with different permission levels. •
From this page, you can see each role, and the editorial stage each role can access. A good example of this is the Copyeditor role, which can only access the copyediting stage. Copyeditors cannot jump to the Review stage to see what happened during the peer review process.
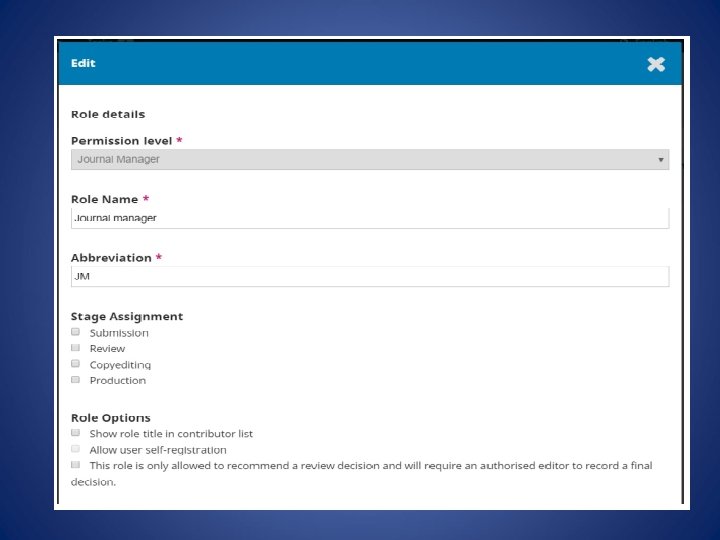
Editing Roles • Unchecking a box removes access to that stage for users with that role. Selecting the blue arrow to the left of the role name reveals the edit link. • Clicking this opens the editing window.
• Permission Level: This indicates how much a user with this role can do in any stage. The Journal Assistant level can communicate with other users and upload and revise files. • Role Name: You can use this field to easily rename any role. • Abbreviation: Each role must have a unique abbreviation.
• Stage Assignment: This allows you to determine which stage users with this role can access. • Role Options: Use these checkboxes to show anyone with this role in the contributor list (e. g. , the author list). • Use the second option to determine whether users can self-register in this role. • Authors and Reviewers are good candidates for self-registration. You would definitely NOT want to allow users to self-register as Journal Managers or Editors! • The third option is useful for guest editors or possibly section editors, depending upon your preferred workflow and authority chain. •
Create New Roles • Use the Create New Roles link to open a window where you can create a new role for your journal, including setting which stages it can access and how much permission it should have
Editorial Workflow • The workflow is divided into 4 stages:
Submission • This is where new submissions land while being assigned to Section Editors and considered for moving into the Review stage. • Some submissions are clearly inappropriate and never make it beyond this stage.
Review • This is where the peer review happens, as well as any revisions required by the author. • Some submission will not pass review and end here. Those that are accepted move to the next stage.
Copyediting • Accepted articles move to this stage, where they are improved by the work of a copyeditor. • Authors can be given the opportunity to review the copyedits. •
Production • Once the copyedits are completed and approved, the submission moves to this stage. • In Production, the copyedited files are converted to galleys -- HTML, XML, PDF, etc. • Again the author has the opportunity to proofread the galleys. • Once everyone is satisfied, the submission is scheduled for publication in a future issue.
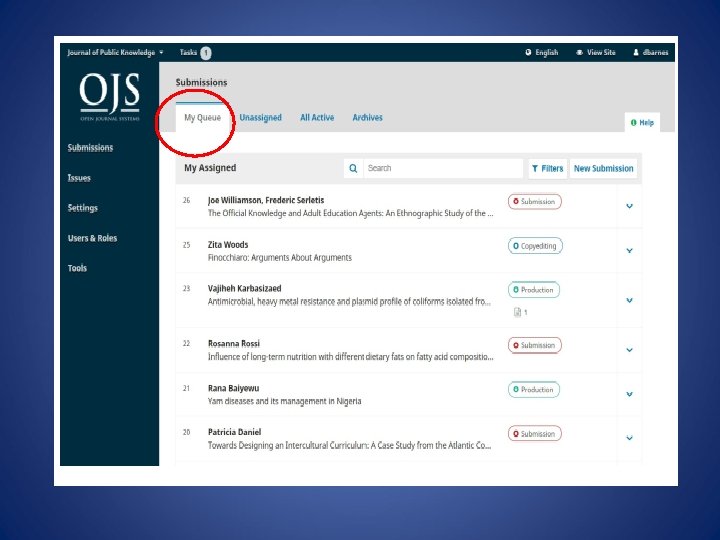
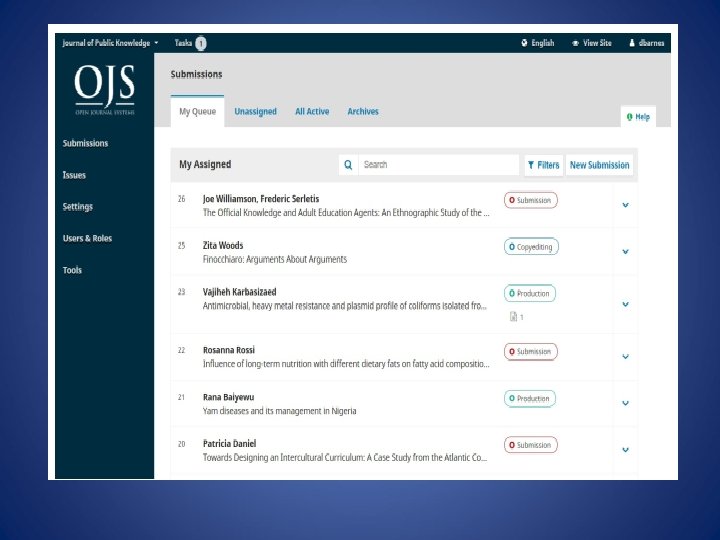
Submissions Stage • When an author makes a new submission to your journal, the editor is automatically emailed. • When you log into your Dashboard, you can find it either from your Tasks, or from one of the queues (My Queue, Unassigned, All Active, and Archives)
Tasks • Your Tasks are available from the top left menu of your Dashboard. • Note the number "1" in the image below. • This indicates that there is currently 1 task in your list.
Tasks provide a quick look at items that need your attention. Bold entries are unread, and unbold entries have been read. Use the checkbox to mark tasks for deletion (the delete link is available at the bottom of the list)
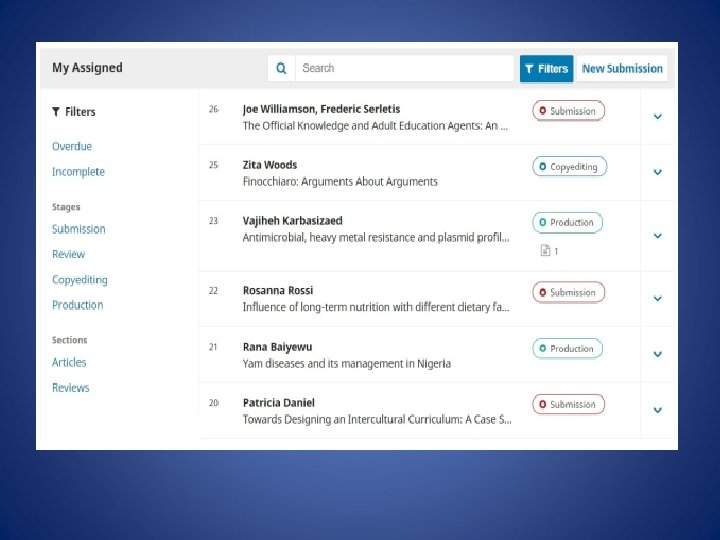
My Queue • My Assigned: This panel includes submissions added to sections where you are a section editor or to your own submissions if you are also an author with this journal. • The Search tool for each queue can sometimes be helpful in tracking down submissions. • The Filter tool allows you to limit your browsing to specific status (e. g. , incomplete, overdue) stages (submission, review, copyediting, production), or sections (e. g. , articles, reviews) for faster searching.
Note that you can use the blue arrows to the right of each submission to reveal more details, including how many reviews are outstanding, new discussions, and more. It also reveals buttons to take you to the submission record, view the activity log and notes, and to delete the submission.
Unassigned • This panel includes submissions added to sections without section editors. In the above example, there are no unassigned submissions, so the panel is empty
All Active • This section includes a list of all submissions, without being organized into queues
Archived • This section includes a list of all submissions either rejected or already published by the journal.
Demonstration Submission • For this demonstration, we are looking for the Williamson and Serletis submission, entitled The Official Knowledge and Adult Education Agents. It can be found at the top of the My Assigned queue, as well as in the All Active queue.
• Once you find the submission, you can use the blue arrow to reveal options to see if there any open discussion (there are none), as well as to view the submission, view the activity logs and note, or to delete the submission. • Delete will move the submission to the Archives
Activity Log & Notes will bring up the submission's history.
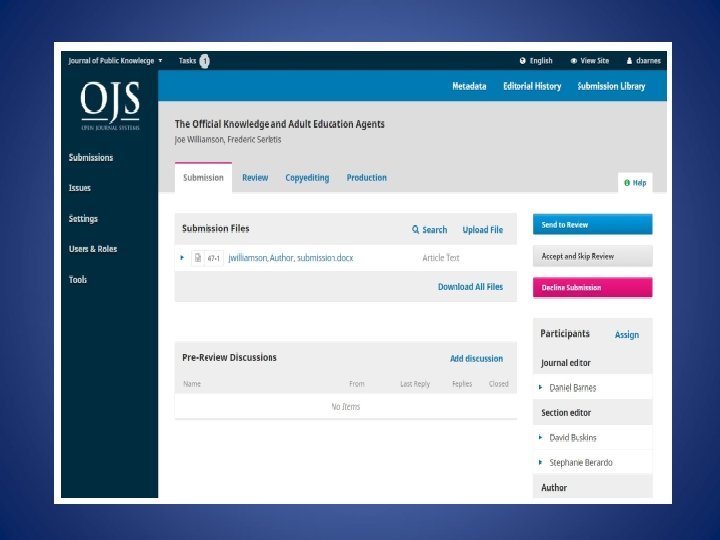
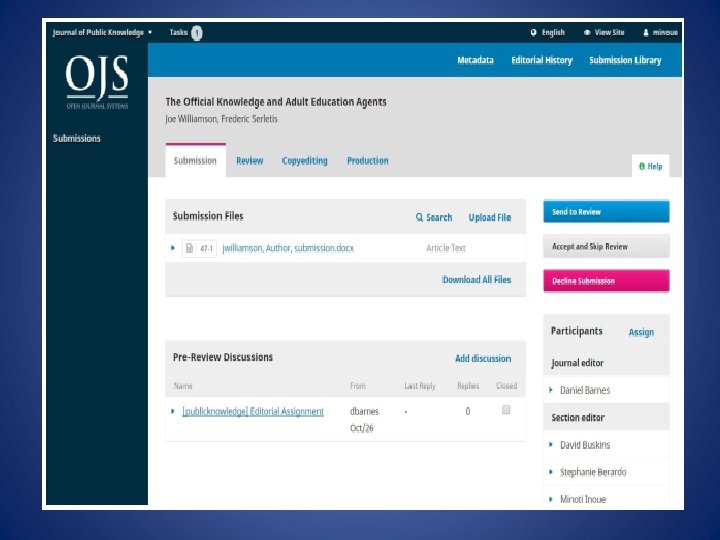
Submission Record To view the submission in more detail, select View Submission button. This will take you to the submission record
Submission Files: • This panel lists the files that have been submitted. In this view, there is just one file, but multiple files could have been submitted.
Pre-Review Discussions • This panel allows the editor to communicate with the author, or with others on the editorial team. For example, to ask the author for some additional information, or to ask a section editor to take responsibility for this submission.
Action Buttons • These include Send to Review, Accept and Skip Review, and Decline Submission. • Note: If you don't see these buttons, you likely have not yet assigned the submission to an editor.
Participants • This panel is where you will see the list of participants involved in the submission, including the editor, section editors, and author. Other names (copyeditors, layout editors, etc. ) will appear here as they are added in subsequent steps. In addition, in the blue bar along the top, you can see: Metadata: Where you can view and revise the submission metadata.
1 -Metadata • In addition, in the blue bar along the top, you can see Metadata Where you can view and revise the submission metadata.
Use the Identifiers tab to also view or add a unique identifier
2 -Editorial History • Where you can view the history and any notes about the submission.
Use the Notes tab to also view or add any editorial notes
3 -Submission Library Where you can add any relevant documents to the submission's library
Action buttons • Send to Review: Moves the submission on to the next stage. • Accept and Skip Review: Skips the Review Stage and moves the submission directly into Copyediting. • Decline Submission: Rejects the submission before going through the review process. The submission would then be archived.
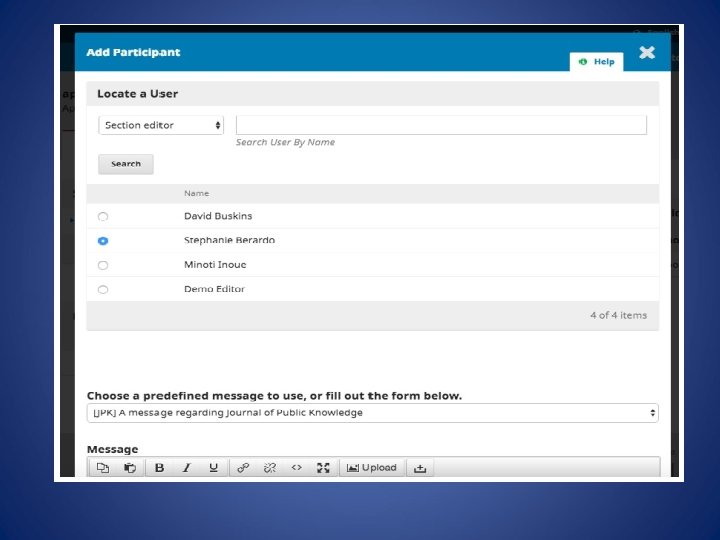
Assigning the Submission • Depending on how you have your sections configured, some new submissions may come in unassigned. If this is the case, the next step is to assign an editor or section editor. • To do so, select the Assign link in the Participants panel
• You will have the option to locate a user by role, choose an individual, and send them a message requesting their assistance. • Note: If you aren't sure of the names of the section editors, simply choose that role from the dropdown menu and then hit the Search button. • All Section Editors will be displayed and available for selection. • Hit the OK button to make the assignment and send the message.
• Note the new Pre-Review Discussion that was automatically created as part of the assignment. You can now see that the Section Editor is listed under Participants, and the Action buttons are available: • Although in this example, the editor assigned a section editor, it would also be possible for the editor to assign herself to the submission.
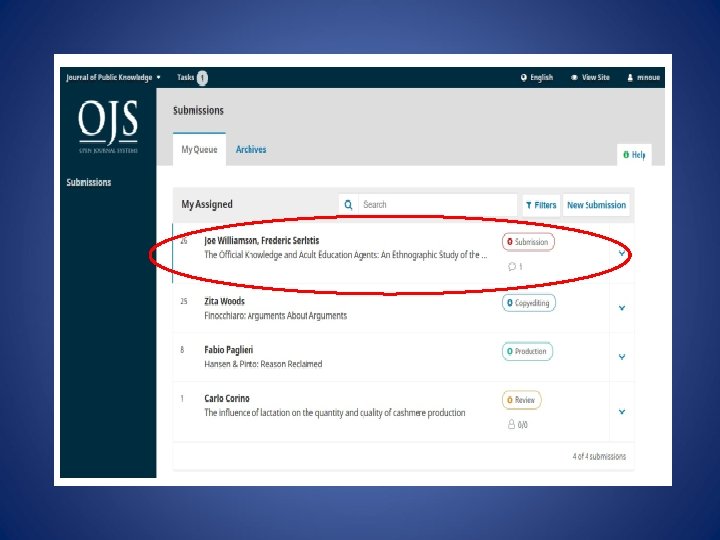
Section Editor • Now that the Section Editor has been assigned, she can login and view her dashboard. The submission can be found at the top of the My Assigned queue.
• Clicking on the article title opens the full submission record
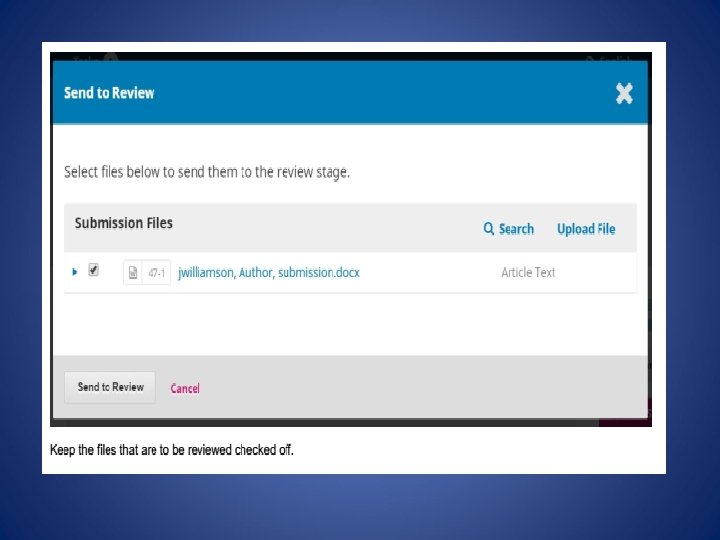
Accepting the Assignment • It is not required, but the Section Editor could reply to the Pre -Review Discussion to inform the editor that she will be proceeding with the assignment. • Communicating with the Author If the Section Editor has any questions for the author, she can use the Pre-Review Discussions. • Sending to Review Once the Section Editor is satisfied that the submission is appropriate for the journal, she can select the Send to Review button to move the submission to the next stag
Review Stage • When the submission enters the Review Stage, a notification indicates that Reviewers need to be assigned. • From the Reviewers panel, you can select Add Reviewer to assign a new Reviewer. This opens a new window, where Reviewers are listed and can be selected one at a time.
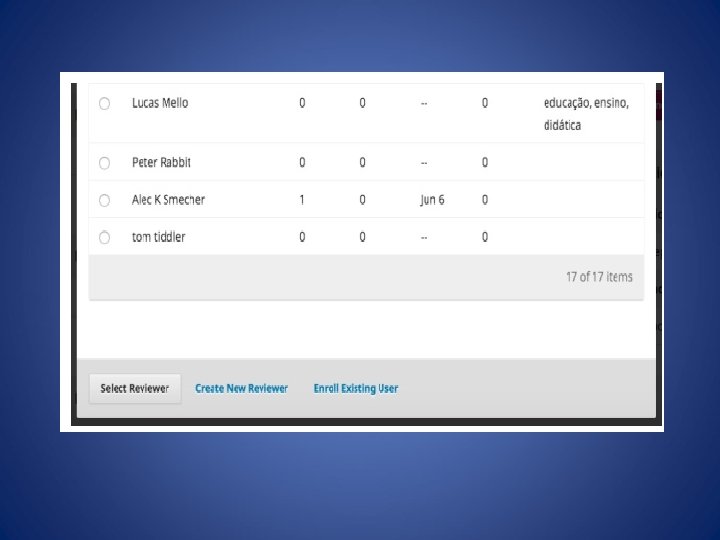
Note the details visible about the Reviewers, including their interests, past assignments, etc. At the bottom of this form, you will see options to:
• Select Reviewer: Use this to confirm your selection once you have picked a Reviewer from the list. • Create New Reviewer: If none of the Reviewers are suitable, you can use this button to create a new Reviewer. This is a new account in the system. • Enroll Existing User: If none of the Reviewers are suitable, you can enroll an existing user as a Reviewer.
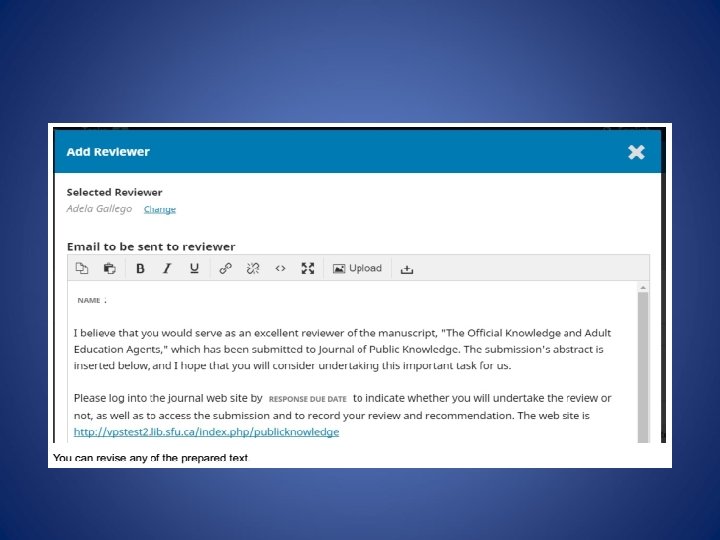
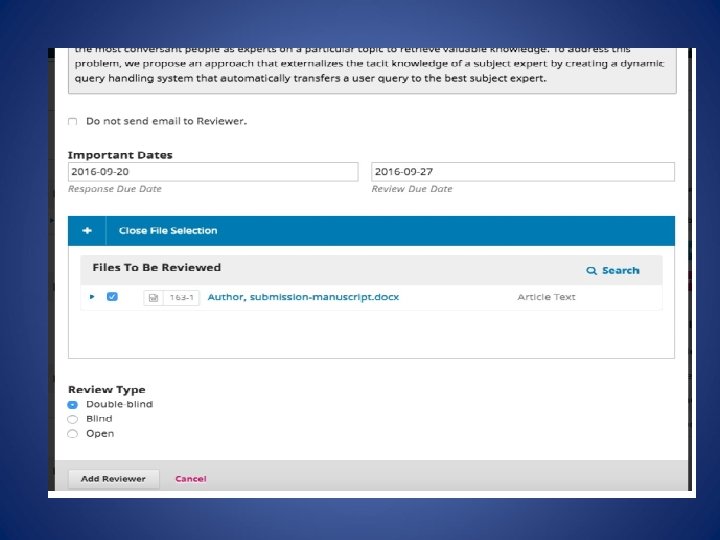
• You can revise any of the prepared text. If you are using a Blind Review method, ensure that the files you send to the Reviewer are stripped of any identifying information about the Author. • Further down the form, you will see the additional details that are sent to the Reviewer including title, abstract, important dates, and a link to the files to be reviewed.
• By default, Reviewers will be provided with an extended text box to type in their comments. • However, the Journal Manager can create Review Forms in Workflow Settings > Review to ask more focused questions. If you would like the Reviewer to fill out a review form, select it under Review Form.
Hit the Add Reviewer button to send the message and assign the Reviewer. Back on the Review Stage, we can see the Reviewer is now listed
• You can make additional changes using the blue arrow toggle next to the Reviewer's name
• Review Details: Provides details on the review.
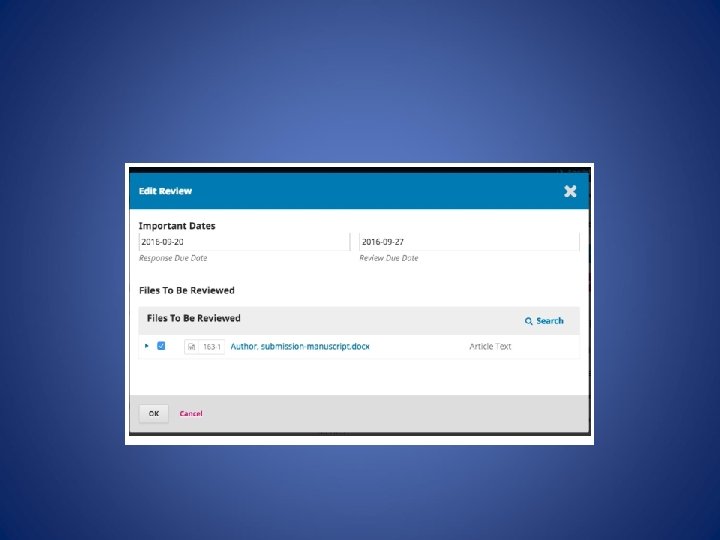
• Edit Review: Allows you to change the review dates and files.
• Unassign Reviewer: Allows you to unassign the Reviewer. History: Provides a brief history of the review.
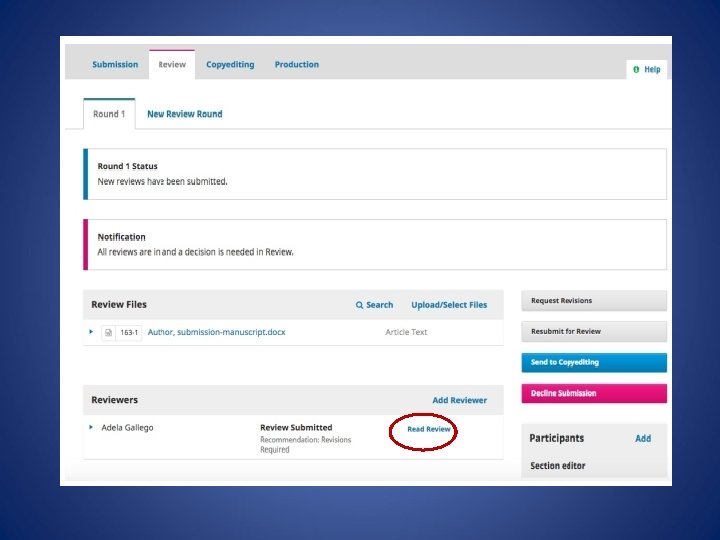
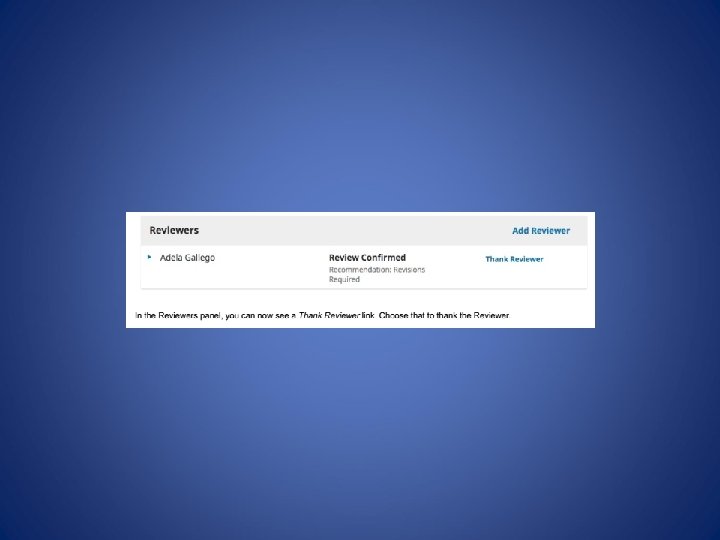
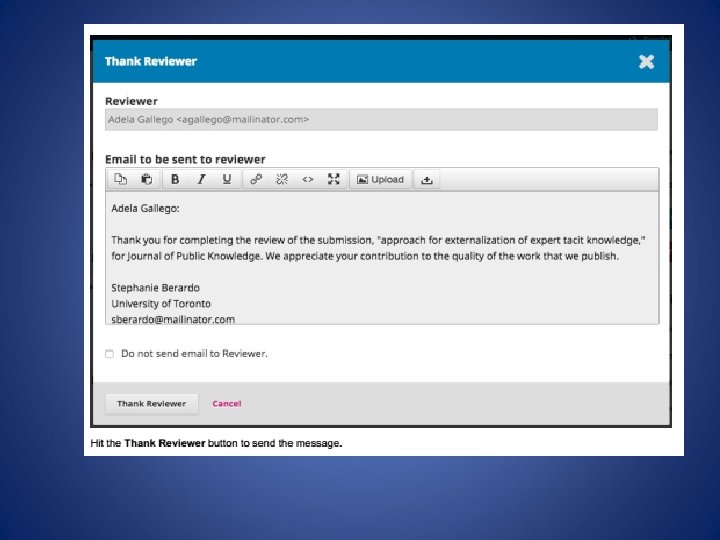
Responding to Reviews • Once the Reviewers have completed their work, the Section Editor can see the results in their dashboard. • Here they will see notifications that new reviews have been submitted and whether all reviews are in.
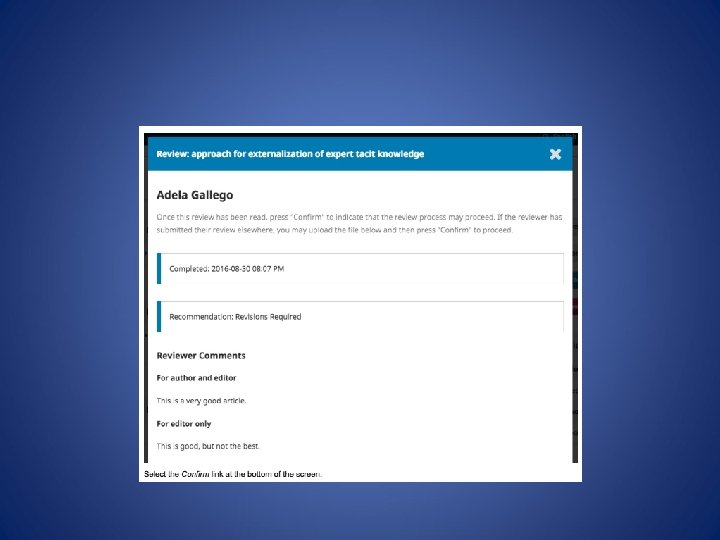
• Use the Read Review link in the Reviewers panel to read the comments from the Reviewers, including those for both the Author and Editor as well as for the Editor only.
Making the Decision • Based on the Reviewer recommendations, you can use the action buttons to make a decision
• Request Revisions: This will require the Author to make minor changes, but no further peer review is required. • Resubmit for Review: This will require the Author to make major changes and another round of review will need to take place.
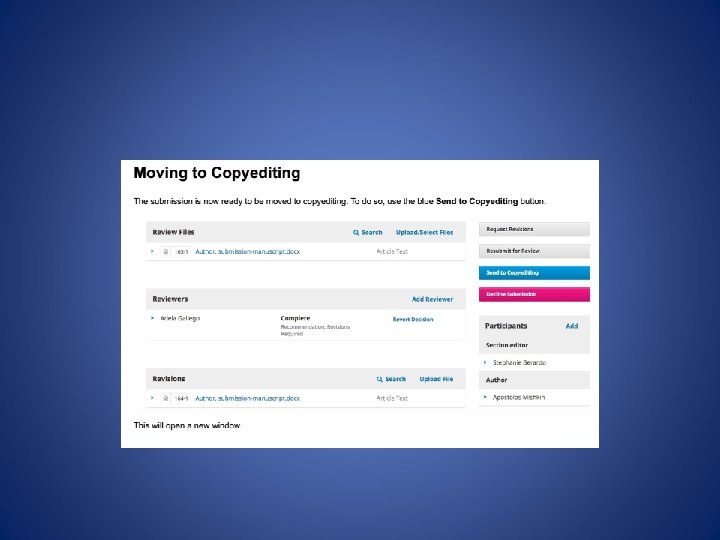
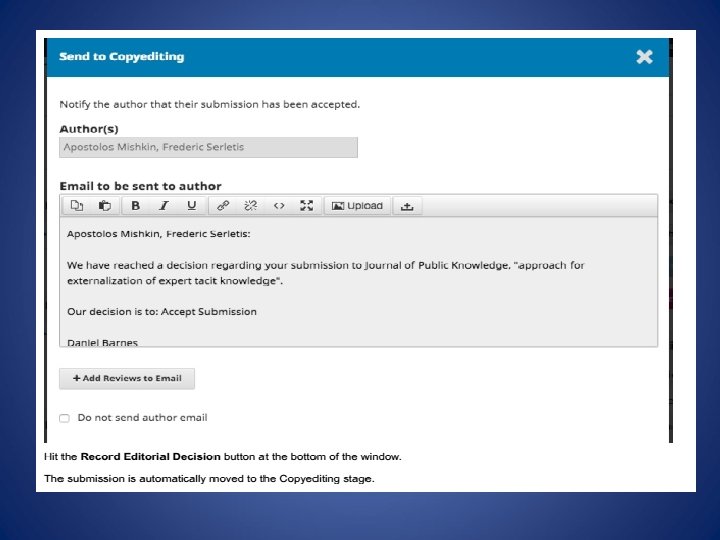
• Send to Copyediting: This means the submission is accepted without revisions and can proceed to the Copyediting stage. • Decline Submission: This means that the submission has not passed peer review and is unsuitable for further consideration. The submission would then move to the Archives.
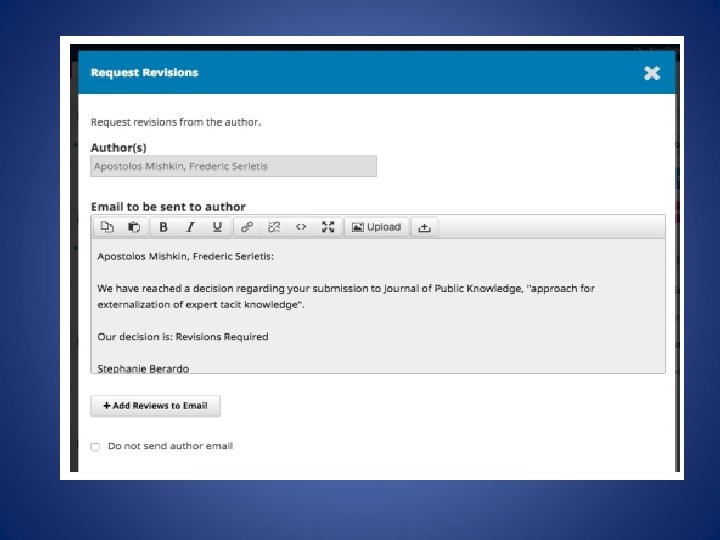
Request Revisions • In this demonstration, we are going to request that the Author make some minor revisions before acceptance. • To do so, select the Request Revisions button. This results in a new message window.
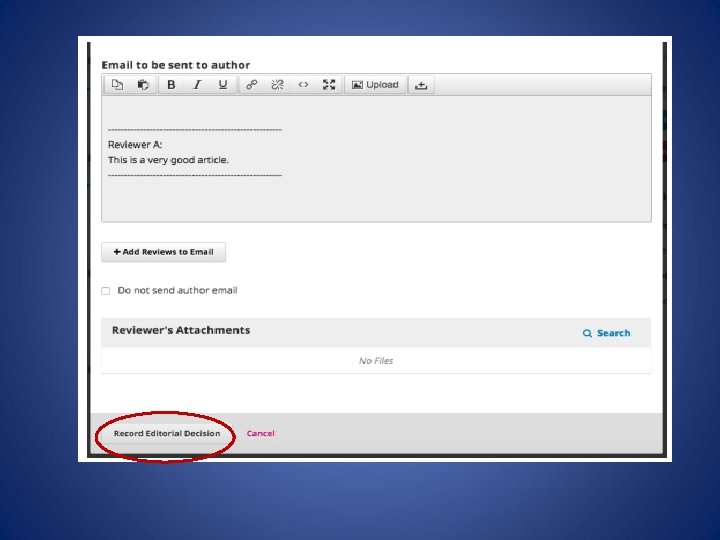
• You can modify any of the text before sending the message. • Use the Add Reviews button to Reviewer's comments from the Author field. Comments in only field will not be import the Editor and the Editor displayed.
• If there any attachments, such as marked up file created by a Reviewer, you can attach it here (as long as it has been anonymized). • Hit the Record Editorial Decision button to send the message. • You must now wait for the Author to respond with her revisions.
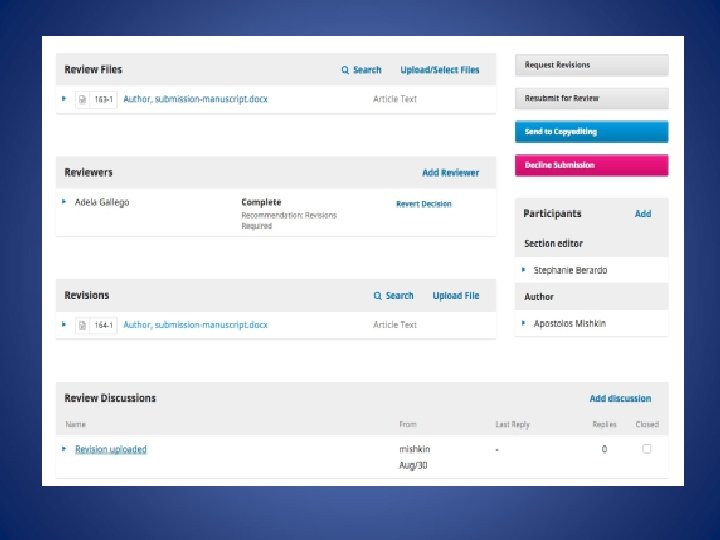
Author Responds • Once the Author has made the revisions, you should receive a message (via email and the Review Discussions panel).
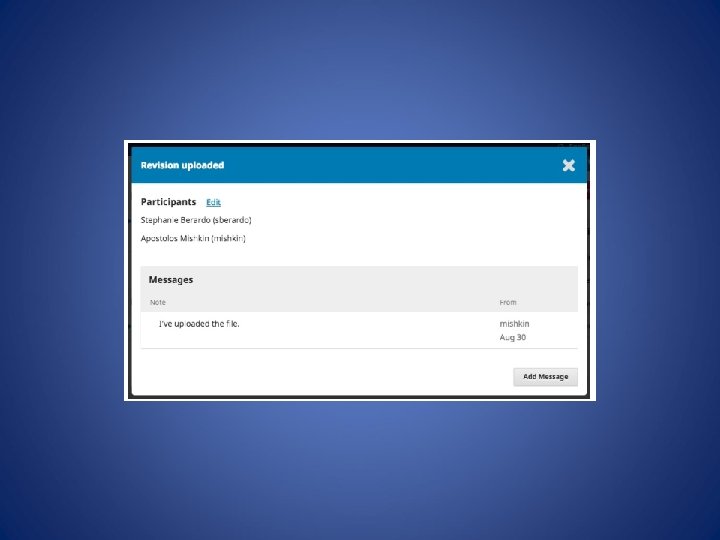
• You will also see the revised file in the Revisions panel. At this point, you can download the revised file, check to make sure it is ready, and communicate with the Author using the Review Discussions panel. • In this case, we're going to inform the Author that we are accepting the revisions. To do so, click on the linked title of the discussion. This will open the discussion box.
• Use the Add Message button to reply
Copyediting Stage • Accepted articles move to this stage, where they are improved by the work of a copyeditor. • Authors can be given the opportunity to review the copyedits. •
Production Stage • Once the copyedits are completed and approved, the submission moves to this stage. • In Production, the copyedited files are converted to galleys -- HTML, XML, PDF, etc. • Again the author has the opportunity to proofread the galleys. • Once everyone is satisfied, the submission is scheduled for publication in a future issue.