GDT Inspection David Mihal Regional Manager Richard Nelson






- Slides: 82

GD&T Inspection David Mihal Regional Manager Richard Nelson Applications Engineer

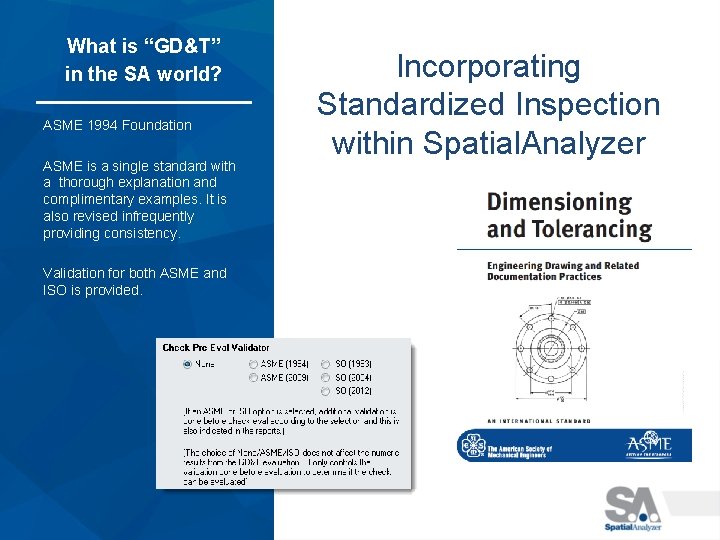
What is “GD&T” in the SA world? ASME 1994 Foundation ASME is a single standard with a thorough explanation and complimentary examples. It is also revised infrequently providing consistency. Validation for both ASME and ISO is provided. Incorporating Standardized Inspection within Spatial. Analyzer

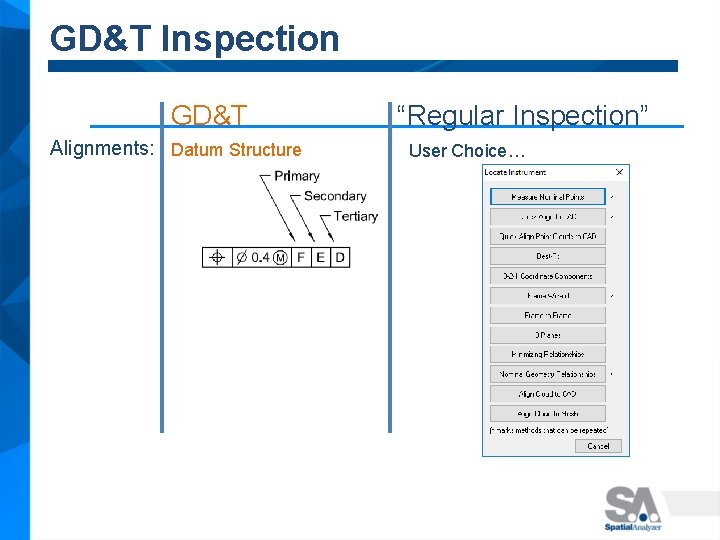
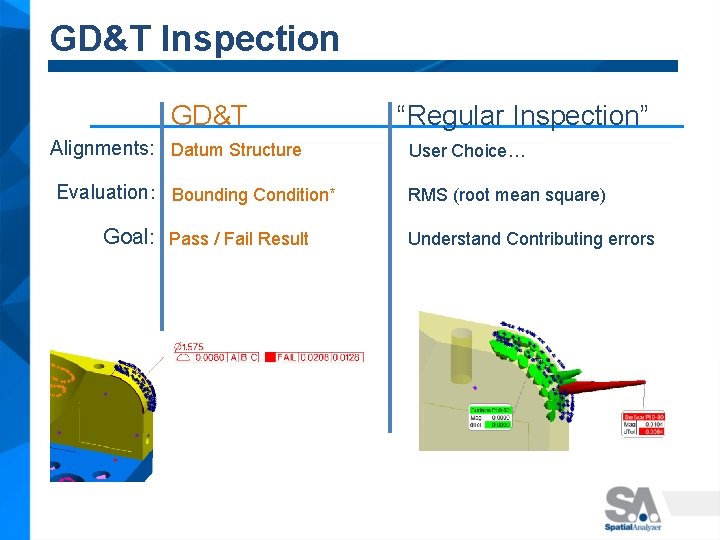
GD&T Inspection GD&T Alignments: Datum Structure “Regular Inspection” User Choice…

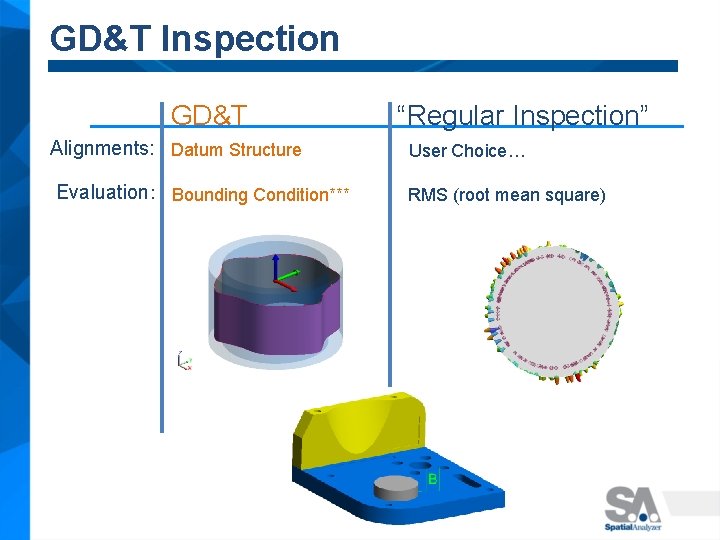
GD&T Inspection GD&T Alignments: Datum Structure Evaluation: Bounding Condition*** “Regular Inspection” User Choice… RMS (root mean square)

GD&T Inspection GD&T Alignments: Datum Structure Evaluation: Bounding Condition* Goal: Pass / Fail Result “Regular Inspection” User Choice… RMS (root mean square) Understand Contributing errors

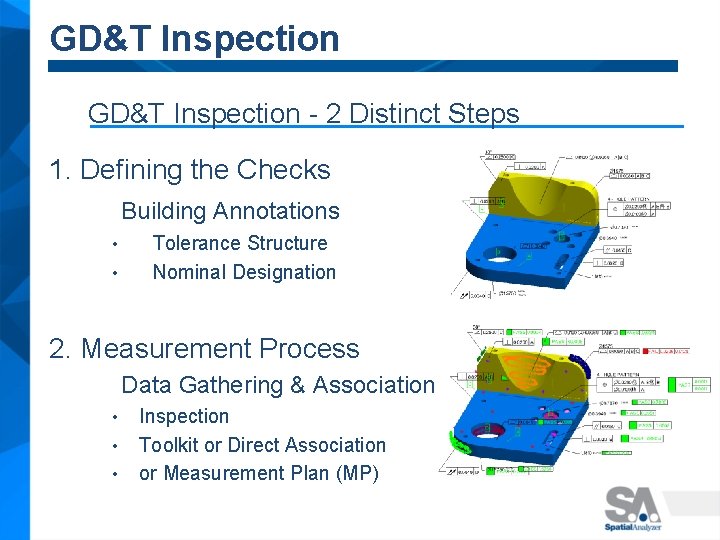
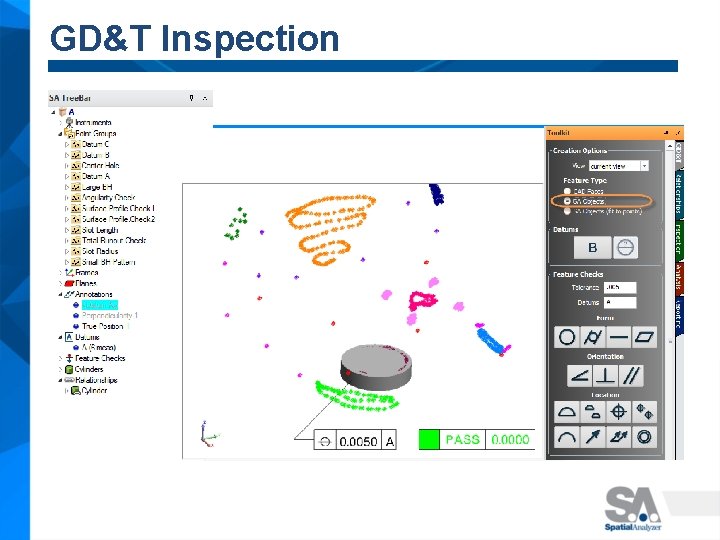
GD&T Inspection - 2 Distinct Steps 1. Defining the Checks Building Annotations • • Tolerance Structure Nominal Designation 2. Measurement Process Data Gathering & Association • • • Inspection Toolkit or Direct Association or Measurement Plan (MP)

Building Annotations The Definition and Details for a Check

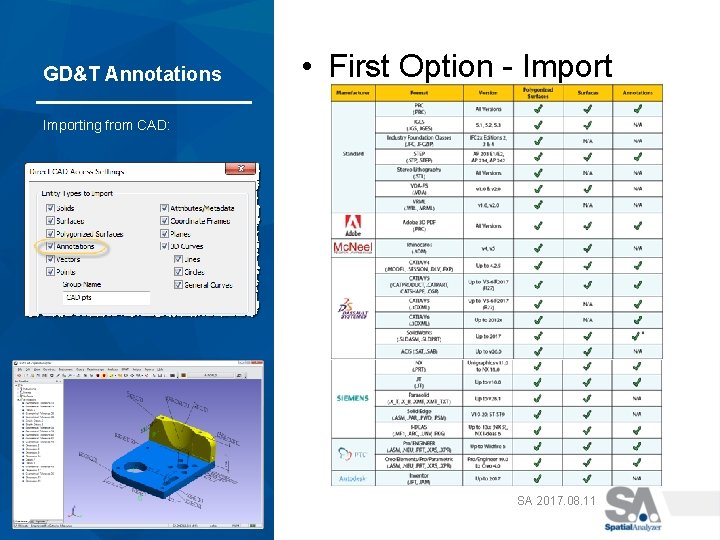
GD&T Annotations • First Option - Importing from CAD: SA 2017. 08. 11

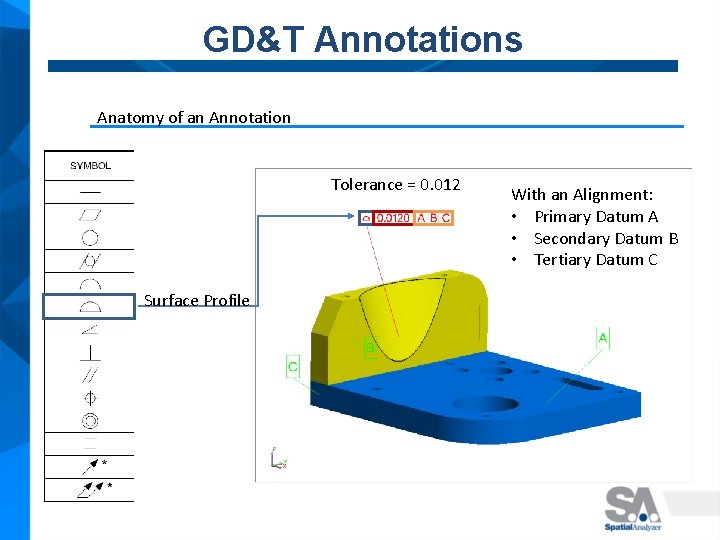
GD&T Annotations Anatomy of an Annotation Tolerance = 0. 012 Surface Profile With an Alignment: • Primary Datum A • Secondary Datum B • Tertiary Datum C

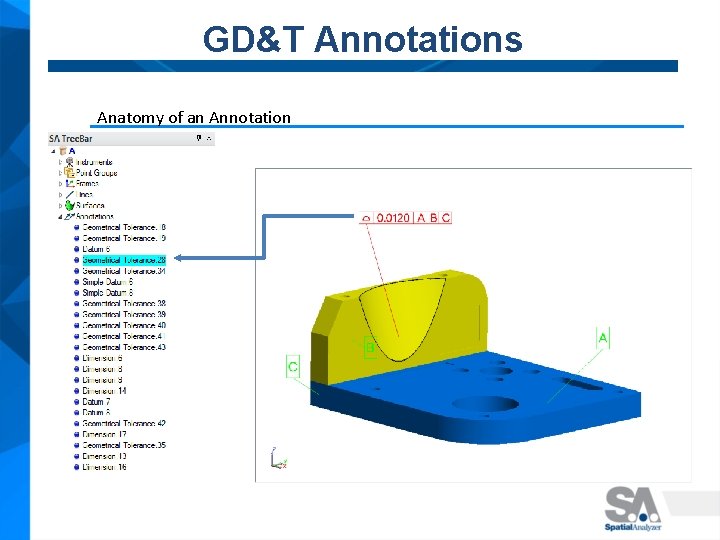
GD&T Annotations Anatomy of an Annotation

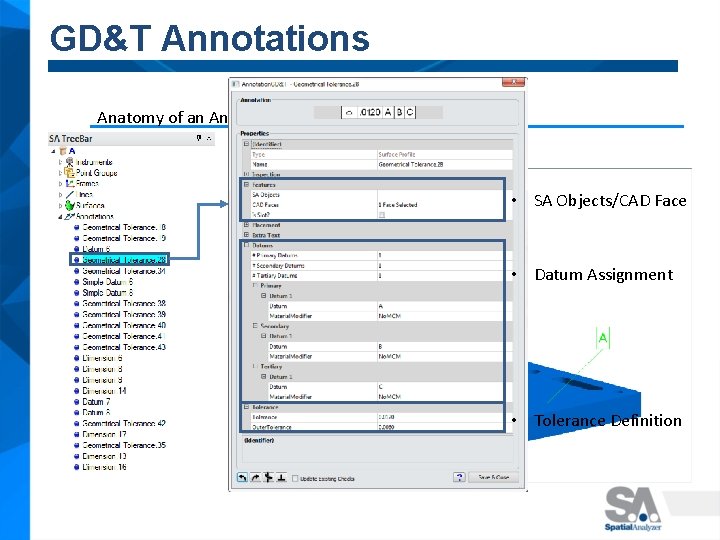
GD&T Annotations Anatomy of an Annotation • SA Objects/CAD Face • Datum Assignment • Tolerance Definition

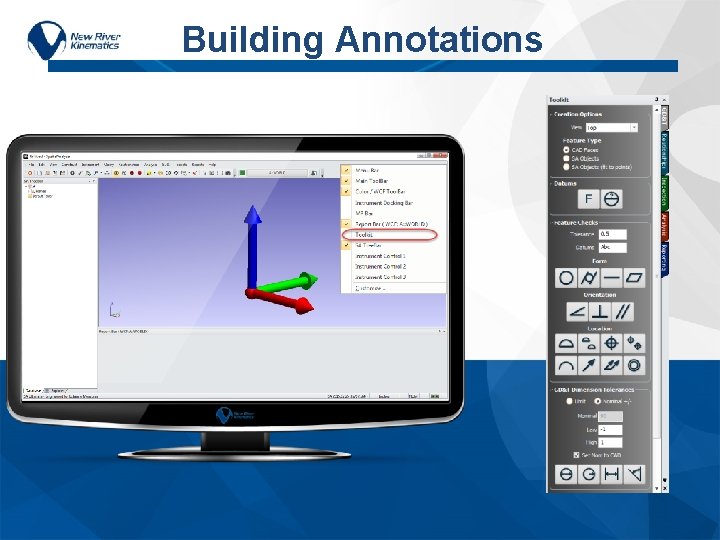
Building Annotations

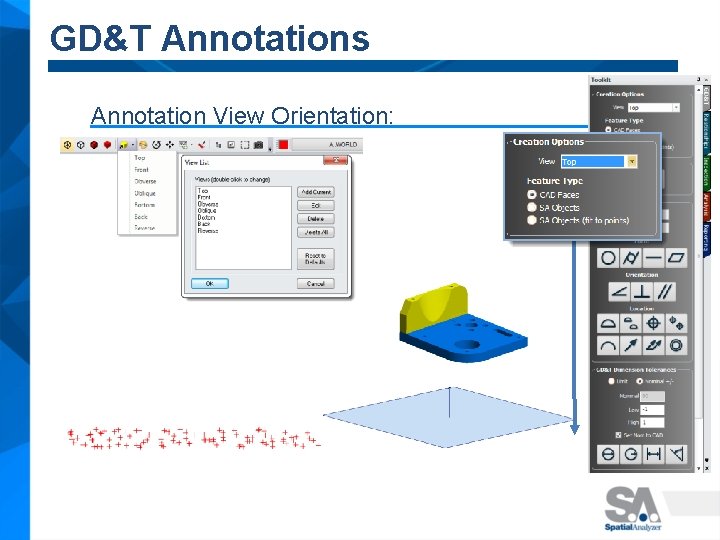
GD&T Annotations Annotation View Orientation:

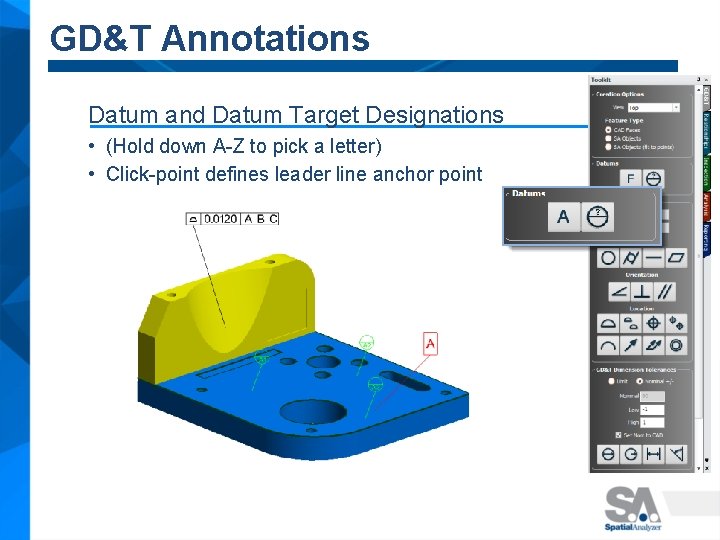
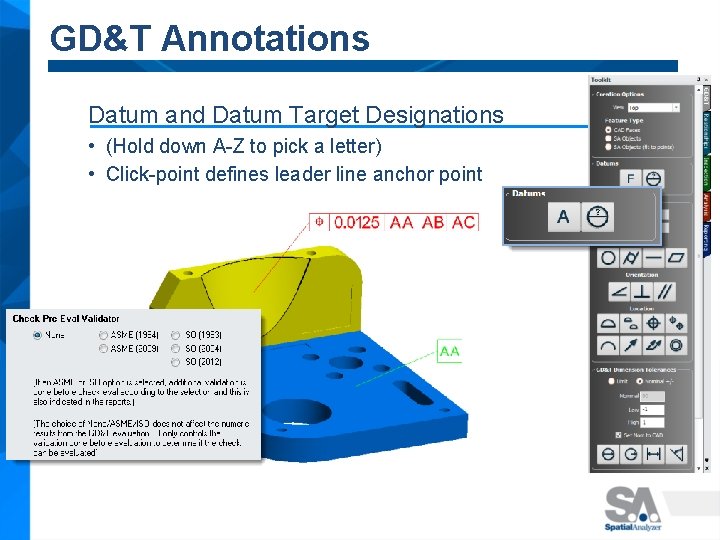
GD&T Annotations Datum and Datum Target Designations • (Hold down A-Z to pick a letter) • Click-point defines leader line anchor point

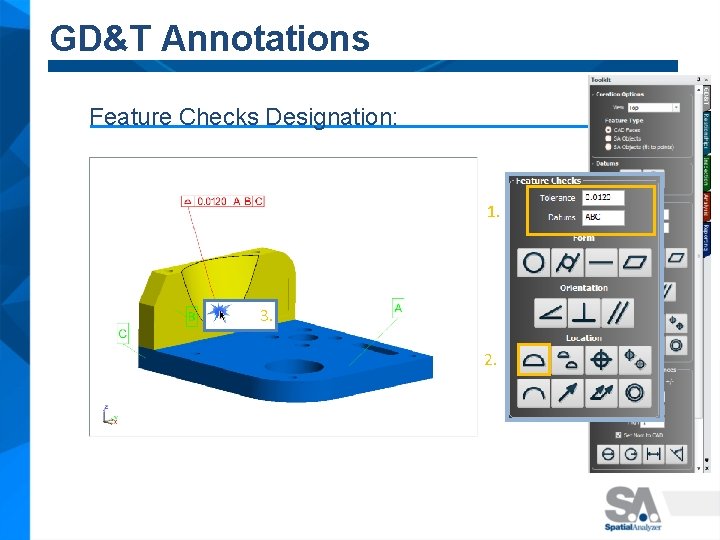
GD&T Annotations Feature Checks Designation: 1. 3. 2.

GD&T Inspection - 2 Distinct Steps 1. Defining the Checks Building Annotations • • Tolerance Structure Nominal Designation 2. Measurement Process Data Gathering & Association • • • Inspection Toolkit or Direct Association or Measurement Plan (MP)

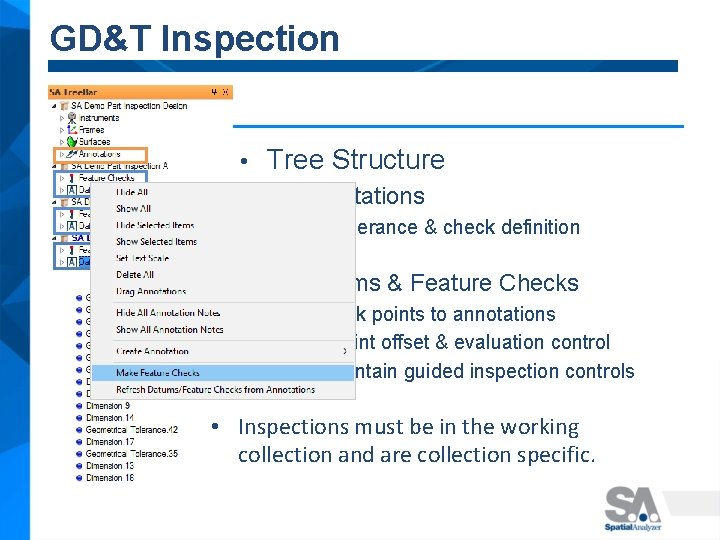
GD&T Inspection • Tree Structure – Annotations • – Tolerance & check definition Datums & Feature Checks Link points to annotations • Point offset & evaluation control • Contain guided inspection controls • • Inspections must be in the working collection and are collection specific.

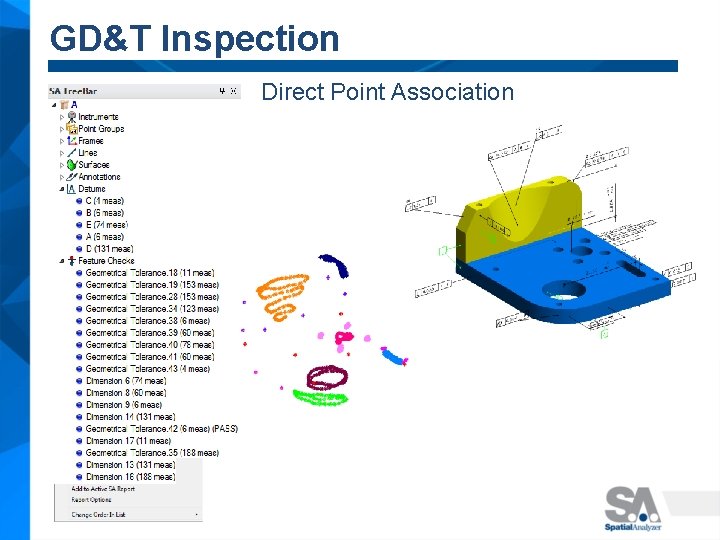
GD&T Inspection Direct Point Association

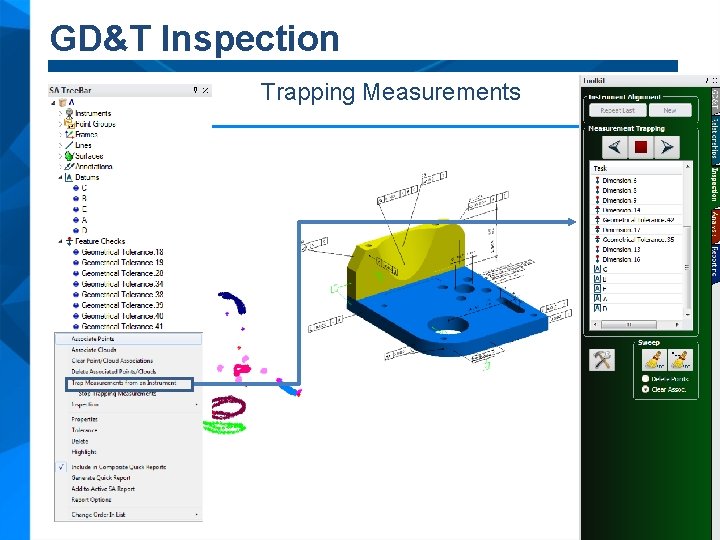
GD&T Inspection Trapping Measurements

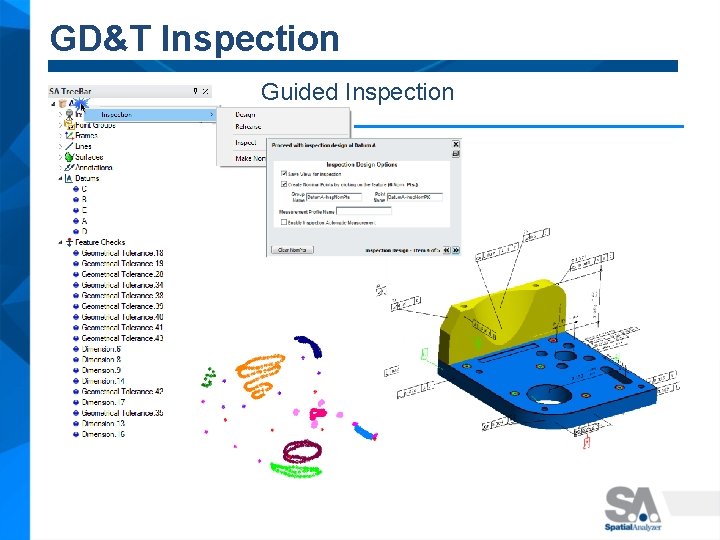
GD&T Inspection Guided Inspection

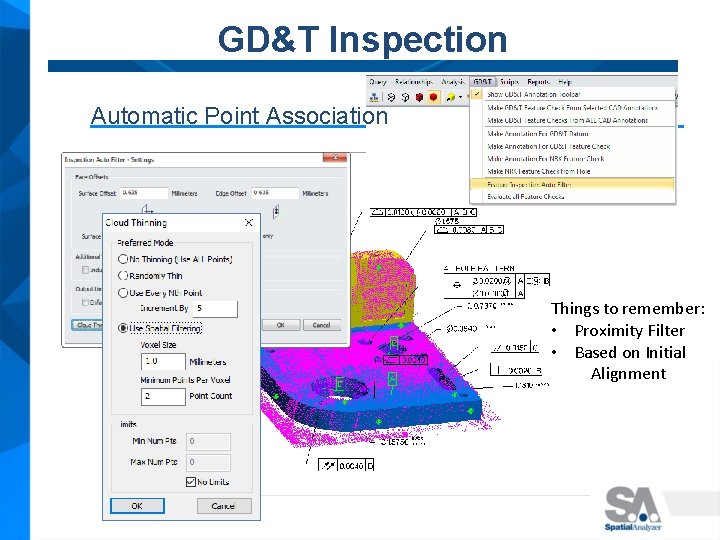
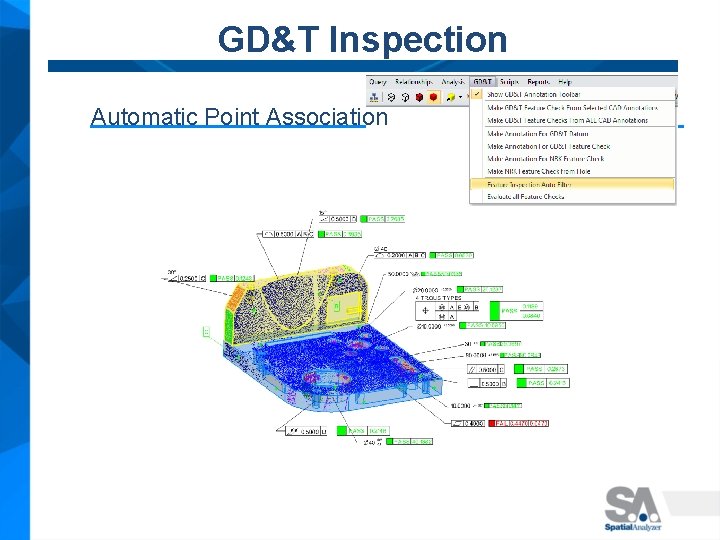
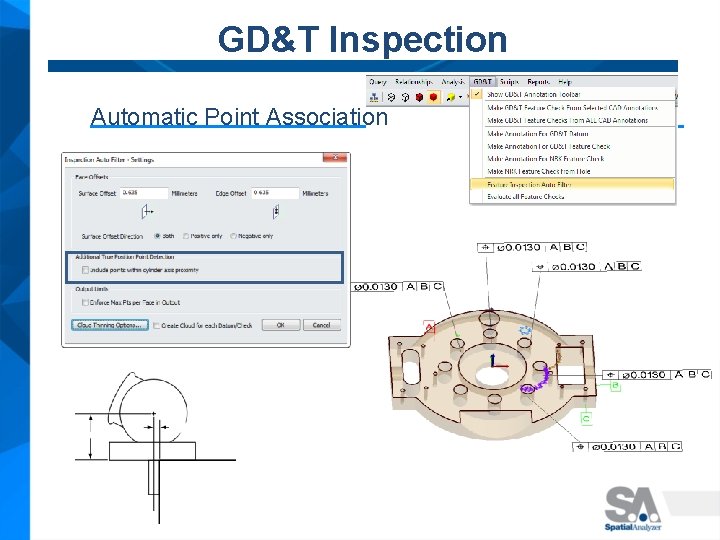
GD&T Inspection Automatic Point Association Things to remember: • Proximity Filter • Based on Initial Alignment

GD&T Inspection Automatic Point Association

GD&T Inspection Automatic Point Association

Working Without CAD Remember Your Basics

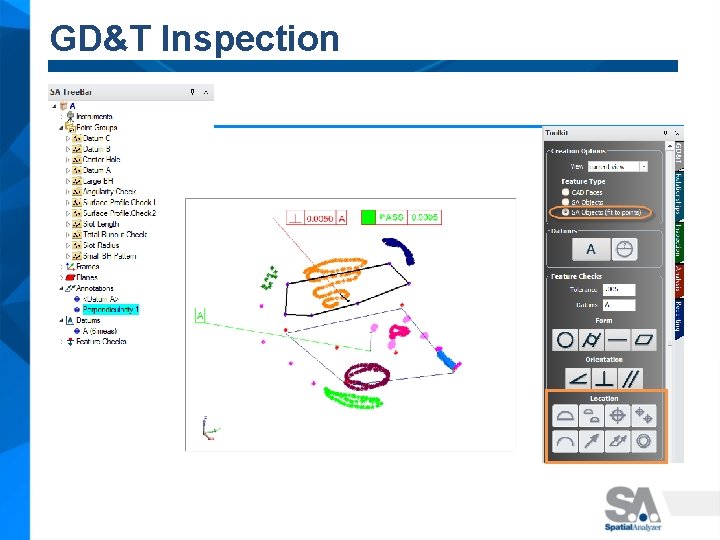
GD&T Inspection

GD&T Inspection

Report Options

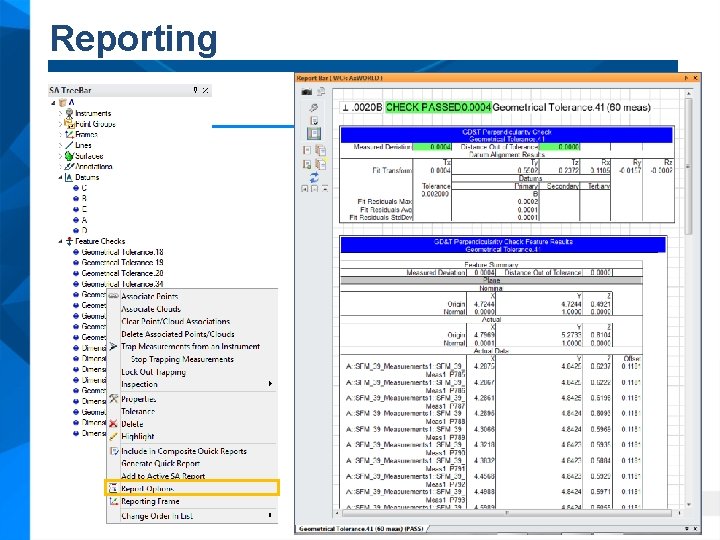
Reporting

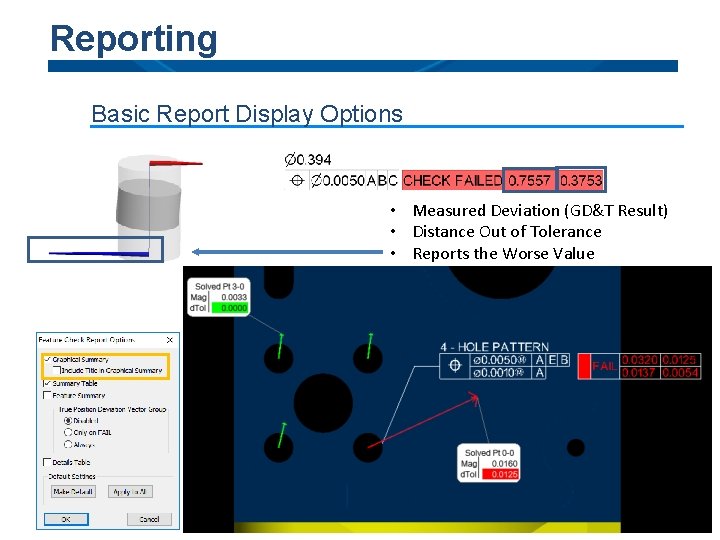
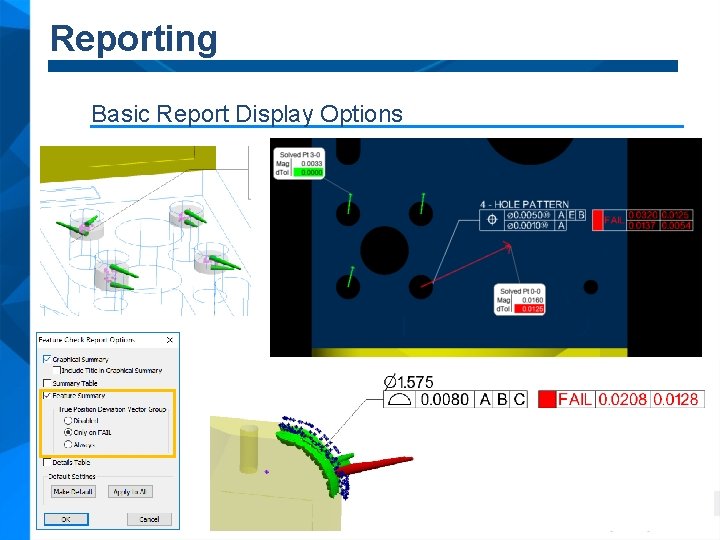
Reporting Basic Report Display Options • Measured Deviation (GD&T Result) • Distance Out of Tolerance • Reports the Worse Value

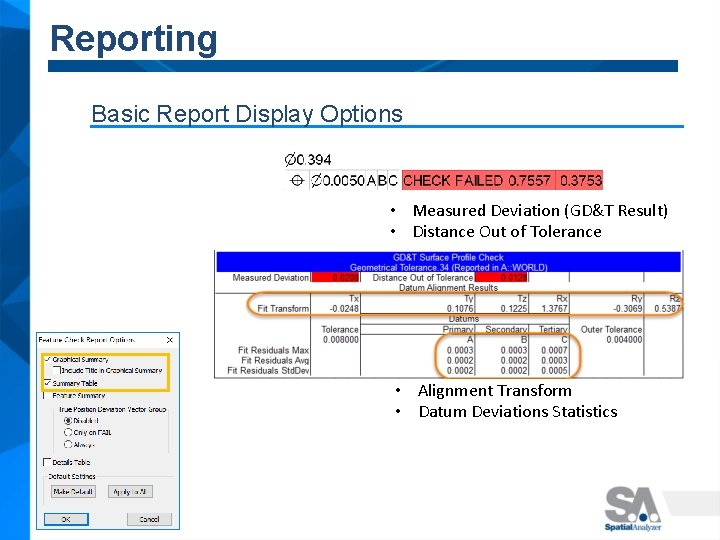
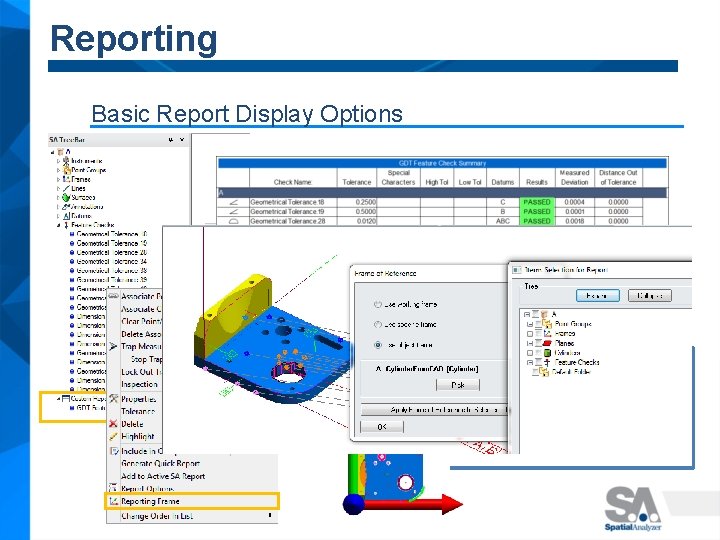
Reporting Basic Report Display Options • Measured Deviation (GD&T Result) • Distance Out of Tolerance • Alignment Transform • Datum Deviations Statistics

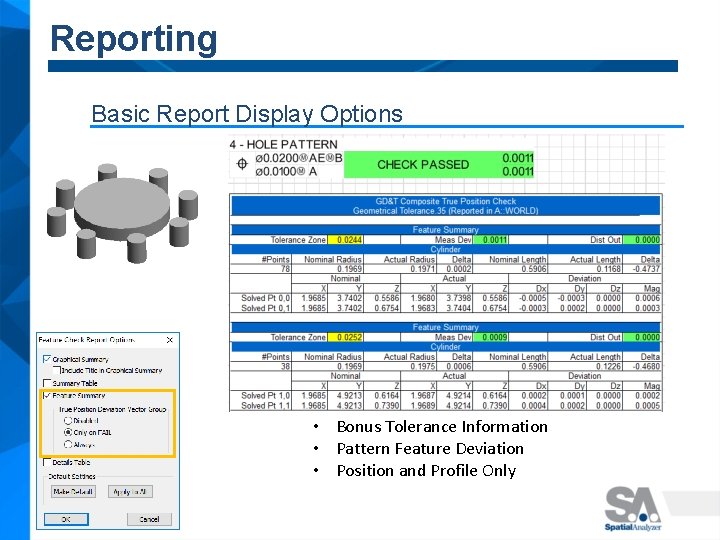
Reporting Basic Report Display Options • Bonus Tolerance Information • Pattern Feature Deviation • Position and Profile Only

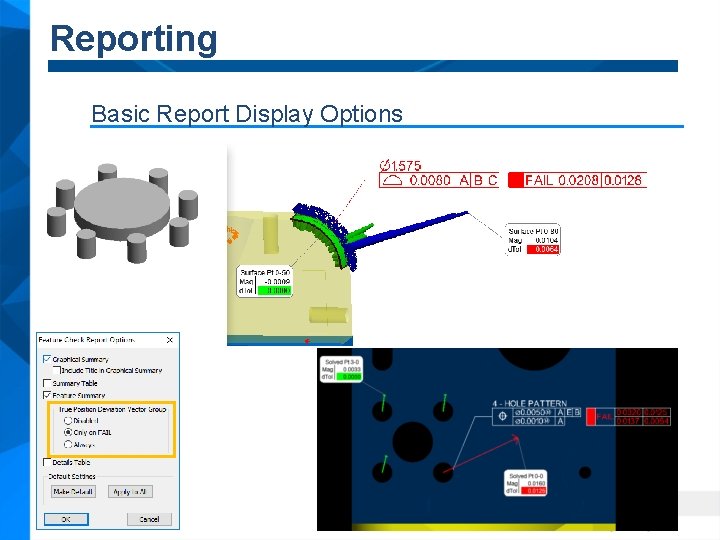
Reporting Basic Report Display Options

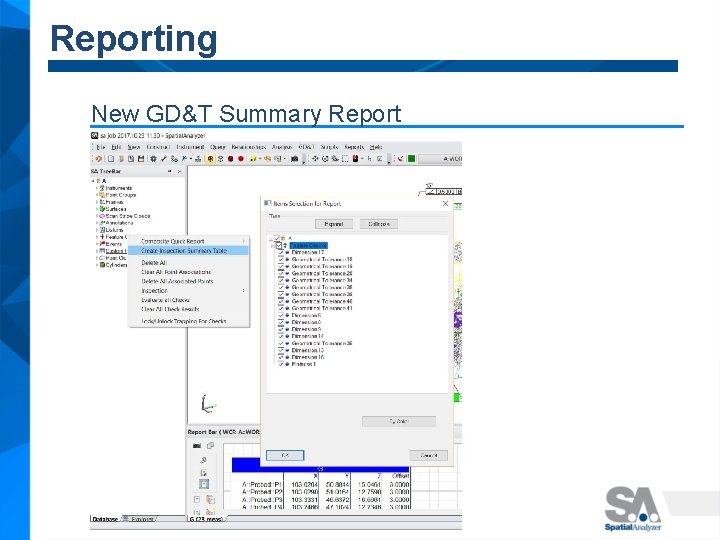
Reporting New GD&T Summary Report

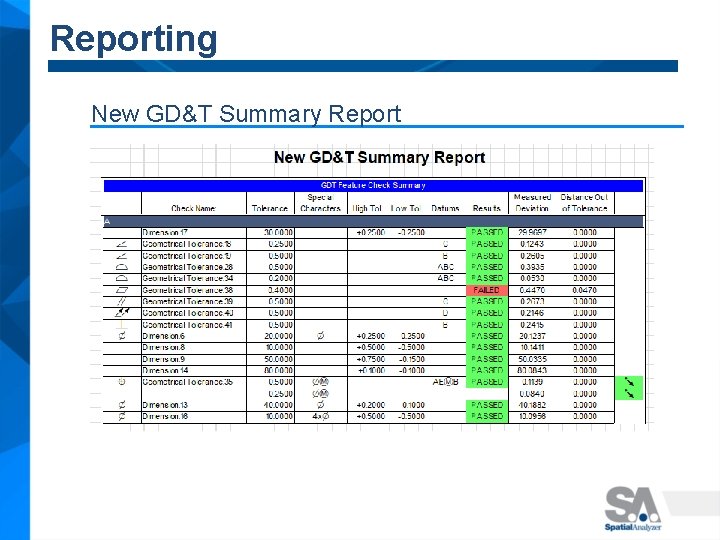
Reporting New GD&T Summary Report

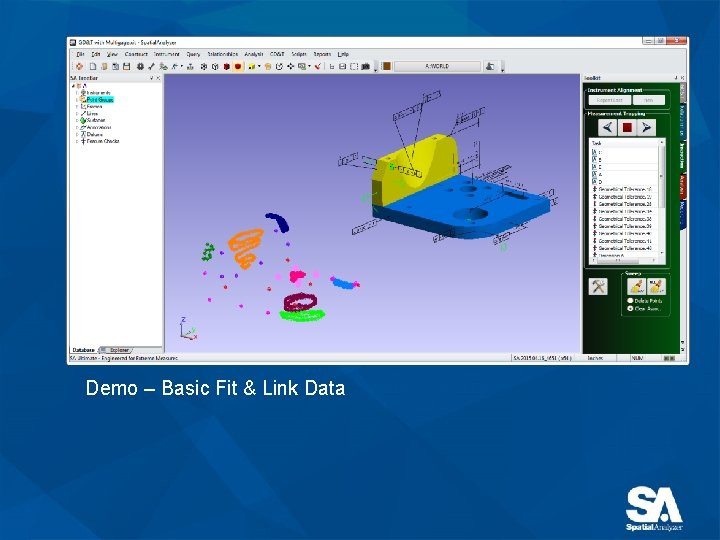
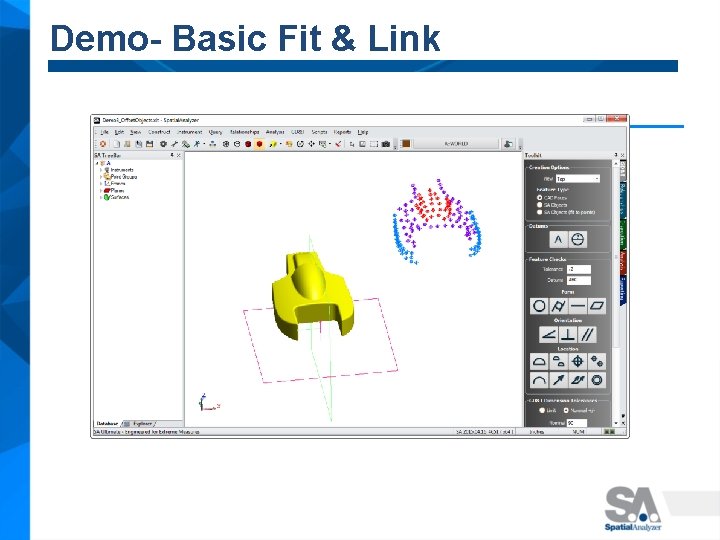
Demo – Basic Fit & Link Data

Getting into the Details Understanding Check Types

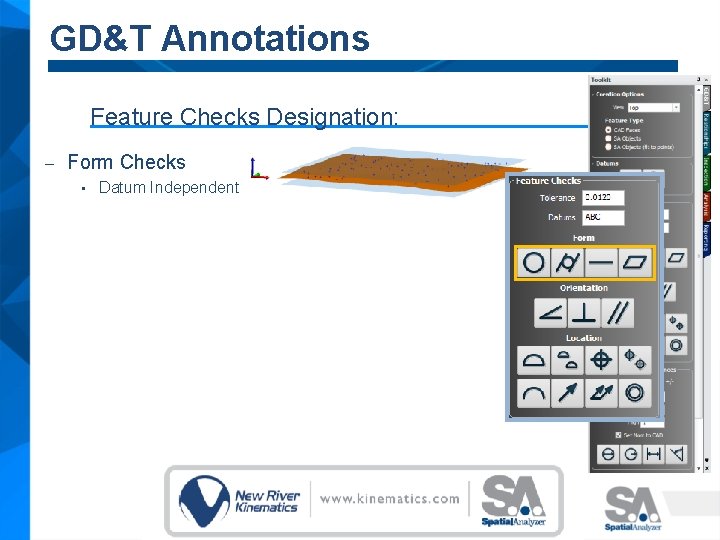
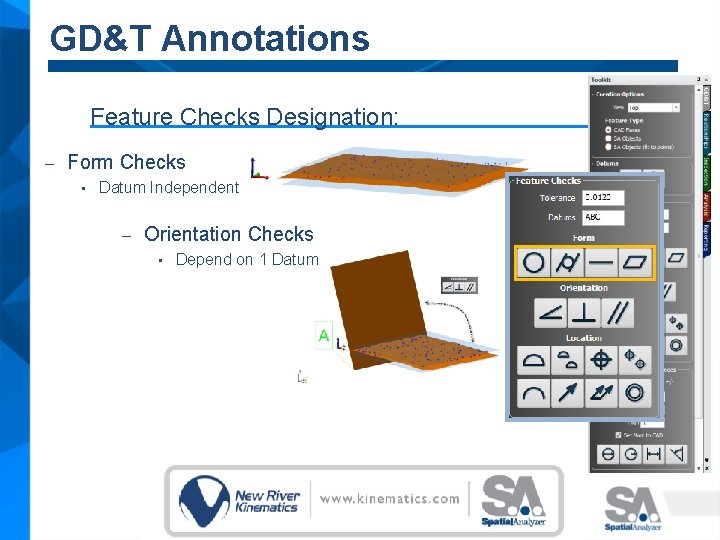
GD&T Annotations Feature Checks Designation: – Form Checks • Datum Independent

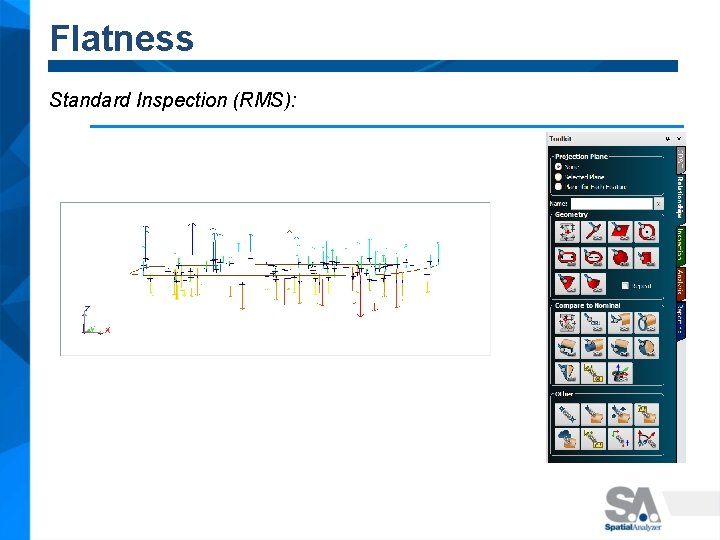
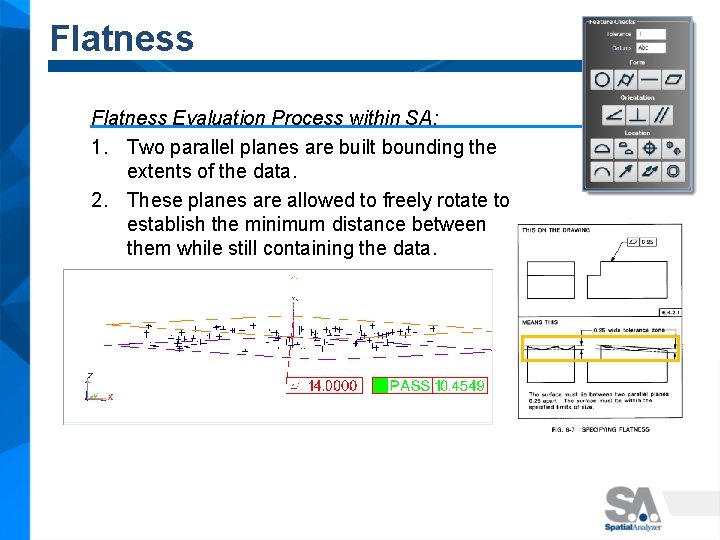
Flatness Standard Inspection (RMS):

Flatness Evaluation Process within SA: 1. Two parallel planes are built bounding the extents of the data. 2. These planes are allowed to freely rotate to establish the minimum distance between them while still containing the data.

GD&T Annotations Feature Checks Designation: – Form Checks • Datum Independent – Orientation Checks • Depend on 1 Datum

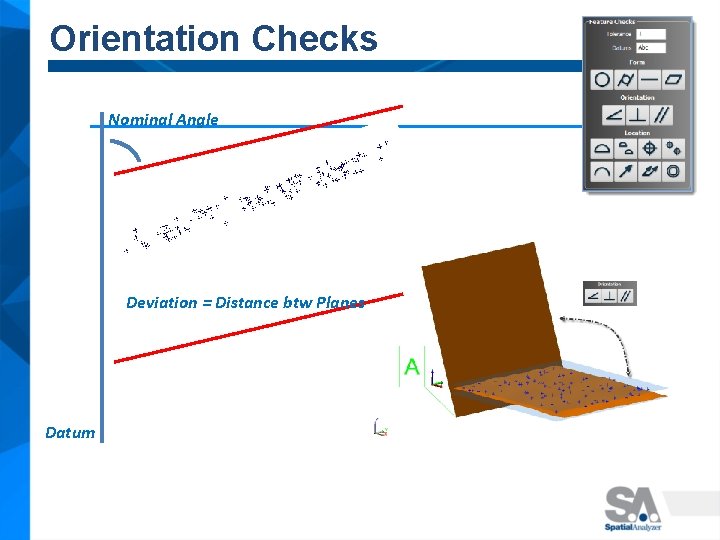
Orientation Checks Nominal Angle Deviation = Distance btw Planes Datum

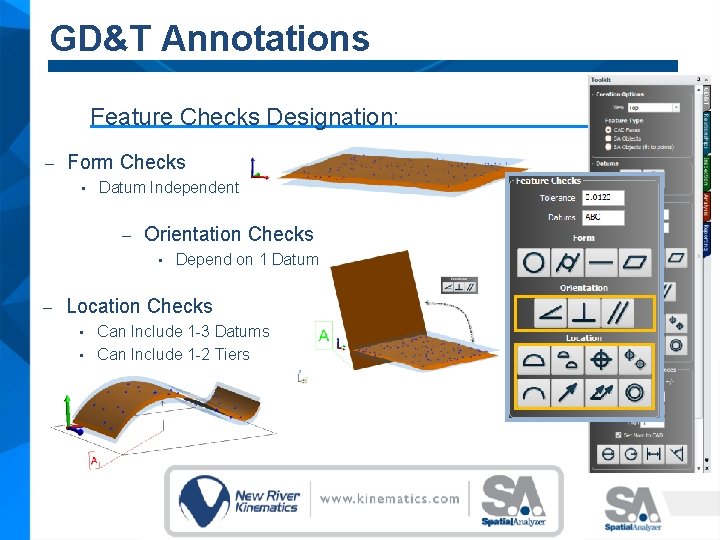
GD&T Annotations Feature Checks Designation: – Form Checks • Datum Independent – Orientation Checks • – Depend on 1 Datum Location Checks Can Include 1 -3 Datums • Can Include 1 -2 Tiers •

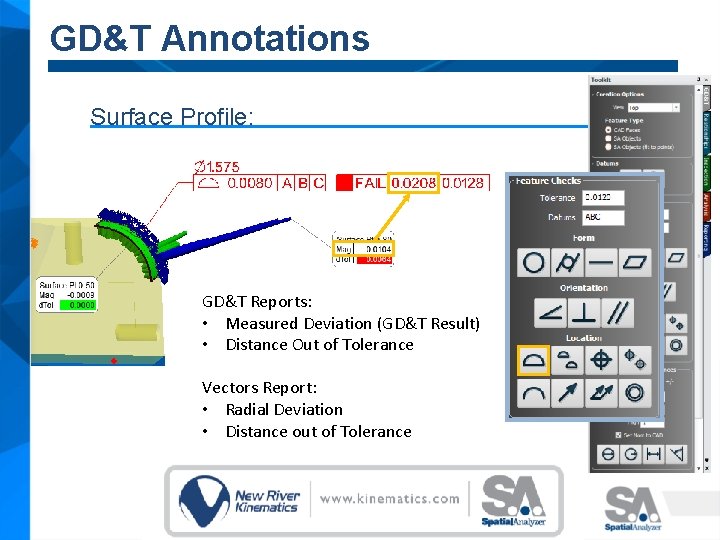
GD&T Annotations Surface Profile: GD&T Reports: • Measured Deviation (GD&T Result) • Distance Out of Tolerance Vectors Report: • Radial Deviation • Distance out of Tolerance

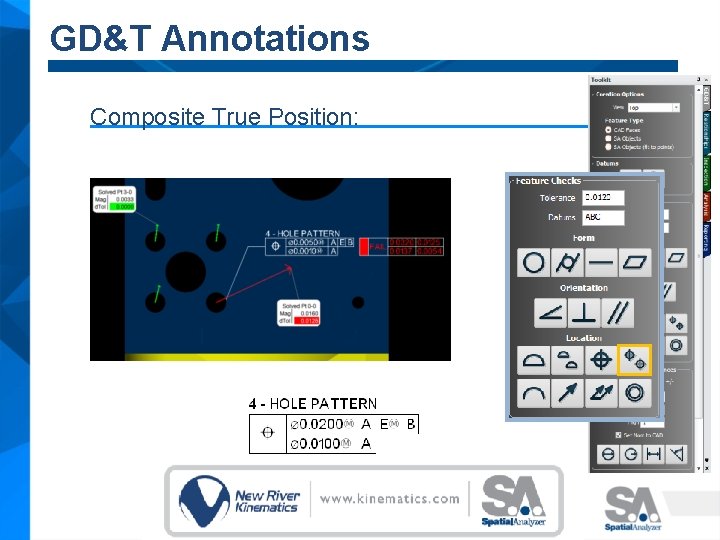
GD&T Annotations Composite True Position:

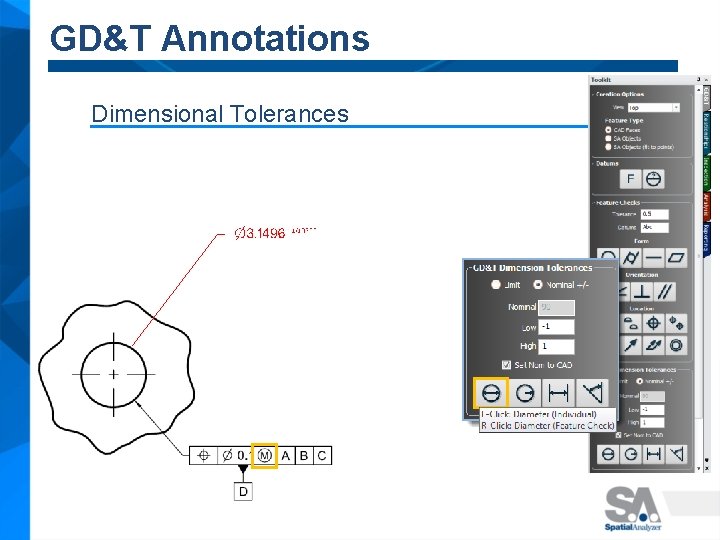
GD&T Annotations Dimensional Tolerances

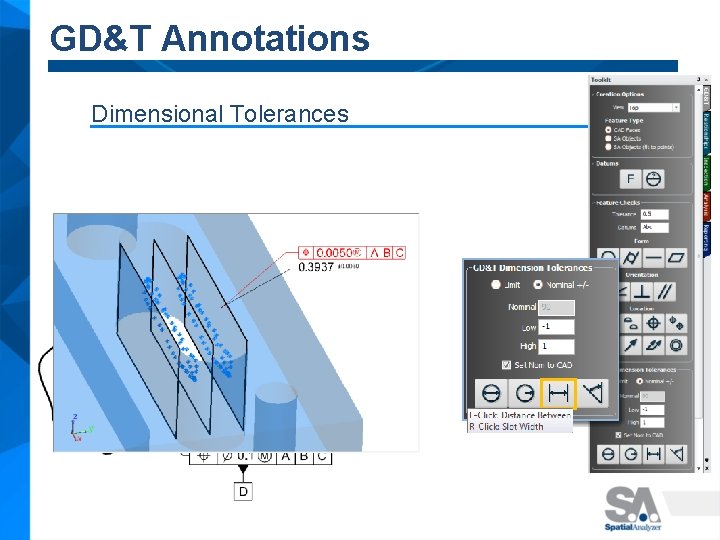
GD&T Annotations Dimensional Tolerances

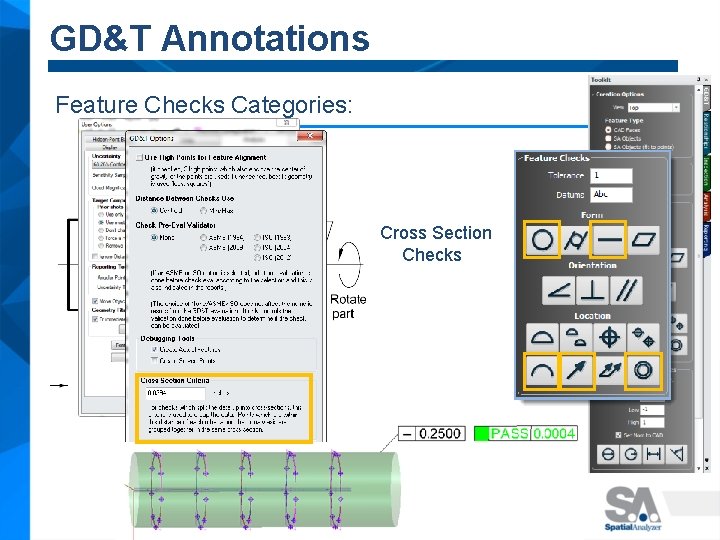
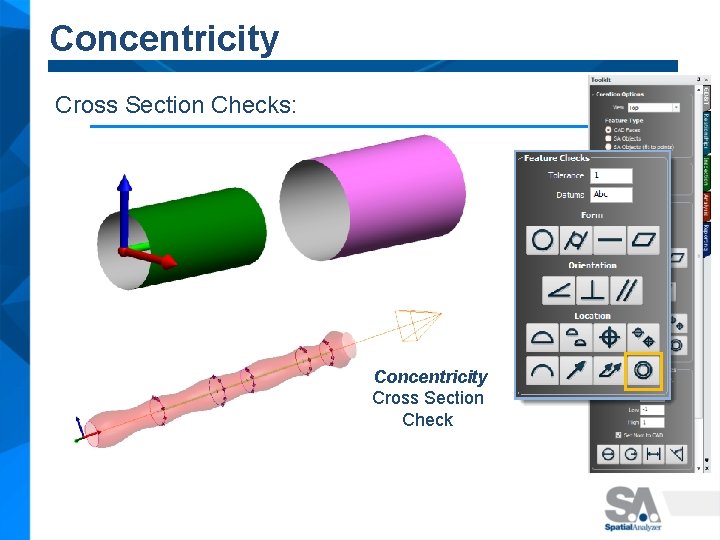
GD&T Annotations Feature Checks Categories: Cross Section Checks

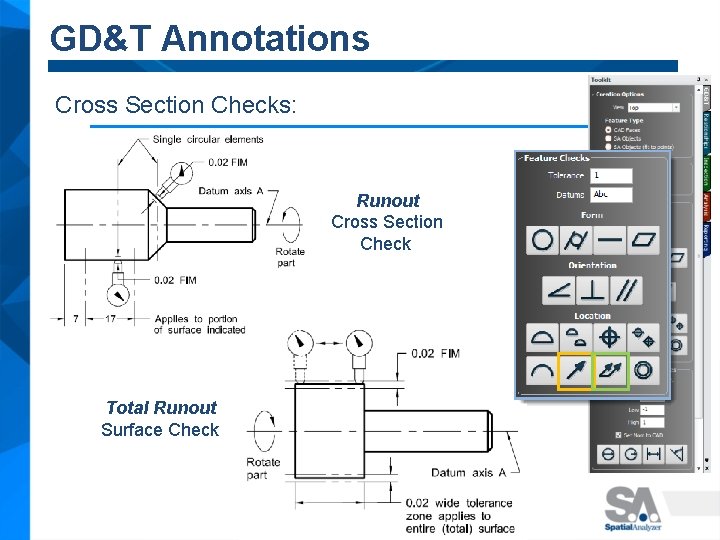
GD&T Annotations Cross Section Checks: Runout Cross Section Check Total Runout Surface Check

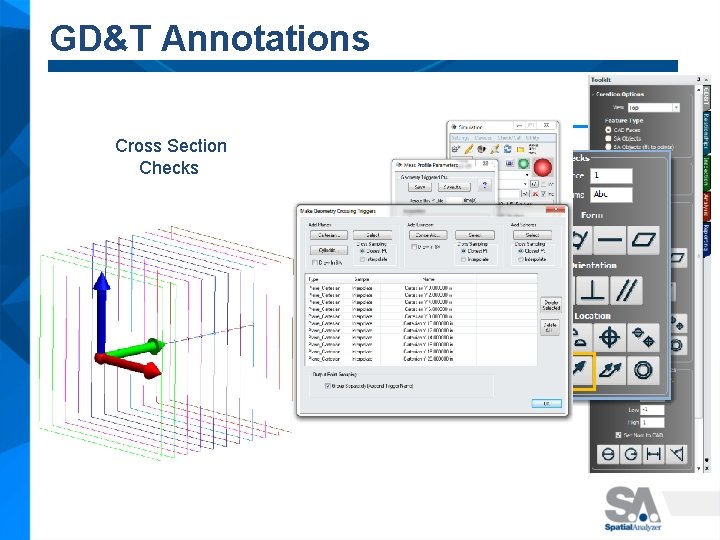
GD&T Annotations Cross Section Checks

Feature Check Properties Going a Bit Deeper

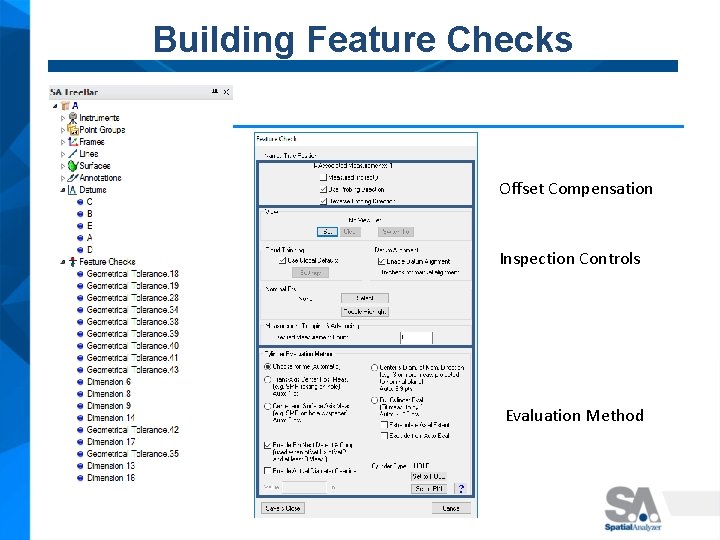
Building Feature Checks Offset Compensation Inspection Controls Evaluation Method

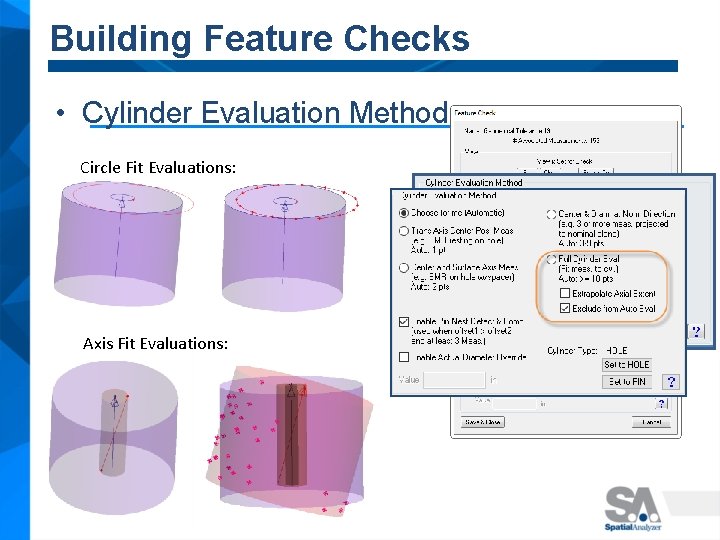
Building Feature Checks • Cylinder Evaluation Method Circle Fit Evaluations: Axis Fit Evaluations:

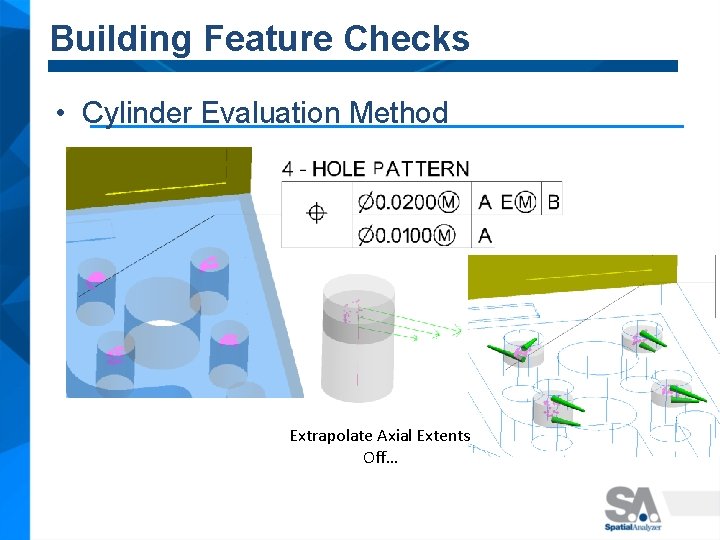
Building Feature Checks • Cylinder Evaluation Method Extrapolate Axial Extents Off…

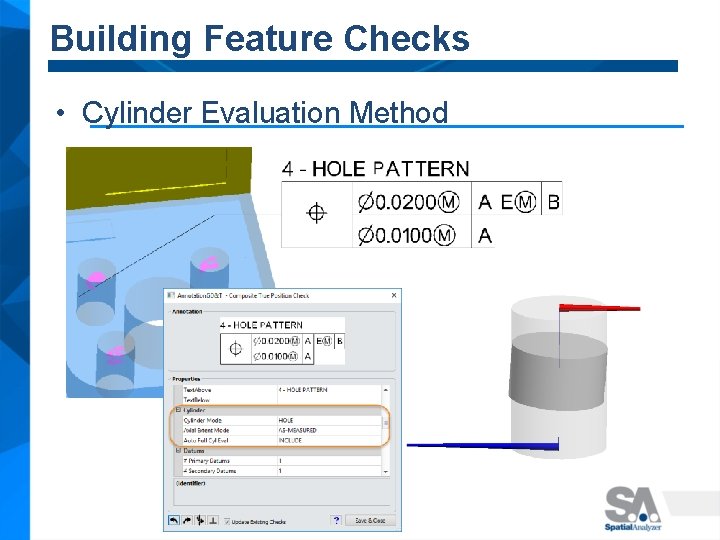
Building Feature Checks • Cylinder Evaluation Method

Datum Alignment

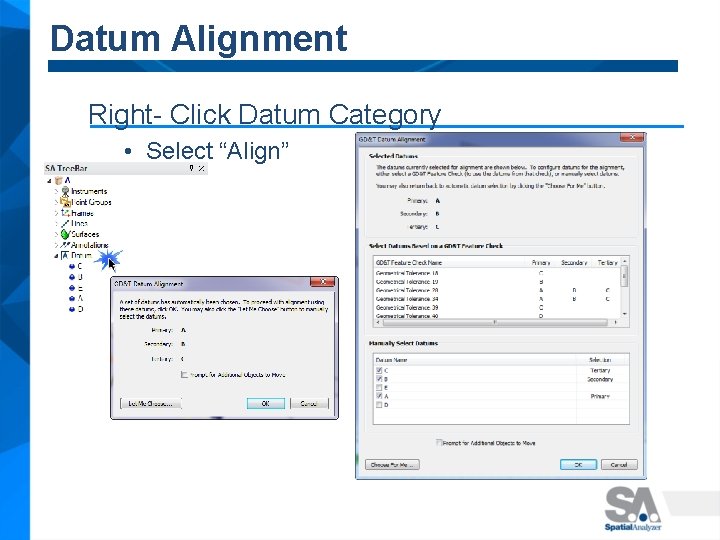
Datum Alignment Right- Click Datum Category • Select “Align”

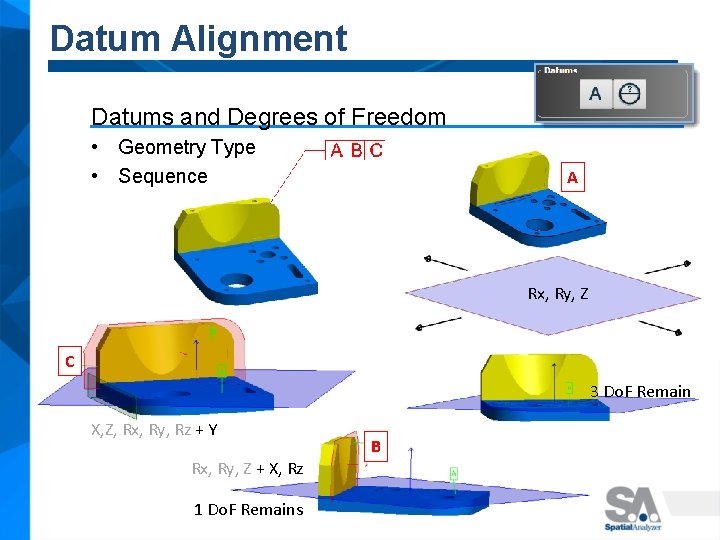
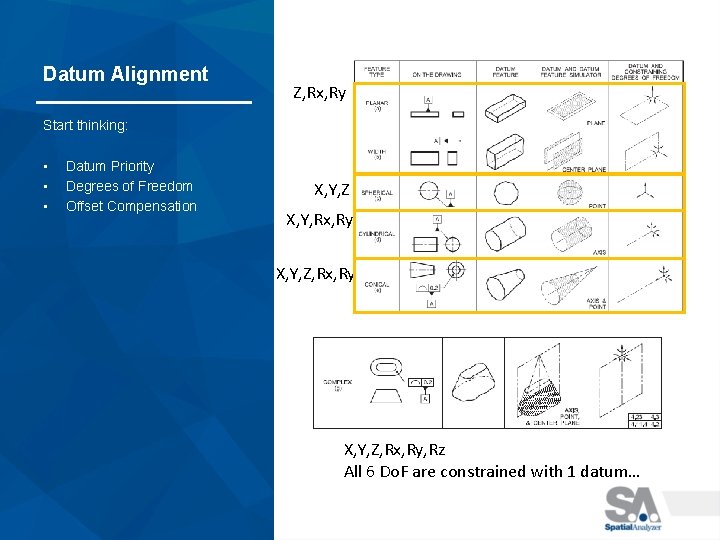
Datum Alignment Datums and Degrees of Freedom • Geometry Type • Sequence A Rx, Ry, Z C 3 Do. F Remain X, Z, Rx, Ry, Rz + Y Rx, Ry, Z + X, Rz 1 Do. F Remains B

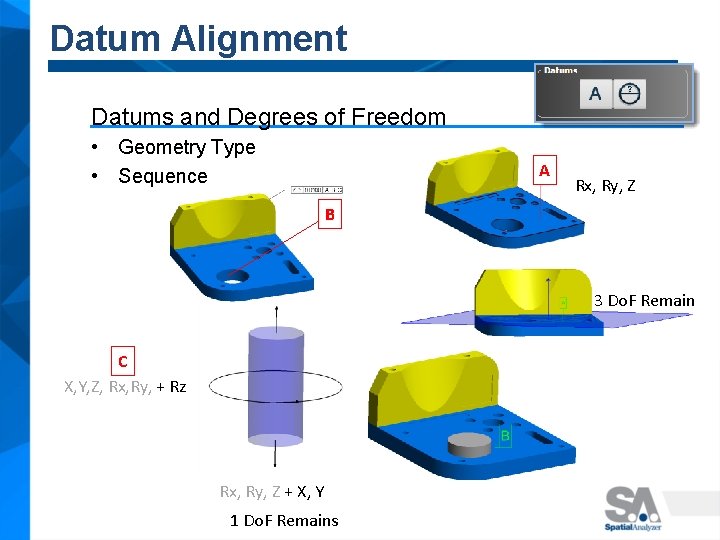
Datum Alignment Datums and Degrees of Freedom • Geometry Type • Sequence A Rx, Ry, Z B 3 Do. F Remain C X, Y, Z, Rx, Ry, + Rz Rx, Ry, Z + X, Y 1 Do. F Remains

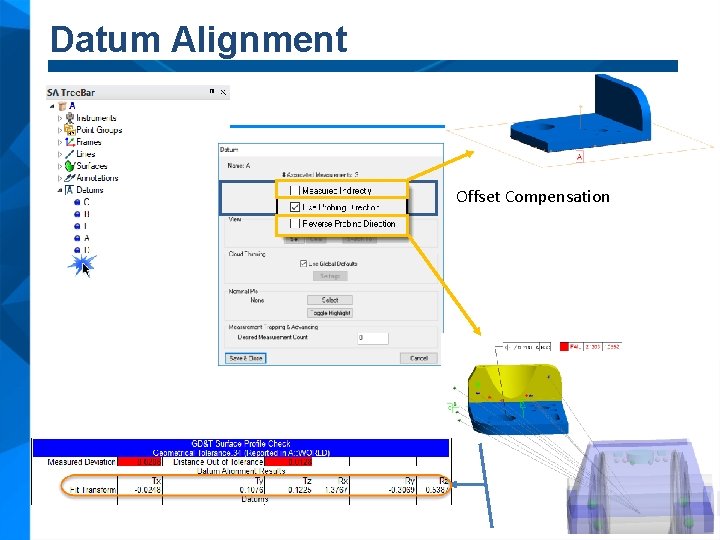
Datum Alignment Offset Compensation

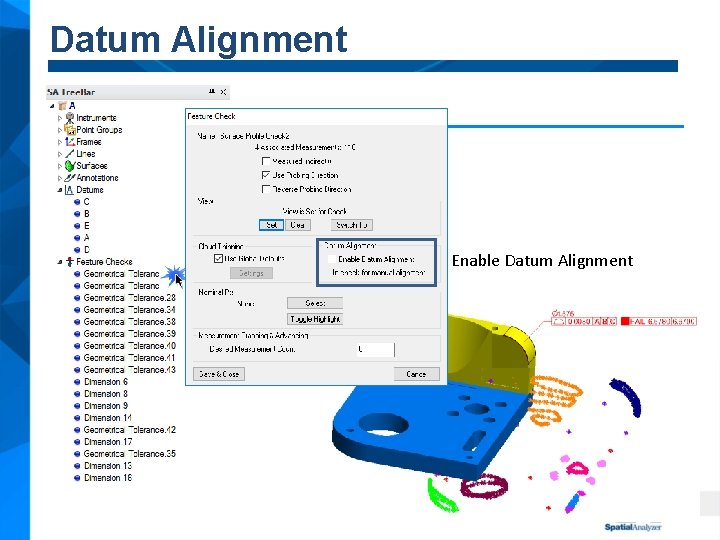
Datum Alignment Enable Datum Alignment

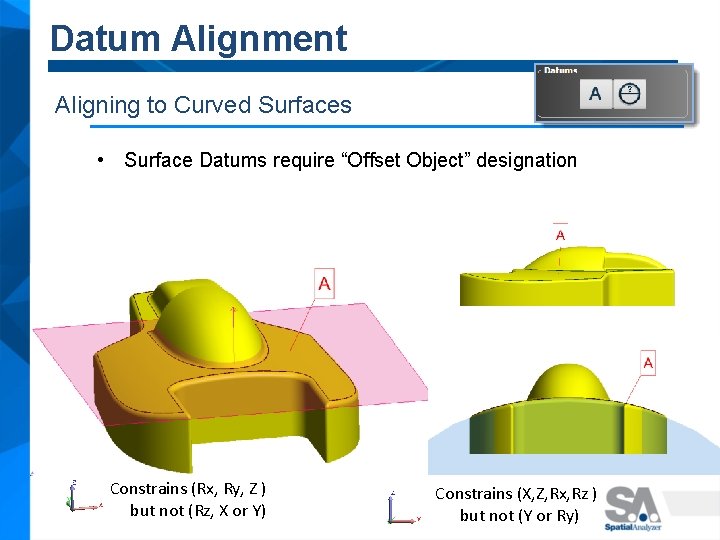
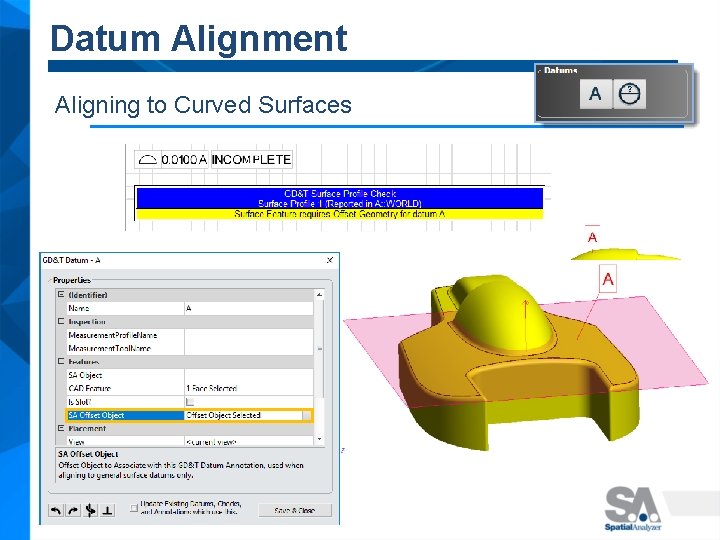
Datum Alignment Aligning to Curved Surfaces • Surface Datums require “Offset Object” designation Constrains (Rx, Ry, Z ) but not (Rz, X or Y) Constrains (X, Z, Rx, Rz ) but not (Y or Ry)

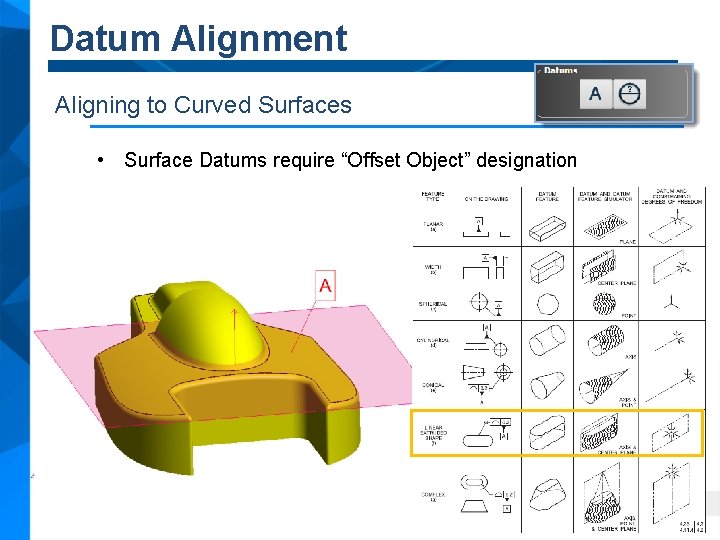
Datum Alignment Aligning to Curved Surfaces • Surface Datums require “Offset Object” designation

Datum Alignment Aligning to Curved Surfaces

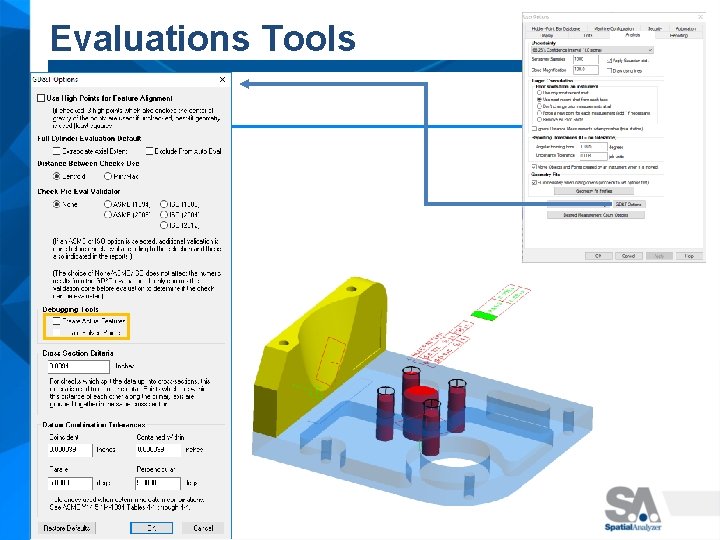
Evaluations Tools

Questions?

11/27/2020

11/27/2020

11/27/2020


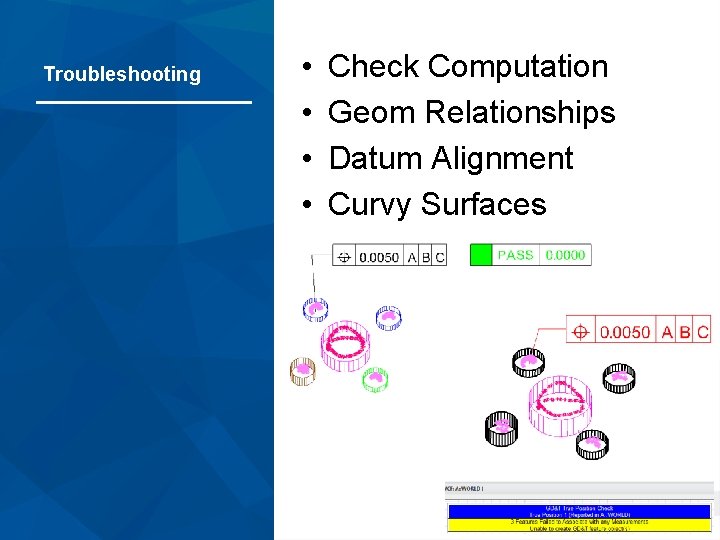
Troubleshooting • • Check Computation Geom Relationships Datum Alignment Curvy Surfaces 11/27/2020

Demo- Basic Fit & Link

Reporting Basic Report Display Options

Reporting Basic Report Display Options

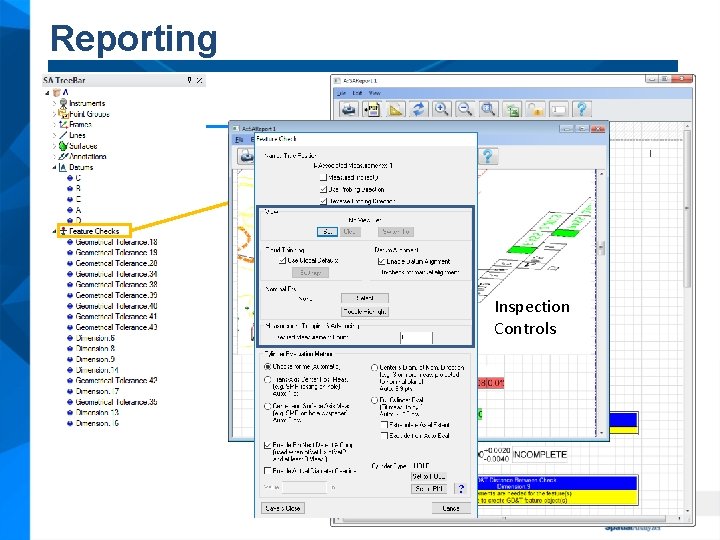
Reporting Inspection Controls

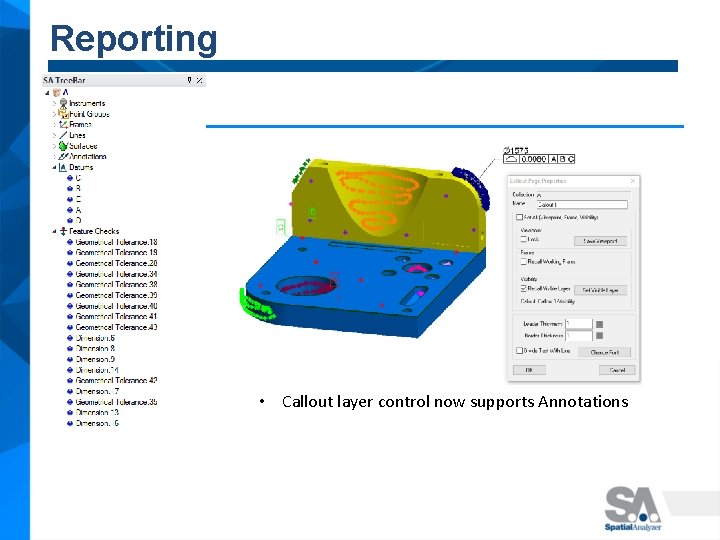
Reporting • Callout layer control now supports Annotations

Datum Alignment Z, Rx, Ry Start thinking: • • • Datum Priority Degrees of Freedom Offset Compensation X, Y, Z X, Y, Rx, Ry X, Y, Z, Rx, Ry, Rz All 6 Do. F are constrained with 1 datum…

Concentricity Cross Section Checks: Concentricity Cross Section Check

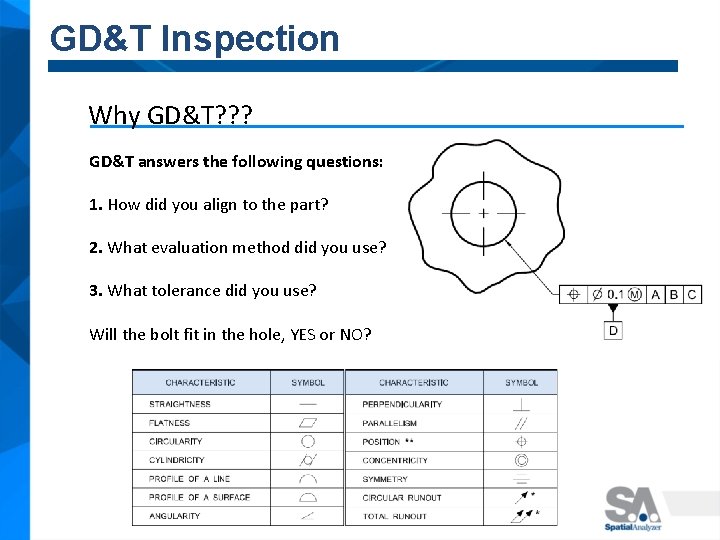
GD&T Inspection Why GD&T? ? ? GD&T answers the following questions: 1. How did you align to the part? 2. What evaluation method did you use? 3. What tolerance did you use? Will the bolt fit in the hole, YES or NO?

GD&T Annotations Datum and Datum Target Designations • (Hold down A-Z to pick a letter) • Click-point defines leader line anchor point

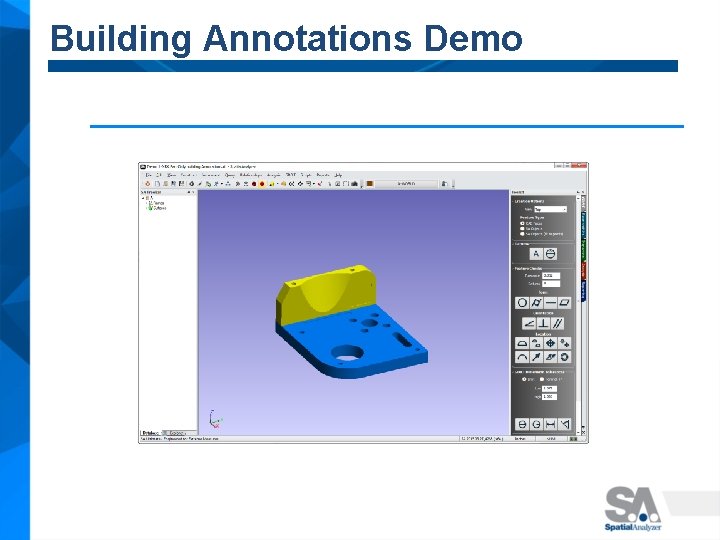
Building Annotations Demo

Associating Data Working with Datums and Feature Checks