Emergency Medical Responder First on Scene TENTH EDITION


- Slides: 69

Emergency Medical Responder First on Scene TENTH EDITION CHAPTER 12 Obtaining a Medical History and Vital Signs Emergency Medical Responder: First on Scene, 10/e Christopher J. Le Baudour | J. David Bergeron Copyright © 2016, 2011, 2009 by Pearson Education, Inc. All Rights Reserved

Media Directory Slide 49 Blood Pressure Assessment Video Emergency Medical Responder: First on Scene, 10/e Christopher J. Le Baudour | J. David Bergeron Copyright © 2016, 2011, 2009 by Pearson Education, Inc. All Rights Reserved

OBTAINING A MEDICAL HISTORY Emergency Medical Responder: First on Scene, 10/e Christopher J. Le Baudour | J. David Bergeron Copyright © 2016, 2011, 2009 by Pearson Education, Inc. All Rights Reserved

Obtaining a Medical History • Medical history ▪ Previous medical conditions and events for patient Emergency Medical Responder: First on Scene, 10/e Christopher J. Le Baudour | J. David Bergeron Copyright © 2016, 2011, 2009 by Pearson Education, Inc. All Rights Reserved

Obtaining a Medical History • Signs ▪ Something you can see and observe about patient • Pale skin • Rapid pulse • Open wound to chest ▪ All are obvious. Emergency Medical Responder: First on Scene, 10/e Christopher J. Le Baudour | J. David Bergeron Copyright © 2016, 2011, 2009 by Pearson Education, Inc. All Rights Reserved

Figure 12. 1 history. Get down at eye level with your patient and make good eye contact as you begin your medical Emergency Medical Responder: First on Scene, 10/e Christopher J. Le Baudour | J. David Bergeron Copyright © 2016, 2011, 2009 by Pearson Education, Inc. All Rights Reserved

Obtaining a Medical History • Symptom ▪ Something patient feels or may complain about • Can be obvious or very subtle • Pain, nausea common symptoms Emergency Medical Responder: First on Scene, 10/e Christopher J. Le Baudour | J. David Bergeron Copyright © 2016, 2011, 2009 by Pearson Education, Inc. All Rights Reserved

Table 12. 1 Common Signs and Symptoms Emergency Medical Responder: First on Scene, 10/e Christopher J. Le Baudour | J. David Bergeron Copyright © 2016, 2011, 2009 by Pearson Education, Inc. All Rights Reserved

Obtaining a Medical History • Interviewing Your Patient ▪ An alert patient is the best source of information. ▪ Chief complaint • Ask questions slowly and clearly. • Allow time for patient to process and respond. • Listen carefully. • Document important details. continued on next slide Emergency Medical Responder: First on Scene, 10/e Christopher J. Le Baudour | J. David Bergeron Copyright © 2016, 2011, 2009 by Pearson Education, Inc. All Rights Reserved

Obtaining a Medical History • Interviewing Your Patient ▪ Establish a good rapport. • • • Introduction Consent Patient's name Patient's age Chief complaint continued on next slide Emergency Medical Responder: First on Scene, 10/e Christopher J. Le Baudour | J. David Bergeron Copyright © 2016, 2011, 2009 by Pearson Education, Inc. All Rights Reserved

Obtaining a Medical History • Interviewing Your Patient ▪ SAMPLE history tool • • • Signs/symptoms Allergies Medications Past pertinent medical history Last oral intake Events leading to the illness or injury continued on next slide Emergency Medical Responder: First on Scene, 10/e Christopher J. Le Baudour | J. David Bergeron Copyright © 2016, 2011, 2009 by Pearson Education, Inc. All Rights Reserved

Obtaining a Medical History • Interviewing Your Patient ▪ OPQRST is the most commonly used for assessment of pain or discomfort. • • • Onset Provocation Quality Region/Radiate Severity Time Emergency Medical Responder: First on Scene, 10/e Christopher J. Le Baudour | J. David Bergeron Copyright © 2016, 2011, 2009 by Pearson Education, Inc. All Rights Reserved

Obtaining a Medical History • Additional Sources of Information ▪ ▪ Family members Bystanders First responders Medical identification jewelry Emergency Medical Responder: First on Scene, 10/e Christopher J. Le Baudour | J. David Bergeron Copyright © 2016, 2011, 2009 by Pearson Education, Inc. All Rights Reserved

Figure 12. 2 Consider using bystanders or family members when your patient is unresponsive or unable to provide a medical history on his own. Emergency Medical Responder: First on Scene, 10/e Christopher J. Le Baudour | J. David Bergeron Copyright © 2016, 2011, 2009 by Pearson Education, Inc. All Rights Reserved

Think About It • You become suddenly ill and a medical provider begins asking you personal medical history questions. What would make you more likely to be honest and forthright with answers? • How could you apply this answer to your own assessment practices? continued on next slide Emergency Medical Responder: First on Scene, 10/e Christopher J. Le Baudour | J. David Bergeron Copyright © 2016, 2011, 2009 by Pearson Education, Inc. All Rights Reserved

Think About It • How would you handle questions such as: ▪ Have you been drinking? ▪ Have you taken any drugs that are not prescribed for you? ▪ Is there a chance you could be pregnant? Emergency Medical Responder: First on Scene, 10/e Christopher J. Le Baudour | J. David Bergeron Copyright © 2016, 2011, 2009 by Pearson Education, Inc. All Rights Reserved

VITAL SIGNS Emergency Medical Responder: First on Scene, 10/e Christopher J. Le Baudour | J. David Bergeron Copyright © 2016, 2011, 2009 by Pearson Education, Inc. All Rights Reserved

Vital Signs • • • Respiration Pulse Blood pressure Skin signs Pupils Perfusion Emergency Medical Responder: First on Scene, 10/e Christopher J. Le Baudour | J. David Bergeron Copyright © 2016, 2011, 2009 by Pearson Education, Inc. All Rights Reserved

Vital Signs • Mental status ▪ Level Of Consciousness (LOC) or level of responsiveness evaluated using AVPU scale. • • Alert Verbal, responsive to verbal stimuli Pain, responsive only to painful stimuli Unresponsive, unconscious, or completely unresponsive Emergency Medical Responder: First on Scene, 10/e Christopher J. Le Baudour | J. David Bergeron Copyright © 2016, 2011, 2009 by Pearson Education, Inc. All Rights Reserved

Vital Signs • Baseline vital signs ▪ First set of vital signs obtained • Trending ▪ Comparing multiple sets of vital signs from same patient over time • Careful analysis of vital signs can alert you to current or developing problems. • Do not rush to a conclusion too soon. Emergency Medical Responder: First on Scene, 10/e Christopher J. Le Baudour | J. David Bergeron Copyright © 2016, 2011, 2009 by Pearson Education, Inc. All Rights Reserved

Vital Signs • Respiration ▪ Act or process of breathing in (inhaling) and out (exhaling) • Evaluate ▪ Rate, depth, sound, ease • Work of breathing ▪ Effort that patient must exert to breathe Emergency Medical Responder: First on Scene, 10/e Christopher J. Le Baudour | J. David Bergeron Copyright © 2016, 2011, 2009 by Pearson Education, Inc. All Rights Reserved

Table 12. 2 Assessment Signs—Respirations Emergency Medical Responder: First on Scene, 10/e Christopher J. Le Baudour | J. David Bergeron Copyright © 2016, 2011, 2009 by Pearson Education, Inc. All Rights Reserved

Vital Signs • Respiratory assessment ▪ Grasp patient's wrist as if you were going to count pulse rate. ▪ Hold his arm firmly against his upper abdomen. ▪ Observe abdomen and chest move in and out. ▪ Listen for abnormal sounds. continued on next slide Emergency Medical Responder: First on Scene, 10/e Christopher J. Le Baudour | J. David Bergeron Copyright © 2016, 2011, 2009 by Pearson Education, Inc. All Rights Reserved

Vital Signs • Respiratory assessment ▪ Count number of breaths patient takes in 15 or 30 seconds. ▪ While counting respirations, note depth and ease of breathing. ▪ Document rate, depth, ease. Emergency Medical Responder: First on Scene, 10/e Christopher J. Le Baudour | J. David Bergeron Copyright © 2016, 2011, 2009 by Pearson Education, Inc. All Rights Reserved

Table 12. 3 Respiration Emergency Medical Responder: First on Scene, 10/e Christopher J. Le Baudour | J. David Bergeron Copyright © 2016, 2011, 2009 by Pearson Education, Inc. All Rights Reserved

Figure 12. 3 a Emergency Medical Responder assessing respirations on a supine patient. continued on next slide Emergency Medical Responder: First on Scene, 10/e Christopher J. Le Baudour | J. David Bergeron Copyright © 2016, 2011, 2009 by Pearson Education, Inc. All Rights Reserved

Figure 12. 3 b Emergency Medical Responder assessing respirations on a seated patient. Emergency Medical Responder: First on Scene, 10/e Christopher J. Le Baudour | J. David Bergeron Copyright © 2016, 2011, 2009 by Pearson Education, Inc. All Rights Reserved

Vital Signs • Pulse ▪ Remote heartbeat ▪ Gives insight into circulatory status of patient ▪ Good pulse indicates blood is moving well throughout body. continued on next slide Emergency Medical Responder: First on Scene, 10/e Christopher J. Le Baudour | J. David Bergeron Copyright © 2016, 2011, 2009 by Pearson Education, Inc. All Rights Reserved

Vital Signs • Pulse ▪ Central pulses • Carotid, femoral ▪ Peripheral pulses • Brachial, radial, pedal Emergency Medical Responder: First on Scene, 10/e Christopher J. Le Baudour | J. David Bergeron Copyright © 2016, 2011, 2009 by Pearson Education, Inc. All Rights Reserved

Figure 12. 4 Locating the carotid pulse point in the neck. Emergency Medical Responder: First on Scene, 10/e Christopher J. Le Baudour | J. David Bergeron Copyright © 2016, 2011, 2009 by Pearson Education, Inc. All Rights Reserved

Figure 12. 5 Locating the radial pulse point in the wrist. Emergency Medical Responder: First on Scene, 10/e Christopher J. Le Baudour | J. David Bergeron Copyright © 2016, 2011, 2009 by Pearson Education, Inc. All Rights Reserved

Vital Signs • Pulse ▪ Assess for rate, strength, rhythm. • Responsive patient ▪ Check radial pulse. • Unresponsive patient ▪ Check carotid pulse. • Radial pulse may not be detectable if blood pressure is too low or if there is extremity injury. Emergency Medical Responder: First on Scene, 10/e Christopher J. Le Baudour | J. David Bergeron Copyright © 2016, 2011, 2009 by Pearson Education, Inc. All Rights Reserved

Vital Signs • Pulse rate for adults is between 60 and 100 beats per minute. ▪ Tachycardia • Rate above 100 ▪ Bradycardia • Rate below 60 • Pulse point for infants under the age of one year is brachial pulse in upper arm. Emergency Medical Responder: First on Scene, 10/e Christopher J. Le Baudour | J. David Bergeron Copyright © 2016, 2011, 2009 by Pearson Education, Inc. All Rights Reserved

Vital Signs • Capillary refill ▪ Time it takes for capillaries to refill after being blanched ▪ Select appropriate finger or toe. ▪ Using thumb and index finger, squeeze pad of finger or toe from both sides. Observe pad as it blanches. continued on next slide Emergency Medical Responder: First on Scene, 10/e Christopher J. Le Baudour | J. David Bergeron Copyright © 2016, 2011, 2009 by Pearson Education, Inc. All Rights Reserved

Vital Signs • Capillary refill ▪ Quickly release pressure. • Observe color return to pad. • Document findings. Emergency Medical Responder: First on Scene, 10/e Christopher J. Le Baudour | J. David Bergeron Copyright © 2016, 2011, 2009 by Pearson Education, Inc. All Rights Reserved

Figure 12. 12 Checking capillary refill using the pad of the finger. Emergency Medical Responder: First on Scene, 10/e Christopher J. Le Baudour | J. David Bergeron Copyright © 2016, 2011, 2009 by Pearson Education, Inc. All Rights Reserved

Vital Signs • Blood pressure ▪ Measurement of pressure of blood against walls of arteries, both when heart beats and when it is at rest ▪ Systolic • Pressure within arteries when heart beats • Contraction phase of heart continued on next slide Emergency Medical Responder: First on Scene, 10/e Christopher J. Le Baudour | J. David Bergeron Copyright © 2016, 2011, 2009 by Pearson Education, Inc. All Rights Reserved

Vital Signs • Blood pressure ▪ Diastolic • Pressure that remains in arteries when heart is at rest • Resting phase of heart Emergency Medical Responder: First on Scene, 10/e Christopher J. Le Baudour | J. David Bergeron Copyright © 2016, 2011, 2009 by Pearson Education, Inc. All Rights Reserved

Vital Signs • Reading of 120/80 considered normal blood pressure • Take several readings to identify changes in status. • Systolic reading above 140 considered high blood pressure (hypertension) Emergency Medical Responder: First on Scene, 10/e Christopher J. Le Baudour | J. David Bergeron Copyright © 2016, 2011, 2009 by Pearson Education, Inc. All Rights Reserved

Table 12. 5 Blood Pressure Emergency Medical Responder: First on Scene, 10/e Christopher J. Le Baudour | J. David Bergeron Copyright © 2016, 2011, 2009 by Pearson Education, Inc. All Rights Reserved

Blood Pressure Assessment Video Click on the screenshot to view a video on the topic of taking blood pressure. Back to Directory Emergency Medical Responder: First on Scene, 10/e Christopher J. Le Baudour | J. David Bergeron Copyright © 2016, 2011, 2009 by Pearson Education, Inc. All Rights Reserved

Vital Signs • Auscultation ▪ Listening to internal sounds of the body with a stethoscope ▪ Have patient sit or lie down. ▪ Remove clothing on arm. ▪ Support arm at level of heart. ▪ Select correct-size blood pressure cuff. Emergency Medical Responder: First on Scene, 10/e Christopher J. Le Baudour | J. David Bergeron Copyright © 2016, 2011, 2009 by Pearson Education, Inc. All Rights Reserved

Figure 12. 6 Adjust the earpieces of the stethoscope so they point forward slightly, into the ear canal. Emergency Medical Responder: First on Scene, 10/e Christopher J. Le Baudour | J. David Bergeron Copyright © 2016, 2011, 2009 by Pearson Education, Inc. All Rights Reserved

Figure 12. 7 a Proper position for taking a blood pressure while seated. continued on next slide Emergency Medical Responder: First on Scene, 10/e Christopher J. Le Baudour | J. David Bergeron Copyright © 2016, 2011, 2009 by Pearson Education, Inc. All Rights Reserved

Figure 12. 7 b Obtaining a blood pressure on a supine patient. Emergency Medical Responder: First on Scene, 10/e Christopher J. Le Baudour | J. David Bergeron Copyright © 2016, 2011, 2009 by Pearson Education, Inc. All Rights Reserved

Figure 12. 8 Location of the brachial artery pulse point. Emergency Medical Responder: First on Scene, 10/e Christopher J. Le Baudour | J. David Bergeron Copyright © 2016, 2011, 2009 by Pearson Education, Inc. All Rights Reserved

Figure 12. 9 Proper placement of the blood pressure cuff. Emergency Medical Responder: First on Scene, 10/e Christopher J. Le Baudour | J. David Bergeron Copyright © 2016, 2011, 2009 by Pearson Education, Inc. All Rights Reserved

Figure 12. 10 Pulse sounds will be heard through the stethoscope between the systolic and diastolic readings. Emergency Medical Responder: First on Scene, 10/e Christopher J. Le Baudour | J. David Bergeron Copyright © 2016, 2011, 2009 by Pearson Education, Inc. All Rights Reserved

Vital Signs • Auscultation ▪ Let rest of air out of cuff quickly. ▪ Record time, arm used, position of person, pressure readings. Emergency Medical Responder: First on Scene, 10/e Christopher J. Le Baudour | J. David Bergeron Copyright © 2016, 2011, 2009 by Pearson Education, Inc. All Rights Reserved

12. 1. 1 Place the cuff snugly around the upper arm. continued on next slide Emergency Medical Responder: First on Scene, 10/e Christopher J. Le Baudour | J. David Bergeron Copyright © 2016, 2011, 2009 by Pearson Education, Inc. All Rights Reserved

12. 1. 2 point. Palpate the brachial pulse point, and place the diaphragm of the stethoscope directly over the pulse Emergency Medical Responder: First on Scene, 10/e Christopher J. Le Baudour | J. David Bergeron Copyright © 2016, 2011, 2009 by Pearson Education, Inc. All Rights Reserved

Vital Signs • Auscultation ▪ Close valve and inflate cuff. • 180 mm. Hg adult • 120 mm. Hg child ▪ Open valve slowly to release pressure from cuff. ▪ Listen carefully as you watch needle move. ▪ Let cuff continue to deflate. Emergency Medical Responder: First on Scene, 10/e Christopher J. Le Baudour | J. David Bergeron Copyright © 2016, 2011, 2009 by Pearson Education, Inc. All Rights Reserved

12. 1. 3 Quickly inflate the cuff then release the pressure to obtain the blood pressure readings. continued on next slide Emergency Medical Responder: First on Scene, 10/e Christopher J. Le Baudour | J. David Bergeron Copyright © 2016, 2011, 2009 by Pearson Education, Inc. All Rights Reserved

12. 1. 4 Document your readings along with the time. Emergency Medical Responder: First on Scene, 10/e Christopher J. Le Baudour | J. David Bergeron Copyright © 2016, 2011, 2009 by Pearson Education, Inc. All Rights Reserved

Vital Signs • Palpation ▪ Using one's hands to touch or feel the body. ▪ Not very accurate method ▪ One reading • Approximate systolic pressure ▪ Used when there is too much noise, making it difficult to hear via stethoscope Emergency Medical Responder: First on Scene, 10/e Christopher J. Le Baudour | J. David Bergeron Copyright © 2016, 2011, 2009 by Pearson Education, Inc. All Rights Reserved

12. 2. 1 Place the cuff and locate the radial pulse prior to inflating the cuff. continued on next slide Emergency Medical Responder: First on Scene, 10/e Christopher J. Le Baudour | J. David Bergeron Copyright © 2016, 2011, 2009 by Pearson Education, Inc. All Rights Reserved

12. 2. 2 Inflate the cuff until you feel the radial pulse go away. continued on next slide Emergency Medical Responder: First on Scene, 10/e Christopher J. Le Baudour | J. David Bergeron Copyright © 2016, 2011, 2009 by Pearson Education, Inc. All Rights Reserved

12. 2. 3 Continue inflating the cuff to approximately 30 mm Hg beyond where the pulse went away. continued on next slide Emergency Medical Responder: First on Scene, 10/e Christopher J. Le Baudour | J. David Bergeron Copyright © 2016, 2011, 2009 by Pearson Education, Inc. All Rights Reserved

12. 2. 4 Release the pressure in the cuff and note the pressure on the gauge when the radial pulse returns. This will be the approximate systolic pressure. Emergency Medical Responder: First on Scene, 10/e Christopher J. Le Baudour | J. David Bergeron Copyright © 2016, 2011, 2009 by Pearson Education, Inc. All Rights Reserved

Vital Signs • Skin signs ▪ Evaluate color, temperature, and moisture. ▪ Pale or cyanotic ▪ Flushed ▪ Jaundiced continued on next slide Emergency Medical Responder: First on Scene, 10/e Christopher J. Le Baudour | J. David Bergeron Copyright © 2016, 2011, 2009 by Pearson Education, Inc. All Rights Reserved

Vital Signs • Skin signs ▪ Examples of skin signs • • Pink, warm, dry (PWD) Pale, cool, moist Flushed, hot, dry Emergency Medical Responder: First on Scene, 10/e Christopher J. Le Baudour | J. David Bergeron Copyright © 2016, 2011, 2009 by Pearson Education, Inc. All Rights Reserved

Table 12. 6 Skin Signs Emergency Medical Responder: First on Scene, 10/e Christopher J. Le Baudour | J. David Bergeron Copyright © 2016, 2011, 2009 by Pearson Education, Inc. All Rights Reserved

Figure 12. 11 Use the back of an ungloved hand to assess skin temperature and moisture. Emergency Medical Responder: First on Scene, 10/e Christopher J. Le Baudour | J. David Bergeron Copyright © 2016, 2011, 2009 by Pearson Education, Inc. All Rights Reserved

Vital Signs • Evaluate skin color in dark-skinned patients ▪ ▪ Oral mucosa Conjunctiva Nail beds Palms continued on next slide Emergency Medical Responder: First on Scene, 10/e Christopher J. Le Baudour | J. David Bergeron Copyright © 2016, 2011, 2009 by Pearson Education, Inc. All Rights Reserved

Vital Signs • Pupils ▪ Note general condition. ▪ Identify any obvious injury or deformity. ▪ Ensure both pupils are round and same size. ▪ Note reaction to changes in light. • Constriction with sudden introduction of light • Dilation when light to pupil is blocked continued on next slide Emergency Medical Responder: First on Scene, 10/e Christopher J. Le Baudour | J. David Bergeron Copyright © 2016, 2011, 2009 by Pearson Education, Inc. All Rights Reserved

Vital Signs • Pupils ▪ PERL stands for: • • Pupils Equal Reactive Light Emergency Medical Responder: First on Scene, 10/e Christopher J. Le Baudour | J. David Bergeron Copyright © 2016, 2011, 2009 by Pearson Education, Inc. All Rights Reserved

Table 12. 7 Pupils Emergency Medical Responder: First on Scene, 10/e Christopher J. Le Baudour | J. David Bergeron Copyright © 2016, 2011, 2009 by Pearson Education, Inc. All Rights Reserved

Figure 12. 13 (A) Constricted pupils. (B) Dilated pupils. (C) Unequal pupils. Emergency Medical Responder: First on Scene, 10/e Christopher J. Le Baudour | J. David Bergeron Copyright © 2016, 2011, 2009 by Pearson Education, Inc. All Rights Reserved

Think About It • Could vital signs ever be considered unreliable? • What does "treat the patient, not the device" mean and why is this especially important to remember when working with automated or electronic vital sign equipment? Emergency Medical Responder: First on Scene, 10/e Christopher J. Le Baudour | J. David Bergeron Copyright © 2016, 2011, 2009 by Pearson Education, Inc. All Rights Reserved
 Emergency medical responder: first on scene
 Emergency medical responder first on scene 10th edition
 Emergency medical responder first on scene 11th edition
 Ac veins
 Red cross emergency medical responder
 Campbell biology tenth edition
 Campbell biology tenth edition
 Campbell biology tenth edition
 Elementary statistics tenth edition
 Digital fundamentals 10th edition
 Corporate finance tenth edition
 Psychology tenth edition david g myers
 Human genetics concepts and applications 10th edition
 Corporate finance tenth edition
 Corporate finance tenth edition
 Corporate finance tenth edition
 Corporate finance tenth edition
 Campbell biology tenth edition
 The graph shows data from the light colored soil
 Clorosplastos
 Biology tenth edition
 Law enforcement first responder
 The standards of prehospital emergency care
 Pre-hospital communication
 Emergency care 13th edition chapter 1
 Outdoor emergency care 6th edition
 Prehospital emergency care 11th edition
 Prehospital emergency care 11th edition
 Prehospital emergency care 11th edition
 Prehospital emergency care 11th edition
 Mis chapter 6
 Using mis (10th edition) 10th edition
 Introduction to emergency medical care
 Chapter 31 assisting in a medical emergency
 Define medical emergency chapter 31
 Medical emergency student lectures
 Nj emd guide cards
 Logisticare transportation texas
 Tdh ems
 Medical
 Introduction to emergency medical care
 The tenth man graham greene summary
 Rounding to the nearest hundred thousand
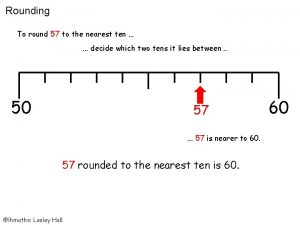
 Round 75 to the nearest 10
 Decimal rounded to the nearest tenth
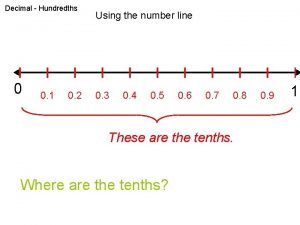
 What is the hundredths place
 Greenspun's tenth rule
 Tuesdays with morrie chapter questions
 326 to the nearest 10
 Tenth rib
 Ubbl fire safety
 Find the volume of the cone. round to the nearest tenth.
 Tenth may dawned bright and clear
 Tenth chapter wired
 Emergency care and first aid ppt
 Chapter 8 emergency care first aid and disasters
 Emancipated minors definition
 Medical law and ethics 5th edition
 Dragon medical network edition
 Ethical problems in the practice of law 5th edition
 Sustical
 Body lying horizontal and facing upward
 Medical dosage calculations a dimensional analysis approach
 Macbeth act 1 summary scenes 1-7
 Macbeth act by act summary
 Responder un correo formal
 Road terminology
 Nwcg iqcs
 Responder las siguientes preguntas
 Crisis responder
