PIT AND FISSURE SEALANTS DEFINITION According to Simonsen


- Slides: 51

PIT AND FISSURE SEALANTS

DEFINITION According to Simonsen Pit and Fissure Sealants are “A material that is introduced into the pits and fissures of caries susceptible teeth, thus forming a micromechanically bonded, protective layer cutting access of caries producing bacteria from their source of nutrients. ”

• Fissure sealants are defined whereby pits and fissures that occur principally on the occlusal surfaces of molar and premolar teeth are occluded by application of fluid materials which are then polymerized.

HISTORY • 1905 - Miller used silver nitrate • 1922 - Hyatt advocated prophylactic odontomy. • 1939 - Gore used solution of cellulose nitrate as fissure sealants. • 1955 - Buonocore observed that after treatment of enamel with H 3 PO 4 the retention of acrylic resin to tooth surface was greatly increased. • 1965 - Bomen developed Bis-GMA • 1971 - First pit and fissure sealant Nurva seal developed.

Morphology of Pits and Fissures • The fissure contains organic plug composed of reduced enamel epithelium, microorganism forming dental plaque and oral debris. • The increased susceptibility of this surface to caries is due to the fact that fissure provides a protected niche for plaque accumulation.

• There are 5 types of pits and fissures: Ø V -type (34%) Ø U-type (14%) Ø I- type (19%) Ø K- type (26%) Ø Inverted y - type (7%)

Histopathology of Pit and Fissure Caries • First evidence of lesion formation occurs at orifice of the fissure and is represented by two bilateral lesion in enamel on opposing cuspal inclines. • Lesion progresses and depth of fissure wall becomes involved. • Two lesions coalesce into one at base of fissure.

• The enamel at the base is affected and lesion spreads laterally along the enamel adjacent to the depth of fissure towards DEJ. • Cavitation occurs owing to loss of mineral and structural support from affected enamel and dentin resulting in the clinically detectable lesion.

Types of Pit and Fissure Sealants : 1. According to chemical structures of monomer used 2. Based on generation 3. Based on filler contents 4. Based on Color 5. Based on curing

1. • • • According to chemical structures of monomer used: MMA Methyl methacrylate TEGDMA - Tri ethylene glycol dimethacrylate BPD Bis Phenol dimethacrylate BISGMA - Bis Phenol A and Glycedyl Methacrylate with methyl methacrylate monomer. ESPE Monomer PMU Propyl methacrylate urethane

2. Based on generation: a) 1 st Gen - Ultraviolet light. But had excessive absorption and incomplete polymerisation of sealant at its depth. b) 2 nd Gen - Self cure or chemical cure based on accelerator catalyst system. c) 3 rd Gen - Visible light d) 4 th Gen - Fluoride Releasing Sealants. 3. Based on filler contents: a) Unfilled - AD - Better flow a retention Dis. AD - ABRADE Rapidly. b) Filled - AD - Resistance to wear Dis. AD - Needs occlusal adjustment

4. Based on Color : a) Clear -Esthetic but difficult to detect b) Tinted / opaque - can be identified c) Colored - Easy to see placement and recall 5. Based on curing : a) Autopolymerizing b) Light cure

INDICATIONS • Clinical judgment is the deciding factor in the placement of sealants. • Newly erupted both primary molars and permanent biouspids and molars with complete recession of pericoronal operculum with open and sticky grooves and fissures. • Stained pits and fissures with minimum decalcification or opacification and no softness at base of fissures. • The tooth in question should have erupted need that 4 years ago.

CONTRAINDICATIONS • Individual with no previous caries experience and well coalesced pit and fissures. Monitor if the individual and teeth not at risk. • Radiographic or clinical evidence of caries on proximal surface should not be sealed. • Wide and self cleansable pit and fissures. • Tooth that cant be isolated or partially erupted. • Pit and fissure that have remained carious free for 4 years or longer.

TECHNIQUE FOR PLACEMENT OF PIT AND FISSURE SEALANT Step 1 : Isolation of Tooth The tooth should be isolated from salivary contamination by use of rubber dam or by cotton rolls and suctioning. Step 2 : Tooth Preparation Different methods - Early concept was to treat the surface with sherry of pumice and water. - Brockleherst suggests : Air abrasion with aluminum oxide. Best method of cleaning as results improved surface of resin wetting, more no of resin tag formation and more depth of sealant peneteration.

Step 3 : Acid Etching Tooth Surface Occlusal surface is then etched with 30 -50% H 3 PO 4 (37%) liquid or gel for 60 seconds. Etching produces microscopic porosities in the channel. Resin extends in these microscopic porosities and forms tags with attach it firmly to tooth surface.

With different etch times, no quantitative differences in surface morphology of enamel are observed. Step Primary teeth Permanent teeth Acid wash 30 sec 20 sec Wash 30 sec Dry 15 sec

Step 4: Rinse and Dry Etched Tooth Surface Rinse the etched tooth surface with air water spray for 30 second. - After etching tooth surface should remain dry and free of any contaminants. - If surface becomes contaminated re-etched for additional 10 sec. Step 5: Application of Bonding Agent Application of bonding agent after etching displaces saliva from enamel. Strength Increases - Saliva contaminated enamel (0. 0005 mpa to 17. 8 mpa) - Uncontaminated enamel (16. 7 mpa to 20. 5 mpa)

Step 6 : Application of Sealant Apply material and allow it to flow into pits and fissures. Avoid Incorporating air bubbles. Step 7 : Curing Material is cured according to manufacturers direction. Step 8 : Evaluation of occlusion Step 9 : Re-call and Re-evaluation Recall and check in subsequent visits. - It is still formally adherent. - no sealant material has been lost (if necessary, material should be added at this time. )

COMPOSITE RESINS

Introduction Apart from the glass ionomers, the only other material that has the ability to restore aesthetics and to develop and maintain adhesion in the oral environment is the composite resin. However their ability to adhere long term to tooth structure is limited to enamel only.

History 1930 s First mention of the methyl methacrylates. Kramer and Mc. Lean 1949 Published several papers on a number of material in this category. Buonocore 1954 Development of a micro mechanical adhesion to enamel simply by acid etching the enamel for up to one minute rather than applying a thin coat of a very low viscosity resin. 1960 s Proved the value of including a variety of fillers. Late Bowen

Bowen’s contribution Apart from proving the value of fillers Bowen also modified the resin formula from a relatively simple methyl methacrylate to a far more complex bisphenol-A diglycidyl dimethacrylate and the modern concept of 'filled' or 'composite resin' was generated.

Based on filler particle size and size distribution- Lutz and Philips (1983) Type 1: macro filled composite resin Type 2: micro filled composite resin Type 3: hybrid composite resin

Type 1: macro filled composite resin This type is also known as conventional or traditional composites. . Because of the relatively large particle size this group exhibits a pattern of unacceptable wear both of itself and of the opposing tooth. Type 2: micro filled composite resin The fillers in this material are amorphous silica particles of 0. 04 mm average diameter. With such small filler particles they are translucent and highly aesthetic but high filler loading is difficult to achieve. The wear resistance is low and they cannot sustain in high filler loading. Type 3: hybrid composite resin These are also known as small particle composites. They contain a combination of macrofiller particles with a proportion of microfiller particles and are probably the most commonly used composite resins. The main variation is in the proportion and distribution of the various particle sizes because this will control the ability to fill the resin and increase the percentage loading.

Constituents The chemistry and setting reaction of a composite resin is very complex so there a number of different chemical and materials incorporated, each with a specific function and the proportion is likely to vary from one manufacturer to another.

- An organic resin component that forms the matrix e. g. Bis. GMA - Inorganic filler: These may be a. Macro fillers with a particle size of about 5 -30 mm e. g. glass, quartz, ceramic etc. b. Micro fillers with a particle size of 0. 04 mm e. g. amorphous silica. - Coupling agent applied to the particles to unite the filler to the resin silane. - Initiator system to activate the setting mechanism. - Stabilisers (inhibitors) - Pigments (colouring agents)

Variations in composite resins Ø Ø Ø Based upon the forgoing information there have been further variation developed in the composite resin range based largely upon the filler particles and their size distribution. Folwable Packable Chemical activated Light activated Others

Flowable l The term flowable has been developed to indicate a composite resin which is relatively simple to place into a cavity in contrast to the standard hybrid materials which can be rather stiff and possibly a bit sticky. Such a flowable material is manly used in the case of a deciduous tooth. The flowability of the composite resin is improved by reducing the filler content.

Packable l Another term has been introduced to differentiate a material from a standard hybrid composite resin and that is the term packable. the difference is achieved by varying the particle size and size distribution though the water uptake and the wear factor will remain standard and acceptable. The main difference will be in the feel of the material when being placed into the cavity. The material will be less likely to stick to the packing instrument and be withdrawn from the cavity during placement.

Chemically activated systems l These materials are marketed as two paste or powder / liquid systems. One part will contain an initiator, benzoyl peroxide, the other part contains a tertiary aromatic amine accelerator and combination of two parts will yield free radicals. These radicals initiate polymerisation of the resin.

Visible light activated systems l Single paste, visible light activated composite resin systems contain a two component initiator system comprising a di-ketone and a tertiary amine. The photosensitive di-ketone, usually 0. 2 -0. 7% camphoroquinone, absorbs the radiant energy of wavelength approximately 470 nm. At the appropriate stage of excitation, the di-ketone combine with the amine to form a complex that breaks down to release free radicals that then initiate polymerisation of the resin.

Other systems l Dual activated composites have both a light activated and a chemically activated initiation system and are packaged as two pastes. The light activation mechanism is used to initiate polymerization and the chemical activation is relied upon to continue and complete the setting reaction.

Properties of Composite Resins Polymerization The actual chemistry of the setting reaction is reasonably complex but is typical of all resin polymerization. In a chemically activated composite resin, the reaction takes place almost uniformly throughout the bulk of the material. In the light activated systems, the depth to which activation will occur is dependent on a number of factors. It is important to note that much of the resin not activated initially by the light at the time of curing will remain unset. µ

Water sorption and solubility Water sorption is higher for micro filled resins and for hybrid and macrofilled resins. A minimum amount of water sorption is essential to a newly placed composite resin because it will bring about a degree of expansion and help to counteract setting reaction. Variation in the water sorption and solubility of different composite resin is associated with the type and amount of monomers. µ

Polymerization contraction The resin matrix in a composite resin is highly subject to a setting contraction whether it is light activated or auto cured. The problems and risk are less in restoring deciduous teeth because the cavities are relatively small and it is therefore somewhat easier to get light activation to penetrate the relatively short distance to the base of the restoration. µ

Wear Clinical wear of the composite resin remains one of the main weaknesses in its use as restoration on load bearing surfaces. Regardless of the material, clinical wear is associated with a roughening of the surface of the restoration, due in part to scratching of microfilled composites and partly due to loss of particles and frictional contact in the case of macro filled composites. The slightly greater resistance to wear of a heavily filled micro filled composite is consistent with the greater resistance to sliding wear shown by this material. Therefore it is desirable to use the most heavily filled material availing regardless of possible difficulty in clinical handling. µ

Etching and bonding l An essential prerequisite for the micro - mechanical attachment is that the enamel should be etched with 37% orthophosphoric acid to deminerablize the enamel to a depth of 20 to 30 um and render it porous. A very low viscosity unfilled resin is then flowed over the surface and allowed to soak in to the porosities for about 30 seconds before it is light activated. Composite resin is then built over the resin bond.

Prerequisites for etching l l The enamel at the cavity margin must be fully mineralized and soundly based on healthy dentin. Also there must be no micro cracks present on the tooth. The best union will be developed at the ends of the enamel rods rather than along the long sides so it is desirable to develop a reasonably long bevel at the cavo-surface margin.

l The goal of a resin dentin bonding agent is to attach composite resin to healthy dentin and to seal the dentin tubules against the entry of bacteria and their toxins. l This will avoid post restoration sensitivity caries and loss of restoration. l Bonding to dentin requires the removal of all deminerlized affected dentin and this is not always desirable, particularly in a deciduous tooth where there will be little enough dentin remaining above the pulp and an exposure is undesirable. l It is possible through the use of glass ionomer to remineralize some of the dentin and this is the preferred method of sealing a cavity in a deciduous tooth.

Principles to successful resin - dentin bonding - Dentin should be etched to remove smear layer and dentin tubule plugs. - Etching should be sufficient to demineralize the surface layer of both inter and intratubular dentin leaving collagen fibers exposed and available for a mechanical interlock with the resin. - The surface should be thoroughly washed to remove all remaining etchant.

- The surface should remain wet but not flooded. - Apply a hydrophilic primer containing acetone or similar to guide and facilitate penetration of the resin adhesive around the exposed collagen fibers. - Finally apply the resin adhesive and cure before applying composite resin.

Delivery and placement Ø Ø The chemical cure and the dual cure materials will be packaged as a paste / paste system or a powder / liquid system. Always follow the manufacturer’s instructions in detail and stay within the time parameters so as not to go beyond the working time. To ensure complete adaptation to the cavity floor it is desirable to place the freshly mixed material into the disposable syringe and then tamp the material into the cavity with a small plastic sponge.

Ø Ø The light activated materials will always be delivered in light proof carpules or syringes which have been loaded under vacuum. This means that they are free of porosity at the time of delivery. Placement must be undertaken with care and attention to detail with particular reference to the depth of cure available through a curing light. The efficiency of the light must be checked periodically to ensure that the lower layers are also cured adequately.

Incremental build up l Due to the problems posed by light activation of composite resins, it is essential to be prepared to undertake incremental build up of any restoration deeper that about 2. 0 mm. Incremental placement means placement of the composite in small quantities in selected areas of the cavity and then directing the light activating unit in such a way that, while curing, the resin will shrink towards the tooth structure rather than away from it.

Depth of cure l In view of the often limited access to the oral environment in a child patient the depth of cure of a composite resin is quite significant. It is imperative that the activator light be placed within 1 -2 mm of the surface of the newly placed restoration otherwise the depth of cure will be limited. l Failure to light activate the composite resin to the full depth of the restoration has important implications for the success and longevity of the restoration.

Factors to be considered while curing Ø Ø The degree of cure will decrease with increasing depth. Increased time to exposure to the light will increase depth of cure. The more heavily filled the resin and the larger the particle size, the greater depth of cure. Micro filled resins will cure to a depth of 2 -3 mm only while hybrid resins may cure to a depth of 4 -5 mm. Lighter the shade of material the greater the depth of cure and the greater the translucency the deeper the cure.

Ø Ø Light activator units vary in their light outputs over time as well as with power fluctuations. The efficiency of each unit should be checked frequently. The tip of the light source should be placed as close as possible to the restoration and should never be more than 4 mm away. The depth of cure should be measured from the face of the activator light. Curing through tooth structure will reduce the depth of cure to the same extent as if curing through a composite resin of similar opacity.

Limitations of composite resins v v v Both the resin and the fillers used are anhydrous and completely inert. However some of the minor constituents such as HEMA have been identified as allergens and pose a potential risk. Any unreacted polymer chains may be an irritant to the pulp and lead to post - insertion sensitivity. The tissue cells respond les favorably to composite resin than they do to glass ionomer and it has been postulated that incomplete cure of the resin is the prime cause of this.

Clinical considerations l In pediatric dentistry a restoration will not be expected to last for more than a few years so a limited amount of wear can be tolerated. However a relatively large setting shrinkage will be undesirable. Aeshtetics and fracture resistance will not be of great significance but the ability to bond effectively to both the enamel and dentin will be relevant. There will often be a relatively short concentration span from the patient as well as limited access to the oral cavity so simplicity of placement techniques will be important. There is often a clear choice between composite resin and glass ionomer and the operator must be aware of the relevant properties of both

Prepared By : Dr. Ronak Shrimal B. D. S. , MHA, MSOLA MIDA, MIAACD
 Pit and fissure sealants definition
 Histopathology of enamel caries
 Lasse simonsen
 Buofi
Buofi Lasse simonsen
 Genuskøb
 Chapter 8 fasteners gaskets seals and sealants
 Fasteners gaskets seals and sealants
 Chapter 59 dental sealants
 Chapter 59 dental sealants
 3 types of sealants used in automotive
 Chapter 59 dental sealants multiple choice
 Lobes in the brain
 Reticular system
 Proscenium stage layout
 Cerebellum anatomy
 Anterior median fissure
 Shoulder muscle name
 Pengertian fissure sealant
 Gliablast
 Midbrain inferior view
 Obturator
 Horizontal fissure of right lung
 Main lobar fissure of the liver
 Hippocampal sulcus remnant cysts
 Posterior/dorsal root ganglia
 Name of burs used in crown preparation
 Chest x-ray anatomy
 Occipitotemporal sulcus
 Dr rima pathak
 Longitudinal cerebral fissure
 Longitudinal fissure
 Interpalpebral fissure
 Rotary cutting instruments in operative dentistry
 Diagnosis
 Transverse fissure sheep brain
 Longitudinal cerebral fissure
 Arcuate fasciculus
 Zygomaticofacial foramen
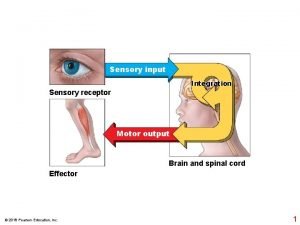
 Sensory input integration and motor output
 Bulging fissure sign
 Maxillary artery branches
 Horizontal fissure
 Palpebral fissure
 Functions of temporal lobe
 Smooth philtrum
 Longitudinal fissure
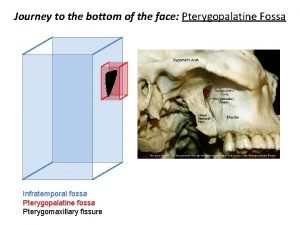
 Pterygopalatine fossa boundaries
 Collateral sulcus
 Oblique fissure
 Anal fissure
 Brain anatomy and physiology

