Metrology 1 Metrology Metrology is the science of




- Slides: 22

Metrology 1

Metrology • Metrology is the science of measurement. • Measurement is a basic form of inspection. • To inspect a component there are two possible methods. 2

Inspection • By using measuring instruments to determine the actual size (measurement). • By using gauges to determine if it is usable or unusable (gauging) 3

Measurement • Measurement in engineering depends on end standards. • The end standards in common use are slip gauges. 4

Slip gauges • These are small blocks of alloy steel. • They are either rectangular or circular. • They have two parallel surfaces at opposite ends • And are heat treated to ensure their accuracy is maintained. 5

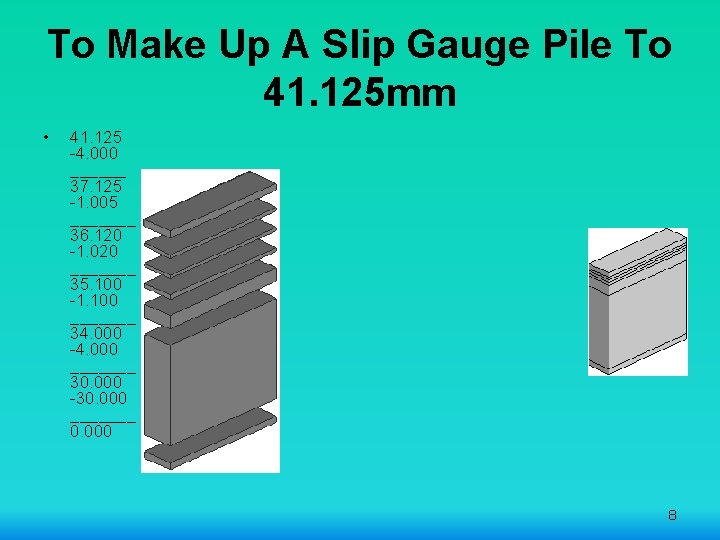
To Make Up A Slip Gauge Pile To 41. 125 mm • A Slip Gauge pile is used to set up or simulate a height that you may require for other purposes. • The Gauges are wrung together. • Generally the top and bottom Slip Gauges in the pile are 2 mm wear gauges. This is so that they will be the only ones that will wear down, and it is much cheaper to replace two gauges than a whole set. 6

To Make Up A Slip Gauge Pile To 41. 125 mm • A Slip Gauge pile is set up with the use of simple maths. • Decide what height you want to set up, in this case 41. 125 mm. • Take away the thickness of the two wear gauges, and then use the gauges in the set to remove each place of decimal in turn, starting with the lowest. 7

To Make Up A Slip Gauge Pile To 41. 125 mm • 41. 125 -4. 000 ______ 37. 125 -1. 005 _______ 36. 120 -1. 020 _______ 35. 100 -1. 100 _______ 34. 000 -4. 000 _______ 30. 000 -30. 000 _______ 0. 000 8

Limits • When machining it is impossible to manufacture a number of pieces to an exact measurement. • There will always be some difference in size. As a result Limits are set. • This means that what the machinist manufactures can differ from the proper size by the small amount stated by the Limits, and still be able to be used. 9

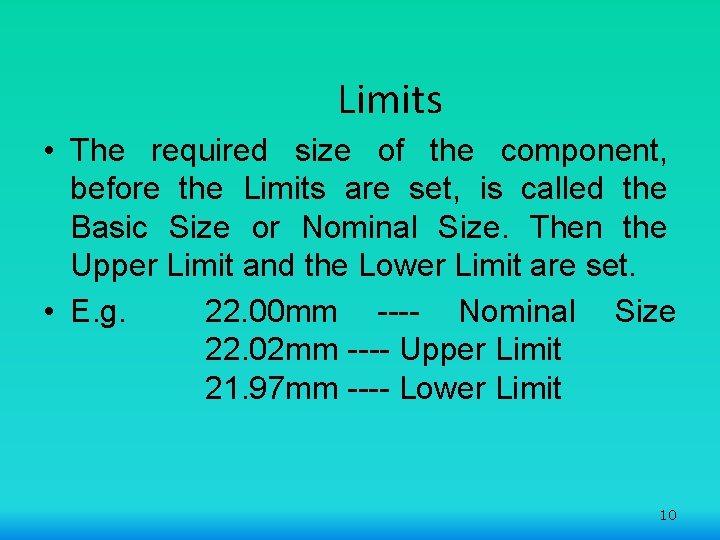
Limits • The required size of the component, before the Limits are set, is called the Basic Size or Nominal Size. Then the Upper Limit and the Lower Limit are set. • E. g. 22. 00 mm ---- Nominal Size 22. 02 mm ---- Upper Limit 21. 97 mm ---- Lower Limit 10

Tolerance • The Tolerance is the difference between the Upper Limit and the Lower Limit. i. e. 0. 5 mm • The Tolerance is the total amount by which the size of the component can differ from the Nominal Size. • A Tolerance is said to be Bilateral if it is spread over both sides of the Nominal Size. The above example is an example of a Bilateral Tolerance. 11

Tolerance • A Tolerance is said to be Unilateral if it is only on one side of the Nominal Size. • These Limits tell the manufacturer that the component can be any size between 22. 00 mm and 22. 02 mm. 12

Allowance • Allowance is basically the gap between components that work together. • Allowance between parts that are assembled is very important. • For example, the axel of a car has to be supported in a bearing otherwise it will fall to the ground. • If there was no gap between the axel and the bearing then there would be a lot of friction and it would be difficult to get the car to move. 13

Allowance • If there was too much of a gap then the axel would be jumping around in the bearing. • It is important to get the Allowance, between the axel and the bearing, correct so that the axel rotates smoothly and easily. 14

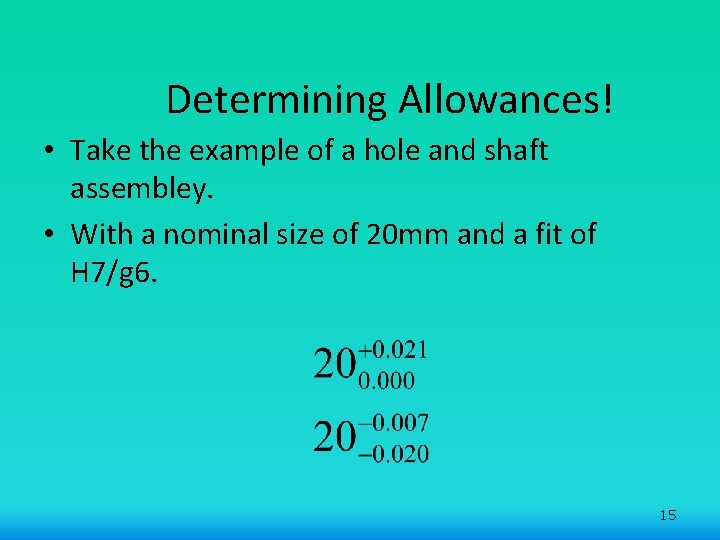
Determining Allowances! • Take the example of a hole and shaft assembley. • With a nominal size of 20 mm and a fit of H 7/g 6. 15

Hole tolerances • • 20 H 7 hole Nominal size 20 mm Upper limit 20. 021 mm Lower limit 20. 000 mm (nominal) Upper deviation 0. 021 mm Lower deviation 0. 000 mm Tolerance 0. 021 mm 16

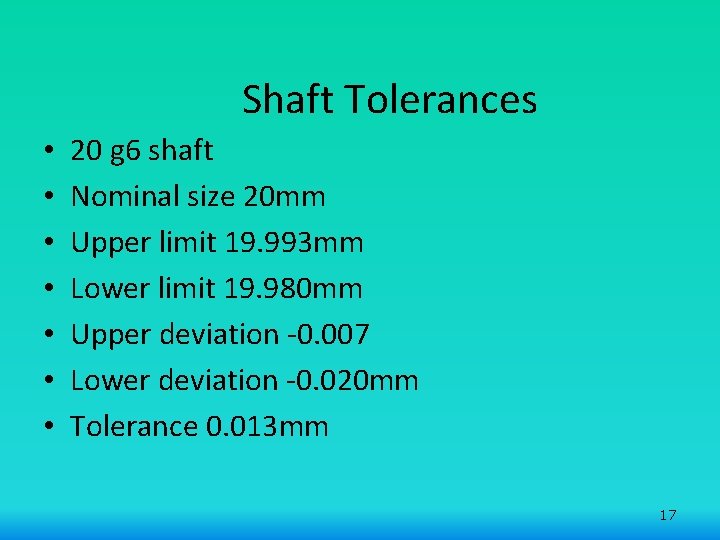
Shaft Tolerances • • 20 g 6 shaft Nominal size 20 mm Upper limit 19. 993 mm Lower limit 19. 980 mm Upper deviation -0. 007 Lower deviation -0. 020 mm Tolerance 0. 013 mm 17

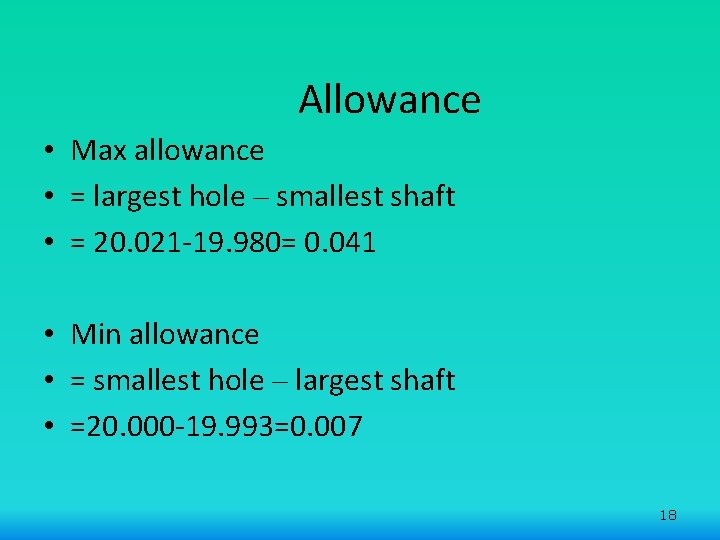
Allowance • Max allowance • = largest hole – smallest shaft • = 20. 021 -19. 980= 0. 041 • Min allowance • = smallest hole – largest shaft • =20. 000 -19. 993=0. 007 18

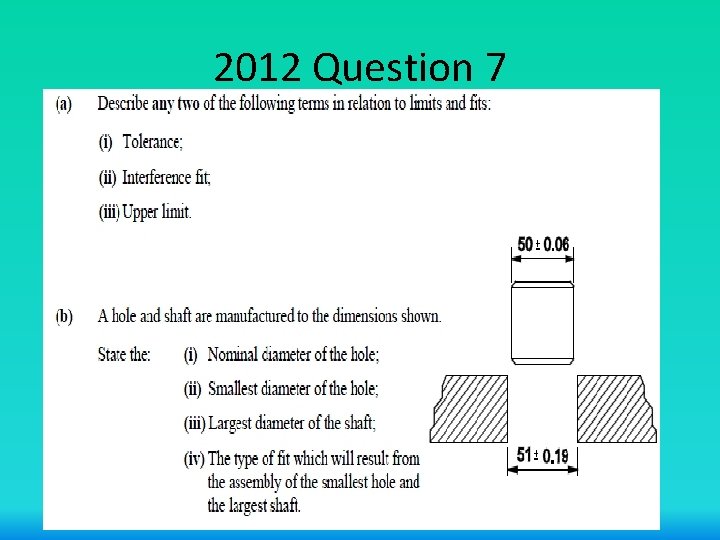
2012 Question 7 Copyright © Practical. Student. com

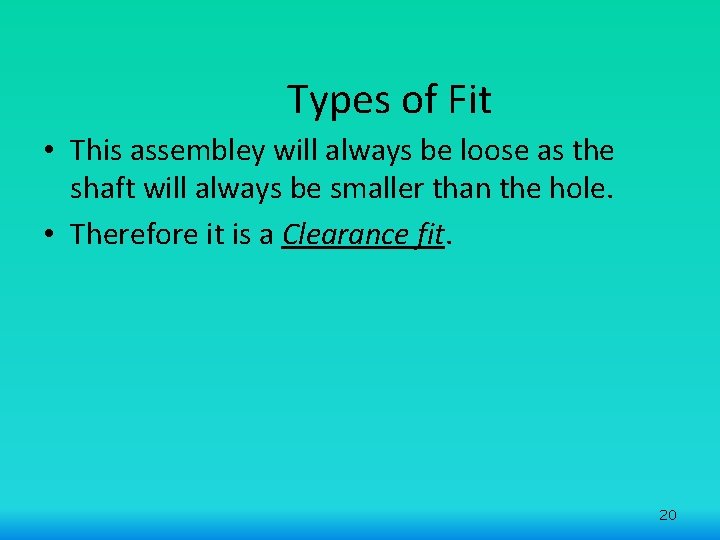
Types of Fit • This assembley will always be loose as the shaft will always be smaller than the hole. • Therefore it is a Clearance fit. 20

Types of Fit • When the shaft is made larger than the hole it is designed to be placed in this fit is known as an Interference Fit. • These assemblies need to be forced together. 21

Types of Fit • Transition Fit • This is a range of fits which can be clearance or interference. • The shaft may be larger or smaller than the hole it fits into. 22