Taping Techniques Sports Medicine Dale Morgan DC CCSP


 bandage l Acute wrap l Example l – figure four ankle wrap")


 l Speed loss l Poor muscle activation (timing / rhythm) l Muscle")


- Slides: 72
Taping Techniques & Sports Medicine
Dale Morgan, DC. CCSP dmorgandc@aol. com www. drdaledc. com
DISCLAIMER l ALL INFORMATION PRESENTED IS BASED ON PRACTICAL EXPERIENCE, RESEARCH, CONTINUING EDUCATION AND CERTIFICATIONS l USE THIS INFORMATON ACCORDING TO YOUR STATE SCOPE-OF-PRACTICE
What is Sports Chiropractic? l Sports chiropractic is that subspecialty of chiropractic within the sports community for the purpose of caring for sports related injuries, as well as contributing to the training of athletes for the prevention of injuries
Sports Chiropractic l Sports Chiropractic is a specialty in chiropractic care where the focus is to provide care in the management, rehabilitation and performance optimization of the neuromusculoskeletal system (nerves, muscles and bones) for athletes. Doctors of chiropractic identify underlying areas of dysfunction, which prevent athletes from achieving optimal performance.
Sports Chiropractic Serving as an Event Chiropractor l Serving as a Team Chiropractor l Using Sports Chiropractic techniques and methods in your office l Every patient wants to improve or regain something they’ve lost. Whether to run faster, or jump higher; or to be able to bend over without pain. l
Team Chiropractor Duties can vary considerably l Referral l On site l Work with team trainer l Part of health care team l l Trainer, l team MD, dentist, ect Only health care professional
Getting involved with a team l Personal connection l Patient l Networking l Letter to team l Introduce l yourself and offer service Contribution / donation / advertising
Event Chiropractor Local events l Local contact for national tour l Personal interest in that sport l Duties can vary l 10 k l Fun runs l Golf tournaments l State or national series l
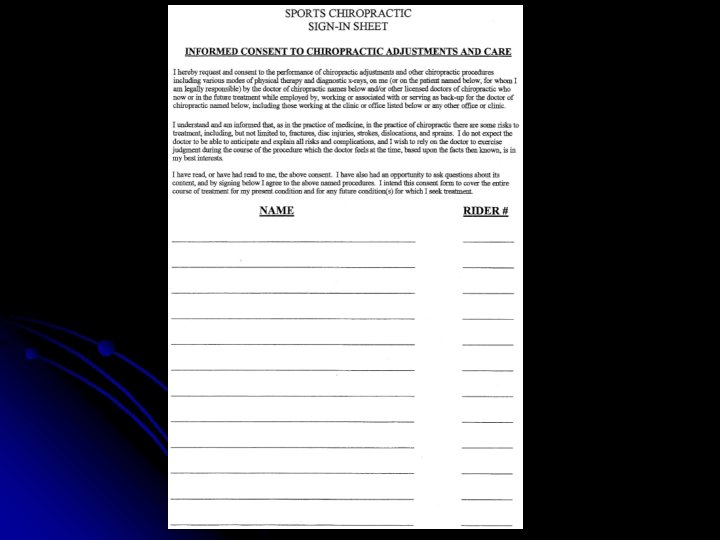
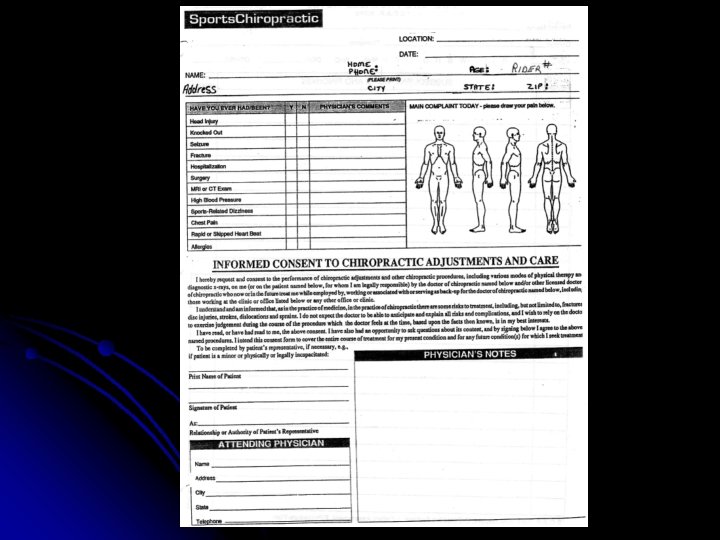
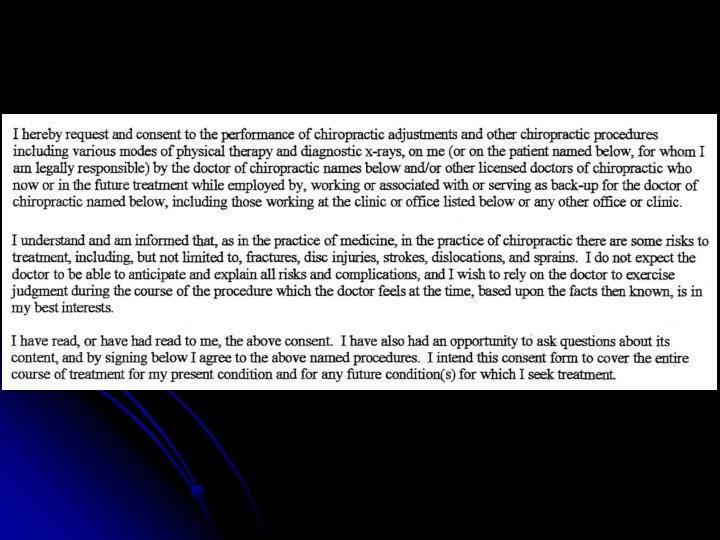
Events – tools of the trade Portable l Portable canopy – EZ-UP l Sign-in sheets l Forms and disclaimers l Tape and taping supplies l Bandages and antiseptics l Braces – appropriate for the sport / event l
Acute Treatment l Protect l Rest l Ice l Compression l Elevate l Support l PRICES
Protect l Protect the injured area from further damage by immediately ceasing the offending activity. l Tape, splint or cast as indicated. l Use an arm sling or crutches to prevent further damage.
Rest The rest component of the PRICES protocol is self-explanatory. Let the injured joint or muscle rest while the pain and swelling goes down. l Patient/athlete is 17 times more likely to sustain exacerbating injury if allowed to return to competition before injury is resolved. l
Ice l Icing an injury constricts the blood vessels, which serves a dual purpose: it minimizes pain and may reduce inflammation, particularly when used immediately following the injury.
Compress l Keep the injury wrapped with a compression bandage to further prevent swelling.
Elevate l Injuries in the legs need to be kept elevated above the level of the heart to reduce swelling. Keep an injured leg elevated even while sleeping.
Support l Support the injured area by bracing or taping as indicated. l This is similar to “protect” but refers to returning the joint to a supported, functional state.
Inflammation After the initial tissue damage from the injury, the resulting inflammation doubles that damage IF the injury is properly managed. l If the injury is not properly managed, the resulting inflammation may be up to 10 times that of the initial insult. l Early intervention minimizes tissue damage. l
Some ways we can help l Cryotherapy – apply ice to the injured area l Compression l Support the injured area by taping, wrapping or fitting a brace or support. l Nutritional support – proteolytic enzymes.
Nutritional supplements for Inflammation
Nutrition Proteolytic enzymes l Effectively reduce edema and speed resolution of the inflammatory process l Enteric coated l Taken on an empty stomach l High doses for 5 to 10 days following injury. 20 tabs a day in divided doses l Intenzyme Forte from Biotics Research is very effective. l
Proteolytic enzymes If used in a timely manner, can speed healing time 30 to 50% The enzymes speed the “cleaning” of the injured area. Especially effective when used with PRICES
Contraindications The only caution with Intenzyme Forte is with blood thinning agents and anemia. If the patient is on a blood thinning medication or is anemic, you must be cautious because Intenzyme Forte will reduce blood viscosity. l Trypsin and chymotrypsin products (like Intenzyme Forte) should be avoided with emphyzsema. Use Bromlin instead. l
Other nutritional support l Vitamin C l Arnica l Tumeric / curcumin
Cryotherapy & Compression
Ice vs gel packs Frostbite can occur at 26º F. l Ice is 32º F. l Gel pack may be colder than ice – if stored in the freezer, for example. l Ice can be placed directly on skin, as can a gel pack from a refrigerator. l If in doubt, place a towel over the skin to prevent the skin from freezing. l
l Ice should be applied as soon as possible after the injury has occurred, held there for 20 minutes, and reapplied at least three or four times a day for the first 48 hours.
Cryo/Cuff Thermos-type cooler holds ice and water. l “Cuff” is a special compression bladder specifically for the shoulder, knee, ankle or elbow. l A hose attaches the cuff to the reservoir l Provides Both compression and cryotherapy. l Can be used continuously. l
Prepare the cooler Connect the blue tube to cooler. Add water to line inside cooler. l Add ice to top of cooler l Lay insulation disc on top of ice. l Attach cooler lid snugly. l Allow 5 minutes with occasional shaking to chill water l
Apply the cuff l Always start with cuff empty l Depending on body part involved, wrap the cuff and secure with the velcro straps.
Fill and pressurize cuff Connect tube to cuff l Open air vent on top of cooler. l Elevate cooler an hold for about 30 seconds to fill and pressurize cuff. l Cooler can now be disconnected if desired to pressing the metal tab on the quickdisconnect while cooler is elevated to seal the pressure. l
Rechill Initially rechill after 15 to 30 minutes to quickly cool skin surface. l Rechill water in cuff once an hour or as needed l Connect the tube, lower the cooler below cuff, and the warmed water will drain from the cuff into the cooler. l Shake the cooler and allow a minute or two for the water to mix with the ice, then elevate the cooler and repeat the filling l
Specific cuffs available for: Shoulder l Knee l Ankle l Elbow l Back and ribs l Self contained and “auto-chill” units are available. l
Caution Use of an elastic wrap with a Cryo/Cuff applied over it causes a cumulative compression pressure and should be avoided. Any under dressing should be applied lightly. l Reduce pressure with any sense of discomfort, numbness or tingling of the limb. l
Introduction to Taping
Types of Tape Regular Athletic Tape l Elastic tape – non adhesive: l l “Ace” l Bandage Elastic tape – adhesive l Light elastic tape – mostly to hold something in place, or light support l Heavy elastic (stretch) tape – acute support l Kinesio Tape
Elastic (ace) bandage l Acute wrap l Example l – figure four ankle wrap Spica wrap l Hip Spica l Shoulder spica l Hold ice / cold pack in place
Tape accessories for traditional tape methods Pre-wrap l Lite taping base that is applied directly to the skin, and under the primary tape l Negates the need to shave the area before applying tape l Can also be used to hold a bandage in place.
Tape accessories l Spray adhesive. Holds pre-wrap in place l Scissors l nurses or bandage scissors – good enough l Special Kinesio taping scissors – works great! l tape cutters – for tape removal l Traditional tape job – ankle, for example
Base prep l Traditional athletic taping methods Spray tape adherent. l Pre-wrap l Provides base for taping l Avoids need to shave the area l
Pre-wrap and tuf-skin
Why tape? l Stabilize acute injury l Support and compress the injury l Can aid in the transition from rest to activity
Kinesio Tape Different concept from “sports taping” l Is waterproof and can sometimes be left in place for 3 to 5 days l May be helpful where other treatment has been less than successful l Relaxes muscle tension and improves blood/lymph flow. l Relatively new concept in taping l
Kinesio tape Methods and products have expanded and diversified from original classic application l Many new, but similar kinesio tape companies and products are available l Some tape companies have their own unique methods and techniques l The “wave pattern” is common to most brands. l
The effect of Kinesio tape l 1. Correct Muscle Function Tape is effective for reconditioning the abnormal muscle tension, or strengthening the weakened muscle. Also, it is effective for muscle fatigue and cramps.
Kinesio Tape l 2. Improve Circulation of blood/lymph Tape will help to eliminate the tissue fluid or bleeding beneath the skin by moving the muscle.
Kinesio Tape l 3. For Pain Neurological suppression of pain occurs by applying the tape to the affected area. Also, pain will be suppressed as noted in Effect 2 above.
Kinesio Tape l 4. Reposition the Subluxated Joint The dislocated/subluxated joint bones, due to abnormal muscle tension can be corrected by taping, which will recover the function of fascia and muscle.
Kinesio Tape l Think of Kinesio Tape as an external layer of connective tissue to support injured or damaged tissue.
Lymphatic circulation
Surface prep l Area to be taped must be clean, dry and free of oils. l Any body hair must be trimmed or shaved. l Patient / athlete should be wearing clothing that allows unrestricted access to regions to be taped
Application of Kinesio tape Measure tape for target tissue length l Cut tape to appropriate length l l Round edges to limit peeling of tape Tear off paper backing (1 -2 inches) at one end of tape l Place target tissue in stretched position l Apply tape to appropriate tissue l l “no stretch application” to l “moderate tension (25% pull)”
Application of Kinesio tape l Tape may be cut into sections to allow for proper contouring around joint lines or creases. l Rub tape vigorously, once the tape is applied to the skin – to activate the adhesive.
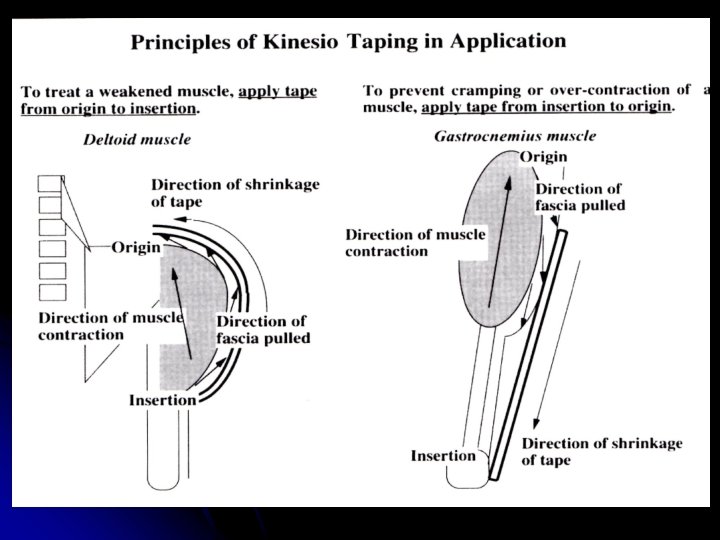
Tape from origin or insertion? acute chronic l Tape from insertion to origin l Tape from origin to insertion l Overuse syndromes l Increase muscle function, tendinitis l Variable depending on injury and circumstances
Kinesio tape application Cut tape to size, including any “Y” or “X” cuts. l Tear the tape and carefully peel back a portion of the backing and begin to apply to area. l Avoid touching any part of the sticky side of the tape. Have to place tape right the first time – it won’t stick on re-application l Apply NO stretch to ends of tape l
“Y” tape cuts
I, X and hourglass cuts
Kinesio tape application Kinesio tape is usually applied with minimum tension. l As the tape is applied, the joint is placed in either a neutral position, or one that minimizes the tension of the tape. l It is normal for the tape to bunch up a bit, depending on the position of the area involved. l Round the ends to prevent peeling l
Setting the adhesive l As the tape is being applied and the backing removed apply pressure with the opposite hand on the tape l After the tape is in place, gently but firmly rub the tape – from the middle towards the ends of the tape – to “set” the tape adhesive.
Kinesio tape removal l Tape typically should remain on skin for a specific event (athletic event). Or: l period of time, from 1 -5 days l Edges that become lifted can be trimmed l Can reinforce ends with “Cover-Roll” reinforcing tape
Kinesio tape removal l Removal is best accomplished when tape is wet or moist l Do not rip tape off quickly as it may irritate or tear the skin. l To remove tape safely, peel back one end while holding skin directly underneath. Remove in the direction of hair growth.
Indications Early performance fatigue l Prolonged recovery l Tightness l Swelling / edema l Weakness l Loss of coordination l Balance insufficiencies l
Indications (con’t) l Speed loss l Poor muscle activation (timing / rhythm) l Muscle inhibition l Movement pattern dysfunction
Kinesio tape l You can tape: l Joints l Muscles l Movements l Sprains l Strains l Recovery from orthopedic surgery
Contraindication Open wounds l Adhesive allergies l l Although he tape is “hypo-allergenic” in some cases mild/moderate skin reactions can occur l These include: Redness, Itching, Hives, Swelling Skin lesions l Infants / toddlers / children l l (who aren’t able to communicate)
Tearing or cutting the tape l Athletic tape l Requires l a quick “impulse” motion Elasticon and other traditional forms of tape l Cut with scissors
Cutting the tape l Kinesio tape l Cut to proper length – 10” pre-cut available l Round the edges – helps prevent or delay peeling l Tear paper backing in the middle or away from the ends of the tape l Avoid touching the adhesive side of the tape, especially at the ends.
Basic Procedures l Anatomy l Examination l Treatment l Rehabilitation l Stabilization