srs LTE Small Cell Internet wlp 5 s


 參考網站: https: //www. sqimway. com/lte_band.")


 從UE的wireshark中看到: UE在srs裡解析封包後, 再透過srs介面將ICMP reply回傳至EPC 44")


- Slides: 53
srs. LTE Small Cell 實驗架構 Internet wlp 5 s 0 192. 168. 111. 104 NIC 2 Application NAT tun_srsue 172. 16. 0. 2 srs_spgw_sgi 172. 16. 0. 1 srs. UE sre. ENB NIC machine 1 usb 3. 0 to type B enp 4 s 0 192. 168. 128. 106 enp 3 s 0 192. 168. 128. 108 127. 0. 1. 100 srs. EPC NIC 1 RF board mme_addr machine 2 usb 3. 0 to type B RF cable / Antenna 6
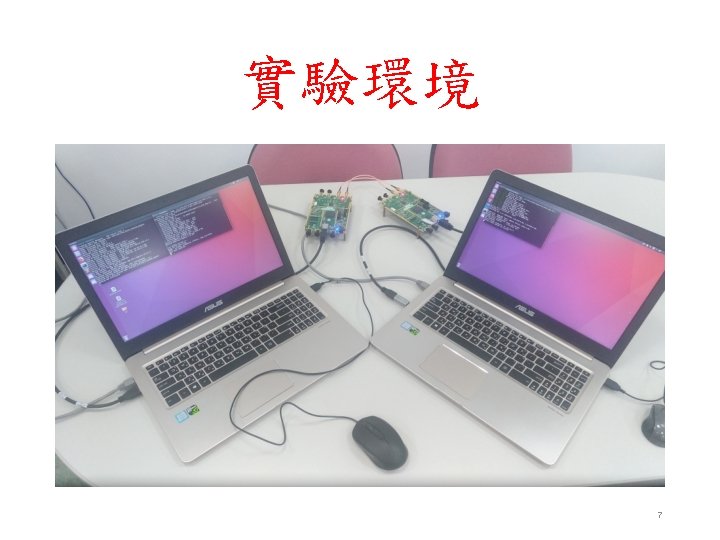
軟硬體環境 – 硬體 名稱 規格 數量 目的 EPC+e. NB 電腦型號 : ASUS NB M 580 V USRP B 210 1 啟動 MME, S-GW, P-GW 1 啟動 srs. LTE e. NB UE 1 模擬 UE 1 啟動 srs. LTE UE 電腦型號 : ASUS NB M 580 V USRP B 210 8
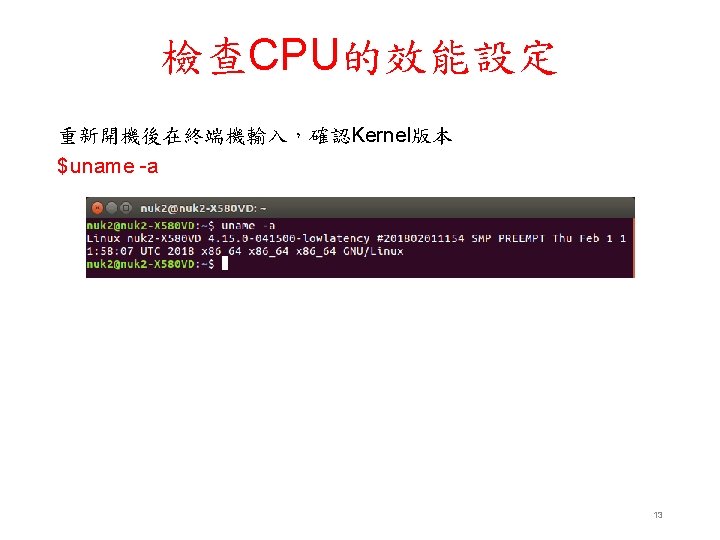
軟硬體環境 – 軟體 名稱 軟體 EPC+e. NB OS : Ubuntu srs. LTE 版本 Ubuntu 16. 04 Kernel : 4. 15. 0 -041500 -lowlatancy srs. LTE 19. 12 d 045213 fb 9 cbf 98 c 83 c 06 d 7 c 17197 a 9 dcbfddacf UE OS : Ubuntu 16. 04 Kernel : 4. 15. 0 -041500 -lowlatancy srs. LTE 19. 12 d 045213 fb 9 cbf 98 c 83 c 06 d 7 c 17197 a 9 dcbfddacf 9
下載及安裝Kernel 在主機上開啟一個新的終端機,並且輸入 $ wget -P ~/Downloads/kernel https: //kernel. ubuntu. com/~kernel-ppa/mainline/v 4. 15/linuxheaders-4. 15. 0 -041500_4. 15. 0 -041500. 201802011154_all. deb $ wget -P ~/Downloads/kernel https: //kernel. ubuntu. com/~kernel-ppa/mainline/v 4. 15/linuxheaders-4. 15. 0 -041500 -lowlatency_4. 15. 0 -041500. 201802011154_amd 64. deb $ wget -P ~/Downloads/kernel https: //kernel. ubuntu. com/~kernel-ppa/mainline/v 4. 15/linux-image 4. 15. 0 -041500 -lowlatency_4. 15. 0 -041500. 201802011154_amd 64. deb $ sudo dpkg -i ~/Downloads/kernel/*. deb 10
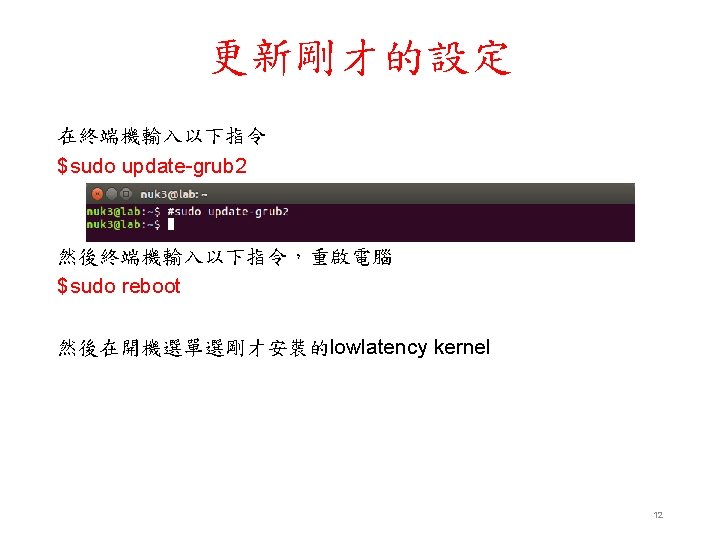
修改開機選單和設定 在終端機輸入以下指令 $sudo gedit /etc/default/grub "GRUB_HIDDEN_TIMEOUT=0" 改成 "#GRUB_HIDDEN_TIMEOUT=0" 11
Required Library • 在終端機輸入以下指令 $ sudo apt-get install cmake libfftw 3 -dev libmbedtls-dev libboostprogram-options-dev libconfig++-dev libsctp-dev 15
Install UHD 根據所使用的硬體安裝不同的套件 $sudo add-apt-repository ppa: ettusresearch/uhd $sudo apt-get update $sudo apt-get install libuhd-dev libuhd 003 uhd-host $sudo /usr/lib/uhd/utils/uhd_images_downloader. py ref: http: //files. ettus. com/manual/page_install. html 16
Download and Build 在終端機輸入以下指令 $ git clone https: //github. com/Nukicslab/nukx. URLLC. git $ cd nukx. URLLC $ mkdir build $ cd build $ cmake. . / $ make test $ sudo make install $ srslte_install_configs. sh user 17
18
Edit File $ cd ~/nukx. URLLC/lib/include/srslte/common/ $ gedit common. h 19
Common define - NUK • 執行e. NB、UE的主機: • 請把 #define NUK 改成 true 20
Common define - e. NB 執行e. NB的主機: 請把 #define NUK_UE 改成 false 21
Common define - UE 執行UE的主機: 請把 #define NUK_UE 改成 true 22
Re Compile 完成後,請重新編譯: $ cd ~/nukx. URLLC/build $ make $ sudo make install 23
Edit UE proxy address $ cd ~/nukx. URLLC/srsue/proxy $ gedit urllc. h 將enb_ip 和ue_ip設定成正確的IP位址後,編譯程式 $ gcc urllc. c -lpthread -o proxy 24
Configure File - enb. conf $ cd ~/. config/srslte • 執行e. NB的主機: $ gedit enb. conf 將x 2 ap_myaddr 改成自己的ip位址 將x 2 ap_neiaddr 改成UE的ip位址 確認 mme, gtp, s 1 c 位址無誤 25
Configure File - epc. conf 執行EPC的主機: $ gedit epc. conf 確認 mme, gtpu 位址無誤 gtpu_bind_addr若是需連到外網,則將此ip位址改成主機連外網的ip位址 26
Checking IP address • 請在終端機上輸入 $ ifconfig 27
e. NB PDU 封包流程 • Down. Link : EPC->e. NB->UE • srsenb: : gtpu: : handle_gtpu_s 1 u_rx_packet() ->srsenb: : pdcp: : write_sdu() ->srslte: : pdcp_entity_lte: : write_sdu() ->srsenb: : rlc: : write_sdu() //在此介面分流 • Down. Link : EPC->e. NB->UE • proxy->srslte: : pdcp: : run_thread() //接收e. NB封包後轉傳到PDCP層 • srslte: : pdcp: : write_pdu() -> srslte: : pdcp_entity_lte: : write_pdu() 28
enb. conf: : enb. n_prb • srs. LTE目前支援 : 6, 15, 25, 50, 75, 100 n_prb對應到的不同頻寬(spectrum bandwidth) 30
enb. conf: : rf. dl_earfcn • dl_earfcn對應到MHz (spectrum frequency) 參考網站: https: //www. sqimway. com/lte_band. php • tx_gain和rx_gain調整接收的放大比率 越高數值並不代表就會有越高的吞吐量(throughput) • e. NB的dl_earfcn需要跟UE一致 以避免無法連線情況 31
Spectrum Frequency 32
開啟 proxy程式 UE在終端機輸入: $ cd ~/path/to/nukx. URLLC/srsue/proxy $ gcc urllc. c -lpthread -o proxy $. /proxy 此程式用來接收e. NB轉傳的封包, 再將原本的內容轉至srsue中 38
Split_ratio • 分流比例為 2: 3,如下圖所示 pkt_4 pkt_3 pkt_2 Ethernet / WLAN UE e. NB LTE pkt_1 pkt_0 41
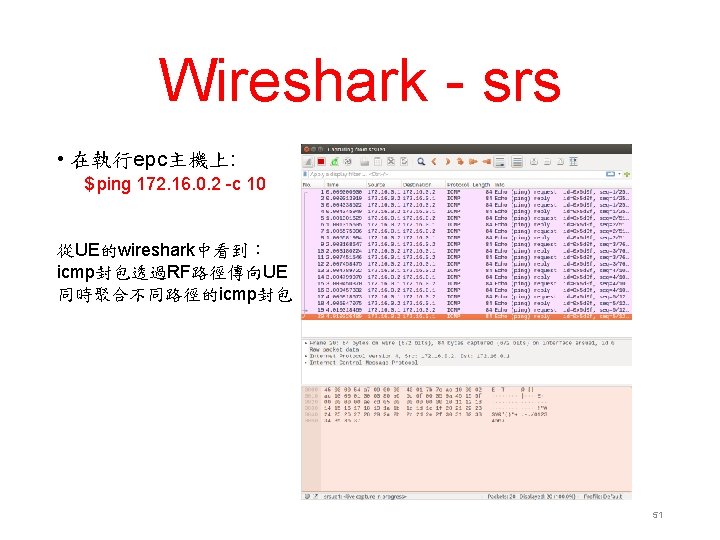
Monitor Seq. 在執行epc主機上: $ ping 172. 16. 0. 2 -c 10 從UE的wireshark中看到 UE在網卡上收到來自enb的UDP封包, 內含從EPC發出的ICMP request, 接著透過proxy程式轉送給srs介面 43
Monitor Seq. (Cont. ) 從UE的wireshark中看到: UE在srs裡解析封包後, 再透過srs介面將ICMP reply回傳至EPC 44
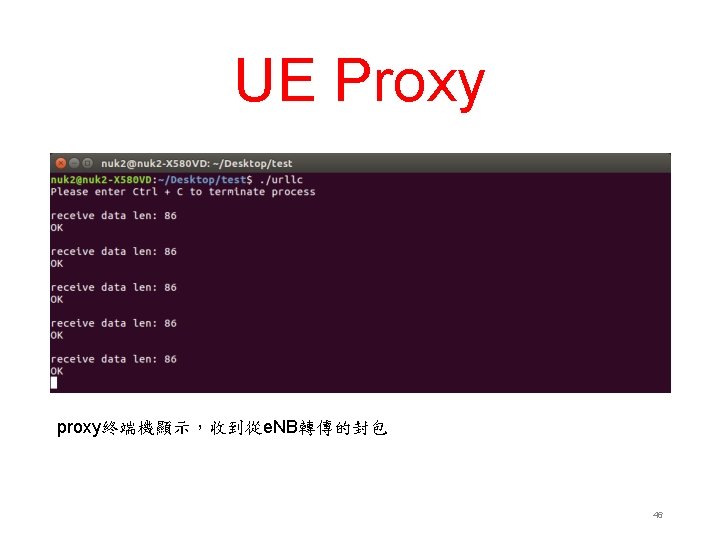
UE Aggregate srsue終端機顯示,收到從proxy轉傳的封包 45
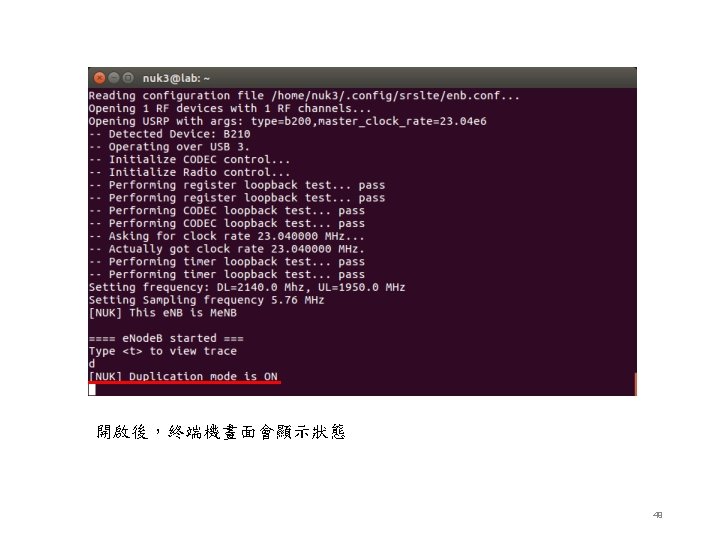
Duplication_mode • 在執行e. NB的主機上: • 輸入 ‘d’,按下’enter’,將會啟動duplication_mode • Duplication mode 和 Split mode 並不會同時存在 pkt_1 pkt_0 Ethernet / WLAN UE e. NB LTE pkt_1 pkt_0 48
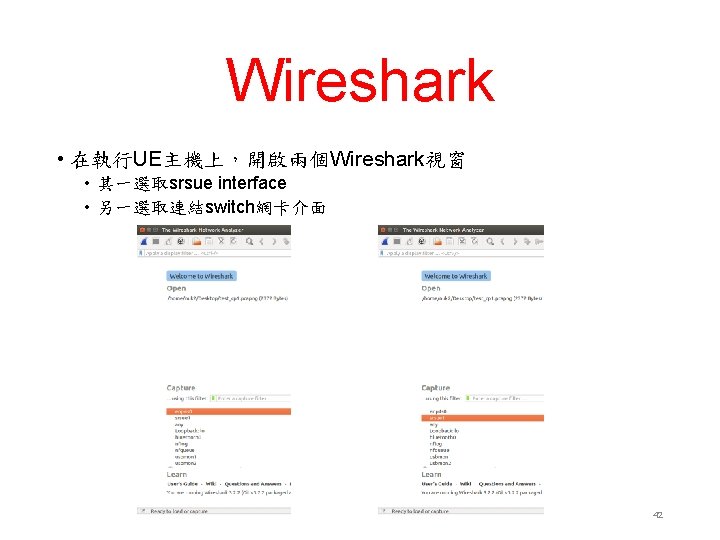
Wireshark - Switch • 在執行epc主機上: $ ping 172. 16. 0. 2 -c 10 從UE的wireshark中看到: icmp封包透過Switch封裝成 UDP封包傳向UE 50