MANUFACTURING PROCESS 1 DPT 110 1 MECHANICAL PROPERTIES





- Slides: 32

MANUFACTURING PROCESS 1 (DPT 110) 1 MECHANICAL PROPERTIES CO 1: Able to ILLUSTRATE the manufacturing process : Plastic Shaping, Metal Casting, Metal Forming and Joining.

2

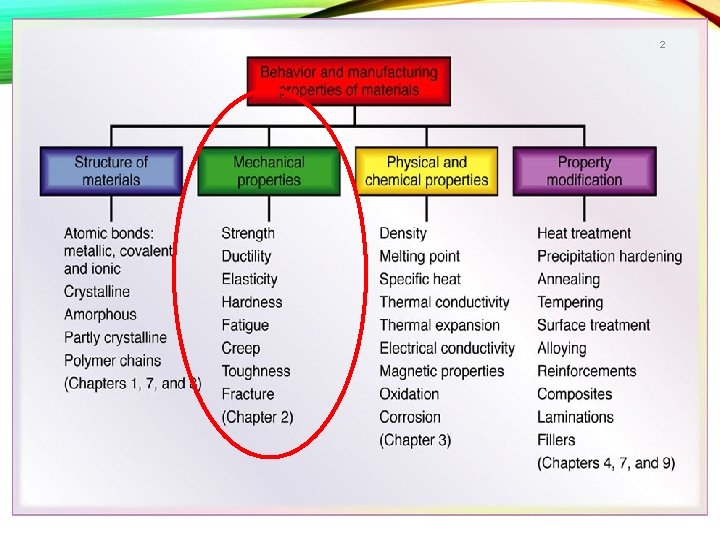
3 ØPhysical properties: A general method to differentiate materials • e. g: Density, melting point, optical property (transparency or opaque), electrical conductivity ØMechanical properties: Determine a material’s behavior when subjected to mechanical stresses/ load or forces • Properties include elastic modulus, ductility, hardness, and various measures of strength ØDilemma: mechanical properties desirable to the designer, such as high strength, usually make manufacturing more difficult • The manufacturing engineer should appreciate the design viewpoint • And the designer should be aware of the manufacturing viewpoint

4 MECHANICAL PROPERTIES ØMost of manufacturing process, parts and components are formed into different shapes by applying external forces to the work piece. ØFor examples, forging turbine disks, drawing wire for making nails and rolling metal to make sheet for car bodies, etc.

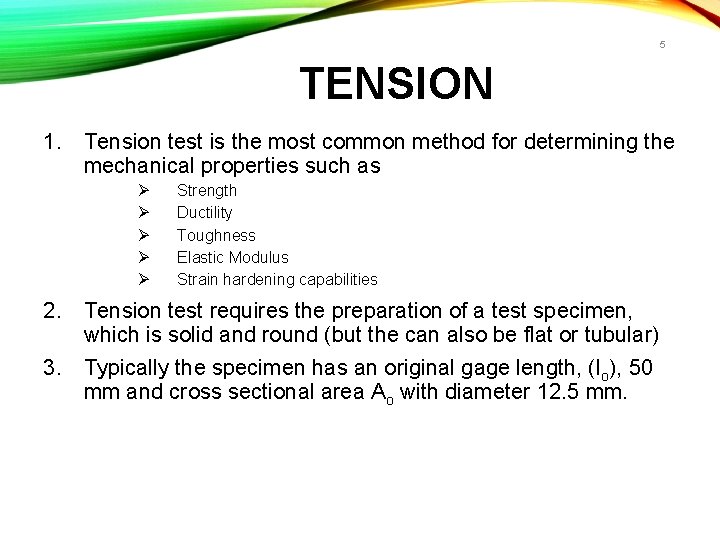
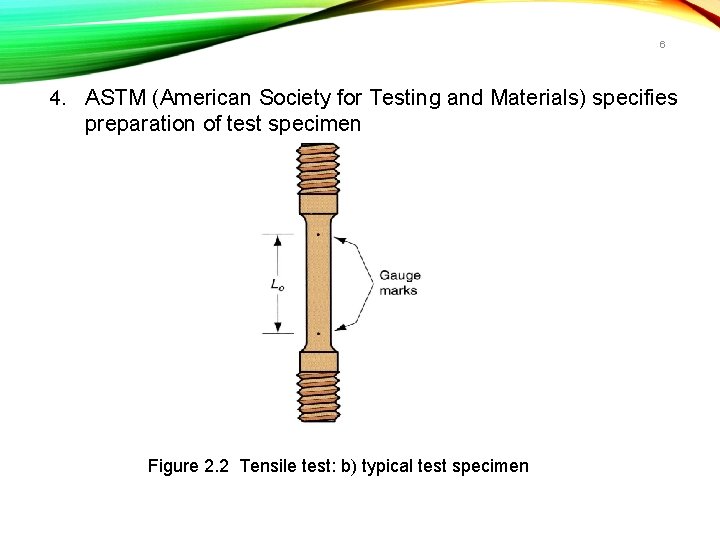
5 TENSION 1. Tension test is the most common method for determining the mechanical properties such as Ø Ø Ø Strength Ductility Toughness Elastic Modulus Strain hardening capabilities 2. Tension test requires the preparation of a test specimen, which is solid and round (but the can also be flat or tubular) 3. Typically the specimen has an original gage length, (lo), 50 mm and cross sectional area Ao with diameter 12. 5 mm.

6 4. ASTM (American Society for Testing and Materials) specifies preparation of test specimen Figure 2. 2 Tensile test: b) typical test specimen

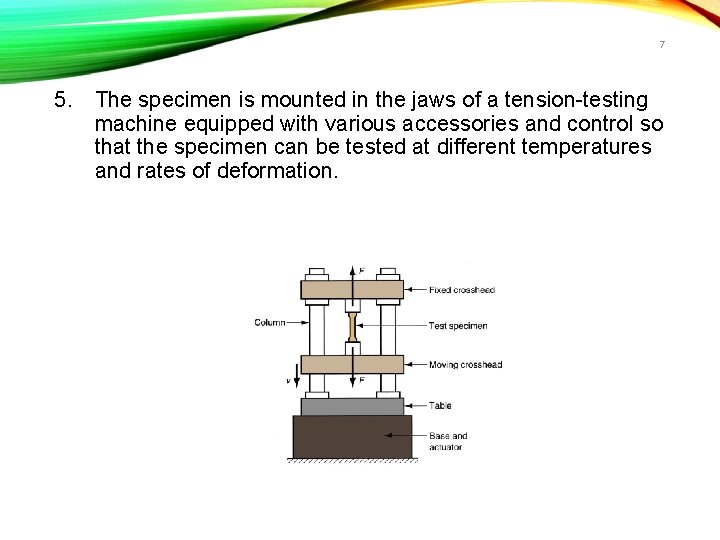
7 5. The specimen is mounted in the jaws of a tension-testing machine equipped with various accessories and control so that the specimen can be tested at different temperatures and rates of deformation.

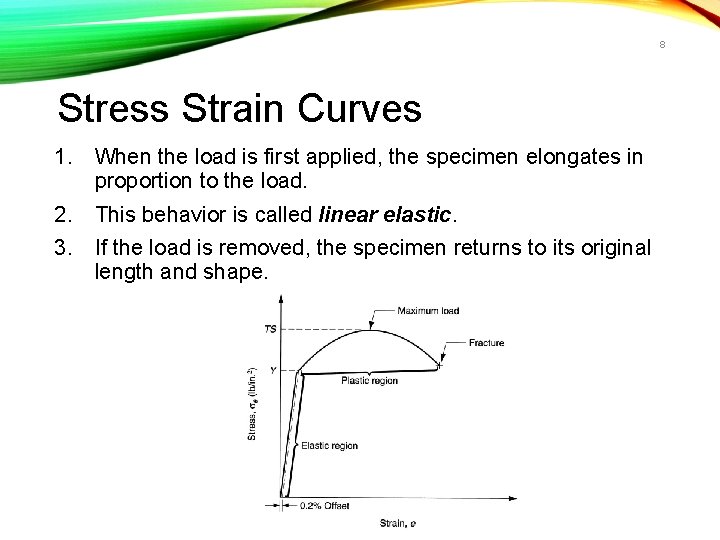
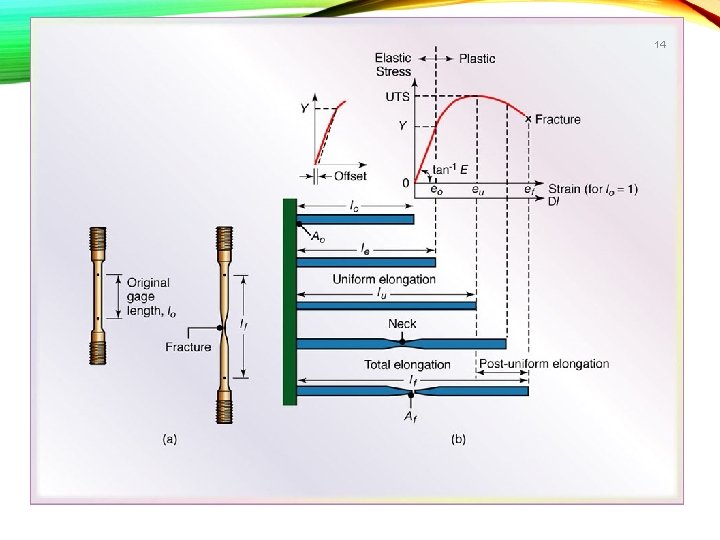
8 Stress Strain Curves 1. When the load is first applied, the specimen elongates in proportion to the load. 2. This behavior is called linear elastic. 3. If the load is removed, the specimen returns to its original length and shape.

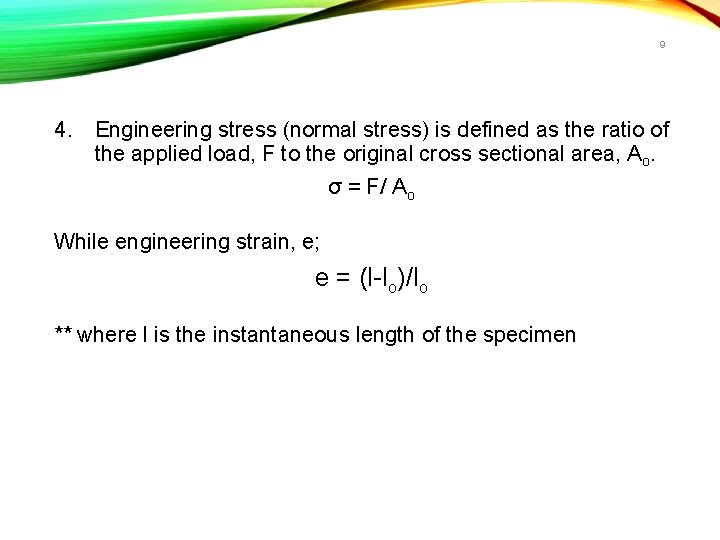
9 4. Engineering stress (normal stress) is defined as the ratio of the applied load, F to the original cross sectional area, Ao. σ = F/ Ao While engineering strain, e; e = (l-lo)/lo ** where l is the instantaneous length of the specimen

10 5. As the load is increased, the specimen begins to undergo nonlinear elastic deformation at a stress called proportional limit. 6. At that point the stress and strain are no longer proportional, but when the load is unloaded, the specimen still returns to its original shape. 7. Permanent (plastic) deformation occurs when the yield stress, Y of the material is reached. 8. As the specimen begin to elongate under a continuously increasing load, its cross sectional area decreases permanently and uniformly throughout its gage length.

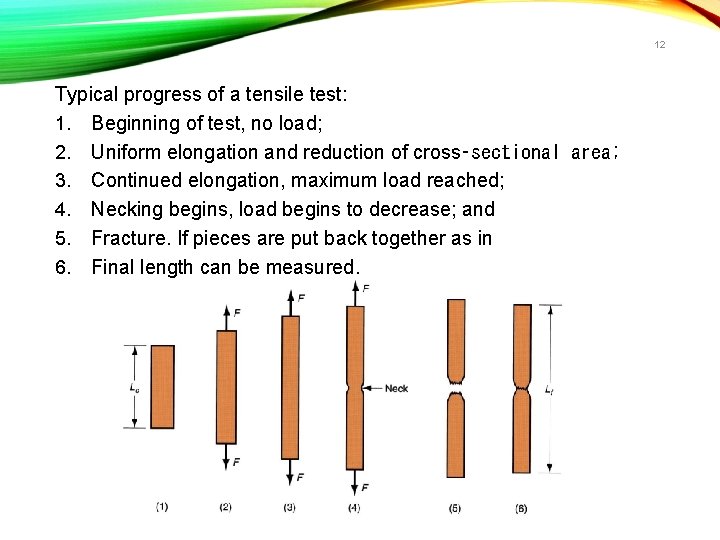
11 9. As the load is increased further, the engineering stress eventually reaches a maximum and then begin to decreased. 10. The maximum engineering stress is called tensile strength or Ultimate Tensile Strength of the material. 11. And, if the specimen is loaded beyond its Ultimate Tensile Strength, it begin to “neck” or “neck down”. 12. The cross sectional area of the specimen is no longer uniform along the gage length and is smaller in the neck region. 13. As the test progresses the engineering stress drops further and the specimen finally fracture at the necked region. 14. The engineering stress at the fracture is known as “breaking” or “Fracture Stress”

12 Typical progress of a tensile test: 1. Beginning of test, no load; 2. Uniform elongation and reduction of cross‑sectional area; 3. Continued elongation, maximum load reached; 4. Necking begins, load begins to decrease; and 5. Fracture. If pieces are put back together as in 6. Final length can be measured.

13 The ratio of stress and strain in the elastic region is the Young Modulus or Modulus of Elasticity, E. E = (σ/e) The linear relationship is known as Hooke’s Laws. Young Modulus, E has same unit as stress because strain is dimensionless.

14

15 Ductility 1. Ductility is an important behavior observed during a tension test. 2. Ductility can be define as an ability of a material to plastically deform without fracture. 3. There are two common measure of ductility Total elongation Reduction of area

16 True Stress And True Strain 1. Engineering stress does not represent the actual stress to which the specimen is subjected. 2. True stress is defined as the ratio of the load, F to the actual (instantaneous)b cross sectional area, A of the specimen. σ = F/A 3. For true strain, ε = ln (l/lo)

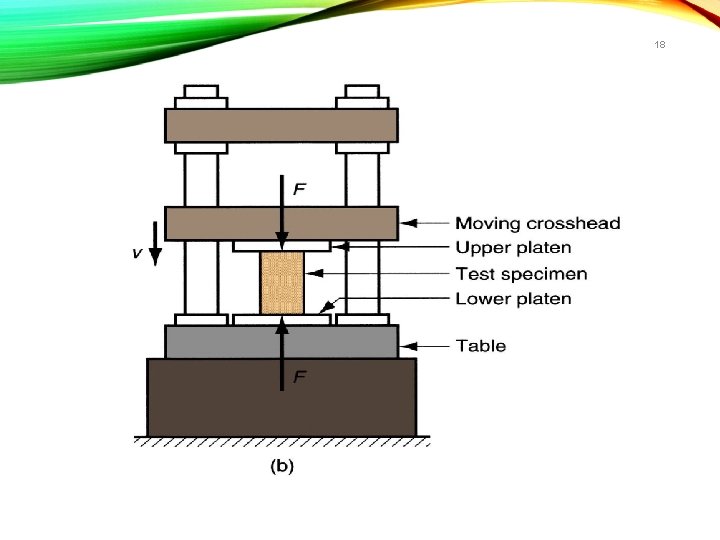
17 COMPRESSION 1. Many operations in manufacturing, particularly processes such as forging, rolling and extrusion, are performed with the work piece subjected to compressed stress. 2. This test usually carried out by compressing a solid cylindrical specimen between two well-lubricated flat dies (platens). 3. Because of friction between the specimen and the platens, the specimen cylindrical surface bulges, and the effect is called “barreling”.

18

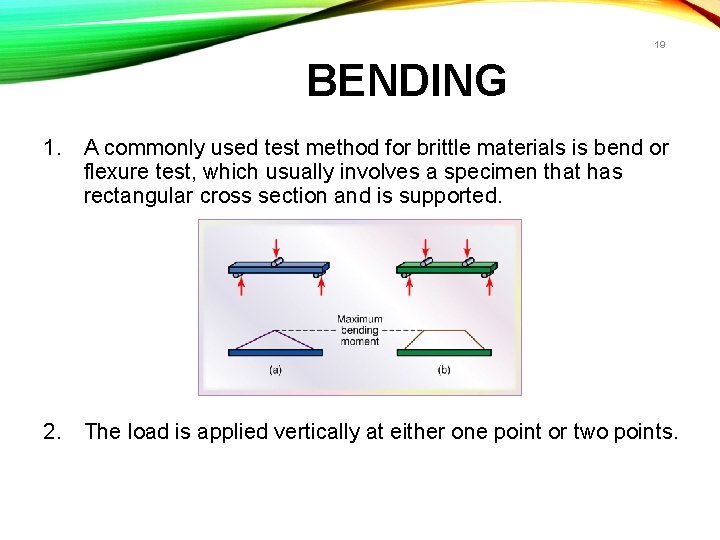
19 BENDING 1. A commonly used test method for brittle materials is bend or flexure test, which usually involves a specimen that has rectangular cross section and is supported. 2. The load is applied vertically at either one point or two points.

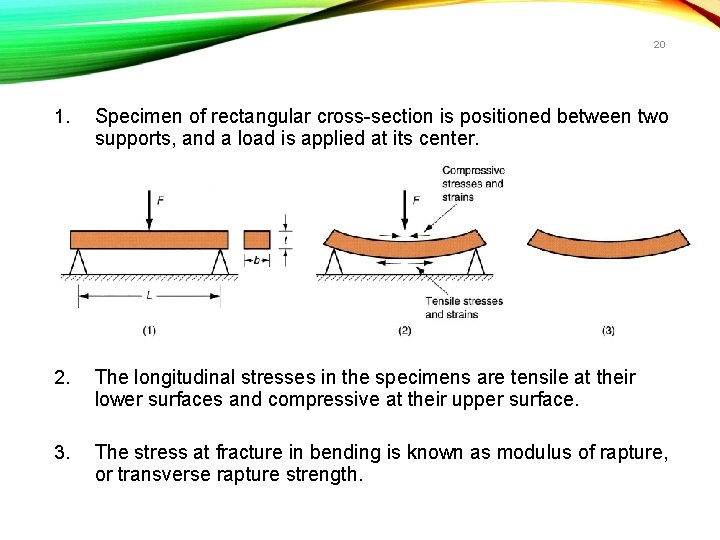
20 1. Specimen of rectangular cross-section is positioned between two supports, and a load is applied at its center. 2. The longitudinal stresses in the specimens are tensile at their lower surfaces and compressive at their upper surface. 3. The stress at fracture in bending is known as modulus of rapture, or transverse rapture strength.

21 HARDNESS ØIt is defined as resistance to permanent indentation ØGood hardness generally means material is resistant to scratching and wear ØMost tooling used in manufacturing must be hard for scratch and wear resistance

22 Hardness Tests ØCommonly used for assessing material properties because they are quick and convenient ØVariety of testing methods are appropriate due to differences in hardness among different materials ØMost well‑known hardness tests are. Brinell and Rockwell ØOther test methods are also available, such as Vickers, Knoop, Scleroscope, and durometer

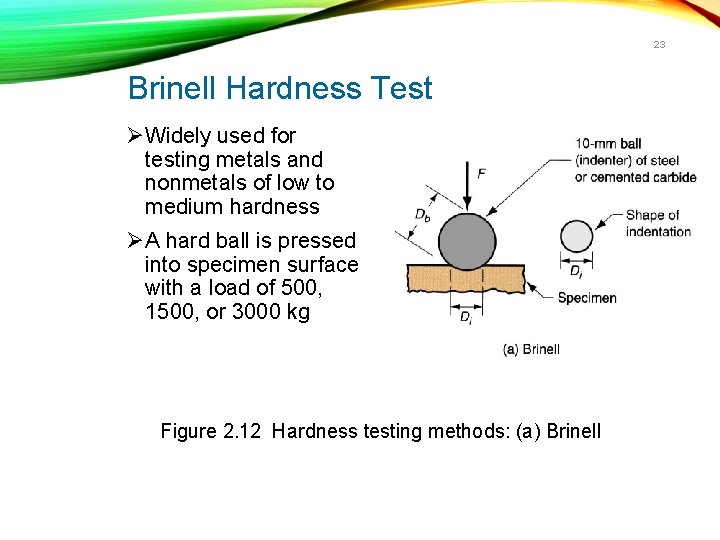
23 Brinell Hardness Test ØWidely used for testing metals and nonmetals of low to medium hardness ØA hard ball is pressed into specimen surface with a load of 500, 1500, or 3000 kg Figure 2. 12 Hardness testing methods: (a) Brinell

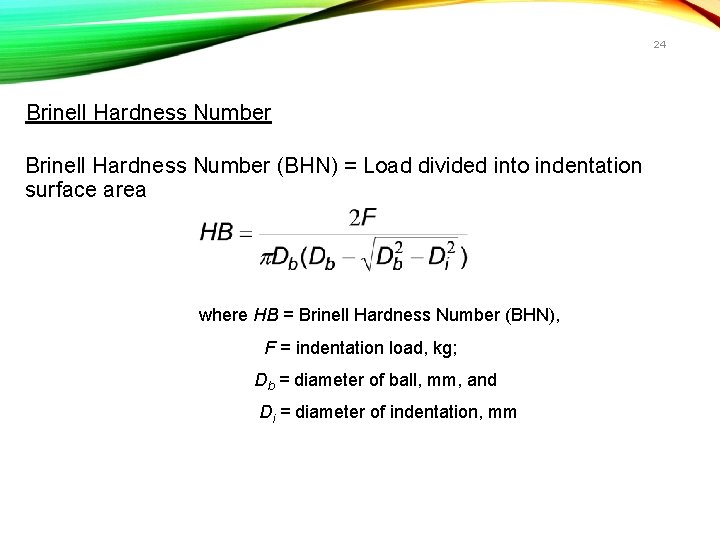
24 Brinell Hardness Number (BHN) = Load divided into indentation surface area where HB = Brinell Hardness Number (BHN), F = indentation load, kg; Db = diameter of ball, mm, and Di = diameter of indentation, mm

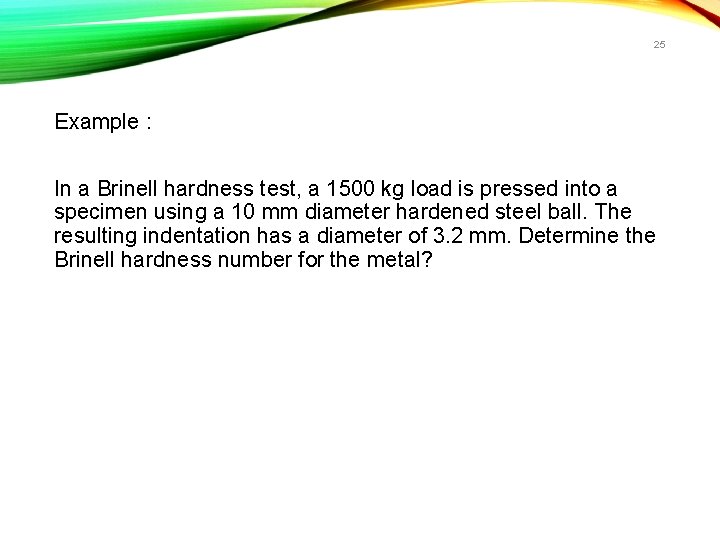
25 Example : In a Brinell hardness test, a 1500 kg load is pressed into a specimen using a 10 mm diameter hardened steel ball. The resulting indentation has a diameter of 3. 2 mm. Determine the Brinell hardness number for the metal?

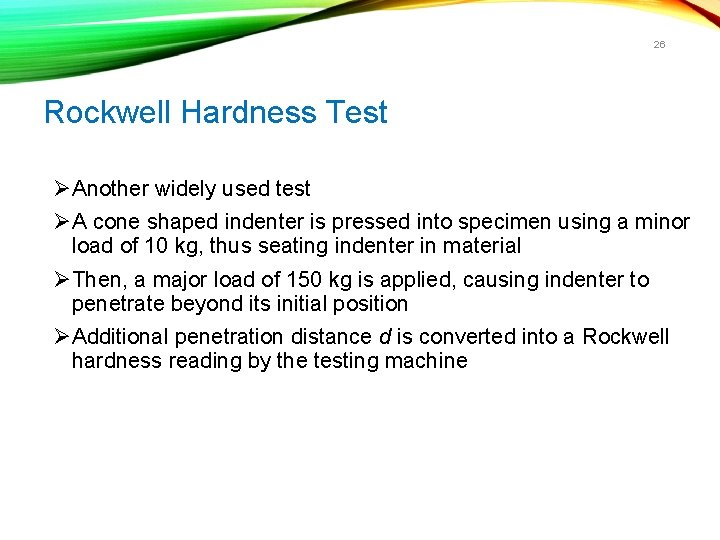
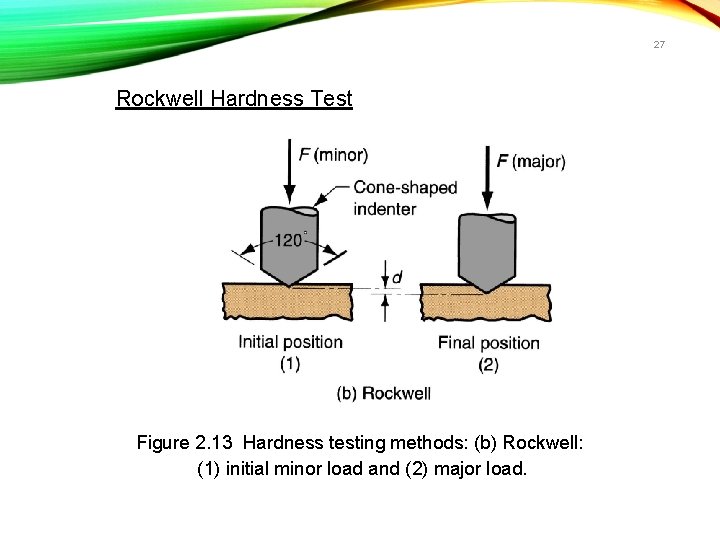
26 Rockwell Hardness Test ØAnother widely used test ØA cone shaped indenter is pressed into specimen using a minor load of 10 kg, thus seating indenter in material ØThen, a major load of 150 kg is applied, causing indenter to penetrate beyond its initial position ØAdditional penetration distance d is converted into a Rockwell hardness reading by the testing machine

27 Rockwell Hardness Test Figure 2. 13 Hardness testing methods: (b) Rockwell: (1) initial minor load and (2) major load.

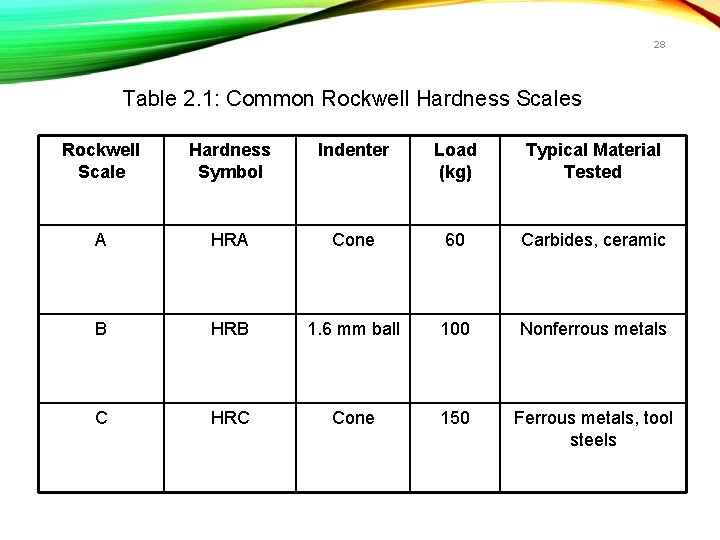
28 Table 2. 1: Common Rockwell Hardness Scales Rockwell Scale Hardness Symbol Indenter Load (kg) Typical Material Tested A HRA Cone 60 Carbides, ceramic B HRB 1. 6 mm ball 100 Nonferrous metals C HRC Cone 150 Ferrous metals, tool steels

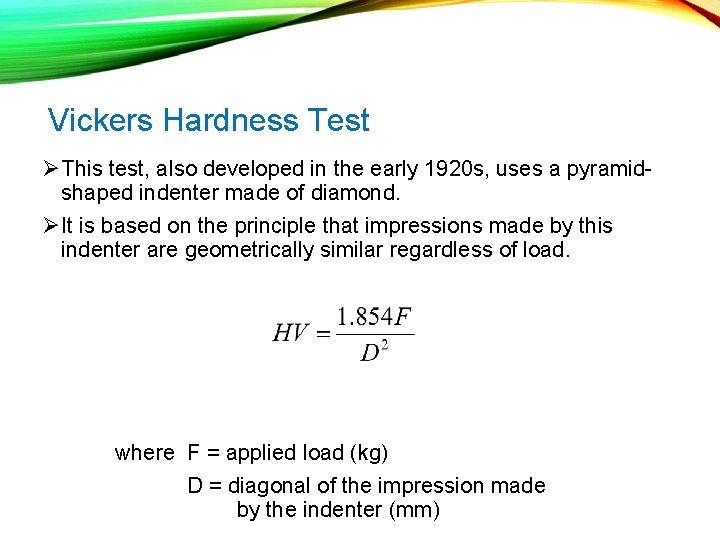
Vickers Hardness Test ØThis test, also developed in the early 1920 s, uses a pyramidshaped indenter made of diamond. ØIt is based on the principle that impressions made by this indenter are geometrically similar regardless of load. where F = applied load (kg) D = diagonal of the impression made by the indenter (mm)

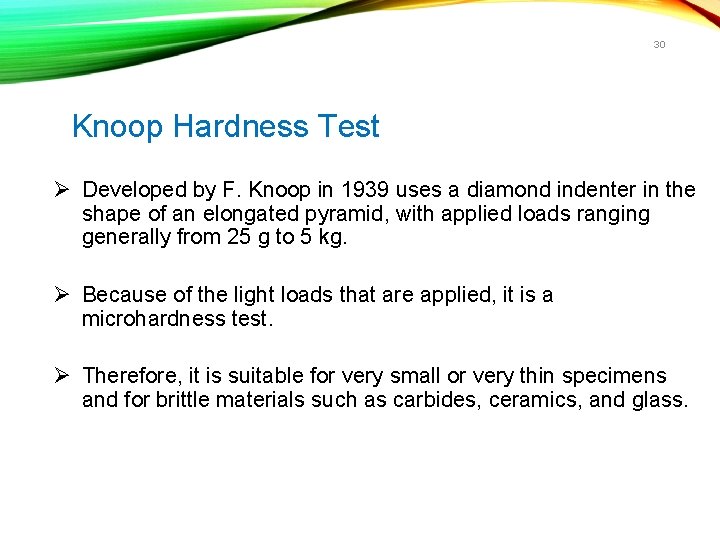
30 Knoop Hardness Test Ø Developed by F. Knoop in 1939 uses a diamond indenter in the shape of an elongated pyramid, with applied loads ranging generally from 25 g to 5 kg. Ø Because of the light loads that are applied, it is a microhardness test. Ø Therefore, it is suitable for very small or very thin specimens and for brittle materials such as carbides, ceramics, and glass.

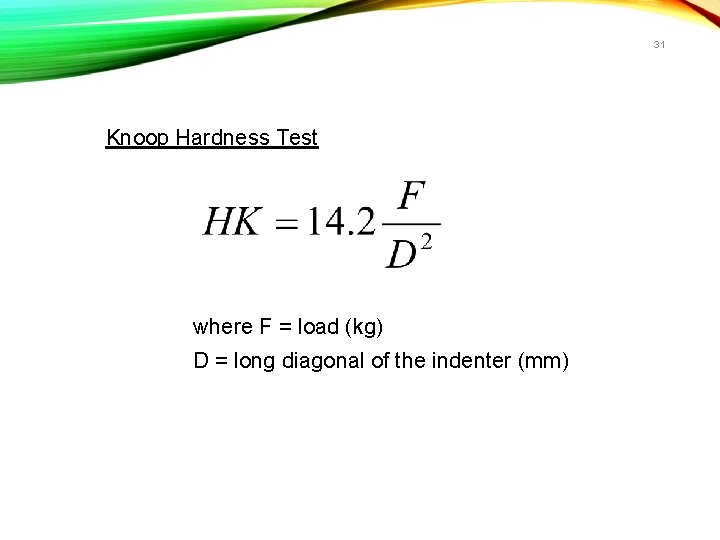
31 Knoop Hardness Test where F = load (kg) D = long diagonal of the indenter (mm)

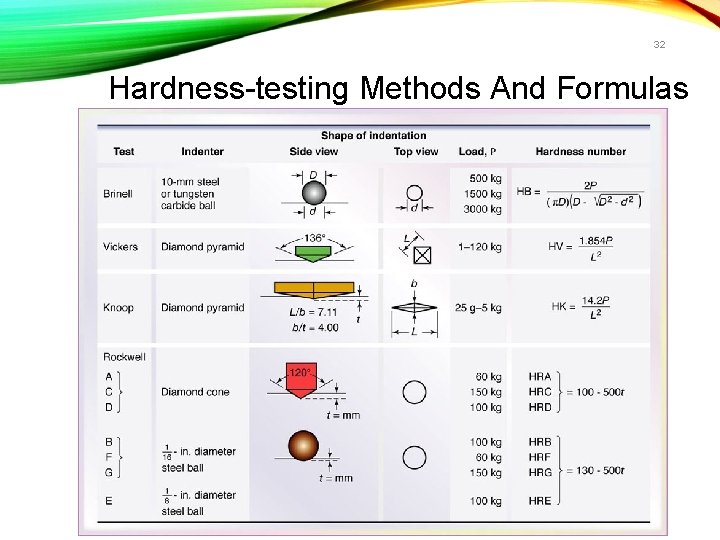
32 Hardness-testing Methods And Formulas