Results of Onshore and Offshore Composite Repair Studies
- Slides: 50

Results of Onshore and Offshore Composite Repair Studies Workshop Presentation Prepared for: BSEE / PHMSA Date: 17 January 2018 Prepared by: Colton Sheets, PE

Agenda / Outline Purpose: Discuss the results of the recently completed study investigating the suitability of composite repair systems as structural reinforcement for onshore and offshore applications. • • Study Objectives Project Review - Onshore § Load Transfer Study Project Review - Offshore § Exposure Testing § Full-scale Testing Results Discussion an employee-owned company 2

Study Objectives • Onshore study: § Does installation pressure have an effect on performance? • – Completed with both external wall loss and plain dents Offshore study: § Replicate offshore / subsea environment. Can nominal performance be maintained? § Potential for a variety of loading conditions offshore. Is structural reinforcement provided? an employee-owned company 3

PROJECT REVIEW: LOAD TRANSFER STUDY an employee-owned company 4

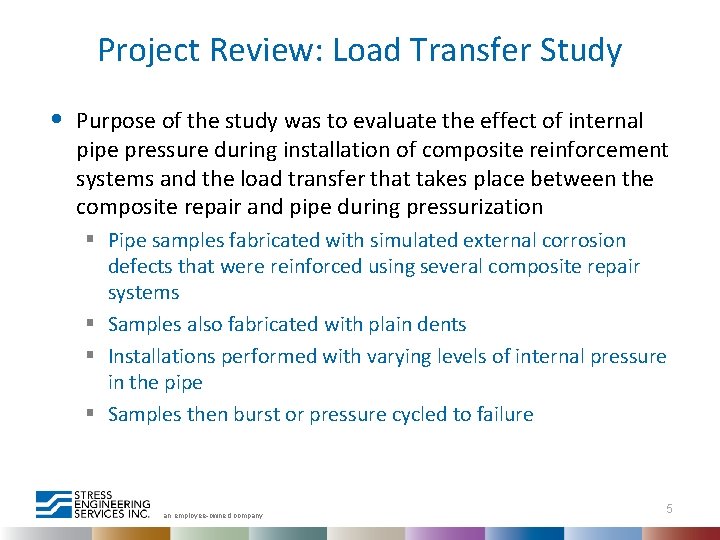
Project Review: Load Transfer Study • Purpose of the study was to evaluate the effect of internal pipe pressure during installation of composite reinforcement systems and the load transfer that takes place between the composite repair and pipe during pressurization § Pipe samples fabricated with simulated external corrosion defects that were reinforced using several composite repair systems § Samples also fabricated with plain dents § Installations performed with varying levels of internal pressure in the pipe § Samples then burst or pressure cycled to failure an employee-owned company 5

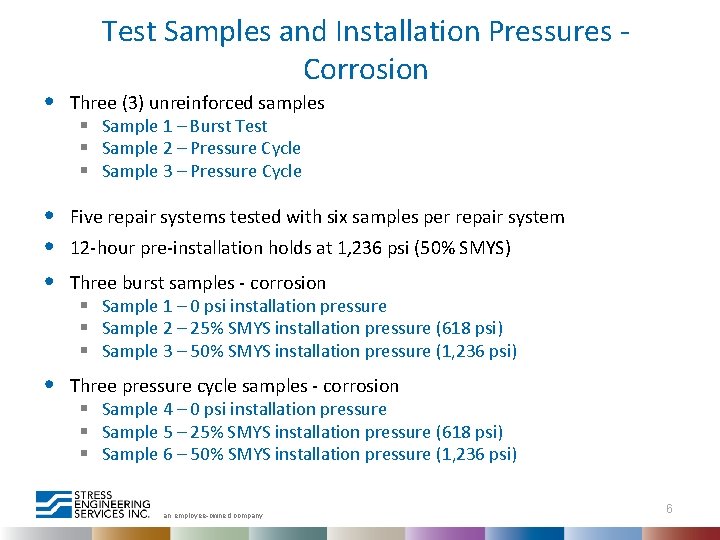
Test Samples and Installation Pressures Corrosion • Three (3) unreinforced samples § Sample 1 – Burst Test § Sample 2 – Pressure Cycle § Sample 3 – Pressure Cycle • • • Five repair systems tested with six samples per repair system • Three pressure cycle samples - corrosion § Sample 4 – 0 psi installation pressure § Sample 5 – 25% SMYS installation pressure (618 psi) § Sample 6 – 50% SMYS installation pressure (1, 236 psi) 12 -hour pre-installation holds at 1, 236 psi (50% SMYS) Three burst samples - corrosion § Sample 1 – 0 psi installation pressure § Sample 2 – 25% SMYS installation pressure (618 psi) § Sample 3 – 50% SMYS installation pressure (1, 236 psi) an employee-owned company 6

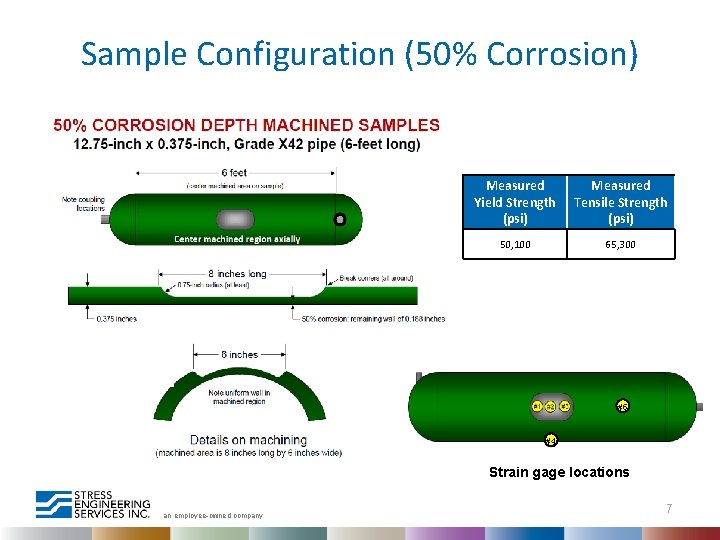
Sample Configuration (50% Corrosion) Measured Yield Strength (psi) Measured Tensile Strength (psi) 50, 100 65, 300 #5 #4 Strain gage locations an employee-owned company 7

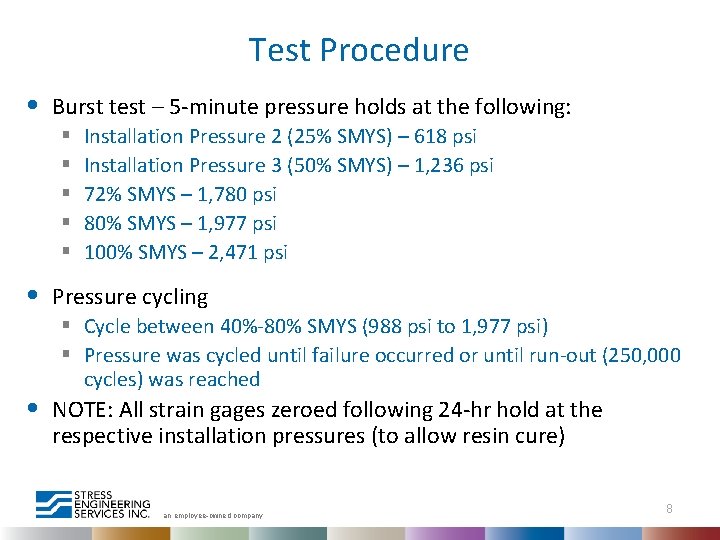
Test Procedure • Burst test – 5 -minute pressure holds at the following: § § § • • Installation Pressure 2 (25% SMYS) – 618 psi Installation Pressure 3 (50% SMYS) – 1, 236 psi 72% SMYS – 1, 780 psi 80% SMYS – 1, 977 psi 100% SMYS – 2, 471 psi Pressure cycling § Cycle between 40%-80% SMYS (988 psi to 1, 977 psi) § Pressure was cycled until failure occurred or until run-out (250, 000 cycles) was reached NOTE: All strain gages zeroed following 24 -hr hold at the respective installation pressures (to allow resin cure) an employee-owned company 8

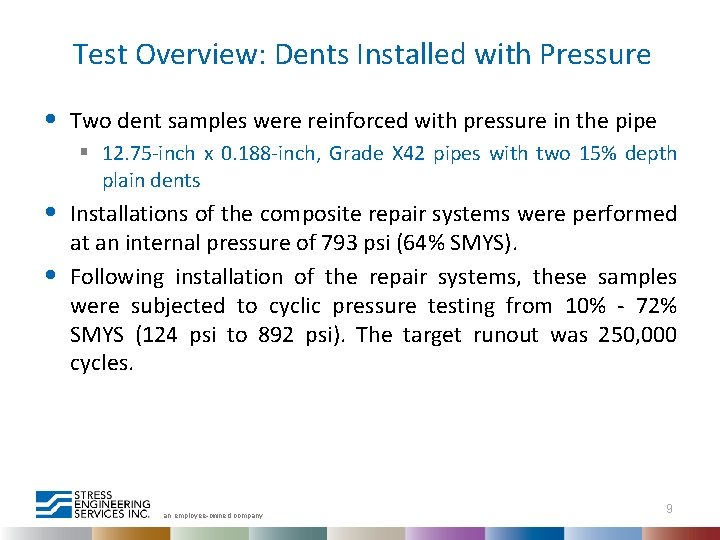
Test Overview: Dents Installed with Pressure • • • Two dent samples were reinforced with pressure in the pipe § 12. 75 -inch x 0. 188 -inch, Grade X 42 pipes with two 15% depth plain dents Installations of the composite repair systems were performed at an internal pressure of 793 psi (64% SMYS). Following installation of the repair systems, these samples were subjected to cyclic pressure testing from 10% - 72% SMYS (124 psi to 892 psi). The target runout was 250, 000 cycles. an employee-owned company 9

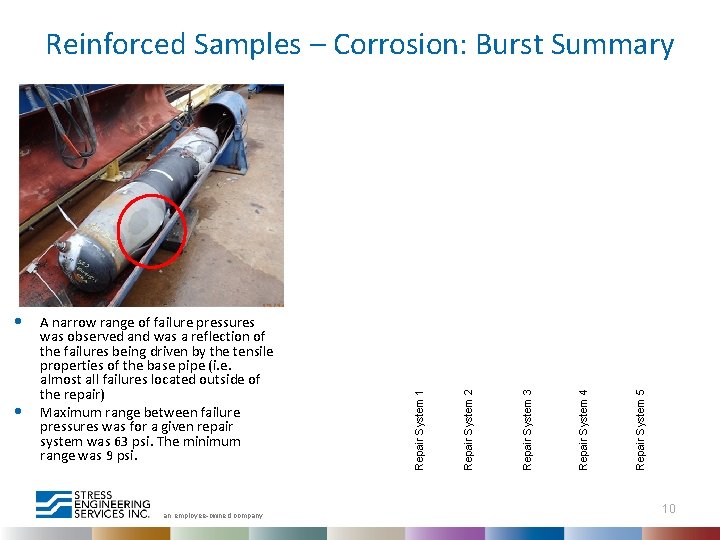
an employee-owned company Repair System 5 Repair System 4 Repair System 3 • A narrow range of failure pressures was observed and was a reflection of the failures being driven by the tensile properties of the base pipe (i. e. almost all failures located outside of the repair) Maximum range between failure pressures was for a given repair system was 63 psi. The minimum range was 9 psi. Repair System 2 • Repair System 1 Reinforced Samples – Corrosion: Burst Summary 10

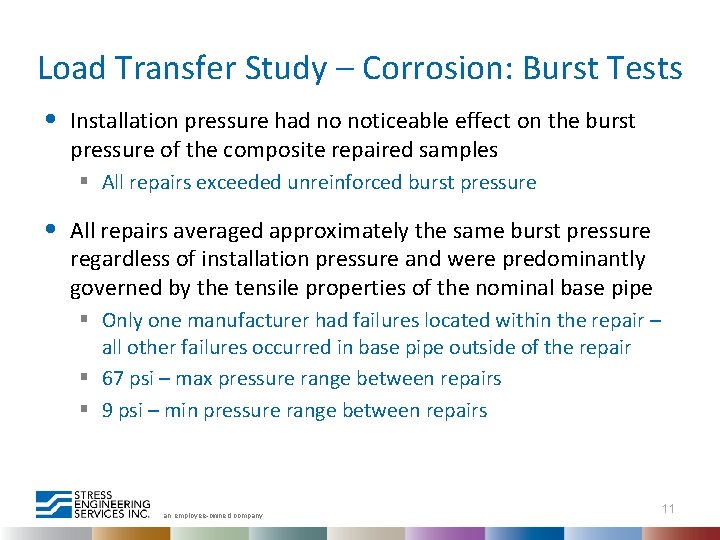
Load Transfer Study – Corrosion: Burst Tests • Installation pressure had no noticeable effect on the burst pressure of the composite repaired samples § All repairs exceeded unreinforced burst pressure • All repairs averaged approximately the same burst pressure regardless of installation pressure and were predominantly governed by the tensile properties of the nominal base pipe § Only one manufacturer had failures located within the repair – all other failures occurred in base pipe outside of the repair § 67 psi – max pressure range between repairs § 9 psi – min pressure range between repairs an employee-owned company 11

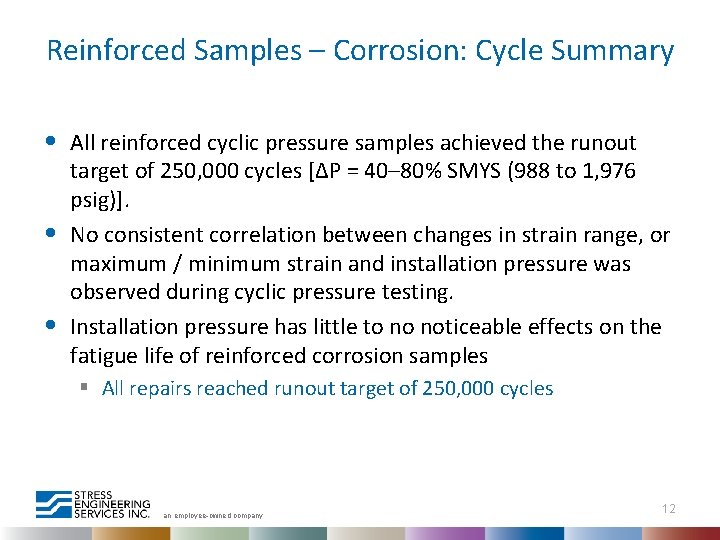
Reinforced Samples – Corrosion: Cycle Summary • • • All reinforced cyclic pressure samples achieved the runout target of 250, 000 cycles [ΔP = 40– 80% SMYS (988 to 1, 976 psig)]. No consistent correlation between changes in strain range, or maximum / minimum strain and installation pressure was observed during cyclic pressure testing. Installation pressure has little to no noticeable effects on the fatigue life of reinforced corrosion samples § All repairs reached runout target of 250, 000 cycles an employee-owned company 12

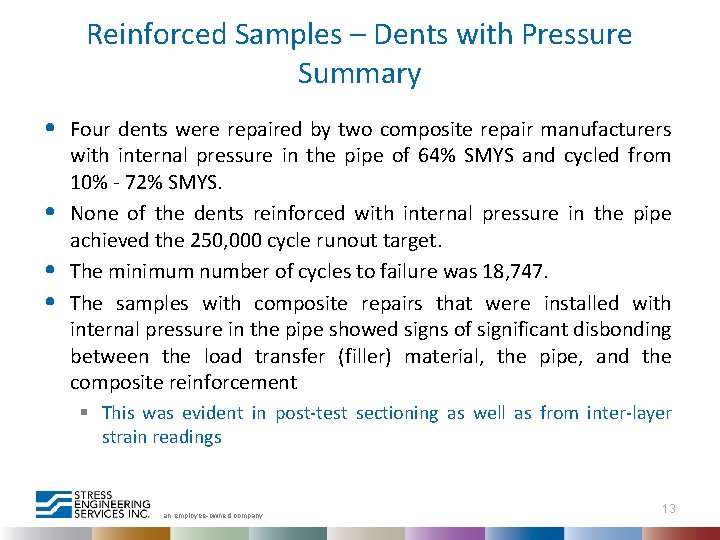
Reinforced Samples – Dents with Pressure Summary • • Four dents were repaired by two composite repair manufacturers with internal pressure in the pipe of 64% SMYS and cycled from 10% - 72% SMYS. None of the dents reinforced with internal pressure in the pipe achieved the 250, 000 cycle runout target. The minimum number of cycles to failure was 18, 747. The samples with composite repairs that were installed with internal pressure in the pipe showed signs of significant disbonding between the load transfer (filler) material, the pipe, and the composite reinforcement § This was evident in post-test sectioning as well as from inter-layer strain readings an employee-owned company 13

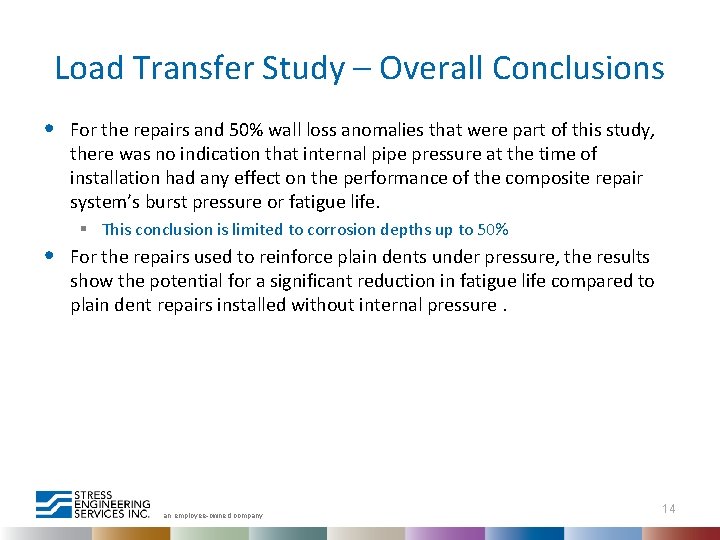
Load Transfer Study – Overall Conclusions • • For the repairs and 50% wall loss anomalies that were part of this study, there was no indication that internal pipe pressure at the time of installation had any effect on the performance of the composite repair system’s burst pressure or fatigue life. § This conclusion is limited to corrosion depths up to 50% For the repairs used to reinforce plain dents under pressure, the results show the potential for a significant reduction in fatigue life compared to plain dent repairs installed without internal pressure. an employee-owned company 14

PROJECT REVIEW: OFFSHORE STUDY an employee-owned company 15

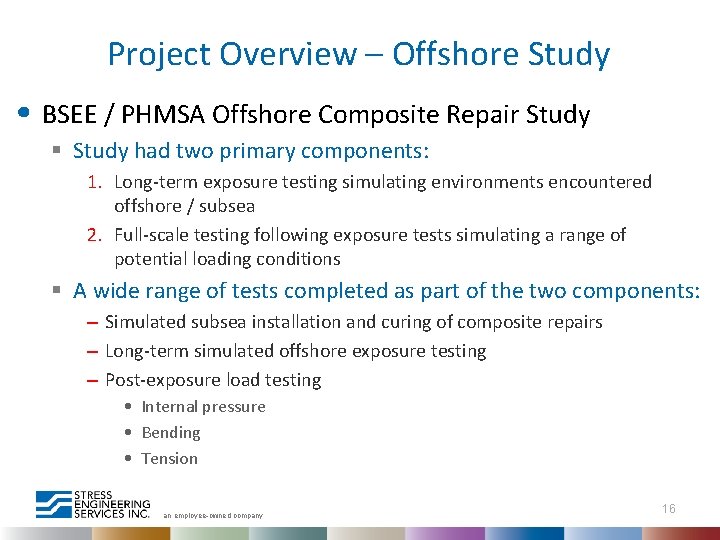
Project Overview – Offshore Study • BSEE / PHMSA Offshore Composite Repair Study § Study had two primary components: 1. Long-term exposure testing simulating environments encountered offshore / subsea 2. Full-scale testing following exposure tests simulating a range of potential loading conditions § A wide range of tests completed as part of the two components: – Simulated subsea installation and curing of composite repairs – Long-term simulated offshore exposure testing – Post-exposure load testing • Internal pressure • Bending • Tension an employee-owned company 16

Project Overview – Exposure Testing • Objective 1 – Evaluate composites for their long-term suitability in offshore / subsea conditions § Non-standard environments require additional vetting § Vetting should consider all aspects of composite repair qualification – in the expected environment – Material selection – Design – Installation § Full-scale testing a way to test major components simultaneously an employee-owned company 17

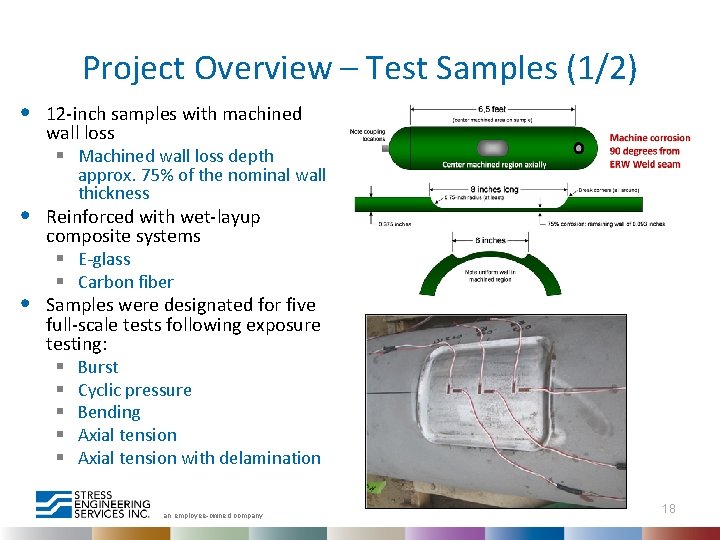
Project Overview – Test Samples (1/2) • • • 12 -inch samples with machined wall loss § Machined wall loss depth approx. 75% of the nominal wall thickness Reinforced with wet-layup composite systems § E-glass § Carbon fiber Samples were designated for five full-scale tests following exposure testing: § Burst § Cyclic pressure § Bending § Axial tension with delamination an employee-owned company 18

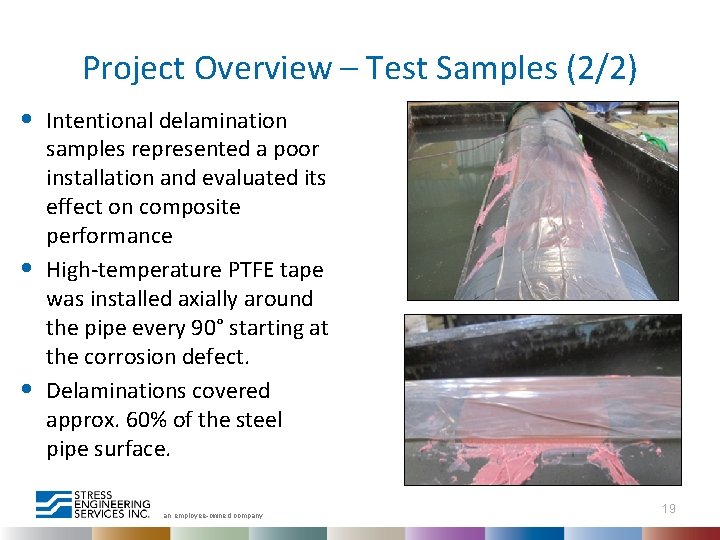
Project Overview – Test Samples (2/2) • • • Intentional delamination samples represented a poor installation and evaluated its effect on composite performance High-temperature PTFE tape was installed axially around the pipe every 90° starting at the corrosion defect. Delaminations covered approx. 60% of the steel pipe surface. an employee-owned company 19

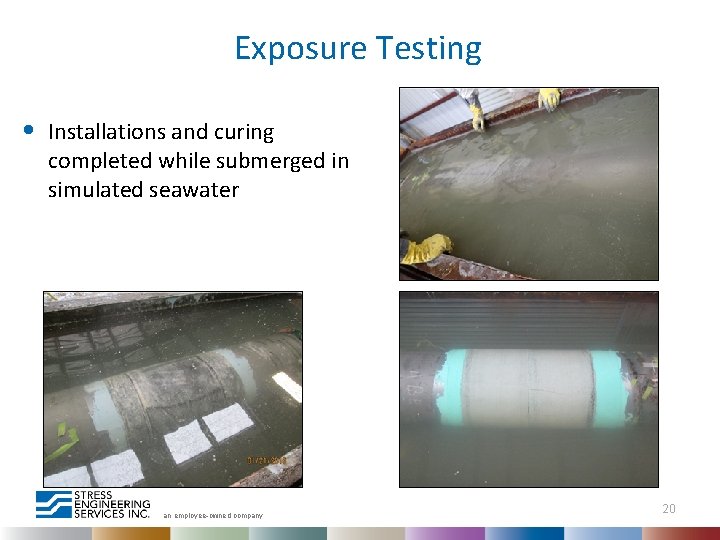
Exposure Testing • Installations and curing completed while submerged in simulated seawater an employee-owned company 20

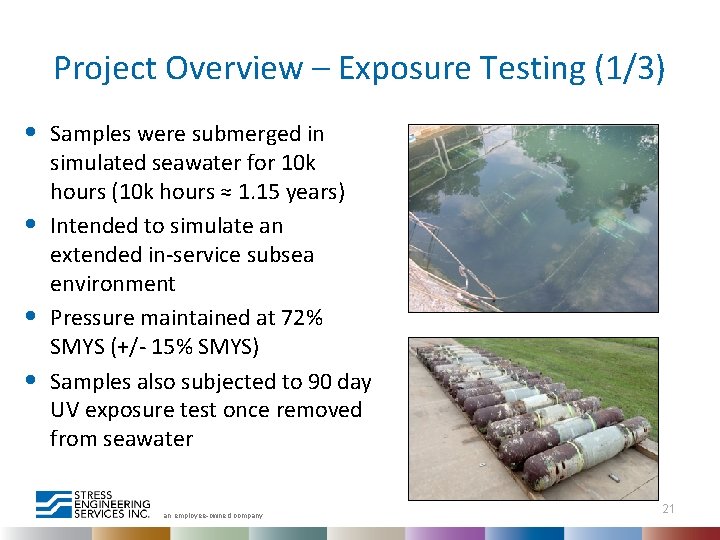
Project Overview – Exposure Testing (1/3) • • Samples were submerged in simulated seawater for 10 k hours (10 k hours ≈ 1. 15 years) Intended to simulate an extended in-service subsea environment Pressure maintained at 72% SMYS (+/- 15% SMYS) Samples also subjected to 90 day UV exposure test once removed from seawater an employee-owned company 21

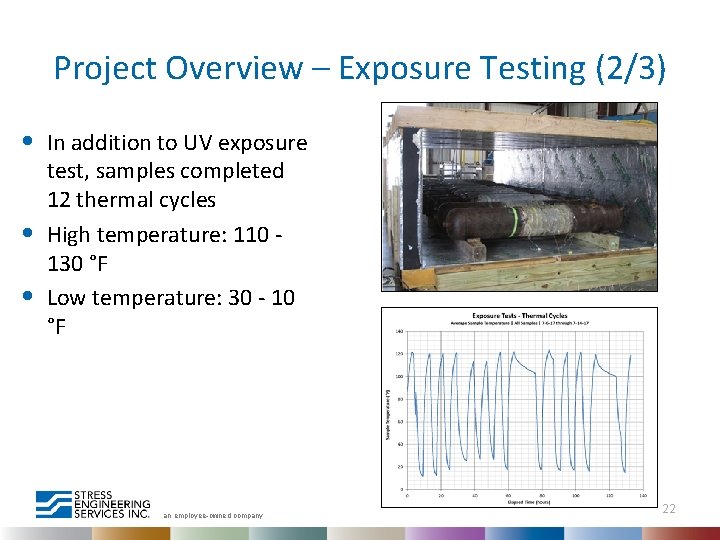
Project Overview – Exposure Testing (2/3) • • • In addition to UV exposure test, samples completed 12 thermal cycles High temperature: 110 130 °F Low temperature: 30 - 10 °F an employee-owned company 22

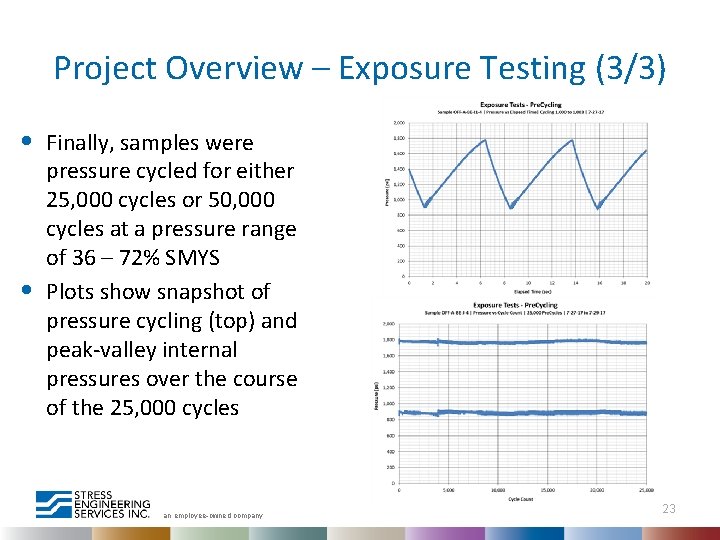
Project Overview – Exposure Testing (3/3) • • Finally, samples were pressure cycled for either 25, 000 cycles or 50, 000 cycles at a pressure range of 36 – 72% SMYS Plots show snapshot of pressure cycling (top) and peak-valley internal pressures over the course of the 25, 000 cycles an employee-owned company 23

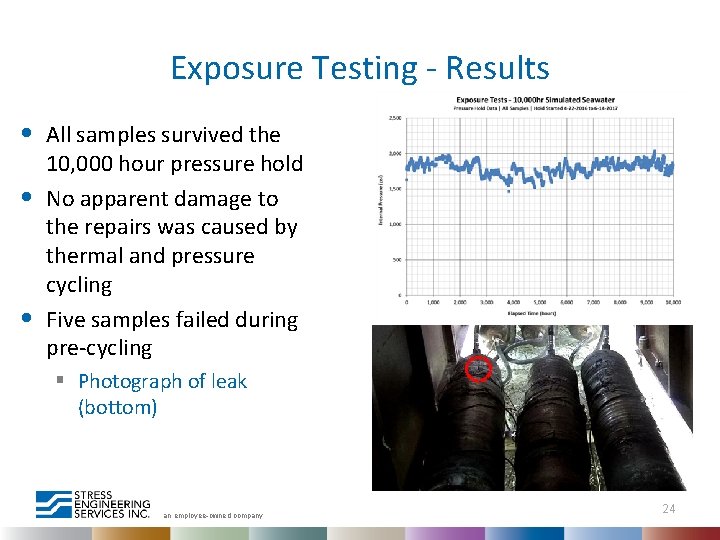
Exposure Testing - Results • • • All samples survived the 10, 000 hour pressure hold No apparent damage to the repairs was caused by thermal and pressure cycling Five samples failed during pre-cycling § Photograph of leak (bottom) an employee-owned company 24

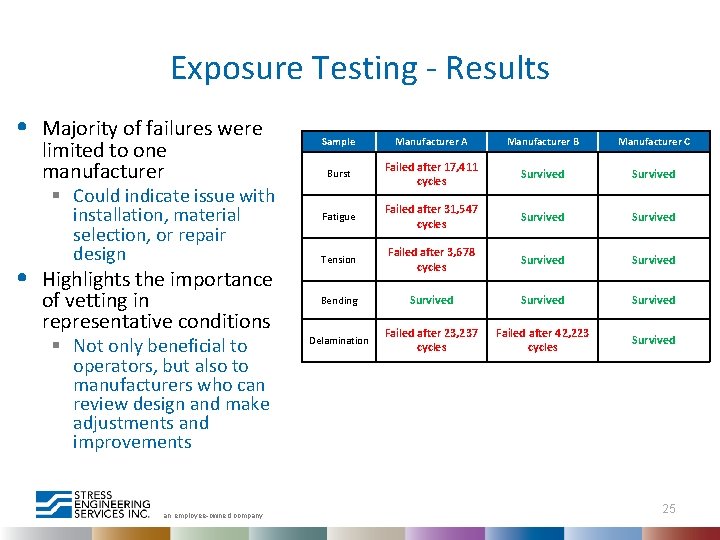
Exposure Testing - Results • • Majority of failures were limited to one manufacturer § Could indicate issue with installation, material selection, or repair design Highlights the importance of vetting in representative conditions § Not only beneficial to operators, but also to manufacturers who can review design and make adjustments and improvements an employee-owned company Sample Manufacturer A Manufacturer B Manufacturer C Burst Failed after 17, 411 cycles Survived Fatigue Failed after 31, 547 cycles Survived Tension Failed after 3, 678 cycles Survived Bending Survived Delamination Failed after 23, 237 cycles Failed after 42, 223 cycles Survived 25

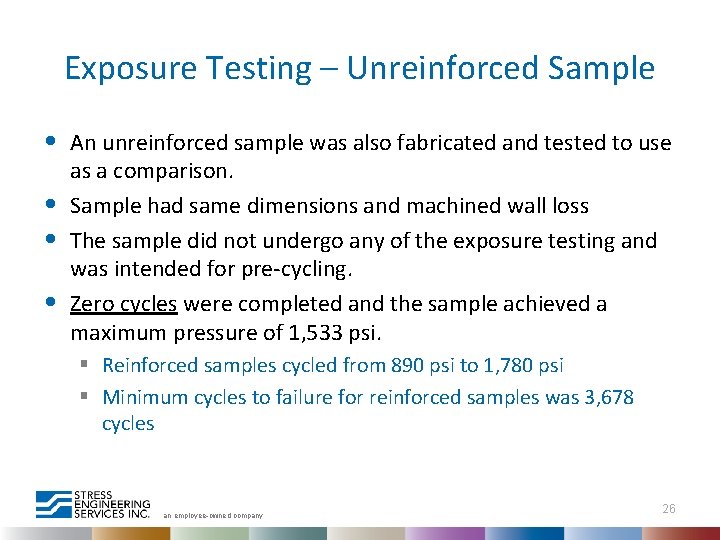
Exposure Testing – Unreinforced Sample • • An unreinforced sample was also fabricated and tested to use as a comparison. Sample had same dimensions and machined wall loss The sample did not undergo any of the exposure testing and was intended for pre-cycling. Zero cycles were completed and the sample achieved a maximum pressure of 1, 533 psi. § Reinforced samples cycled from 890 psi to 1, 780 psi § Minimum cycles to failure for reinforced samples was 3, 678 cycles an employee-owned company 26

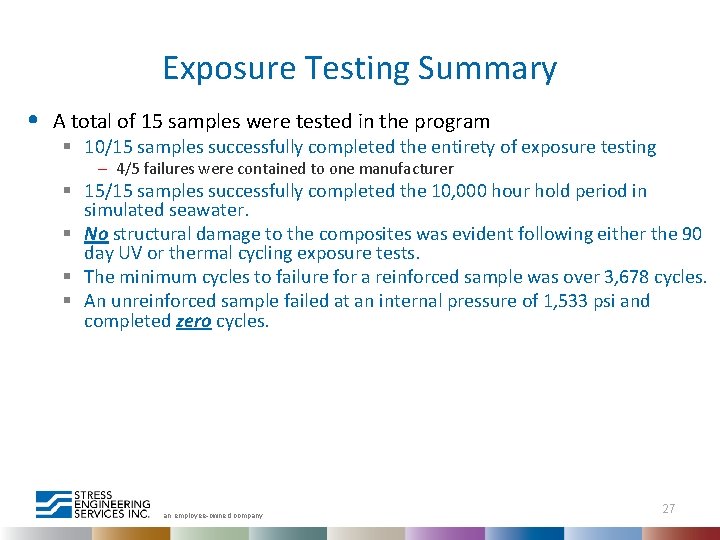
Exposure Testing Summary • A total of 15 samples were tested in the program § 10/15 samples successfully completed the entirety of exposure testing – 4/5 failures were contained to one manufacturer § 15/15 samples successfully completed the 10, 000 hour hold period in simulated seawater. § No structural damage to the composites was evident following either the 90 day UV or thermal cycling exposure tests. § The minimum cycles to failure for a reinforced sample was over 3, 678 cycles. § An unreinforced sample failed at an internal pressure of 1, 533 psi and completed zero cycles. an employee-owned company 27

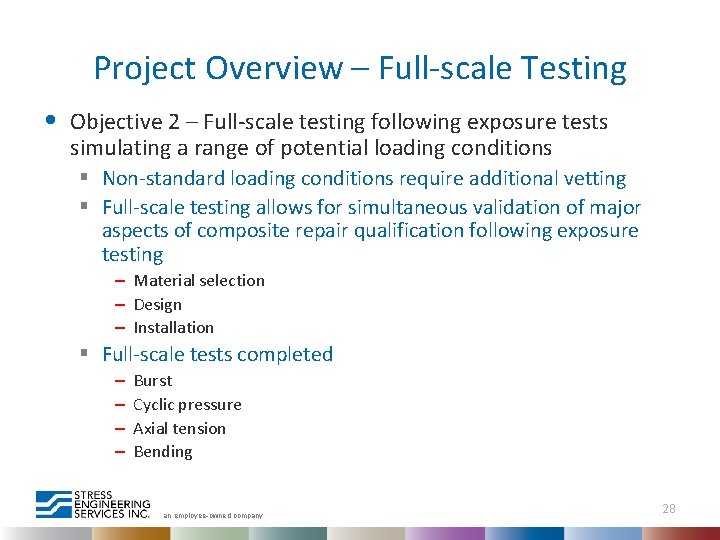
Project Overview – Full-scale Testing • Objective 2 – Full-scale testing following exposure tests simulating a range of potential loading conditions § Non-standard loading conditions require additional vetting § Full-scale testing allows for simultaneous validation of major aspects of composite repair qualification following exposure testing – Material selection – Design – Installation § Full-scale tests completed – – Burst Cyclic pressure Axial tension Bending an employee-owned company 28

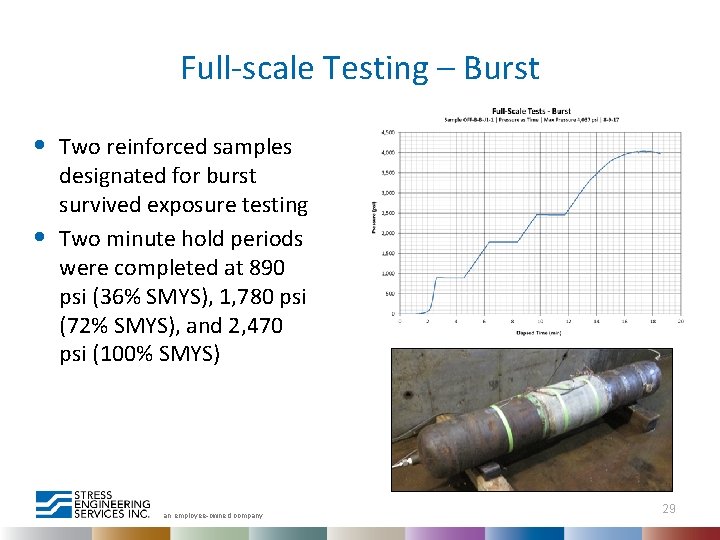
Full-scale Testing – Burst • • Two reinforced samples designated for burst survived exposure testing Two minute hold periods were completed at 890 psi (36% SMYS), 1, 780 psi (72% SMYS), and 2, 470 psi (100% SMYS) an employee-owned company 29

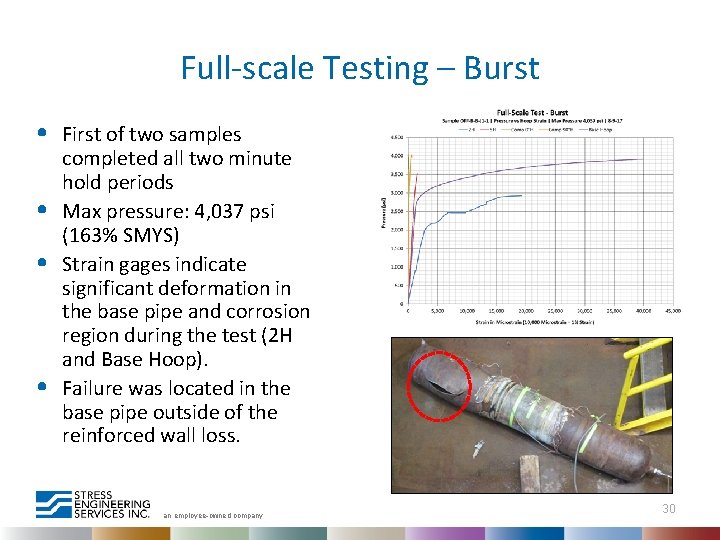
Full-scale Testing – Burst • • First of two samples completed all two minute hold periods Max pressure: 4, 037 psi (163% SMYS) Strain gages indicate significant deformation in the base pipe and corrosion region during the test (2 H and Base Hoop). Failure was located in the base pipe outside of the reinforced wall loss. an employee-owned company 30

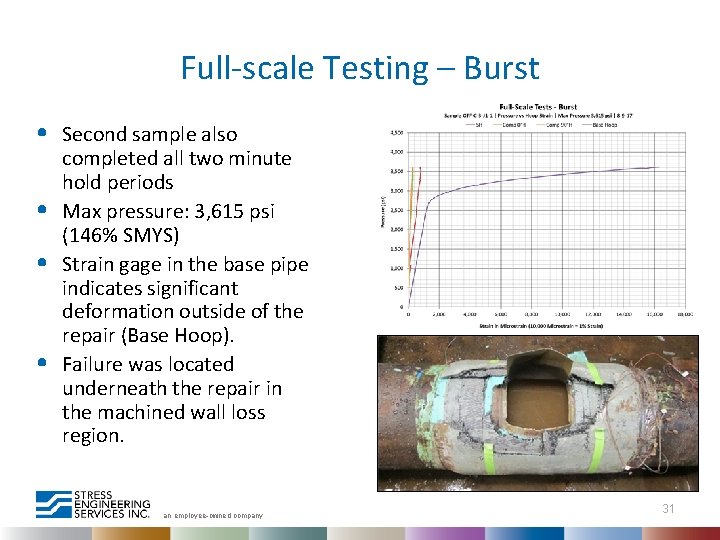
Full-scale Testing – Burst • • Second sample also completed all two minute hold periods Max pressure: 3, 615 psi (146% SMYS) Strain gage in the base pipe indicates significant deformation outside of the repair (Base Hoop). Failure was located underneath the repair in the machined wall loss region. an employee-owned company 31

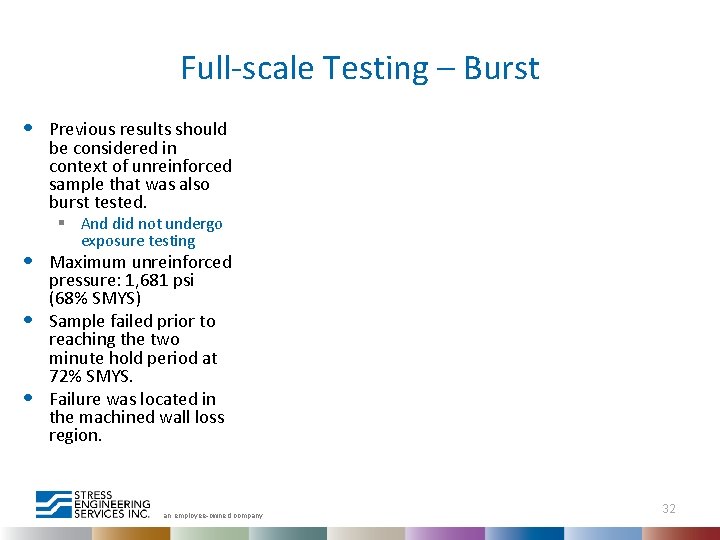
Full-scale Testing – Burst • • Previous results should be considered in context of unreinforced sample that was also burst tested. § And did not undergo exposure testing Maximum unreinforced pressure: 1, 681 psi (68% SMYS) Sample failed prior to reaching the two minute hold period at 72% SMYS. Failure was located in the machined wall loss region. an employee-owned company 32

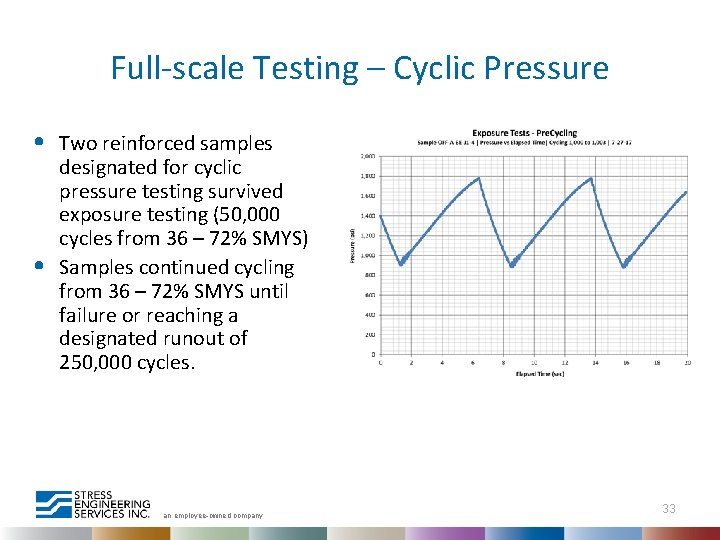
Full-scale Testing – Cyclic Pressure • • Two reinforced samples designated for cyclic pressure testing survived exposure testing (50, 000 cycles from 36 – 72% SMYS) Samples continued cycling from 36 – 72% SMYS until failure or reaching a designated runout of 250, 000 cycles. an employee-owned company 33

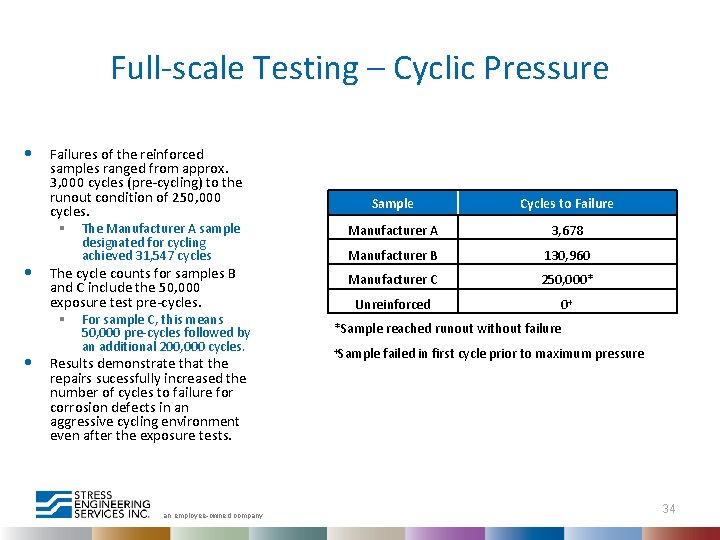
Full-scale Testing – Cyclic Pressure • • • Failures of the reinforced samples ranged from approx. 3, 000 cycles (pre-cycling) to the runout condition of 250, 000 cycles. § The Manufacturer A sample designated for cycling achieved 31, 547 cycles The cycle counts for samples B and C include the 50, 000 exposure test pre-cycles. § For sample C, this means 50, 000 pre-cycles followed by an additional 200, 000 cycles. Results demonstrate that the repairs sucessfully increased the number of cycles to failure for corrosion defects in an aggressive cycling environment even after the exposure tests. an employee-owned company Sample Cycles to Failure Manufacturer A 3, 678 Manufacturer B 130, 960 Manufacturer C 250, 000* Unreinforced 0+ *Sample reached runout without failure +Sample failed in first cycle prior to maximum pressure 34

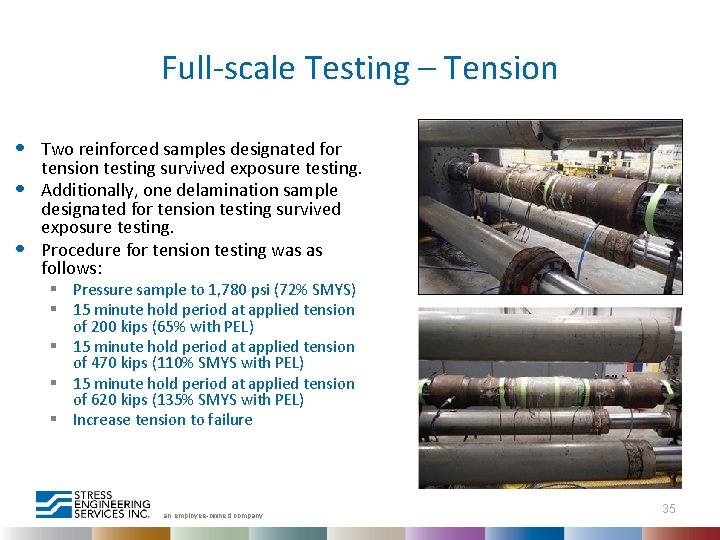
Full-scale Testing – Tension • • • Two reinforced samples designated for tension testing survived exposure testing. Additionally, one delamination sample designated for tension testing survived exposure testing. Procedure for tension testing was as follows: § Pressure sample to 1, 780 psi (72% SMYS) § 15 minute hold period at applied tension of 200 kips (65% with PEL) § 15 minute hold period at applied tension of 470 kips (110% SMYS with PEL) § 15 minute hold period at applied tension of 620 kips (135% SMYS with PEL) § Increase tension to failure an employee-owned company 35

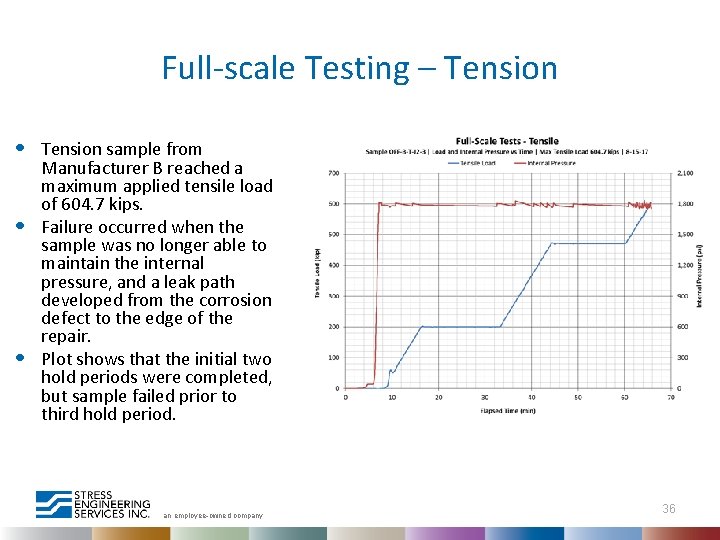
Full-scale Testing – Tension • • • Tension sample from Manufacturer B reached a maximum applied tensile load of 604. 7 kips. Failure occurred when the sample was no longer able to maintain the internal pressure, and a leak path developed from the corrosion defect to the edge of the repair. Plot shows that the initial two hold periods were completed, but sample failed prior to third hold period. an employee-owned company 36

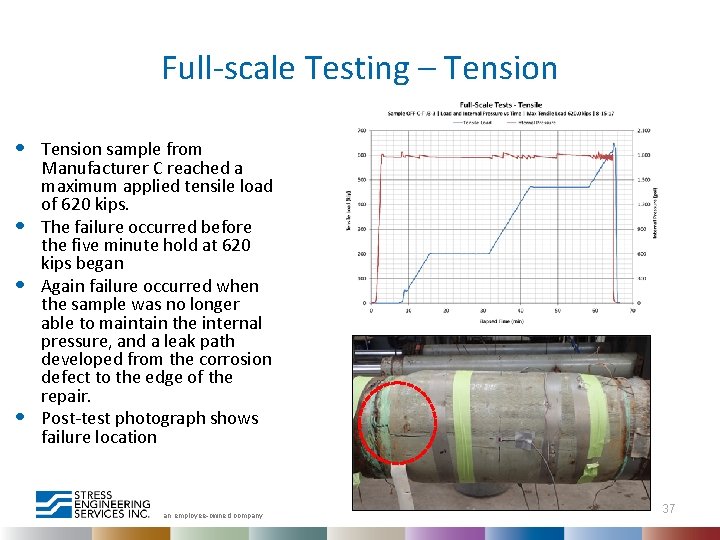
Full-scale Testing – Tension • • Tension sample from Manufacturer C reached a maximum applied tensile load of 620 kips. The failure occurred before the five minute hold at 620 kips began Again failure occurred when the sample was no longer able to maintain the internal pressure, and a leak path developed from the corrosion defect to the edge of the repair. Post-test photograph shows failure location an employee-owned company 37

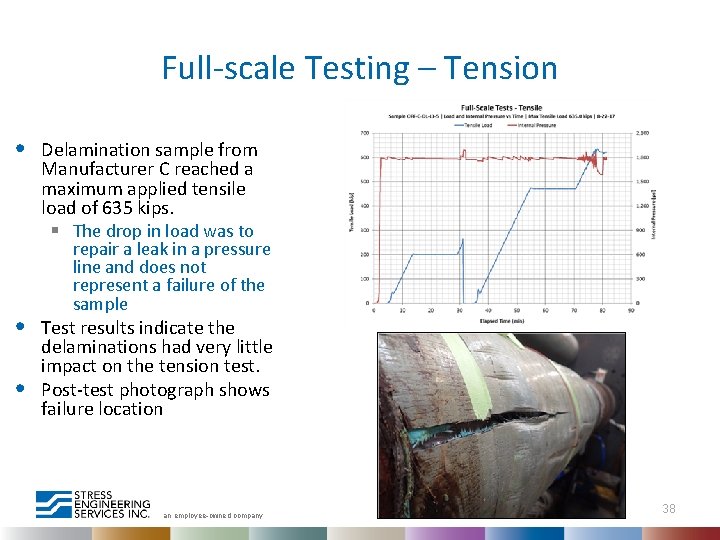
Full-scale Testing – Tension • • • Delamination sample from Manufacturer C reached a maximum applied tensile load of 635 kips. § The drop in load was to repair a leak in a pressure line and does not represent a failure of the sample Test results indicate the delaminations had very little impact on the tension test. Post-test photograph shows failure location an employee-owned company 38

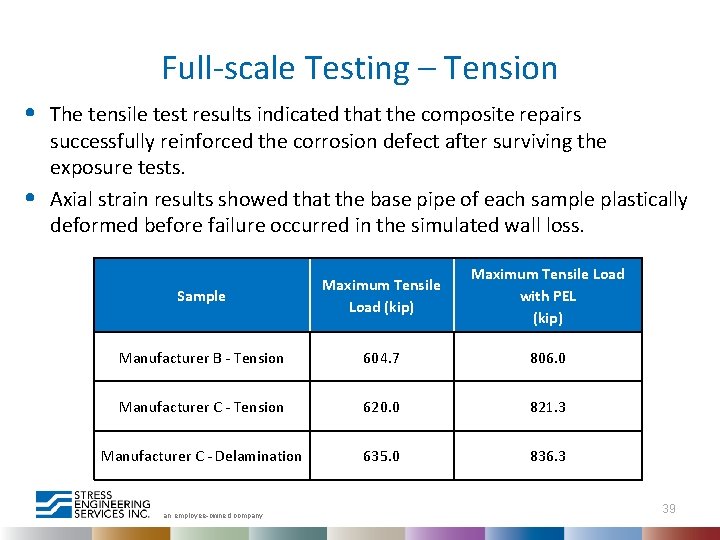
Full-scale Testing – Tension • • The tensile test results indicated that the composite repairs successfully reinforced the corrosion defect after surviving the exposure tests. Axial strain results showed that the base pipe of each sample plastically deformed before failure occurred in the simulated wall loss. Sample Maximum Tensile Load (kip) Maximum Tensile Load with PEL (kip) Manufacturer B - Tension 604. 7 806. 0 Manufacturer C - Tension 620. 0 821. 3 Manufacturer C - Delamination 635. 0 836. 3 an employee-owned company 39

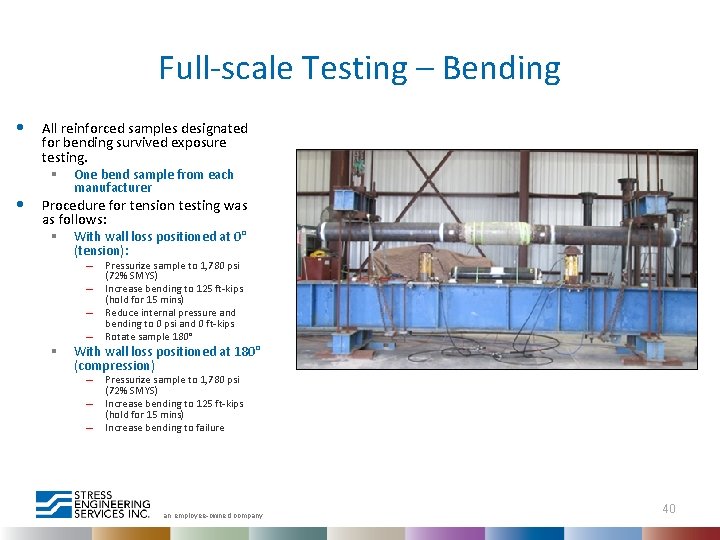
Full-scale Testing – Bending • • All reinforced samples designated for bending survived exposure testing. § One bend sample from each manufacturer Procedure for tension testing was as follows: § With wall loss positioned at 0° (tension): – – § Pressurize sample to 1, 780 psi (72% SMYS) Increase bending to 125 ft-kips (hold for 15 mins) Reduce internal pressure and bending to 0 psi and 0 ft-kips Rotate sample 180° With wall loss positioned at 180° (compression) – – – Pressurize sample to 1, 780 psi (72% SMYS) Increase bending to 125 ft-kips (hold for 15 mins) Increase bending to failure an employee-owned company 40

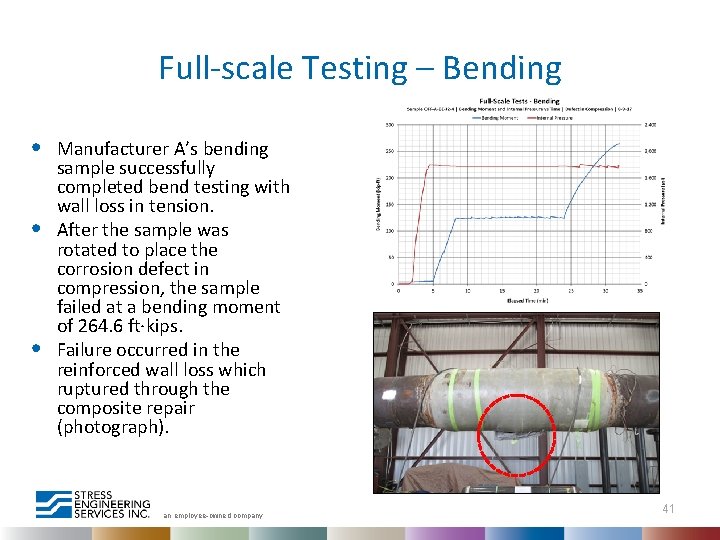
Full-scale Testing – Bending • • • Manufacturer A’s bending sample successfully completed bend testing with wall loss in tension. After the sample was rotated to place the corrosion defect in compression, the sample failed at a bending moment of 264. 6 ft·kips. Failure occurred in the reinforced wall loss which ruptured through the composite repair (photograph). an employee-owned company 41

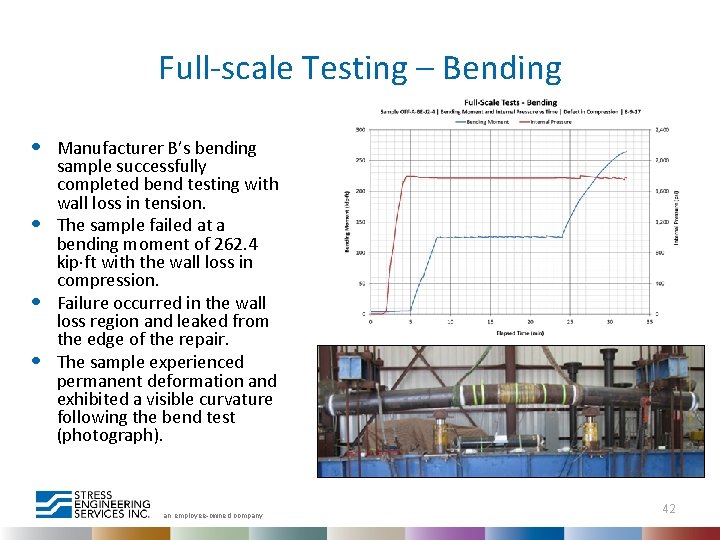
Full-scale Testing – Bending • • Manufacturer B’s bending sample successfully completed bend testing with wall loss in tension. The sample failed at a bending moment of 262. 4 kip·ft with the wall loss in compression. Failure occurred in the wall loss region and leaked from the edge of the repair. The sample experienced permanent deformation and exhibited a visible curvature following the bend test (photograph). an employee-owned company 42

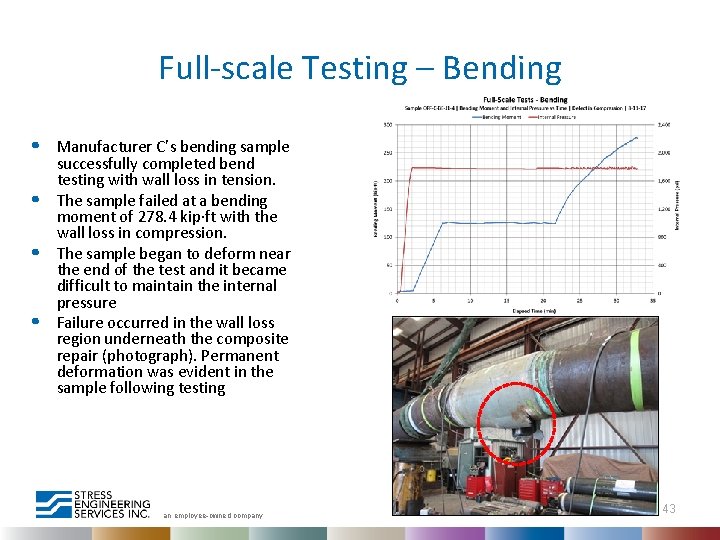
Full-scale Testing – Bending • • Manufacturer C’s bending sample successfully completed bend testing with wall loss in tension. The sample failed at a bending moment of 278. 4 kip·ft with the wall loss in compression. The sample began to deform near the end of the test and it became difficult to maintain the internal pressure Failure occurred in the wall loss region underneath the composite repair (photograph). Permanent deformation was evident in the sample following testing an employee-owned company 43

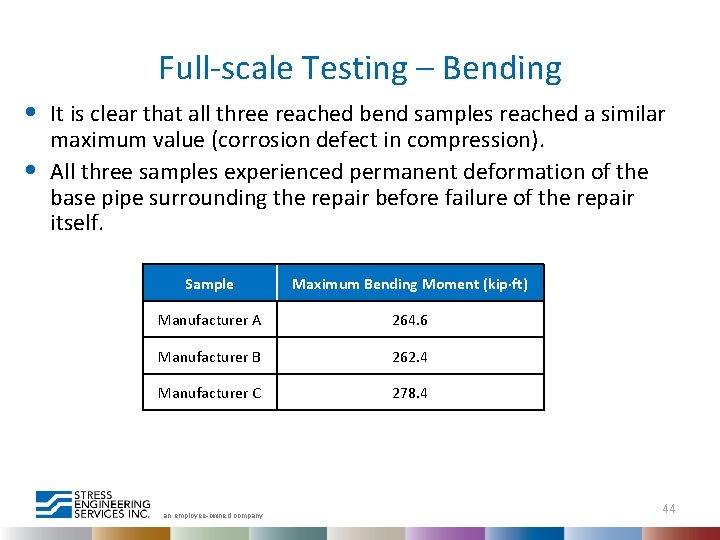
Full-scale Testing – Bending • • It is clear that all three reached bend samples reached a similar maximum value (corrosion defect in compression). All three samples experienced permanent deformation of the base pipe surrounding the repair before failure of the repair itself. Sample Maximum Bending Moment (kip·ft) Manufacturer A 264. 6 Manufacturer B 262. 4 Manufacturer C 278. 4 an employee-owned company 44

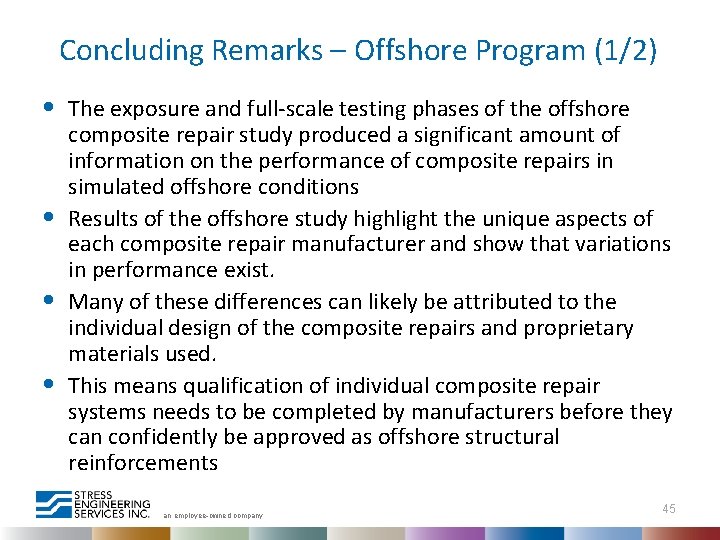
Concluding Remarks – Offshore Program (1/2) • • The exposure and full-scale testing phases of the offshore composite repair study produced a significant amount of information on the performance of composite repairs in simulated offshore conditions Results of the offshore study highlight the unique aspects of each composite repair manufacturer and show that variations in performance exist. Many of these differences can likely be attributed to the individual design of the composite repairs and proprietary materials used. This means qualification of individual composite repair systems needs to be completed by manufacturers before they can confidently be approved as offshore structural reinforcements an employee-owned company 45

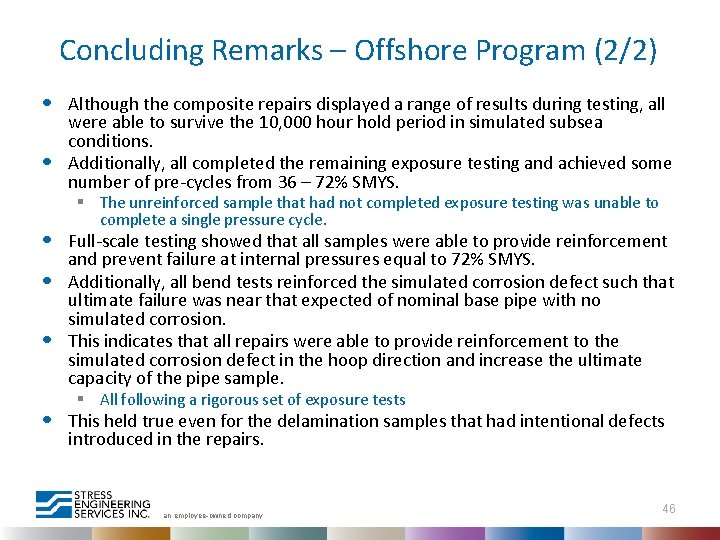
Concluding Remarks – Offshore Program (2/2) • • • Although the composite repairs displayed a range of results during testing, all were able to survive the 10, 000 hour hold period in simulated subsea conditions. Additionally, all completed the remaining exposure testing and achieved some number of pre-cycles from 36 – 72% SMYS. § The unreinforced sample that had not completed exposure testing was unable to complete a single pressure cycle. Full-scale testing showed that all samples were able to provide reinforcement and prevent failure at internal pressures equal to 72% SMYS. Additionally, all bend tests reinforced the simulated corrosion defect such that ultimate failure was near that expected of nominal base pipe with no simulated corrosion. This indicates that all repairs were able to provide reinforcement to the simulated corrosion defect in the hoop direction and increase the ultimate capacity of the pipe sample. § All following a rigorous set of exposure tests This held true even for the delamination samples that had intentional defects introduced in the repairs. an employee-owned company 46

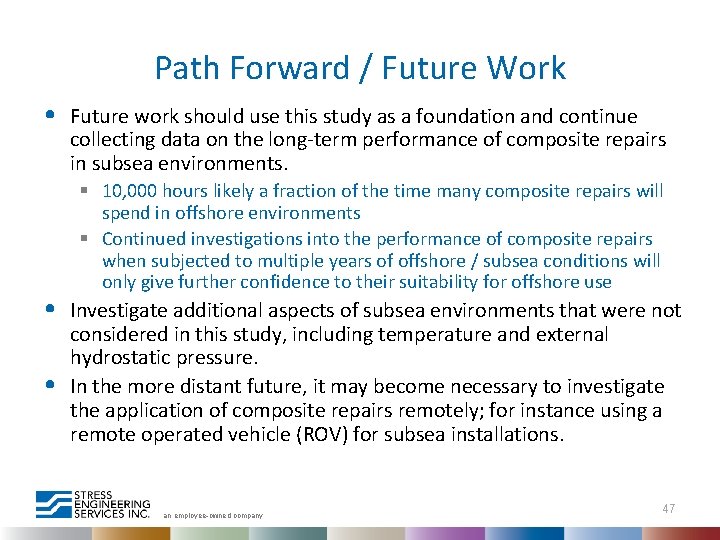
Path Forward / Future Work • • • Future work should use this study as a foundation and continue collecting data on the long-term performance of composite repairs in subsea environments. § 10, 000 hours likely a fraction of the time many composite repairs will spend in offshore environments § Continued investigations into the performance of composite repairs when subjected to multiple years of offshore / subsea conditions will only give further confidence to their suitability for offshore use Investigate additional aspects of subsea environments that were not considered in this study, including temperature and external hydrostatic pressure. In the more distant future, it may become necessary to investigate the application of composite repairs remotely; for instance using a remote operated vehicle (ROV) for subsea installations. an employee-owned company 47

Questions? Colton Sheets Associate Stress Engineering Services, Inc. colton. sheets@stress. com 281 -955 -2900 an employee-owned company 48

Thank You! an employee-owned company 49

Limitations of This Report This report is prepared for the sole benefit of the Client, and the scope is limited to matters expressly covered within the text. In preparing this report, Stress Engineering Services, Inc. (SES) has relied on information provided by the Client and, if requested by the Client, third parties. SES may not have made an independent investigation as to the accuracy or completeness of such information unless specifically requested by the Client or otherwise required. Any inaccuracy, omission, or change in the information or circumstances on which this report is based may affect the recommendations, findings, and conclusions expressed in this report. SES has prepared this report in accordance with the standard of care appropriate for competent professionals in the relevant discipline and the generally applicable industry standards. However, SES is not able to direct or control operation or maintenance of the Client’s equipment or processes. Rev Date 0 17 -Jan-2018 Description Issued for use an employee-owned company Originator C. Sheets Checker Reviewer B. Vyvial 50