IAT 106 Spatial Thinking and Communicating Week 04


- Slides: 47

IAT 106 Spatial Thinking and Communicating Week 04 Pictorial Projections & Intro to On. Shape

Objectives for today • Review material from last week – Basics of edges & surfaces—i. e. where lines come from – Review of ortho/multiview techniques • Introduction to pictorial views, especially isometric/axonometric • Introduction to On. Shape

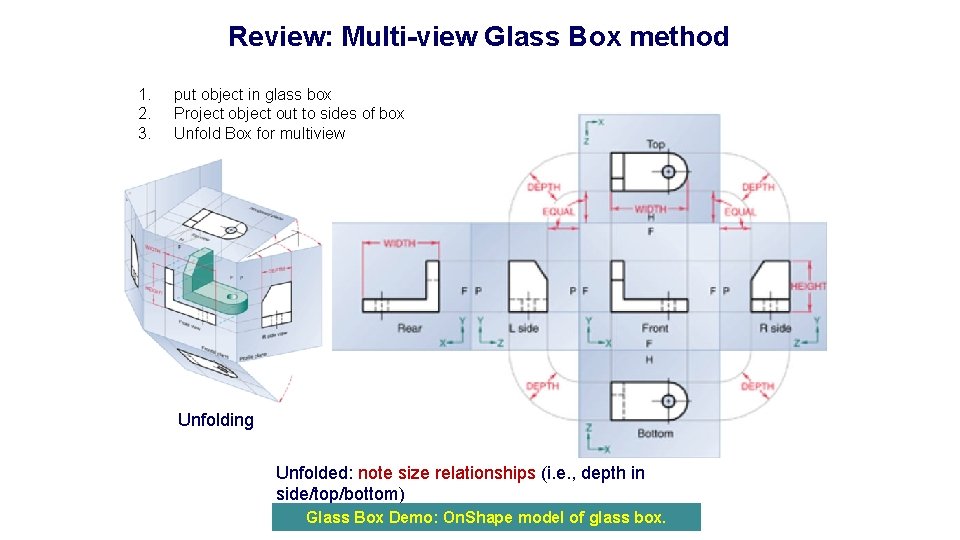
Review: Multi-view Glass Box method 1. 2. 3. put object in glass box Project object out to sides of box Unfold Box for multiview Unfolding Unfolded: note size relationships (i. e. , depth in side/top/bottom) Glass Box Demo: On. Shape model of glass box.

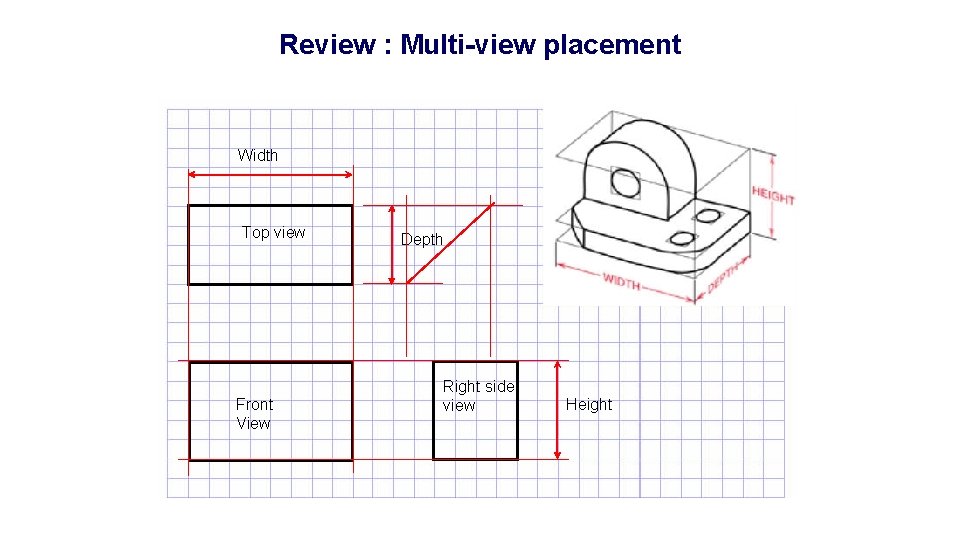
Review : Multi-view placement Width Top view Depth Front View Right side view Height

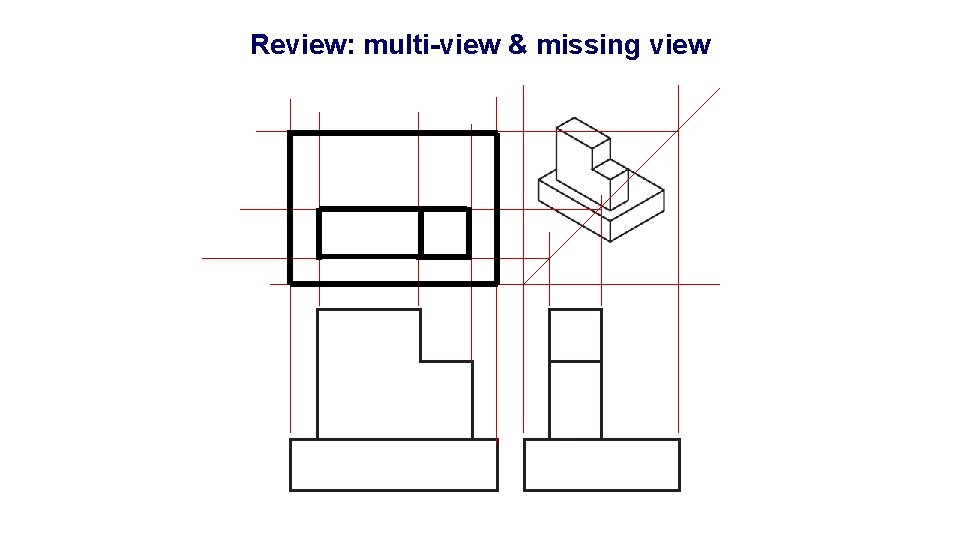
Review: multi-view & missing view

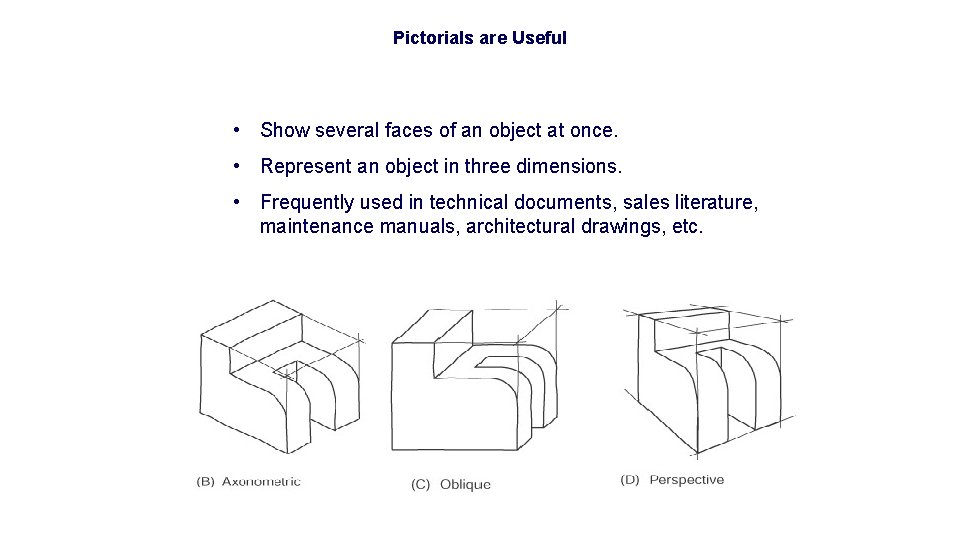
Pictorials are Useful • Show several faces of an object at once. • Represent an object in three dimensions. • Frequently used in technical documents, sales literature, maintenance manuals, architectural drawings, etc.

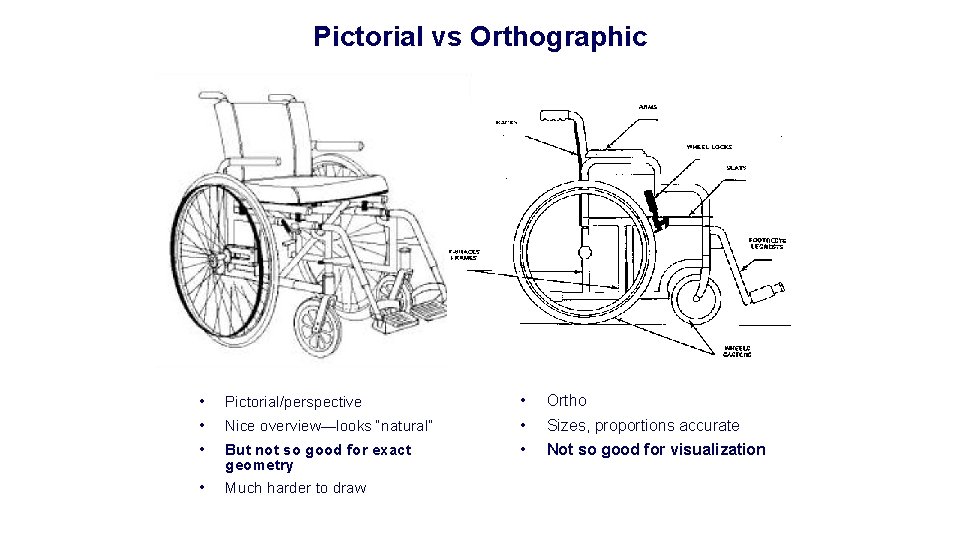
Pictorial vs Orthographic • • • Pictorial/perspective • Much harder to draw Nice overview—looks “natural” But not so good for exact geometry • • • Ortho Sizes, proportions accurate Not so good for visualization

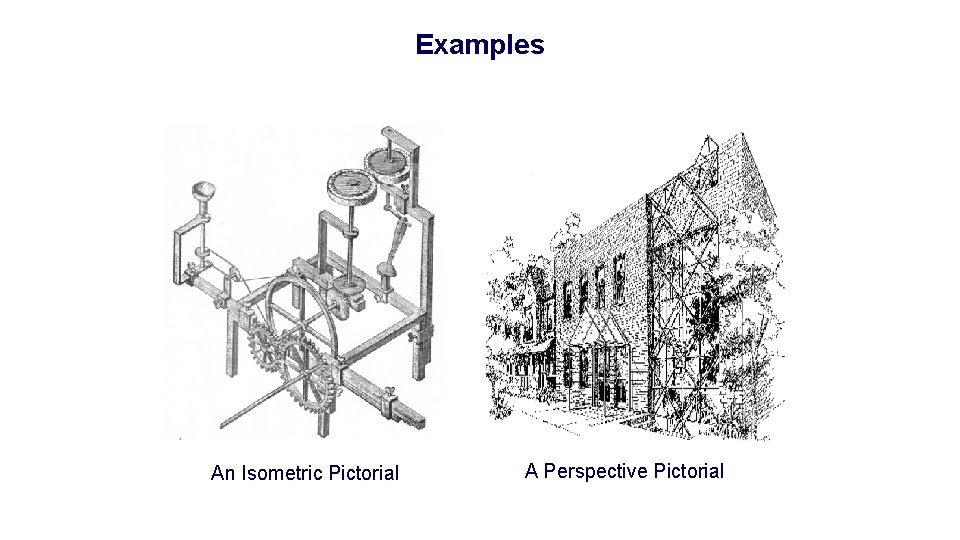
Examples An Isometric Pictorial A Perspective Pictorial

Objectives • Define axonometric projection and its three classes. • Create an isometric sketch.

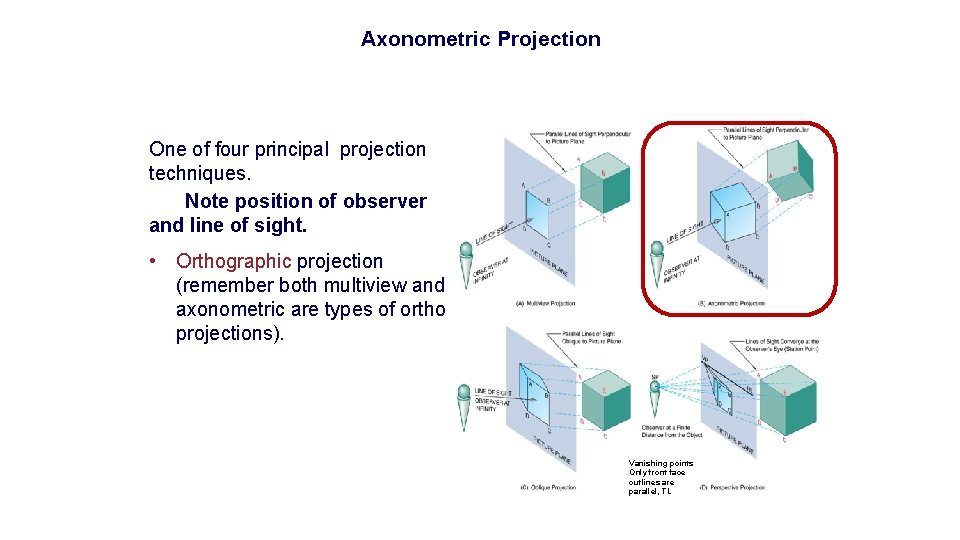
Axonometric Projection One of four principal projection techniques. Note position of observer and line of sight. • Orthographic projection (remember both multiview and axonometric are types of ortho projections). Vanishing points Only front face outlines are parallel, TL

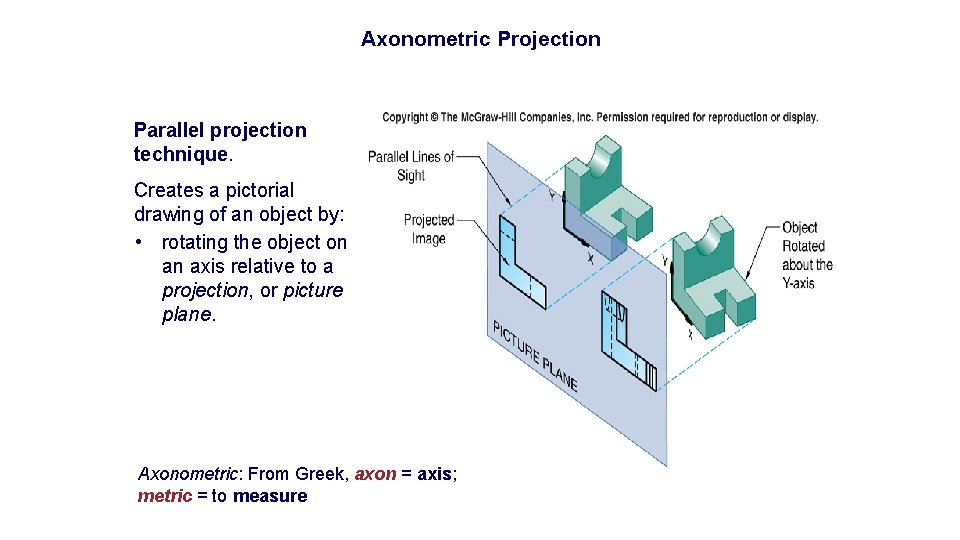
Axonometric Projection Parallel projection technique. Creates a pictorial drawing of an object by: • rotating the object on an axis relative to a projection, or picture plane. Axonometric: From Greek, axon = axis; metric = to measure

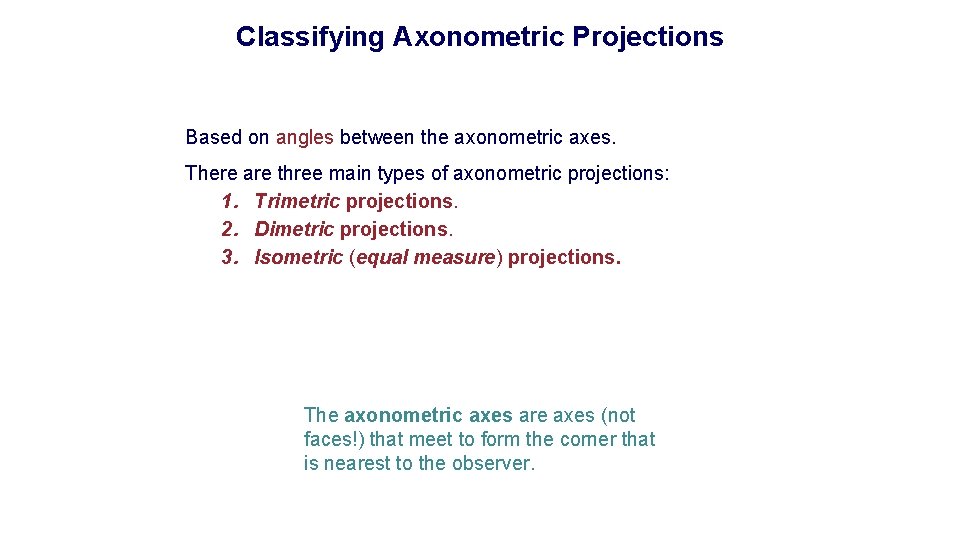
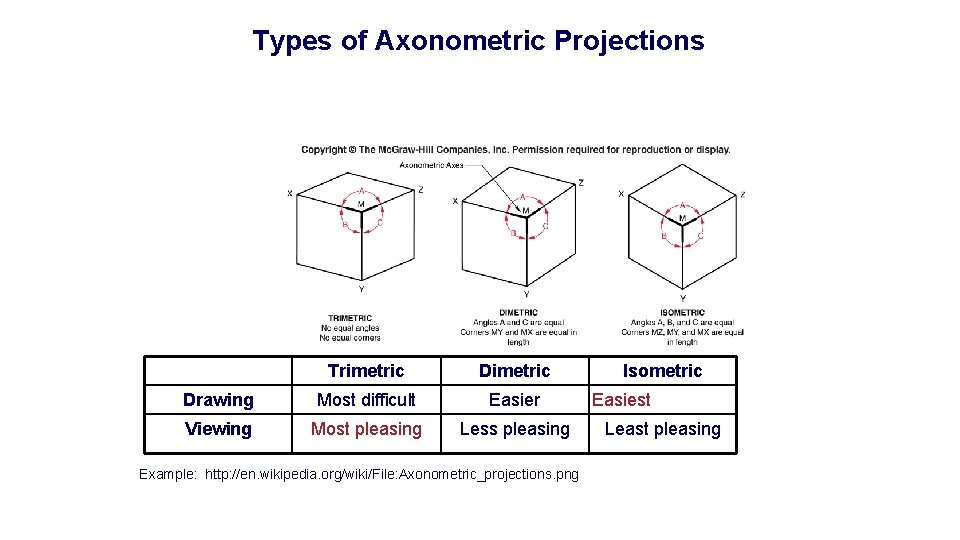
Classifying Axonometric Projections Based on angles between the axonometric axes. There are three main types of axonometric projections: 1. Trimetric projections. 2. Dimetric projections. 3. Isometric (equal measure) projections. . The axonometric axes are axes (not faces!) that meet to form the corner that is nearest to the observer.

Types of Axonometric Projections Trimetric Drawing Most difficult Easier Viewing Most pleasing Less pleasing Example: http: //en. wikipedia. org/wiki/File: Axonometric_projections. png Isometric Easiest Least pleasing

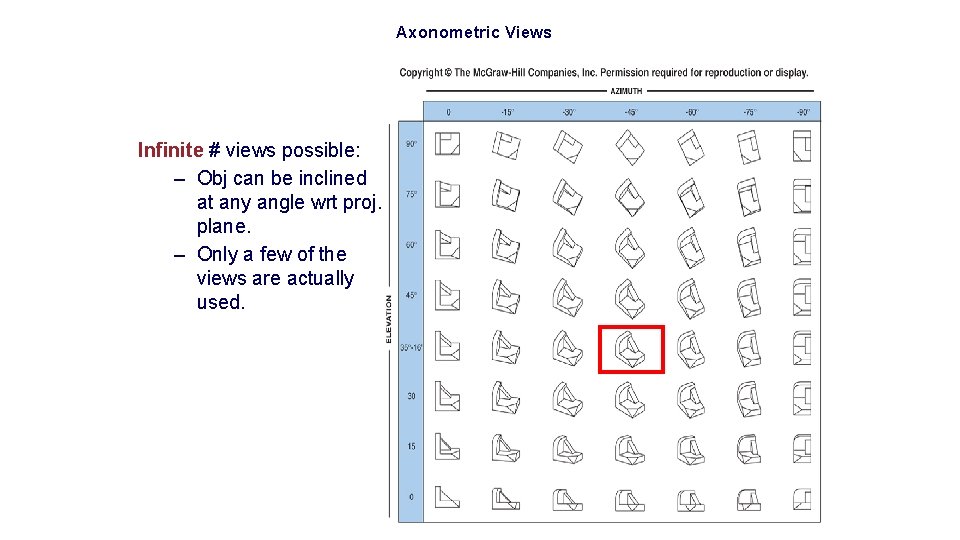
Axonometric Views Infinite # views possible: – Obj can be inclined at any angle wrt proj. plane. – Only a few of the views are actually used.

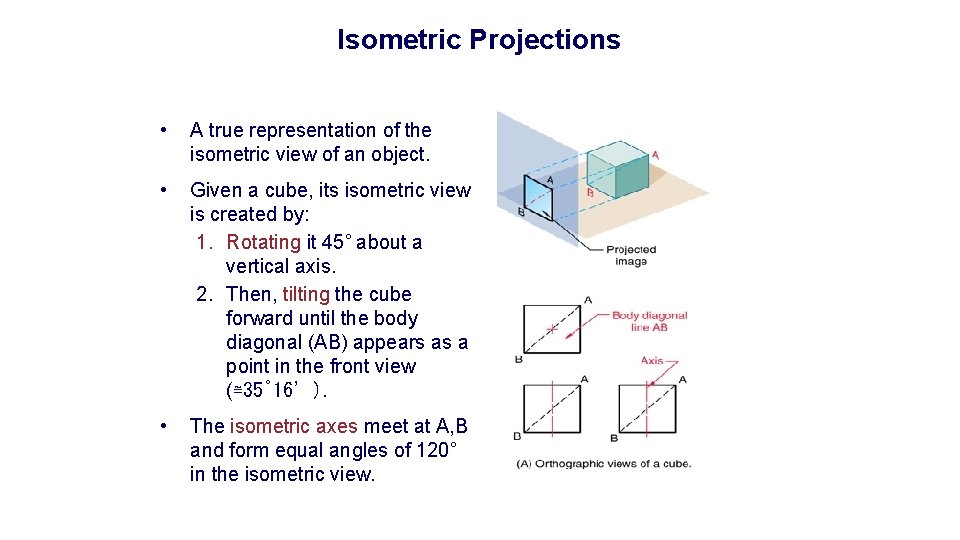
Isometric Projections • A true representation of the isometric view of an object. • Given a cube, its isometric view is created by: 1. Rotating it 45˚ about a vertical axis. 2. Then, tilting the cube forward until the body diagonal (AB) appears as a point in the front view (≅35˚ 16’). • The isometric axes meet at A, B and form equal angles of 120˚ in the isometric view.

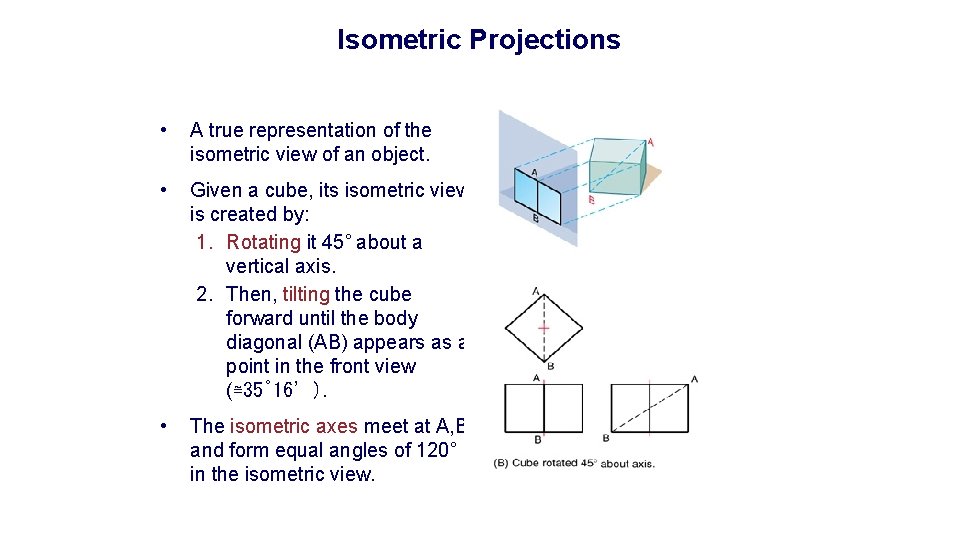
Isometric Projections • A true representation of the isometric view of an object. • Given a cube, its isometric view is created by: 1. Rotating it 45˚ about a vertical axis. 2. Then, tilting the cube forward until the body diagonal (AB) appears as a point in the front view (≅35˚ 16’). • The isometric axes meet at A, B and form equal angles of 120˚ in the isometric view.

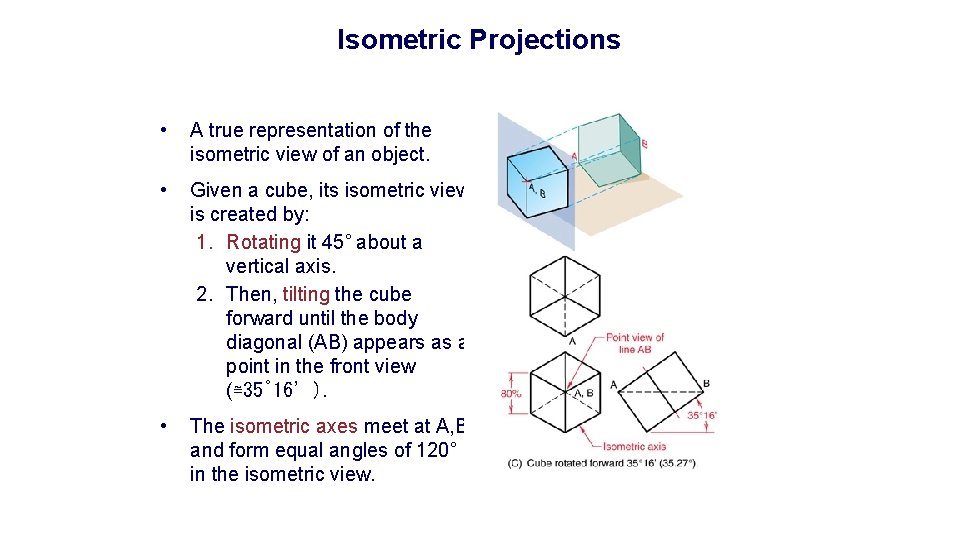
Isometric Projections • A true representation of the isometric view of an object. • Given a cube, its isometric view is created by: 1. Rotating it 45˚ about a vertical axis. 2. Then, tilting the cube forward until the body diagonal (AB) appears as a point in the front view (≅35˚ 16’). • The isometric axes meet at A, B and form equal angles of 120˚ in the isometric view.

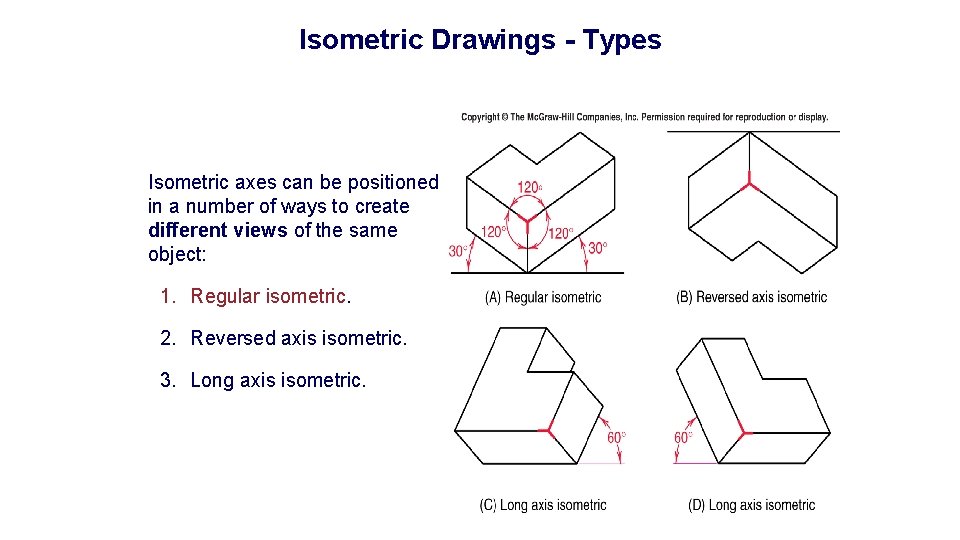
Isometric Drawings - Types Isometric axes can be positioned in a number of ways to create different views of the same object: 1. Regular isometric. 2. Reversed axis isometric. 3. Long axis isometric.

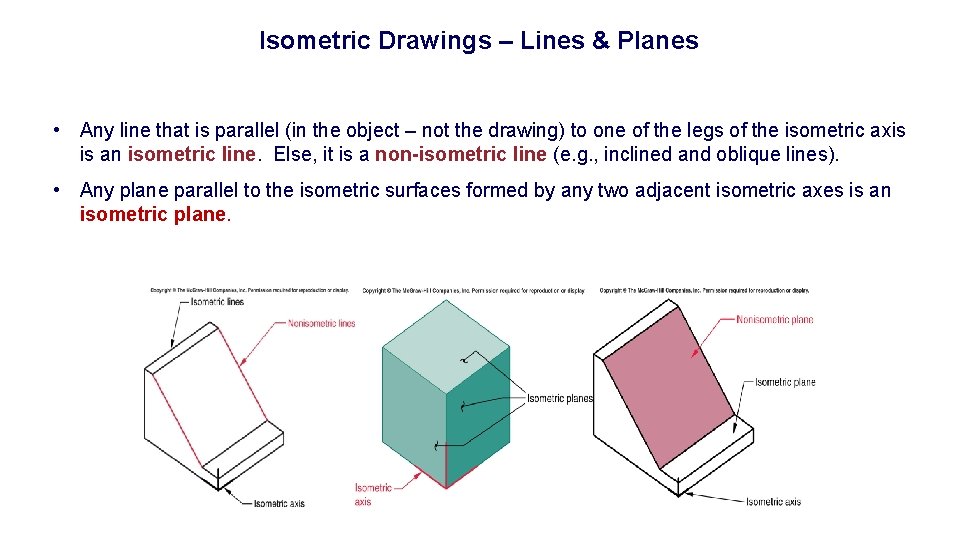
Isometric Drawings – Lines & Planes • Any line that is parallel (in the object – not the drawing) to one of the legs of the isometric axis is an isometric line. Else, it is a non-isometric line (e. g. , inclined and oblique lines). • Any plane parallel to the isometric surfaces formed by any two adjacent isometric axes is an isometric plane.

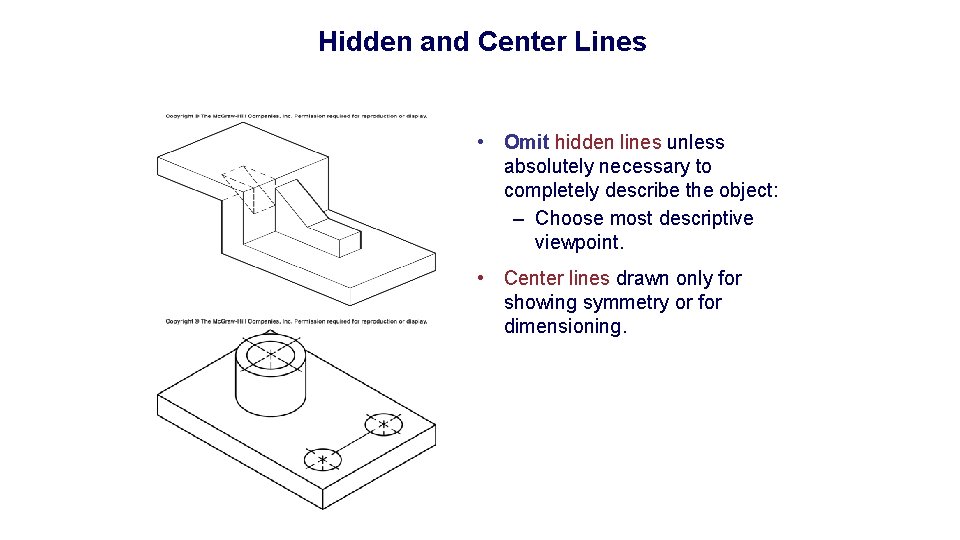
Hidden and Center Lines • Omit hidden lines unless absolutely necessary to completely describe the object: – Choose most descriptive viewpoint. • Center lines drawn only for showing symmetry or for dimensioning.

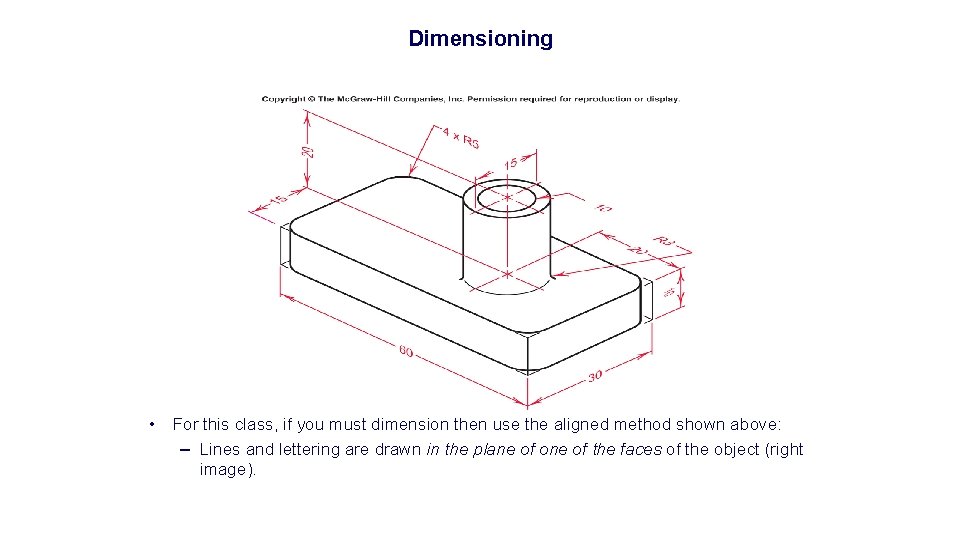
Dimensioning • For this class, if you must dimension then use the aligned method shown above: – Lines and lettering are drawn in the plane of one of the faces of the object (right image).

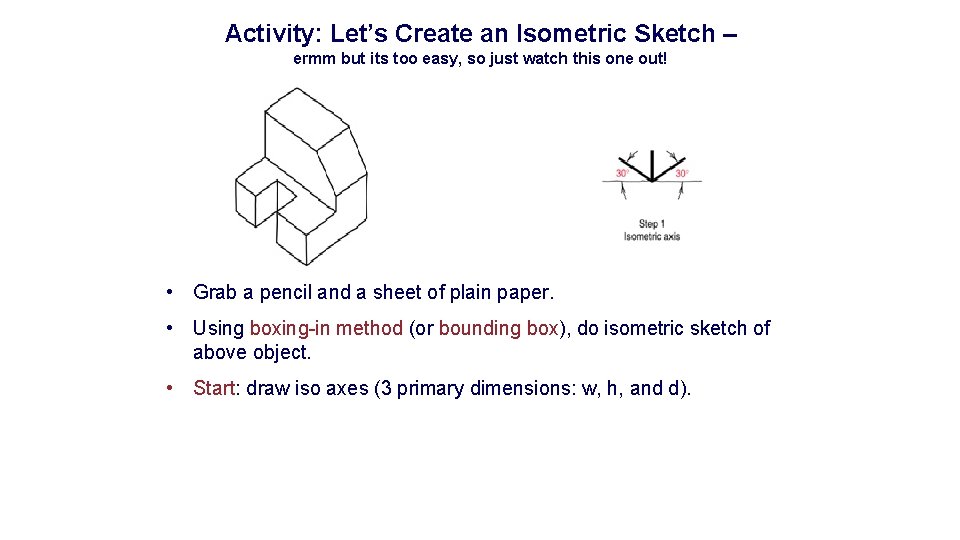
Activity: Let’s Create an Isometric Sketch – ermm but its too easy, so just watch this one out! • Grab a pencil and a sheet of plain paper. • Using boxing-in method (or bounding box), do isometric sketch of above object. • Start: draw iso axes (3 primary dimensions: w, h, and d).

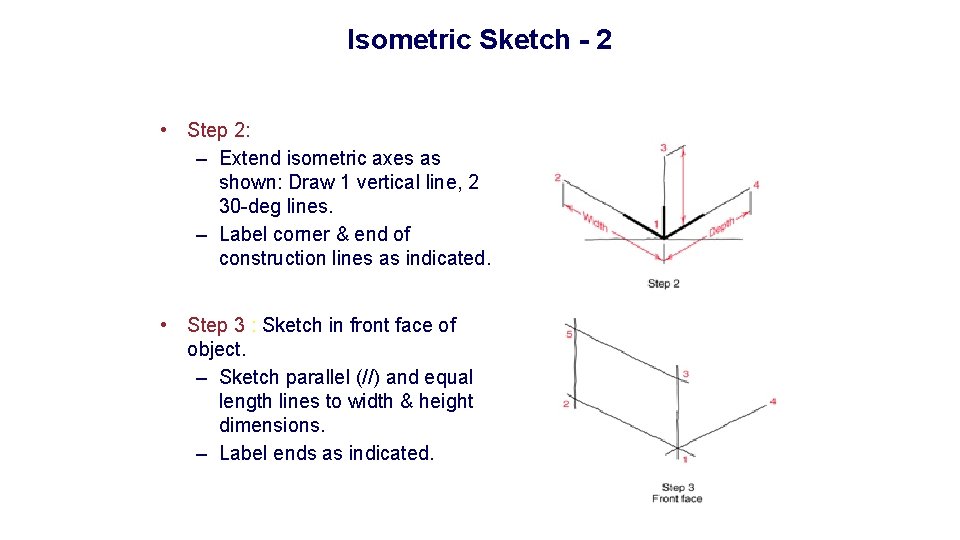
Isometric Sketch - 2 • Step 2: – Extend isometric axes as shown: Draw 1 vertical line, 2 30 -deg lines. – Label corner & end of construction lines as indicated. • Step 3 : Sketch in front face of object. – Sketch parallel (//) and equal length lines to width & height dimensions. – Label ends as indicated.

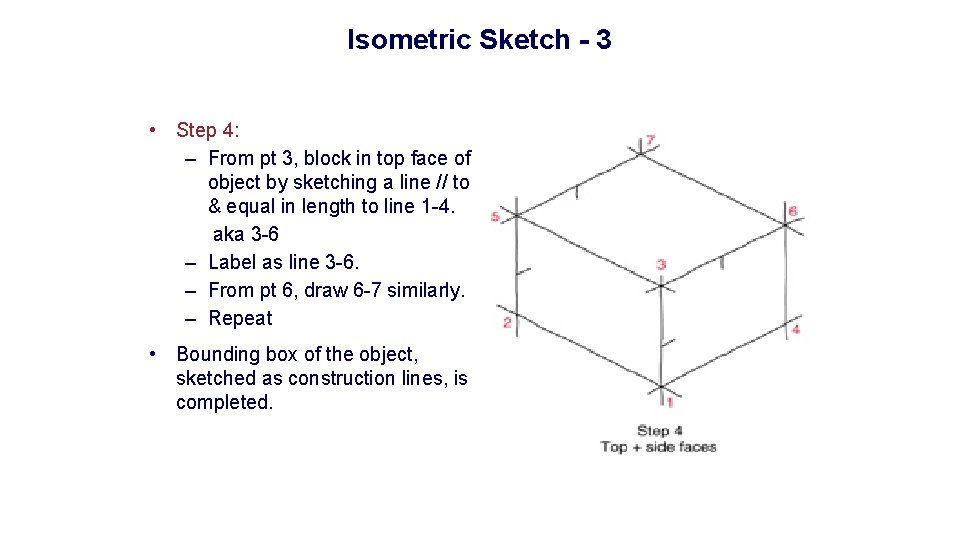
Isometric Sketch - 3 • Step 4: – From pt 3, block in top face of object by sketching a line // to & equal in length to line 1 -4. aka 3 -6 – Label as line 3 -6. – From pt 6, draw 6 -7 similarly. – Repeat • Bounding box of the object, sketched as construction lines, is completed.

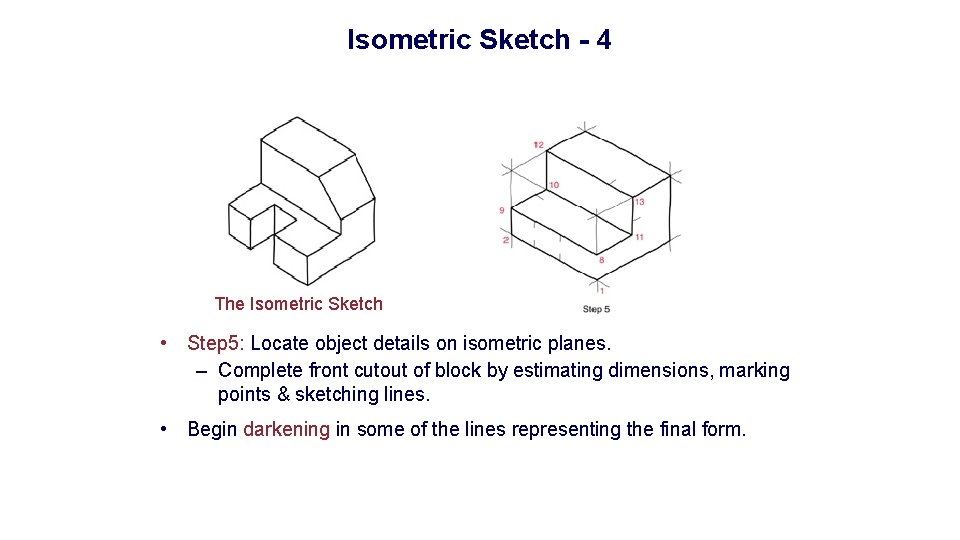
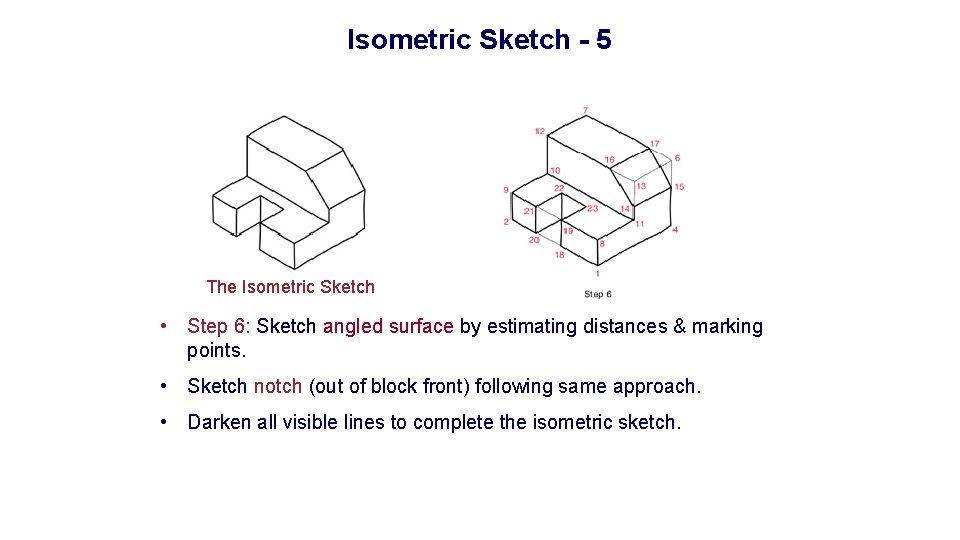
Isometric Sketch - 4 The Isometric Sketch • Step 5: Locate object details on isometric planes. – Complete front cutout of block by estimating dimensions, marking points & sketching lines. • Begin darkening in some of the lines representing the final form.

Isometric Sketch - 5 The Isometric Sketch • Step 6: Sketch angled surface by estimating distances & marking points. • Sketch notch (out of block front) following same approach. • Darken all visible lines to complete the isometric sketch.

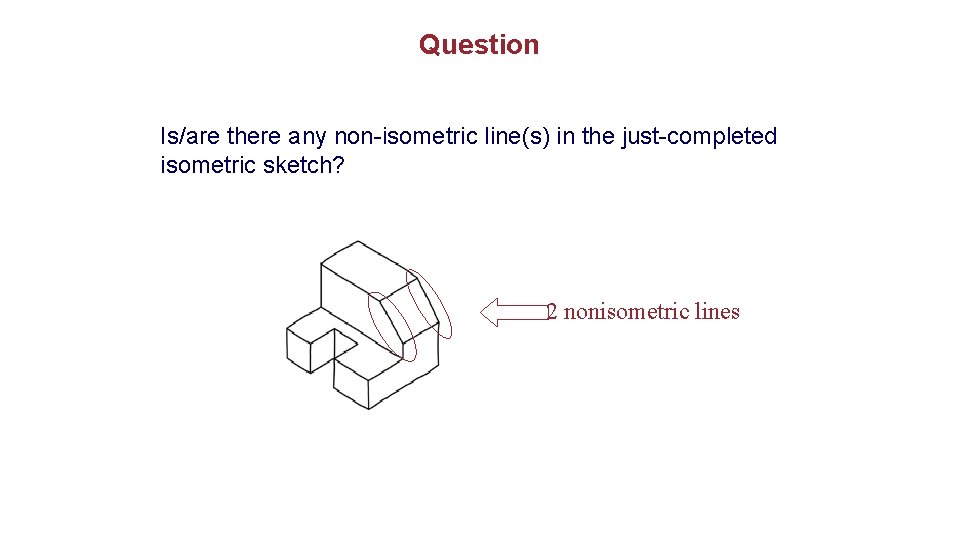
Question Is/are there any non-isometric line(s) in the just-completed isometric sketch? 2 nonisometric lines

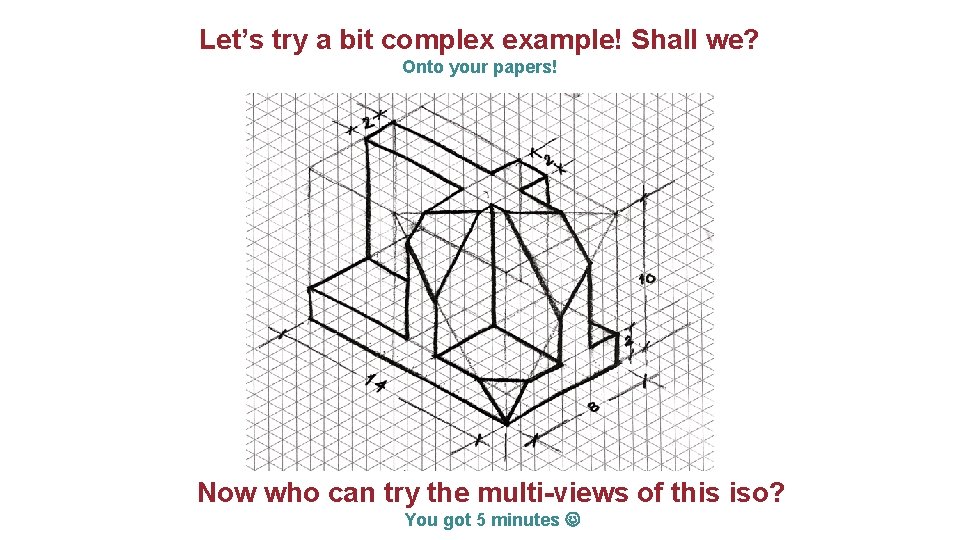
Let’s try a bit complex example! Shall we? Onto your papers! Now who can try the multi-views of this iso? You got 5 minutes

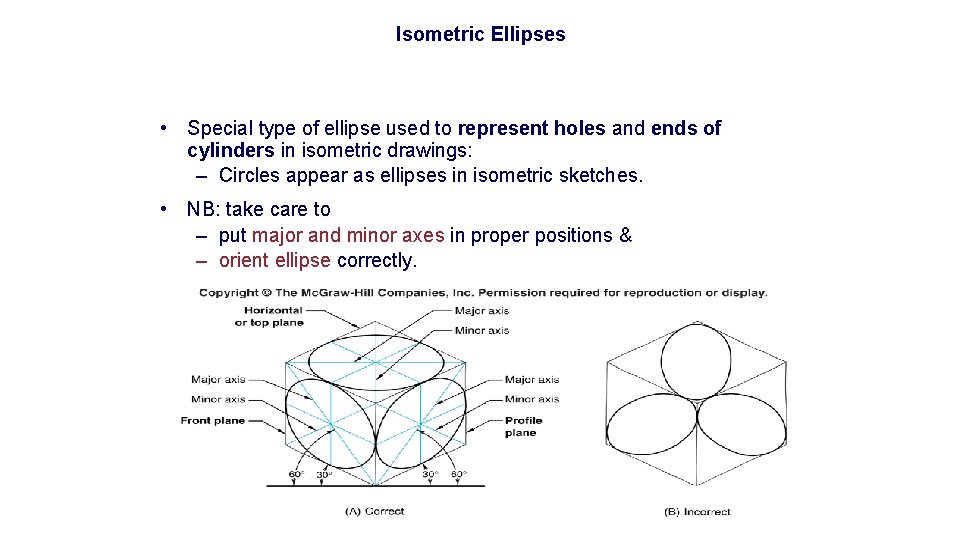
Isometric Ellipses • Special type of ellipse used to represent holes and ends of cylinders in isometric drawings: – Circles appear as ellipses in isometric sketches. • NB: take care to – put major and minor axes in proper positions & – orient ellipse correctly.

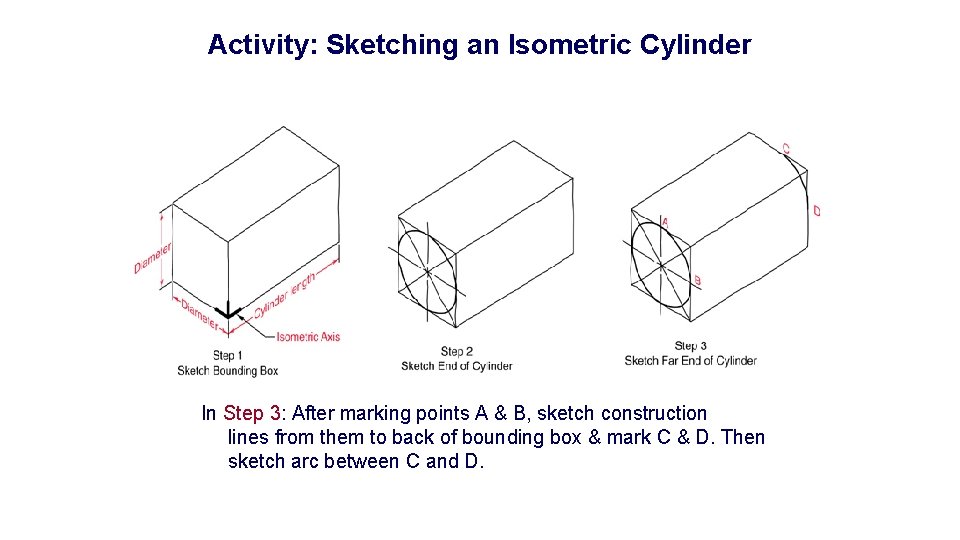
Activity: Sketching an Isometric Cylinder In Step 3: After marking points A & B, sketch construction lines from them to back of bounding box & mark C & D. Then sketch arc between C and D.

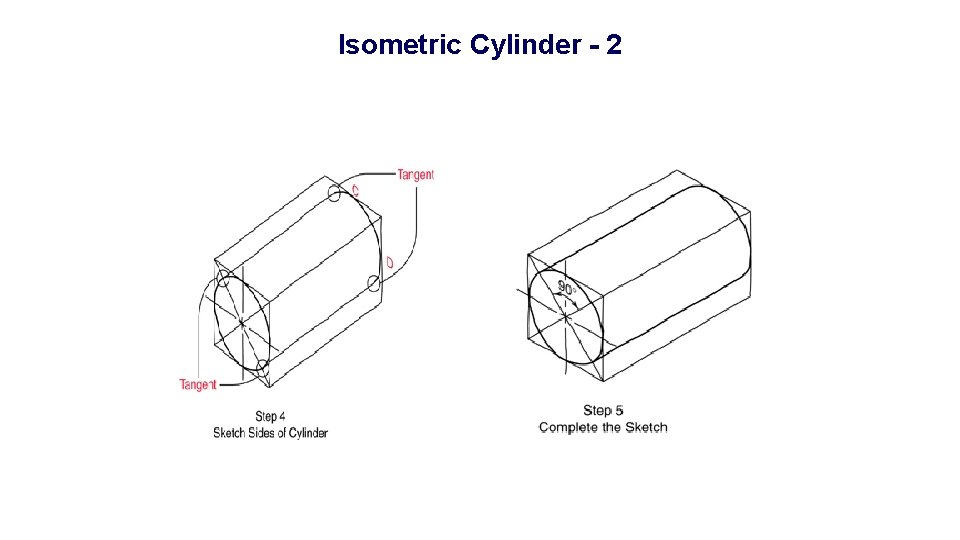
Isometric Cylinder - 2

Reading 1. Reading: – – – From last week: Ch 5 ( 5. 1 - 5. 7, 5. 8. 1 - 5. 8. 4, 5. 10 - 5. 13) Ch 7 (7. 1 - 7. 6, 7. 14 - 7. 19) In Section 5. 4. 2 there is an explanation of first- and third-angle projection. You may find the wikipedia article at http: //en. wikipedia. org/wiki/Multiview_orthographic_projection to be a good explanation of the differences between the two. 2. Bring plain paper and both regular and isometric grid paper to your lab. 3. Bring your textbook to your lab!!

Lecture 4 – Part 2 Introduction to On. Shape

On. Shape • On. Shape is an industrial-strength 3 -D solid-model based computeraided design (CAD) system. • In On. Shape, you sketch ideas and experiment with different designs to create 3 D models. • On. Shape is used by students, designers, engineers, and other professionals to produce simple and complex parts, assemblies, and drawings.

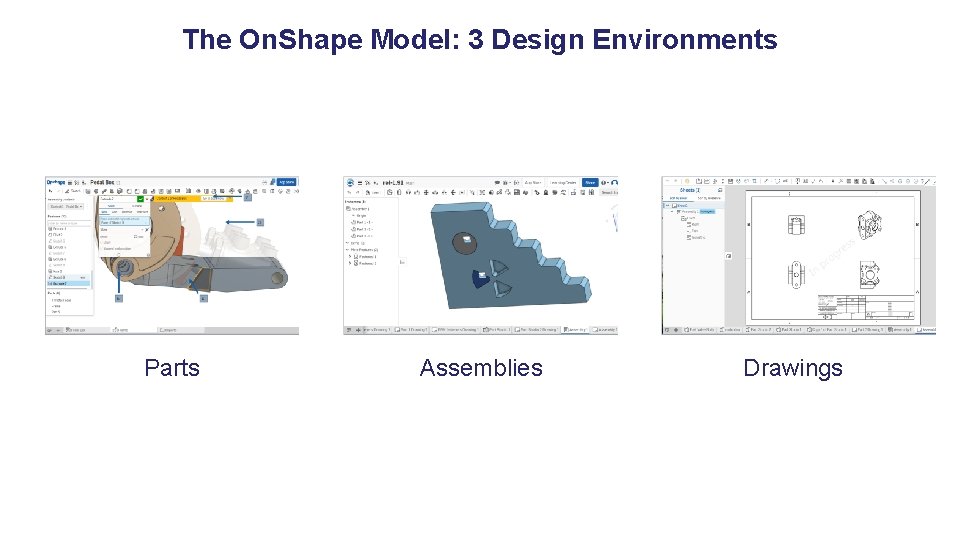
The On. Shape Model: 3 Design Environments Parts Assemblies Drawings

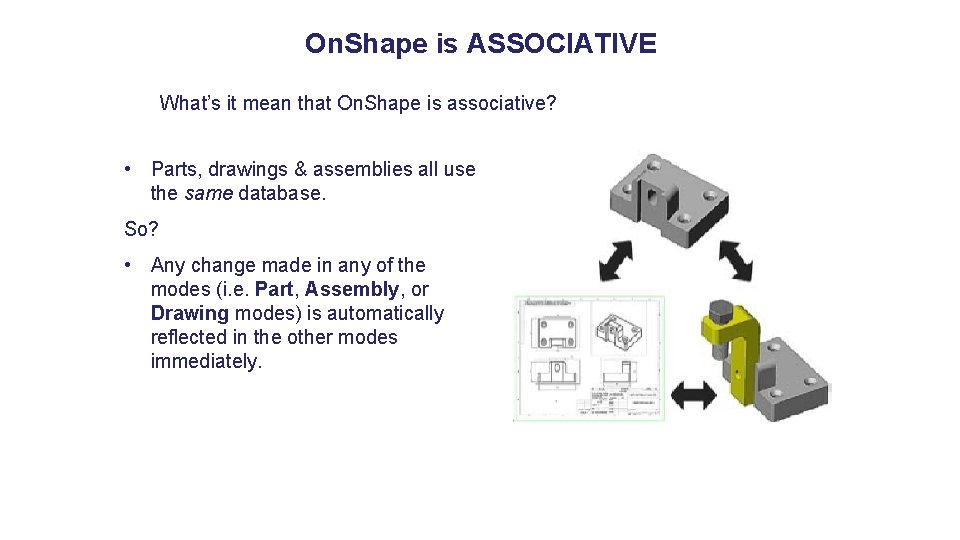
On. Shape is ASSOCIATIVE What’s it mean that On. Shape is associative? • Parts, drawings & assemblies all use the same database. So? • Any change made in any of the modes (i. e. Part, Assembly, or Drawing modes) is automatically reflected in the other modes immediately.

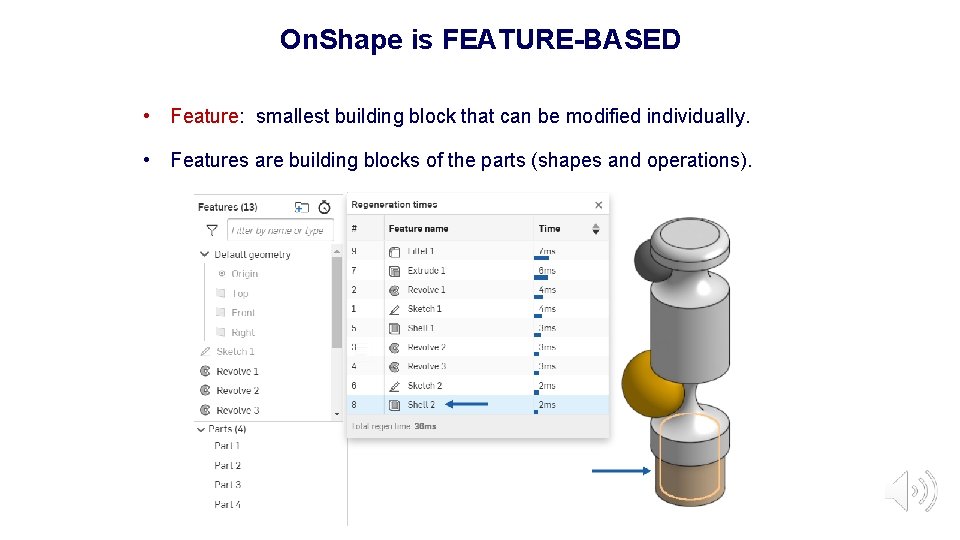
On. Shape is FEATURE-BASED • Feature: smallest building block that can be modified individually. • Features are building blocks of the parts (shapes and operations).

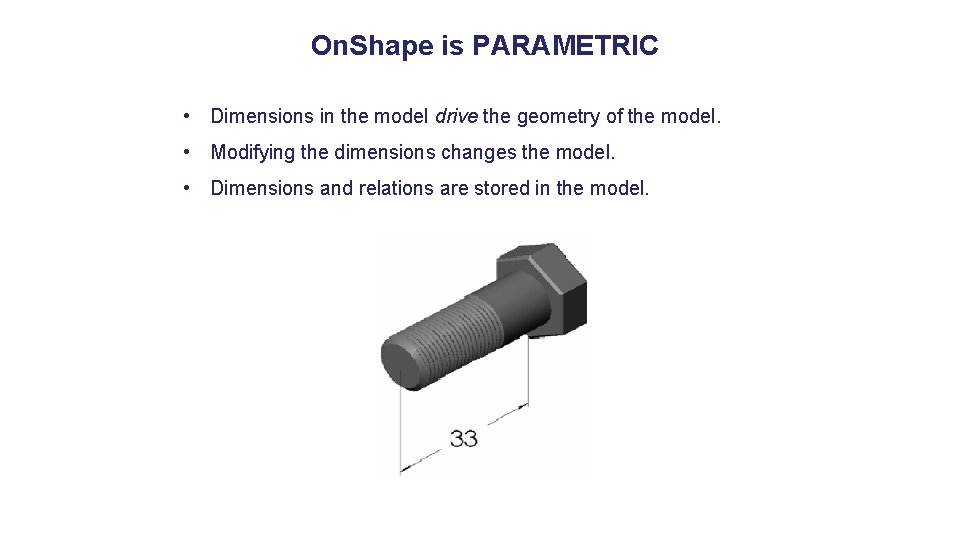
On. Shape is PARAMETRIC • Dimensions in the model drive the geometry of the model. • Modifying the dimensions changes the model. • Dimensions and relations are stored in the model.

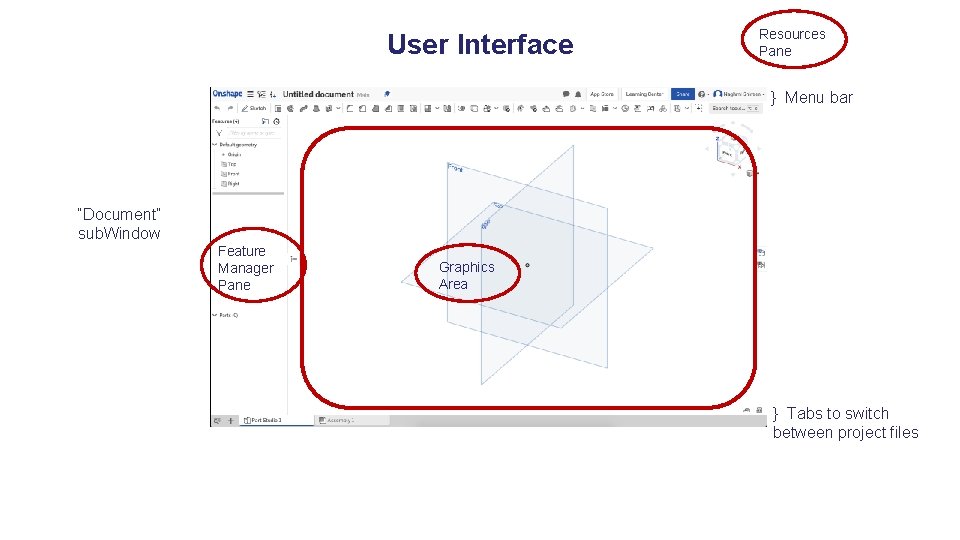
User Interface Resources Pane } Menu bar “Document” sub. Window Feature Manager Pane Graphics Area } Tabs to switch between project files

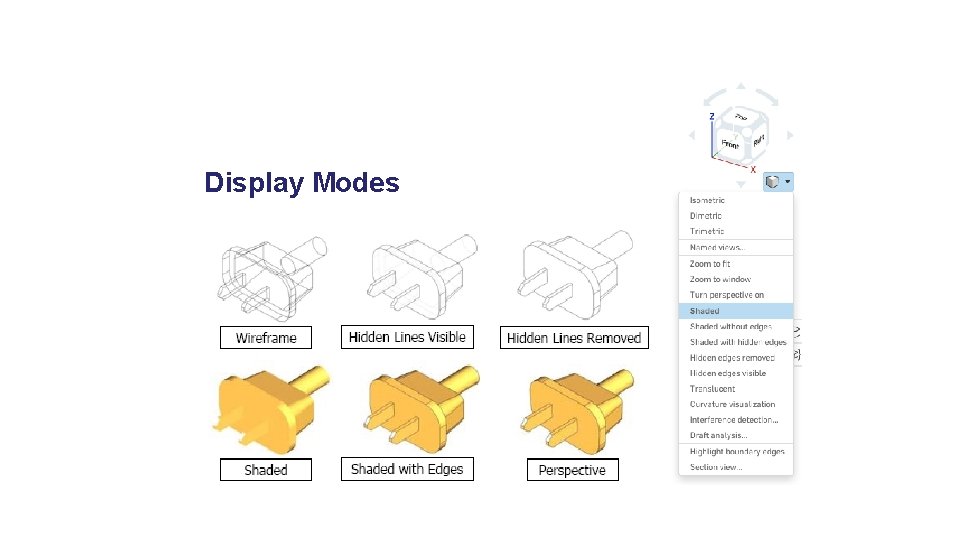
Display Modes

How do we actually build a Part? • Build parts by combining features Ok how do I make a feature? • Build feature by drawing a 2 D sketch and extruding it into the 3 rd dimension: – Use familiar drawing tools. • The sketch does not need to be dimensionally accurate. – Just needs to represent basic shape (topology) of profile: • Number of sides • Relationships between elements (parallel, etc. )

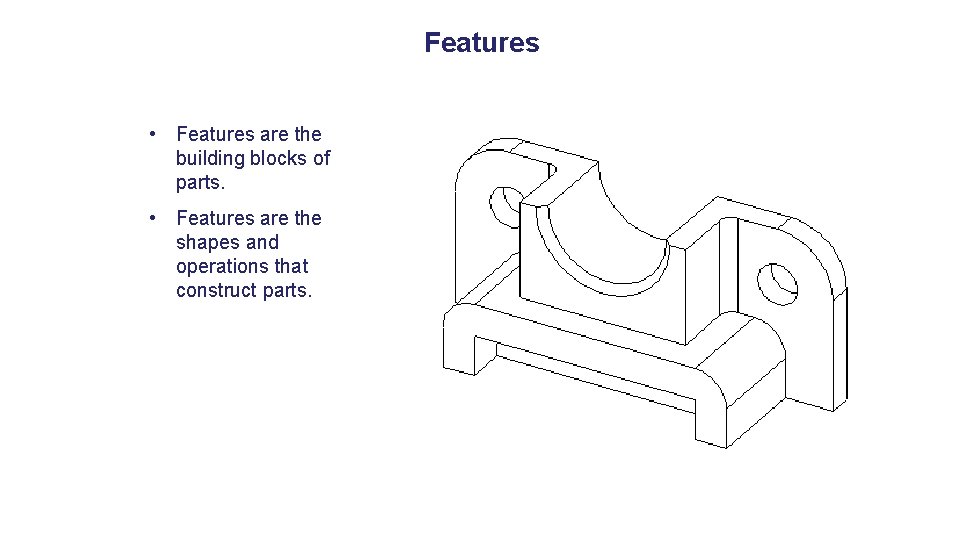
Features • Features are the building blocks of parts. • Features are the shapes and operations that construct parts.

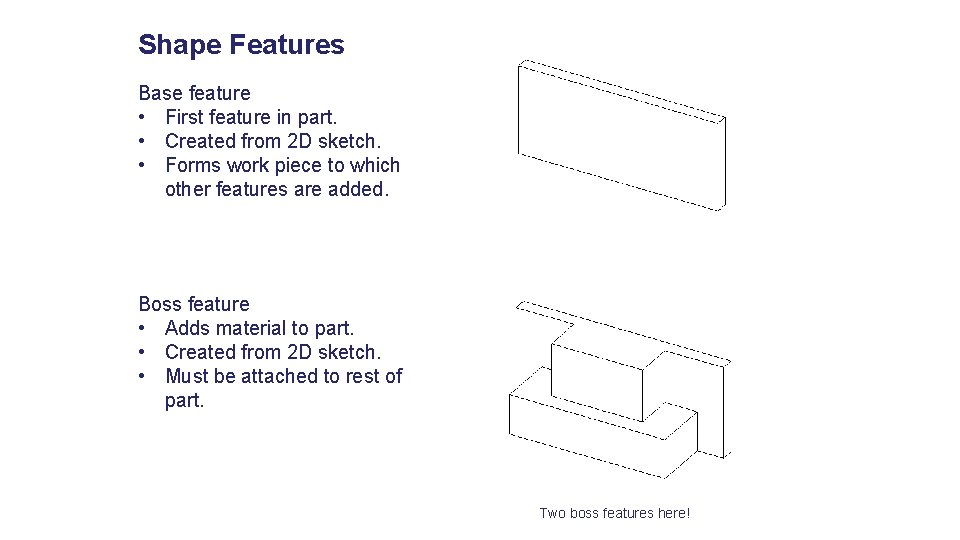
Shape Features Base feature • First feature in part. • Created from 2 D sketch. • Forms work piece to which other features are added. Boss feature • Adds material to part. • Created from 2 D sketch. • Must be attached to rest of part. Two boss features here!

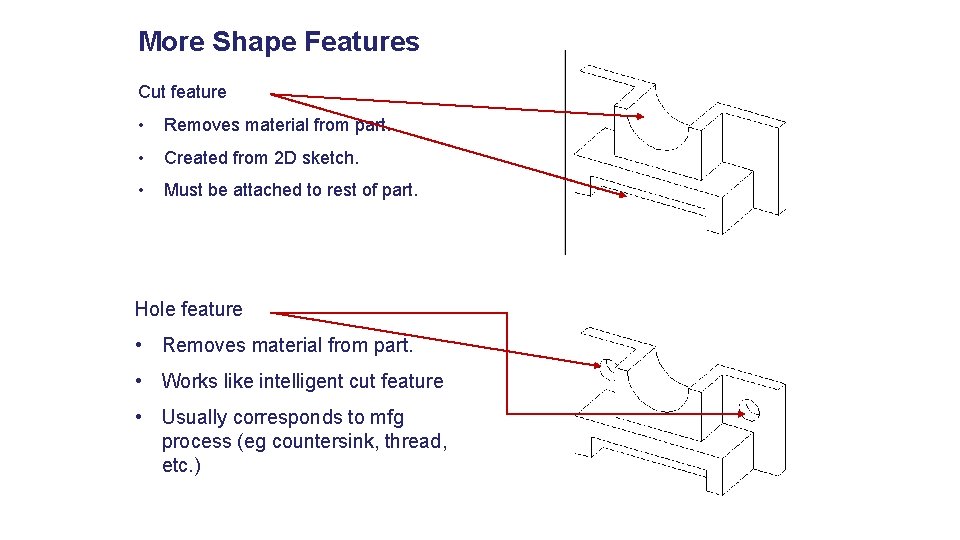
More Shape Features Cut feature • Removes material from part. • Created from 2 D sketch. • Must be attached to rest of part. Hole feature • Removes material from part. • Works like intelligent cut feature • Usually corresponds to mfg process (eg countersink, thread, etc. )

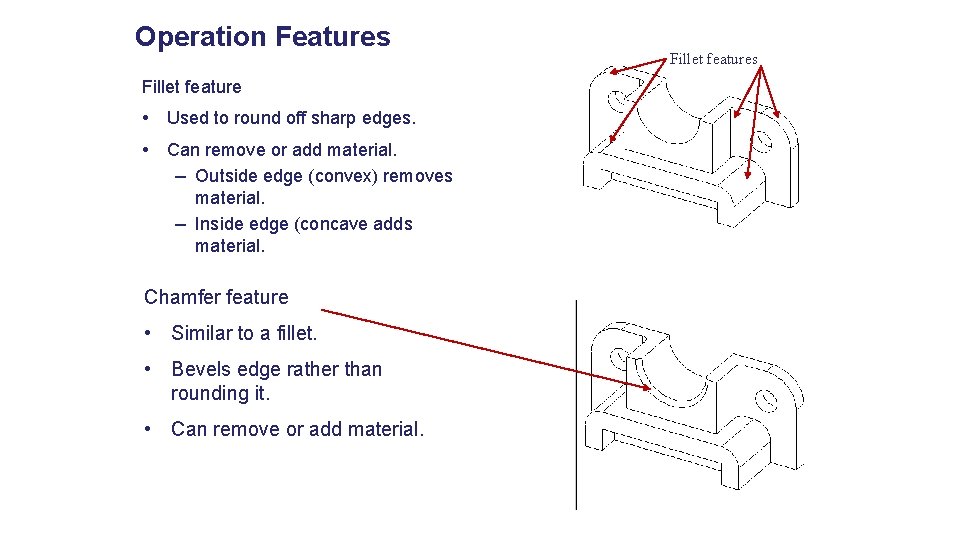
Operation Features Fillet feature • Used to round off sharp edges. • Can remove or add material. – Outside edge (convex) removes material. – Inside edge (concave adds material. Chamfer feature • Similar to a fillet. • Bevels edge rather than rounding it. • Can remove or add material. Fillet features

Feature attributes Sketched Features • Shape features have sketches, are based on sketches • Sketched features are built from 2 D sketches (profiles) Operation Features • Do not have sketches • Applied directly to work piece by selecting edges or faces

NO PRE-LAB THIS WEEK