Chapter 17 Minor Surgery In The Medical Office


- Slides: 26

Chapter 17 Minor Surgery In The Medical Office

Minor Surgery In The Medical Office • As a clinical medical assistant, you may assist with a variety of sterile procedures, including in-office surgery • Maintaining medical asepsis is vital to prevent the transmission of disease before, during, and following any of the invasive procedures performed in the medical office or clinic • Setup for various procedures can vary slightly according to the physician, however, sterile technique will always remain the same for any invasive procedure

Instrument Care • Each instrument used in the performance of minor surgical procedures has a specific function • Most instruments should be cared for in the same manner • Some general rules: • 1. Blood, tissue, or bodily fluids must not be allowed to dry on an instrument • 2. Instruments should be soaked in a room temperature solution immediately after each use • 3. Use the correct detergent/solution • 4. Instruments should be soaked in a plastic container to prevent damage to the instruments • 5. Separate sharp or heavier instruments from others to prevent damage • 6. Scrub all surfaces and crevices with a brush to remove any foreign material • 7. A careful visual inspection should be conducted before, during, and after every use • 8. Damaged instruments should not be used

Instrument Components • Each part of an instrument’s structure has a specific function • Ratchet: Designed to close or clamp the instrument

Instrument Components • Ring handle: • Designed so you can hold this with your thumb and fingers

Instrument Components Serrations: Little fissures into the surface of hemostats to prevent slipping

Instrument Components • Teeth: Very sharp and used to grasp tissue

Instrument Classifications • Cutting includes scissors and scalpels

Instrument Classifications • Clamping or gasping instruments include: • Hemostats Instrument used to clamp off blood vessels • Forceps Instrument used for holding or seizing • Needle holders Used to hold the suture needle

Instrument Classifications • Dilating or probing instruments includes: • Retractors: Instrument used to draw back tissue and hold open a surgical site • Speculums Used to enlarge a body cavity for better viewing • Nasal and vaginal

Preparing for Surgery • The day before the scheduled surgery, get all the necessary surgical instruments and supplies ready • All surgical instruments must be properly labeled and autoclaved • The basic setup for most minor surgical procedures includes: • Disposable scalpel • Hemostat • Needles and suture material • Suture scissors • Thumb forcep • Gauze squares(4 x 4’s) • Anesthetic medication vial(lidocaine) given by the physician • Syringes • Towels • Bandages

Preparing for Surgery • Autoclaved items remain sterile for 30 days • Most items used today are disposable and come already sterile in the manufacturer's packaging • You need to make sure the package is not opened or torn to ensure sterility • The room where the surgery will take place and the sterile tray should be set up before the patient is escorted to the area to be prepared for the procedure

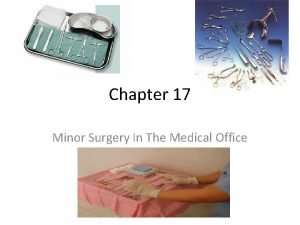
Sterile Tray Set Up • Disinfect the mayo tray and adjust the stand to waist level • Place the sterile drape on a clean surface • Open the pack, with the corners facing you • Grasp the sterile drape with the thumb and finger, lift the drape up enough that it unfolds but does not touch anything • Grasp the opposite corner and allow the drape to completely unfold and place on the mayo stand • Next open the all other sterile items and drop onto the sterile field(rule: never place items below waist level or above the neck level, never turn your back to the field)

Preparing The Patient • When the patient arrives for surgery, a consent form must be completed • The procedure should be explained and the patient should be given enough time to ask questions • The patient’s(guardians) signature, along with yours and the physicians signature, must be on the consent form, which will be scanned into patient's chart • The patient's vital signs and medical history should be taken and noted(including allergies)

Preparing The Patient • In procedures requiring biopsies, careful labeling and handling of the specimen is vital • The lab provides a formalin solution container to preserve the specimen, this container is sterile and the specimen should be placed in this solution with a sterile instrument • A completed lab request form should be completed with the specific laboratory order

Preparing The Patient • In certain surgical procedures, such as the removal of warts or polyps, an electrocautery device may be used to stop the bleeding

Preparing The Patient • Another method used in removing skin tags, warts, and other skin disorders and growths is by cryosurgery • This process used subfreezing temperature to destroy or remove tissue with liquid nitrogen

Skin Preparation • • Preparation of the area of skin that will be affected by the surgical procedure, this is called skin prep Because hair encourages microbial accumulation, it is sometime shaved In preparing a surgical site, shave at a 30 degrees angle(page 886) An antiseptic can be used to reduce microbial growth To protect yourself and the patient you should wear sterile gloves when preparing the skin or changing a dressing Iodine is the most common antiseptic used in surgery This solution is applied in a circular motion from the site outward

Assisting With Minor Surgical Procedures • Many minor surgical procedures are now performed in the medical office or clinic • Medical assistants should have a general knowledge of the minor surgical procedures in their medical office • It is critical to maintain a strict sterile technique, any break in a sterile technique can result in an infection for the patient

General Information • Many physicians prefer to perform minor surgery on the day the patient is scheduled • The doctor may require that patients fast for a certain time before the procedure • Fasting lessens the possibility of nausea and vomiting, which some patients experience during and after surgery • Outpatient surgery in recent years has become more acceptable than ever before • Patients naturally feel more comfortable at home, following the same-day surgery most patient are sent home to recover • Printed post-op surgery instructions, with emergency phone numbers are given and explained to patient(or whomever is with patient)

Sterile Gloves • • If the physician wishes you to assist directly with the surgical procedure, sterile gloves must be worm Before you put on sterile gloves, wash your hands for 20 seconds Inspect the sterile gloves for any tears Open the pack by pulling on the center paper folds Grasp the fold of the inside of the cuff of the gloves with the thumb and fingers of your dominant hand Insert your non-dominant hand into the glove on with your dominant hand by the turned-down cuff Insert the fingers of your gloved non- dominant hand under the folded-down cuff of the glove, and insert your dominant hand Check glove for and tears or holes

Suture Material • The term suture means a type of thread that is used to join skin of a wound • Sutures are made of catgut(absorbable), sheep intestines, silk, or nylon(needs to be removed) • Suture material are attached to needle of various lengths, sizes, straight and curved • Your efficiency preparation of setting up the treatment room will be appreciated by both the physician and the patient • Make sure follow up appointments are made for patients to return for a suture removal(5 to 14 days) • Check patients record for an updated tetanus immunization

Suture Removal • In many offices, the medical assistant's responsibility to remove the sutures • Be sure to remove the same number of sutures as were inserted • Always check the physicians order for removal date, check for infection(if unsure have the physician check the site first) • Suture that are not removed will become infected(note any suture that have fallen out before the patient returns to the office) • Removal of staples is preformed with a staple extractor

Suture Removal • After sutures or staples have been removed, physicians may order additional closure materials, called steri-strips applied with a glue called benzoin

Suture Removal Assemble all necessary items on the mayo stand • • • Put on gloves Apply antiseptic solution(ask for allergies) Remove suture(see below) Pull on the suture with the forceps toward the healing lesion so that no stress is put on it Use steri-strips if ordered

Protective Bandages • The type of bandage that the physician orders will vary and should be appropriate for the wound and the patient • Make sure you advise the patient to keep the dressing dry and clean • Inform the patient to return to the clinic for any signs of infection or concerns • A wound culture may need to be done • Application of an ace wrap increases circulation of the area, which helps the healing process
 Minor minor minor
 Minor surgery list
 Minor surgery tray setup
 Teorema lui kronecker
 Chapter 56 oral and maxillofacial surgery
 Chapter 26 oral and maxillofacial surgery
 Chapter 56 oral and maxillofacial surgery
 Hình ảnh bộ gõ cơ thể búng tay
 Lp html
 Bổ thể
 Tỉ lệ cơ thể trẻ em
 Gấu đi như thế nào
 Chụp phim tư thế worms-breton
 Chúa yêu trần thế alleluia
 Môn thể thao bắt đầu bằng từ đua
 Thế nào là hệ số cao nhất
 Các châu lục và đại dương trên thế giới
 Công thức tiính động năng
 Trời xanh đây là của chúng ta thể thơ
 Mật thư tọa độ 5x5
 Phép trừ bù
 độ dài liên kết
 Các châu lục và đại dương trên thế giới
 Thể thơ truyền thống
 Quá trình desamine hóa có thể tạo ra
 Một số thể thơ truyền thống
 Cái miệng nó xinh thế


