Part Design The Part Design application is used
- Slides: 21

Part Design • The Part Design application is used to create solid models of parts • Solid parts are usually created from 2 D profiles that are extruded or revolved to form a base feature • The Part Design task is tightly integrated with a 2 D sketching tool • A library of features is provided to allow user to additional details to a base part • Parts can be modified by selecting their features in the specification tree • Parts are stored in files with the extension. CATPart

Part Design • The Part Design task uses intelligent design features • The features contain information about their context as well as their shape • For example a Hole feature can only be created once you have created a part body – A hole feature requires an attachment face, and driving dimensions – A hole is a negative feature – it is automatically subtracted from the main Part Body • Other features include Pad, Revolve, Pocket, Groove, Thread, Rib, Slot, Stiffener • When a new feature is added to a solid part it is automatically combined with the existing part

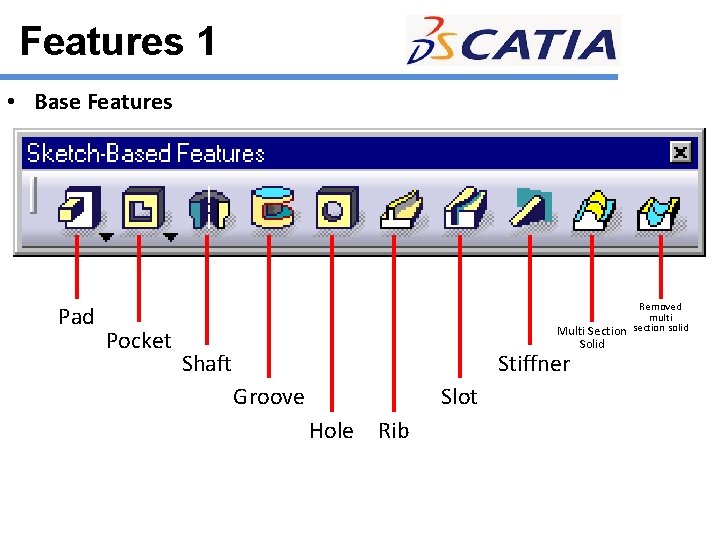
Features 1 • Base Features Pad Pocket Removed multi Multi Section solid Shaft Stiffner Groove Slot Hole Rib Solid

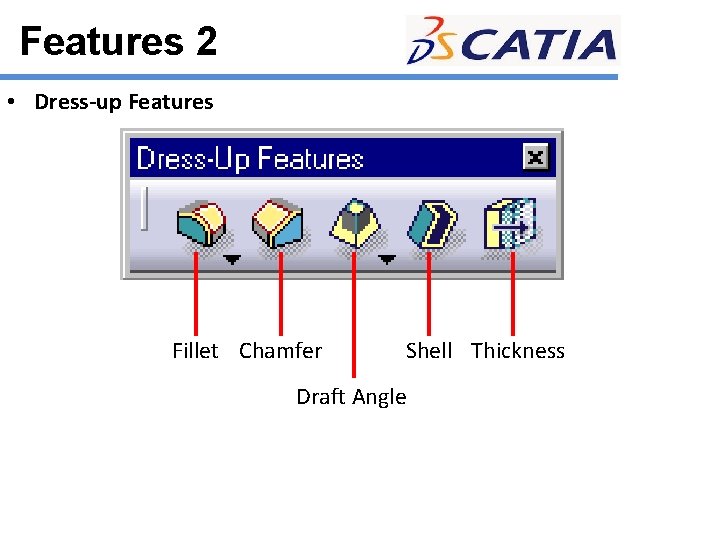
Features 2 • Dress-up Features Fillet Chamfer Shell Thickness Draft Angle

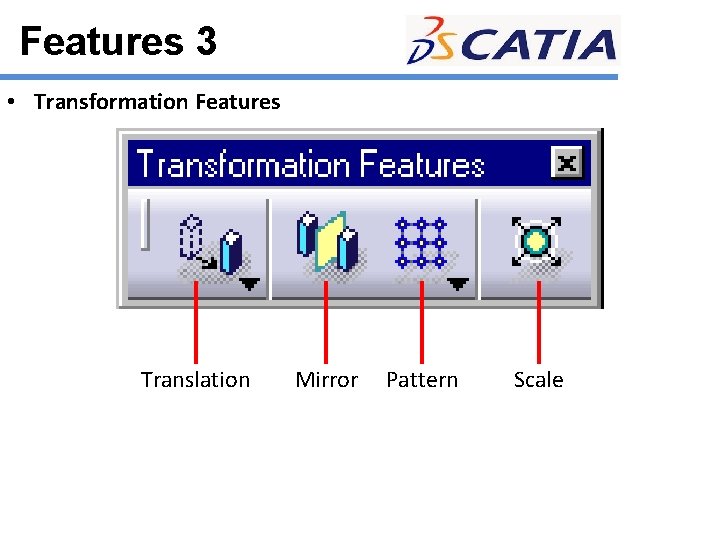
Features 3 • Transformation Features Translation Mirror Pattern Scale

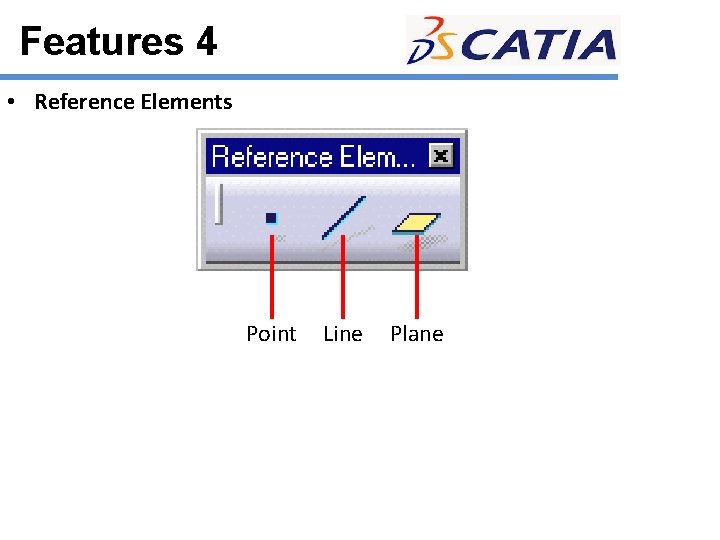
Features 4 • Reference Elements Point Line Plane

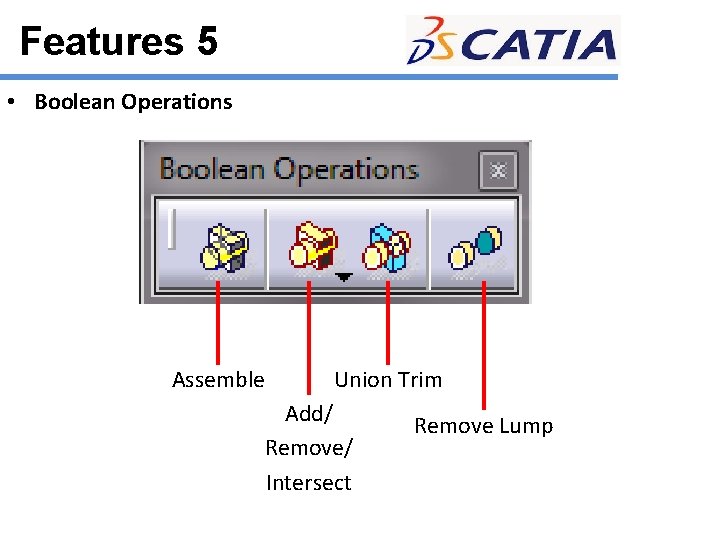
Features 5 • Boolean Operations Assemble Union Trim Add/ Remove/ Intersect Remove Lump

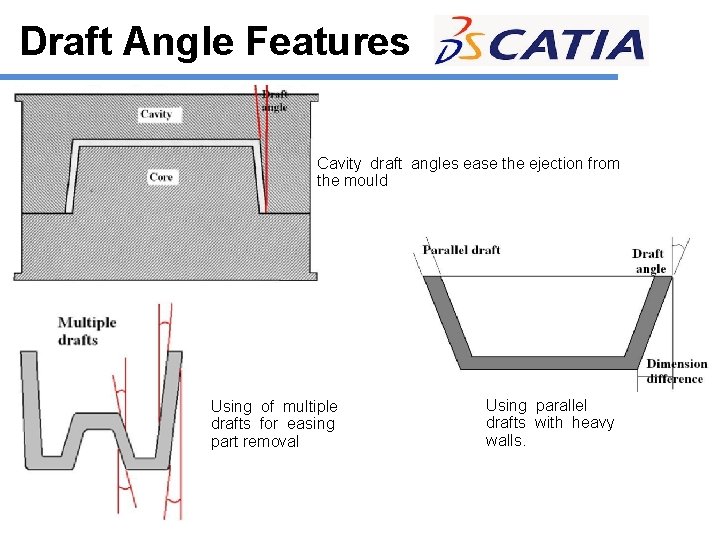
Draft Angle Features • What is Draft Angle? • Draft angle is for plastic part design consideration in injection moulding process. • It was necessary for any vertical wall of an injection molded product. • The function of draft angle is to make an easier the part’s to ejected from the mold. • Without draft angle, the part will effect due to the friction during removal. • Advantages of draft angle: – reduce the effects of undercuts – eliminate sliding friction – facilitate air movement which compensates the vacuum effect when opening the mold.

Draft Angle Features Cavity draft angles ease the ejection from the mould Using of multiple drafts for easing part removal Using parallel drafts with heavy walls.

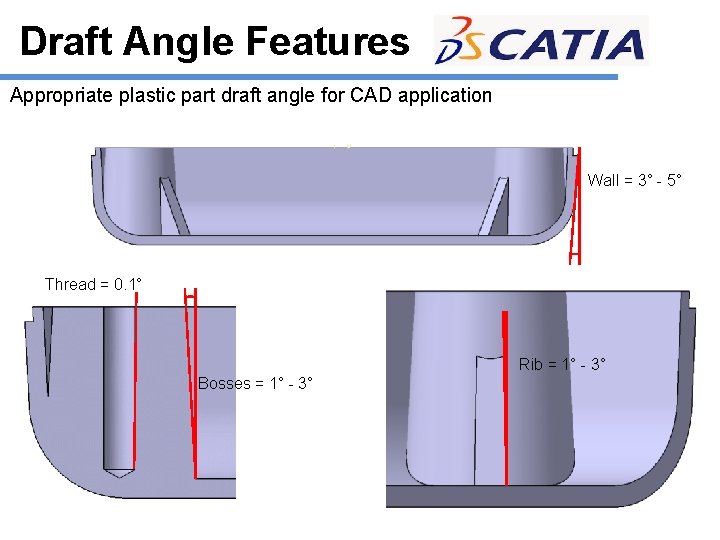
Draft Angle Features Appropriate plastic part draft angle for CAD application Wall = 3° - 5° Thread = 0. 1° Rib = 1° - 3° Bosses = 1° - 3°

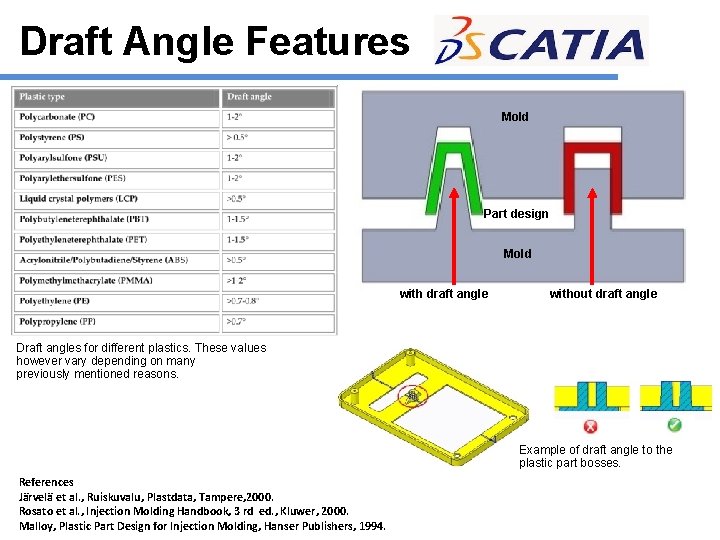
Draft Angle Features Mold Part design Mold with draft angle without draft angle Draft angles for different plastics. These values however vary depending on many previously mentioned reasons. Example of draft angle to the plastic part bosses. References Järvelä et al. , Ruiskuvalu, Plastdata, Tampere, 2000. Rosato et al. , Injection Molding Handbook, 3 rd ed. , Kluwer, 2000. Malloy, Plastic Part Design for Injection Molding, Hanser Publishers, 1994.

Modifying a Part • All parts created in Part Design can be edited at any time in the life of the part • The parameters used to create a feature can be accessed by double clicking on the feature definition in the product specification tree or on the part geometry • For example to change the height of a pad you should double click on the pad node in the specification tree. • The original feature dialogue will appear on the screen • Change the values and click on OK. • When you have modified the feature parameters the part will automatically update. The part turns red briefly to indicate that it is out of date

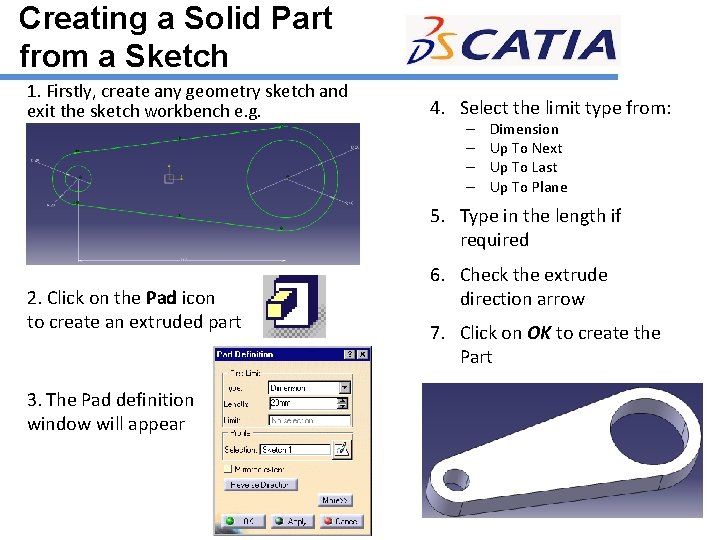
Creating a Solid Part from a Sketch 1. Firstly, create any geometry sketch and exit the sketch workbench e. g. 4. Select the limit type from: – – Dimension Up To Next Up To Last Up To Plane 5. Type in the length if required 2. Click on the Pad icon to create an extruded part 3. The Pad definition window will appear 6. Check the extrude direction arrow 7. Click on OK to create the Part

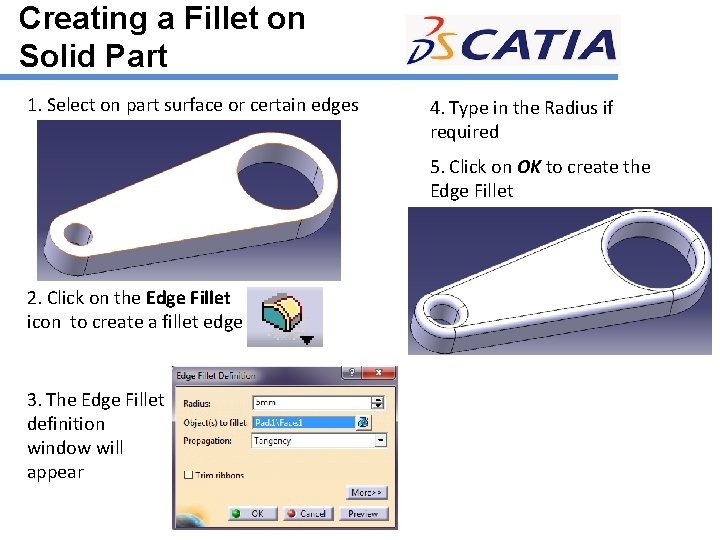
Creating a Fillet on Solid Part 1. Select on part surface or certain edges 4. Type in the Radius if required 5. Click on OK to create the Edge Fillet 2. Click on the Edge Fillet icon to create a fillet edge 3. The Edge Fillet definition window will appear

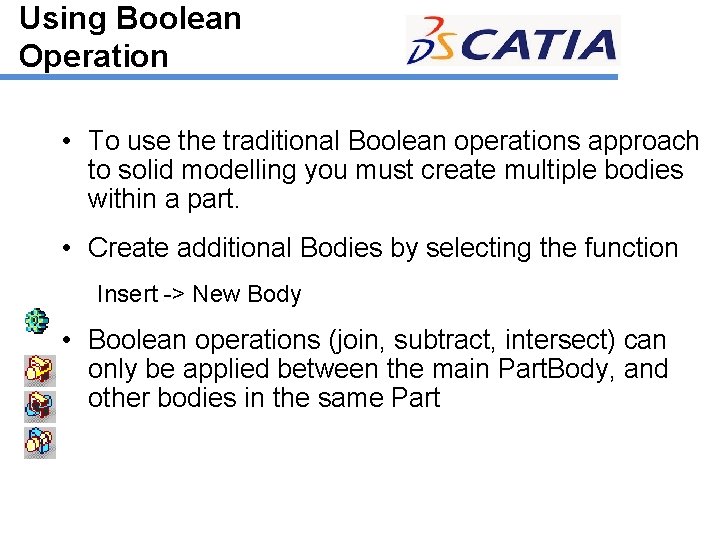
Using Boolean Operation • To use the traditional Boolean operations approach to solid modelling you must create multiple bodies within a part. • Create additional Bodies by selecting the function Insert -> New Body • Boolean operations (join, subtract, intersect) can only be applied between the main Part. Body, and other bodies in the same Part

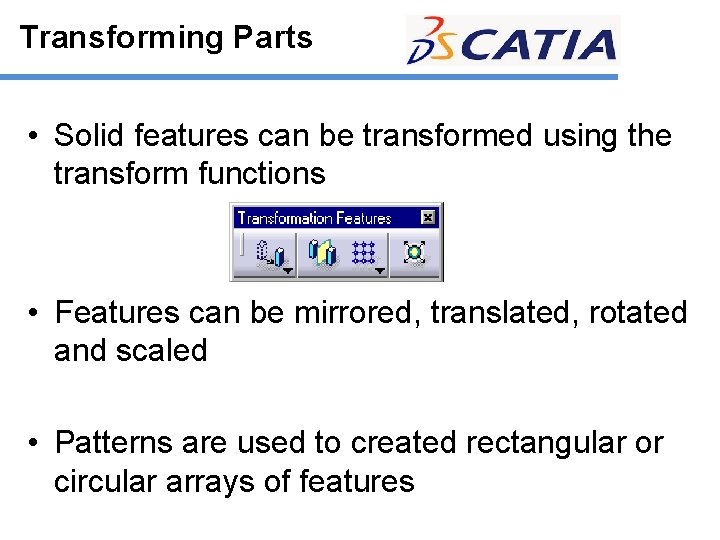
Transforming Parts • Solid features can be transformed using the transform functions • Features can be mirrored, translated, rotated and scaled • Patterns are used to created rectangular or circular arrays of features

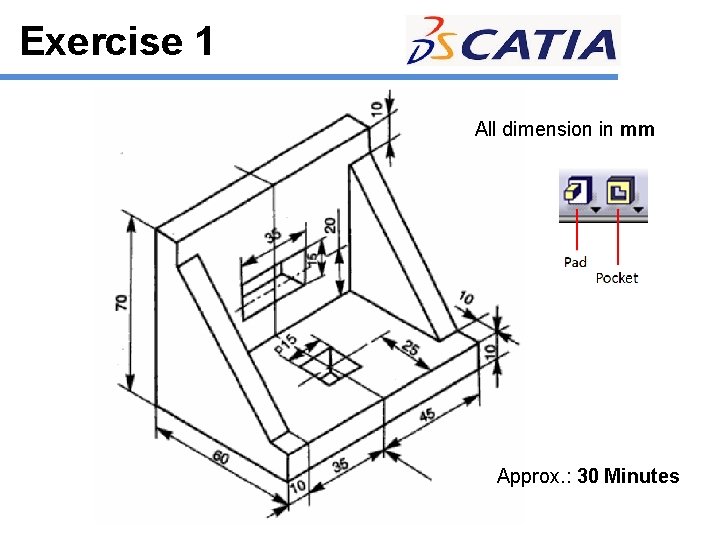
Exercise 1 All dimension in mm Approx. : 30 Minutes

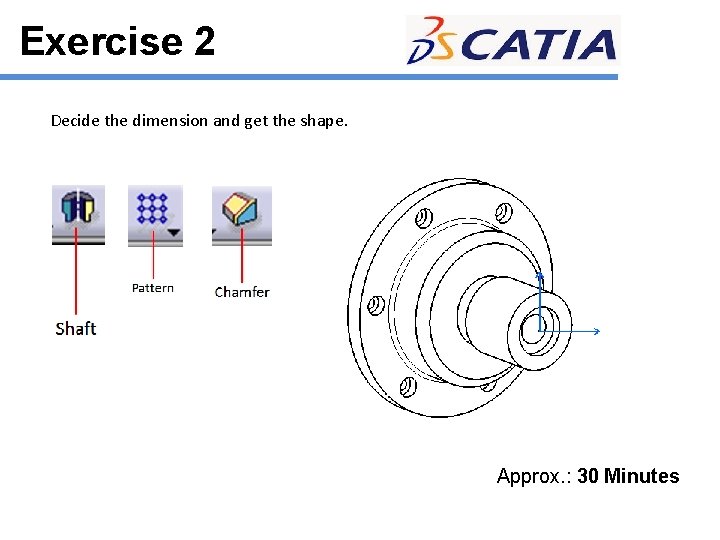
Exercise 2 Decide the dimension and get the shape. Approx. : 30 Minutes

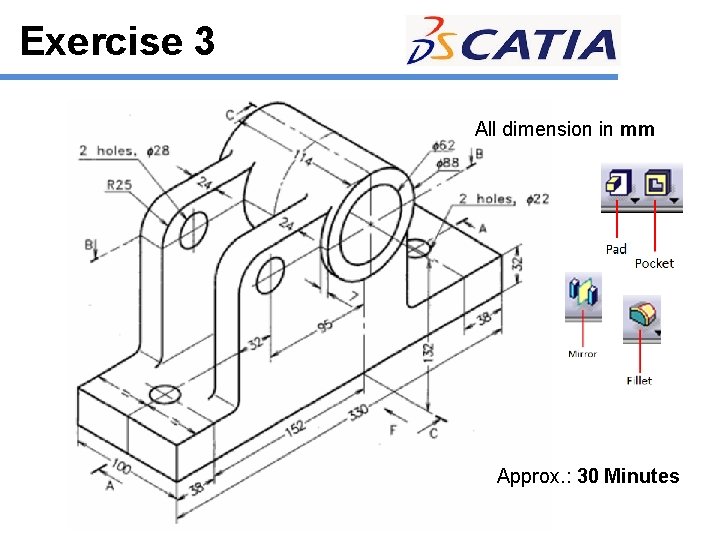
Exercise 3 All dimension in mm Approx. : 30 Minutes

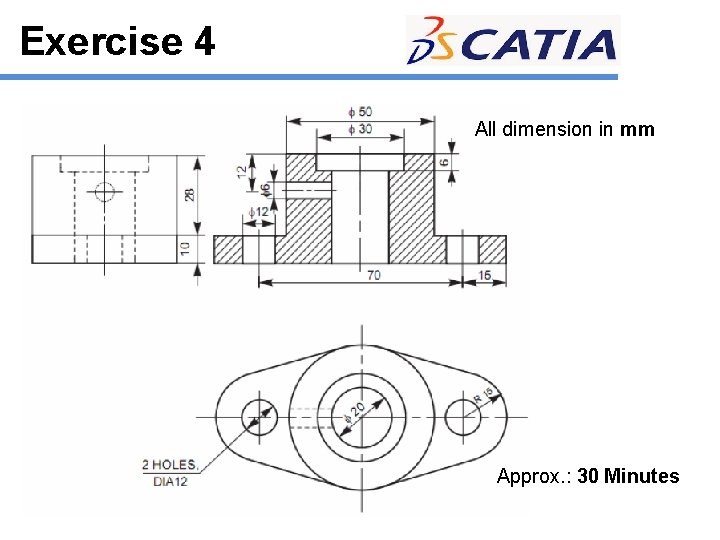
Exercise 4 All dimension in mm Approx. : 30 Minutes

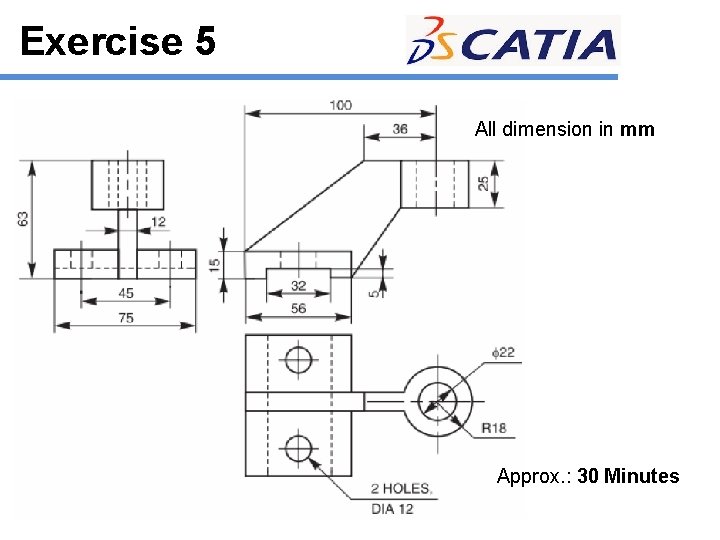
Exercise 5 All dimension in mm Approx. : 30 Minutes