Modeling Part 2 Sahar Mosleh Ahmad R Hadaegh
- Slides: 40

Modeling Part 2 Sahar Mosleh & Ahmad R. Hadaegh California State University San Marcos Page 1

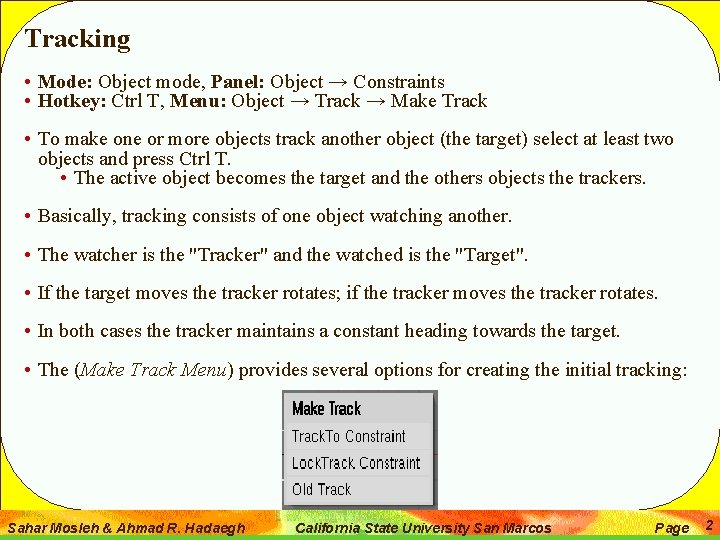
Tracking • Mode: Object mode, Panel: Object → Constraints • Hotkey: Ctrl T, Menu: Object → Track → Make Track • To make one or more objects track another object (the target) select at least two objects and press Ctrl T. • The active object becomes the target and the others objects the trackers. • Basically, tracking consists of one object watching another. • The watcher is the "Tracker" and the watched is the "Target". • If the target moves the tracker rotates; if the tracker moves the tracker rotates. • In both cases the tracker maintains a constant heading towards the target. • The (Make Track Menu) provides several options for creating the initial tracking: Sahar Mosleh & Ahmad R. Hadaegh California State University San Marcos Page 2

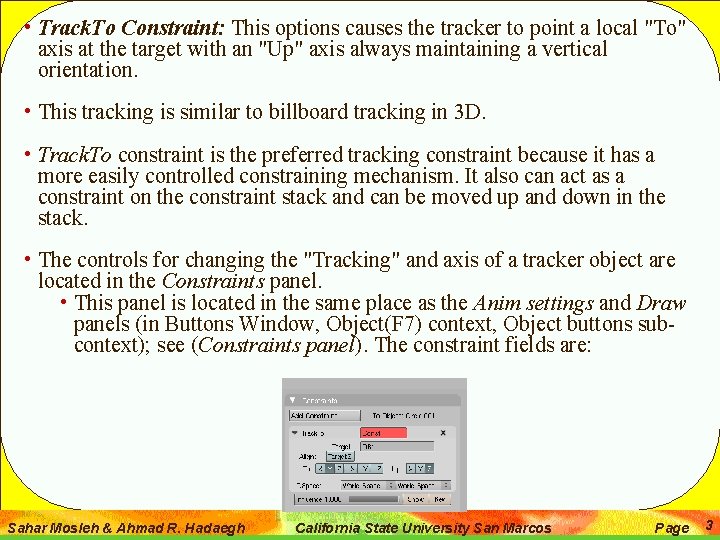
• Track. To Constraint: This options causes the tracker to point a local "To" axis at the target with an "Up" axis always maintaining a vertical orientation. • This tracking is similar to billboard tracking in 3 D. • Track. To constraint is the preferred tracking constraint because it has a more easily controlled constraining mechanism. It also can act as a constraint on the constraint stack and can be moved up and down in the stack. • The controls for changing the "Tracking" and axis of a tracker object are located in the Constraints panel. • This panel is located in the same place as the Anim settings and Draw panels (in Buttons Window, Object(F 7) context, Object buttons subcontext); see (Constraints panel). The constraint fields are: Sahar Mosleh & Ahmad R. Hadaegh California State University San Marcos Page 3

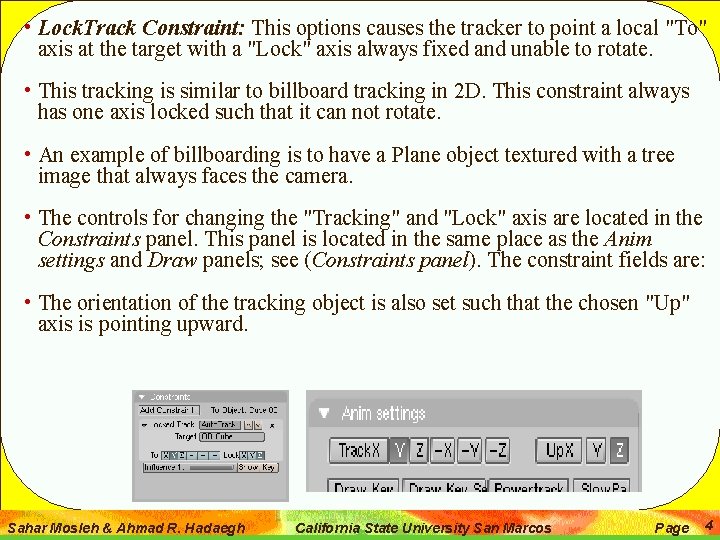
• Lock. Track Constraint: This options causes the tracker to point a local "To" axis at the target with a "Lock" axis always fixed and unable to rotate. • This tracking is similar to billboard tracking in 2 D. This constraint always has one axis locked such that it can not rotate. • An example of billboarding is to have a Plane object textured with a tree image that always faces the camera. • The controls for changing the "Tracking" and "Lock" axis are located in the Constraints panel. This panel is located in the same place as the Anim settings and Draw panels; see (Constraints panel). The constraint fields are: • The orientation of the tracking object is also set such that the chosen "Up" axis is pointing upward. Sahar Mosleh & Ahmad R. Hadaegh California State University San Marcos Page 4

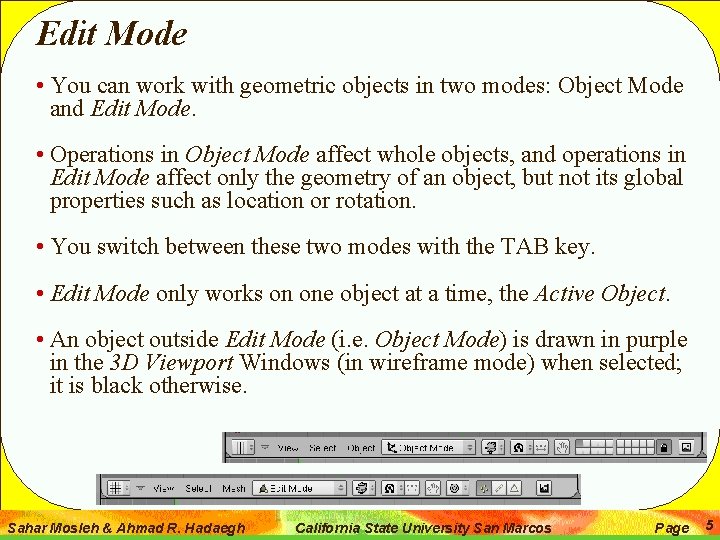
Edit Mode • You can work with geometric objects in two modes: Object Mode and Edit Mode. • Operations in Object Mode affect whole objects, and operations in Edit Mode affect only the geometry of an object, but not its global properties such as location or rotation. • You switch between these two modes with the TAB key. • Edit Mode only works on one object at a time, the Active Object. • An object outside Edit Mode (i. e. Object Mode) is drawn in purple in the 3 D Viewport Windows (in wireframe mode) when selected; it is black otherwise. Sahar Mosleh & Ahmad R. Hadaegh California State University San Marcos Page 5

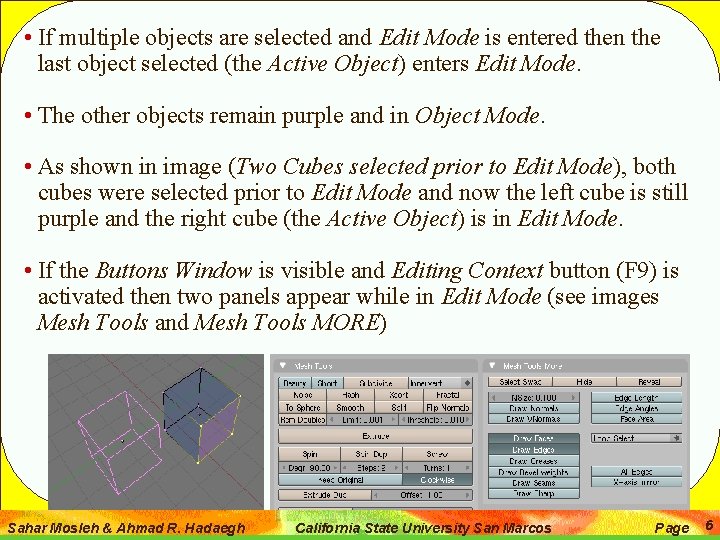
• If multiple objects are selected and Edit Mode is entered then the last object selected (the Active Object) enters Edit Mode. • The other objects remain purple and in Object Mode. • As shown in image (Two Cubes selected prior to Edit Mode), both cubes were selected prior to Edit Mode and now the left cube is still purple and the right cube (the Active Object) is in Edit Mode. • If the Buttons Window is visible and Editing Context button (F 9) is activated then two panels appear while in Edit Mode (see images Mesh Tools and Mesh Tools MORE) Sahar Mosleh & Ahmad R. Hadaegh California State University San Marcos Page 6

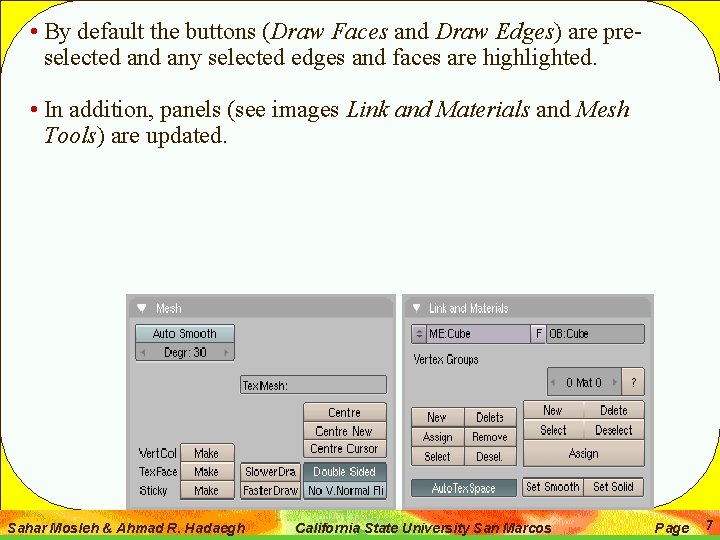
• By default the buttons (Draw Faces and Draw Edges) are preselected any selected edges and faces are highlighted. • In addition, panels (see images Link and Materials and Mesh Tools) are updated. Sahar Mosleh & Ahmad R. Hadaegh California State University San Marcos Page 7

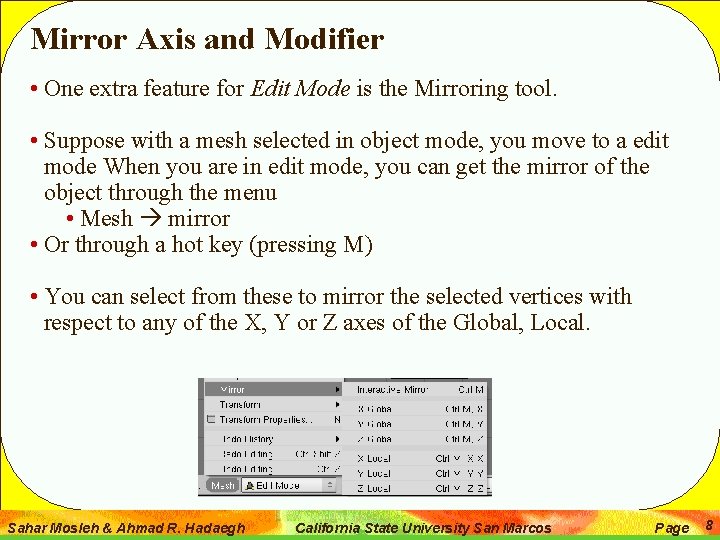
Mirror Axis and Modifier • One extra feature for Edit Mode is the Mirroring tool. • Suppose with a mesh selected in object mode, you move to a edit mode When you are in edit mode, you can get the mirror of the object through the menu • Mesh mirror • Or through a hot key (pressing M) • You can select from these to mirror the selected vertices with respect to any of the X, Y or Z axes of the Global, Local. Sahar Mosleh & Ahmad R. Hadaegh California State University San Marcos Page 8

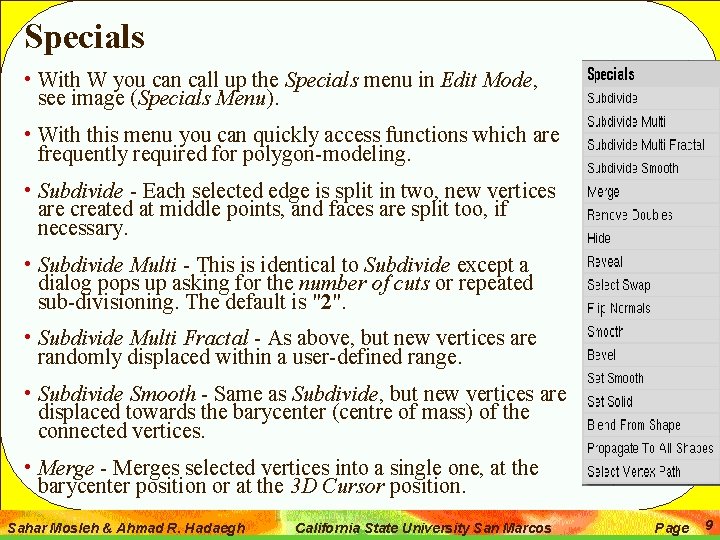
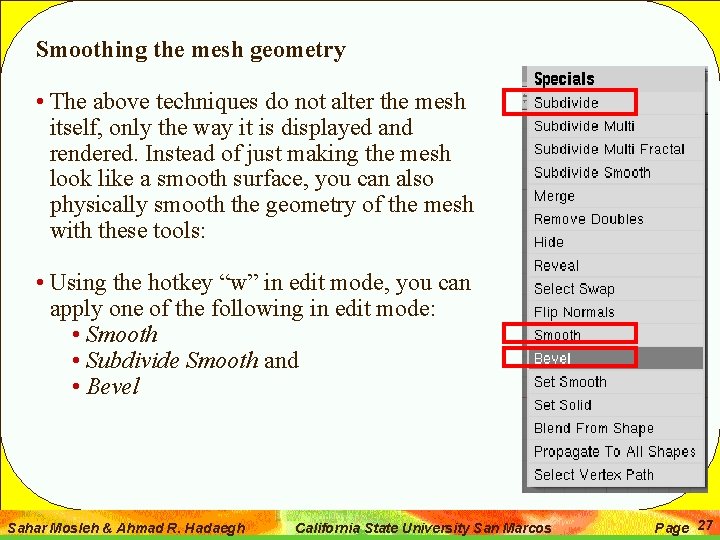
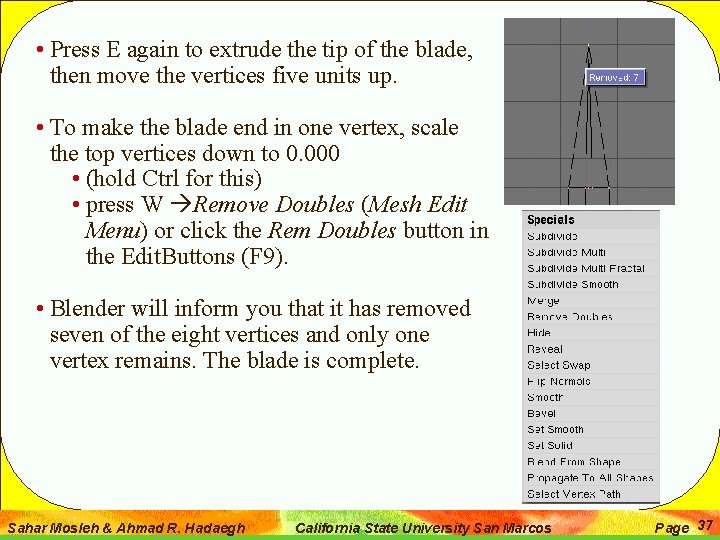
Specials • With W you can call up the Specials menu in Edit Mode, see image (Specials Menu). • With this menu you can quickly access functions which are frequently required for polygon-modeling. • Subdivide - Each selected edge is split in two, new vertices are created at middle points, and faces are split too, if necessary. • Subdivide Multi - This is identical to Subdivide except a dialog pops up asking for the number of cuts or repeated sub-divisioning. The default is "2". • Subdivide Multi Fractal - As above, but new vertices are randomly displaced within a user-defined range. • Subdivide Smooth - Same as Subdivide, but new vertices are displaced towards the barycenter (centre of mass) of the connected vertices. • Merge - Merges selected vertices into a single one, at the barycenter position or at the 3 D Cursor position. Sahar Mosleh & Ahmad R. Hadaegh California State University San Marcos Page 9

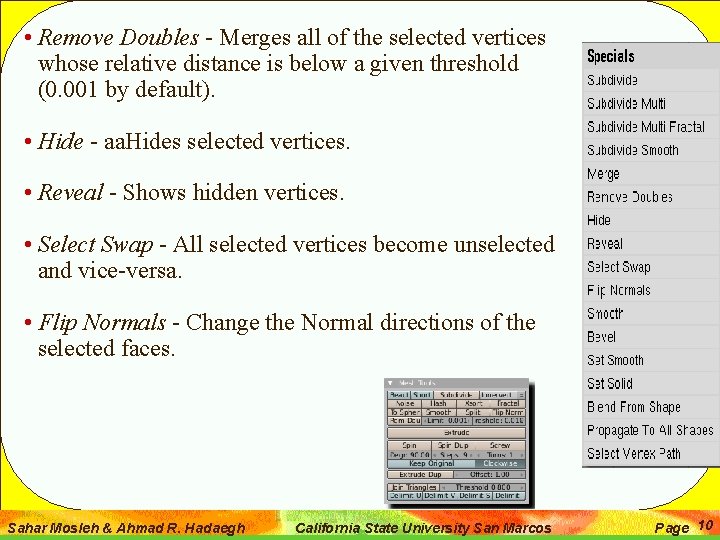
• Remove Doubles - Merges all of the selected vertices whose relative distance is below a given threshold (0. 001 by default). • Hide - aa. Hides selected vertices. • Reveal - Shows hidden vertices. • Select Swap - All selected vertices become unselected and vice-versa. • Flip Normals - Change the Normal directions of the selected faces. Sahar Mosleh & Ahmad R. Hadaegh California State University San Marcos Page 10

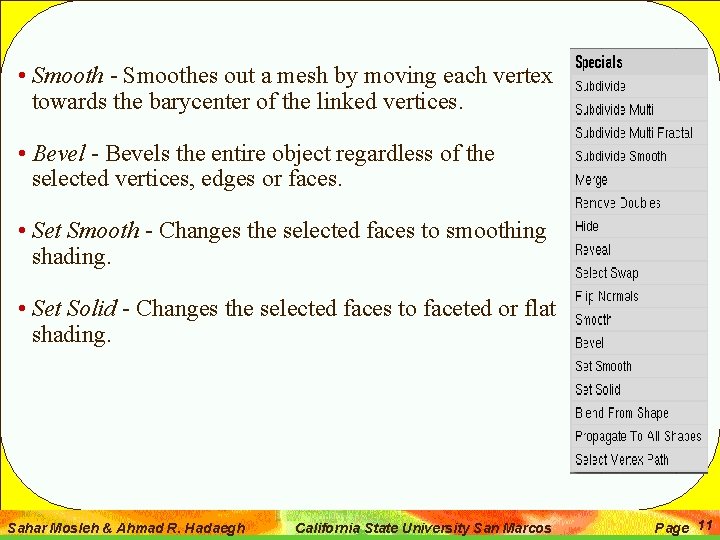
• Smooth - Smoothes out a mesh by moving each vertex towards the barycenter of the linked vertices. • Bevel - Bevels the entire object regardless of the selected vertices, edges or faces. • Set Smooth - Changes the selected faces to smoothing shading. • Set Solid - Changes the selected faces to faceted or flat shading. Sahar Mosleh & Ahmad R. Hadaegh California State University San Marcos Page 11

Mesh Structures: Vertices, Edges and Faces • In basic meshes, everything is built from three basic structures: Vertices, Edges and Faces. • Vertices: • A vertex is primarily a single point or position in 3 D space. • It is usually invisible in rendering and in Object. Mode. • To create a new vertex, change to Edit mode, • Make sure the entire object is not selected • Then hold down CTRL, and click with the LMB • The new vertex is placed at the depth of the 3 D cursor 'into' the screen. • Any vertices selected previously are automatically connected to the new one with an edge. Sahar Mosleh & Ahmad R. Hadaegh California State University San Marcos Page 12

• Edges • An edge always connects two vertices with a straight line. • The edges are the 'wires' you see when you look at a mesh in wireframe view. • They are usually invisible on the rendered image. They are used to construct faces. Create an edge by selecting two vertices and pressing F. • Faces • A Face is the highest level structure in a mesh. • Faces are used to build the actual surface of the object. They are what you see when you render the mesh. A Face is defined as the area between either three (triangles) or four vertices (quads), with an Edge on every side. • Four-sided faces only work well if the Face is pretty much flat (all points lie within one imaginary plane) and convex (the angle at no corner is greater than or equal to 180 degrees). This is the case with the faces of a cube, for example. • An area between three or four vertices, outlined by Edges, doesn't have to be a face. If this area does not contain a face, it will simply be transparent or non-existent in the rendered image. • To create a face, select three or four suitable vertices and press F. Sahar Mosleh & Ahmad R. Hadaegh California State University San Marcos Page 13

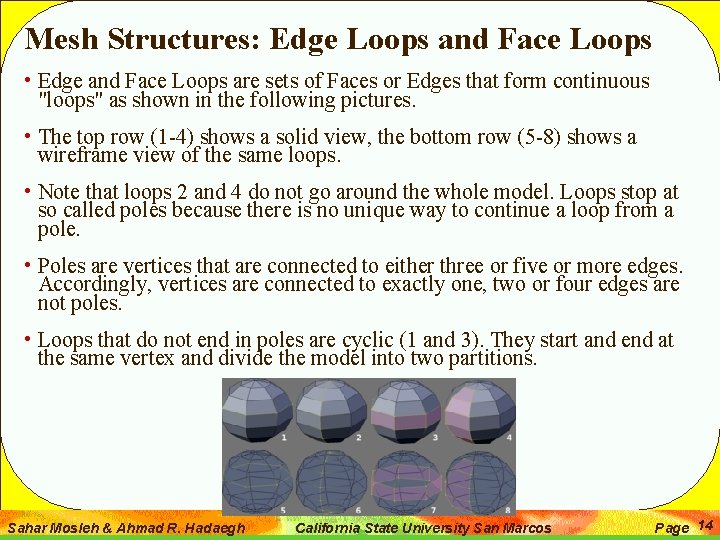
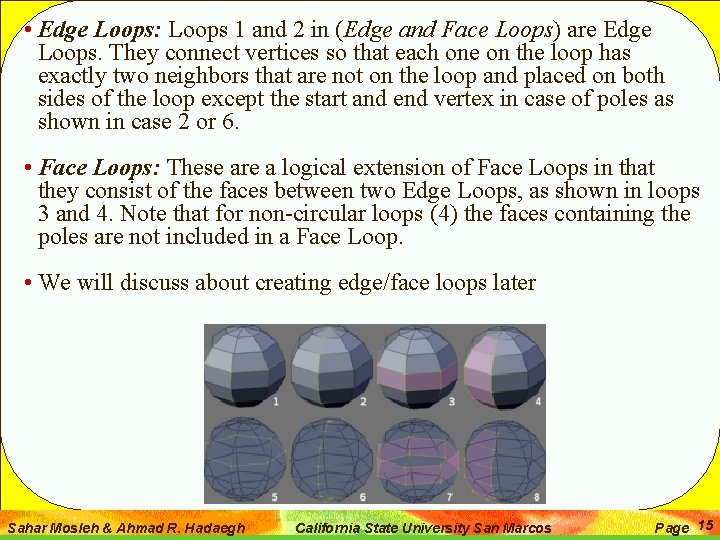
Mesh Structures: Edge Loops and Face Loops • Edge and Face Loops are sets of Faces or Edges that form continuous "loops" as shown in the following pictures. • The top row (1 -4) shows a solid view, the bottom row (5 -8) shows a wireframe view of the same loops. • Note that loops 2 and 4 do not go around the whole model. Loops stop at so called poles because there is no unique way to continue a loop from a pole. • Poles are vertices that are connected to either three or five or more edges. Accordingly, vertices are connected to exactly one, two or four edges are not poles. • Loops that do not end in poles are cyclic (1 and 3). They start and end at the same vertex and divide the model into two partitions. Sahar Mosleh & Ahmad R. Hadaegh California State University San Marcos Page 14

• Edge Loops: Loops 1 and 2 in (Edge and Face Loops) are Edge Loops. They connect vertices so that each one on the loop has exactly two neighbors that are not on the loop and placed on both sides of the loop except the start and end vertex in case of poles as shown in case 2 or 6. • Face Loops: These are a logical extension of Face Loops in that they consist of the faces between two Edge Loops, as shown in loops 3 and 4. Note that for non-circular loops (4) the faces containing the poles are not included in a Face Loop. • We will discuss about creating edge/face loops later Sahar Mosleh & Ahmad R. Hadaegh California State University San Marcos Page 15

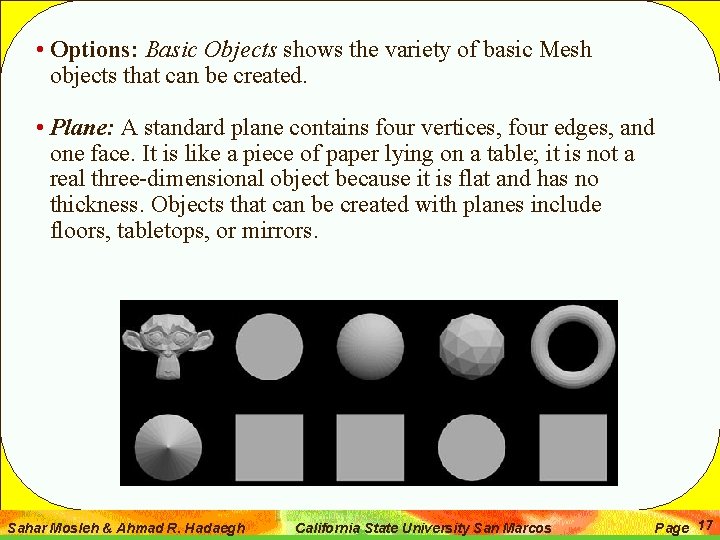
Basic Mesh Objects • Mode: Object Mode, Hotkey: Shift A, • Menu: Add → Mesh (see Add Submenu) • A common object type used in a 3 D scene is a Mesh. • Blender comes with a number of 'primitive' mesh shapes that you can start modeling from. • There are several options that are included in more than one primitive that you should know. • The first is Radius. This option is included with the Circle, Cylinder, Cone, UVSphere and Ico. Sphere primitives and sets their starting size. • And the 2 nd option is Depth, a parameter that comes with the Cylinder and Cone that sets their starting size. Sahar Mosleh & Ahmad R. Hadaegh California State University San Marcos Page 16

• Options: Basic Objects shows the variety of basic Mesh objects that can be created. • Plane: A standard plane contains four vertices, four edges, and one face. It is like a piece of paper lying on a table; it is not a real three-dimensional object because it is flat and has no thickness. Objects that can be created with planes include floors, tabletops, or mirrors. Sahar Mosleh & Ahmad R. Hadaegh California State University San Marcos Page 17

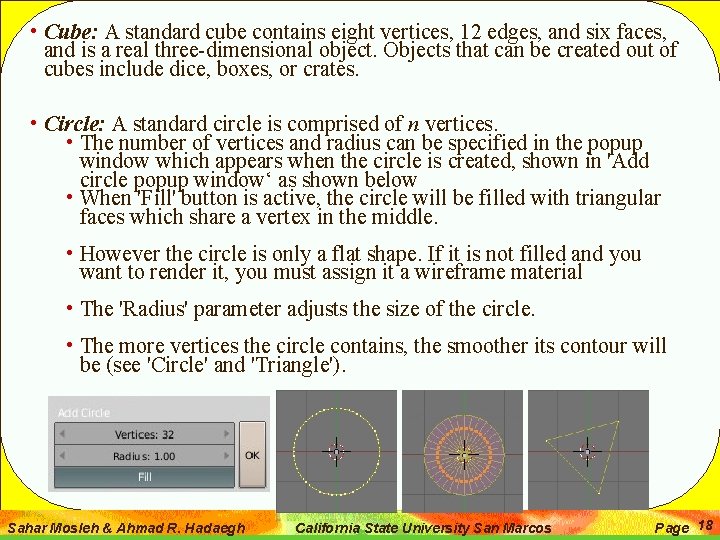
• Cube: A standard cube contains eight vertices, 12 edges, and six faces, and is a real three-dimensional object. Objects that can be created out of cubes include dice, boxes, or crates. • Circle: A standard circle is comprised of n vertices. • The number of vertices and radius can be specified in the popup window which appears when the circle is created, shown in 'Add circle popup window‘ as shown below • When 'Fill' button is active, the circle will be filled with triangular faces which share a vertex in the middle. • However the circle is only a flat shape. If it is not filled and you want to render it, you must assign it a wireframe material • The 'Radius' parameter adjusts the size of the circle. • The more vertices the circle contains, the smoother its contour will be (see 'Circle' and 'Triangle'). Sahar Mosleh & Ahmad R. Hadaegh California State University San Marcos Page 18

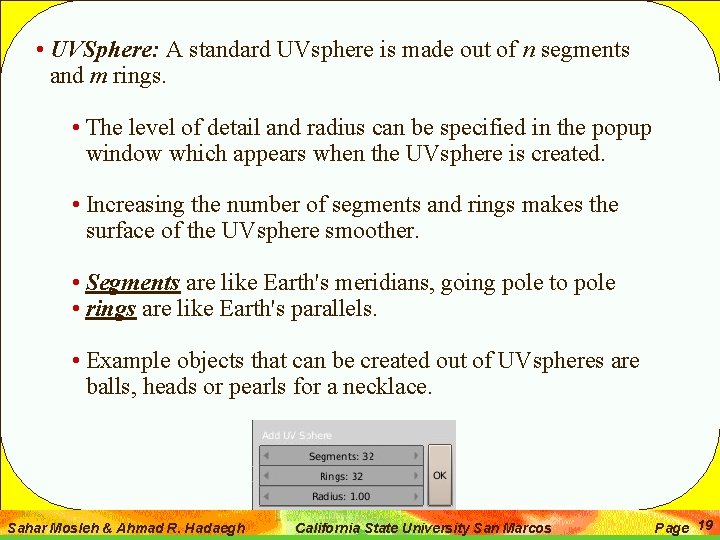
• UVSphere: A standard UVsphere is made out of n segments and m rings. • The level of detail and radius can be specified in the popup window which appears when the UVsphere is created. • Increasing the number of segments and rings makes the surface of the UVsphere smoother. • Segments are like Earth's meridians, going pole to pole • rings are like Earth's parallels. • Example objects that can be created out of UVspheres are balls, heads or pearls for a necklace. Sahar Mosleh & Ahmad R. Hadaegh California State University San Marcos Page 19

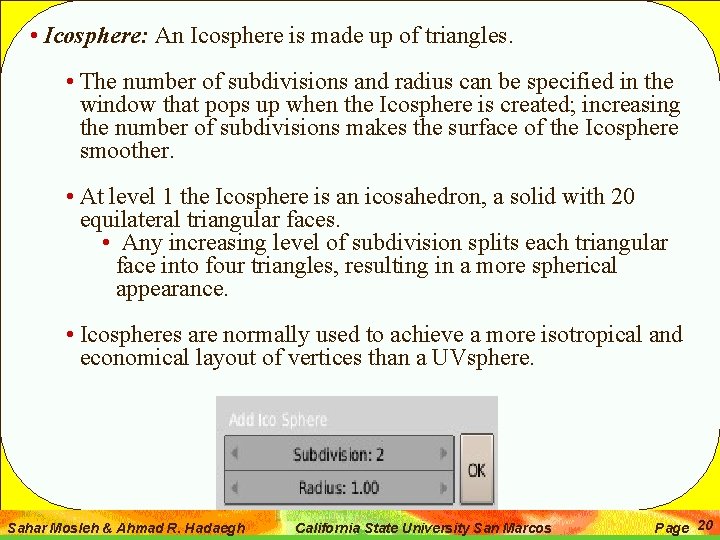
• Icosphere: An Icosphere is made up of triangles. • The number of subdivisions and radius can be specified in the window that pops up when the Icosphere is created; increasing the number of subdivisions makes the surface of the Icosphere smoother. • At level 1 the Icosphere is an icosahedron, a solid with 20 equilateral triangular faces. • Any increasing level of subdivision splits each triangular face into four triangles, resulting in a more spherical appearance. • Icospheres are normally used to achieve a more isotropical and economical layout of vertices than a UVsphere. Sahar Mosleh & Ahmad R. Hadaegh California State University San Marcos Page 20

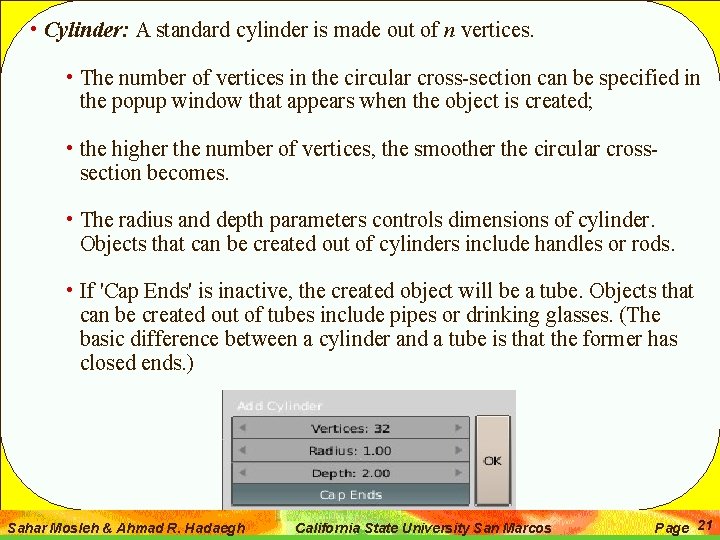
• Cylinder: A standard cylinder is made out of n vertices. • The number of vertices in the circular cross-section can be specified in the popup window that appears when the object is created; • the higher the number of vertices, the smoother the circular crosssection becomes. • The radius and depth parameters controls dimensions of cylinder. Objects that can be created out of cylinders include handles or rods. • If 'Cap Ends' is inactive, the created object will be a tube. Objects that can be created out of tubes include pipes or drinking glasses. (The basic difference between a cylinder and a tube is that the former has closed ends. ) Sahar Mosleh & Ahmad R. Hadaegh California State University San Marcos Page 21

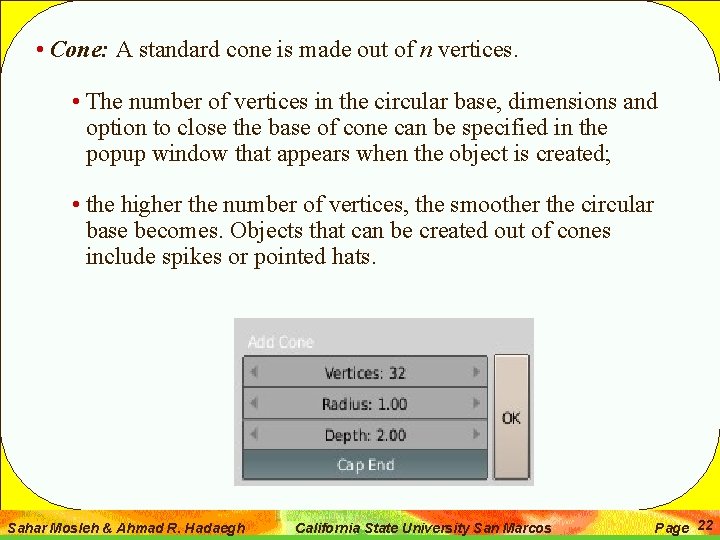
• Cone: A standard cone is made out of n vertices. • The number of vertices in the circular base, dimensions and option to close the base of cone can be specified in the popup window that appears when the object is created; • the higher the number of vertices, the smoother the circular base becomes. Objects that can be created out of cones include spikes or pointed hats. Sahar Mosleh & Ahmad R. Hadaegh California State University San Marcos Page 22

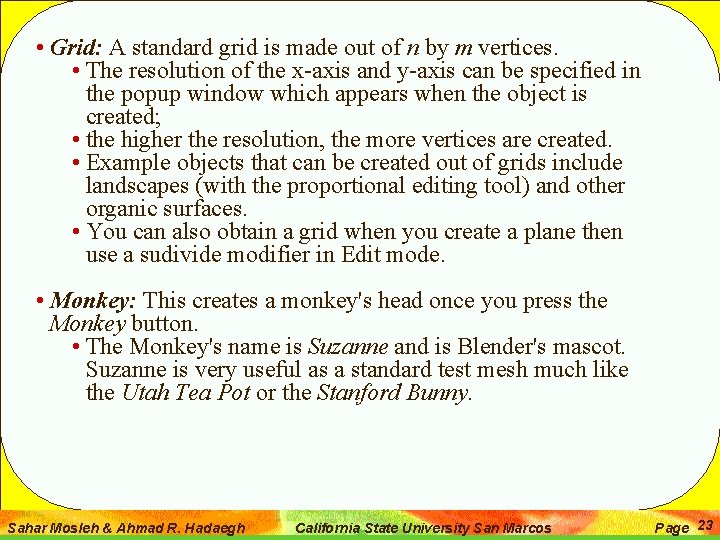
• Grid: A standard grid is made out of n by m vertices. • The resolution of the x-axis and y-axis can be specified in the popup window which appears when the object is created; • the higher the resolution, the more vertices are created. • Example objects that can be created out of grids include landscapes (with the proportional editing tool) and other organic surfaces. • You can also obtain a grid when you create a plane then use a sudivide modifier in Edit mode. • Monkey: This creates a monkey's head once you press the Monkey button. • The Monkey's name is Suzanne and is Blender's mascot. Suzanne is very useful as a standard test mesh much like the Utah Tea Pot or the Stanford Bunny. Sahar Mosleh & Ahmad R. Hadaegh California State University San Marcos Page 23

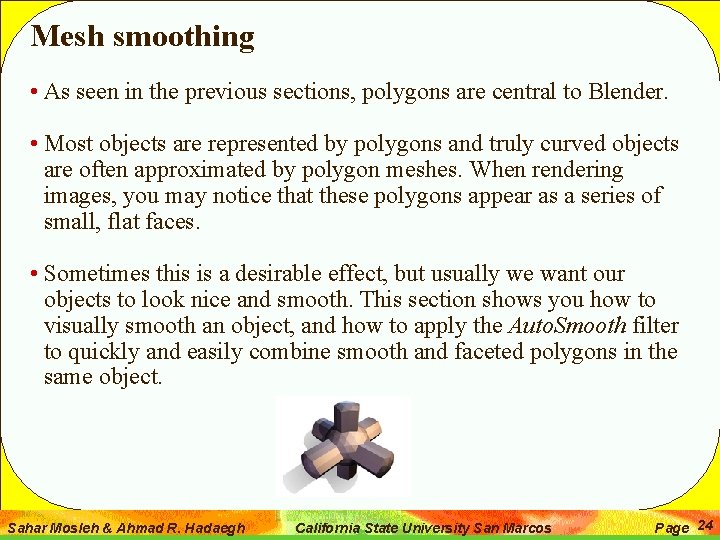
Mesh smoothing • As seen in the previous sections, polygons are central to Blender. • Most objects are represented by polygons and truly curved objects are often approximated by polygon meshes. When rendering images, you may notice that these polygons appear as a series of small, flat faces. • Sometimes this is a desirable effect, but usually we want our objects to look nice and smooth. This section shows you how to visually smooth an object, and how to apply the Auto. Smooth filter to quickly and easily combine smooth and faceted polygons in the same object. Sahar Mosleh & Ahmad R. Hadaegh California State University San Marcos Page 24

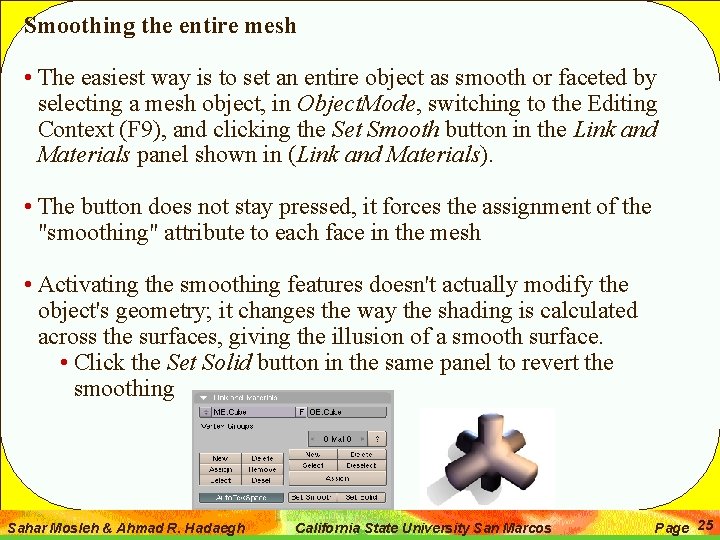
Smoothing the entire mesh • The easiest way is to set an entire object as smooth or faceted by selecting a mesh object, in Object. Mode, switching to the Editing Context (F 9), and clicking the Set Smooth button in the Link and Materials panel shown in (Link and Materials). • The button does not stay pressed, it forces the assignment of the "smoothing" attribute to each face in the mesh • Activating the smoothing features doesn't actually modify the object's geometry; it changes the way the shading is calculated across the surfaces, giving the illusion of a smooth surface. • Click the Set Solid button in the same panel to revert the smoothing Sahar Mosleh & Ahmad R. Hadaegh California State University San Marcos Page 25

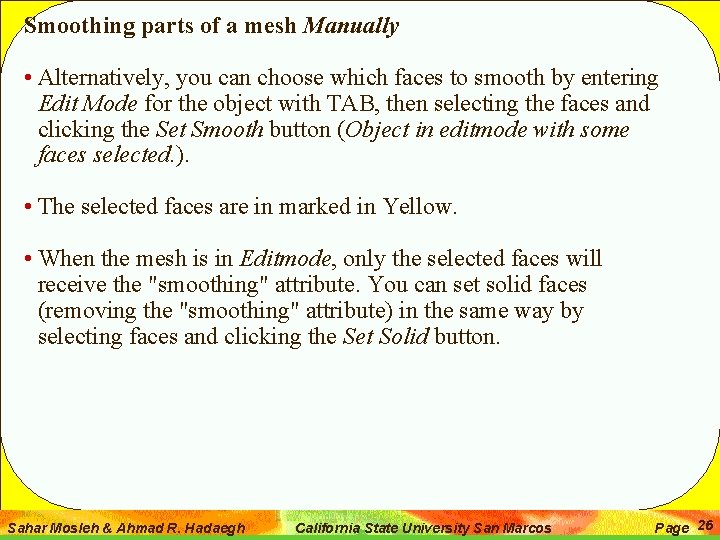
Smoothing parts of a mesh Manually • Alternatively, you can choose which faces to smooth by entering Edit Mode for the object with TAB, then selecting the faces and clicking the Set Smooth button (Object in editmode with some faces selected. ). • The selected faces are in marked in Yellow. • When the mesh is in Editmode, only the selected faces will receive the "smoothing" attribute. You can set solid faces (removing the "smoothing" attribute) in the same way by selecting faces and clicking the Set Solid button. Sahar Mosleh & Ahmad R. Hadaegh California State University San Marcos Page 26

Smoothing the mesh geometry • The above techniques do not alter the mesh itself, only the way it is displayed and rendered. Instead of just making the mesh look like a smooth surface, you can also physically smooth the geometry of the mesh with these tools: • Using the hotkey “w” in edit mode, you can apply one of the following in edit mode: • Smooth • Subdivide Smooth and • Bevel Sahar Mosleh & Ahmad R. Hadaegh California State University San Marcos Page 27

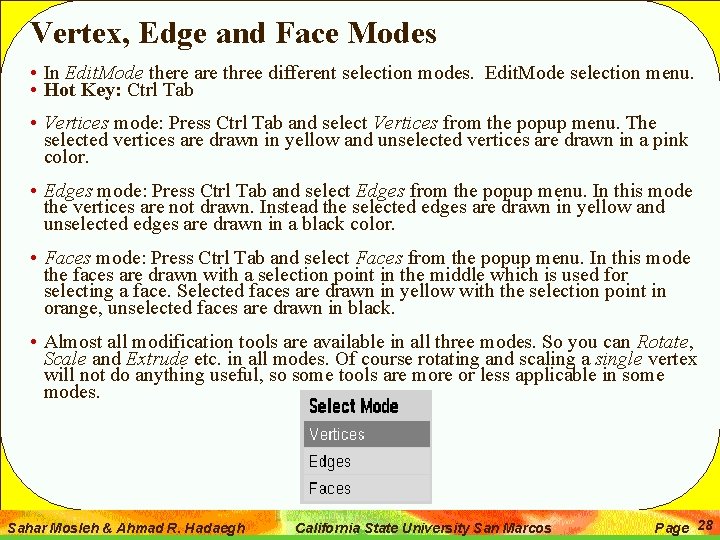
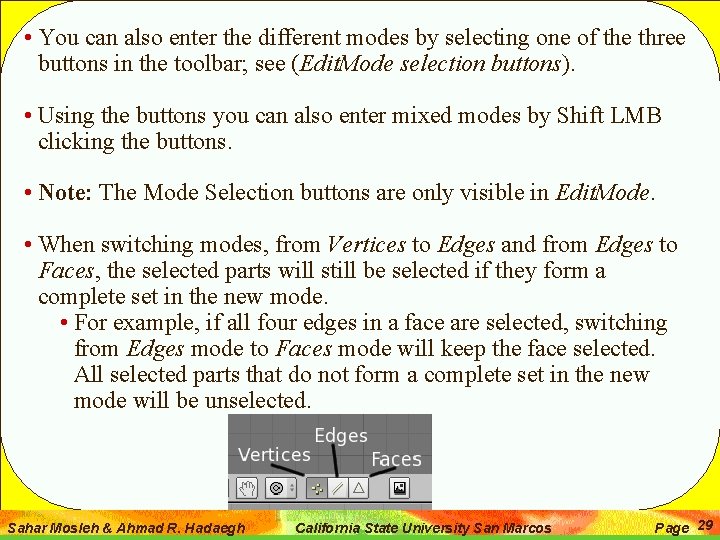
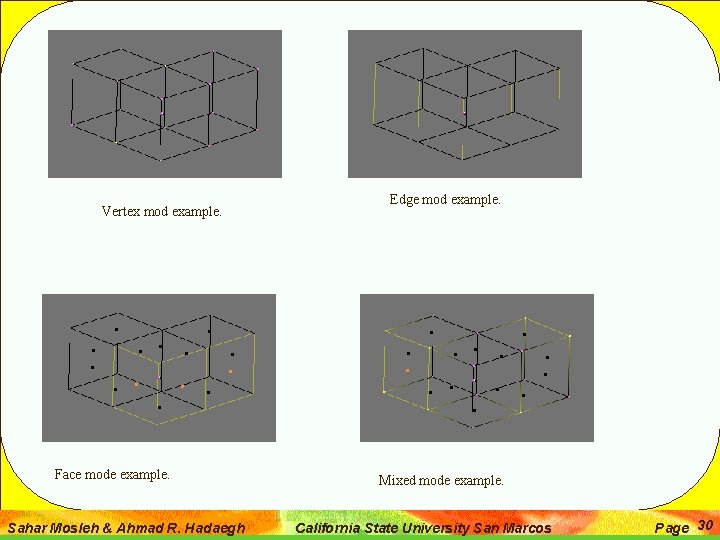
Vertex, Edge and Face Modes • In Edit. Mode there are three different selection modes. Edit. Mode selection menu. • Hot Key: Ctrl Tab • Vertices mode: Press Ctrl Tab and select Vertices from the popup menu. The selected vertices are drawn in yellow and unselected vertices are drawn in a pink color. • Edges mode: Press Ctrl Tab and select Edges from the popup menu. In this mode the vertices are not drawn. Instead the selected edges are drawn in yellow and unselected edges are drawn in a black color. • Faces mode: Press Ctrl Tab and select Faces from the popup menu. In this mode the faces are drawn with a selection point in the middle which is used for selecting a face. Selected faces are drawn in yellow with the selection point in orange, unselected faces are drawn in black. • Almost all modification tools are available in all three modes. So you can Rotate, Scale and Extrude etc. in all modes. Of course rotating and scaling a single vertex will not do anything useful, so some tools are more or less applicable in some modes. Sahar Mosleh & Ahmad R. Hadaegh California State University San Marcos Page 28

• You can also enter the different modes by selecting one of the three buttons in the toolbar; see (Edit. Mode selection buttons). • Using the buttons you can also enter mixed modes by Shift LMB clicking the buttons. • Note: The Mode Selection buttons are only visible in Edit. Mode. • When switching modes, from Vertices to Edges and from Edges to Faces, the selected parts will still be selected if they form a complete set in the new mode. • For example, if all four edges in a face are selected, switching from Edges mode to Faces mode will keep the face selected. All selected parts that do not form a complete set in the new mode will be unselected. Sahar Mosleh & Ahmad R. Hadaegh California State University San Marcos Page 29

Vertex mod example. Face mode example. Sahar Mosleh & Ahmad R. Hadaegh Edge mod example. Mixed mode example. California State University San Marcos Page 30

Point Selection • The most common way to select an element is to RMB on that item, this will replace the existing selection with the new item. • To add to the existing selection hold down Shift while right clicking. Clicking again on a selected item will de-select it. • Region selection allows you to select groups of elements within a 2 D region. • The region can be either a circle or rectangle. • The circular region is only available in Edit mode. • The rectangular region, or Border Select, is available in both Edit mode and Object mode. Sahar Mosleh & Ahmad R. Hadaegh California State University San Marcos Page 31

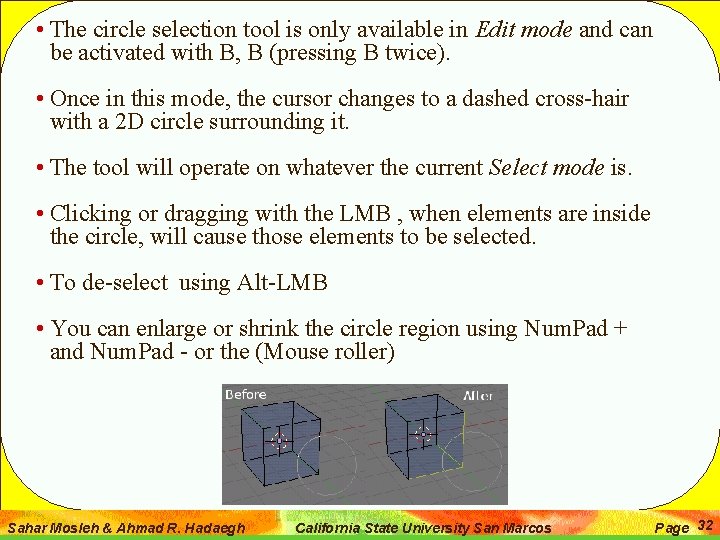
• The circle selection tool is only available in Edit mode and can be activated with B, B (pressing B twice). • Once in this mode, the cursor changes to a dashed cross-hair with a 2 D circle surrounding it. • The tool will operate on whatever the current Select mode is. • Clicking or dragging with the LMB , when elements are inside the circle, will cause those elements to be selected. • To de-select using Alt-LMB • You can enlarge or shrink the circle region using Num. Pad + and Num. Pad - or the (Mouse roller) Sahar Mosleh & Ahmad R. Hadaegh California State University San Marcos Page 32

Rectangular or Border Select • Border Select is available in either Edit mode or Object mode. To activate the tool use the B. • Use Border Select to select a group of objects by drawing a rectangle while holding down LMB • In doing this you will select all objects that lie within or touch this rectangle. • If any object that was last active appears in the group it will become selected and active. Sahar Mosleh & Ahmad R. Hadaegh California State University San Marcos Page 33

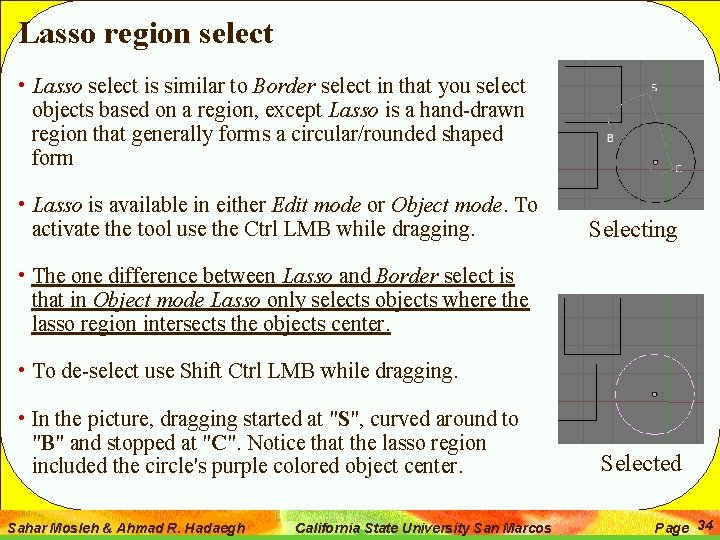
Lasso region select • Lasso select is similar to Border select in that you select objects based on a region, except Lasso is a hand-drawn region that generally forms a circular/rounded shaped form • Lasso is available in either Edit mode or Object mode. To activate the tool use the Ctrl LMB while dragging. Selecting • The one difference between Lasso and Border select is that in Object mode Lasso only selects objects where the lasso region intersects the objects center. • To de-select use Shift Ctrl LMB while dragging. • In the picture, dragging started at "S", curved around to "B" and stopped at "C". Notice that the lasso region included the circle's purple colored object center. Sahar Mosleh & Ahmad R. Hadaegh California State University San Marcos Selected Page 34

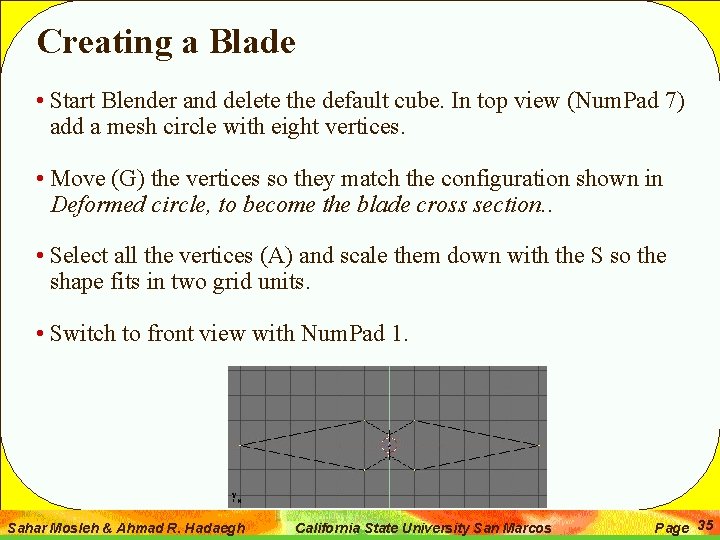
Creating a Blade • Start Blender and delete the default cube. In top view (Num. Pad 7) add a mesh circle with eight vertices. • Move (G) the vertices so they match the configuration shown in Deformed circle, to become the blade cross section. . • Select all the vertices (A) and scale them down with the S so the shape fits in two grid units. • Switch to front view with Num. Pad 1. Sahar Mosleh & Ahmad R. Hadaegh California State University San Marcos Page 35

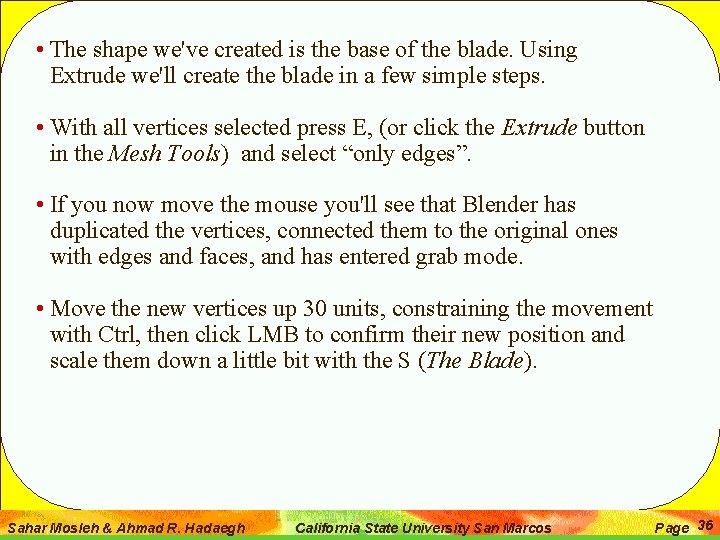
• The shape we've created is the base of the blade. Using Extrude we'll create the blade in a few simple steps. • With all vertices selected press E, (or click the Extrude button in the Mesh Tools) and select “only edges”. • If you now move the mouse you'll see that Blender has duplicated the vertices, connected them to the original ones with edges and faces, and has entered grab mode. • Move the new vertices up 30 units, constraining the movement with Ctrl, then click LMB to confirm their new position and scale them down a little bit with the S (The Blade). Sahar Mosleh & Ahmad R. Hadaegh California State University San Marcos Page 36

• Press E again to extrude the tip of the blade, then move the vertices five units up. • To make the blade end in one vertex, scale the top vertices down to 0. 000 • (hold Ctrl for this) • press W Remove Doubles (Mesh Edit Menu) or click the Rem Doubles button in the Edit. Buttons (F 9). • Blender will inform you that it has removed seven of the eight vertices and only one vertex remains. The blade is complete. Sahar Mosleh & Ahmad R. Hadaegh California State University San Marcos Page 37

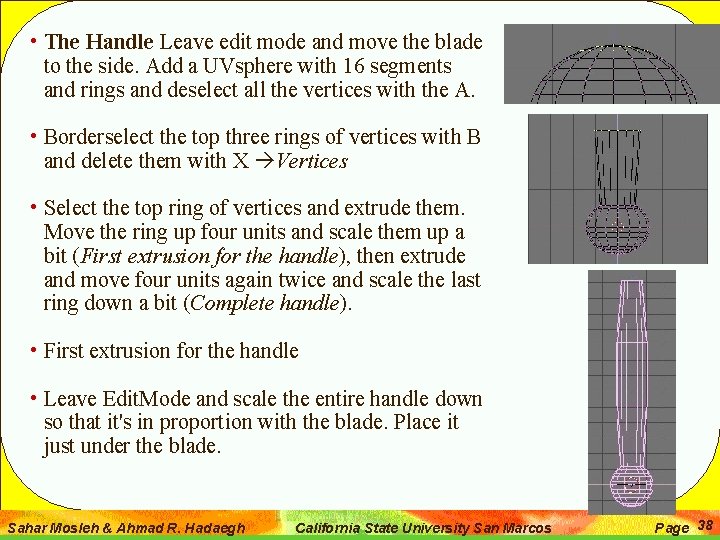
• The Handle Leave edit mode and move the blade to the side. Add a UVsphere with 16 segments and rings and deselect all the vertices with the A. • Borderselect the top three rings of vertices with B and delete them with X Vertices • Select the top ring of vertices and extrude them. Move the ring up four units and scale them up a bit (First extrusion for the handle), then extrude and move four units again twice and scale the last ring down a bit (Complete handle). • First extrusion for the handle • Leave Edit. Mode and scale the entire handle down so that it's in proportion with the blade. Place it just under the blade. Sahar Mosleh & Ahmad R. Hadaegh California State University San Marcos Page 38

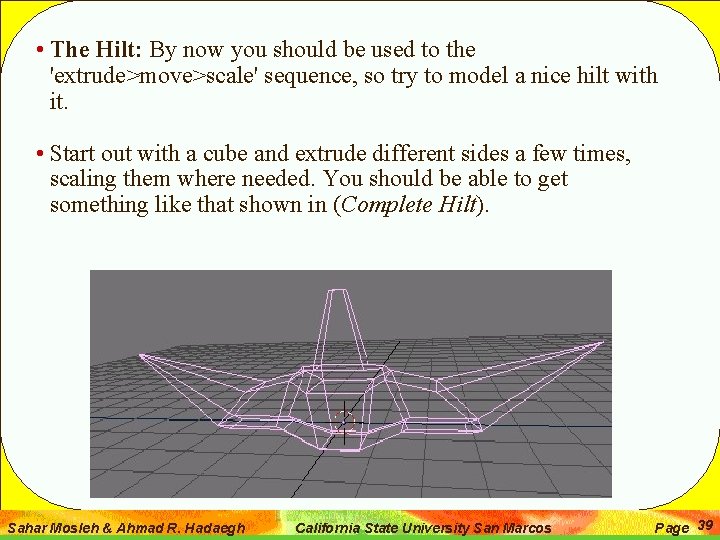
• The Hilt: By now you should be used to the 'extrude>move>scale' sequence, so try to model a nice hilt with it. • Start out with a cube and extrude different sides a few times, scaling them where needed. You should be able to get something like that shown in (Complete Hilt). Sahar Mosleh & Ahmad R. Hadaegh California State University San Marcos Page 39

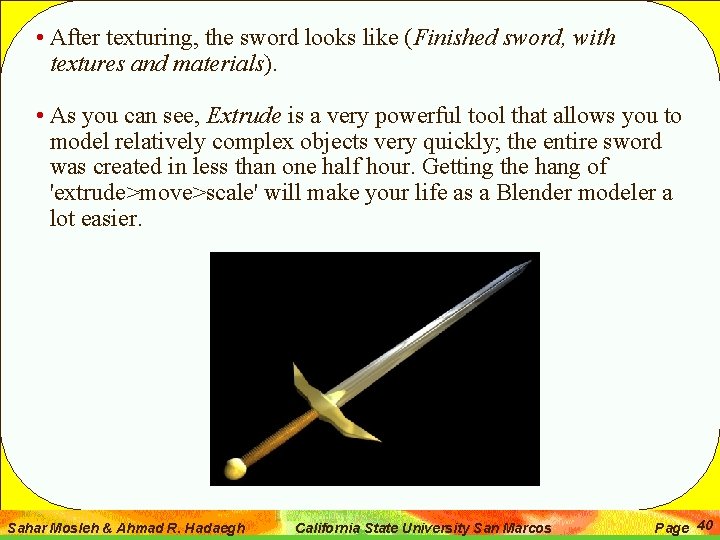
• After texturing, the sword looks like (Finished sword, with textures and materials). • As you can see, Extrude is a very powerful tool that allows you to model relatively complex objects very quickly; the entire sword was created in less than one half hour. Getting the hang of 'extrude>move>scale' will make your life as a Blender modeler a lot easier. Sahar Mosleh & Ahmad R. Hadaegh California State University San Marcos Page 40