Assignment 2 Creating a LOGO Sahar Mosleh Ahmad
![Step 2 • Move to front view [Num. Pad 1] • Add a bezier Step 2 • Move to front view [Num. Pad 1] • Add a bezier](https://slidetodoc.com/presentation_image_h2/660a694a260abb242e6b94a0cf764c4d/image-4.jpg)
![Step 4 • Move to the object mode [Tab] • Make sure the object Step 4 • Move to the object mode [Tab] • Make sure the object](https://slidetodoc.com/presentation_image_h2/660a694a260abb242e6b94a0cf764c4d/image-6.jpg)
![Step 6 • Load the image called number. jpg • [view background Image load] Step 6 • Load the image called number. jpg • [view background Image load]](https://slidetodoc.com/presentation_image_h2/660a694a260abb242e6b94a0cf764c4d/image-8.jpg)
![Step 7 • Select the circle [RMB] • Move to the edit mode [Tab] Step 7 • Select the circle [RMB] • Move to the edit mode [Tab]](https://slidetodoc.com/presentation_image_h2/660a694a260abb242e6b94a0cf764c4d/image-10.jpg)
![• Move to top view [NUMPad 7] to see if the number is • Move to top view [NUMPad 7] to see if the number is](https://slidetodoc.com/presentation_image_h2/660a694a260abb242e6b94a0cf764c4d/image-14.jpg)
- Slides: 14

Assignment 2 Creating a LOGO Sahar Mosleh & Ahmad R. Hadaegh California State University San Marcos Page 1

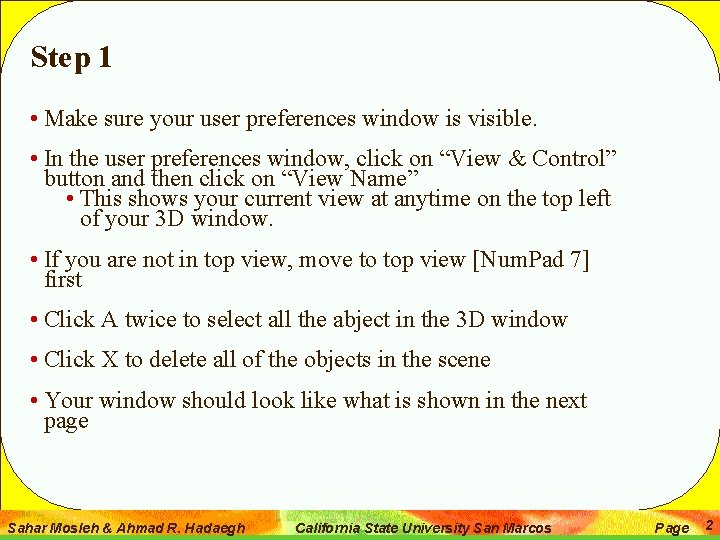
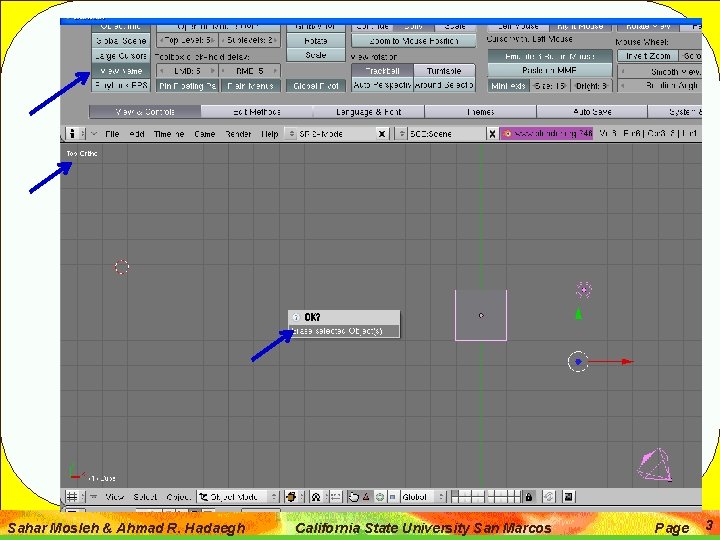
Step 1 • Make sure your user preferences window is visible. • In the user preferences window, click on “View & Control” button and then click on “View Name” • This shows your current view at anytime on the top left of your 3 D window. • If you are not in top view, move to top view [Num. Pad 7] first • Click A twice to select all the abject in the 3 D window • Click X to delete all of the objects in the scene • Your window should look like what is shown in the next page Sahar Mosleh & Ahmad R. Hadaegh California State University San Marcos Page 2

Sahar Mosleh & Ahmad R. Hadaegh California State University San Marcos Page 3
![Step 2 Move to front view Num Pad 1 Add a bezier Step 2 • Move to front view [Num. Pad 1] • Add a bezier](https://slidetodoc.com/presentation_image_h2/660a694a260abb242e6b94a0cf764c4d/image-4.jpg)
Step 2 • Move to front view [Num. Pad 1] • Add a bezier circle [Space Add Curve Bezier Circle] • Your circle should look like a line at this stage because you are in front view • Move it [G] to the center of the screen right on the intersection of blue and red line of your screen • Make sure the circle is selected (RMB) • Click R twice for rotating and move the mouse down to see the circle • Move to Edit mode [Tap] Sahar Mosleh & Ahmad R. Hadaegh California State University San Marcos Page 4

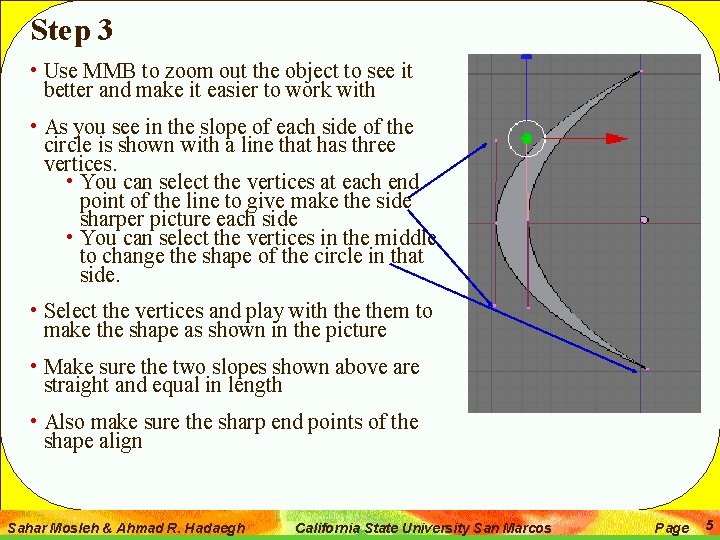
Step 3 • Use MMB to zoom out the object to see it better and make it easier to work with • As you see in the slope of each side of the circle is shown with a line that has three vertices. • You can select the vertices at each end point of the line to give make the side sharper picture each side • You can select the vertices in the middle to change the shape of the circle in that side. • Select the vertices and play with them to make the shape as shown in the picture • Make sure the two slopes shown above are straight and equal in length • Also make sure the sharp end points of the shape align Sahar Mosleh & Ahmad R. Hadaegh California State University San Marcos Page 5
![Step 4 Move to the object mode Tab Make sure the object Step 4 • Move to the object mode [Tab] • Make sure the object](https://slidetodoc.com/presentation_image_h2/660a694a260abb242e6b94a0cf764c4d/image-6.jpg)
Step 4 • Move to the object mode [Tab] • Make sure the object is selected [RMB] • Create a duplicate/copy of the object [Shift D] • This makes a exact copy right on the top of the original object. So move your mouse and press LMB to see them both • Select the copy and mirror it in the x direction [object mirror x local] • This rotates the copy 180 degrees • Move the two copies close together as show in the picture on the next slide Sahar Mosleh & Ahmad R. Hadaegh California State University San Marcos Page 6

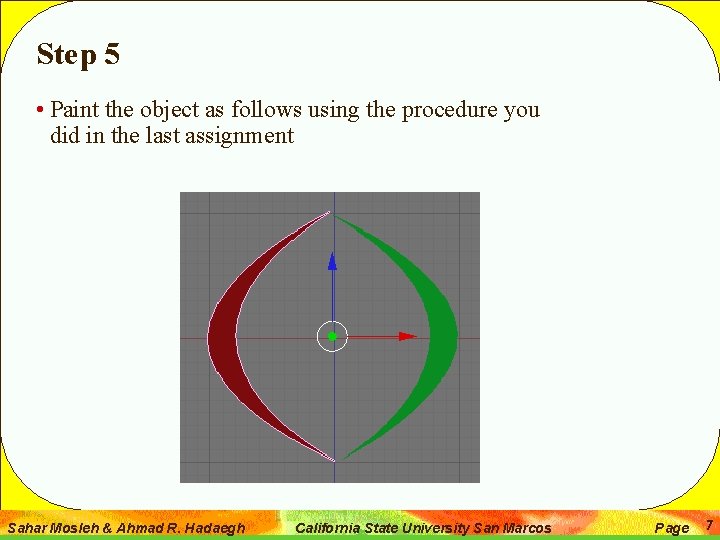
Step 5 • Paint the object as follows using the procedure you did in the last assignment Sahar Mosleh & Ahmad R. Hadaegh California State University San Marcos Page 7
![Step 6 Load the image called number jpg view background Image load Step 6 • Load the image called number. jpg • [view background Image load]](https://slidetodoc.com/presentation_image_h2/660a694a260abb242e6b94a0cf764c4d/image-8.jpg)
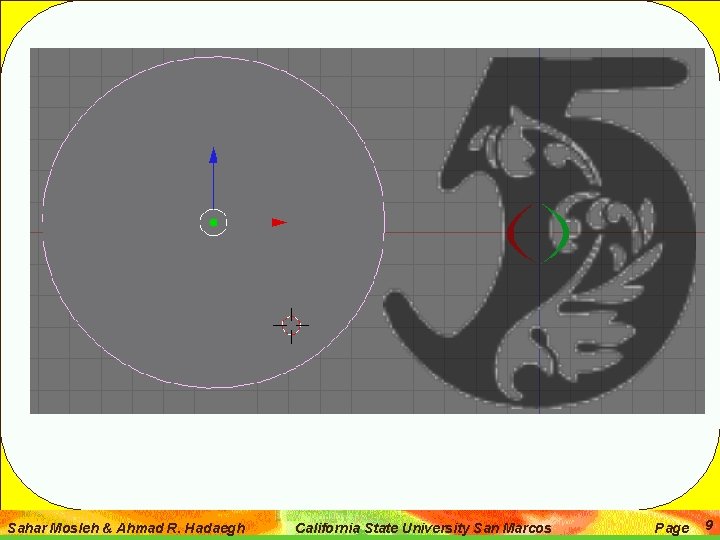
Step 6 • Load the image called number. jpg • [view background Image load] • select the file number. gif by clicking on it with your MMB • Create another Bezier circle [space Add curve bezier Circle] • rotate it to see it in your front view [press R twice and move the mouse down] • Scale it to make as big as the image as shown in the next slide Sahar Mosleh & Ahmad R. Hadaegh California State University San Marcos Page 8

Sahar Mosleh & Ahmad R. Hadaegh California State University San Marcos Page 9
![Step 7 Select the circle RMB Move to the edit mode Tab Step 7 • Select the circle [RMB] • Move to the edit mode [Tab]](https://slidetodoc.com/presentation_image_h2/660a694a260abb242e6b94a0cf764c4d/image-10.jpg)
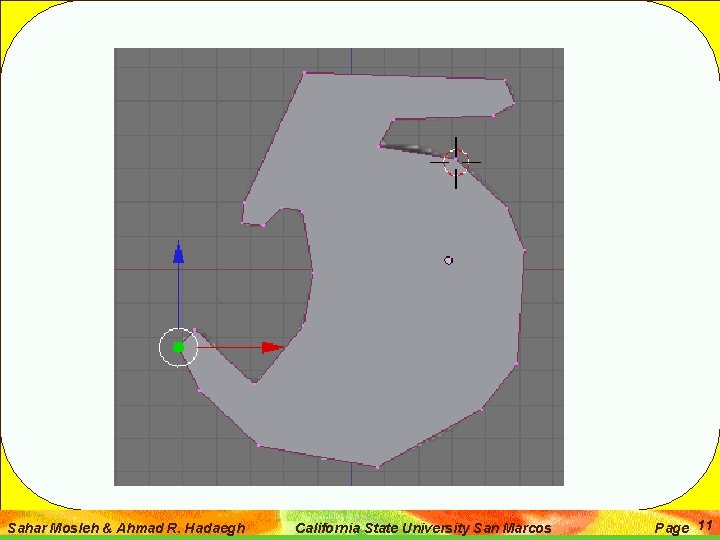
Step 7 • Select the circle [RMB] • Move to the edit mode [Tab] • Click F 9 or the editing button to start editing the circle • On the “curve tools” panel select poly to convert the shape to a poly • You should see about 12 vertices on the shape where each vertex can be selected and moved individually • On the “curve tools 1” panel select subdivide to see more vertices on the shape. • You are going to move the vertices of the vertices to make a shape similar to your background image • So, select the vertices one by one [RMB] and move them [G] on the background image and release them on the edges of the background image [LMB] as shown in the next page Sahar Mosleh & Ahmad R. Hadaegh California State University San Marcos Page 10

Sahar Mosleh & Ahmad R. Hadaegh California State University San Marcos Page 11

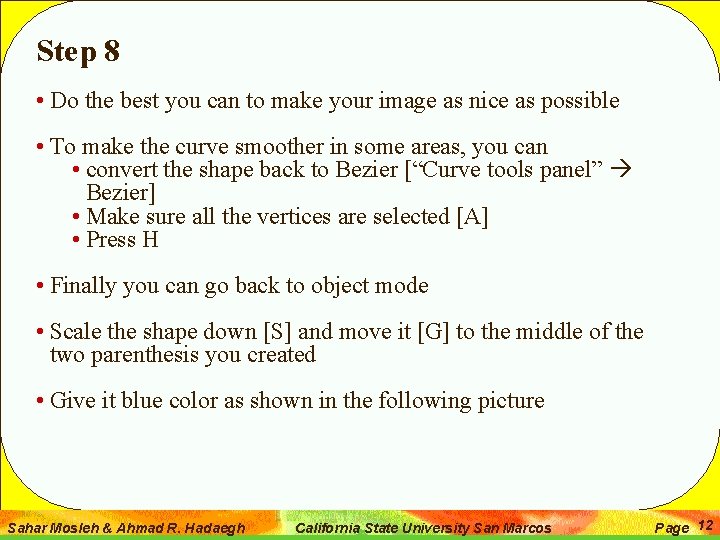
Step 8 • Do the best you can to make your image as nice as possible • To make the curve smoother in some areas, you can • convert the shape back to Bezier [“Curve tools panel” Bezier] • Make sure all the vertices are selected [A] • Press H • Finally you can go back to object mode • Scale the shape down [S] and move it [G] to the middle of the two parenthesis you created • Give it blue color as shown in the following picture Sahar Mosleh & Ahmad R. Hadaegh California State University San Marcos Page 12

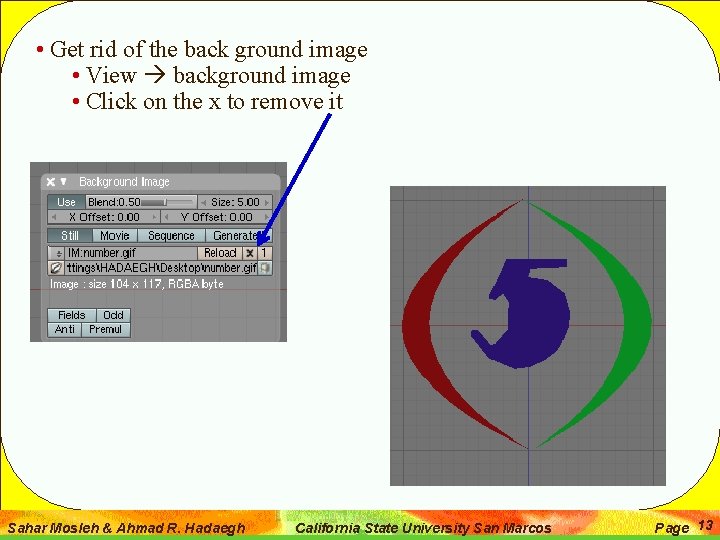
• Get rid of the back ground image • View background image • Click on the x to remove it Sahar Mosleh & Ahmad R. Hadaegh California State University San Marcos Page 13
![Move to top view NUMPad 7 to see if the number is • Move to top view [NUMPad 7] to see if the number is](https://slidetodoc.com/presentation_image_h2/660a694a260abb242e6b94a0cf764c4d/image-14.jpg)
• Move to top view [NUMPad 7] to see if the number is on the same line with the parenthesis; • if not, move the number to the same line as the parenthesis • Go back to the front view and add a camera, spot light and a plane as you did in Assignment 1. • Your final shape should similar as shown to on the next slide Sahar Mosleh & Ahmad R. Hadaegh California State University San Marcos Page 14