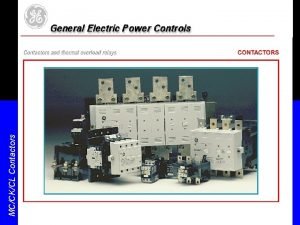
Contactors Relays Contactors are relays that switch high


- Slides: 22

Contactors & Relays

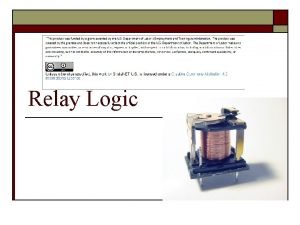
Contactors are relays that switch high current loads a. k. a magnetic starters

Manual Motor Starter

Contactors A Contactor is a control device that uses a small control current to energize or deenergize the load connected to it. Abouts: • A contactor has a frame, plunger, and a solenoid coil. • The action of the plunger is used to close (or open) sets of contacts. • A contactor does not include overload protection. • The closing of the contacts allows electrical devices to be controlled from remote locations.

Example of a Wired Contactor

Magnetic Motor Starters • A magnetic motor starter is an electricallyoperated switch (contactor) that includes motor overload protection. • Magnetic motor starters are identical to contactors except that they have overloads attached to them. • The overloads have heaters or electronic overloads (located in the power circuit) which sense excessive current flow to the motor. • The heaters open the NC overload contacts (located in the control circuit) when the overload becomes dangerous to the motor.

Magnetic Starter

Magnetic Motor Starter L 1 (1) - first line in from power source (phase 1 for 3 ph / Neutral for 1 ph) L 2 (3) - second line in from power source (phase 2 for 3 ph / Hot for 1 ph* see below for alternate wiring using L 2 & L 3) L 3 (5) - third line in from power source (phase 3 for 3 ph / NC for 1 ph) COIL T 1 (2) - first line out to motor (phase 1 for 3 ph / Hot for 1 ph) T 2 (4) - second line out to motor (phase 2 for 3 ph / NC for 1 ph* see below for alternate wiring) T 3 (6) - third line out to motor (phase 3 for 3 ph / Neutral for 1 ph)

Motor Starter Control Circuit • Alternate method of drawing the electrical circuit

NEMA vs IEC If we compare the NEMA magnetic motor starter to the IEC magnetic motor starter, the following differences would be noticed: • An IEC device is physically smaller than a comparable NEMA device. • An IEC device is usually less expensive than a comparable NEMA device. • An IEC device has a life cycle of approximately one million operations while a comparable NEMA device has a life cycle of almost four times that number. • An IEC device should normally be protected with fastacting, current-limiting fuses while a NEMA device can be protected with conventional time delay fuses.

Reversing Starter

Relay Timers • ON Delay • OFF Delay

Wired ON Delay X 1 X 2 OFF NO ON NC 1 1. Energy applied to power rails

Wired ON Delay - NCTO X 1 X 2 ON 1. 2. NC ON NC 2 Energy applied to power rails Start PB is pressed - Coil is energized - Holding contact close - Timer contact stays closed, lamp stays on. - Count begins (5 sec)

Wired ON Delay - NCTO X 1 X 2 ON 3. Timer count ends - Coil is still energized - Timer contact open - lamp goes off. NC NO The OFF 3 4. Timer contacts remain open until the coil is deenergized Normally Closed contact will take 5 seconds To Open when the coil is energized.

ON Delay - NOTC X 1 X 2 OFF NO 1. Power is applied to rails OFF 1 The Normally Open contact will take 5 seconds To Close when the coil is energized.

ON Delay - NOTC X 1 X 2 ON 2. Start PB is pressed – – NC OFF – – – Coil energizes Holding contacts close Timer contacts stay open Lamp stays off Counter starts to count (5 sec) 2 The Normally Open contact will take 5 seconds To Close when the coil is energized.

ON Delay - NOTC X 1 X 2 ON 3. Counter finishes count – – – NC NC Coil stays energized Timer contacts close Lamp goes on ON 4. Timer contacts will open when relay coil is de-energized. 3 The Normally Open contact will take 5 seconds To Close when the coil is energized.

OFF Delay - NCTC 1. Power is applied to rails 2. Coil is off, contacts are closed, lamp is on The timer contacts will close 5 seconds after the coil is de-energized

OFF Delay - NCTC 3. Start PB is pressed 4. Timer contacts open 5. Counter will start to count only when coil is de-energized.

OFF Delay - NOTO 1. Power is applied to rails 2. Coil is off, contacts are closed, lamp is on

OFF Delay - NOTO 3. Start is pressed. 4. Contacts close, lamp on 5. Counter only starts when coil is de-energize
 Mikael ferm
 Go switch working principle
 The resources need to be reserved during the setup phase in
 Sau thất bại ở hồ điển triệt
 Thơ thất ngôn tứ tuyệt đường luật
 Con hãy đưa tay khi thấy người vấp ngã
 Thơ thất ngôn tứ tuyệt đường luật
 Tôn thất thuyết là ai
 Phân độ lown
 Walmart thất bại ở nhật
 Gây tê cơ vuông thắt lưng
 Block nhĩ thất cấp 1
 Tìm độ lớn thật của tam giác abc
 Two types of baton exchange in relays
 Electro pneumatic contactor
 Nand gate with relays
 High precision vs high recall
 High directive and low supportive behavior
 Reluctant contributor
 Pengertian investasi
 High expectations high support
 High precision vs high recall
 Significant figures

