Intraoral Radiographs Introduction In order to see what


 - is an extension")


")


- Slides: 39
Intraoral Radiographs
Introduction • In order to see what is the state of a patient’s oral cavity, then dental radiographs are performed.
• Why Radiology? • To see pathology hiding below the gingiva or inside the tooth • Evaluate an area where the teeth appear to be missing • To document the obvious - supporting treatment decisions • For client communication • Medical/legal documentation • Postoperative confirmation of proper extraction • Preoperative, intraoperative, and postoperative endodontics • Follow progression of pulpal pathology and/or periodontal disease • For prepurchase exams on show dogs to see if the proper number of teeth exist
Documentation • Periodontal disease is the most common ailment in small animals. • The x-ray shows lesions above and below the gum line. • Legal uses of radiographs to support treatment decisions prove invaluable. • The dental radiograph becomes part of your patient’s permanent medical record. Examining serial radiographs of periodontal or endodontic cases taken at three to six-month intervals provides invaluable information concerning progression or resolution of disease.
X-rays help us determine whether extractions are necessary.
When to take a Radiograph • When a tooth is mobile • When gingiva bleeds with or without probing When a tooth is fractured (either enamel, dentin, or pulpal exposure) • When a tooth is discolored (pulpitis) • When furcation exposure is present (periodontal disease) • When teeth are missing without explanation • When a feline ondoclastic resorptive lesion (FORL) is noted. • Prior to extraction for anatomical orientation and documentation
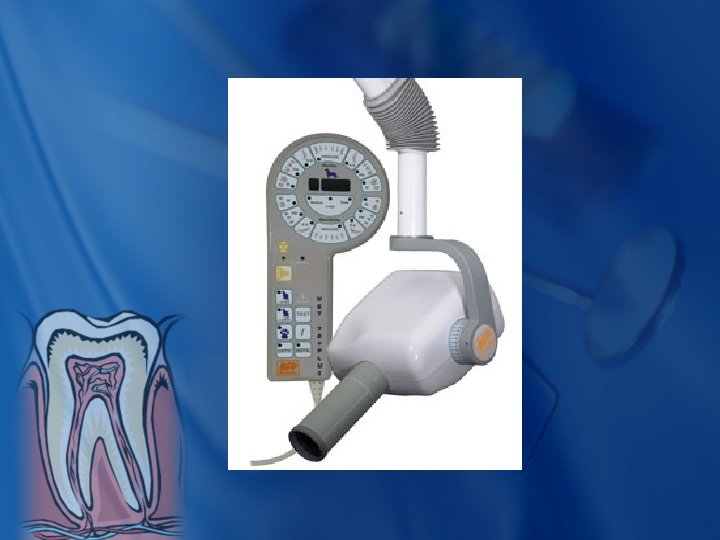
Anatomy of Intraoral Radiograph Machine • Position Indicating Device (PID) - is an extension placed on the tube head at the collimator attachment. To minimize the amount of radiation exposure, the PID is lead lined. The shape of the PID may be circular or rectangular. . • Arm - the connection between the x-ray tube and control pannel. • Control Panel - contains timer, kilovoltage, and / or milliamperage regulators. • Electric timer-as a safety device, the timer operates only while the switch is being depressed and automatically cuts off electric current at the end of the exposure. The timer resets itself after each exposure.
Tooth Film Distance • When utilizing intraoral technique, film is placed parallel to the palatal or lingual tooth surface. • Due to small animal oral anatomy this is not always possible. Instead, a bisecting angle technique is used resulting in a 2050 degree angulation of the x-ray beam to the film plane, depending on which tooth is radiographed
Rules for Successful Positioning • The closer the object being radiographed is to the film, the sharper and more accurate the image. • Use the longest film focal distance practical • Direct the central ray as close to a right angle (or bisecting angle) to the film as possible • Maintain as parallel interface between the film and object as possible
Proper positioning for a radiograph of the mandibular premolars and molars.
Positioning for a study of the mandibular incisors and canines.
Positioning for the rostral mandibular premolars. This can also be used to obtain a lateral view of the incisors and canine tooth.
Notice that the incisor teeth are missing!
Positioning for the maxillary incisors.
Maxillary incisors!
Positioning for a study of the maxillary premolars. This can also be used to obtain a lateral view of the maxillary incisors and canine tooth.
And here’s the result!
Digital imaging dental radiology • Digital imaging is a recent technical advancement in dental radiology. It will be as popular or even replace, film-based imaging in the future. • Computer image capturing and image enhancement has many advantages compared to the traditional film systems. With digital imaging, the dental radiograph machine is still used to expose the lesion, but instead of film, a sensor pad is placed inside the mouth, accepts the image, and transfers it to the computer screen.
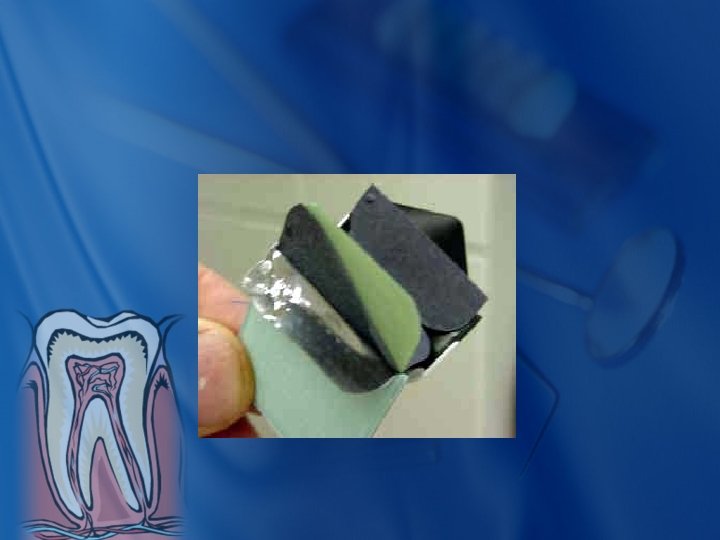
Film • Small intraoral film is used in dental radiography. It is inexpensive, flexible, and provides great detail. Non-screen film is preferable due to the high definition necessary to interpret dental lesions. Dental film is conveniently used for intra or extra-oral placement. • Individual dental films are packaged in a light tight packet that is made of either plastic or paper. Inside the packet, film is positioned between an inner lining of two sheets of black paper. A sheet of lead foil is located at the "back" of the packet, next to the tab opening. Lead foil protects the film from secondary radiation, which may cause the film to fog
Film Continued • The back of the packet has a tab opening used to remove film for processing. This side is placed next to the tongue or palate. • Intraoral dental film is packaged singly or with two films per packet. When two films are exposed, the practitioner may use the second film to give to the client or referring veterinarian. Film packets are color-coded— green indicates a single film packet, gray a two-film packet.
Components of intraoral dental film. Lead foil Waterresistant wrapper Dental film Black paper
Film Speed • Commonly used dental film is available as speed D (ultra speed) and speed E (ekta speed). Speed E film is rated at twice the speed of D film, requiring half the exposure, with small loss of quality. • Ultra speed is used predominantly in veterinary dentistry.
Film Sizes • Three sizes of dental film are frequently used in veterinary dentistry: • child periapical size 0 measures 7/8 x 1 5/8 inches-used mostly in cats, exotics, and small dogs • Adult periapical size 2, also called standard size measures 1 ¼ x 1 -9/16 inches. Size 2 is the most popular size used. • Occlusal size 4 measures 2 ¼ x 3 inches. Occlusal film used to radiograph larger teeth and survey studies
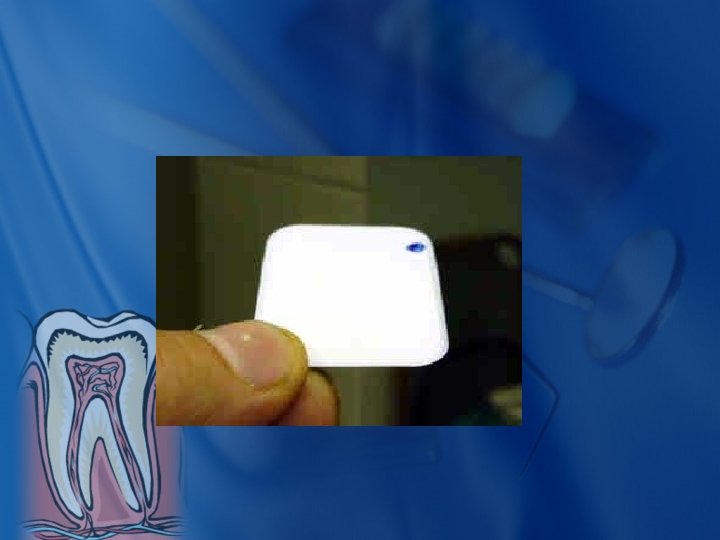
Film Dot • Dental film is embossed with a raised dot in one of the corners. The convex side of the dot indicates front side of the film. The dot is used to identify right from left. The convex (raised) dot is placed at the occlusal edge and toward the x-ray tube. The concave (depressed) dot is placed toward the tongue or palate. • To determine whether a film is on the right or left side, imagine where the convex dot is located, and identify the progression of teeth from incisors to molars.
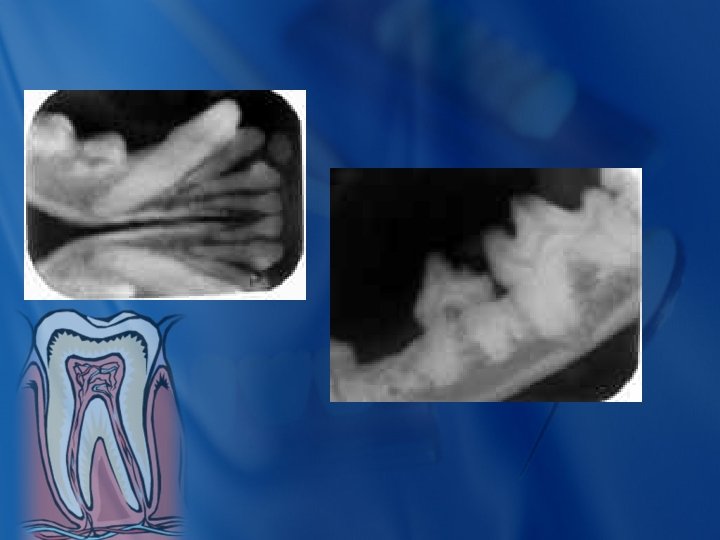
Radiographic Landmarks • It is important to be able to look at a film and identify the area exposed. • Maxillary incisors will show a large radiodense (white area) distal to the teeth, with two ovals representing the nasal area. All incisor teeth have one root • Mandibular incisors - look for a black space separating mandibular rami • Maxillary premolars and molars - look for a fine while line representing the maxillary recess apical to the roots • Mandibular premolars and molars - look for radiolucent (black areas) above and below the jaw. Other than the first premolar (in the dog) and third premolar (in the cat), all mandibular premolars and molars have two roots
It is important to know how many roots each tooth has. Can you think of any reasons why?
Positioning of Film and Patient • Place film inside the mouth, parallel to the teeth to be examined. • Bisecting angle technique is used in most exposures. Lay film far enough inside the animal’s mouth so that its root structure will be projected on the film. Imaginary lines are drawn along the long axis of the tooth and the plane of the film. The point where these two lines meet will create an angle. Instead of aiming the central beam perpendicular to the film as in the parallel technique, the central beam is aimed perpendicular to the line bisecting the angle created between the line of the tooth and line of the film
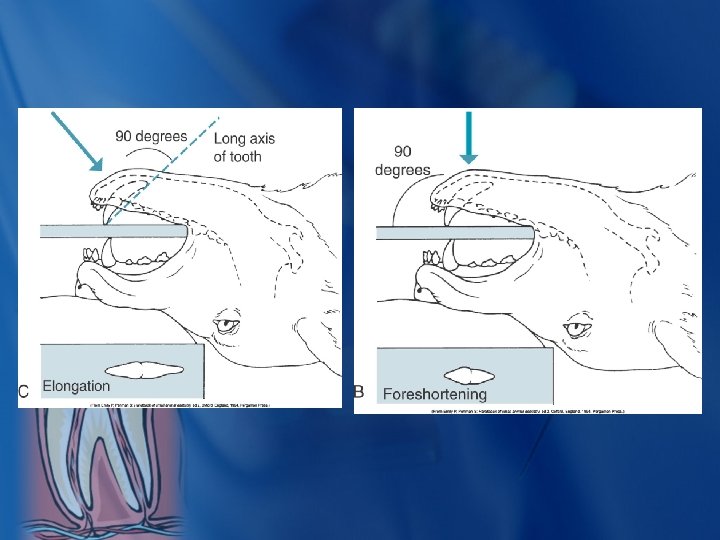
Bisecting Angle Technique: this minimizes image distortion and produces an accurate image of the canine teeth on the dental film. In any 90 degree arc, there is one angle that will allow an x-ray beam to cast an accurate shadow of the tooth on the film.
1. Bisecting Angle: Find the middle of the “long axis of tooth and film. 2. You now want to use the BA and x-ray head to create a 90 degree angle, no larger, no smaller. This takes practice, patience and time. Tubehead on xray machine Film Distance between the tooth and the film. CTVT pg. 888888
This angle will make the tooth appear short on the xray film. Tube head
This angle makes the tooth appear longer on the x-ray. Tubehead On X-ray machine FILM
Film Processing • Film may be developed: • By hand with regular or rapid dental processing solutions in the darkroom • With Chairside developer - a portable light safe box with developer, fixer, and water in small containers. Putting your hands through two diaphragms in a lighted room accesses the solutions. The box’s top, an orange or red Plexiglas safety filter, enables you to see inside. The whole process from opening the film packet to examination of a rinsed film takes approximately one minute • Automatically Film is placed into one end of the automatic dental processor and comes out fully developed, fixed, and dried in 2 to 7 minutes. Using standard veterinary automatic processors are discouraged because small dental films may become lost in the processor, and tape used to attach to larger films, may harm the processor’s rollers • Instant dental x-ray film (Veterinary dental film system VDFS-Hawaii Mega-cor, Inc. Aiea, Hawaii) develops in 30 seconds within the film packet after infusion of developer and fix solutions
Steps for manually processing dental x-rays • • Once the film packet is in a light secured area, open the packet tab on the packet and slide forward the paper liner and film. This will present film to be processed. Only touch the sides of the film with your fingers A film hanger is attached to the film. Film should extend horizontally from the clip. Give the film a gentle tug to make certain it is firmly attached to the clip Place the film into the developing solution for 10 -30 seconds (depending on room temperature - longer time if less than 68 degrees) The film is rinsed in distilled water for 10 seconds Place the film in the fixing solution for 30 seconds Rinse for 30 seconds in distilled water After viewing, the film is placed in the fixer for 5 minutes and a distilled water rinse for 20 minutes When rinsing is complete, hang the radiograph on a rack to dry or use a hair drier for rapid drying Chemicals should be changed at least once weekly.