Production Sound AUDA 203 Sound recording for live


- Slides: 29

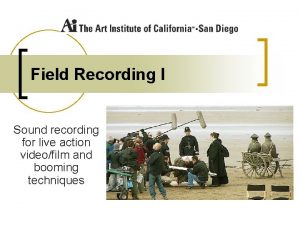
Production Sound AUDA 203 Sound recording for live action video/film and booming techniques

First up……. Sound recording for live action

general sound considerations n n Hire a dedicated sound person When scouting locations: ¡ ¡ ¡ Listen for noise and reverberation example - graffiti location under a highway bridge (unusable) example - large museum interior – too much reverberation (use lavs instead of booms)

general sound considerations n on set noise – enlist help from each department ¡ ¡ ¡ Set dressers can hang blankets out of camera view to soak up excess reverb Grips rig dolly’s to be quiet (squeaks, gears, wheels, etc) Costumers provide cloth booties for actors in scenes where feet are not seen and provide places for lavs Generator operators can place generators for minimum noise Assistant directors maintain a quiet and disciplined set

main microphone techniques n boom – the preferred method ¡ n Naturally matches the perspective of what is on screen – farther away for wide shots, closer during close ups lavaliere (on the actor/subject) n planted mic (on the set/location)

mic techniques – pros and cons n Boom ¡ Pros – n n n ¡ Cons – n Obtrusive n potential exists for more susceptible to reverb and noise than the lav mics, poles and boom operators can make actors nervous n n ¡ best sound in most situations most representative voice timbre ability to match camera perspective Special considerations – n n needs an operator separate from the camera operator coordination between camera and sound personnel

mic techniques – pros and cons n Wired and wireless lavaliere ¡ Pro – n n n ¡ Closest to mouth Less influenced by room noise and reverberation than a boom mic The mic can sometimes cover more than one subject/actor if they are close together Con – n n Mic can’t see the mouth and mounting on the chest can change the timbre for the worse Lacks matching the camera perspective if a subject moves Subject to clothing noise, actor touching clothes, beating chest Invasive to place the microphone on the actor

mic techniques – pros and cons n Wired and wireless lavaliere ¡ Special considerations n Wired ¡ n Wire tether restricts movement but is a more reliable link than a radio/wireless mic Radio/wireless ¡ More freedom of movement at expense of less reliable connection

mic techniques – pros and cons n Lavaliere in hair or hat ¡ Pro – n n n ¡ Commonly used “Broadway method” – potentially less costume interference than on the chest Perspective stays the same when the actor turns their head Con – n n n Difficult to place and wire Timbre requires equalization More subject to perspiration than chest mounted mic

mic techniques – pros and cons n Planted microphone (hidden on set) ¡ Pro – n ¡ Works well for certain situations Con – n inflexible

typical 2 channel recording methods n Record the same signal from one or more mics ¡ ¡ Provides redundancy Each channel can be recorded at a different line level 10 – 15 d. B level difference on one channel protects for distortion – editor can use the lower channel if needed Also allows for capturing 2 different ‘perspectives’ at the same time

typical 2 channel recording methods n Record a left/right stereo pair from a stereo mic ¡ ¡ ¡ Provides a more realistic recording and dialog matches the scenes location r/l channels must be used together instead of as separate mono channels Complicates editing process but an option that sounds more natural

typical 2 channel recording methods n Record “dual mono” ¡ ¡ 2 different mono microphone sources recorded on separate channels (boom & lav) Provides redundancy and protection against the issues each type of mic can have Gives the sound editor the greatest flexibility to use the best sounding channel (volume, timbre and perspective) The best sound typically results from a mix of both sources

typical 2 channel recording methods n Record to camera and recorder ¡ ¡ The same channel is recorded to both the camera audio track and to a dedicated field recorder Provides redundancy Provides reference for editor since the camera track is already sync’d Allows for more flexibility

Recording live sound Questions? Next up: Booming techniques…


booms and booming techniques

boom operator in action!

boom microphone systems n Types of poles ¡ ¡ n aluminum carbon fiber (lightest) jointed pole extendable pole – variety of lengths available Types of cables ¡ ¡ internal – typically of the coiled variety like on an old telephone handset external – generally wrapped around the boom a few turns and held taut by the operators hand nearest the bottom of the boom

boom microphone systems n Accessories ¡ ¡ ¡ n counter weights hand grips Kit Cool system tripod or floor mount shock mount Windscreens Over the shoulder harness (Kit Cool system) Most varieties of microphones can be used on a boom pole

The Boom Operator’s job (also known as the ‘microphone placement engineer’) n n n n n Often combined duties as the sound recordist Main goal: capture the actors voice in a clear and natural manner – with the ultimate goal of having NO dialog replacement (ADR) Hold up the boom pole for extended periods of time and move it silently Learn the dialog for scene so that the right moments can be emphasized and for coverage of the person speaking in multiple actor situations Match the microphone perspective to the camera shot Know where the “frame line” is and avoid it Act as the ‘front line’ person for the sound crew since they are closest to the actors – often positioning wireless mics Do not distract the actors by making eye contact Understand that noise heard on headphones is more prevalent than what is heard over speakers – know when the noise is too much Do not hit the talent in the head with the boom pole – easy to do when distracted

What makes a good Boom Operator? n n n n Able to memorize a script quickly Can follow the action Ability to get the microphone where it belongs to match the perspective of the shot Ability to remain completely professional in the line of fire Must not distract the actors Understands set politics Understands everyone’s jobs and enjoys their pursuit of excellence as well as your own

Booming Techniques n Overhead – best n Under frame line – 2 nd choice depending on the situation (also known as ‘scooping’) n Off axis – booming from the sides (to be avoided due to the unnatural sound it produces)

Booming Techniques n n Boom operator – tips and tricks (4: 10) Boom operator commercial (0: 32) The Art of Zen-Boom article (pdf file) Boom operator in action (5: 20)

The Directors sound responsibilities n n n If at all possible, designate a dedicated sound person during production whose principal responsibility is sound Scout locations for sound as well as looks. You can pan offending sign but you can’t pan offending sound In fiction pieces, make everyone aware of the need to get good production sound Record production sound of the event well but fill in by recording room tone Boom mics are first choice, lav’s second

The Directors sound responsibilities n n Ambience can be recorded with an on-camera mic if needed Use 2 channel recording for redundancy with staggered levels for widest clean dynamic range or for 2 different perspectives Use shock mounts, windscreens and boom poles effectively to produce silent microphone moves The boom operator is much more than “a big kid out of high school with strong arms”. Professional production sound mixers know that skilled boom operators make their job infinitely simpler by learning the scene, tracking the action and capturing clean and consistent recordings. Hire competent boom operators!

next weeks lecture: n field recording for sound effects

The end Questions?

Week 5 – homework (5 pts) -read "The Art of Zen-Boom" Parts 1 and 2 - download here. -Boom and record 1 minute of actor/speaker dialog using 2 different boom positions (30 seconds overhead and 30 seconds underneath). Attempt at either close or medium perspective, concentrating on consistency of volume and timbre for each position and as the mic is rotated. Select the appropriate microphone for your situation, use good booming techniques, recording techniques, minimizing background and mic handling noise and appropriate gain level. - Save edited file as. wav or. mp 3, 44. 1 khz, 16 bit, stereo or mono file and submit as instructed in class. Use an understandable naming convention with your name and object recorded. (ex. Week 05_Aaron. Marks_Boom. Exercise. wav)
 Auda history
 Auda parts
 Audatex calculatie
 Alir proses produksi
 Www quizlet live
 Birmingham and solihull stp
 Cst 203
 Agreed deliverables
 Afi 10-203
 203 fourgonnette
 Eet 203
 Eet 203
 Jumlah deret 5+12+19+26+...+355 adalah
 Fha 203 h
 Cpsc 203
 Master203
 Eet 203
 Cmsc 421 umbc
 952 203-0000
 Lol-203
 Eet 203
 Mathematical induction
 Rumus un
 Etx-203ax
 State postulate
 1948 peugeot 203
 Cmsc 203 umbc
 456x203
 Resource management guide 203
 Rad 203
