HAAS UNIQUE GCODES UNIQUE MILL GCODES v G


- Slides: 28

HAAS UNIQUE G-CODES

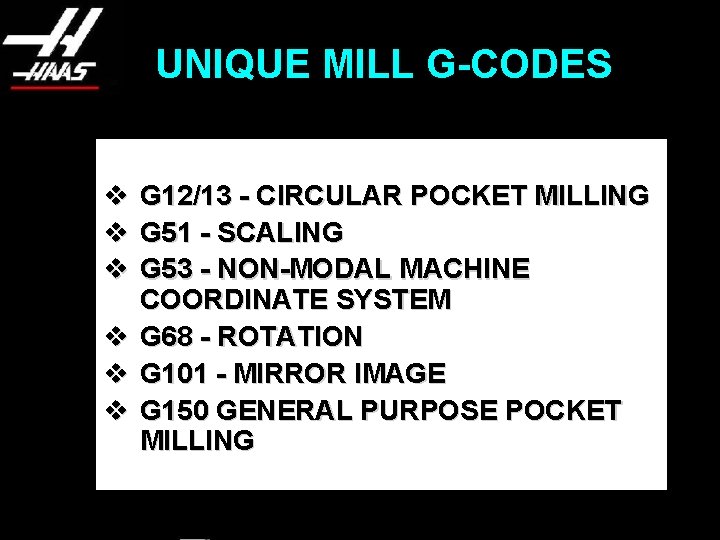
UNIQUE MILL G-CODES v G 12/13 - CIRCULAR POCKET MILLING v G 51 - SCALING v G 53 - NON-MODAL MACHINE COORDINATE SYSTEM v G 68 - ROTATION v G 101 - MIRROR IMAGE v G 150 GENERAL PURPOSE POCKET MILLING

OVERVIEW • • • Description of Codes Code Format Effects of Settings Unique Features Examples

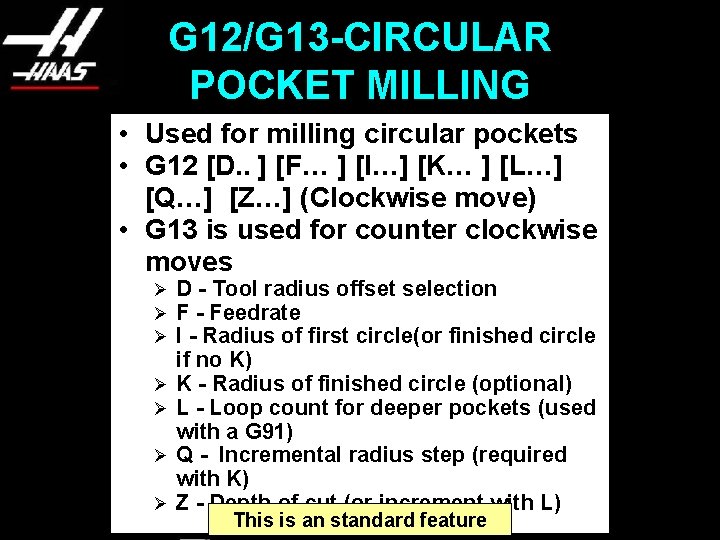
G 12/G 13 -CIRCULAR POCKET MILLING • Used for milling circular pockets • G 12 [D. . ] [F… ] [I…] [K… ] [L…] [Q…] [Z…] (Clockwise move) • G 13 is used for counter clockwise moves Ø Ø Ø Ø D - Tool radius offset selection F - Feedrate I - Radius of first circle(or finished circle if no K) K - Radius of finished circle (optional) L - Loop count for deeper pockets (used with a G 91) Q - Incremental radius step (required with K) Z - Depth of cut (or increment with L) This is an standard feature

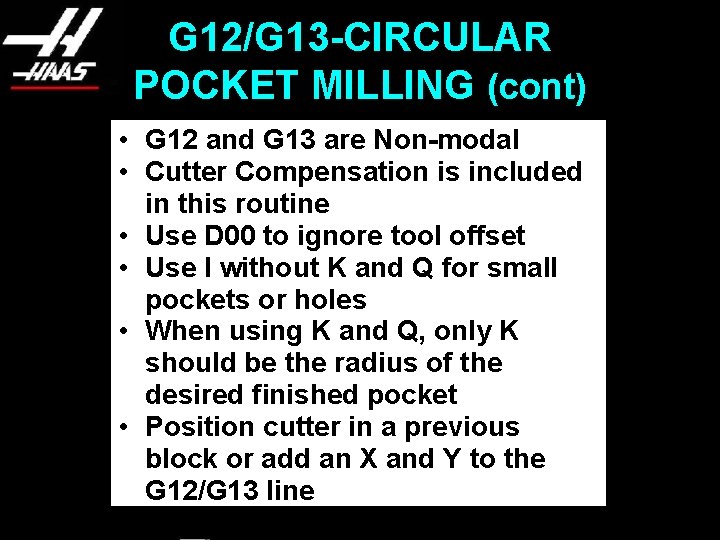
G 12/G 13 -CIRCULAR POCKET MILLING (cont) • G 12 and G 13 are Non-modal • Cutter Compensation is included in this routine • Use D 00 to ignore tool offset • Use I without K and Q for small pockets or holes • When using K and Q, only K should be the radius of the desired finished pocket • Position cutter in a previous block or add an X and Y to the G 12/G 13 line

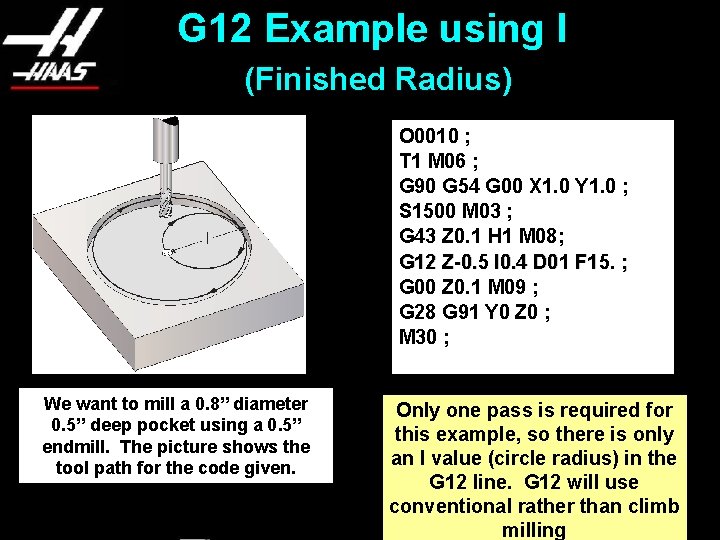
G 12 Example using I (Finished Radius) O 0010 ; T 1 M 06 ; G 90 G 54 G 00 X 1. 0 Y 1. 0 ; S 1500 M 03 ; G 43 Z 0. 1 H 1 M 08; G 12 Z-0. 5 I 0. 4 D 01 F 15. ; G 00 Z 0. 1 M 09 ; G 28 G 91 Y 0 Z 0 ; M 30 ; We want to mill a 0. 8” diameter 0. 5” deep pocket using a 0. 5” endmill. The picture shows the tool path for the code given. Only one pass is required for this example, so there is only an I value (circle radius) in the G 12 line. G 12 will use conventional rather than climb milling

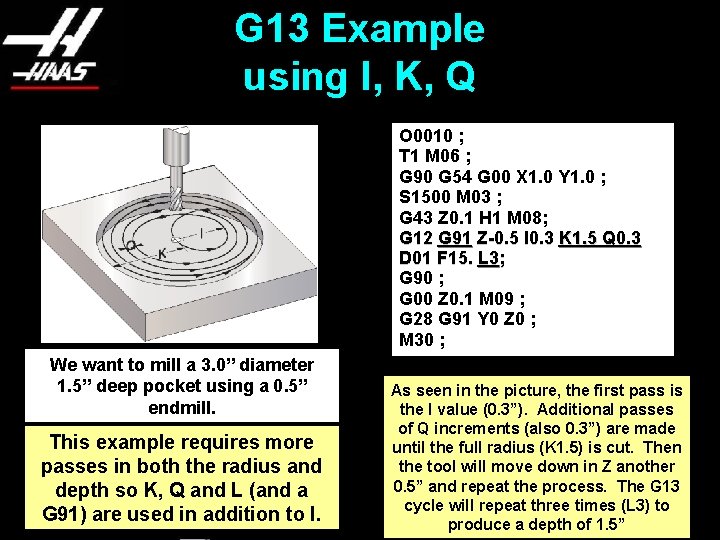
G 13 Example using I, K, Q O 0010 ; T 1 M 06 ; G 90 G 54 G 00 X 1. 0 Y 1. 0 ; S 1500 M 03 ; G 43 Z 0. 1 H 1 M 08; G 12 G 91 Z-0. 5 I 0. 3 K 1. 5 Q 0. 3 D 01 F 15. L 3; G 90 ; G 00 Z 0. 1 M 09 ; G 28 G 91 Y 0 Z 0 ; M 30 ; We want to mill a 3. 0” diameter 1. 5” deep pocket using a 0. 5” endmill. This example requires more passes in both the radius and depth so K, Q and L (and a G 91) are used in addition to I. As seen in the picture, the first pass is the I value (0. 3”). Additional passes of Q increments (also 0. 3”) are made until the full radius (K 1. 5) is cut. Then the tool will move down in Z another 0. 5” and repeat the process. The G 13 cycle will repeat three times (L 3) to produce a depth of 1. 5”

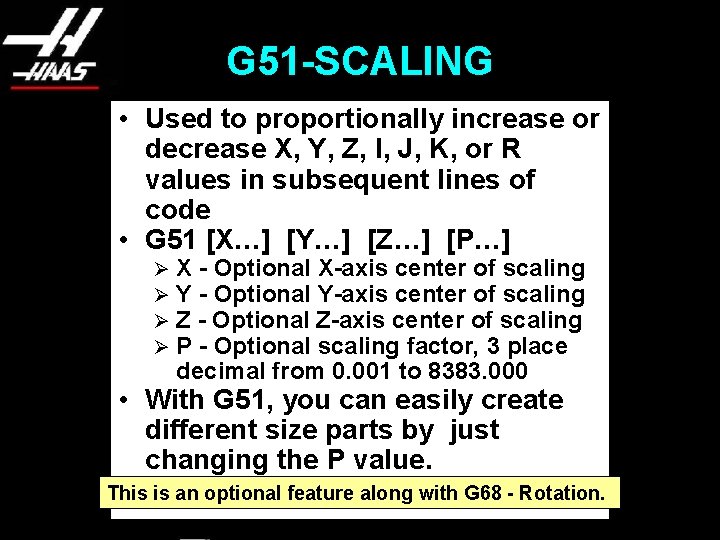
G 51 -SCALING • Used to proportionally increase or decrease X, Y, Z, I, J, K, or R values in subsequent lines of code • G 51 [X…] [Y…] [Z…] [P…] Ø Ø X - Optional X-axis center of scaling Y - Optional Y-axis center of scaling Z - Optional Z-axis center of scaling P - Optional scaling factor, 3 place decimal from 0. 001 to 8383. 000 • With G 51, you can easily create different size parts by just changing the P value. • G 50 - Cancel Scaling This is an optional feature along with G 68 - Rotation.

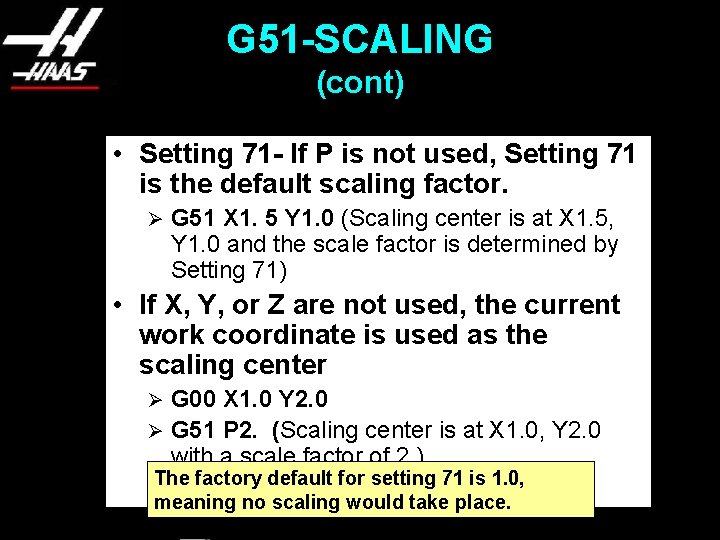
G 51 -SCALING (cont) • Setting 71 - If P is not used, Setting 71 is the default scaling factor. Ø G 51 X 1. 5 Y 1. 0 (Scaling center is at X 1. 5, Y 1. 0 and the scale factor is determined by Setting 71) • If X, Y, or Z are not used, the current work coordinate is used as the scaling center G 00 X 1. 0 Y 2. 0 Ø G 51 P 2. (Scaling center is at X 1. 0, Y 2. 0 with a scale factor of 2. ) Ø The factory default for setting 71 is 1. 0, meaning no scaling would take place.

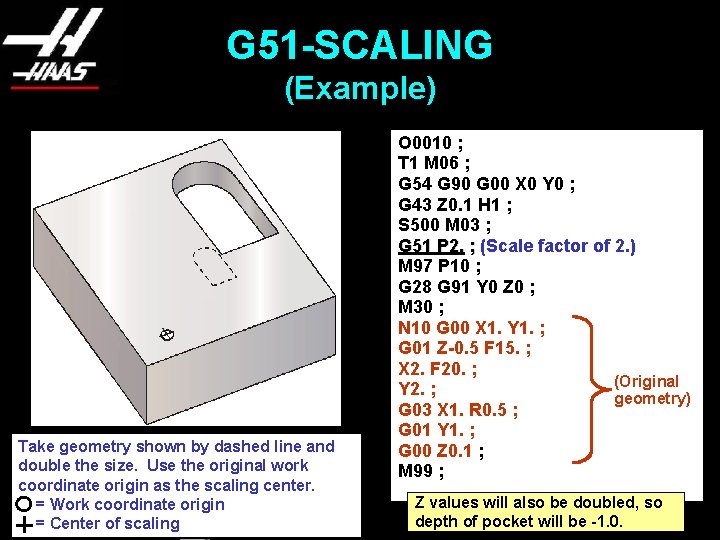
G 51 -SCALING (Example) Take geometry shown by dashed line and double the size. Use the original work coordinate origin as the scaling center. = Work coordinate origin = Center of scaling O 0010 ; T 1 M 06 ; G 54 G 90 G 00 X 0 Y 0 ; G 43 Z 0. 1 H 1 ; S 500 M 03 ; G 51 P 2. ; (Scale factor of 2. ) M 97 P 10 ; G 28 G 91 Y 0 Z 0 ; M 30 ; N 10 G 00 X 1. Y 1. ; G 01 Z-0. 5 F 15. ; X 2. F 20. ; (Original Y 2. ; geometry) G 03 X 1. R 0. 5 ; G 01 Y 1. ; G 00 Z 0. 1 ; M 99 ; Z values will also be doubled, so depth of pocket will be -1. 0.

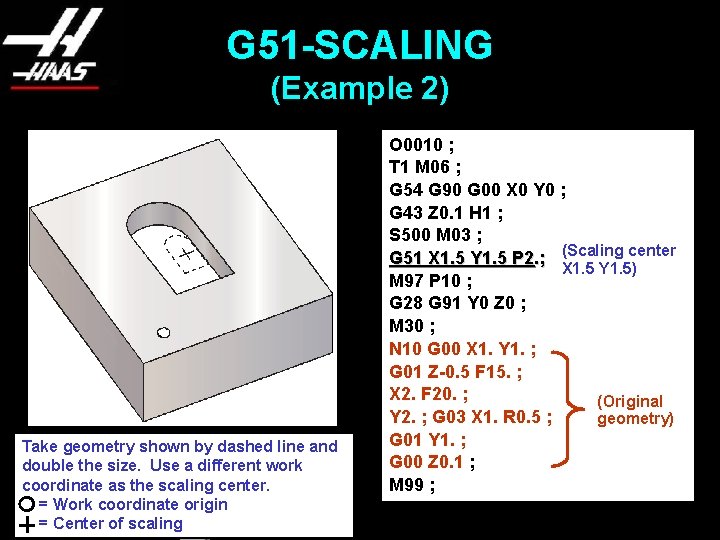
G 51 -SCALING (Example 2) Take geometry shown by dashed line and double the size. Use a different work coordinate as the scaling center. = Work coordinate origin = Center of scaling O 0010 ; T 1 M 06 ; G 54 G 90 G 00 X 0 Y 0 ; G 43 Z 0. 1 H 1 ; S 500 M 03 ; G 51 X 1. 5 Y 1. 5 P 2. ; (Scaling center X 1. 5 Y 1. 5) M 97 P 10 ; G 28 G 91 Y 0 Z 0 ; M 30 ; N 10 G 00 X 1. Y 1. ; G 01 Z-0. 5 F 15. ; X 2. F 20. ; (Original Y 2. ; G 03 X 1. R 0. 5 ; geometry) G 01 Y 1. ; G 00 Z 0. 1 ; M 99 ;

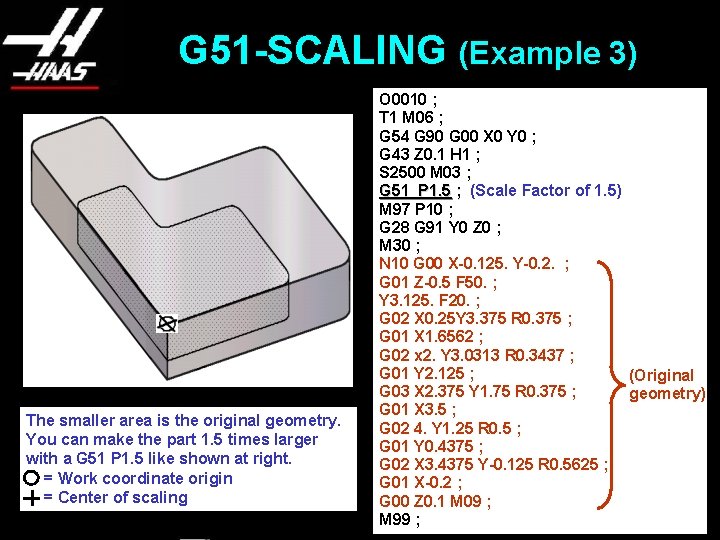
G 51 -SCALING (Example 3) The smaller area is the original geometry. You can make the part 1. 5 times larger with a G 51 P 1. 5 like shown at right. = Work coordinate origin = Center of scaling O 0010 ; T 1 M 06 ; G 54 G 90 G 00 X 0 Y 0 ; G 43 Z 0. 1 H 1 ; S 2500 M 03 ; G 51 P 1. 5 ; (Scale Factor of 1. 5) M 97 P 10 ; G 28 G 91 Y 0 Z 0 ; M 30 ; N 10 G 00 X-0. 125. Y-0. 2. ; G 01 Z-0. 5 F 50. ; Y 3. 125. F 20. ; G 02 X 0. 25 Y 3. 375 R 0. 375 ; G 01 X 1. 6562 ; G 02 x 2. Y 3. 0313 R 0. 3437 ; G 01 Y 2. 125 ; (Original G 03 X 2. 375 Y 1. 75 R 0. 375 ; geometry) G 01 X 3. 5 ; G 02 4. Y 1. 25 R 0. 5 ; G 01 Y 0. 4375 ; G 02 X 3. 4375 Y-0. 125 R 0. 5625 ; G 01 X-0. 2 ; G 00 Z 0. 1 M 09 ; M 99 ;

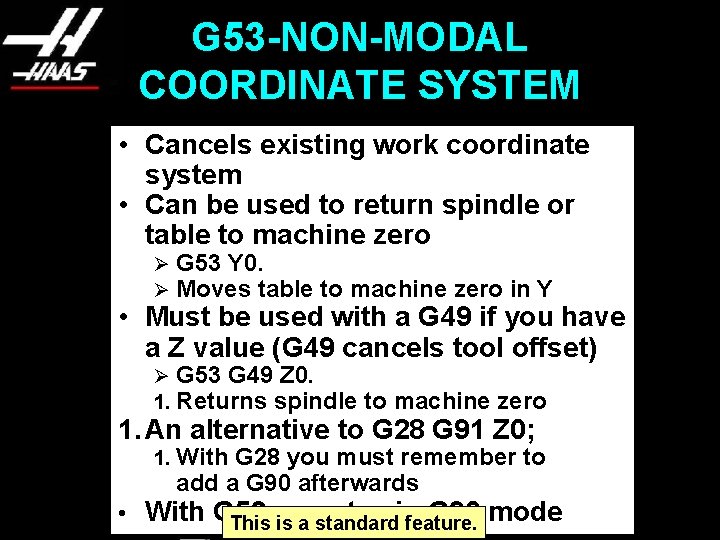
G 53 -NON-MODAL COORDINATE SYSTEM • Cancels existing work coordinate system • Can be used to return spindle or table to machine zero Ø Ø G 53 Y 0. Moves table to machine zero in Y Ø 1. G 53 G 49 Z 0. Returns spindle to machine zero 1. With G 28 you must remember to add a G 90 afterwards • Must be used with a G 49 if you have a Z value (G 49 cancels tool offset) 1. An alternative to G 28 G 91 Z 0; • With G 53 stay in G 90 mode This you is a standard feature.

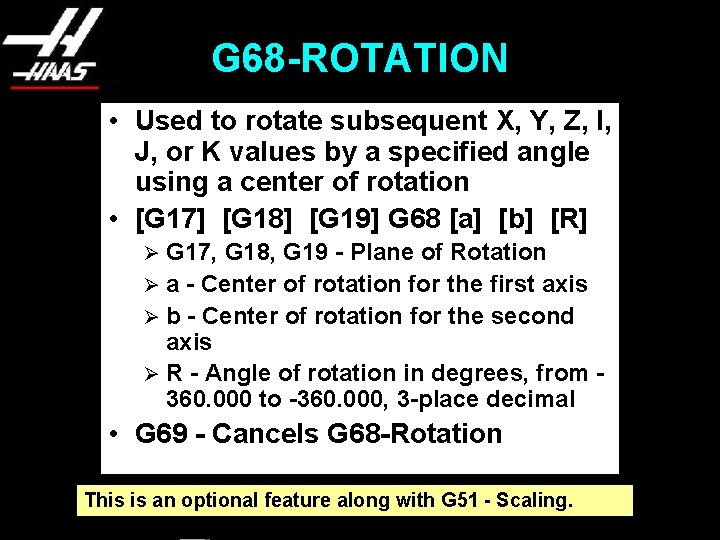
G 68 -ROTATION • Used to rotate subsequent X, Y, Z, I, J, or K values by a specified angle using a center of rotation • [G 17] [G 18] [G 19] G 68 [a] [b] [R] G 17, G 18, G 19 - Plane of Rotation Ø a - Center of rotation for the first axis Ø b - Center of rotation for the second axis Ø R - Angle of rotation in degrees, from 360. 000 to -360. 000, 3 -place decimal Ø • G 69 - Cancels G 68 -Rotation This is an optional feature along with G 51 - Scaling.

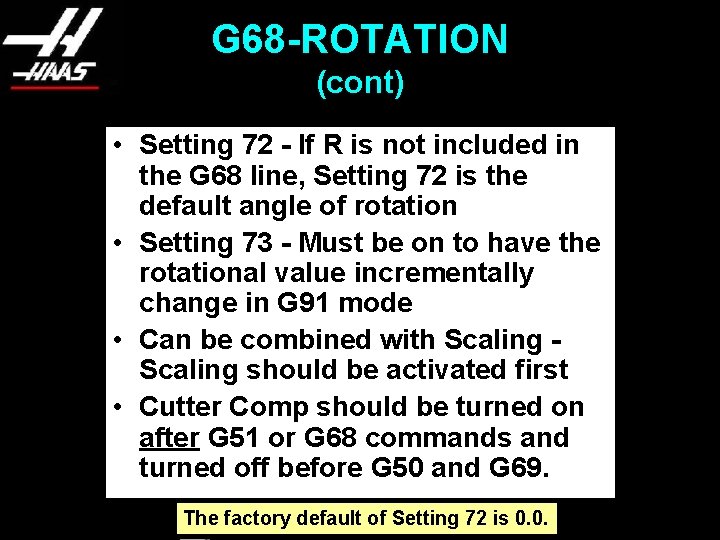
G 68 -ROTATION (cont) • Setting 72 - If R is not included in the G 68 line, Setting 72 is the default angle of rotation • Setting 73 - Must be on to have the rotational value incrementally change in G 91 mode • Can be combined with Scaling should be activated first • Cutter Comp should be turned on after G 51 or G 68 commands and turned off before G 50 and G 69. The factory default of Setting 72 is 0. 0.

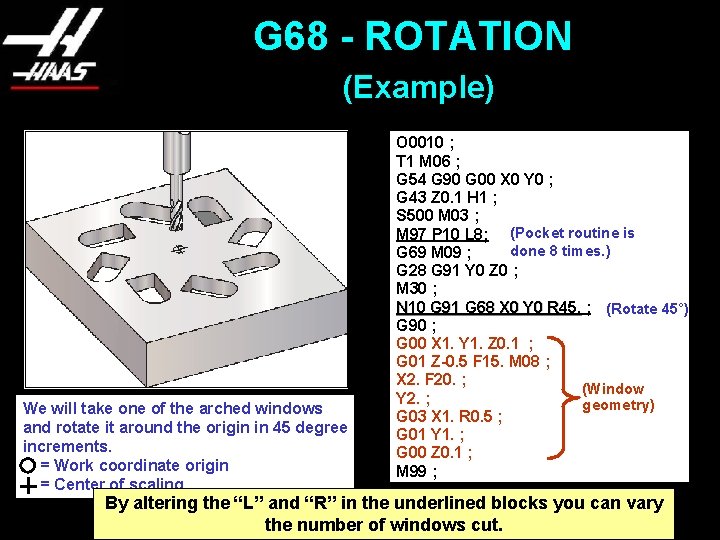
G 68 - ROTATION (Example) We will take one of the arched windows and rotate it around the origin in 45 degree increments. = Work coordinate origin = Center of scaling O 0010 ; T 1 M 06 ; G 54 G 90 G 00 X 0 Y 0 ; G 43 Z 0. 1 H 1 ; S 500 M 03 ; M 97 P 10 L 8; (Pocket routine is done 8 times. ) G 69 M 09 ; G 28 G 91 Y 0 Z 0 ; M 30 ; N 10 G 91 G 68 X 0 Y 0 R 45. ; (Rotate 45°) G 90 ; G 00 X 1. Y 1. Z 0. 1 ; G 01 Z-0. 5 F 15. M 08 ; X 2. F 20. ; (Window Y 2. ; geometry) G 03 X 1. R 0. 5 ; G 01 Y 1. ; G 00 Z 0. 1 ; M 99 ; By altering the “L” and “R” in the underlined blocks you can vary the number of windows cut.

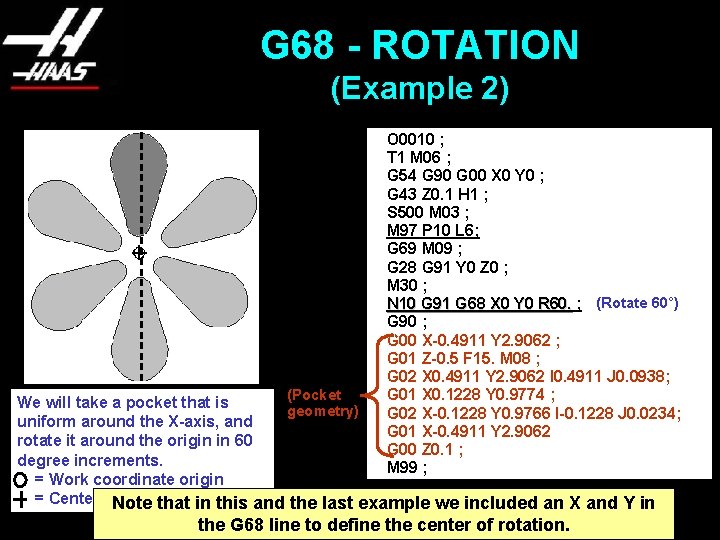
G 68 - ROTATION (Example 2) O 0010 ; T 1 M 06 ; G 54 G 90 G 00 X 0 Y 0 ; G 43 Z 0. 1 H 1 ; S 500 M 03 ; M 97 P 10 L 6; G 69 M 09 ; G 28 G 91 Y 0 Z 0 ; M 30 ; N 10 G 91 G 68 X 0 Y 0 R 60. ; (Rotate 60°) G 90 ; G 00 X-0. 4911 Y 2. 9062 ; G 01 Z-0. 5 F 15. M 08 ; G 02 X 0. 4911 Y 2. 9062 I 0. 4911 J 0. 0938; G 01 X 0. 1228 Y 0. 9774 ; G 02 X-0. 1228 Y 0. 9766 I-0. 1228 J 0. 0234; G 01 X-0. 4911 Y 2. 9062 G 00 Z 0. 1 ; M 99 ; (Pocket We will take a pocket that is geometry) uniform around the X-axis, and rotate it around the origin in 60 degree increments. = Work coordinate origin = Center of. Note scaling that in this and the last example we included an X and Y in the G 68 line to define the center of rotation.

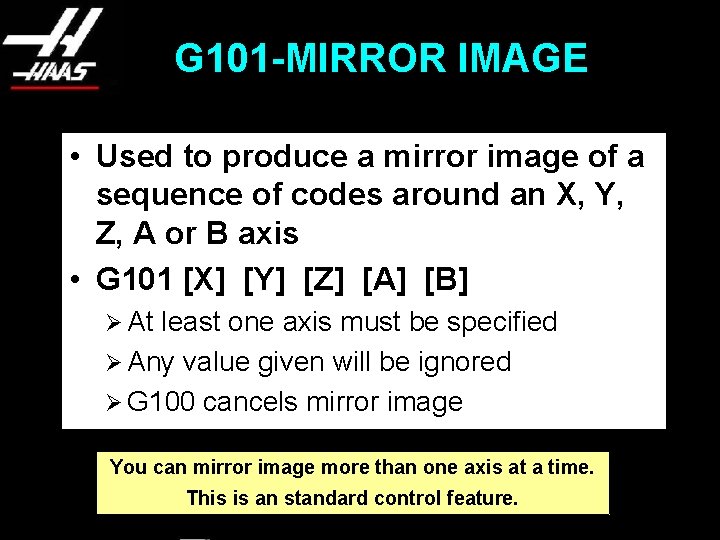
G 101 -MIRROR IMAGE • Used to produce a mirror image of a sequence of codes around an X, Y, Z, A or B axis • G 101 [X] [Y] [Z] [A] [B] Ø At least one axis must be specified Ø Any value given will be ignored Ø G 100 cancels mirror image You can mirror image more than one axis at a time. This is an standard control feature.

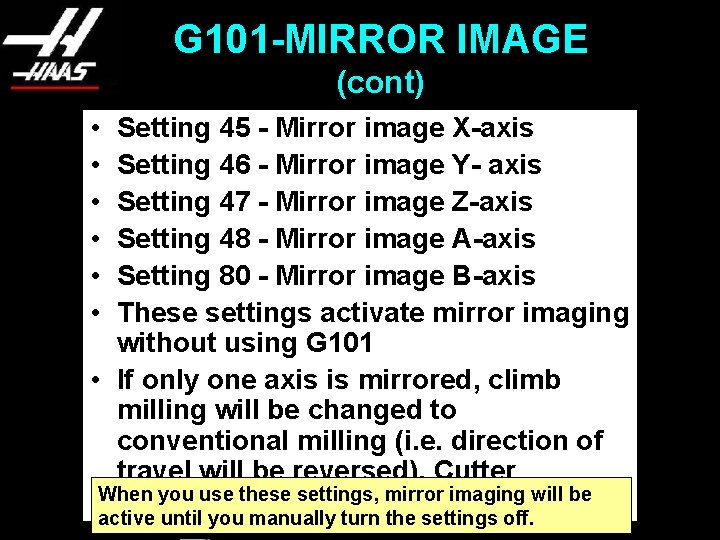
G 101 -MIRROR IMAGE (cont) • • • Setting 45 - Mirror image X-axis Setting 46 - Mirror image Y- axis Setting 47 - Mirror image Z-axis Setting 48 - Mirror image A-axis Setting 80 - Mirror image B-axis These settings activate mirror imaging without using G 101 • If only one axis is mirrored, climb milling will be changed to conventional milling (i. e. direction of travel will be reversed). Cutter When you use these settings, mirror imaging will be compensation is also reversed. active until you manually turn the settings off.

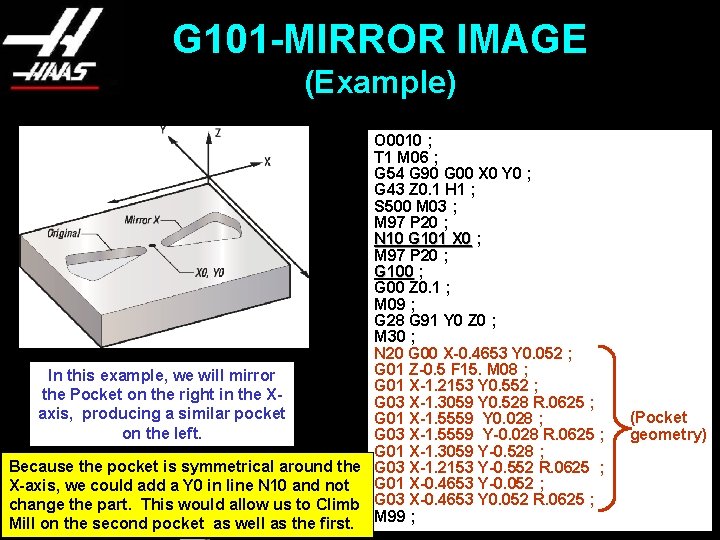
G 101 -MIRROR IMAGE (Example) O 0010 ; T 1 M 06 ; G 54 G 90 G 00 X 0 Y 0 ; G 43 Z 0. 1 H 1 ; S 500 M 03 ; M 97 P 20 ; N 10 G 101 X 0 ; M 97 P 20 ; G 100 ; G 00 Z 0. 1 ; M 09 ; G 28 G 91 Y 0 Z 0 ; M 30 ; N 20 G 00 X-0. 4653 Y 0. 052 ; G 01 Z-0. 5 F 15. M 08 ; In this example, we will mirror G 01 X-1. 2153 Y 0. 552 ; the Pocket on the right in the XG 03 X-1. 3059 Y 0. 528 R. 0625 ; axis, producing a similar pocket G 01 X-1. 5559 Y 0. 028 ; on the left. G 03 X-1. 5559 Y-0. 028 R. 0625 ; G 01 X-1. 3059 Y-0. 528 ; Because the pocket is symmetrical around the G 03 X-1. 2153 Y-0. 552 R. 0625 ; G 01 X-0. 4653 Y-0. 052 ; X-axis, we could add a Y 0 in line N 10 and not change the part. This would allow us to Climb G 03 X-0. 4653 Y 0. 052 R. 0625 ; Mill on the second pocket as well as the first. M 99 ; (Pocket geometry)

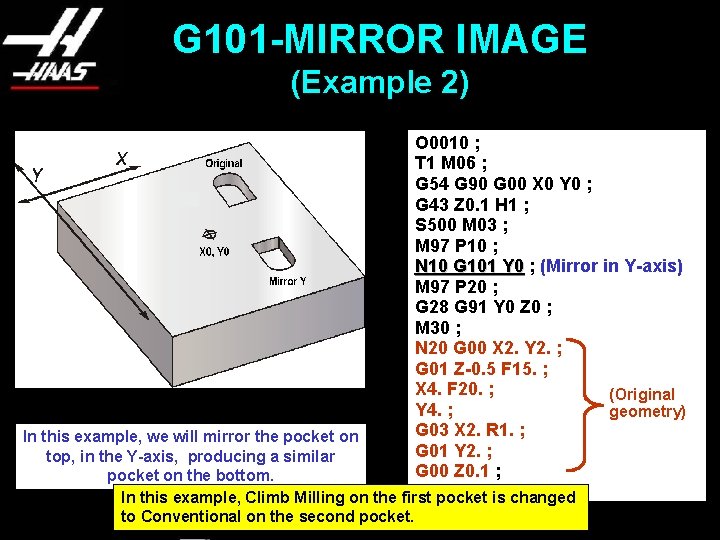
G 101 -MIRROR IMAGE (Example 2) O 0010 ; T 1 M 06 ; G 54 G 90 G 00 X 0 Y 0 ; G 43 Z 0. 1 H 1 ; S 500 M 03 ; M 97 P 10 ; N 10 G 101 Y 0 ; (Mirror in Y-axis) M 97 P 20 ; G 28 G 91 Y 0 Z 0 ; M 30 ; N 20 G 00 X 2. Y 2. ; G 01 Z-0. 5 F 15. ; X 4. F 20. ; (Original Y 4. ; geometry) G 03 X 2. R 1. ; In this example, we will mirror the pocket on G 01 Y 2. ; top, in the Y-axis, producing a similar G 00 Z 0. 1 ; pocket on the bottom. M 99 ; In this example, Climb Milling on the first pocket is changed to Conventional on the second pocket.

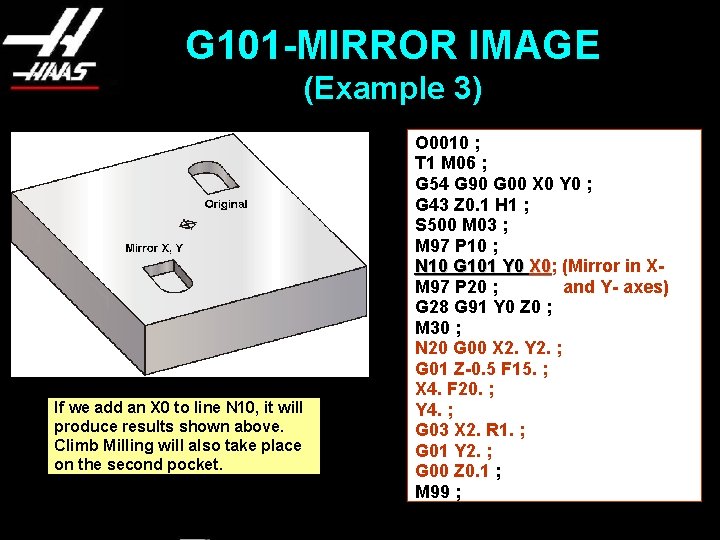
G 101 -MIRROR IMAGE (Example 3) If we add an X 0 to line N 10, it will produce results shown above. Climb Milling will also take place on the second pocket. O 0010 ; T 1 M 06 ; G 54 G 90 G 00 X 0 Y 0 ; G 43 Z 0. 1 H 1 ; S 500 M 03 ; M 97 P 10 ; N 10 G 101 Y 0 X 0; X 0 (Mirror in XM 97 P 20 ; and Y- axes) G 28 G 91 Y 0 Z 0 ; M 30 ; N 20 G 00 X 2. Y 2. ; G 01 Z-0. 5 F 15. ; X 4. F 20. ; Y 4. ; G 03 X 2. R 1. ; G 01 Y 2. ; G 00 Z 0. 1 ; M 99 ;

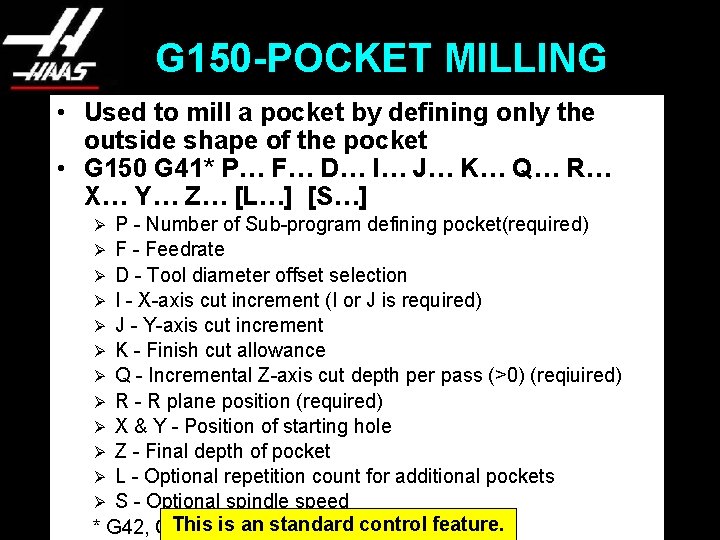
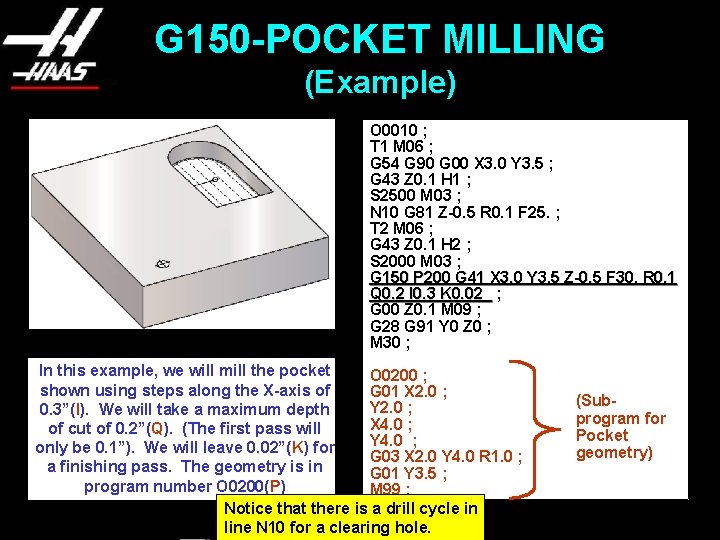
G 150 -POCKET MILLING • Used to mill a pocket by defining only the outside shape of the pocket • G 150 G 41* P… F… D… I… J… K… Q… R… X… Y… Z… [L…] [S…] P - Number of Sub-program defining pocket(required) Ø F - Feedrate Ø D - Tool diameter offset selection Ø I - X-axis cut increment (I or J is required) Ø J - Y-axis cut increment Ø K - Finish cut allowance Ø Q - Incremental Z-axis cut depth per pass (>0) (reqiuired) Ø R - R plane position (required) Ø X & Y - Position of starting hole Ø Z - Final depth of pocket Ø L - Optional repetition count for additional pockets Ø S - Optional spindle speed This Comp is an standard control feature. * G 42, Cutter Right, is also permissible Ø

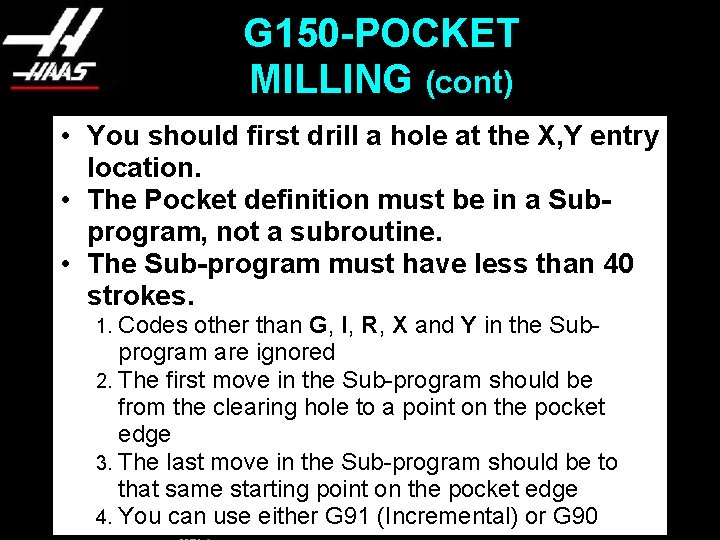
G 150 -POCKET MILLING (cont) • You should first drill a hole at the X, Y entry location. • The Pocket definition must be in a Subprogram, not a subroutine. • The Sub-program must have less than 40 strokes. Codes other than G, I, R, X and Y in the Subprogram are ignored 2. The first move in the Sub-program should be from the clearing hole to a point on the pocket edge 3. The last move in the Sub-program should be to that same starting point on the pocket edge 4. You can use either G 91 (Incremental) or G 90 1.

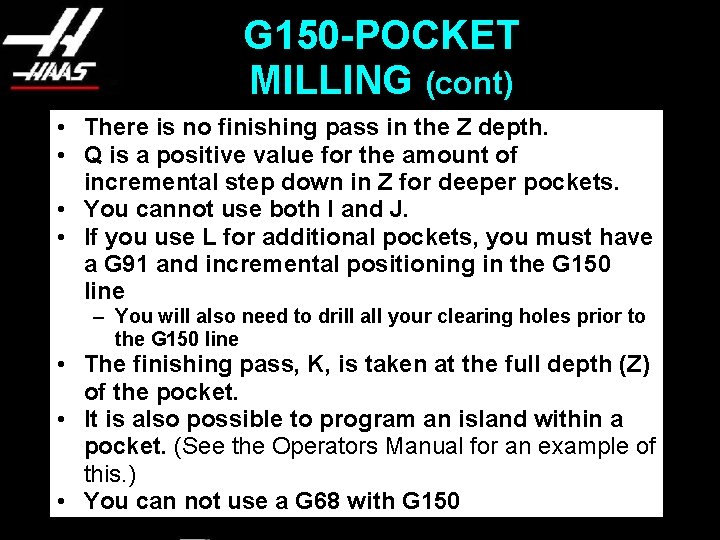
G 150 -POCKET MILLING (cont) • There is no finishing pass in the Z depth. • Q is a positive value for the amount of incremental step down in Z for deeper pockets. • You cannot use both I and J. • If you use L for additional pockets, you must have a G 91 and incremental positioning in the G 150 line – You will also need to drill all your clearing holes prior to the G 150 line • The finishing pass, K, is taken at the full depth (Z) of the pocket. • It is also possible to program an island within a pocket. (See the Operators Manual for an example of this. ) • You can not use a G 68 with G 150

G 150 -POCKET MILLING (Example) O 0010 ; T 1 M 06 ; G 54 G 90 G 00 X 3. 0 Y 3. 5 ; G 43 Z 0. 1 H 1 ; S 2500 M 03 ; N 10 G 81 Z-0. 5 R 0. 1 F 25. ; T 2 M 06 ; G 43 Z 0. 1 H 2 ; S 2000 M 03 ; G 150 P 200 G 41 X 3. 0 Y 3. 5 Z-0. 5 F 30. R 0. 1 Q 0. 2 I 0. 3 K 0. 02 ; G 00 Z 0. 1 M 09 ; G 28 G 91 Y 0 Z 0 ; M 30 ; In this example, we will mill the pocket O 0200 ; shown using steps along the X-axis of G 01 X 2. 0 ; Y 2. 0 ; 0. 3”(I). We will take a maximum depth X 4. 0 ; of cut of 0. 2”(Q). (The first pass will Y 4. 0 ; only be 0. 1”). We will leave 0. 02”(K) for G 03 X 2. 0 Y 4. 0 R 1. 0 ; a finishing pass. The geometry is in G 01 Y 3. 5 ; program number O 0200(P) M 99 ; Notice that there is a drill cycle in line N 10 for a clearing hole. (Subprogram for Pocket geometry)

Visit our web site, http: //www. haascnc. com/training to view Information Modules on other features of the Haas Control. You can also download training booklets on the Haas Control and CNC Programming.

Prepared by Haas Automation Training Department Oxnard, CA 93030