TISSUE MANAGEMENT IMPRESSION MAKING DR MUHAMMAD RIZWAN MEMON


 to the pinholes and isolate and")


- Slides: 51
TISSUE MANAGEMENT & IMPRESSION MAKING DR MUHAMMAD RIZWAN MEMON F. C. P. S Assistant Professor www. drrizwan. comlu. com
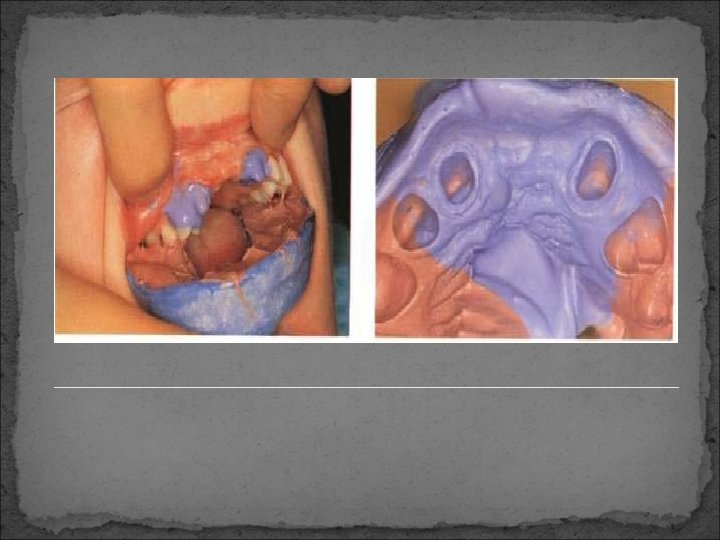
Displacement of Gingival Tissues Mechanical Methods: Copper Band Displacement/Retraction Cord Rubber Dam Chemico- Mechanical Methods: Displacement/Retraction Cord Surgical Methods: Rotary Curettage Electrosurgical Retraction
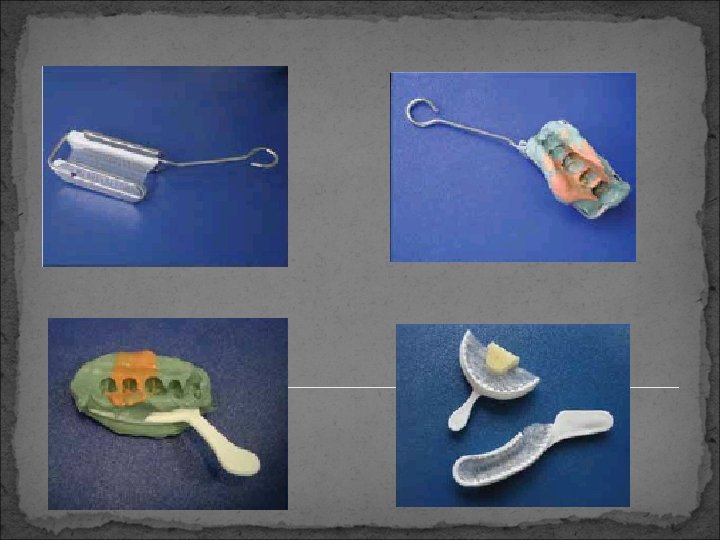
Copper Band:
Displacement/Retraction Cord:
Retraction Cord
Rubber Dam:
Rubber Dam
Expasyl gel retraction system
Chemico- Mechanical Methods: Displacement/Retraction Cord 8% epinephrine Aluminum chloride Aluminum sulphate Ferric sulphate
Rotary Curettage:
Electrosurgical Retraction:
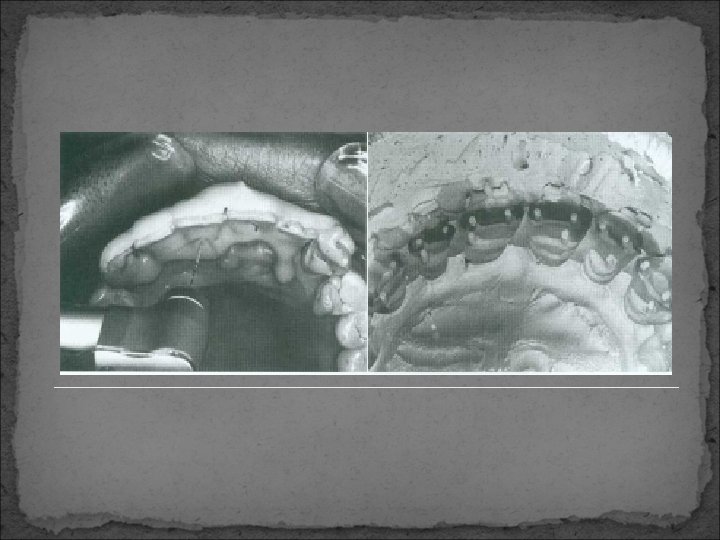
Impression Techniques Impression Making based on Type of Impression Tray: Ø Impression Making using a Stock Tray ØTwo step Heavy body-Light body combination ØOne step Heavy body-Light body combination ØAn Alternative Putty/Wash Impression Technique ØSingle Mix Technique ØAutomix Technique ØMachine Mixing Technique Ø Impression Making using a Custom Tray Ø Closed Bite/Double Arch Method/ Dual Quad tray/ Triple tray/ Closed Mouth Impression/ Accu-bite Ø Copper Band Special Considerations Pin-retained restorations Post and cores Disinfection Evaluation
Impression Making using a Stock Tray Indications: Used in most clinical situations where combination of medium to heavy bodied & light bodied elastomer is necessary Advantages: Trays are readily available Metal trays are rigid so do not distort Disadvantages: Need to sterilize the trays More impression material is required
1. Two step Heavy body-Light body combination: Select Stock tray Place gingival displacement cord in the sulcus Mix Putty impression material & load into the Tray Place Spacer (Polythene sheet) over loaded putty material Make Full mouth impression Remove impression and carefully peel away spacer Scrap areas for additional relieving over tooth preparation Remove the displacement cord & gently dry the preparation with compressed air Syringe light body material over putty impression & tooth preparations Remove set material from mouth and inspect
2. One step Heavy body-Light body combination: Select Stock tray Place gingival displacement cord in the sulcus Remove the displacement cord & gently dry the preparation with compressed air Mix Putty impression material & load onto the Tray Syringe light body material over tooth preparations and over loaded tray Make full mouth impression using the loaded stock Tray
One step Heavy body-Light body combination
3. An Alternative Putty/Wash Impression Technique Soften a sheet of baseplate wax, fold it in half and adapt it around the teeth. Chill the wax in cold water and cut out 2 mm square sections in the premolar regions to allow the formation of occlusal stops at a later stage. Replace the wax in the mouth and select a stock tray which provides the closest fit around the wax. load putty impression material on the tray. Insert the loaded tray in the mouth over the wax and wait until the putty sets. On removal of the putty impression, the wax usually remains in the putty and needs to be removed. The putty will now function as a custom tray. Place light bodied impression material in the space previously occupied by the wax and syringe some onto the teeth. Insert the newly loaded tray into position and allow the material to set. When removed, an accurate impression, with a uniform thickness of wash material, is achieved.
An Alternative Putty/Wash Impression Technique
4. Single Mix Technique: Same steps are performed for single mix as for the one step Heavy body-Light body combination But only one mix is used to load the syringe and fill the tray
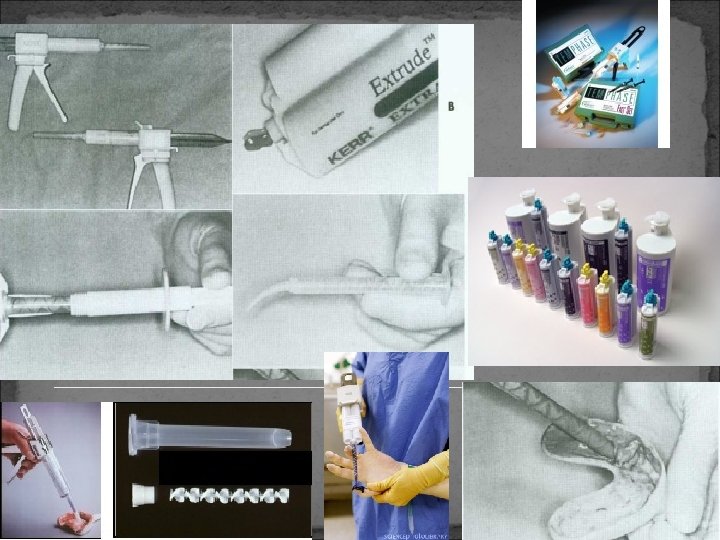
5. Automix Technique: Most manufacturers offer impression material in prepackaged cartridges with a disposable mixing tip attached The cartridge is inserted in a gunlike device, and the base and catalyst are extruded into the mixing tip The material can be directly placed on the prepared tooth and impression tray One of this system's advantages is the elimination of hand mixing on pads and the elimination of this variable has been shown to produce fewer voids in the impression.
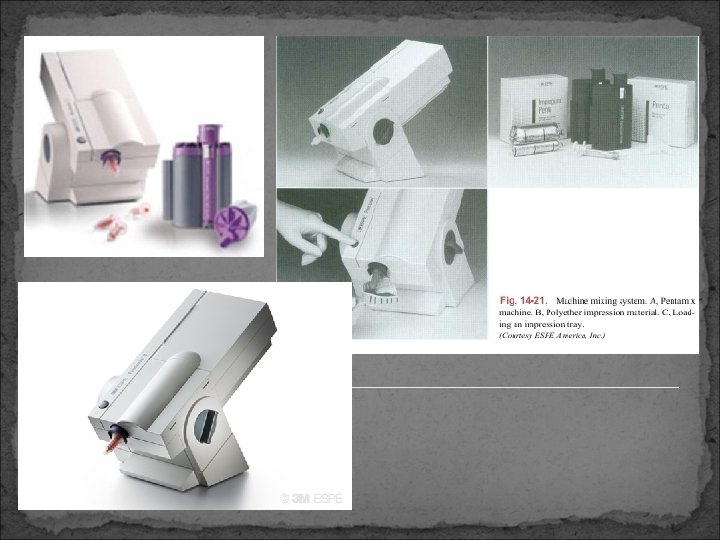
6. Machine Mixing Technique: An alternative method for improving impression mixing is to use a machine mixer This system is convenient and produces void-free impressions.
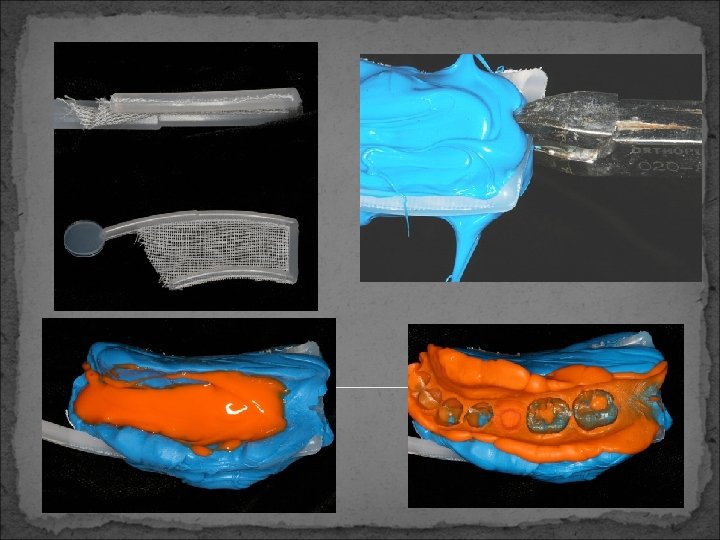
Impression Making using a Custom Tray Advantages: Less amount of impression material is required More hygienic Less chances of distortion due to uniform thickness of impression material Disadvantages: Increased time required for fabrication of Tray Can not be used for patients allergic to Acrylic
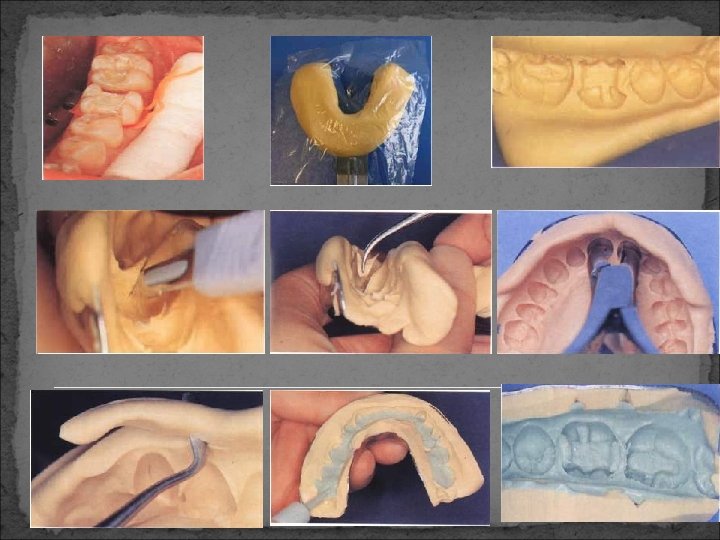
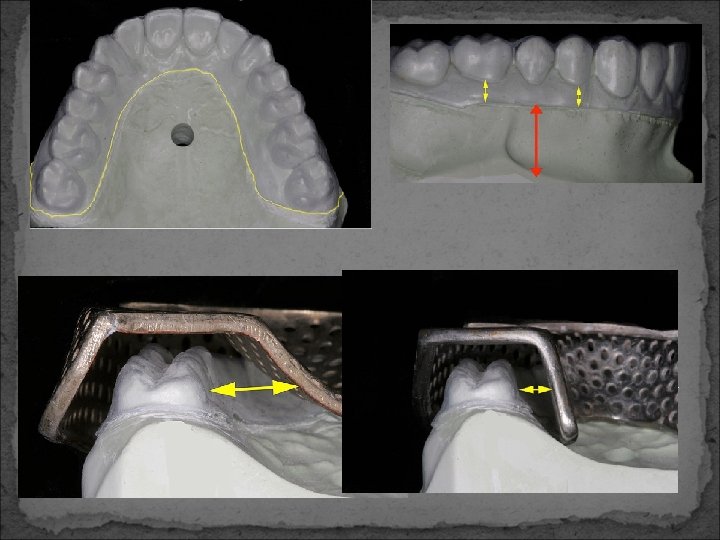
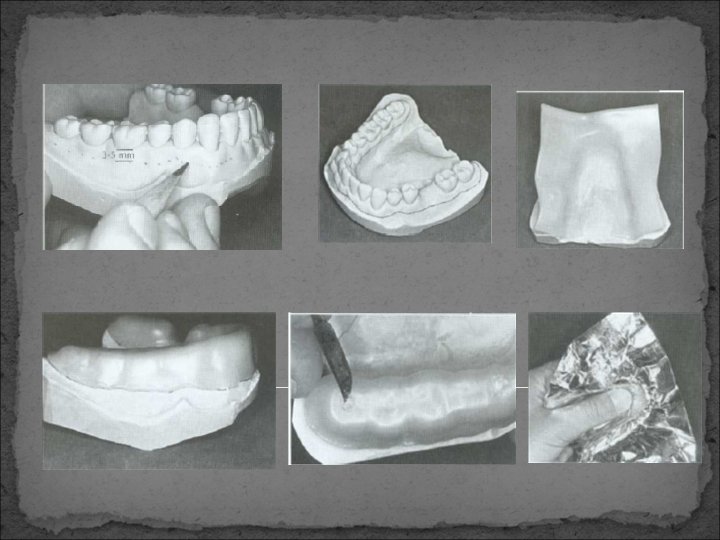
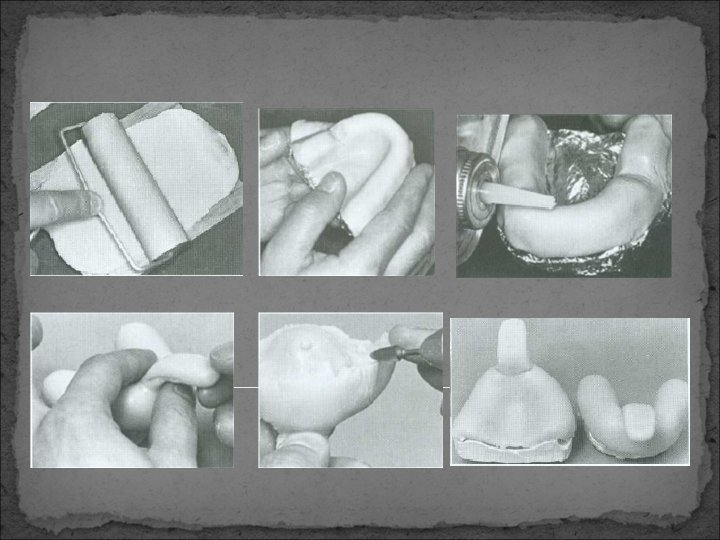
Custom Tray Fabrication: Outline border of tray on cast Tray should extend 3 -5 mm from the gingival margin & about 3 mm beyond the most distal tooth Soft & adapt two thickness baseplate wax as spacer Remove wax from tray stops Cover with tinfoil as separator Mix resin and adapt to the cast in doughy stage Attach handle Shape the periphery with an acrylic trimming bur after curing of resin Tray is ready for taking Impression
Vacuum-formed custom tray
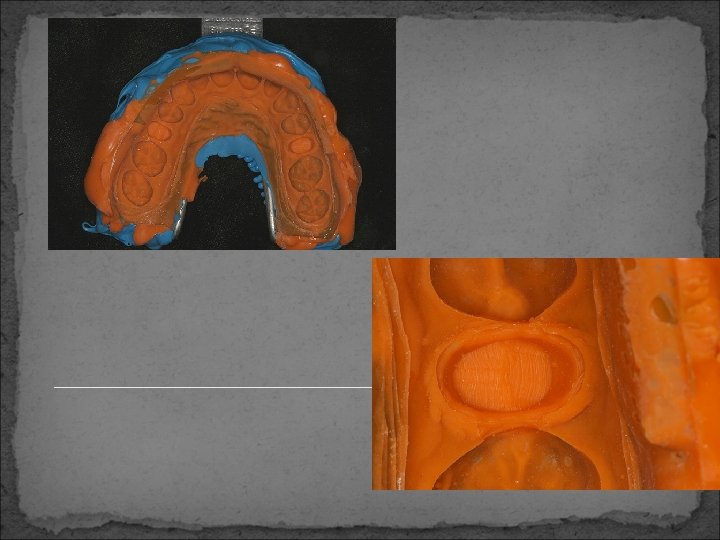
Impression Technique: Apply tray adhesive over tray as Elastomers do not adhere to acrylic Load the Tray with medium bodied Elastomer Syringe light bodied elastomer around the tooth preparations Seat the tray with impression material over tooth surfaces and allow the material to set On removal, an accurate impression, with a uniform thickness of wash material, is achieved.
Closed Bite/ Double Arch Method/ Dual Quad tray/ Closed Mouth Impression Triple tray/Accu-bite Indications: Sufficient inter-digitation b/w natural teeth Advantages: Material saving B/c of recording of single quadrant Time saving as both arches are recorded simultaneously Accurate Bite is recorded Disadvantages: Distortion is possible as tray is not rigid
Impression Technique: Inject light body material around the prepared teeth Load the tray with heavy body material on both sides Place tray between the arches Ask the patient to bite slowly Ask the patient to open mouth slowly after setting of material Tray will adhere to one arch as the patient open his mouth Remove the tray by applying bilateral pressure (right & left)
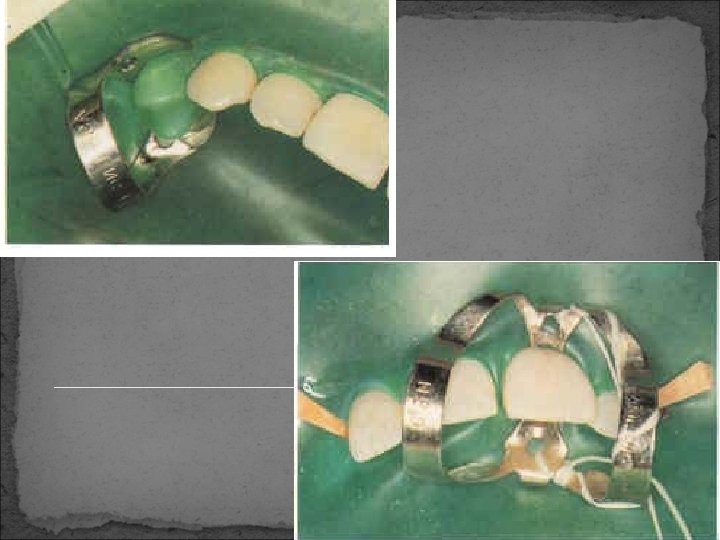
Copper Band Impression Indication: Single tooth preparation In case of multiple preparation when impression of one or two preparations have not been recorded properly Advantages: Time saving An accurate finish line can be obtained Disadvantages: Requires additional impressions Proper orientation of die with the dies of adjacent/opposite teeth is difficult
Technique: Coat fingers with petroleum jelly to prevent sticking of compound Heat green stick compound over flame Place soft material in copper band & fill one third of the tube Place this on prepared tooth Remove the band after setting of material Coat the surface of compound with adhesive Syringe light bodied material on the prepared tooth & seat the band over the syringe material Remove the set impression
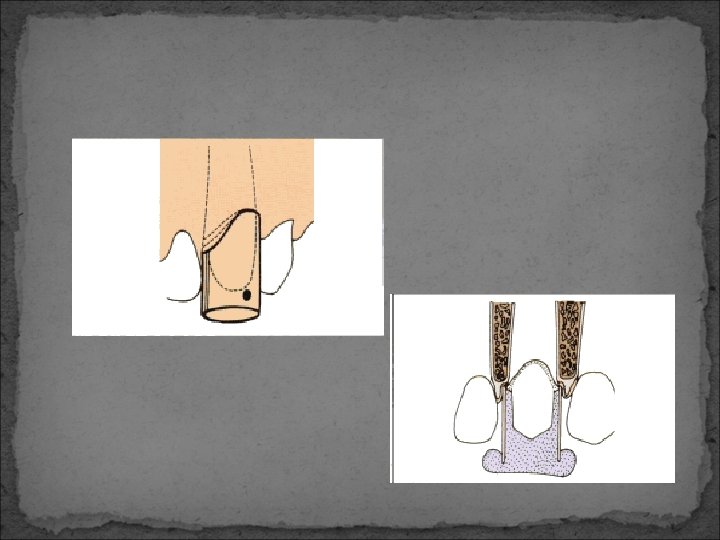
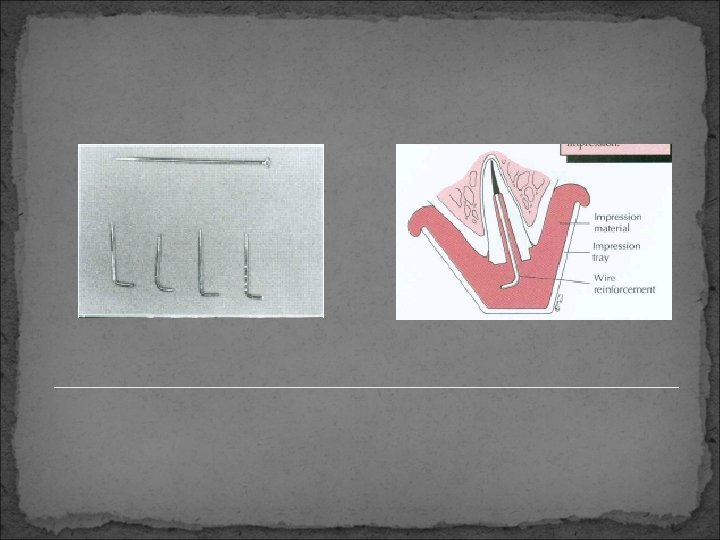
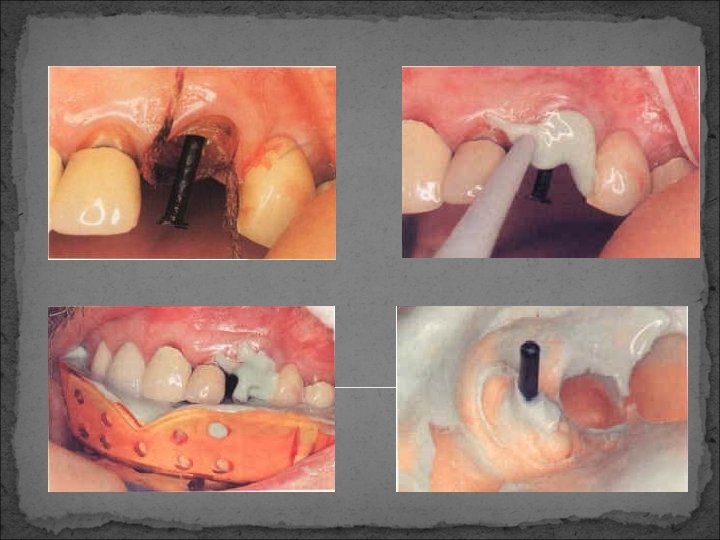
Pin-retained Restorations Technique: Apply a separating medium (lubricant) to the pinholes and isolate and displace the tissue in the conventional manner Cement Tube: After mixing the light-bodied impression material, keep back a small amount for placement into the pinholes Lentulo: Spiral the material into the pinholes, rotating slowly while moving the lentulo along the side of the pinhole Prefabricated Plastic Pins: When making a reversible hydrocolloid impression of a pin-retained restoration, use elastomer bristles to record the pin holes. Their lengths should be adjusted so that they do not contact the impression tray. (A bristle should extend 2 mm above the opening of the pinhole. ) Apply a separating medium to the pinhole before placing the bristle and completing the impression.
Post and Cores Any elastomeric material will make an accurate impression of the root canal if a wire reinforcement is placed to prevent distortion. Cut pieces of orthodontic wire to length and shape them like the letter J Verify the fit of the wire in each canal. It should fit loosely and extend to the full depth of the post space Coat the wire with tray adhesive. If subgingival margins are present, tissue displacement may be helpful Lubricate the canals to facilitate removal of the impression without distortion Using a lentulo spiral, fill the canals with elastomeric impression material Pick up a small amount of material with the largest lentulo spiral that fits into the post space. Insert the lentulo with the handpiece set at low rotational speed to slowly carry material into the apical portion of the post space. Then increase handpiece speed and slowly with draw the lentulo from the post space. Repeat until the post space is filled. Seat the wire reinforcement to the full depth of each post space, syringe in more impression material around the prepared teeth, and insert the impression tray Remove the impression evaluate it, and pour the working cast as usual
DISINFECTION • After removal of impression from the patient's mouth, the impression is immediately rinsed with tap water and dried with an air syringe. Suitable chemicals should be used, such as glutaraldehyde solutions or iodophor sprays. • Because of its tendency to distort and absorb moisture, polyether or "hydrophilic" addition silicone impression materials should be sprayed and stored in a plastic bag rather than submerged and soaked in a glutaraldehyde solution. • Disinfection is an essential step for preventing cross-infection and exposure of laboratory personnel. If it is performed properly, disinfection will not affect the accuracy or surface reproduction of the elastomer.
THANK U