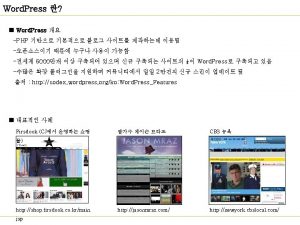
Training on ITS Word Press CMS Service Gripen


- Slides: 59

Training on ITS Word. Press CMS Service Gripen Kwok / Steven Man 19 Nov 2020

About Us Gripen Kwok Email: gripen@hku. hk Tel: 3917 2455 Steven Man Email: manwk@hku. hk Tel: 3917 6230

Welcome to Word. Press Training Be ready to START: 1. Please check in with Attendance@HKU, and get the ticket 1. Find any available seat , login with your HKU Portal UID and password 2. Use Chrome to access https: //wpcms-its. hku. hk/trainingsession/, view or download the embedded PDF 3. Visit your demo site: https: //wpmockup. XX. hku. hk/wp-admin/, XX is the ticket number.

Agenda 1. 2. 3. 4. 5. Introduction to Word. Press CMS service Login to Word. Press demo sites and get started Install WP plugins and themes Edit page Create pages that require access control by using HKU Portal accounts 6. Menus, and configure WP Settings 7. Hand-on exercises 8. Q&A

Introduction

About Word. Press § § § A content management system (CMS) is a software that facilitates creating, editing, organizing, and publishing content. Word. Press is a Content Management System, that allows you to create and publish your content on the web. Free and open-source Content Management System (CMS) written in PHP [GPLv 2+] First release on May 27, 2003 33. 6% of the top 10 million websites There are tons of online resources, more than 3, 000 themes and 50, 000 plugins are available for developing projects on Word. Press

Objectives § § § Reduce the cost and manpower in managing the Word. Press platform, so that users can concentrate on the web content creation and management An intuitive interface for users to create & maintain a website without knowledge of web programming ITS will be the gatekeeper of the Word. Press CMS core and will maintain and enhance the platform with ongoing update

What’s ITS Word. Press CMS Service § § § In-house Word. Press CMS is based on Red. Hat Open. Shift Container Platform Word. Press 5. 4. 2 with PHP 7. 3, Maria. DB 10. 2 (5. 5. 3 will be released soon) Webmaster can install themes and plugins 10 GB capacity for each site (Included both web and database) Integrate with HKU Portal to enable Single Sign-On • Sign in by HKU Portal UID and PIN to start content creation; • Protect any restricted using HKU Portal authentication § At least 10 quotas of Word. Press sites are available free for each department

How to start a webpage using Word. Press CMS § § Submit CF 83 Select “new Word. Press site” under "Application type” Then given the following information inside the form: - Domain name XXXXX. hku. hk* - Name of your website - HKU Portal UID of your site administrator * As Word. Press CMS uses HKU wildcard SSL certificate with WAF, the domain name will be limited to “XXXXX. hku. hk”. If applicants who want to make use of other domain, you should apply your own SSL certificate and key (via CF 36).

Login and get started

Access the admin dashboard § § Visit your demo site: https: //wpmockup. XX. hku. hk/wp-admin/, XX is the ticket number. The demo site will be kept for 2 weeks, you can feel free to test it within these 2 weeks (2 Dec 2020).

Login § Access https: //wpmockup. XX. hku. hk/wp-admin/, click “Login via HKU Portal”, and then login with your HKU UID

Follow me - Access the WP CMS 1. Access your main site from a web browser https: //wpcms-its. hku. hk 2. Login WP CMS with your HKU Portal UID and PIN *** Remember, DO NOT put your email address into “Username or Email Address” field to logon WP CMS *** After logging into the WP Dashboard, the main page is shown

WP CMS Dashboard Main Navigation Menu

Dashboard Section Posts Media Pages Manage posts Media files and attachments Manage pages Comments Appearance Plugins Users Tools Settings Manage comments Manage themes, widgets, menus Manage and install WP plugins View and manage WP users Plugins settings Various WP settings, plugins settings

Add new users 1. User log in via Single Sign-on (SSO) 2. The delegate can then login the Word. Press site via HKU portal without extra password.

Add new users 1. Select Users 3. Enter UID 4. Enter email address 2. Add New 5. Select User’s Role

Add new users – User Role § § § Administrator – access to all the administration features within a single site. Editor –publish and manage posts including the posts of other users. Author –publish and manage their own posts. Contributor –write and manage their own posts but cannot publish them Subscriber – read posts

Add new users – 5 HKU custom Roles 5 HKU custom roles, which are assigned and updated when user login via HKU Portal. You don’t need to and cannot update the role. It is used for SSO-protected page. The HKU custom roles can co-exist with any other Word. Press roles § HKU staff § HKU student § HKU department - departmental account § HKU retiree § HKU honorary

Follow me - Add New User and Grant User Role for accessing WP Page 1. Click ‘Users’ 2. Select ‘Add New’ 3. Enter UID of the delegate as username 4. Enter his / her HKU email address (UID@hku. hk for staff and UID@connect. hku. hk for student) in the email session 5. Select user ‘Role’ per your requirement.

Install WP plugins and themes

Install WP Themes 1. Mouse over Appearance 2. Select Themes 3. Click “Add New”

Install WP Themes A 4. Upload your theme A 5. Upload your theme B 4. Search B 5. Install

Theme customization 6. “Appearance” -> “Customeize” 7. update

Follow me – Install themes into your WP CMS 1. Move your mouse to “Appearance” 2. Select “Themes” 3. Click “Add New” button 2. Select Themes 1. Mouse over Appearance 3. Click “Add New”

Two methods here! Continuous install themes into your WP CMS 4. Select “Upload Theme” (Method 1) 5. Press “Choose File” to select your custom theme 5* Press “Install Now” to install your custom theme. | | 4. Use search function to select the suggested themes by WP (Method 2) 5. Press “Install theme” after found your suitable theme (Method 1) 4. Select “Upload Theme” (Method 1) 5. Choose your theme’s file (Method 1) Press Install your theme (Method 2) 4. Use Search function here (Method 2) 5. Install theme Go to next page!

Theme Customization 6. Select “Appearance” 7. Select “Customize” in pop-up menu 8. Update theme’s option and layout at left-handside menu. 7. Then select “Customize” 8. Update the option and layout by LHS menu Finish!

Install WP Plugins 1. Mouse over Plugin and select “Add New” A 2. Upload your plugin A 3. Upload your plugin B 2. Search B 3. Install

Follow me – Install Plugins into your WP CMS 1. Move your mouse to “Plugins” on main menu and select “Add New” 2. Upload the Plugins (Method 1) OR Search Plugins by WP (Method 2). 2 a. Upload your plugin (Method 1) 1. Mouse over Plugin and select “Add New” 2 b. Upload your plugin file (Method 1) A 2. Search by WP (Method 2) B 2. Press “Install Now” once you choose the Plugin (Method 2)

Manage Plugins

Edit page/post

Posts & Pages § § § Both used for publishing content. You can add text, images, forms, etc. Posts are blog content listed in a reverse chronological order (newest content on top). You will see posts listed on your blog page. Pages are static “one-off” type content such as your about page, privacy policy, contact page, etc.

Create new Pages / Posts A. “Pages” -> “Add New” B. “Posts” -> “Add New”

Create new Pages / Posts Click “+” to add new block • The first block of every post or page is the title. It is also used to generate the initial permalink • You can click on the add new block button on the top left corner of the editor, below an existing block, or on the left side of a block • You can click on tabs to browse block categories or type in the keyword to quickly search for a block. “Title” block

Follow me – Add New Categories in your WP CMS 1. Move your mouse to “Posts” on main menu 2. Select “Categories” inside the pulldown menu 3. Add New Categories. • Main menu 1. Move on “Posts” 3. Add New Category 2. Select “Categories”

Continuous Add New Categories in your WP CMS 4. Type a new category name here (Any name) 5. Press a “Add New Category” button 6. A new category has been created and now you could edit it into this category. 4. Type a new category name here – we use “News” for example 6. A new category “ News” was created 5. Press a “Add New Category” button

Edit Page / Post § You can move blocks up and down by simple drag and drop or by clicking the up and down buttons next to each block. § Each block can also have its own block settings which would appear in the right column of your edit screen.

Block Editor (Gutenberg) § § Block editor, aka Gutenberg, becomes the default editor since Word. Press 5. 0 Blocks are content elements, you add to the edit screen to create content layouts. Each item you added is a block. Blocks can be paragraph, images, videos, galleries, audio, lists. Additional blocks can be added by WP plugins

Block editor Document history, Undo / Redo Title Block (first block) WP Private Content Plus setting Save Draft/ Preview/ Publish Document / Block properties Add different blocks

Different type of blocks

Media § Media includes images, audio, video, and other files. § Under “Media”, tab, you can upload files, manage media, even simple image editing § Even you can check how many disk space is available

Menu § Navigation menu is a list of a links pointing to important areas of a website. § Navigation menus give your site structure and help visitors find what they’re looking for. § The exact location of your menu will depend on your Word. Press theme. Most themes will have several options, so you can create different menus that can be displayed in different places. § Most Word. Press themes come with a primary menu that appears on the top

Create Menus “Create a new menu” Go to Appearance Select “Menus” 43

Create Menus Select a menu to edit it • In Menus Select the menu items which you want to add in menu Save Menu Select the menu’s display location 44

Create Menus • In Menus Select a menu to delete it The Menu has been successfully deleted Delete Menu 45

Follow me – Create Menus in your WP CMS 1. Move your mouse to “Appearance” on main menu 2. Select “Menus” inside the pulldown menu 3. Click “Create a new menu” • Main menu 1. Go to Appearance 3. Click “Create a new menu” 2. Select “Menus” 46

Continuous Create Menus in your WP CMS 4. Give a new menu name (For example – put a new menu name – menu_2) 5. Click “Create Menu” button • In Menus 5. Click Create Menu 4. Give a new menu name 47

Continuous Create Menus in your WP CMS 6. Select a menu to edit it (For example – menu_2) 7. Select the menu items which you want to add in menu 8 & 9. Select the menu’s display location. Press “Save Menu” button to save your settings. 6. Select a menu • In Menus to edit it 7. Select the menu items which you want to add in menu Add menu items from the column on the left 9. Save Menu 8. Select the menu’s display location 48

Option task – Delete Menus in your WP CMS 1. Select a menu to delete it 2. Click “Delete Menu” link to delete the unnecessary menu. • In Menus 1. Select a menu to delete it The Menu has been successfully deleted 2. Click “Delete Menu” 49

Configure WP settings • Settings menu 2. Click Setting items 1. Select “Settings” in main menu at the left-hand side 50

Configure WP settings • Settings menu 1. Select Setting items 2. Config your options and press “Save Changes” to complete 51

Create SSO-protected pages

Create SSO-protected pages/posts § Use the Plugin “WP Private Content Plus” § For each page / post, under the “Restriction Settings” of “WP Private Content Plus“, in “Redirection URL“ dialog, enter “/wplogin. php? redirect_to=/PERMALINK/“, e. g. : “/wplogin. php? redirect_to=/how-to-create-page-required-portal-login/” § Select the “Visibility” that matches your need

SSO-protected page/post 2 A. All users 2 C. Specified users 2 B. Specified type of users 1. Redirection URL

SSO-protected attachments § § Use the Plugin “WP Private Content Plus” For each page / post, under the “Manage file attachment” of “WP Private Content Plus“, click “Add files” to upload / select attachment. Select both “Visibility” and “Download” to “Members” The generated attachment URL will not be usual “/uploads/XXXXX” URL pattern and required login.

SSO-protected files 2. Visibility: “Members” 1. Add Files 3. Download Permission: “Members”

Support services § Online documentation https: //wpcms-its. hku. hk https: //wordpress. org/support/ § Support email: wpcms@hku. hk

Q&A § § Any Question? Send your feedback from below evaluation form § https: //hku. au 1. qualtrics. com/jfe/form/SV_3 OQLd. Mx 1 tt. Zh 71 P

Thank you
 Collins introduction to poetry
 A verb is a word its an action word
 [email protected]
 Medicare training program
 Emigree
 When a train increases its velocity its momentum
 Windy snowy rainy sunny
 If its square its a sonnet summary
 Its halloween its halloween the moon is full and bright
 Its not easy but its worth it
 Bookkeeping is a mechanical task which involves
 Match each word to its meaning
 Figurative language alliteration examples
 Match the word with its meaning
 A word and its structure
 Introduction match each term with its correct definition
 Para language
 Kulaks definition
 Match each food chain word to its definition
 Match each vocabulary word to the correct meaning.
 Wmpress
 Lost wax pattern
 Thermal press hair
 What is the importance of the penny press? *
 George and tamara doesn't or don't
 Sms extrusion press
 Smart bench press
 Drill press safety poster
 Rundown press conference
 Press tool design
 Ravne press
 Pine forge press
 Maria press
 Press release distribution
 Piramida terbalik press release
 Phk buku ub press
 Oxford university press south africa
 Theories of the press
 8 normative theory of communication
 Normative society
 Ketobe knob utah
 Persoona loomine
 Color20082009
 Press release subhead
 Oxford university press 2019 answers
 Health administration press
 Olive press gethsemane
 Clairmont press
 Function of press
 Freedom of press definition
 ( yuo have hit the spacebar )
 Compaction
 Chapter 19 section 3 freedom of speech and press
 Tips zaalhockey
 Whats a press conference
 Diamond press break
 Ios press journals
 Solemar commercial press
 Progressive dies
 Personologi


