Recent developments in the field of frequency scanning

- Slides: 26

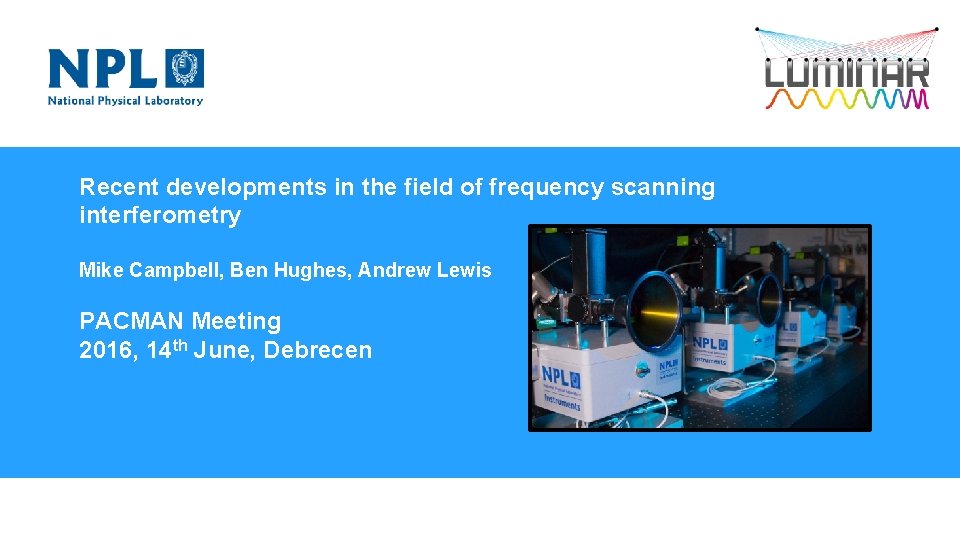
Recent developments in the field of frequency scanning interferometry Mike Campbell, Ben Hughes, Andrew Lewis PACMAN Meeting 2016, 14 th June, Debrecen Welcome to the National Physical Laboratory

Outline § § § Introduction NPL’s Proposed Coordinate Metrology System Multilateration Results Wire Tests Summary & Conclusions

Introduction § Developed a novel optical coordinate measurement system (CMS) § Objective is to make a CMS that is: 1. As accurate as possible 2. Measures multiple points simultaneously 3. Self-calibrating - built-in compensation for systematic errors 4. Has built-in traceability to SI metre 5. Gives on-line uncertainty estimation § Current project focus on proof-of-principle

Proposed solution § Combination of: • Multilateration • calculates coordinates from distances • self calibrating • Frequency scanning interferometry • high accuracy range measurement

Outline § § § Introduction NPL’s Proposed Coordinate Metrology System Multilateration Results Wire Tests Summary & Conclusions

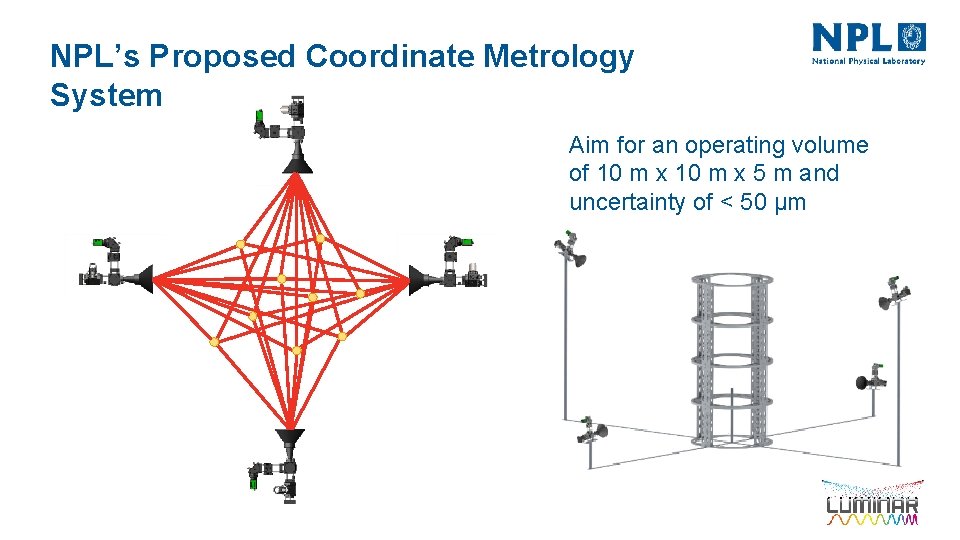
NPL’s Proposed Coordinate Metrology System Aim for an operating volume of 10 m x 5 m and uncertainty of < 50 µm

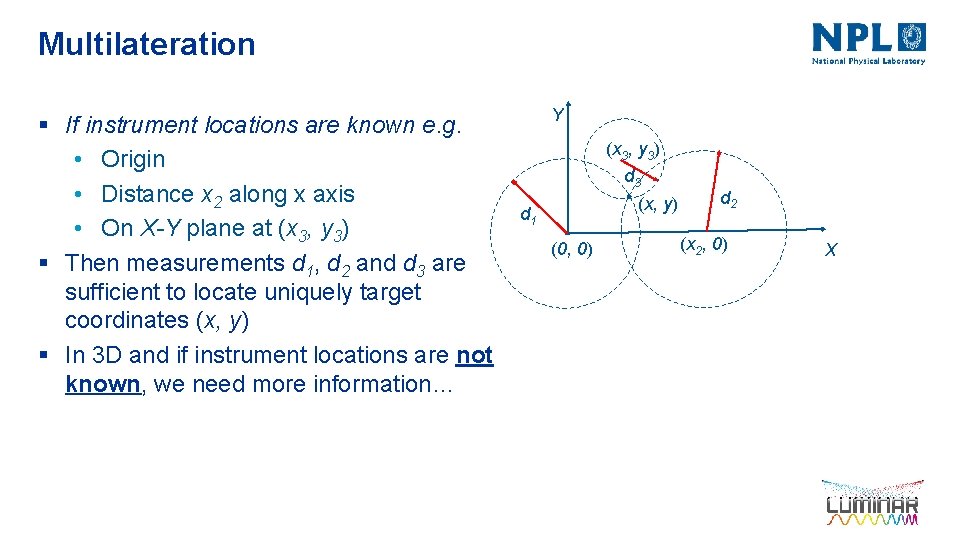
Multilateration § If instrument locations are known e. g. • Origin • Distance x 2 along x axis • On X-Y plane at (x 3, y 3) § Then measurements d 1, d 2 and d 3 are sufficient to locate uniquely target coordinates (x, y) § In 3 D and if instrument locations are not known, we need more information… Y (x 3, y 3) d 3 (x, y) d 1 (0, 0) d 2 (x 2, 0) X

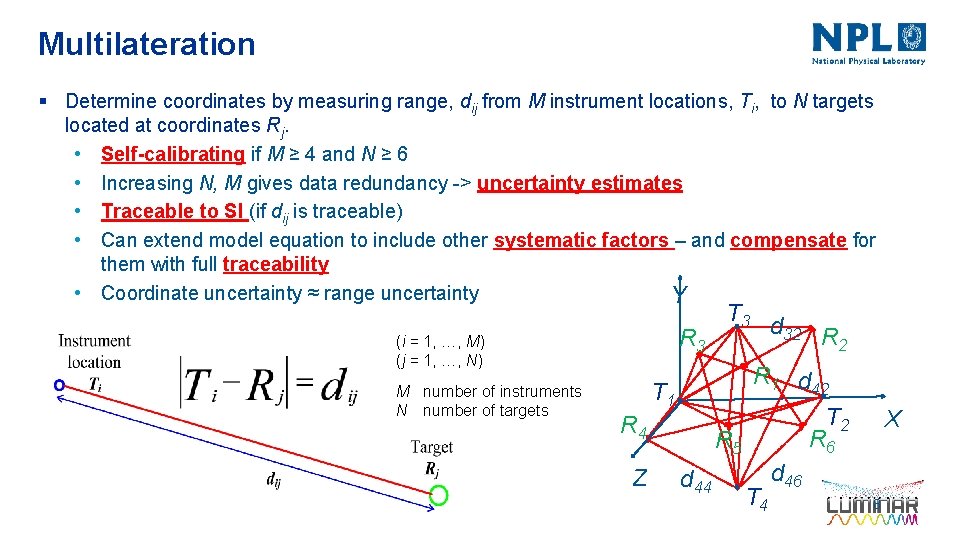
Multilateration § Determine coordinates by measuring range, dij from M instrument locations, Ti, to N targets located at coordinates Rj. • Self-calibrating if M ≥ 4 and N ≥ 6 • Increasing N, M gives data redundancy -> uncertainty estimates • Traceable to SI (if dij is traceable) • Can extend model equation to include other systematic factors – and compensate for them with full traceability • Coordinate uncertainty ≈ range uncertainty Y R 3 (i = 1, …, M) (j = 1, …, N) M number of instruments N number of targets T 3 R 1 d 42 T 1 R 4 Z d 32 R 2 T 2 R 6 R 5 d 44 T 4 X d 46 8

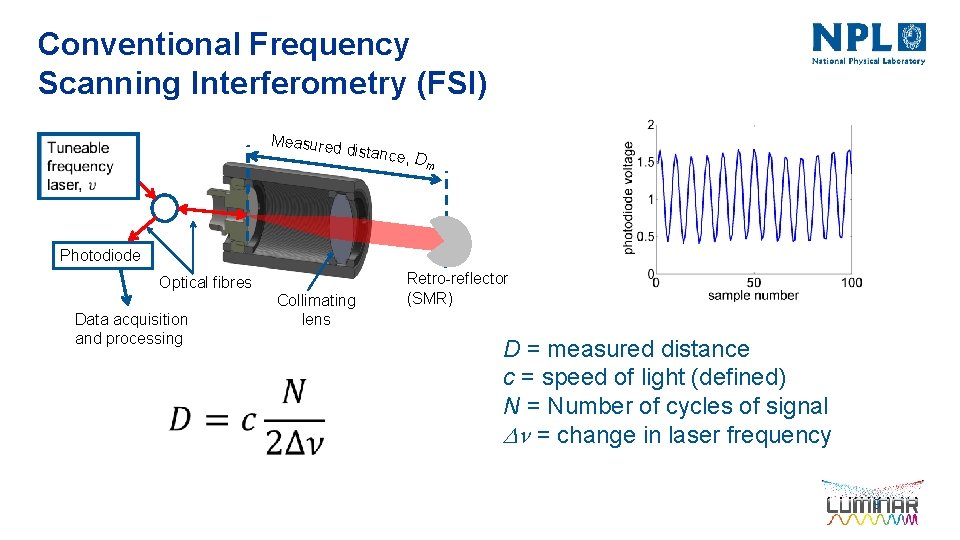
Conventional Frequency Scanning Interferometry (FSI) Measured distance , Dm Photodiode Optical fibres Data acquisition and processing Collimating lens Retro-reflector (SMR) D = measured distance c = speed of light (defined) N = Number of cycles of signal Dn = change in laser frequency 9

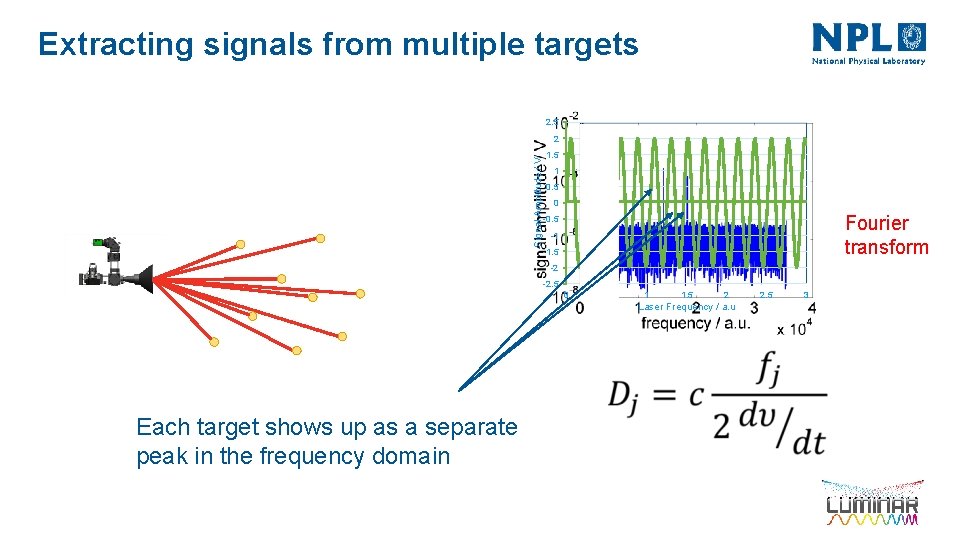
Extracting signals from multiple targets 2. 5 6 Signal Amplitude / V 2 4 1. 5 1 2 0. 5 00 Fourier transform -0. 5 -2 -1 -1. 5 -4 -2 -6 -2. 5 00 0. 5 Each target shows up as a separate peak in the frequency domain 11 1. 5 2 Laser Frequency / a. u 2. 5 33

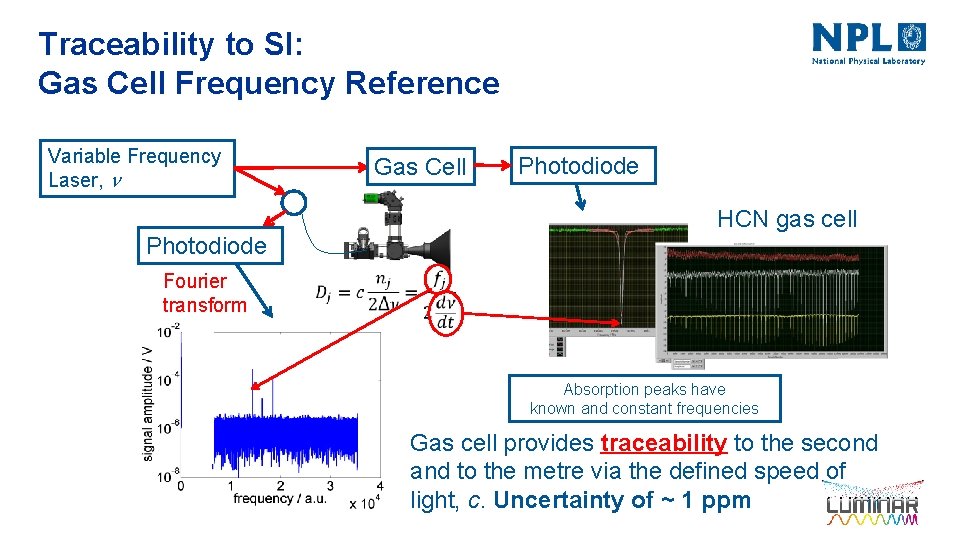
Traceability to SI: Gas Cell Frequency Reference Variable Frequency Laser, n Gas Cell Photodiode HCN gas cell Photodiode Fourier transform Absorption peaks have known and constant frequencies Gas cell provides traceability to the second and to the metre via the defined speed of light, c. Uncertainty of ~ 1 ppm 11

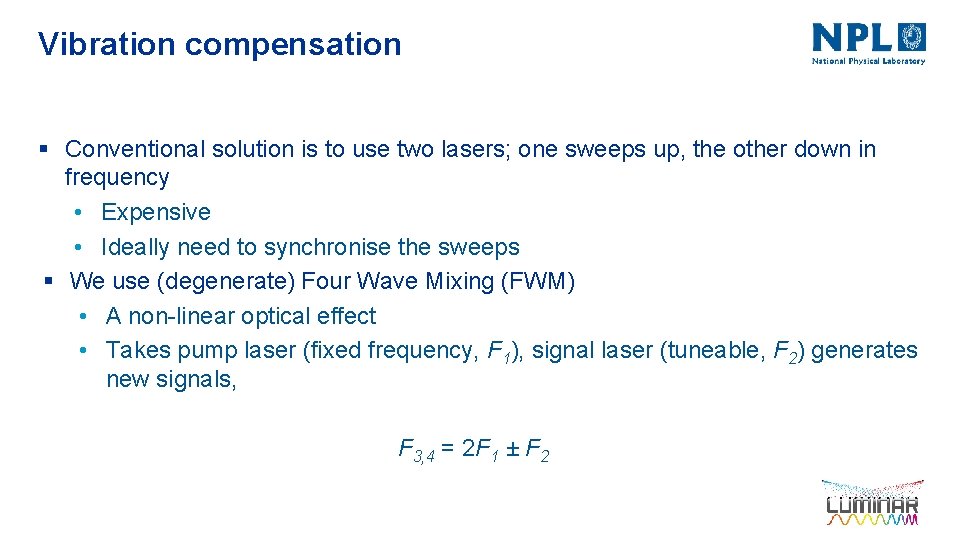
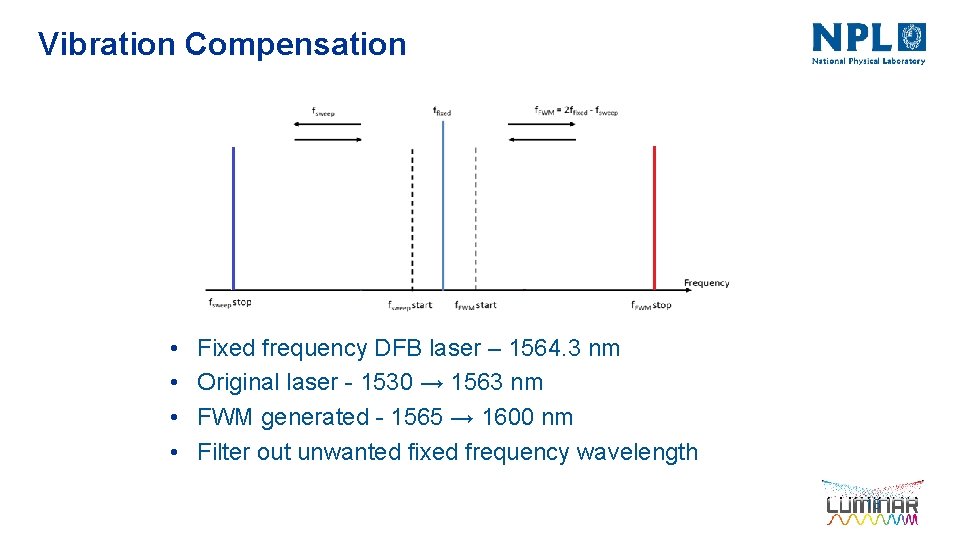
Vibration compensation § Conventional solution is to use two lasers; one sweeps up, the other down in frequency • Expensive • Ideally need to synchronise the sweeps § We use (degenerate) Four Wave Mixing (FWM) • A non-linear optical effect • Takes pump laser (fixed frequency, F 1), signal laser (tuneable, F 2) generates new signals, F 3, 4 = 2 F 1 ± F 2

Vibration Compensation • • Fixed frequency DFB laser – 1564. 3 nm Original laser - 1530 → 1563 nm FWM generated - 1565 → 1600 nm Filter out unwanted fixed frequency wavelength 13

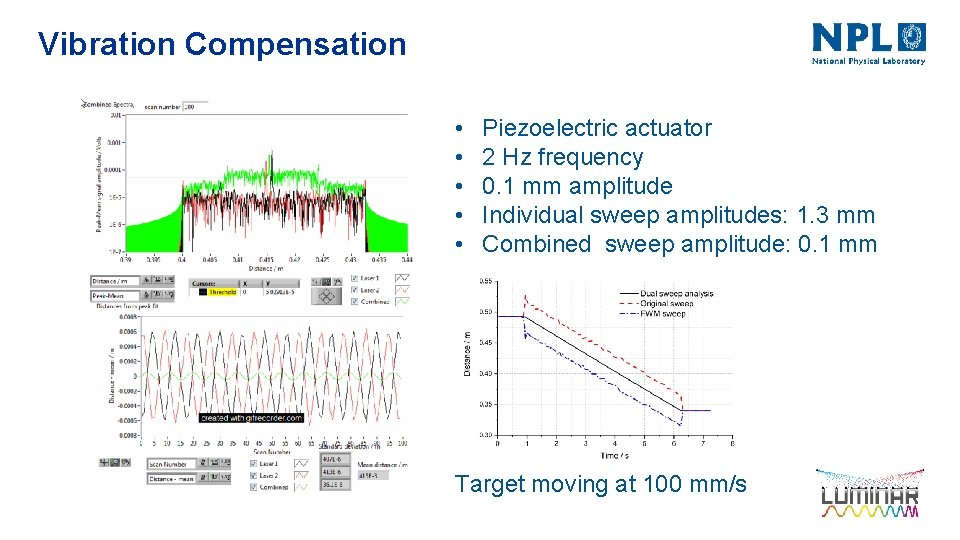
Vibration Compensation • • • Piezoelectric actuator 2 Hz frequency 0. 1 mm amplitude Individual sweep amplitudes: 1. 3 mm Combined sweep amplitude: 0. 1 mm Target moving at 100 mm/s

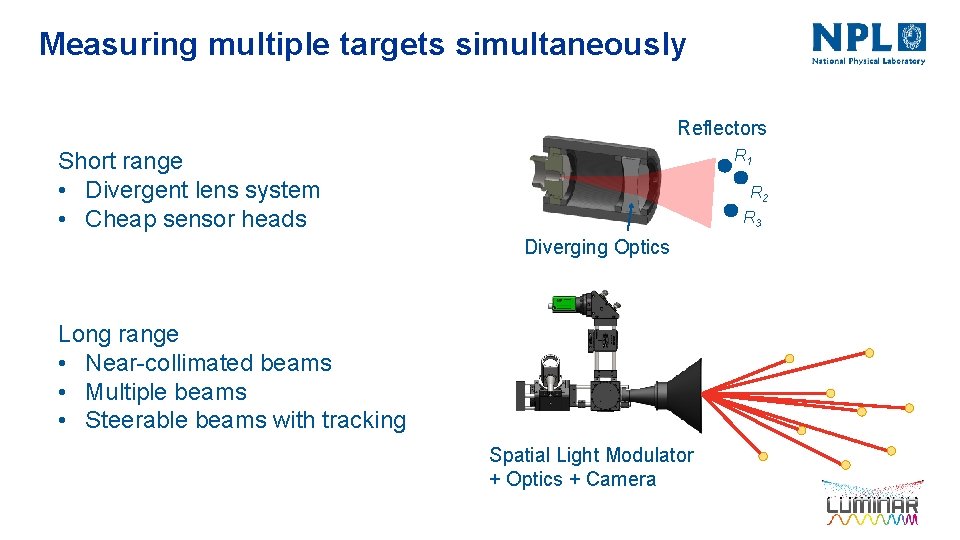
Measuring multiple targets simultaneously Reflectors R 1 Short range • Divergent lens system • Cheap sensor heads R 2 R 3 Diverging Optics Long range • Near-collimated beams • Multiple beams • Steerable beams with tracking Spatial Light Modulator + Optics + Camera

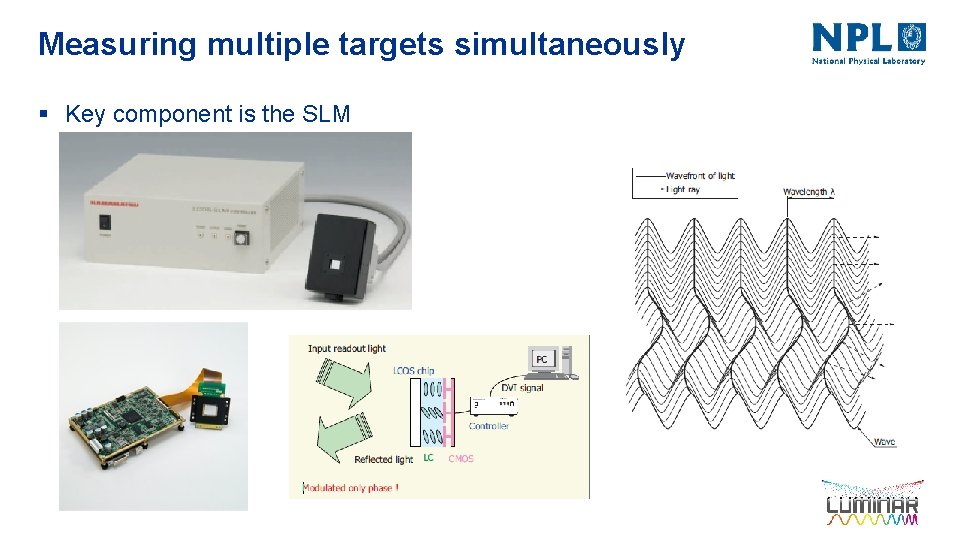
Measuring multiple targets simultaneously § Key component is the SLM

Outline § § § Introduction NPL’s Proposed Coordinate Metrology System Multilateration Results Wire Tests Summary & Conclusions

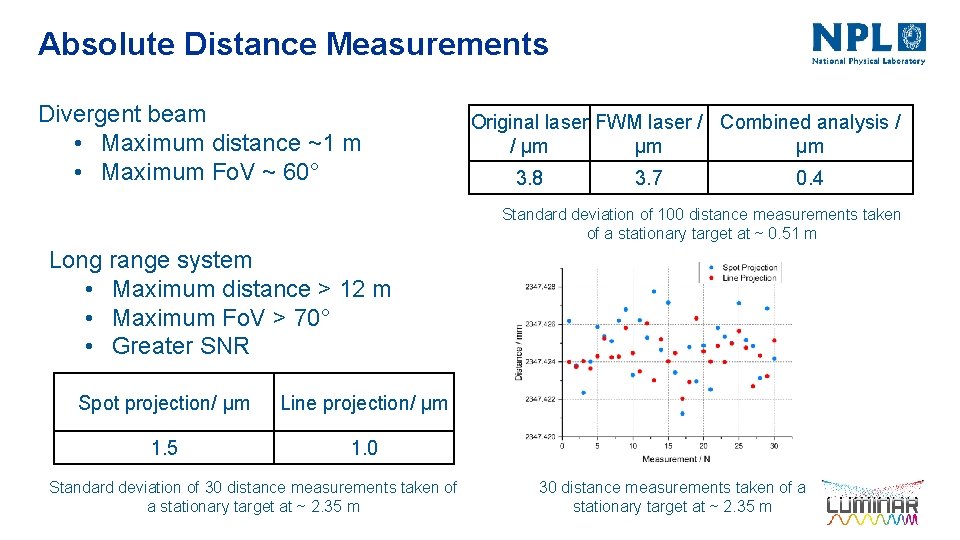
Absolute Distance Measurements Divergent beam • Maximum distance ~1 m • Maximum Fo. V ~ 60° Original laser FWM laser / Combined analysis / / µm µm µm 3. 8 3. 7 0. 4 Standard deviation of 100 distance measurements taken of a stationary target at ~ 0. 51 m Long range system • Maximum distance > 12 m • Maximum Fo. V > 70° • Greater SNR Spot projection/ µm Line projection/ µm 1. 5 1. 0 Standard deviation of 30 distance measurements taken of a stationary target at ~ 2. 35 m

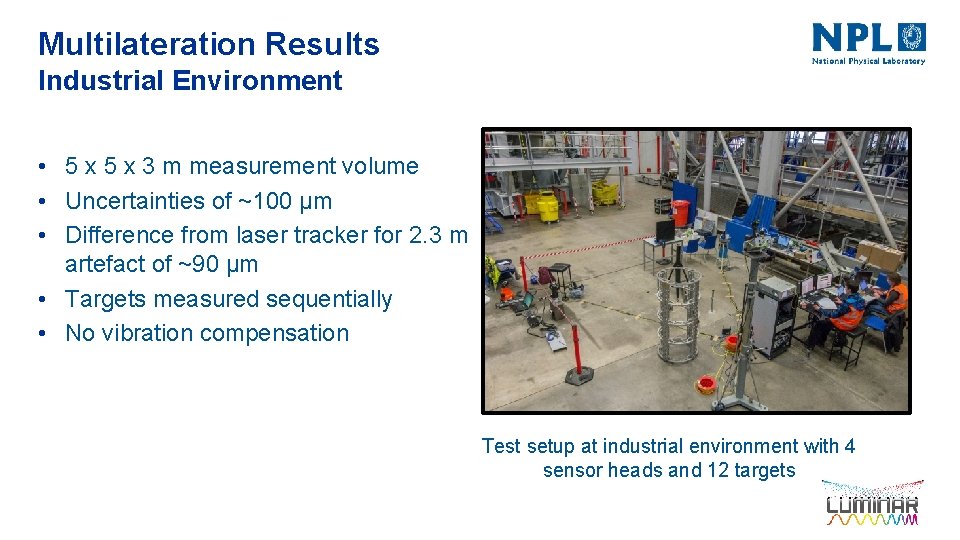
Multilateration Results Industrial Environment • 5 x 3 m measurement volume • Uncertainties of ~100 µm • Difference from laser tracker for 2. 3 m artefact of ~90 µm • Targets measured sequentially • No vibration compensation Test setup at industrial environment with 4 sensor heads and 12 targets

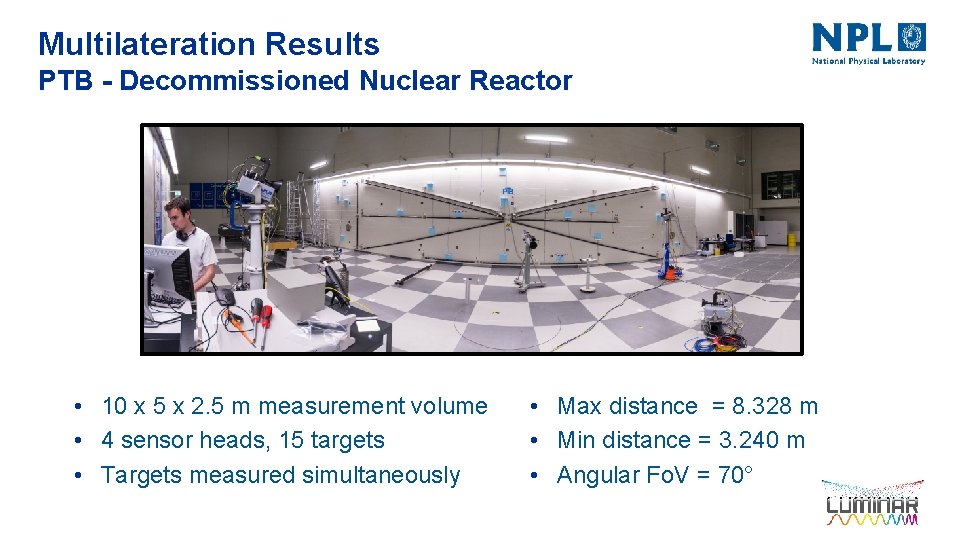
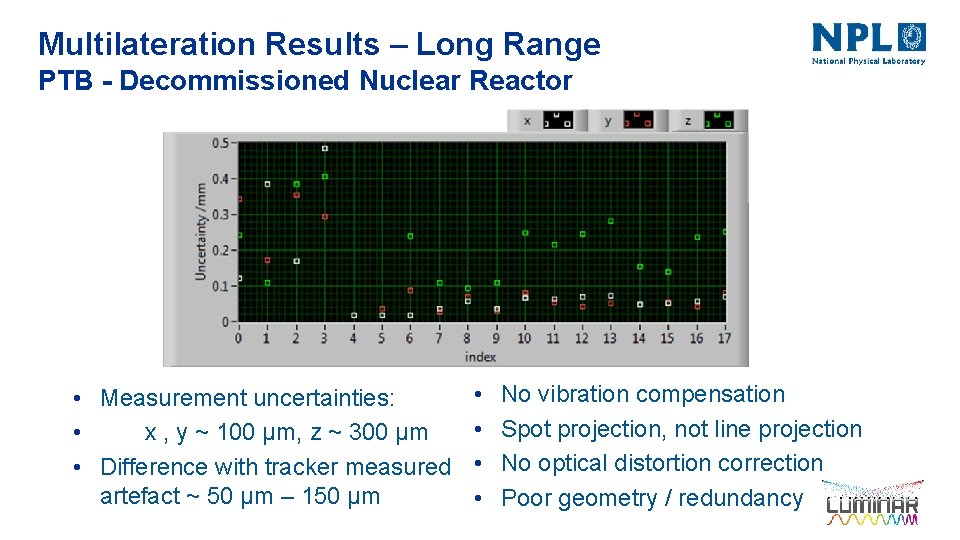
Multilateration Results PTB - Decommissioned Nuclear Reactor • 10 x 5 x 2. 5 m measurement volume • 4 sensor heads, 15 targets • Targets measured simultaneously • Max distance = 8. 328 m • Min distance = 3. 240 m • Angular Fo. V = 70°

Multilateration Results – Long Range PTB - Decommissioned Nuclear Reactor • Measurement uncertainties: • x , y ~ 100 µm, z ~ 300 µm • Difference with tracker measured artefact ~ 50 µm – 150 µm • • No vibration compensation Spot projection, not line projection No optical distortion correction Poor geometry / redundancy

Outline § § § Introduction NPL’s Proposed Coordinate Metrology System Multilateration Results Wire Tests Summary & Conclusions

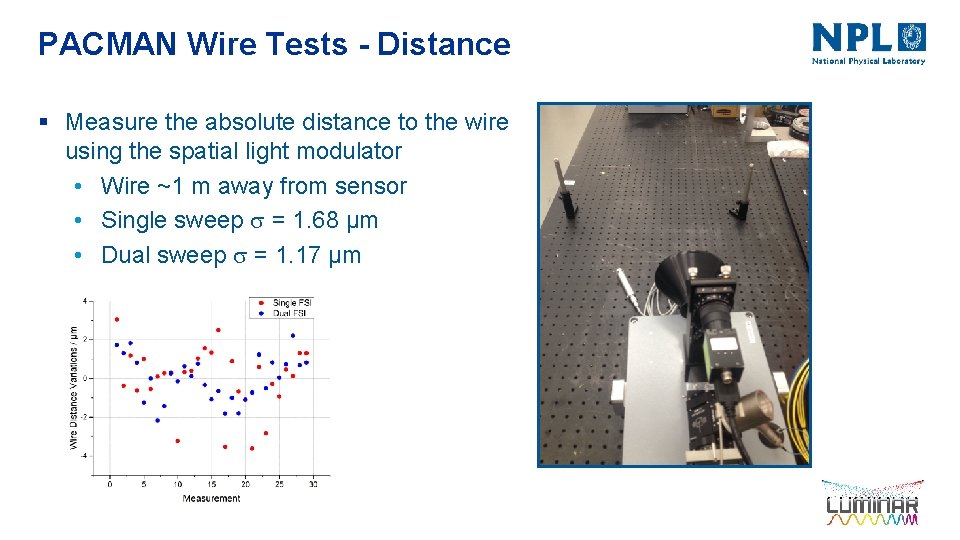
PACMAN Wire Tests - Distance § Measure the absolute distance to the wire using the spatial light modulator • Wire ~1 m away from sensor • Single sweep = 1. 68 µm • Dual sweep = 1. 17 µm

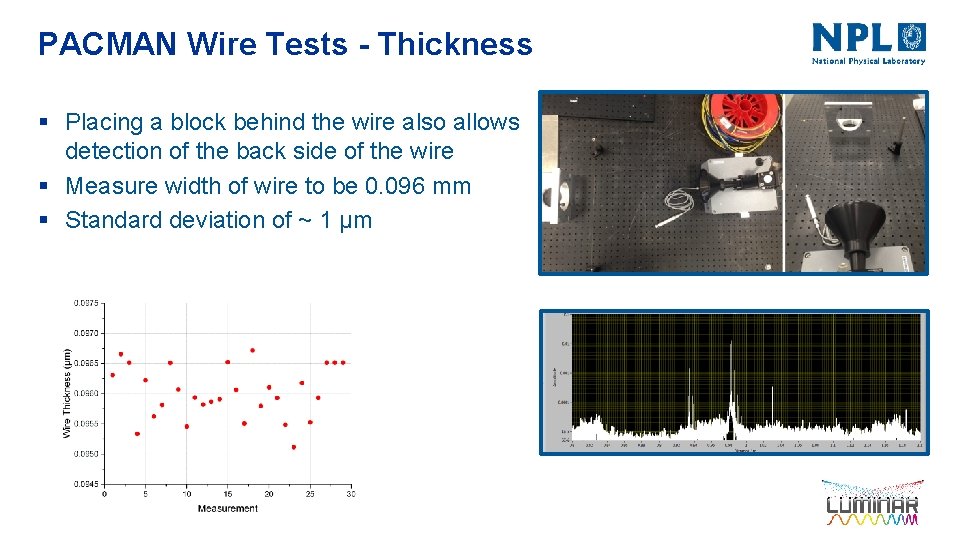
PACMAN Wire Tests - Thickness § Placing a block behind the wire also allows detection of the back side of the wire § Measure width of wire to be 0. 096 mm § Standard deviation of ~ 1 µm

Summary and Conclusion § Prototype proof-of-concept system constructed § Two types of sensor developed • Short range (simple diverging lens) • Long range ( SLM + optics + camera) § Repeatability < 0. 5 µm for short range system § Multi-beam steering over wide angular range using SLM § FWM for synchronised dual laser sweep generation – vibration/motion compensation § Simultaneous FSI to multiple targets over large volume from multiple sensors demonstrated § Traceability through direct, in-situ calibration against a gas absorption cell with an uncertainty of 1 ppm. § Currently achieving uncertainties ~ 100 µm (but lots of improvements coming) § 3 patents pending

Thank you 26