RC 1043 SARVAJANIK COLLEGE OF ENGINEERING AND TECHNOLOGY
- Slides: 33

RC 1043 SARVAJANIK COLLEGE OF ENGINEERING AND TECHNOLOGY Surat DEPARTMENT OF MECHANICAL ENGINEERING Group No: 1043_11 Team Leader: Amit U. Mehta Team Member: Satish Dokiparti 29 -Jan-22

Orthographic Projections 29 -Jan-22

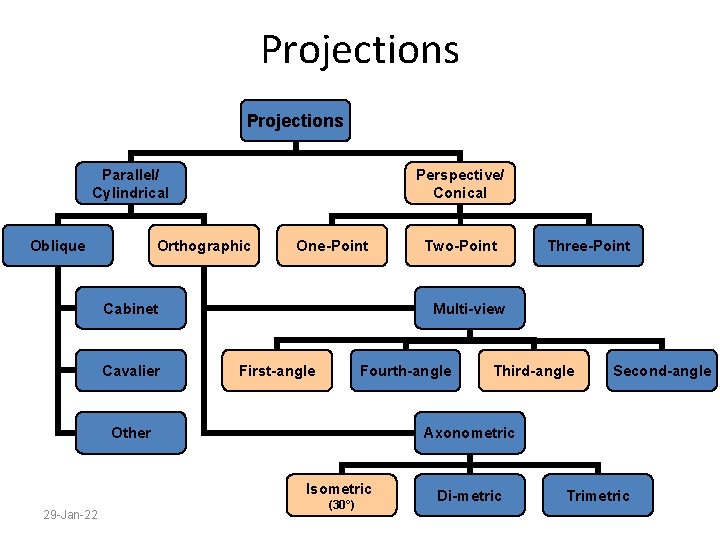
Projections Parallel/ Cylindrical Oblique Perspective/ Conical Orthographic One-Point Cabinet Cavalier Three-Point Multi-view First-angle Fourth-angle Other Third-angle Second-angle Axonometric Isometric 29 -Jan-22 Two-Point (30°) Di-metric Trimetric

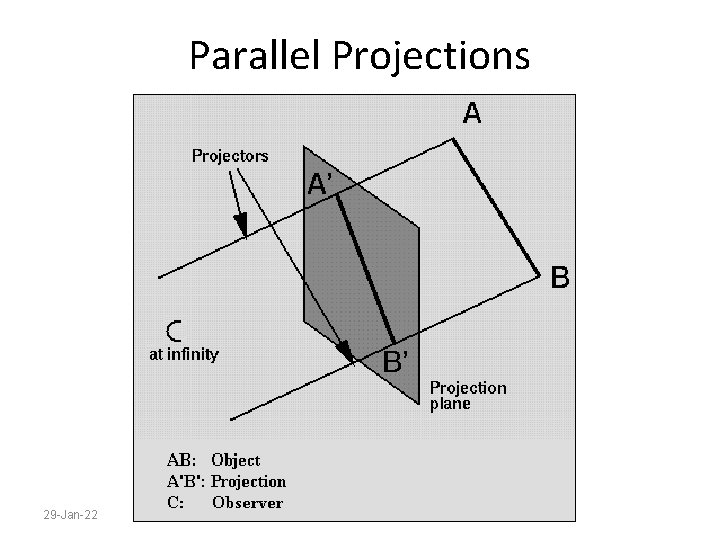
Parallel Projections 29 -Jan-22

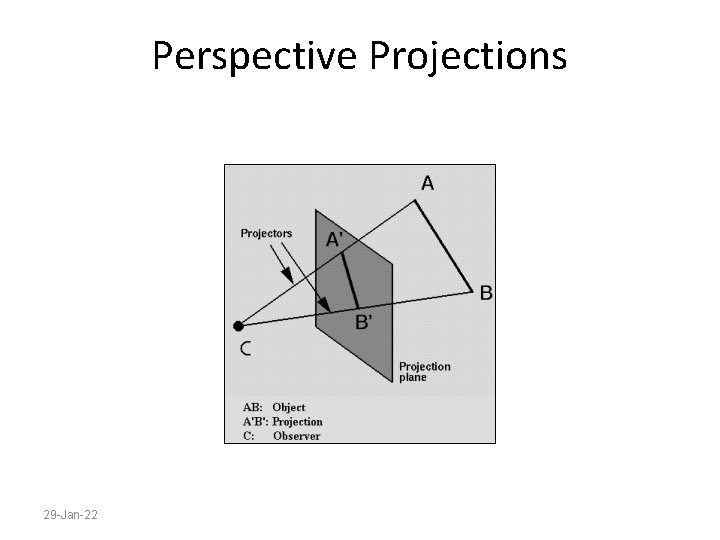
Perspective Projections 29 -Jan-22

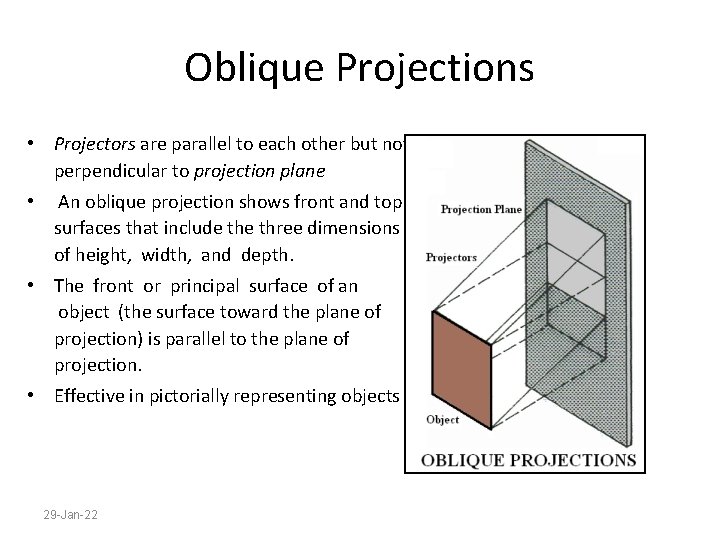
Oblique Projections • Projectors are parallel to each other but not perpendicular to projection plane • An oblique projection shows front and top surfaces that include three dimensions of height, width, and depth. • The front or principal surface of an object (the surface toward the plane of projection) is parallel to the plane of projection. • Effective in pictorially representing objects 29 -Jan-22

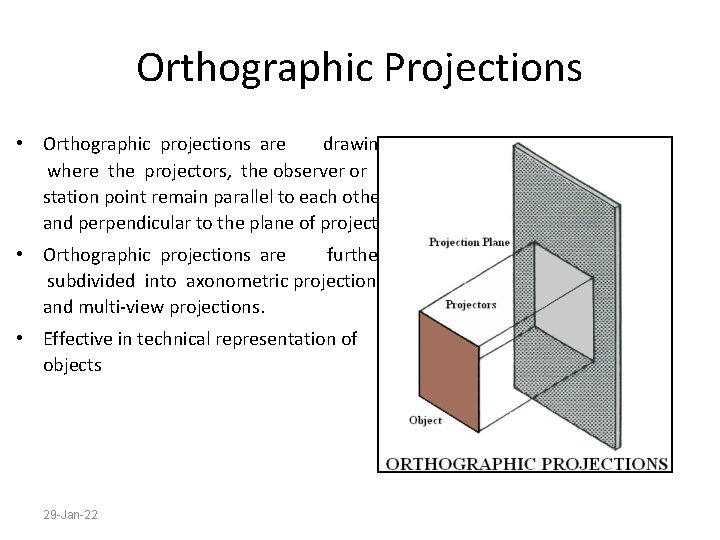
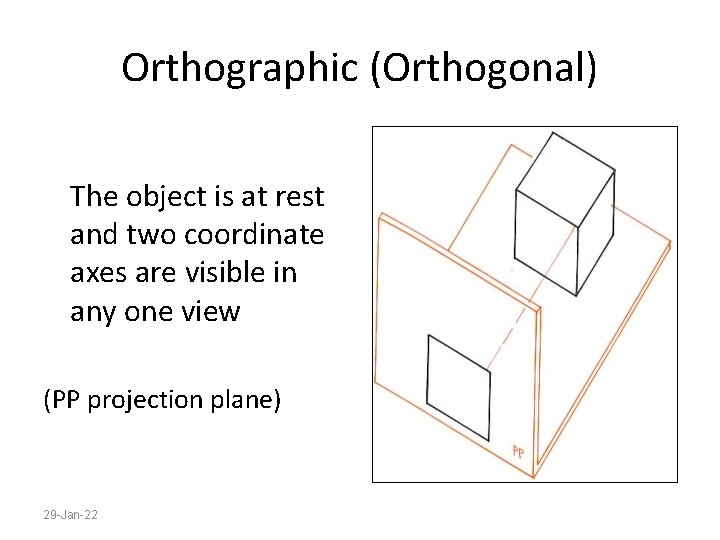
Orthographic Projections • Orthographic projections are drawings where the projectors, the observer or station point remain parallel to each other and perpendicular to the plane of projection. • Orthographic projections are further subdivided into axonometric projections and multi-view projections. • Effective in technical representation of objects 29 -Jan-22

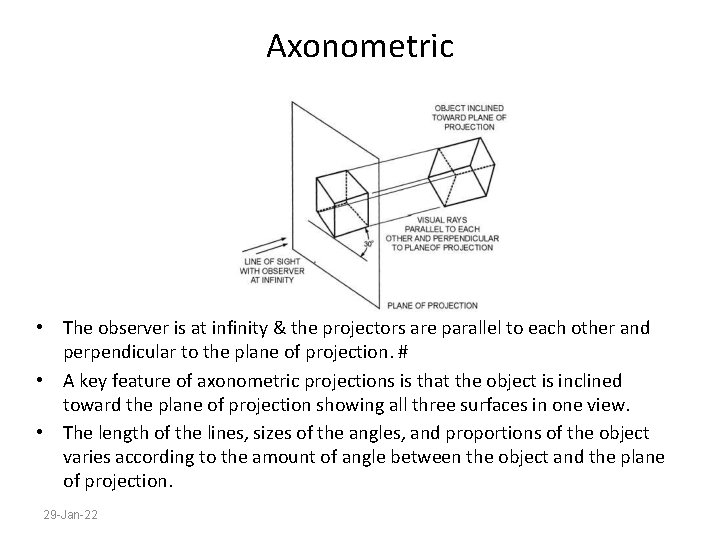
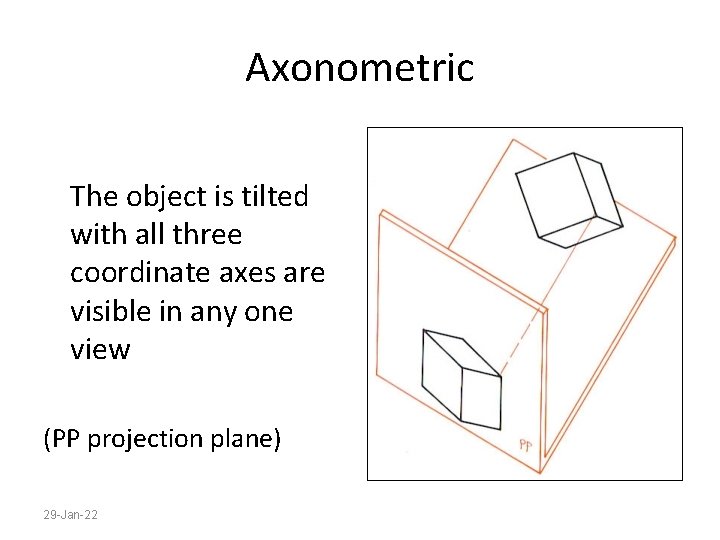
Axonometric • The observer is at infinity & the projectors are parallel to each other and perpendicular to the plane of projection. # • A key feature of axonometric projections is that the object is inclined toward the plane of projection showing all three surfaces in one view. • The length of the lines, sizes of the angles, and proportions of the object varies according to the amount of angle between the object and the plane of projection. 29 -Jan-22

Axonometric The object is tilted with all three coordinate axes are visible in any one view (PP projection plane) 29 -Jan-22

Orthographic (Orthogonal) The object is at rest and two coordinate axes are visible in any one view (PP projection plane) 29 -Jan-22

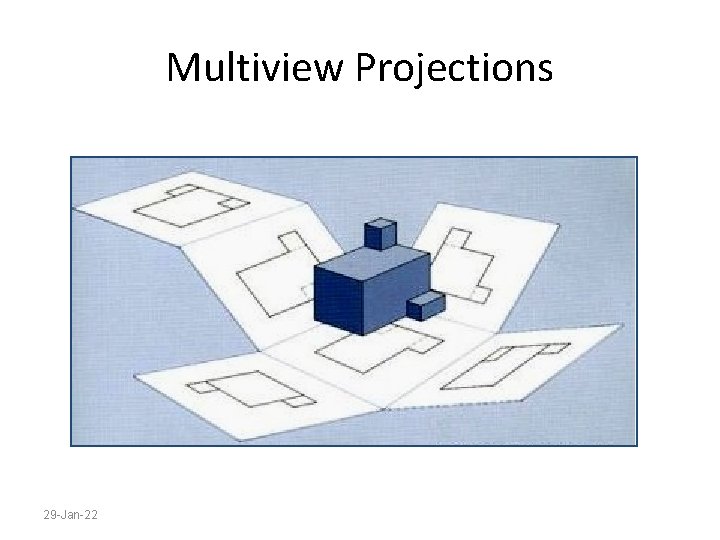
Multiview Projections 29 -Jan-22

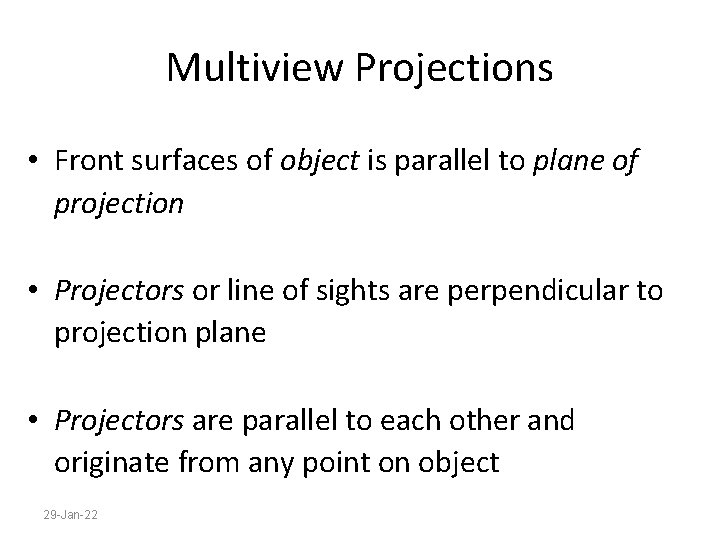
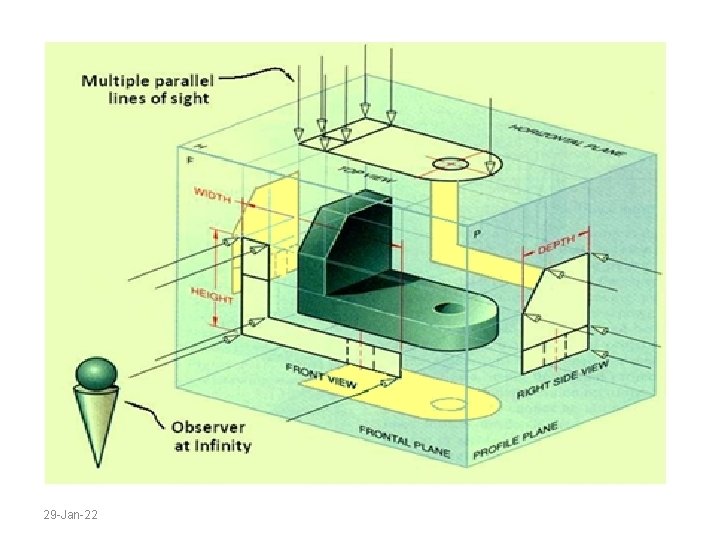
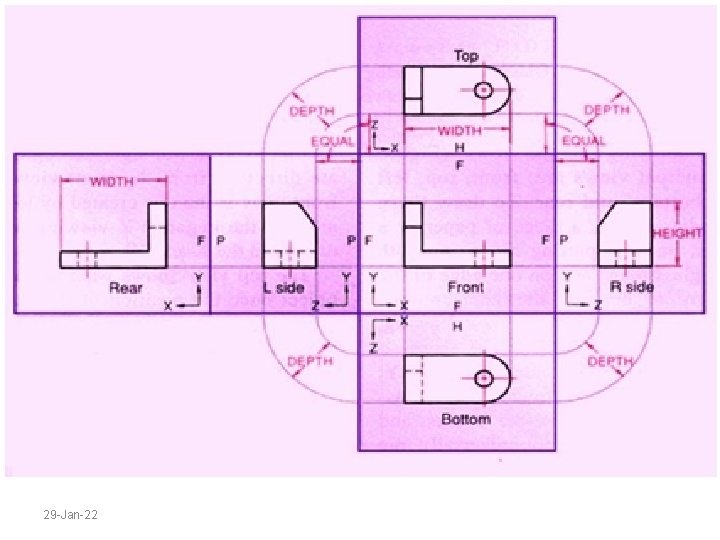
Multiview Projections • Front surfaces of object is parallel to plane of projection • Projectors or line of sights are perpendicular to projection plane • Projectors are parallel to each other and originate from any point on object 29 -Jan-22

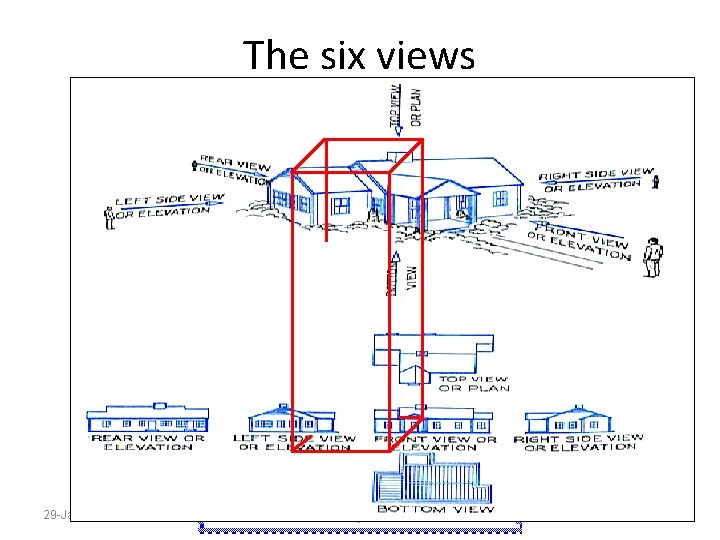
The six views 29 -Jan-22

29 -Jan-22

29 -Jan-22

29 -Jan-22

29 -Jan-22

29 -Jan-22

29 -Jan-22

29 -Jan-22

29 -Jan-22

29 -Jan-22

29 -Jan-22

29 -Jan-22

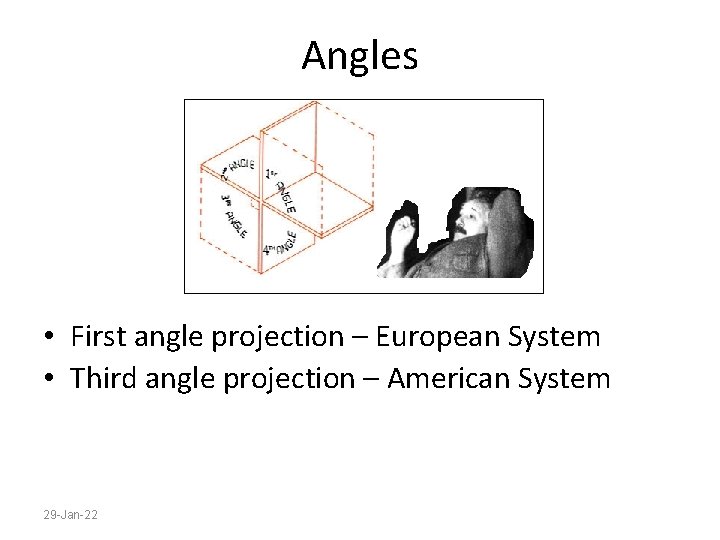
Angles • First angle projection – European System • Third angle projection – American System 29 -Jan-22

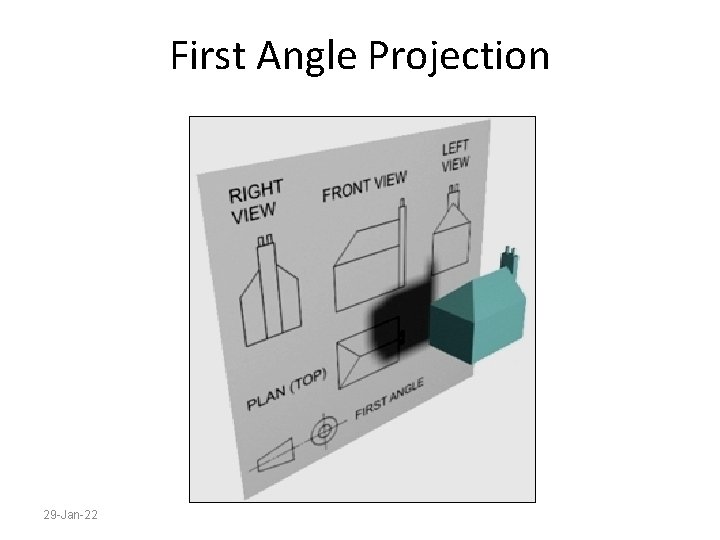
First Angle Projection 29 -Jan-22

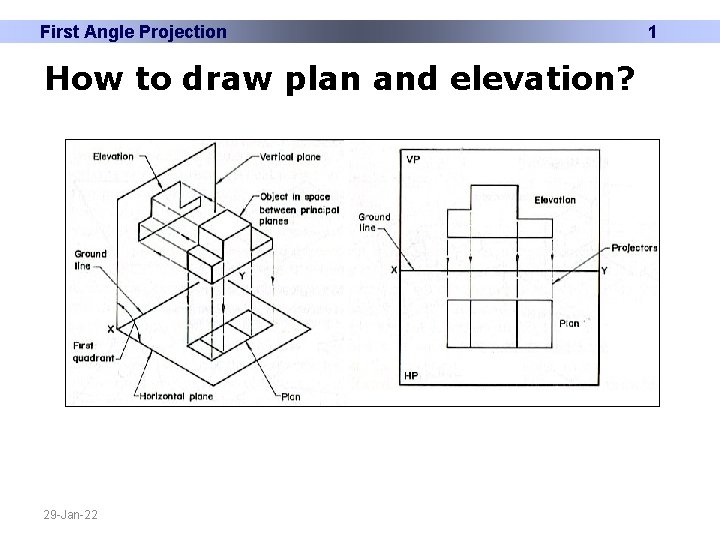
First Angle Projection How to draw plan and elevation? 29 -Jan-22 1

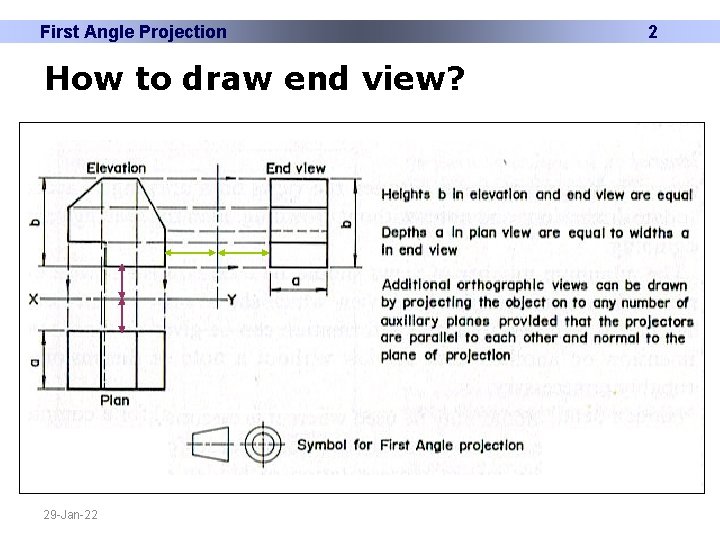
First Angle Projection How to draw end view? 29 -Jan-22 2

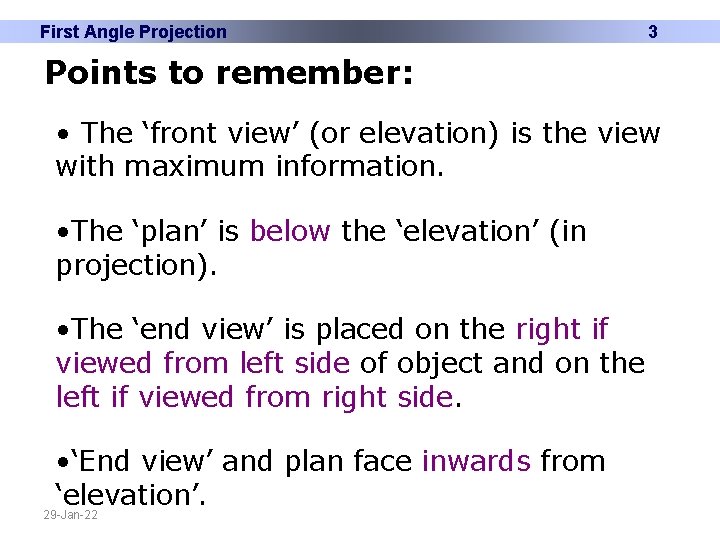
First Angle Projection 3 Points to remember: • The ‘front view’ (or elevation) is the view with maximum information. • The ‘plan’ is below the ‘elevation’ (in projection). • The ‘end view’ is placed on the right if viewed from left side of object and on the left if viewed from right side. • ‘End view’ and plan face inwards from ‘elevation’. 29 -Jan-22

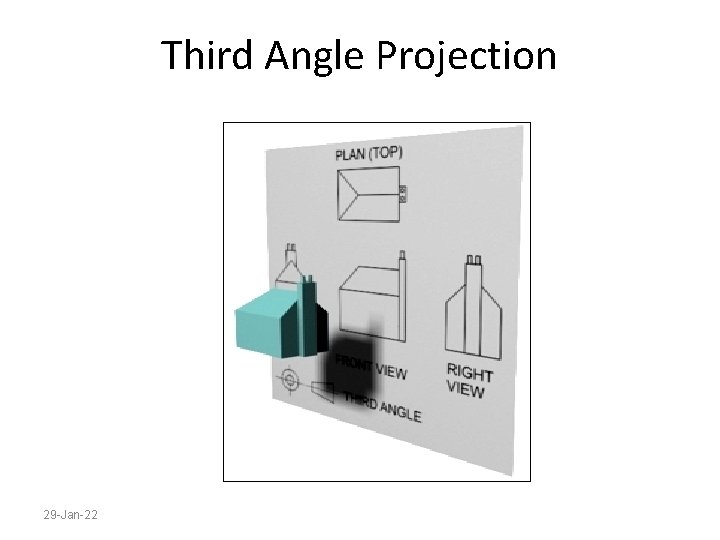
Third Angle Projection 29 -Jan-22

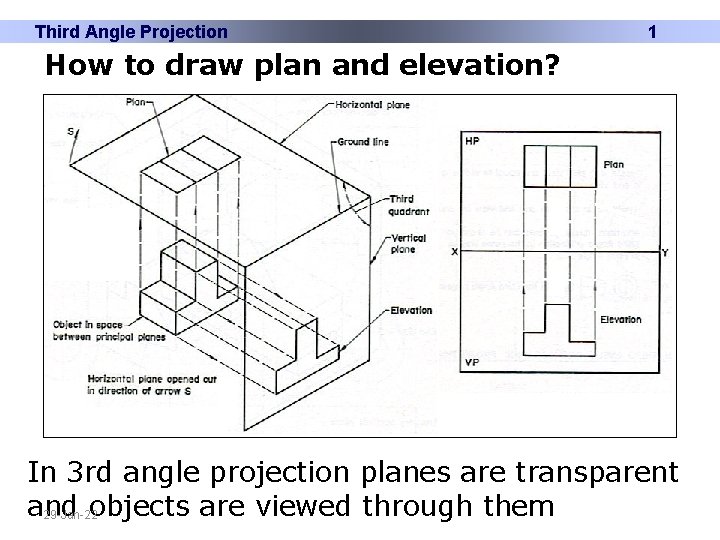
Third Angle Projection 1 How to draw plan and elevation? In 3 rd angle projection planes are transparent and objects are viewed through them 29 -Jan-22

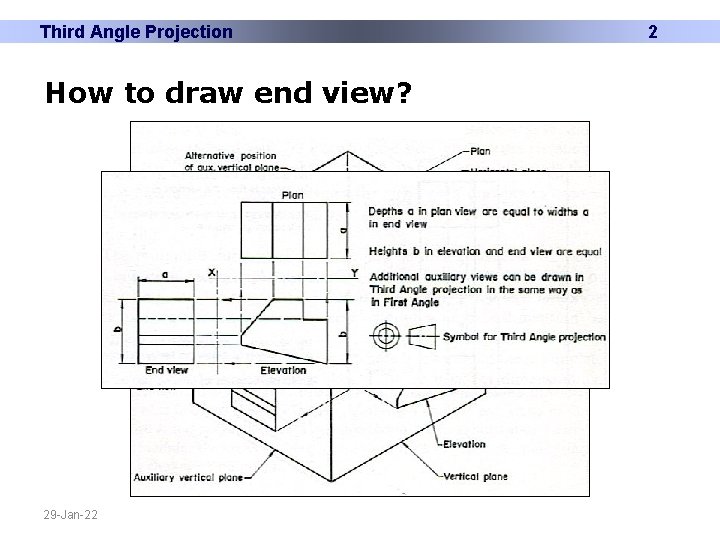
Third Angle Projection How to draw end view? 29 -Jan-22 2

Third Angle Projection 3 Points to remember: • The ‘front view’ (or elevation) is the view with maximum information. • The ‘plan’ is above the ‘elevation’ (in projection). • The ‘end view’ is placed on the right if viewed from right side of object and on the left if viewed from left side. • ‘End view’ and plan face outwards from ‘elevation’. 29 -Jan-22