Accuracy and Precision of Measurement Introduction to Engineering
- Slides: 25

Accuracy and Precision of Measurement Introduction to Engineering Design © 2012 Project Lead The Way, Inc.

Recording Measurements • A measurement always includes a value • A measurement always includes units • A measurement always involves uncertainty – A measurement is the best estimate of a quantity – A measurement is useful if we can quantify the uncertainty

Sources of Error in Measurement • Potential errors create uncertainty • Two sources of error in measurement – Random Error • Errors without a predictable pattern • E. g. , reading scale where actual value is between marks and value is estimated • Can be determined by repeated measurements – Systematic Error • Errors that consistently cause measurement value to be too large or too small • E. g. , reading from the end of a meter stick instead of from the zero mark

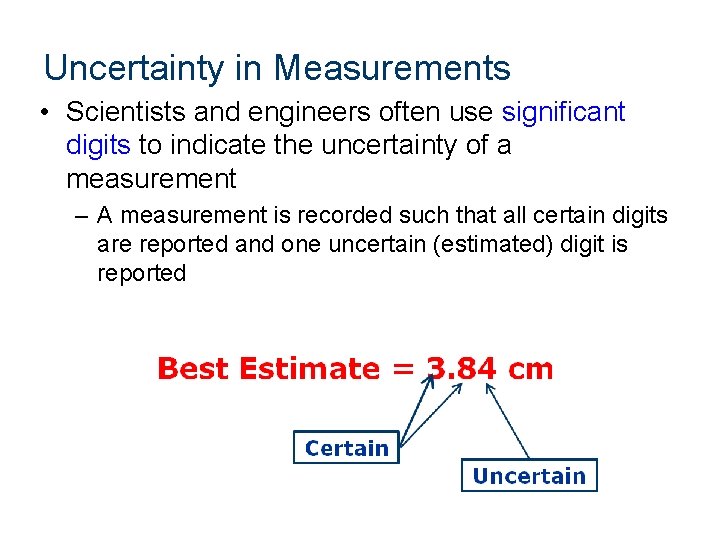
Uncertainty in Measurements • Scientists and engineers often use significant digits to indicate the uncertainty of a measurement – A measurement is recorded such that all certain digits are reported and one uncertain (estimated) digit is reported

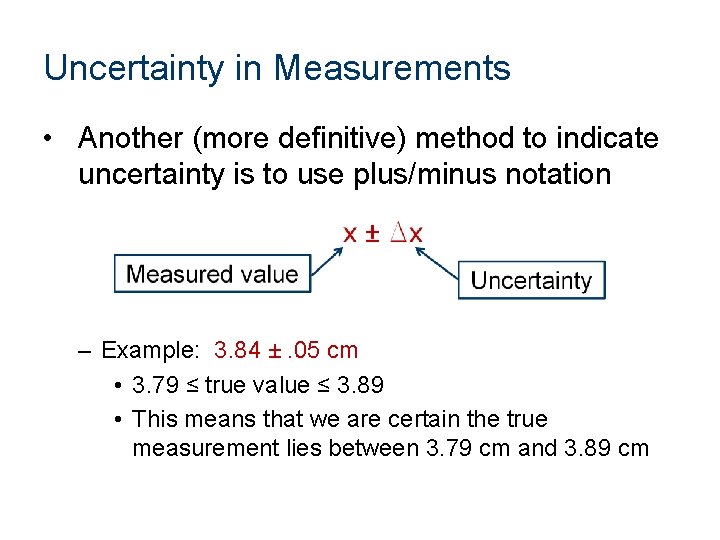
Uncertainty in Measurements • Another (more definitive) method to indicate uncertainty is to use plus/minus notation – Example: 3. 84 ±. 05 cm • 3. 79 ≤ true value ≤ 3. 89 • This means that we are certain the true measurement lies between 3. 79 cm and 3. 89 cm

Uncertainty in Measurement • In some cases the uncertainty from a digital or analog instrument is greater than indicated by the scale or reading display – Resolution of the instrument is better than the accuracy • Example: Speedometers How can we determine, with confidence, how close a measurement is to the true value?

Uncertainty in Measurement • Uncertainty of single measurement − How close is this measurement to the true value? − Uncertainty dependent on instrument and scale • Uncertainty in repeated measurements − Random error − Best estimate is the mean of the values

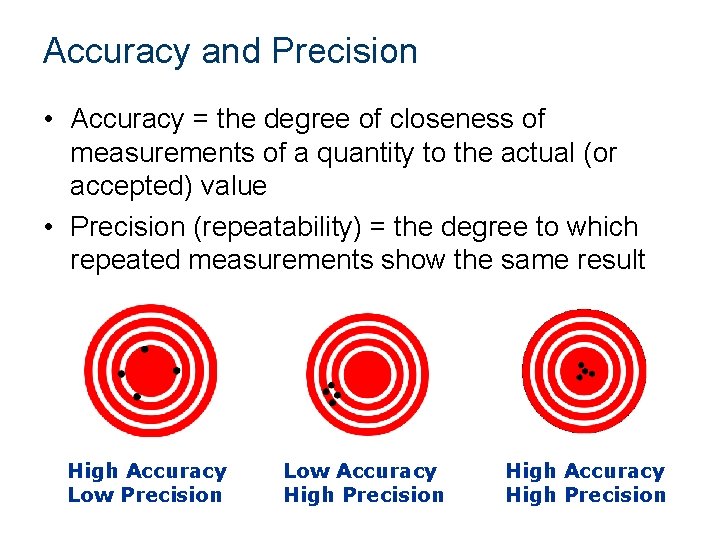
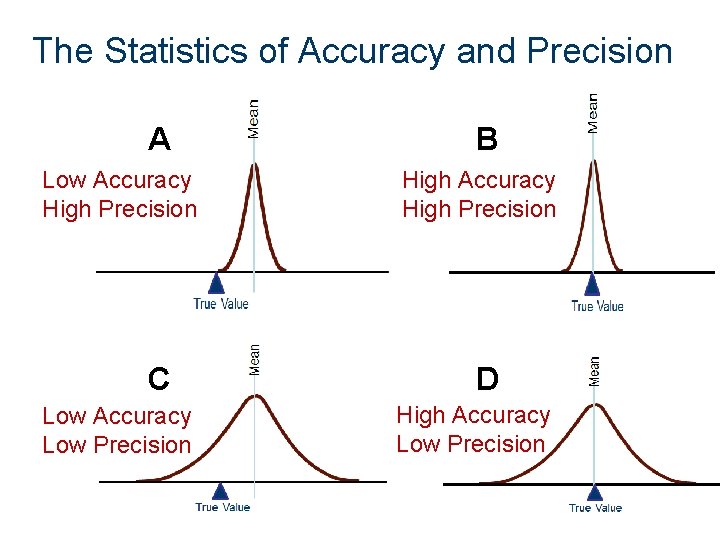
Accuracy and Precision • Accuracy = the degree of closeness of measurements of a quantity to the actual (or accepted) value • Precision (repeatability) = the degree to which repeated measurements show the same result High Accuracy Low Precision Low Accuracy High Precision High Accuracy High Precision

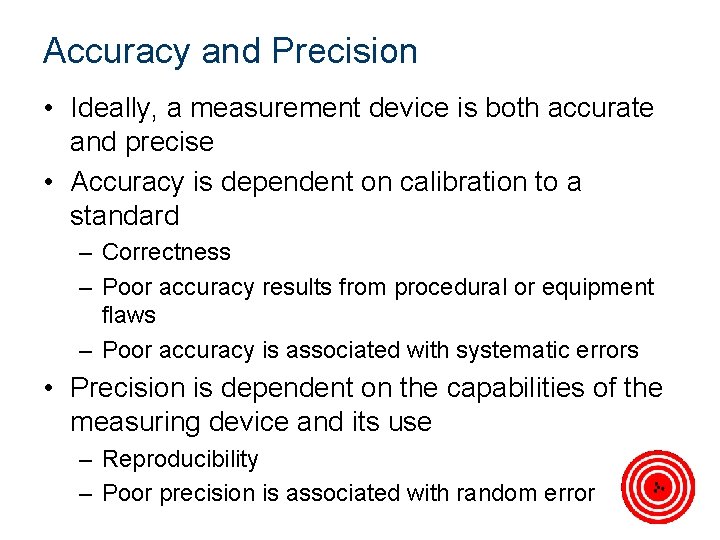
Accuracy and Precision • Ideally, a measurement device is both accurate and precise • Accuracy is dependent on calibration to a standard – Correctness – Poor accuracy results from procedural or equipment flaws – Poor accuracy is associated with systematic errors • Precision is dependent on the capabilities of the measuring device and its use – Reproducibility – Poor precision is associated with random error

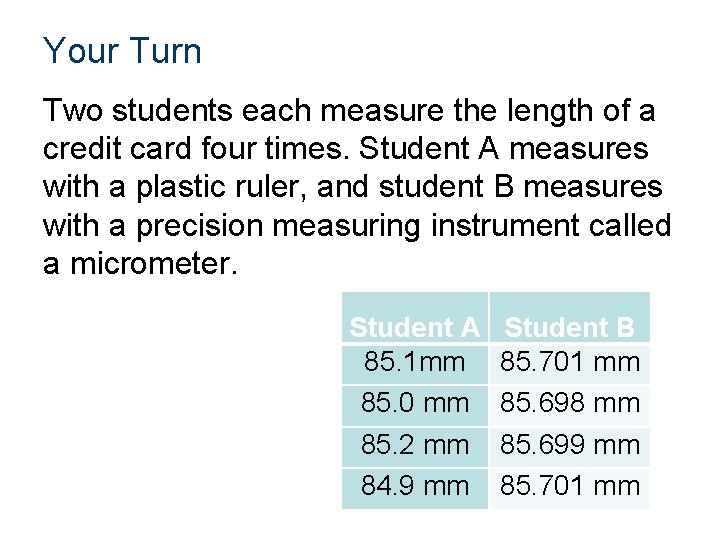
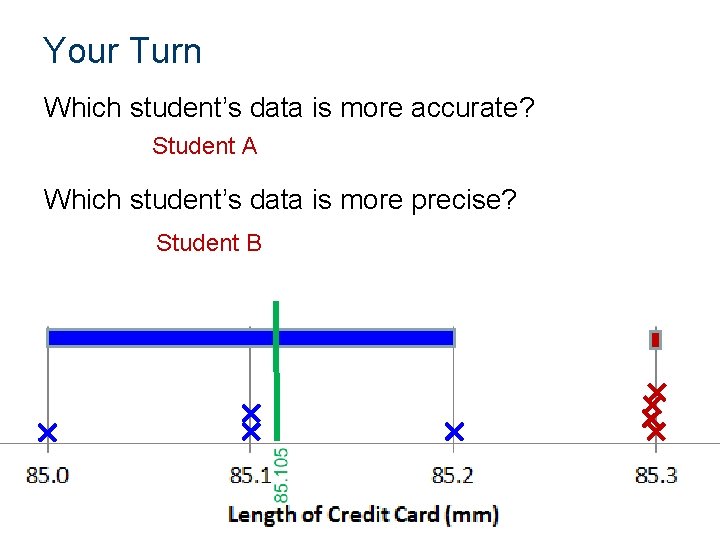
Your Turn Two students each measure the length of a credit card four times. Student A measures with a plastic ruler, and student B measures with a precision measuring instrument called a micrometer. Student A 85. 1 mm 85. 0 mm 85. 2 mm 84. 9 mm Student B 85. 701 mm 85. 698 mm 85. 699 mm 85. 701 mm

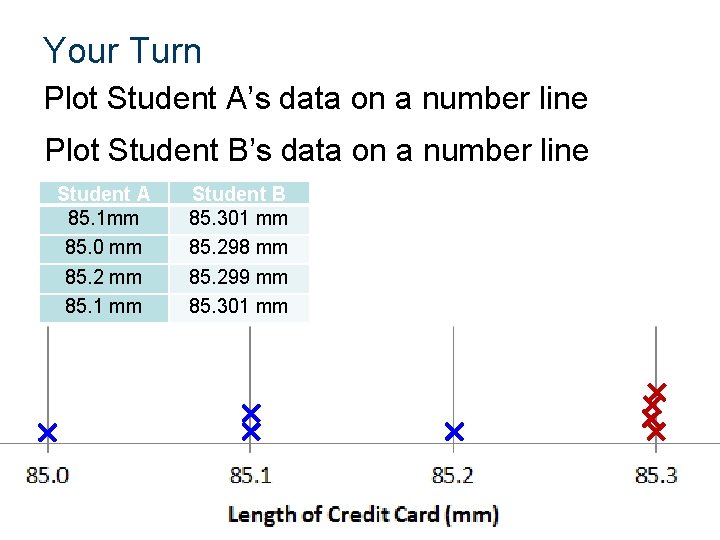
Your Turn Plot Student A’s data on a number line Plot Student B’s data on a number line Student A 85. 1 mm 85. 0 mm 85. 2 mm 85. 1 mm Student B 85. 301 mm 85. 298 mm 85. 299 mm 85. 301 mm

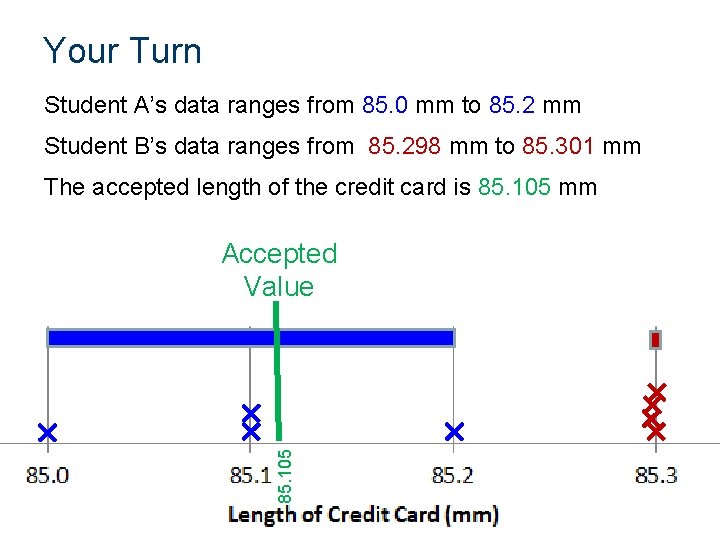
Your Turn Student A’s data ranges from 85. 0 mm to 85. 2 mm Student B’s data ranges from 85. 298 mm to 85. 301 mm The accepted length of the credit card is 85. 105 mm 85. 105 Accepted Value

Your Turn Which student’s data is more accurate? Student A Which student’s data is more precise? Student B

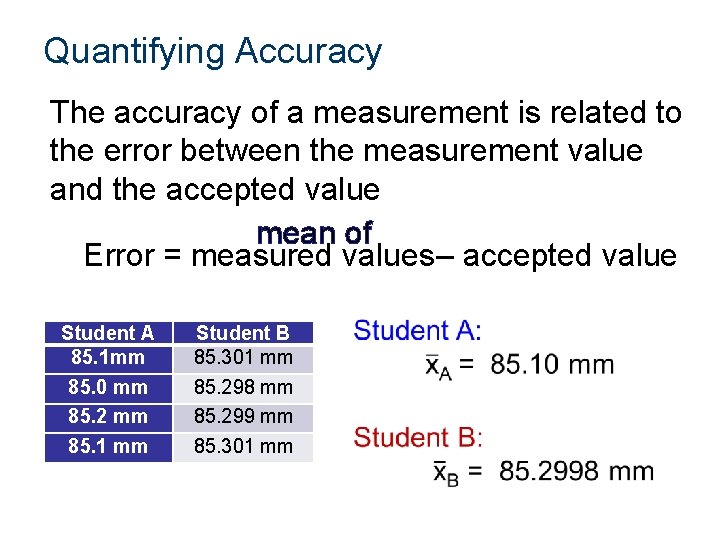
Quantifying Accuracy The accuracy of a measurement is related to the error between the measurement value and the accepted value mean of Error = measured values – accepted value Student A 85. 1 mm 85. 0 mm 85. 2 mm 85. 1 mm Student B 85. 301 mm 85. 298 mm 85. 299 mm 85. 301 mm

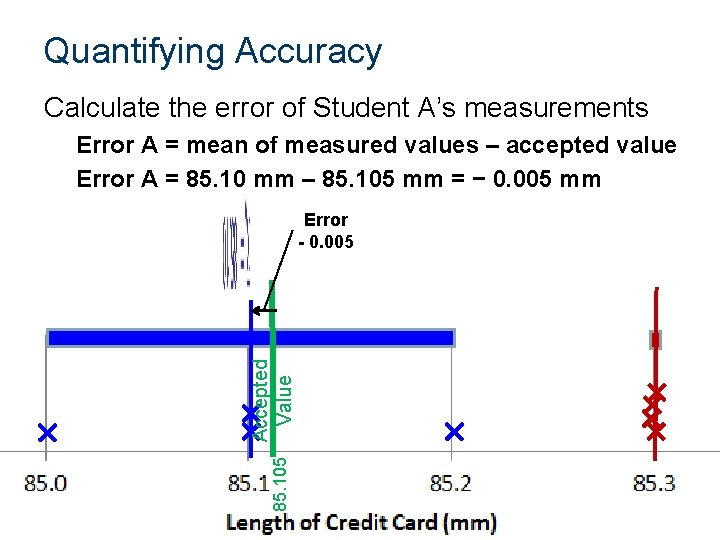
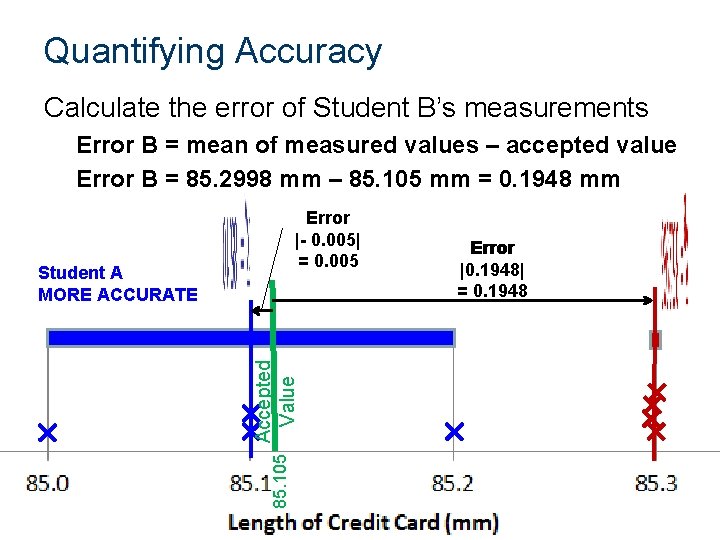
Quantifying Accuracy Calculate the error of Student A’s measurements Error A = mean of measured values – accepted value Error A = 85. 10 mm – 85. 105 mm = − 0. 005 mm Accepted 85. 105 Value Error - 0. 005

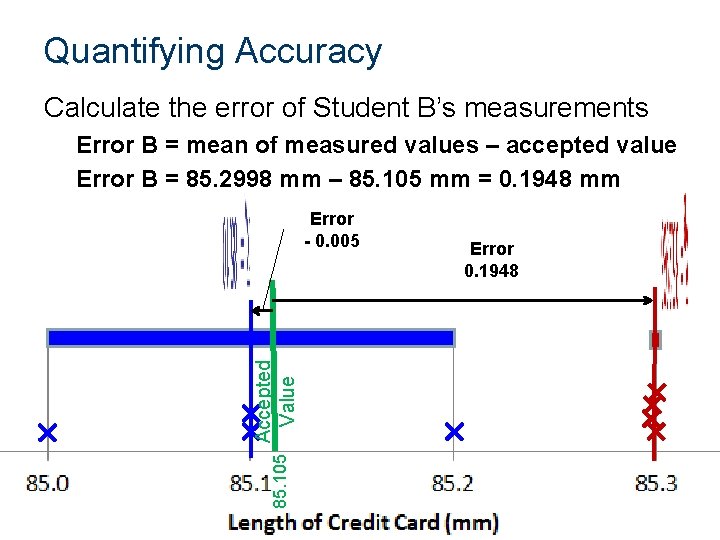
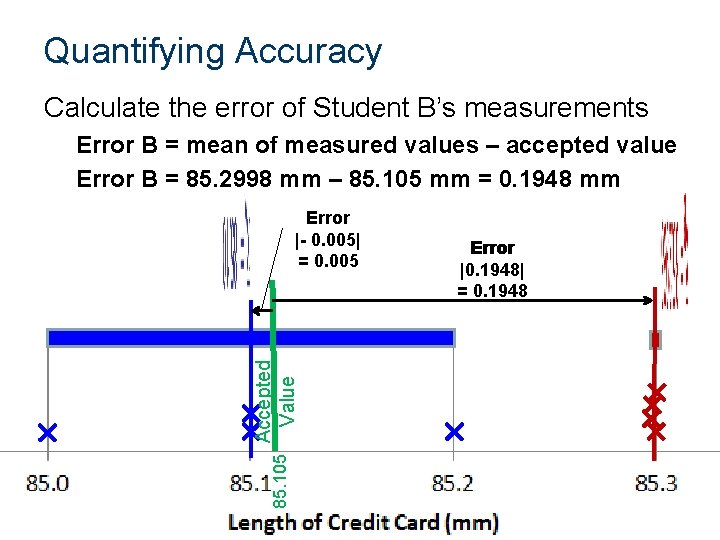
Quantifying Accuracy Calculate the error of Student B’s measurements Error B = mean of measured values – accepted value Error B = 85. 2998 mm – 85. 105 mm = 0. 1948 mm Accepted 85. 105 Value Error - 0. 005 Error 0. 1948

Quantifying Accuracy Calculate the error of Student B’s measurements Error B = mean of measured values – accepted value Error B = 85. 2998 mm – 85. 105 mm = 0. 1948 mm Accepted 85. 105 Value Error |-- 0. 005| = 0. 005 Error |0. 1948| 0. 1948 = 0. 1948

Quantifying Accuracy Calculate the error of Student B’s measurements Error B = mean of measured values – accepted value Error B = 85. 2998 mm – 85. 105 mm = 0. 1948 mm Accepted 85. 105 Value Student A MORE ACCURATE Error |-- 0. 005| = 0. 005 Error |0. 1948| 0. 1948 = 0. 1948

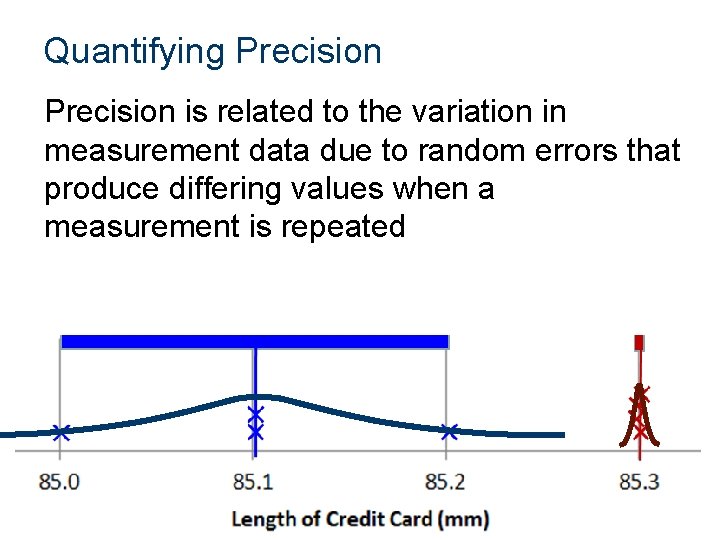
Quantifying Precision is related to the variation in measurement data due to random errors that produce differing values when a measurement is repeated

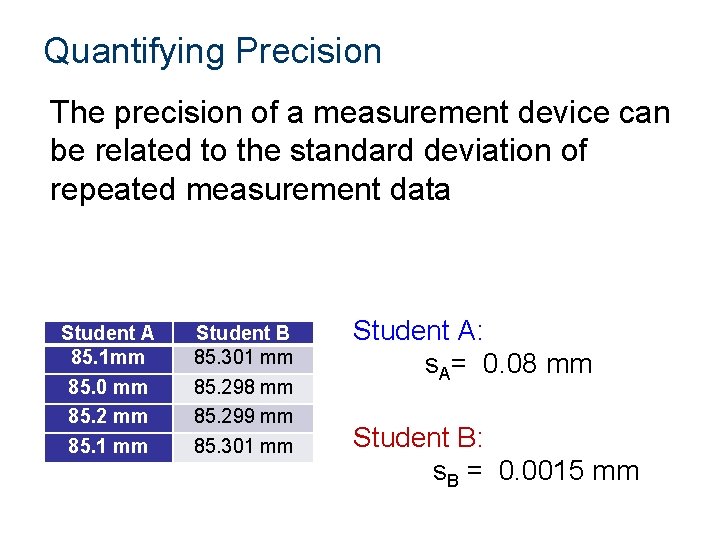
Quantifying Precision The precision of a measurement device can be related to the standard deviation of repeated measurement data Student A 85. 1 mm 85. 0 mm 85. 2 mm 85. 1 mm Student B 85. 301 mm 85. 298 mm 85. 299 mm 85. 301 mm Student A: s. A= 0. 08 mm Student B: s. B = 0. 0015 mm

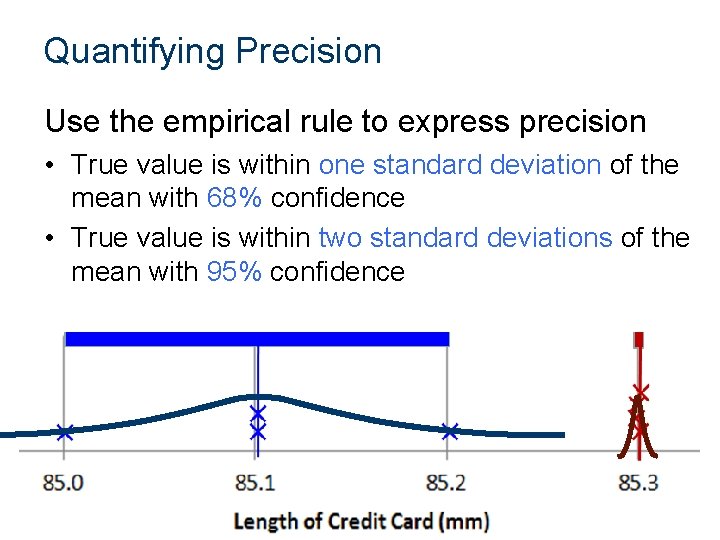
Quantifying Precision Use the empirical rule to express precision • True value is within one standard deviation of the mean with 68% confidence • True value is within two standard deviations of the mean with 95% confidence

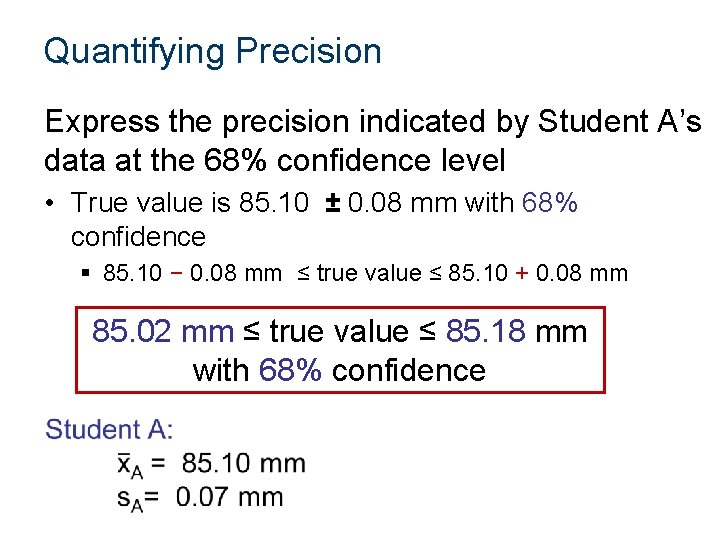
Quantifying Precision Express the precision indicated by Student A’s data at the 68% confidence level • True value is 85. 10 ± 0. 08 mm with 68% confidence § 85. 10 − 0. 08 mm ≤ true value ≤ 85. 10 + 0. 08 mm 85. 02 mm ≤ true value ≤ 85. 18 mm with 68% confidence

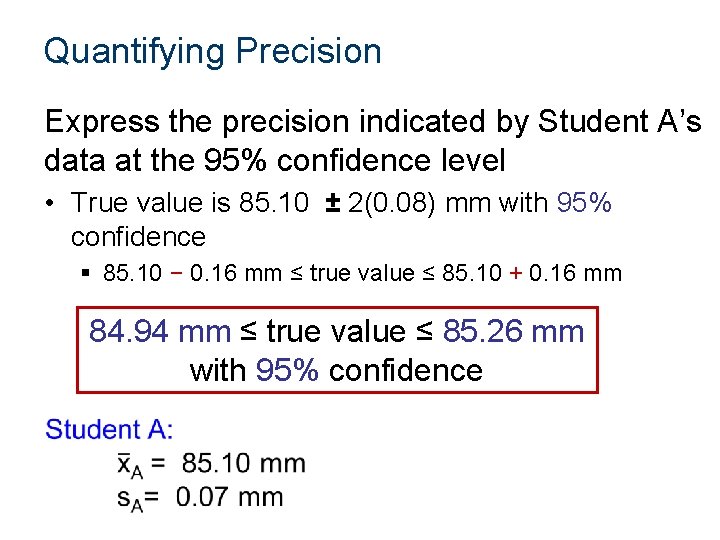
Quantifying Precision Express the precision indicated by Student A’s data at the 95% confidence level • True value is 85. 10 ± 2(0. 08) mm with 95% confidence § 85. 10 − 0. 16 mm ≤ true value ≤ 85. 10 + 0. 16 mm 84. 94 mm ≤ true value ≤ 85. 26 mm with 95% confidence

The Statistics of Accuracy and Precision A Low Accuracy High Precision C Low Accuracy Low Precision B High Accuracy High Precision D High Accuracy Low Precision

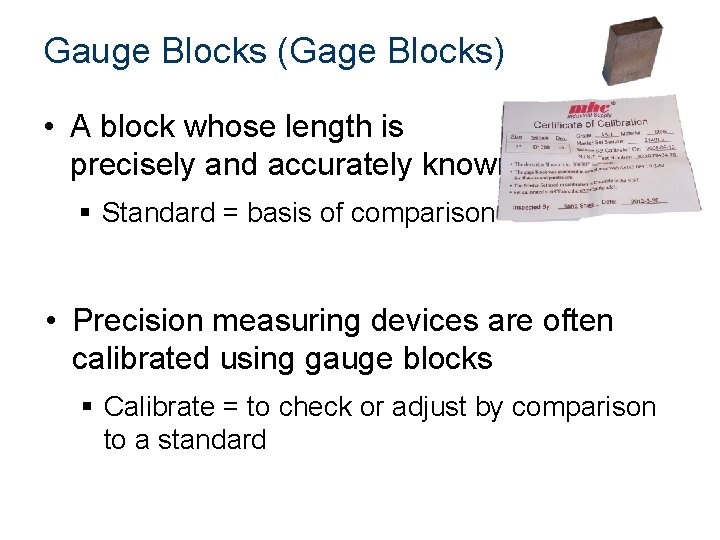
Gauge Blocks (Gage Blocks) • A block whose length is precisely and accurately known § Standard = basis of comparison • Precision measuring devices are often calibrated using gauge blocks § Calibrate = to check or adjust by comparison to a standard