Accuracy Precision in Measurement Accuracy Precision Accuracy Precision


- Slides: 12

Accuracy & Precision in Measurement

Accuracy & Precision • Accuracy: • Precision: • How close you are to the • How finely tuned your actual value • Depends on the person measuring • Calculated by the formula: % Error = (YV – AV) x 100 ÷ AV measurements are or how close they can be to each other • Depends on the measuring tool • Determined by the number of significant digits Where: YV is YOUR measured Value & AV is the Accepted Value

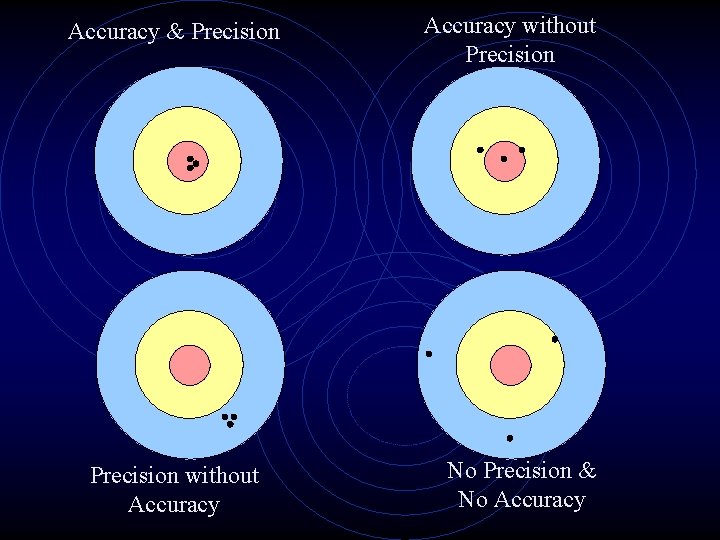
Accuracy & Precision • Accuracy & Precision may be demonstrated by shooting at a target. • Accuracy is represented by hitting the bulls eye (the accepted value) • Precision is represented by a tight grouping of shots (they are finely tuned)

Accuracy & Precision without Accuracy without Precision No Precision & No Accuracy

Accuracy - Calculating % Error How Close Are You to the Accepted Value (Bull’s Eye)

Accuracy - Calculating % Error • If a student measured the room width at 8. 46 m and the accepted value was 9. 45 m what was their accuracy? • Using the formula: % error = (YV – AV) x 100 ÷ AV • Where YV is the student’s measured value & AV is the accepted value

Accuracy - Calculating % Error • Since YV = 8. 46 m, AV = 9. 45 m • % Error = (8. 46 m – 9. 45 m) x 100 ÷ 9. 45 m • = -0. 99 m x 100 ÷ 9. 45 m • = -99 m ÷ 9. 45 m • = -10. 5 % • Note that the meter unit cancels during the division & the unit is %. The (-) shows that YV was low • The student was off by almost 11% & must remeasure • Acceptable % error is within 5%

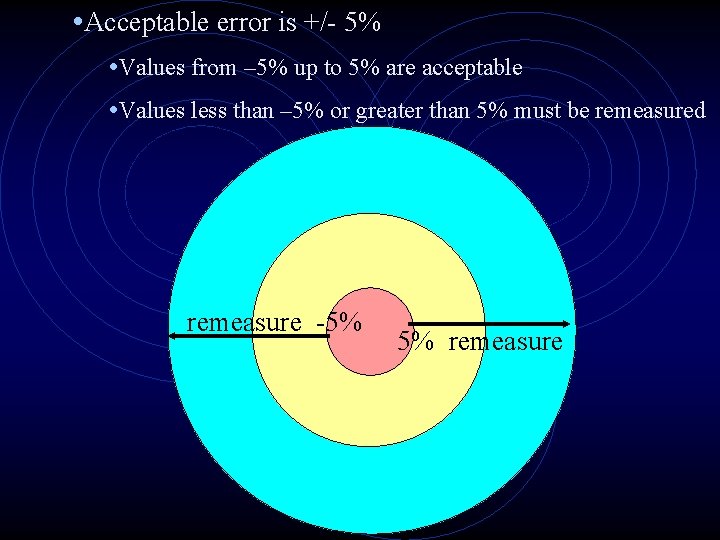
• Acceptable error is +/- 5% • Values from – 5% up to 5% are acceptable • Values less than – 5% or greater than 5% must be remeasured remeasure -5% 5% remeasure


Significant Digits How to Check a Measurement for Precision

Significant Digits & Precision • The precision of a measurement is the smallest possible unit that could be measured. • Significant Digits (sd) are the numbers that result from a measurement. • When a measurement is converted we need to make sure we know which digits are significant and keep them in our conversion • All digits that are measured are significant

Significant Digits & Precision • What is the length of the bar? • How many digits are there in the measurement? • All of these digits are significant • There are 3 sd 0 1 2 cm Length of Bar = 3. 23 cm 3 4