Measurements and errors Precision and accuracy Significant figures
- Slides: 57

Measurements and errors • Precision and accuracy • Significant figures • Scientific notation • Measurements • Types of errors • Combination of errors © Manhattan Press (H. K. ) Ltd. 1

Measurement and errors (SB p. 13) Measurements and errors Reading: • single determination of the value of an unknown quantity • actual reading taken during an experiment Measurement: • final result of the analysis of a series of readings © Manhattan Press (H. K. ) Ltd. 2

Measurement and errors (SB p. 13) Precision and accuracy Precision: indicates the agreement among repeated measurements • take readings repeatedly • calculate mean ( ) • deviation (d) = • measure the precision: by the mean deviation © Manhattan Press (H. K. ) Ltd. 3

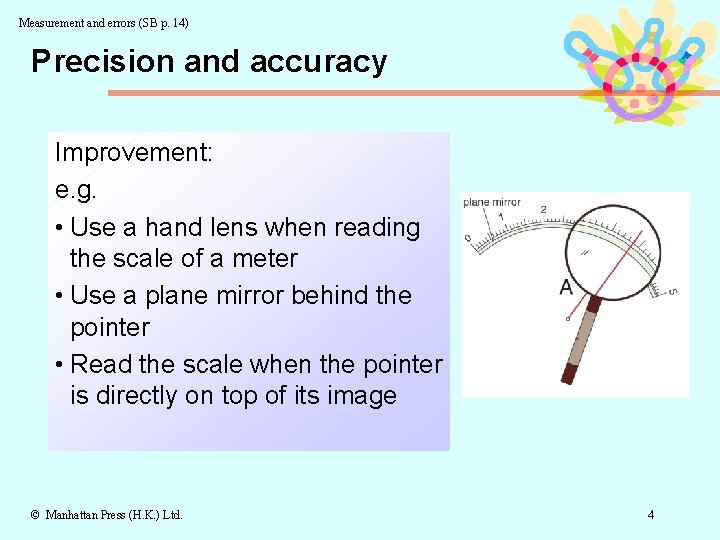
Measurement and errors (SB p. 14) Precision and accuracy Improvement: e. g. • Use a hand lens when reading the scale of a meter • Use a plane mirror behind the pointer • Read the scale when the pointer is directly on top of its image © Manhattan Press (H. K. ) Ltd. 4

Measurement and errors (SB p. 14) Precision and accuracy A measurement is said to be accurate if it is close to the actual value. Accuracy: Indicates how correct the result is © Manhattan Press (H. K. ) Ltd. 5

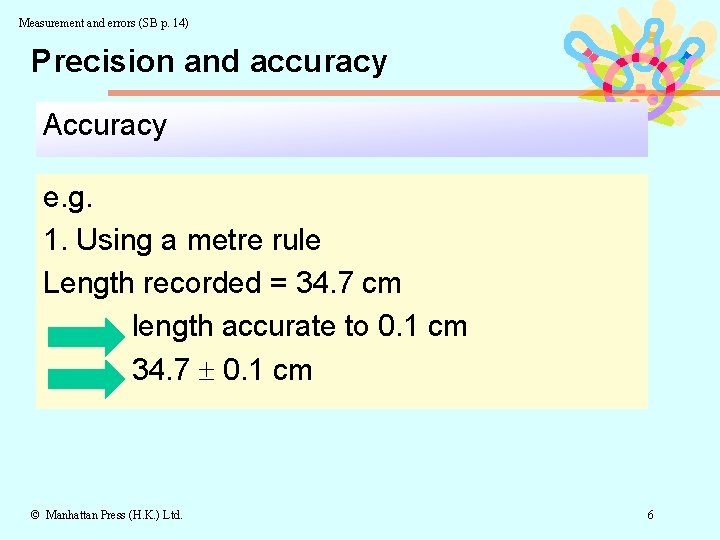
Measurement and errors (SB p. 14) Precision and accuracy Accuracy e. g. 1. Using a metre rule Length recorded = 34. 7 cm length accurate to 0. 1 cm 34. 7 0. 1 cm © Manhattan Press (H. K. ) Ltd. 6

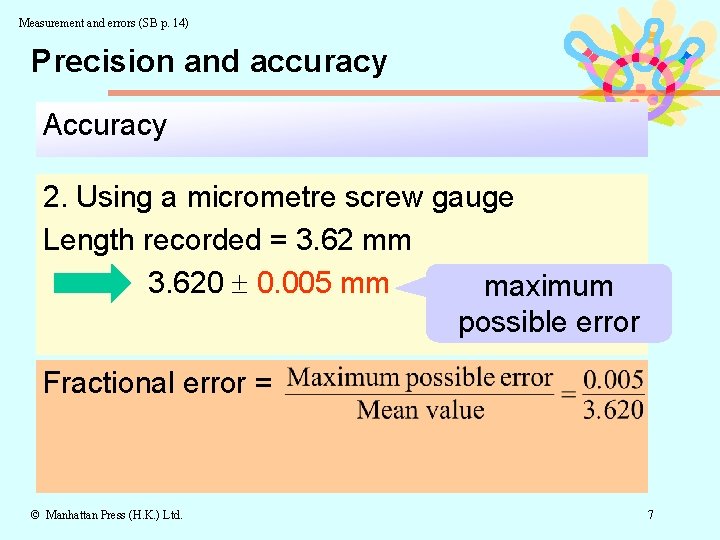
Measurement and errors (SB p. 14) Precision and accuracy Accuracy 2. Using a micrometre screw gauge Length recorded = 3. 62 mm 3. 620 0. 005 mm maximum possible error Fractional error = © Manhattan Press (H. K. ) Ltd. 7

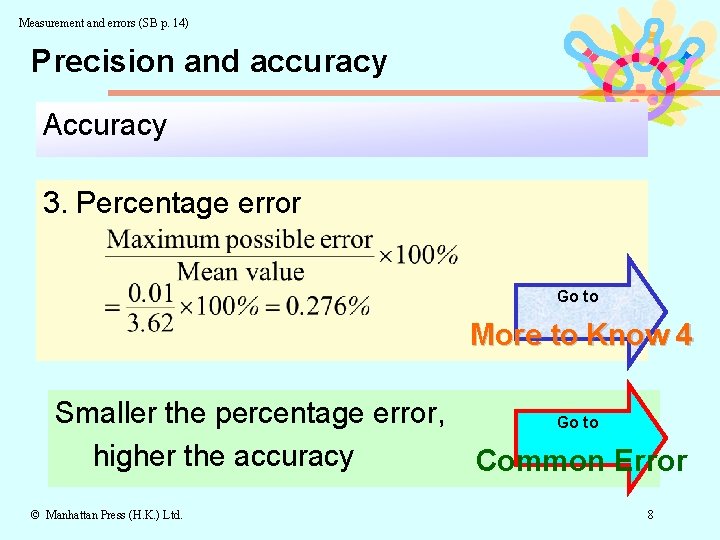
Measurement and errors (SB p. 14) Precision and accuracy Accuracy 3. Percentage error Go to More to Know 4 Smaller the percentage error, higher the accuracy © Manhattan Press (H. K. ) Ltd. Go to Common Error 8

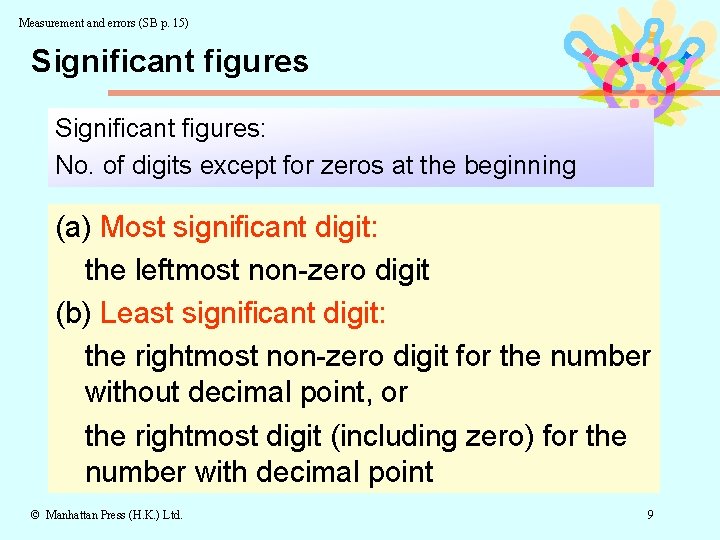
Measurement and errors (SB p. 15) Significant figures: No. of digits except for zeros at the beginning (a) Most significant digit: the leftmost non-zero digit (b) Least significant digit: the rightmost non-zero digit for the number without decimal point, or the rightmost digit (including zero) for the number with decimal point © Manhattan Press (H. K. ) Ltd. 9

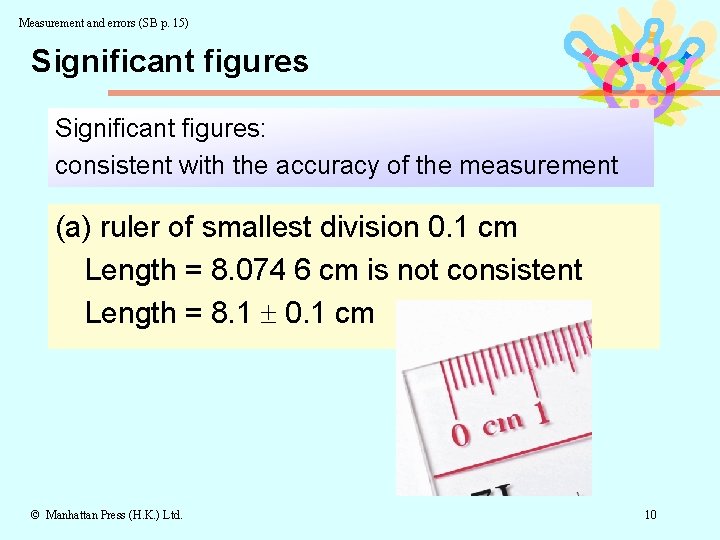
Measurement and errors (SB p. 15) Significant figures: consistent with the accuracy of the measurement (a) ruler of smallest division 0. 1 cm Length = 8. 074 6 cm is not consistent Length = 8. 1 0. 1 cm © Manhattan Press (H. K. ) Ltd. 10

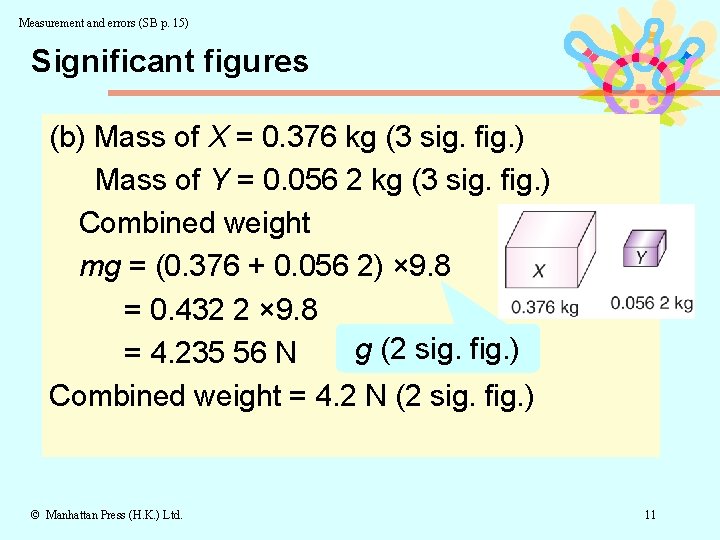
Measurement and errors (SB p. 15) Significant figures (b) Mass of X = 0. 376 kg (3 sig. fig. ) Mass of Y = 0. 056 2 kg (3 sig. fig. ) Combined weight mg = (0. 376 + 0. 056 2) × 9. 8 = 0. 432 2 × 9. 8 g (2 sig. fig. ) = 4. 235 56 N Combined weight = 4. 2 N (2 sig. fig. ) © Manhattan Press (H. K. ) Ltd. 11

Measurement and errors (SB p. 16) Significant figures No. of significant figures = no. of significant figures in the quantity which has the least no. of significant figures © Manhattan Press (H. K. ) Ltd. 12

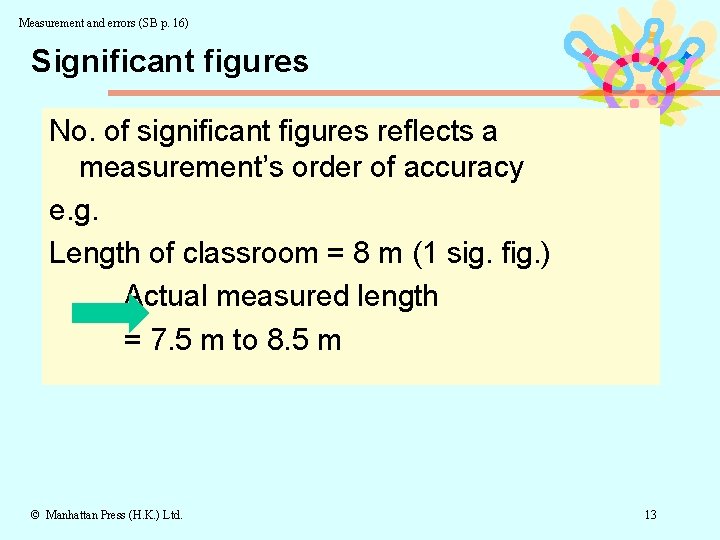
Measurement and errors (SB p. 16) Significant figures No. of significant figures reflects a measurement’s order of accuracy e. g. Length of classroom = 8 m (1 sig. fig. ) Actual measured length = 7. 5 m to 8. 5 m © Manhattan Press (H. K. ) Ltd. 13

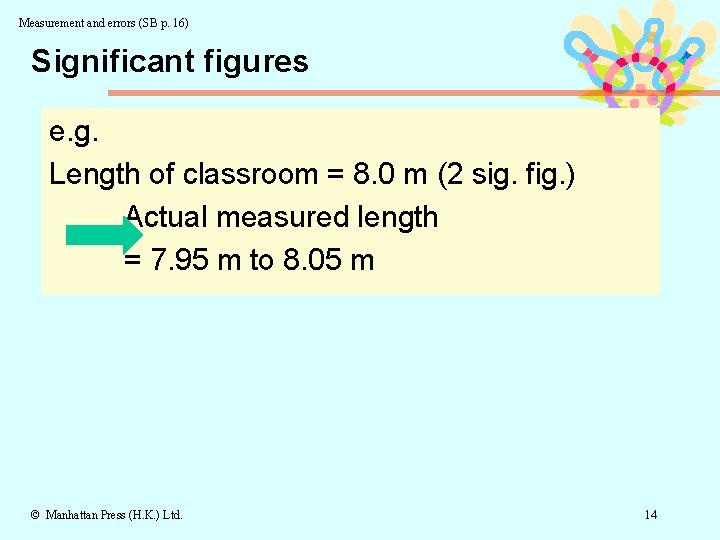
Measurement and errors (SB p. 16) Significant figures e. g. Length of classroom = 8. 0 m (2 sig. fig. ) Actual measured length = 7. 95 m to 8. 05 m © Manhattan Press (H. K. ) Ltd. 14

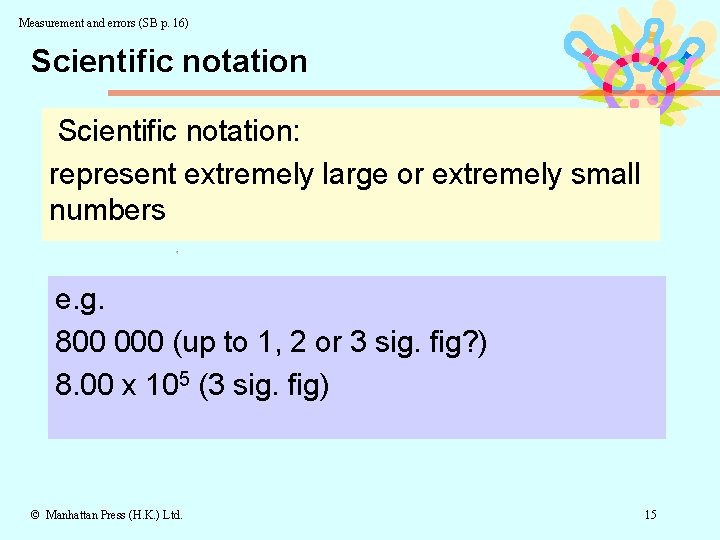
Measurement and errors (SB p. 16) Scientific notation: represent extremely large or extremely small numbers e. g. 800 000 (up to 1, 2 or 3 sig. fig? ) 8. 00 x 105 (3 sig. fig) © Manhattan Press (H. K. ) Ltd. 15

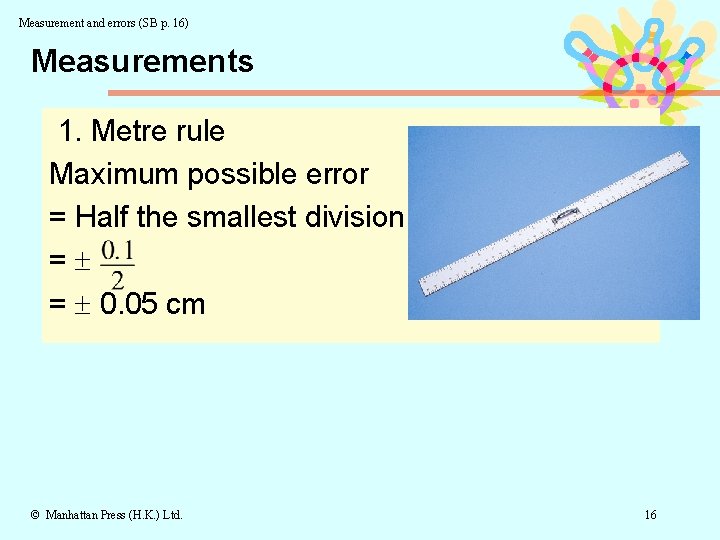
Measurement and errors (SB p. 16) Measurements 1. Metre rule Maximum possible error = Half the smallest division = = 0. 05 cm © Manhattan Press (H. K. ) Ltd. 16

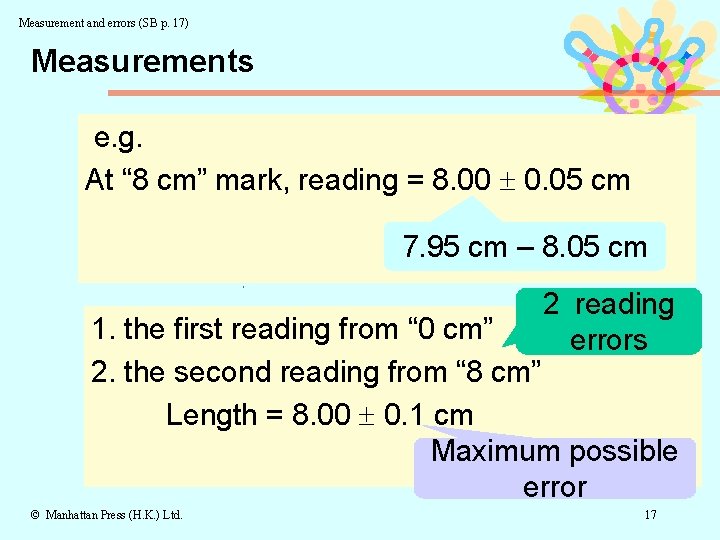
Measurement and errors (SB p. 17) Measurements e. g. At “ 8 cm” mark, reading = 8. 00 0. 05 cm 7. 95 cm – 8. 05 cm 2 reading errors 1. the first reading from “ 0 cm” 2. the second reading from “ 8 cm” Length = 8. 00 0. 1 cm Maximum possible error © Manhattan Press (H. K. ) Ltd. 17

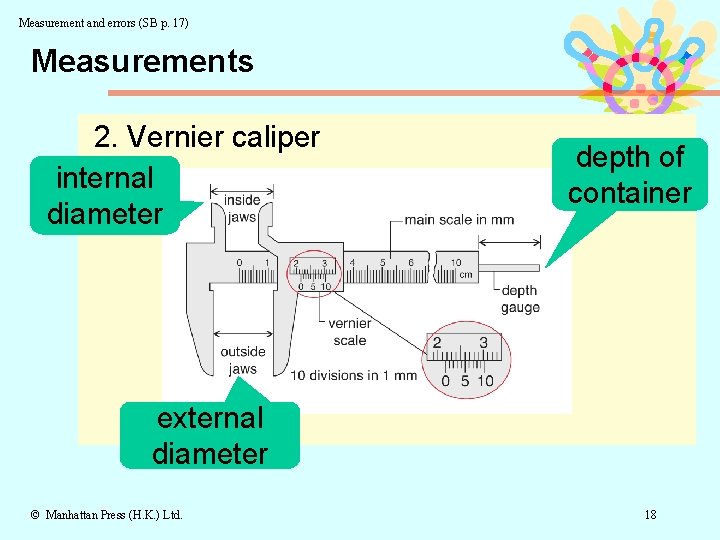
Measurement and errors (SB p. 17) Measurements 2. Vernier caliper internal diameter depth of container external diameter © Manhattan Press (H. K. ) Ltd. 18

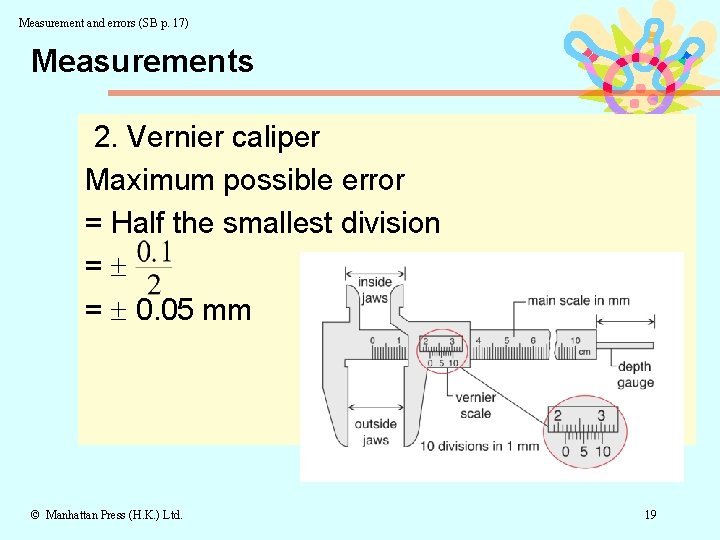
Measurement and errors (SB p. 17) Measurements 2. Vernier caliper Maximum possible error = Half the smallest division = = 0. 05 mm © Manhattan Press (H. K. ) Ltd. 19

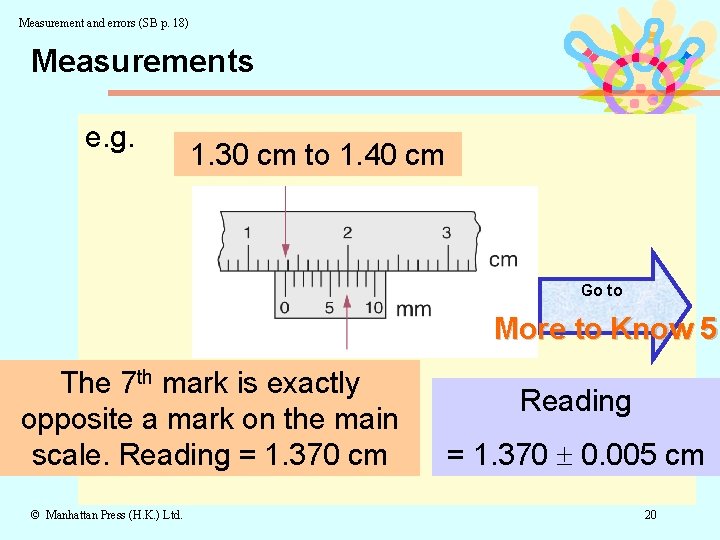
Measurement and errors (SB p. 18) Measurements e. g. 1. 30 cm to 1. 40 cm Go to More to Know 5 The 7 th mark is exactly opposite a mark on the main scale. Reading = 1. 370 cm © Manhattan Press (H. K. ) Ltd. Reading = 1. 370 0. 005 cm 20

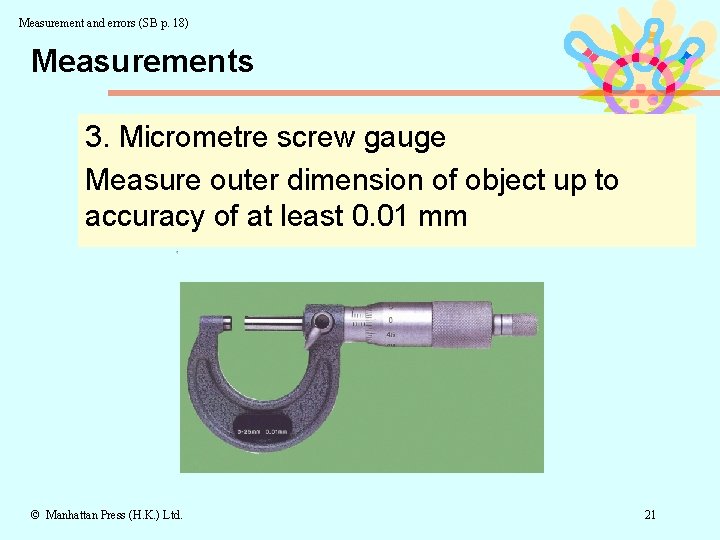
Measurement and errors (SB p. 18) Measurements 3. Micrometre screw gauge Measure outer dimension of object up to accuracy of at least 0. 01 mm © Manhattan Press (H. K. ) Ltd. 21

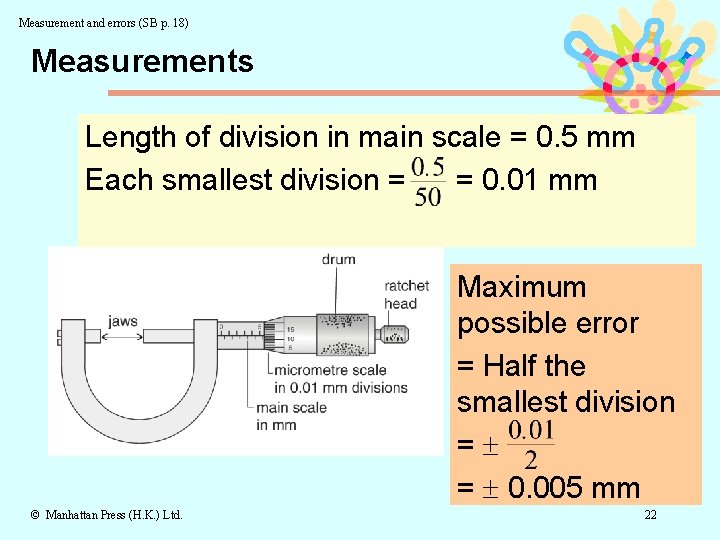
Measurement and errors (SB p. 18) Measurements Length of division in main scale = 0. 5 mm Each smallest division = = 0. 01 mm Maximum possible error = Half the smallest division = = 0. 005 mm © Manhattan Press (H. K. ) Ltd. 22

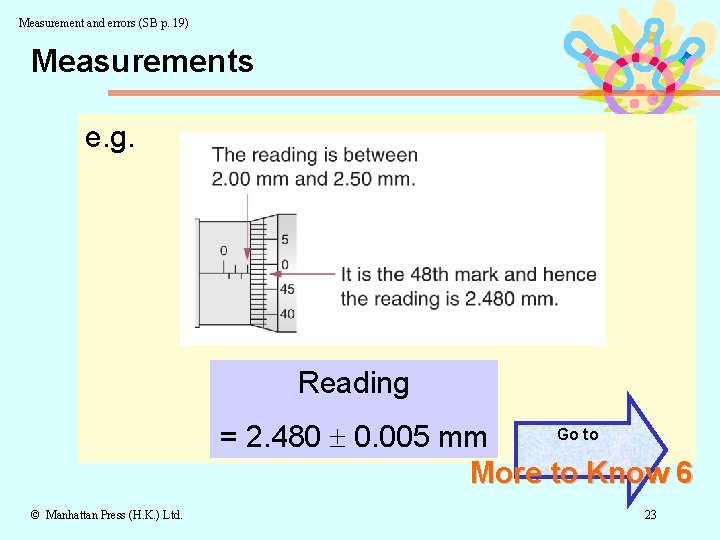
Measurement and errors (SB p. 19) Measurements e. g. Reading Go to = 2. 480 0. 005 mm More to Know 6 © Manhattan Press (H. K. ) Ltd. 23

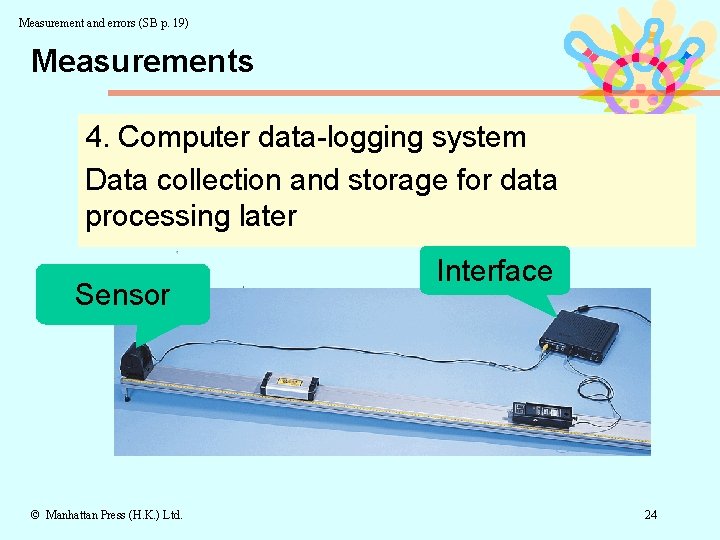
Measurement and errors (SB p. 19) Measurements 4. Computer data-logging system Data collection and storage for data processing later Sensor © Manhattan Press (H. K. ) Ltd. Interface 24

Measurement and errors (SB p. 20) Types of errors 1. Systematic errors are errors in the measurement of physical quantities due to instruments, faults in the surrounding conditions or mistakes made by the observer. An experiment with small systematic error is said to be accurate. © Manhattan Press (H. K. ) Ltd. 25

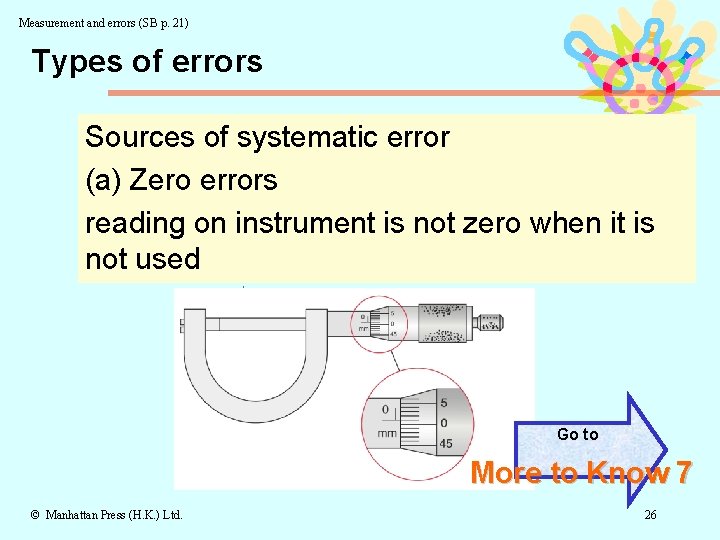
Measurement and errors (SB p. 21) Types of errors Sources of systematic error (a) Zero errors reading on instrument is not zero when it is not used Go to More to Know 7 © Manhattan Press (H. K. ) Ltd. 26

Measurement and errors (SB p. 21) Types of errors (b) Personal errors of the observer From physical constrains or limitation of an individual (reaction time) © Manhattan Press (H. K. ) Ltd. 27

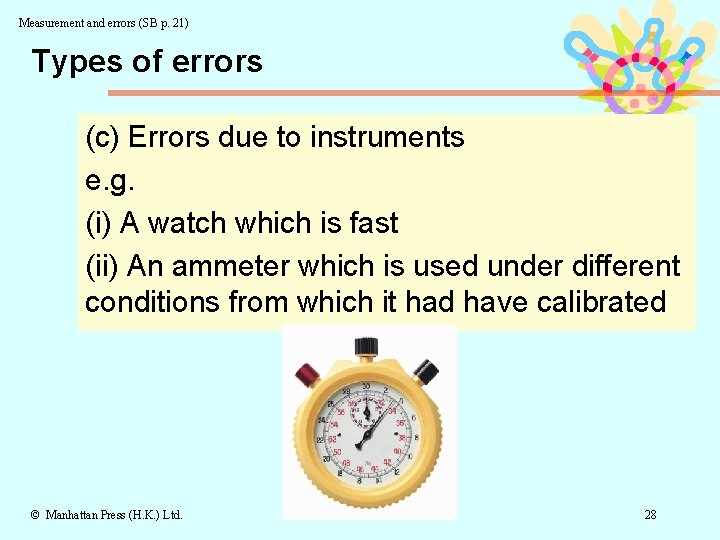
Measurement and errors (SB p. 21) Types of errors (c) Errors due to instruments e. g. (i) A watch which is fast (ii) An ammeter which is used under different conditions from which it had have calibrated © Manhattan Press (H. K. ) Ltd. 28

Measurement and errors (SB p. 21) Types of errors (d) Errors due to wrong assumption e. g. acceleration due to gravity (g) is assumed to be 9. 81 m s-2 Systematic errors cannot be reduced by repeating measurements using the same method, same instrument and by the same observer. © Manhattan Press (H. K. ) Ltd. 29

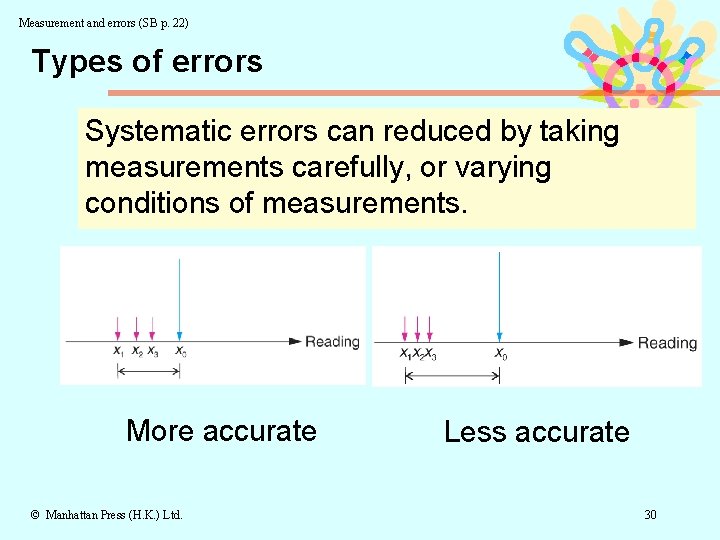
Measurement and errors (SB p. 22) Types of errors Systematic errors can reduced by taking measurements carefully, or varying conditions of measurements. More accurate © Manhattan Press (H. K. ) Ltd. Less accurate 30

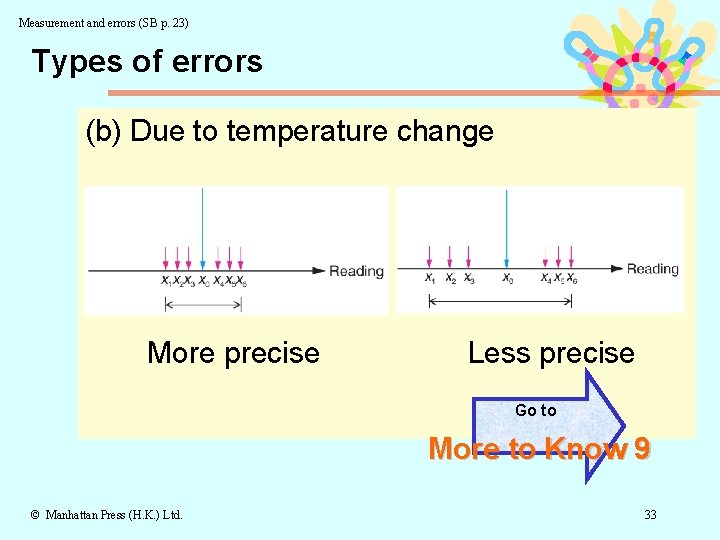
Measurement and errors (SB p. 22) Types of errors 2. Random errors are errors in a measurement made by the observer or person who takes the measurement. An experiment with small random error is said to be precise. © Manhattan Press (H. K. ) Ltd. 31

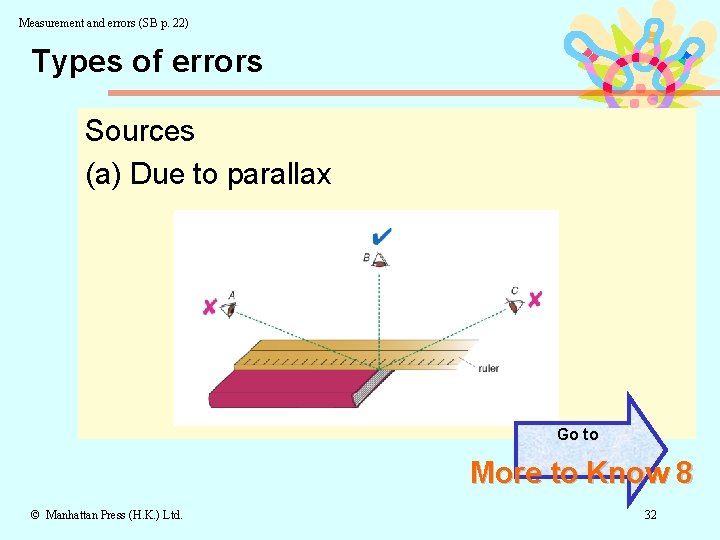
Measurement and errors (SB p. 22) Types of errors Sources (a) Due to parallax Go to More to Know 8 © Manhattan Press (H. K. ) Ltd. 32

Measurement and errors (SB p. 23) Types of errors (b) Due to temperature change More precise Less precise Go to More to Know 9 © Manhattan Press (H. K. ) Ltd. 33

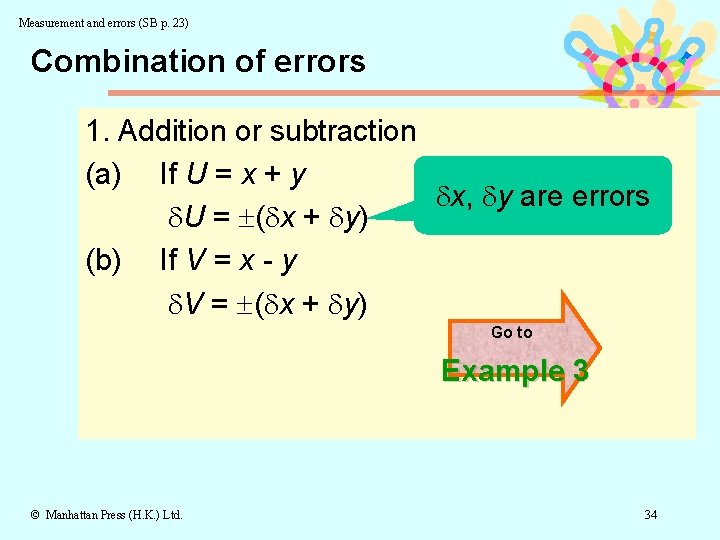
Measurement and errors (SB p. 23) Combination of errors 1. Addition or subtraction (a) If U = x + y x, y are errors U = ( x + y) (b) If V = x - y V = ( x + y) Go to Example 3 © Manhattan Press (H. K. ) Ltd. 34

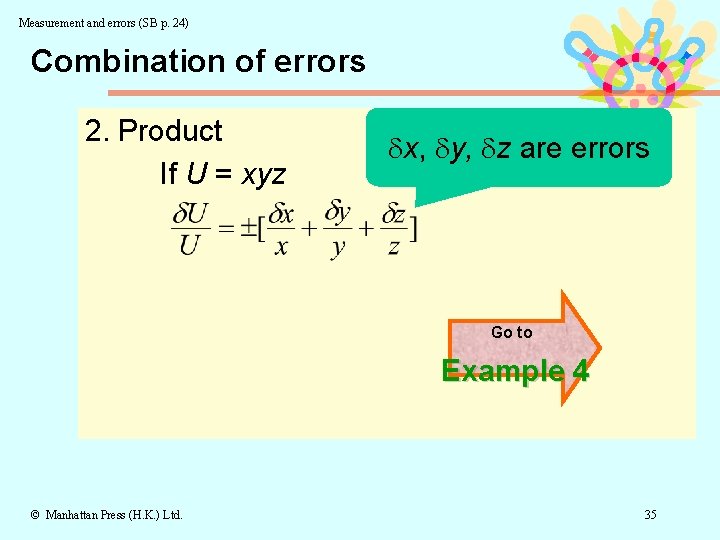
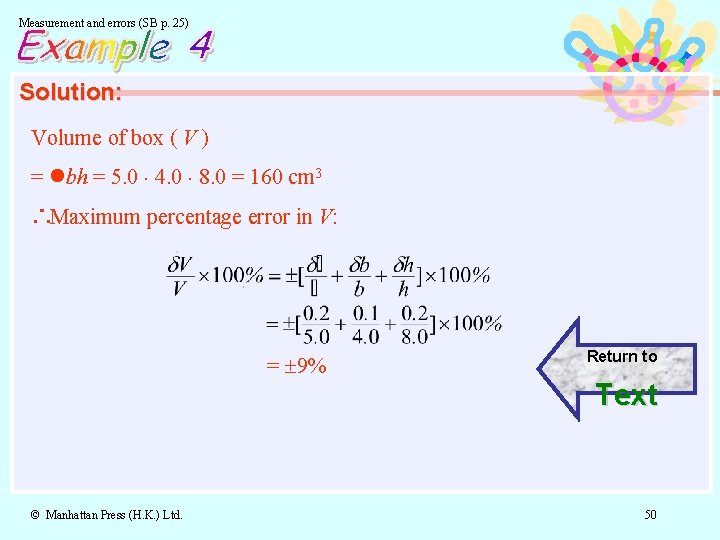
Measurement and errors (SB p. 24) Combination of errors 2. Product If U = xyz x, y, z are errors Go to Example 4 © Manhattan Press (H. K. ) Ltd. 35

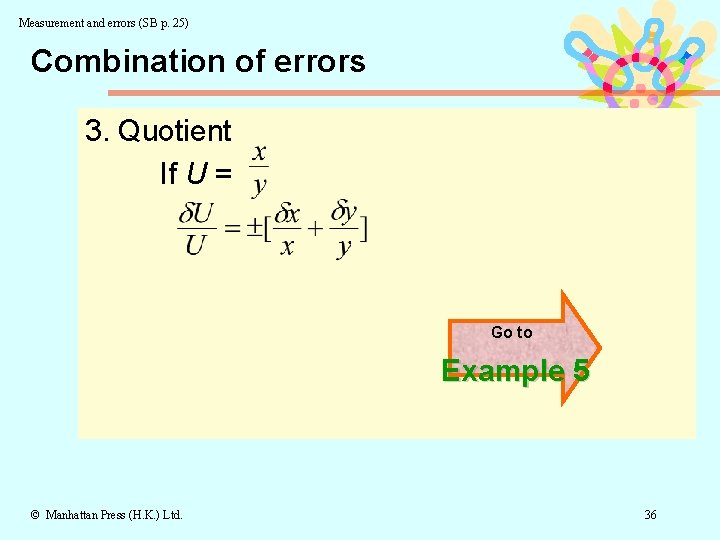
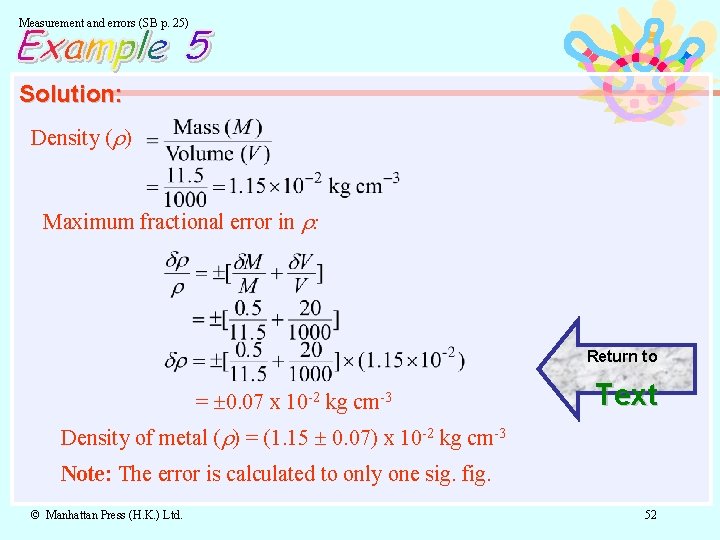
Measurement and errors (SB p. 25) Combination of errors 3. Quotient If U = Go to Example 5 © Manhattan Press (H. K. ) Ltd. 36

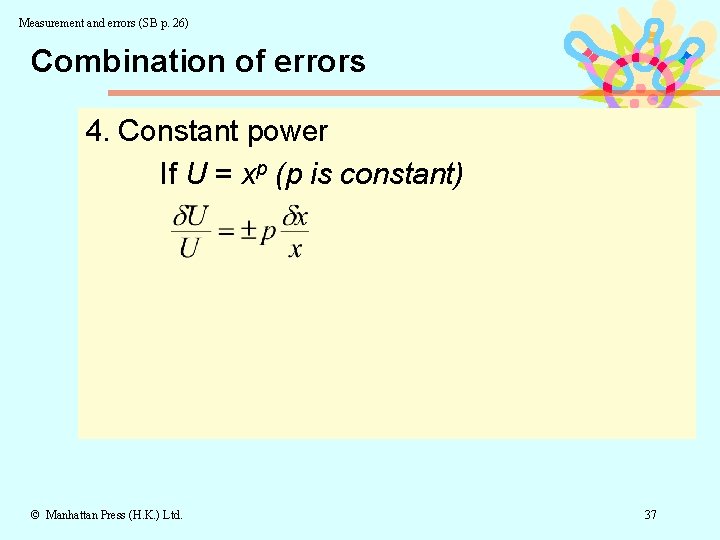
Measurement and errors (SB p. 26) Combination of errors 4. Constant power If U = xp (p is constant) © Manhattan Press (H. K. ) Ltd. 37

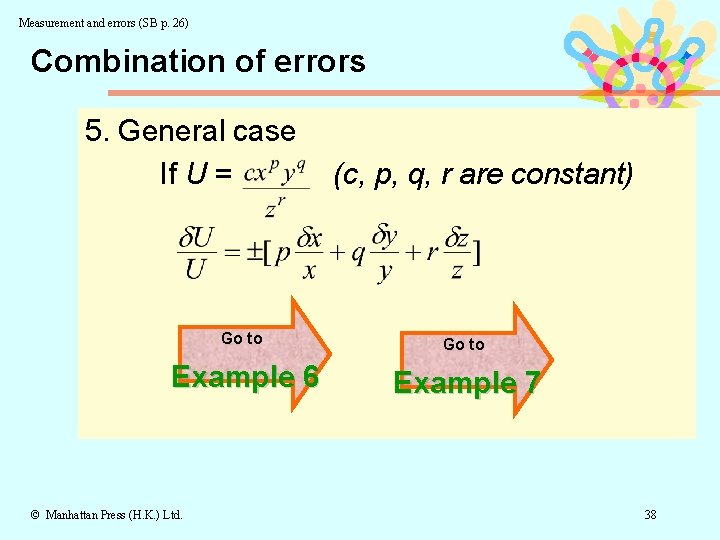
Measurement and errors (SB p. 26) Combination of errors 5. General case If U = (c, p, q, r are constant) Go to Example 6 Example 7 © Manhattan Press (H. K. ) Ltd. 38

End © Manhattan Press (H. K. ) Ltd. 39

Measurement and errors (SB p. 14) Maximum possible error If a metre rule is graduated in mm, the maximum possible error of a measurement is equal to the half of the smallest division (0. 05 cm or 0. 5 mm). Why should the maximum possible error of the measurement of the metal rod be 0. 1 cm? For details, please refer to the Section D of Metre rule. Return to © Manhattan Press (H. K. ) Ltd. Text 40

Measurement and errors (SB p. 15) A common zero error arises from using a metre rule from one end, which may be worn. It is a better practice to use the centre of the rule, instead of measuring from one end. Return to © Manhattan Press (H. K. ) Ltd. Text 41

Measurement and errors (SB p. 18) Most vernier calipers will read zero when the jaws are closed, without an object in place. However, as a result of misuse or wear, the instrument may not read zero. In these cases, a zero reading error must be added or subtracted. The maximum possible error becomes ± 0. 05 mm × 2 = ± 0. 1 mm. Return to © Manhattan Press (H. K. ) Ltd. Text 42

Measurement and errors (SB p. 19) Choice of measuring instrument When we choose a measuring instrument, we should consider: 1. its convenience to be used, 2. its precision, and 3. the range of the reading we need. © Manhattan Press (H. K. ) Ltd. Return to Text 43

Measurement and errors (SB p. 21) Zero reading error and zero error Zero reading error is due to the limitation of measuring device at the “ 0” mark and is equal to the half of the smallest division of the device. Zero error of the device is due to the deviation from “ 0” value at the “ 0” mark. Return to © Manhattan Press (H. K. ) Ltd. Text 44

Measurement and errors (SB p. 22) 1. Reading can be taken with great precision but not accurate if there is a systematic error. 2. Reading can be accurate but not precise when there is a random error. Return to Text © Manhattan Press (H. K. ) Ltd. 45

Measurement and errors (SB p. 23) Random errors can be reduced by repeated measurements while systematic errors cannot. Return to Text © Manhattan Press (H. K. ) Ltd. 46

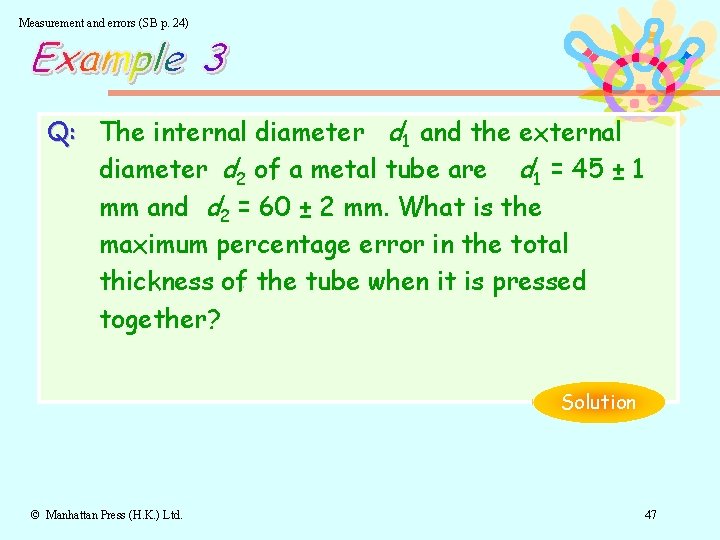
Measurement and errors (SB p. 24) Q: The internal diameter d 1 and the external diameter d 2 of a metal tube are d 1 = 45 ± 1 mm and d 2 = 60 ± 2 mm. What is the maximum percentage error in the total thickness of the tube when it is pressed together? Solution © Manhattan Press (H. K. ) Ltd. 47

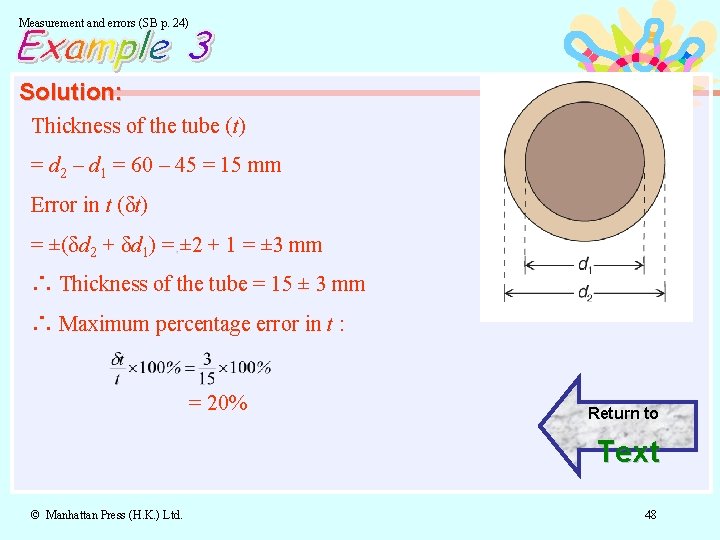
Measurement and errors (SB p. 24) Solution: Thickness of the tube (t) = d 2 – d 1 = 60 – 45 = 15 mm Error in t (δt) = ±(δd 2 + δd 1) = ± 2 + 1 = ± 3 mm ∴ Thickness of the tube = 15 ± 3 mm ∴ Maximum percentage error in t : = 20% Return to Text © Manhattan Press (H. K. ) Ltd. 48

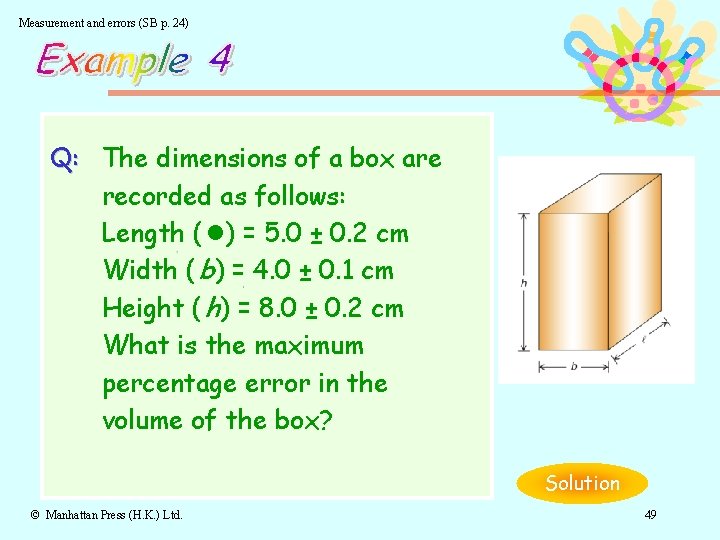
Measurement and errors (SB p. 24) Q: The dimensions of a box are recorded as follows: Length ( l) = 5. 0 ± 0. 2 cm Width ( b) = 4. 0 ± 0. 1 cm Height ( h) = 8. 0 ± 0. 2 cm What is the maximum percentage error in the volume of the box? Solution © Manhattan Press (H. K. ) Ltd. 49

Measurement and errors (SB p. 25) Solution: Volume of box ( V ) = lbh = 5. 0 × 4. 0 × 8. 0 = 160 cm 3 ∴Maximum percentage error in V: = 9% Return to Text © Manhattan Press (H. K. ) Ltd. 50

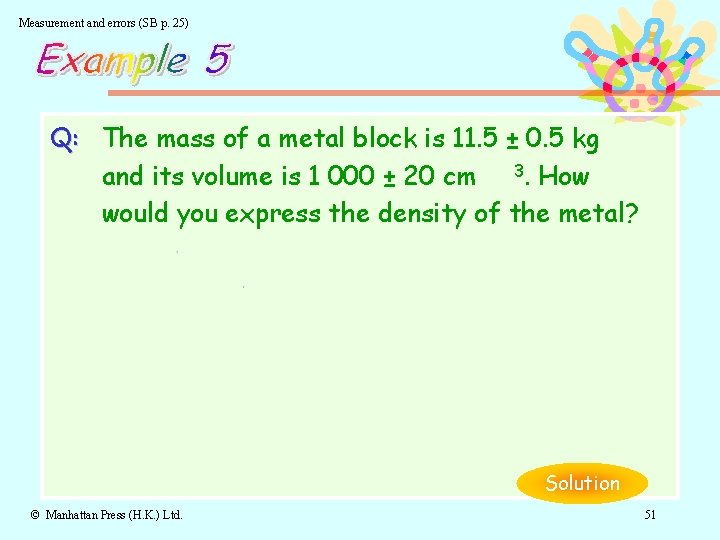
Measurement and errors (SB p. 25) Q: The mass of a metal block is 11. 5 ± 0. 5 kg and its volume is 1 000 ± 20 cm 3. How would you express the density of the metal? Solution © Manhattan Press (H. K. ) Ltd. 51

Measurement and errors (SB p. 25) Solution: Density ( ) Maximum fractional error in : Return to = 0. 07 x 10 -2 kg cm-3 Text Density of metal ( ) = (1. 15 0. 07) x 10 -2 kg cm-3 Note: The error is calculated to only one sig. fig. © Manhattan Press (H. K. ) Ltd. 52

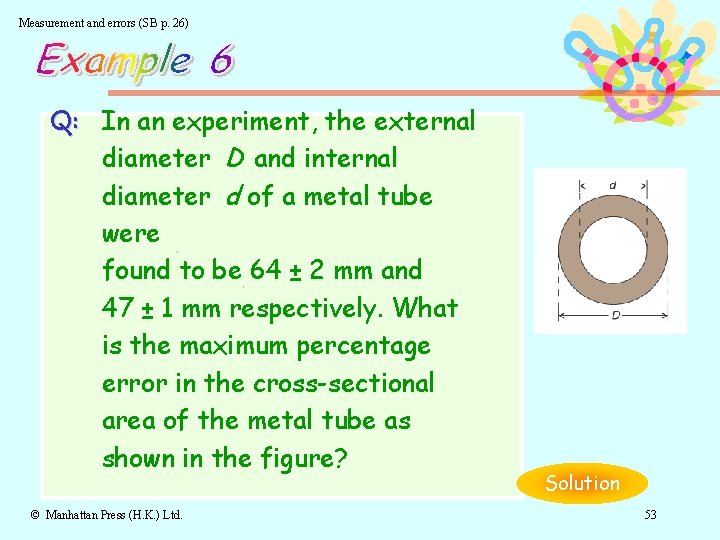
Measurement and errors (SB p. 26) Q: In an experiment, the external diameter D and internal diameter d of a metal tube were found to be 64 ± 2 mm and 47 ± 1 mm respectively. What is the maximum percentage error in the cross-sectional area of the metal tube as shown in the figure? © Manhattan Press (H. K. ) Ltd. Solution 53

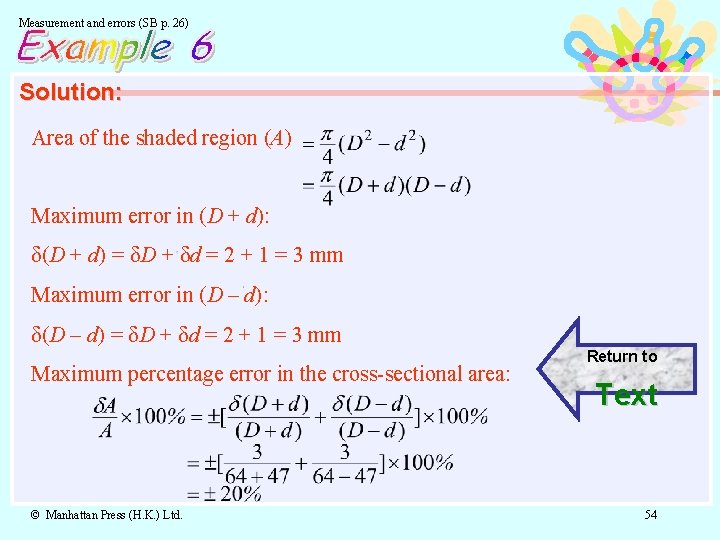
Measurement and errors (SB p. 26) Solution: Area of the shaded region (A) Maximum error in (D + d): δ(D + d) = δD + δd = 2 + 1 = 3 mm Maximum error in (D – d): δ(D – d) = δD + δd = 2 + 1 = 3 mm Maximum percentage error in the cross-sectional area: © Manhattan Press (H. K. ) Ltd. Return to Text 54

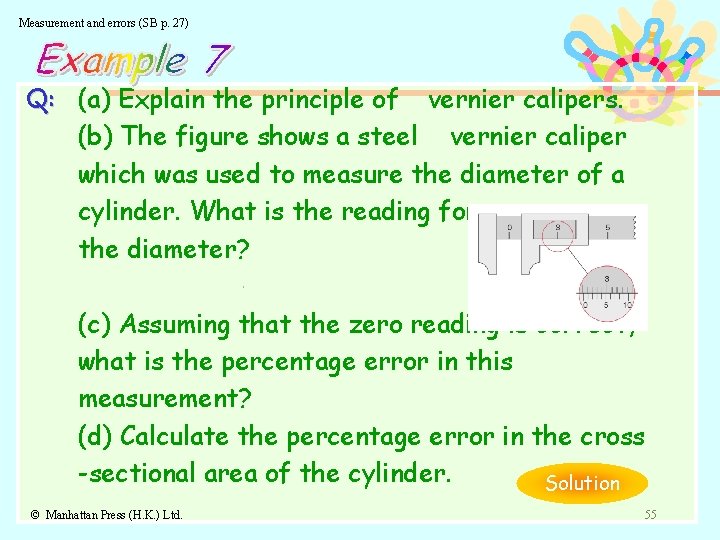
Measurement and errors (SB p. 27) Q: (a) Explain the principle of vernier calipers. (b) The figure shows a steel vernier caliper which was used to measure the diameter of a cylinder. What is the reading for the diameter? (c) Assuming that the zero reading is correct, what is the percentage error in this measurement? (d) Calculate the percentage error in the cross -sectional area of the cylinder. Solution © Manhattan Press (H. K. ) Ltd. 55

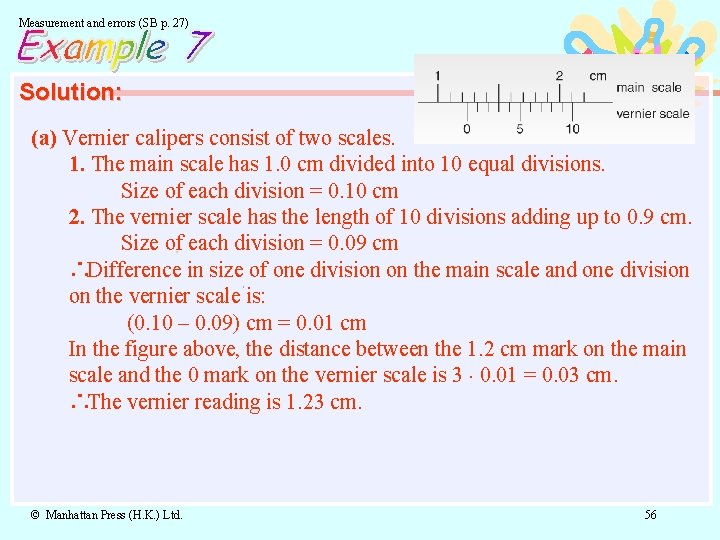
Measurement and errors (SB p. 27) Solution: (a) Vernier calipers consist of two scales. 1. The main scale has 1. 0 cm divided into 10 equal divisions. Size of each division = 0. 10 cm 2. The vernier scale has the length of 10 divisions adding up to 0. 9 cm. Size of each division = 0. 09 cm ∴Difference in size of one division on the main scale and one division on the vernier scale is: (0. 10 – 0. 09) cm = 0. 01 cm In the figure above, the distance between the 1. 2 cm mark on the main scale and the 0 mark on the vernier scale is 3 × 0. 01 = 0. 03 cm. ∴The vernier reading is 1. 23 cm. © Manhattan Press (H. K. ) Ltd. 56

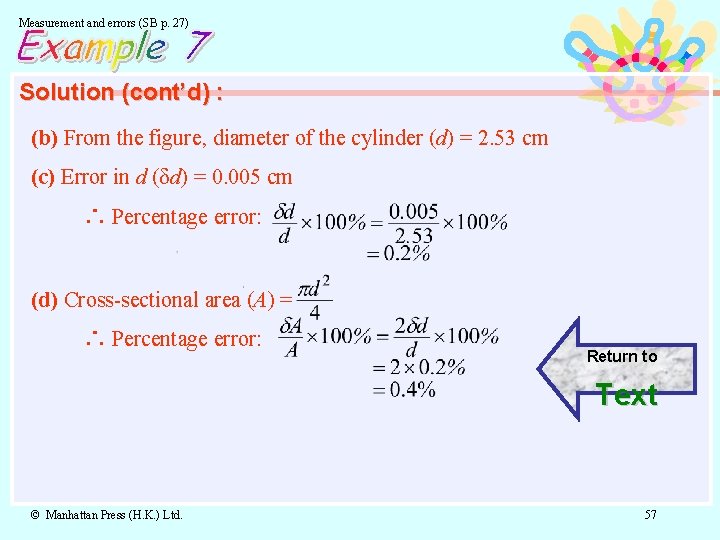
Measurement and errors (SB p. 27) Solution (cont’d) : (b) From the figure, diameter of the cylinder (d) = 2. 53 cm (c) Error in d (δd) = 0. 005 cm ∴ Percentage error: (d) Cross-sectional area (A) = ∴ Percentage error: Return to Text © Manhattan Press (H. K. ) Ltd. 57