UnitIV Mechanical Failure MECHANICAL FAILURE Mechanical failures involve









- Slides: 31

Unit-IV Mechanical Failure

MECHANICAL FAILURE • Mechanical failures involve a complex interaction of load, time, and environment (i. e. temperature and corrosion). • Loads may be monotonic, steady, variable, uniaxial or multiaxial. • The loading duration may range from centuries to years, as in steel bridges, or to seconds or milliseconds, as in firing a handgun. • Temperatures can vary from cryogenic with rocket motor fuels, to over a thousand degrees Celsius, with gas turbine engines. Temperatures may be isothermal or variable.

MECHANICAL FAILURE MODES OF METALS • Excess deformation–elastic, or yielding (i. e. onset of plasticity) Ø Excess deformation by yielding is probably the most commonly studied failure mode. It is based upon the maximum shear stress criterion or the octahedral shear stress criterion. Ø Failure by excess deformation may also be elastic such as in rotating machinery where seizure can occur. • Ductile fracture Ø Ductile fracture involves significant plasticity. Ø It is associated with high-energy absorption with fracture.

MECHANICAL FAILURE MODES OF METALS Brittle fracture • Brittle fracture contains little plasticity. • It involves low energy absorption. Impact or dynamic loading • Can cause excess deformation or fracture. • Impact or dynamic loading conditions that create high strain rates in metals tend to cause lower toughness and ductility. Creep • can cause excess deformation or fracture. • In metals it is most predominant at elevated temperatures. • Example: Gas turbine engine blades due to centrifugal forces.

MECHANICAL FAILURE MODES OF METALS Relaxation • Relaxation is primarily responsible for loss of residual stress and loss of external load that can occur in bolted fasteners at elevated or ambient temperature. Thermal shock • Thermal shock tends to promote cracking and/or brittle fracture. • Example: quenching operation during heat treatment of metals.

MECHANICAL FAILURE MODES OF METALS Wear • Can occur at any temperature and include many possible failure mechanisms. • Dominant in roller or taper bearings and in gear teeth surfaces. Buckling • Buckling failure can be induced by external loading or by thermal conditions. • Can involve elastic or plastic instabilities. • Most dominant in columns and thin sheets subjected to compressive loads.

FRACTURE • Fracture: separation of a body into pieces due to stress, at temperatures below the melting point. Steps in fracture: • crack formation • crack propagation • Depending on the ability of material to undergo plastic deformation before the fracture two fracture modes can be defined - ductile or brittle • Ductile fracture - most metals (not too cold): • Extensive plastic deformation ahead of crack • Crack is “stable”: resists further extension unless applied stress is increased • Brittle fracture - ceramics, ice, cold metals: • Relatively little plastic deformation • Crack is “unstable”: propagates rapidly without increase in applied stress

Brittle vs. Ductile Fracture Ductile materials - extensive plastic deformation and energy absorption (“toughness”) before fracture • Brittle materials - little plastic deformation and low energy absorption before fracture

Brittle vs. Ductile Fracture A. Very ductile, soft metals (e. g. Pb, Au) at room temperature, other metals, polymers, glasses at high temperature. B. Moderately ductile fracture, typical for ductile metals C. Brittle fracture, cold metals, ceramics. A B C

Ductile Fracture (Dislocation Mediated) (a) Necking (b) Formation of microvoids (c) Coalescence of microvoids to form a crack (d) Crack propagation by shear deformation (e) Fracture 45 degree -Maximum shear stress Crack grows 90 degree to applied stress Cup-and-cone fracture

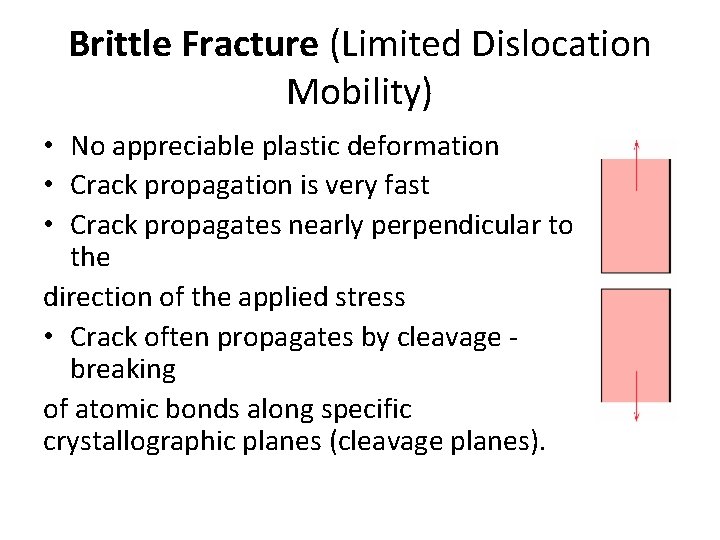
Brittle Fracture (Limited Dislocation Mobility) • No appreciable plastic deformation • Crack propagation is very fast • Crack propagates nearly perpendicular to the direction of the applied stress • Crack often propagates by cleavage breaking of atomic bonds along specific crystallographic planes (cleavage planes).

Brittle Fracture A. Transgranular fracture: Fracture cracks pass through grains. Fracture surface have faceted texture because of different orientation of cleavage planes in grains. B. Intergranular fracture: Fracture crack propagation is along grain boundaries (grain boundaries are weakened or embrittled by impurities segregation etc. )

PRINCIPLES OF FRACTURE MECHANICS • The measured fracture strengths for most materials are significantly lower than those predicted by theoretical calculations based on atomic bonding energies. This discrepancy is explained by the presence of microscopic flaws or cracks that always exist under normal conditions at the surface and within the interior of a body of material. These flaws are a detriment to the fracture strength because an applied stress may be amplified or concentrated at the tip, the magnitude of this amplification depending on crack orientation and geometry. This phenomenon is demonstrated in Figure a

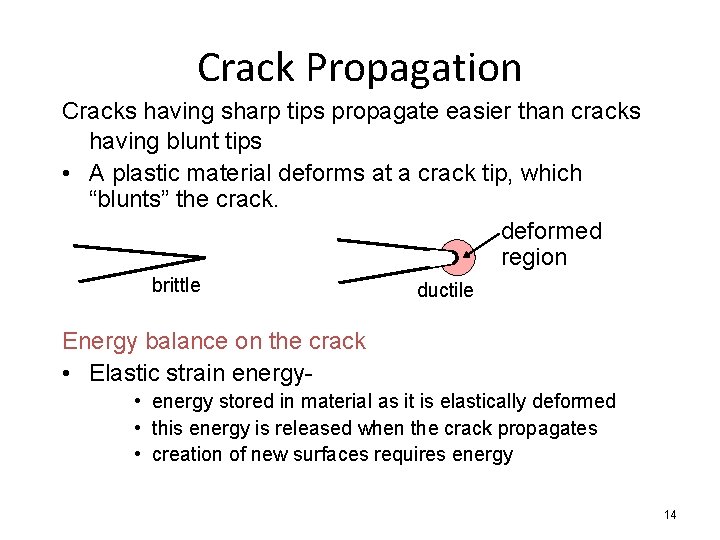
Crack Propagation Cracks having sharp tips propagate easier than cracks having blunt tips • A plastic material deforms at a crack tip, which “blunts” the crack. deformed region brittle ductile Energy balance on the crack • Elastic strain energy • energy stored in material as it is elastically deformed • this energy is released when the crack propagates • creation of new surfaces requires energy 14

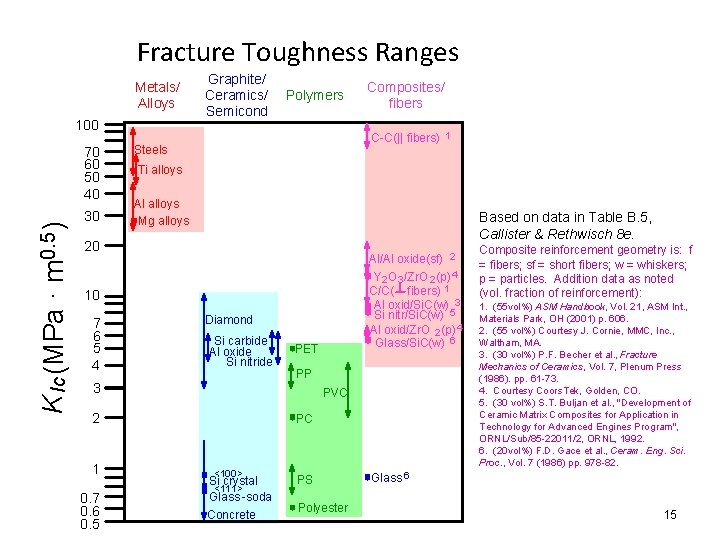
Fracture Toughness Ranges Metals/ Alloys 100 K Ic (MPa · m 0. 5 ) 70 60 50 40 30 Graphite/ Ceramics/ Semicond Polymers C-C(|| fibers) 1 Steels Ti alloys Al alloys Mg alloys Based on data in Table B. 5, Callister & Rethwisch 8 e. 20 Al/Al oxide(sf) 2 Y 2 O 3 /Zr. O 2 (p) 4 C/C( fibers) 1 Al oxid/Si. C(w) 3 Si nitr/Si. C(w) 5 Al oxid/Zr. O 2 (p) 4 Glass/Si. C(w) 6 10 7 6 5 4 Diamond Si carbide Al oxide Si nitride 3 0. 7 0. 6 0. 5 PET PP PVC 2 1 Composites/ fibers PC <100> Si crystal <111> Glass -soda Concrete PS Polyester Composite reinforcement geometry is: f = fibers; sf = short fibers; w = whiskers; p = particles. Addition data as noted (vol. fraction of reinforcement): 1. (55 vol%) ASM Handbook, Vol. 21, ASM Int. , Materials Park, OH (2001) p. 606. 2. (55 vol%) Courtesy J. Cornie, MMC, Inc. , Waltham, MA. 3. (30 vol%) P. F. Becher et al. , Fracture Mechanics of Ceramics, Vol. 7, Plenum Press (1986). pp. 61 -73. 4. Courtesy Coors. Tek, Golden, CO. 5. (30 vol%) S. T. Buljan et al. , "Development of Ceramic Matrix Composites for Application in Technology for Advanced Engines Program", ORNL/Sub/85 -22011/2, ORNL, 1992. 6. (20 vol%) F. D. Gace et al. , Ceram. Eng. Sci. Proc. , Vol. 7 (1986) pp. 978 -82. Glass 6 15

Baldwin Hydraulic Machine for Tension & Compression test

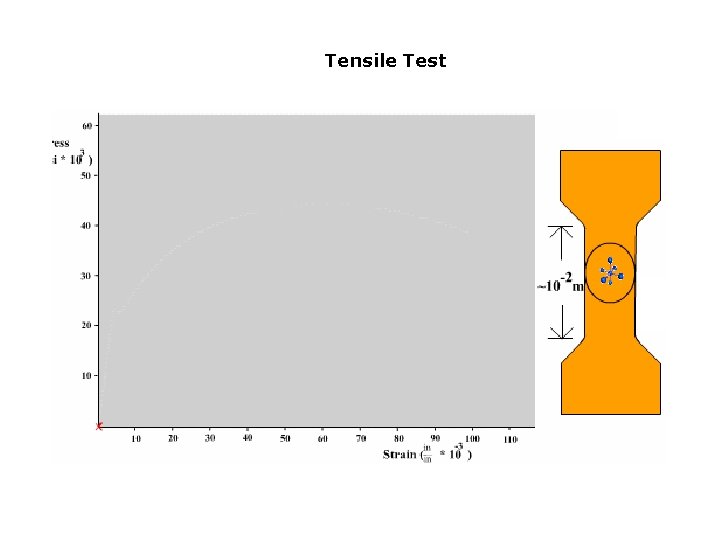
Tensile Test Click START

Tensile Test Elastic Region: • This is the region where stress is proportional to strain

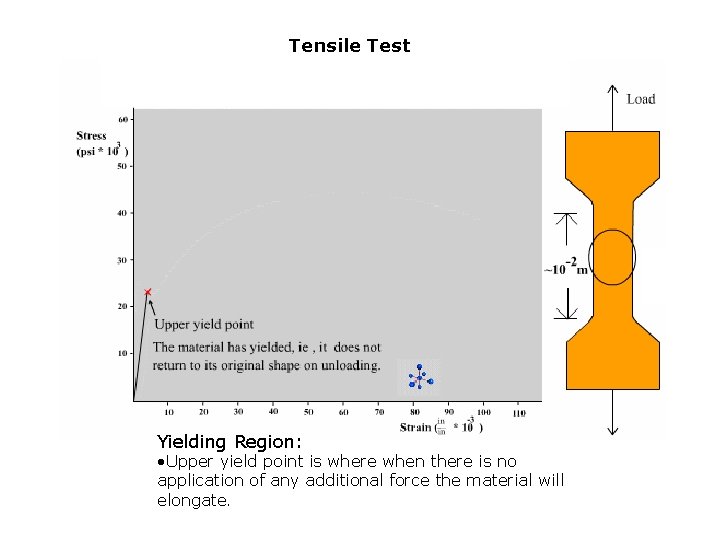
Tensile Test Yielding Region: • Upper yield point is where when there is no application of any additional force the material will elongate.

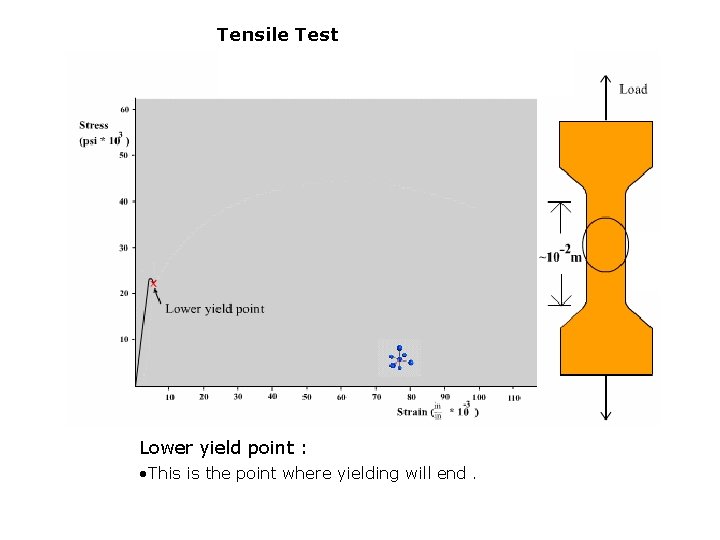
Tensile Test Lower yield point : • This is the point where yielding will end.

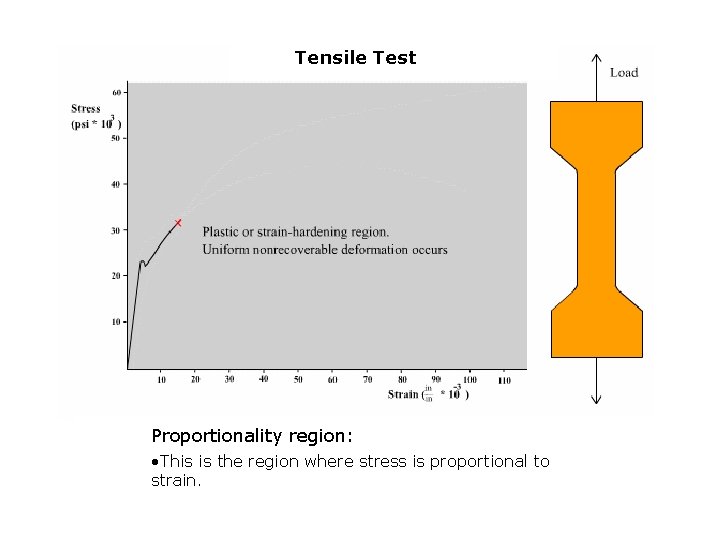
Tensile Test Proportionality region: • This is the region where stress is proportional to strain.

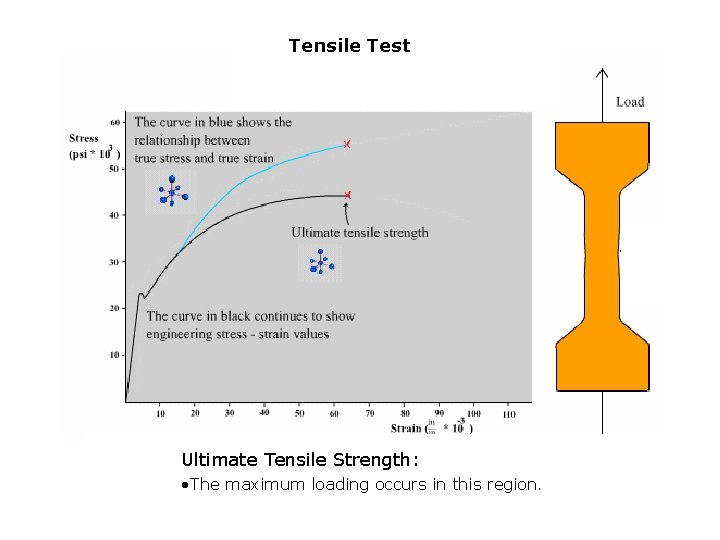
Tensile Test Ultimate Tensile Strength: • The maximum loading occurs in this region.

Tensile Test Necking: • Fracture of material occurs by reduction of area.

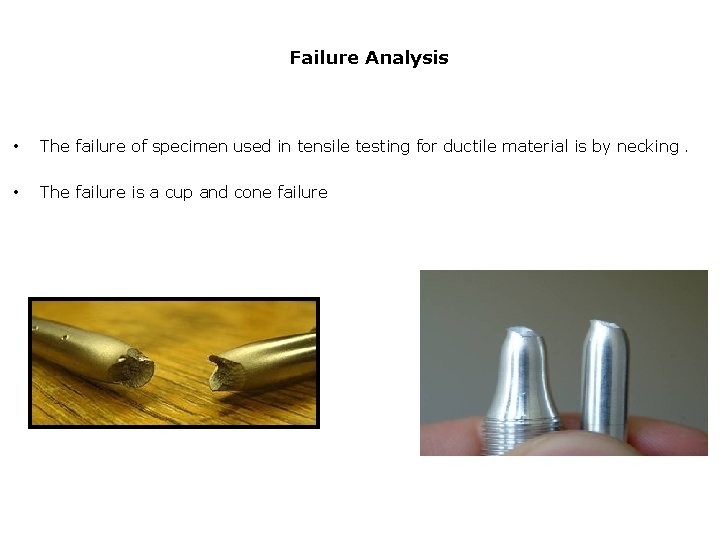
Failure Analysis • The failure of specimen used in tensile testing for ductile material is by necking. • The failure is a cup and cone failure

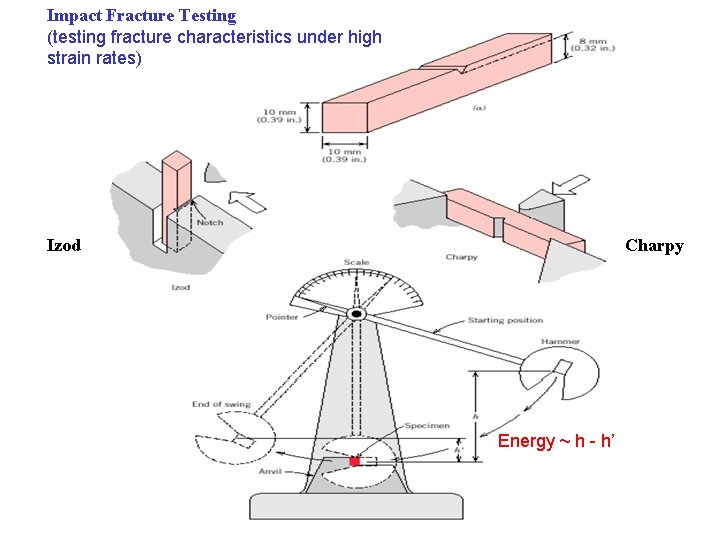
Impact Fracture Testing (testing fracture characteristics under high strain rates) Izod Charpy Energy ~ h - h’

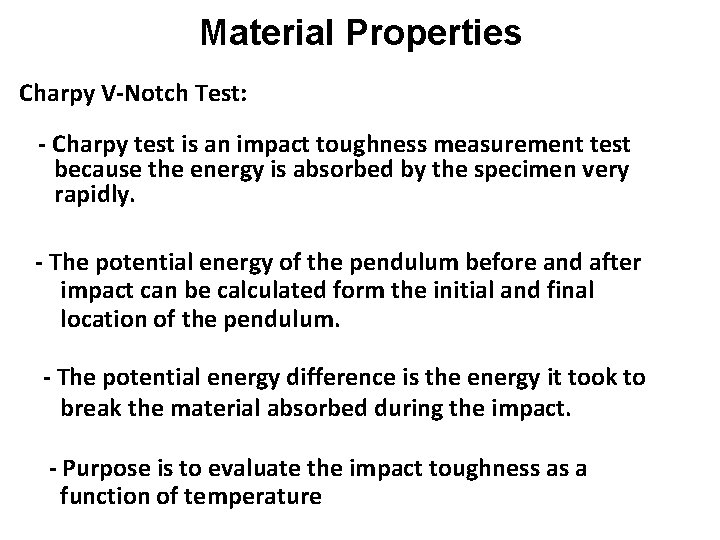
Material Properties Charpy V-Notch Test: - Charpy test is an impact toughness measurement test because the energy is absorbed by the specimen very rapidly. - The potential energy of the pendulum before and after impact can be calculated form the initial and final location of the pendulum. - The potential energy difference is the energy it took to break the material absorbed during the impact. - Purpose is to evaluate the impact toughness as a function of temperature

Material Properties Charpy V-Notch Test:

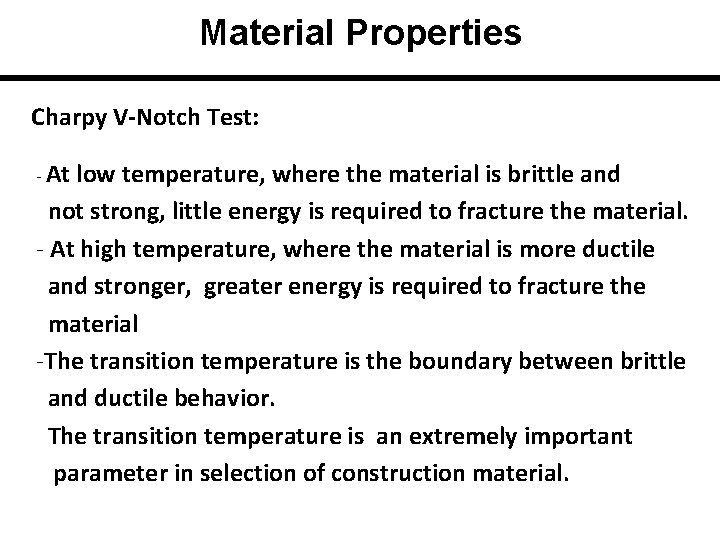
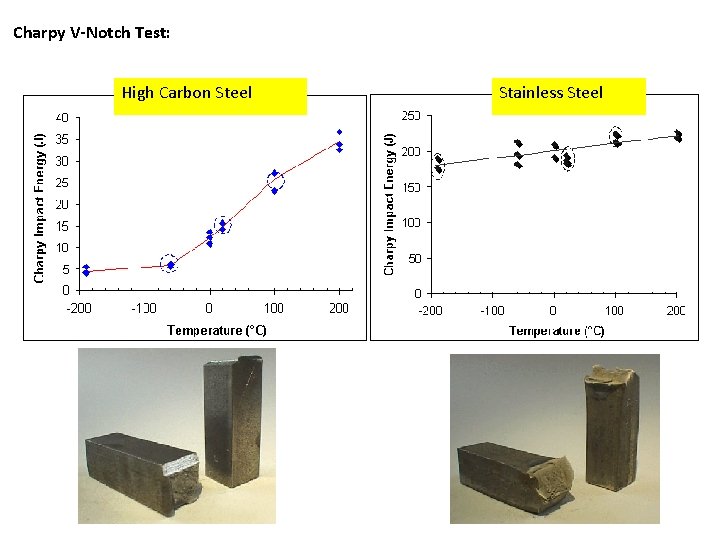
Material Properties Charpy V-Notch Test: - At low temperature, where the material is brittle and not strong, little energy is required to fracture the material. - At high temperature, where the material is more ductile and stronger, greater energy is required to fracture the material -The transition temperature is the boundary between brittle and ductile behavior. The transition temperature is an extremely important parameter in selection of construction material.

Charpy V-Notch Test: High Carbon Steel Stainless Steel

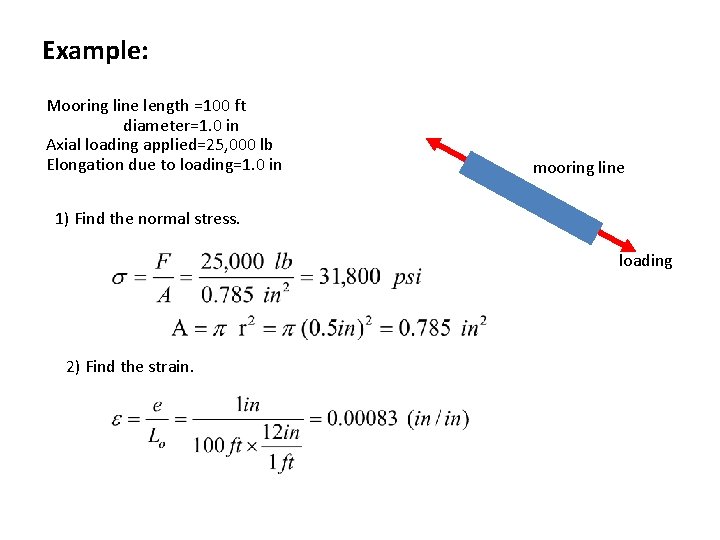
Example: Mooring line length =100 ft diameter=1. 0 in Axial loading applied=25, 000 lb Elongation due to loading=1. 0 in mooring line 1) Find the normal stress. loading 2) Find the strain.

Example: - Salvage crane is lifting an object of 20, 000 lb. - Characteristics of the cable diameter=1. 0 in, length prior to lifting =50 ft 1) Find the normal stress in the cable. 2) Find the strain. 3) Determine the cable stretch in inches.