LVMC 06 982021 Geraint W Jones Engineering Group


- Slides: 32

LVMC 06 9/8/2021 Geraint W Jones Engineering Group Leader Metrology Airbus UK Large Jig Verification Project Use menu "View - Header & Footer" for Presentation title - Siglum - Reference

© AIRBUS UK LTD. All rights reserved. Confidential and proprietary document. Background Use menu "View - Header & Footer" for Presentation title - Siglum - Reference month 200 X 2

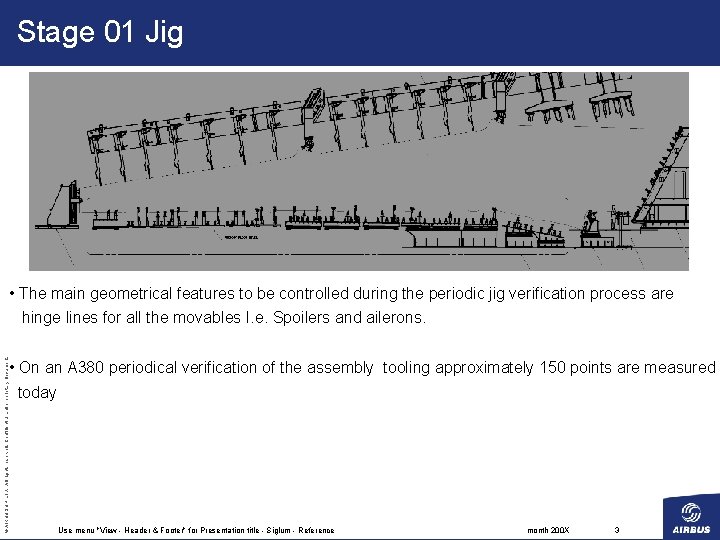
Stage 01 Jig • The main geometrical features to be controlled during the periodic jig verification process are © AIRBUS UK LTD. All rights reserved. Confidential and proprietary document. hinge lines for all the movables I. e. Spoilers and ailerons. • On an A 380 periodical verification of the assembly tooling approximately 150 points are measured today Use menu "View - Header & Footer" for Presentation title - Siglum - Reference month 200 X 3

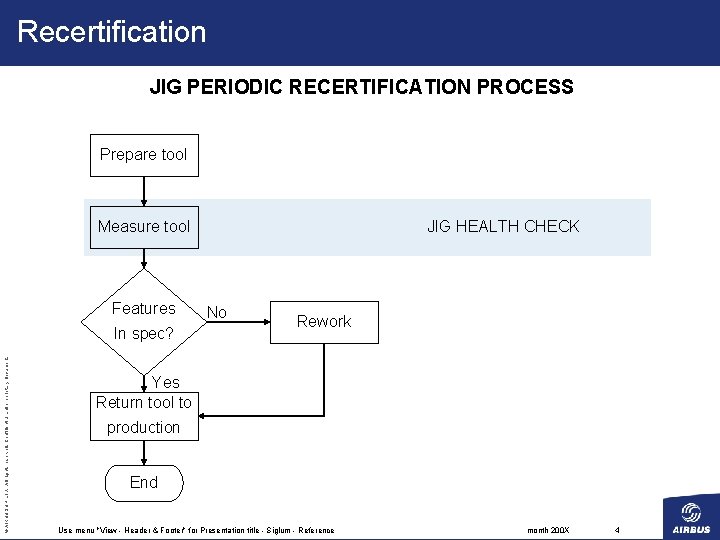
Recertification JIG PERIODIC RECERTIFICATION PROCESS Prepare tool Measure tool Features © AIRBUS UK LTD. All rights reserved. Confidential and proprietary document. In spec? JIG HEALTH CHECK No Rework Yes Return tool to production End Use menu "View - Header & Footer" for Presentation title - Siglum - Reference month 200 X 4

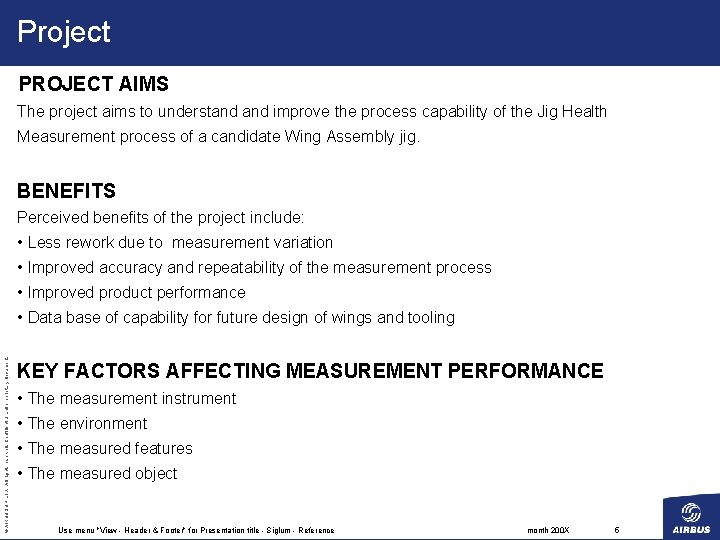
Project PROJECT AIMS The project aims to understand improve the process capability of the Jig Health Measurement process of a candidate Wing Assembly jig. BENEFITS Perceived benefits of the project include: • Less rework due to measurement variation • Improved accuracy and repeatability of the measurement process • Improved product performance © AIRBUS UK LTD. All rights reserved. Confidential and proprietary document. • Data base of capability for future design of wings and tooling KEY FACTORS AFFECTING MEASUREMENT PERFORMANCE • The measurement instrument • The environment • The measured features • The measured object Use menu "View - Header & Footer" for Presentation title - Siglum - Reference month 200 X 5

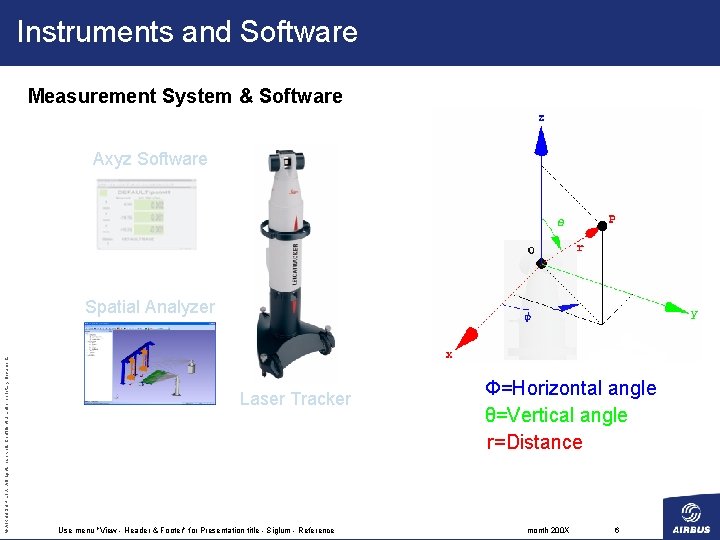
Instruments and Software Measurement System & Software Axyz Software © AIRBUS UK LTD. All rights reserved. Confidential and proprietary document. Spatial Analyzer Laser Tracker Use menu "View - Header & Footer" for Presentation title - Siglum - Reference Φ=Horizontal angle θ=Vertical angle r=Distance month 200 X 6

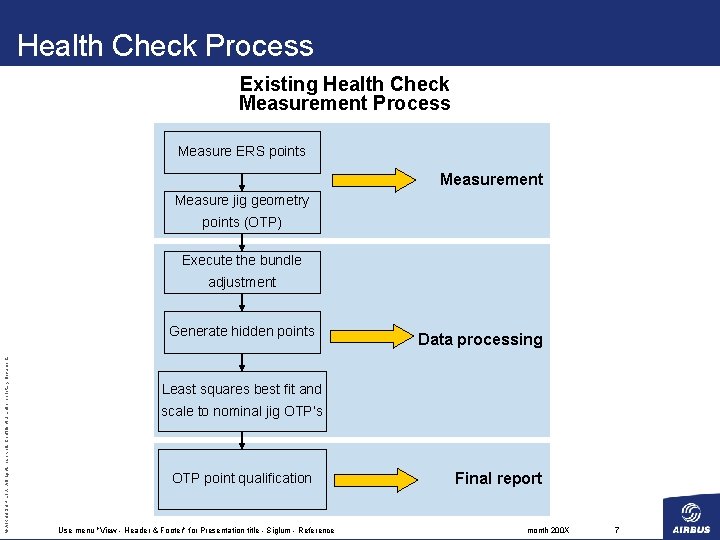
Health Check Process Existing Health Check Measurement Process Measure ERS points Measurement Measure jig geometry points (OTP) Execute the bundle adjustment © AIRBUS UK LTD. All rights reserved. Confidential and proprietary document. Generate hidden points Data processing Least squares best fit and scale to nominal jig OTP’s OTP point qualification Use menu "View - Header & Footer" for Presentation title - Siglum - Reference Final report month 200 X 7

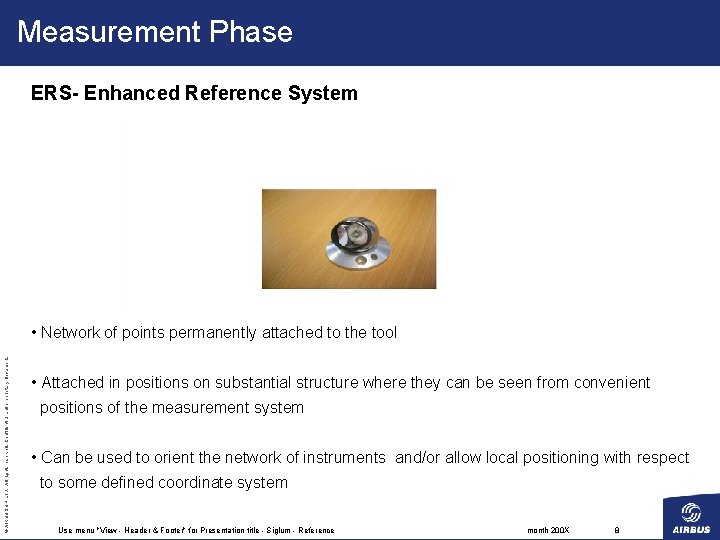
Measurement Phase ERS- Enhanced Reference System © AIRBUS UK LTD. All rights reserved. Confidential and proprietary document. • Network of points permanently attached to the tool • Attached in positions on substantial structure where they can be seen from convenient positions of the measurement system • Can be used to orient the network of instruments and/or allow local positioning with respect to some defined coordinate system Use menu "View - Header & Footer" for Presentation title - Siglum - Reference month 200 X 8

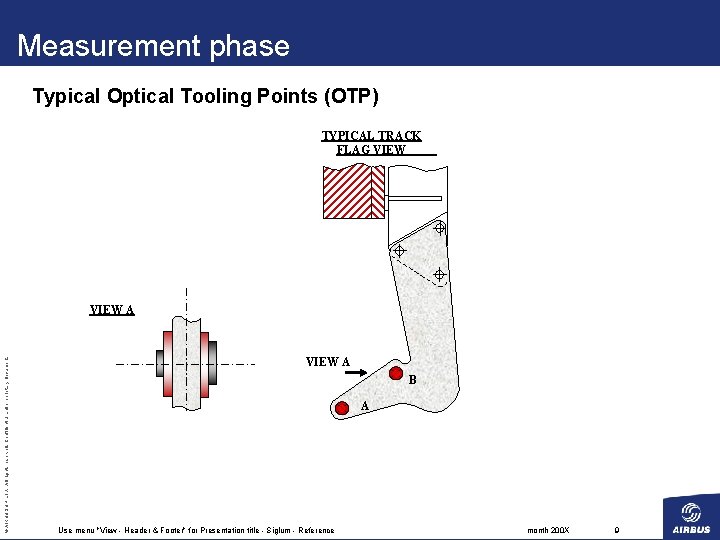
Measurement phase Typical Optical Tooling Points (OTP) TYPICAL TRACK FLAG VIEW © AIRBUS UK LTD. All rights reserved. Confidential and proprietary document. VIEW A B A Use menu "View - Header & Footer" for Presentation title - Siglum - Reference month 200 X 9

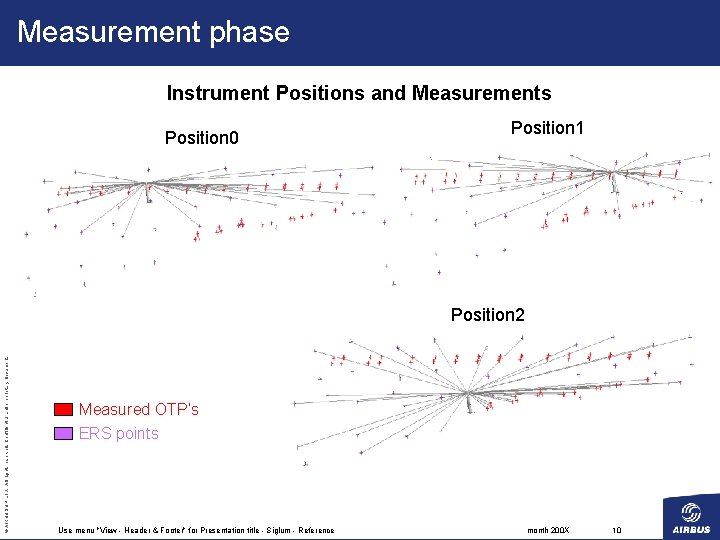
Measurement phase Instrument Positions and Measurements Position 0 Position 1 © AIRBUS UK LTD. All rights reserved. Confidential and proprietary document. Position 2 Measured OTP’s ERS points Use menu "View - Header & Footer" for Presentation title - Siglum - Reference month 200 X 10

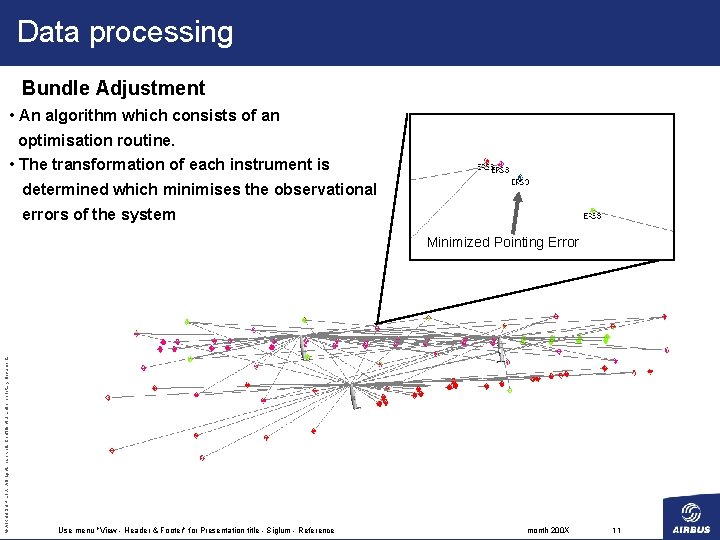
Data processing Bundle Adjustment • An algorithm which consists of an optimisation routine. • The transformation of each instrument is determined which minimises the observational errors of the system © AIRBUS UK LTD. All rights reserved. Confidential and proprietary document. Minimized Pointing Error Use menu "View - Header & Footer" for Presentation title - Siglum - Reference month 200 X 11

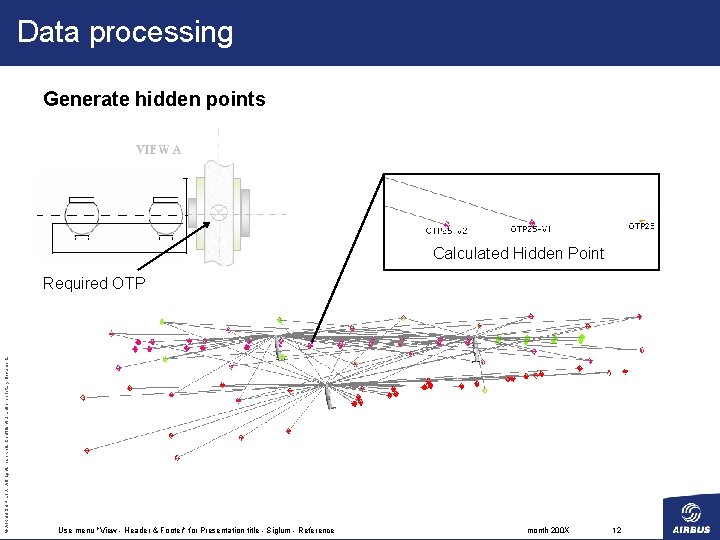
Data processing Generate hidden points Calculated Hidden Point © AIRBUS UK LTD. All rights reserved. Confidential and proprietary document. Required OTP Use menu "View - Header & Footer" for Presentation title - Siglum - Reference month 200 X 12

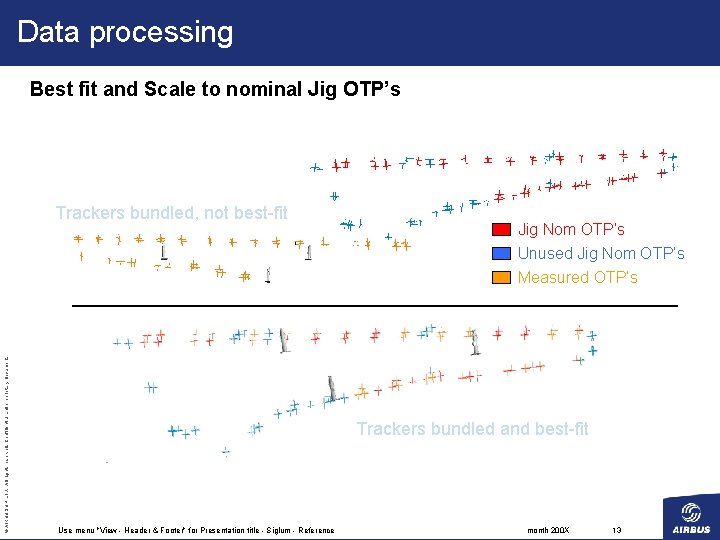
Data processing Best fit and Scale to nominal Jig OTP’s © AIRBUS UK LTD. All rights reserved. Confidential and proprietary document. Trackers bundled, not best-fit Jig Nom OTP’s Unused Jig Nom OTP’s Measured OTP’s Trackers bundled and best-fit Use menu "View - Header & Footer" for Presentation title - Siglum - Reference month 200 X 13

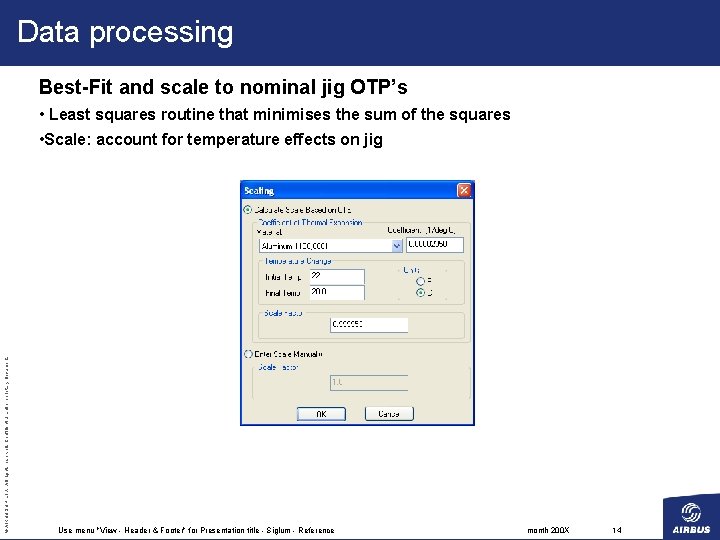
Data processing Best-Fit and scale to nominal jig OTP’s • Least squares routine that minimises the sum of the squares © AIRBUS UK LTD. All rights reserved. Confidential and proprietary document. • Scale: account for temperature effects on jig Use menu "View - Header & Footer" for Presentation title - Siglum - Reference month 200 X 14

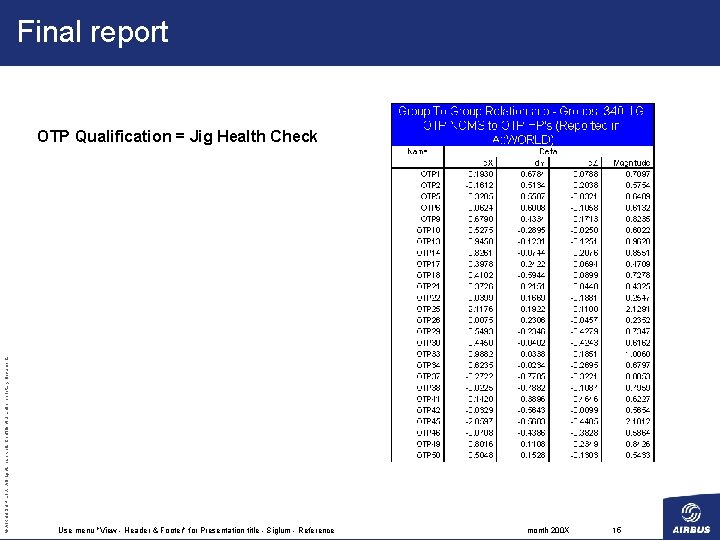
Final report © AIRBUS UK LTD. All rights reserved. Confidential and proprietary document. OTP Qualification = Jig Health Check Use menu "View - Header & Footer" for Presentation title - Siglum - Reference month 200 X 15

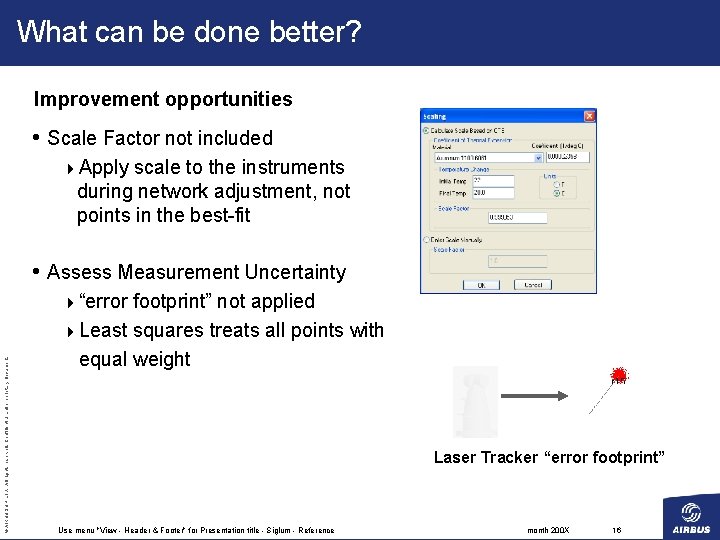
What can be done better? Improvement opportunities • Scale Factor not included 4 Apply scale to the instruments during network adjustment, not points in the best-fit • Assess Measurement Uncertainty © AIRBUS UK LTD. All rights reserved. Confidential and proprietary document. 4“error footprint” not applied 4 Least squares treats all points with equal weight Laser Tracker “error footprint” Use menu "View - Header & Footer" for Presentation title - Siglum - Reference month 200 X 16

What can be done better? Improvement opportunities • The effect on measurement performance due to laser tracker instrument placement and ERS proximity is unknown. • If we knew these effects we could optimise and standardise the measurement procedure • If we could express the measurement process capability it could result in: - Better informed decisions regarding rework - Better designs for future tools © AIRBUS UK LTD. All rights reserved. Confidential and proprietary document. - More appropriate specifications for setting and periodic checks - Save time and money!! Use menu "View - Header & Footer" for Presentation title - Siglum - Reference month 200 X 17

What can be done better? Additional evidence to back up case for improvement Evidence of ERS and subsequent OTP point variation upon recertification • Excessive rework on seemingly stable tooling monuments • ERS best fit results degradation • No standard method for valuation of ERS involving how many instruments required, © AIRBUS UK LTD. All rights reserved. Confidential and proprietary document. best practice for instrument placement and minimum points required for tie-in • Use of DVT (hidden point) tooling can have detrimental effect on measurement performance, need a case to back this up Use menu "View - Header & Footer" for Presentation title - Siglum - Reference month 200 X 18

Measurement Uncertainty - U D • A parameter that is associated with the result of a measurement, that characterises the dispersion of values that could reasonably be attributed to the measurand (VIM 1993, 3. 9) • An uncertainty is not an error, which is defined as the difference between the result of a measurement and the true value • If a measurement error is known, a correction can be applied to achieve a more accurate result. The remaining uncertainty (from that component) is the uncertainty in the correction © AIRBUS UK LTD. All rights reserved. Confidential and proprietary document. Arriving at a measurement uncertainty for a typically Large Scale measurement process such as this Airbus example involving multiple instrument locations was hitherto very difficult and Impractical. This is now possible! Use menu "View - Header & Footer" for Presentation title - Siglum - Reference month 200 X 19

Measurement uncertainty How can we understand the effects of instrument uncertainty, placement and the measurement procedure for Large Jig Verification? • New River Kinematics Unified Spatial Metrology Network (USMN) - Element of the Spatial Analyser software - Combines measurement systems - Allows for scaling at the bundle adjustment stage - Effectively uses the instrument “error footprint” to assess measurement performance © AIRBUS UK LTD. All rights reserved. Confidential and proprietary document. - Simulation tools to optimize job layout Use menu "View - Header & Footer" for Presentation title - Siglum - Reference month 200 X 20

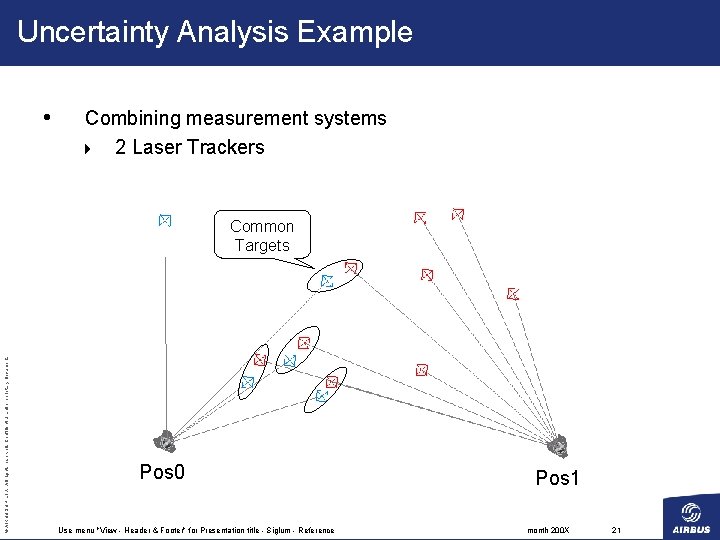
Uncertainty Analysis Example • Combining measurement systems 4 2 Laser Trackers © AIRBUS UK LTD. All rights reserved. Confidential and proprietary document. Common Targets Pos 0 Use menu "View - Header & Footer" for Presentation title - Siglum - Reference Pos 1 month 200 X 21

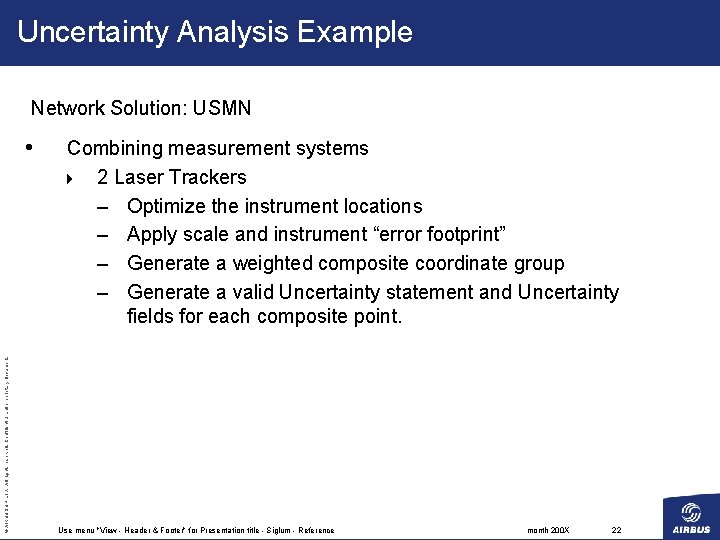
Uncertainty Analysis Example Network Solution: USMN © AIRBUS UK LTD. All rights reserved. Confidential and proprietary document. • Combining measurement systems 4 2 Laser Trackers – Optimize the instrument locations – Apply scale and instrument “error footprint” – Generate a weighted composite coordinate group – Generate a valid Uncertainty statement and Uncertainty fields for each composite point. Use menu "View - Header & Footer" for Presentation title - Siglum - Reference month 200 X 22

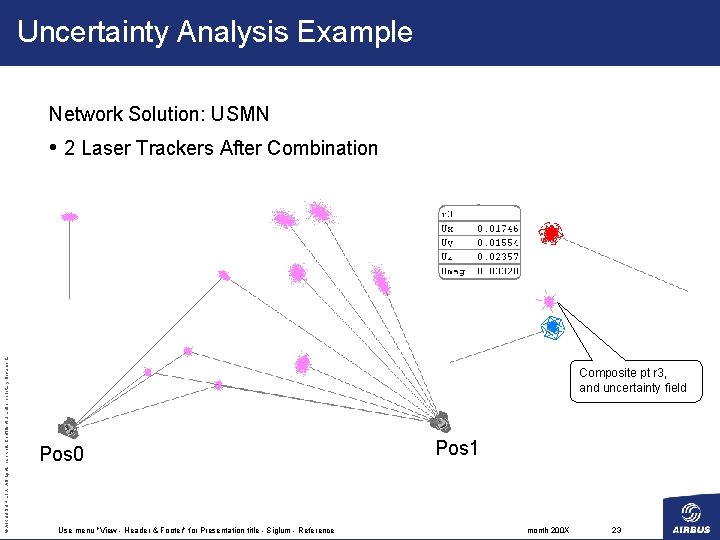
Uncertainty Analysis Example Network Solution: USMN © AIRBUS UK LTD. All rights reserved. Confidential and proprietary document. • 2 Laser Trackers After Combination Composite pt r 3, and uncertainty field Pos 0 Use menu "View - Header & Footer" for Presentation title - Siglum - Reference Pos 1 month 200 X 23

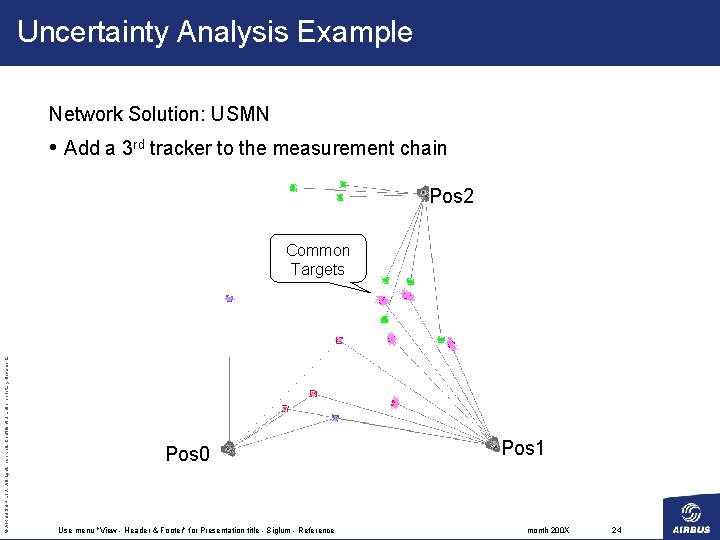
Uncertainty Analysis Example Network Solution: USMN • Add a 3 rd tracker to the measurement chain Pos 2 © AIRBUS UK LTD. All rights reserved. Confidential and proprietary document. Common Targets Pos 0 Use menu "View - Header & Footer" for Presentation title - Siglum - Reference Pos 1 month 200 X 24

Uncertainty Analysis Example Network Solution: USMN • Uncertainty propagation: open loop survey © AIRBUS UK LTD. All rights reserved. Confidential and proprietary document. Pos 2 Fixed Reference Pos 0 Use menu "View - Header & Footer" for Presentation title - Siglum - Reference Pos 1 month 200 X 25

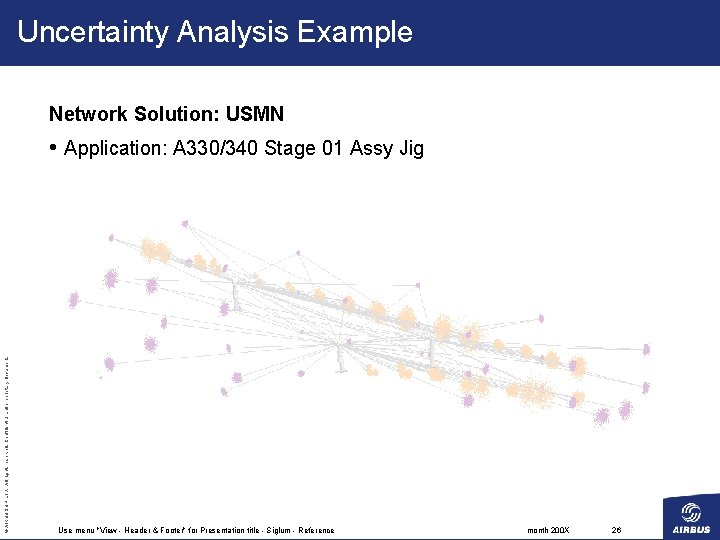
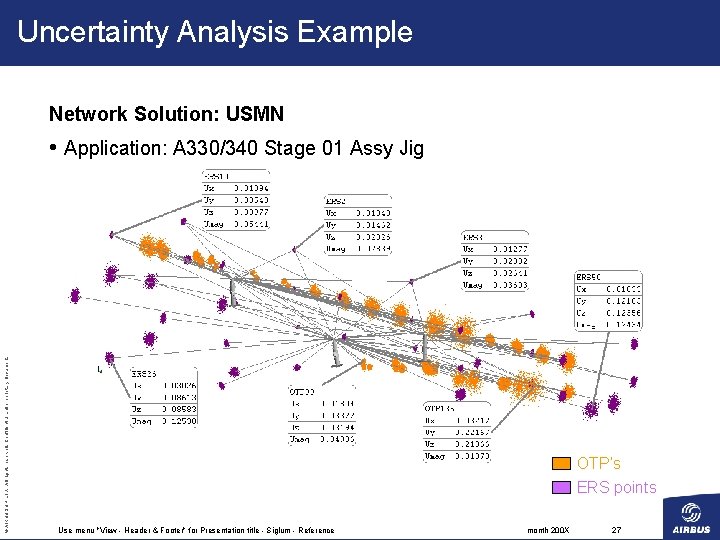
Uncertainty Analysis Example Network Solution: USMN © AIRBUS UK LTD. All rights reserved. Confidential and proprietary document. • Application: A 330/340 Stage 01 Assy Jig Use menu "View - Header & Footer" for Presentation title - Siglum - Reference month 200 X 26

Uncertainty Analysis Example Network Solution: USMN © AIRBUS UK LTD. All rights reserved. Confidential and proprietary document. • Application: A 330/340 Stage 01 Assy Jig OTP’s ERS points Use menu "View - Header & Footer" for Presentation title - Siglum - Reference month 200 X 27

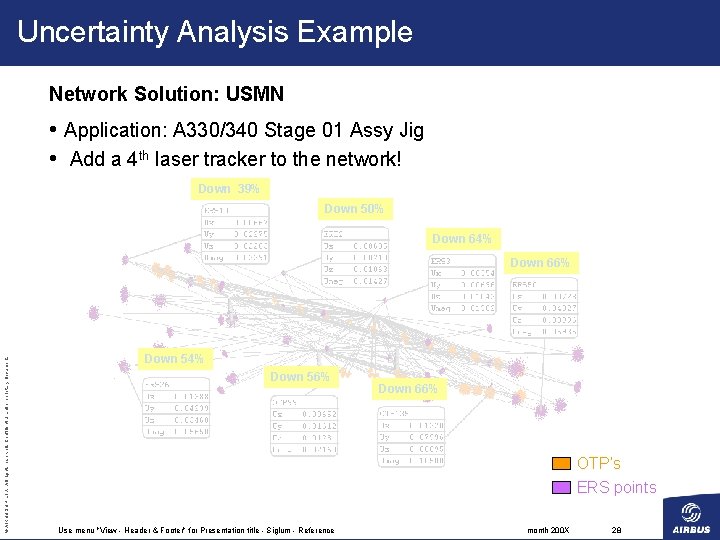
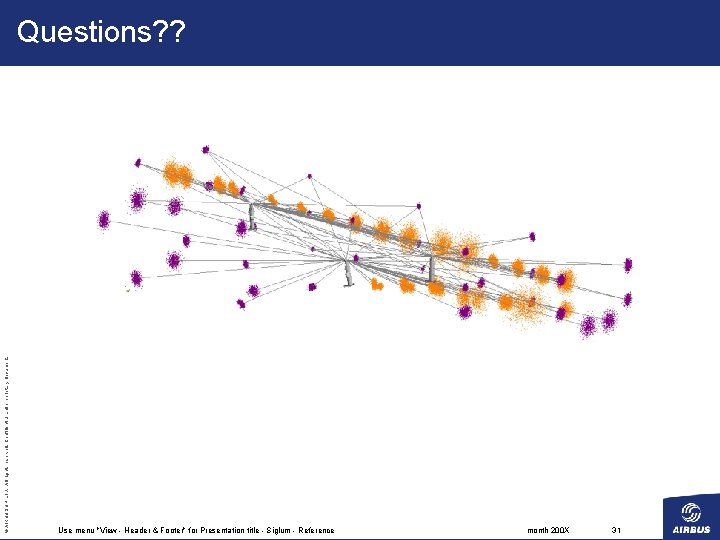
Uncertainty Analysis Example Network Solution: USMN • Application: A 330/340 Stage 01 Assy Jig • Add a 4 th laser tracker to the network! Down 39% Down 50% Down 64% © AIRBUS UK LTD. All rights reserved. Confidential and proprietary document. Down 66% Down 54% Down 56% Down 66% OTP’s ERS points Use menu "View - Header & Footer" for Presentation title - Siglum - Reference month 200 X 28

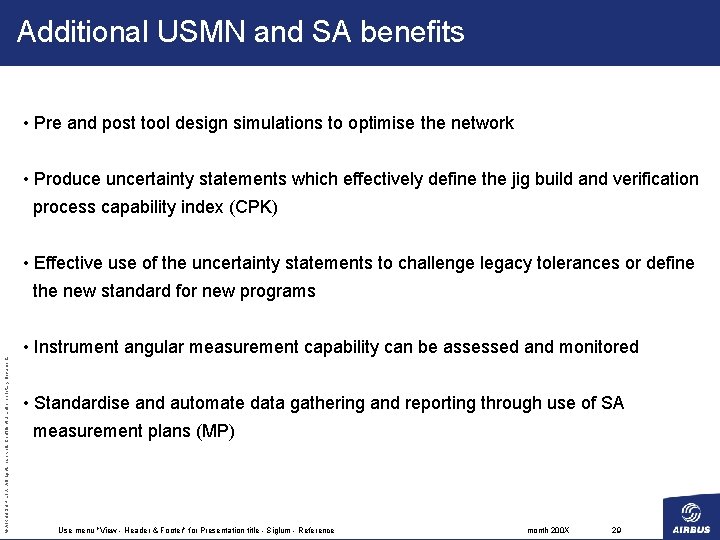
Additional USMN and SA benefits • Pre and post tool design simulations to optimise the network • Produce uncertainty statements which effectively define the jig build and verification process capability index (CPK) • Effective use of the uncertainty statements to challenge legacy tolerances or define © AIRBUS UK LTD. All rights reserved. Confidential and proprietary document. the new standard for new programs • Instrument angular measurement capability can be assessed and monitored • Standardise and automate data gathering and reporting through use of SA measurement plans (MP) Use menu "View - Header & Footer" for Presentation title - Siglum - Reference month 200 X 29

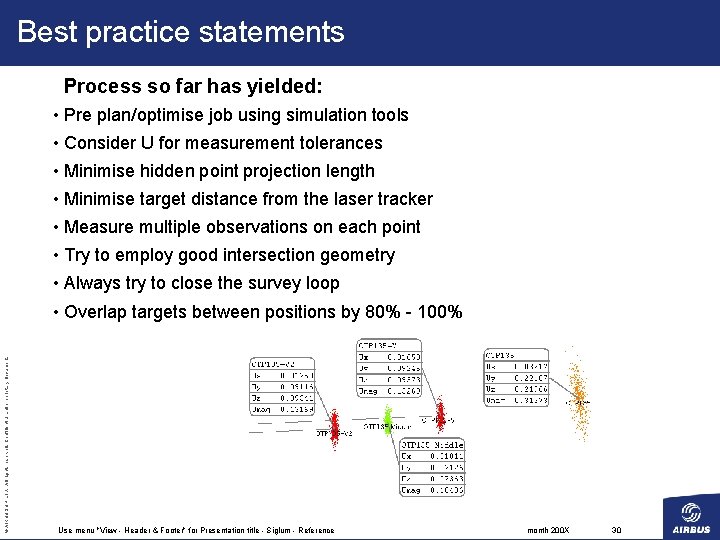
Best practice statements Process so far has yielded: • Pre plan/optimise job using simulation tools • Consider U for measurement tolerances • Minimise hidden point projection length • Minimise target distance from the laser tracker • Measure multiple observations on each point • Try to employ good intersection geometry • Always try to close the survey loop © AIRBUS UK LTD. All rights reserved. Confidential and proprietary document. • Overlap targets between positions by 80% - 100% Use menu "View - Header & Footer" for Presentation title - Siglum - Reference month 200 X 30

© AIRBUS UK LTD. All rights reserved. Confidential and proprietary document. Questions? ? Use menu "View - Header & Footer" for Presentation title - Siglum - Reference month 200 X 31

© AIRBUS UK LTD. All rights reserved. Confidential and proprietary document. This document and all information contained herein is the sole property of AIRBUS UK LTD. No intellectual property rights are granted by the delivery of this document or the disclosure of its content. This document shall not be reproduced or disclosed to a third party without the express written consent of AIRBUS UK LTD. This document and its content shall not be used for any purpose other than that for which it is supplied. The statements made herein do not constitute an offer. They are based on the mentioned assumptions and are expressed in good faith. Where the supporting grounds for these statements are not shown, AIRBUS UK LTD will be pleased to explain the basis thereof. © AIRBUS UK LTD. All rights reserved. Confidential and proprietary document. AIRBUS, its logo, A 300, A 318, A 319, A 320, A 321, A 330, A 340, A 350, A 380, A 400 M are registered trademarks. Use menu "View - Header & Footer" for Presentation title - Siglum - Reference month 200 X 32