JACKSON STATE UNIVERSITY Online Requisition ENTRY AND APPROVAL


- Slides: 31

JACKSON STATE UNIVERSITY Online Requisition ENTRY AND APPROVAL PROCEDURES “Maximizing the Efficiencies of the Purchasing Process” 1

Log into Banner Go to www. jsums. edu/Banner to access banner. Log into Banner. Enter your J number and password. 2

Buttons to Remember Next Block Button Save Button Exit Button Execute Query 3

Vendor ID Search Type FOICOMP directly in the Go To field on the Banner main menu and press Enter to access the vendor search form. 4

Search for Vendor In the Name column, enter part of the vendor’s name using the wildcard (%) at the beginning of the first character and at the end of the last character (e. g. %Flooring%). We are searching for 3 -D Flooring. This field is case sensitive. From the menu bar click the Execute Query icon to retrieve the list of names that are similar to the one you are searching for. The shortcut key for Execute Query is F 8, press F 7 to clear results. Record the J number of your vendor, then exit this form. This J number will be used later. 5

Log into Banner Access the Requisition form Type FPAREQN directly in the Go To field on the Banner main menu and press Enter to access the requisition form. 6

Entering Requestor and Delivery Information Click the NEXT BLOCK button 7

The Order Date and Transaction Date should remain as the defaulted current date. Choose your date, then click OK Delivery Date – Enter a date that is 10 business days after the order date. Double click in the date field or click on the calendar to choose your delivery date. Click Next Block 8

Entering Vendor Information Your name and organization information will automatically populate. *Note: You will only be allowed to change your organization number if you are assigned to multiple budgets. Tab to Ship To, and enter CENREC and press tab Tab to Attention To, and enter the recipient’s name, Department, Building. Click Next Block 9

Enter the J# of your vendor and press tab, the vendor information will then populate. If the address does not match, click on the address type drop down arrow to select the correct address for which the PO should be mailed. Discount = 30 Click Next Block 10

Entering Commodity & Budget Accounting Enter the description of the goods or services you are requesting. Use the following format. Item Name/ Item Description/ Item Number Example: Scissors Black 7” Straight #EXP 10646 No entry 11

Enter the Unit of Measure (i. e. the way the goods are sold or packaged). For example, EA for Each or CTN for Carton. Press the search button to review a list of choices. No entry Enter the quantity you wish to purchase Enter the price for the goods or services requested. To enter additional products for this requisition, press the down arrow key on your keyboard and repeat the previous steps. When you have finished entering all of your items, press the Next Block icon. 12

Press the down arrow on your keyboard to start a new item. 13

If you need to enter more information than will fit in the description field, follow the steps below Click Options from the main menu, and select Item Text 14

Save button In the text form that appears, press the Next Block icon. When you have finished adding text, press the Save button and then press the Exit button to return to your requisition. NOTE: Press the down arrow key to go to the next line in this form. 15

Click Next Block to go the FOAPAL Validate your Fund, Org, and Program. Tab to the Account field and enter the correct account number Tab to “Extended” and enter the amount for this account code 16

To enter multiple account codes, tab to the COA field and press the down arrow key and enter the next FOAPAL, with the corresponding “Extended” amount. Your accounting total should equal your document total Click Next Block 17

Completing a Requisition Review each tab to insure that the requisition is correct. Note: Once you click Complete, your requisition can not be changed. Click complete button, and document will be forwarded to approval process 18

Make note of the requisition number for tracking purposes. 19

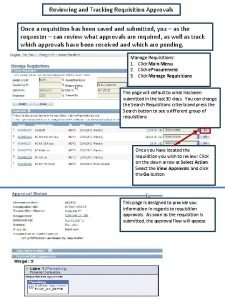
Approve Requisitions in JSU P. A. W. S. Navigate to JSU P. A. W. S. 20

Enter your User ID and PIN. If you do not know your pin, click “Do not know my PIN? ” for instructions on resetting your PIN. 21

Select the “Finance” tab or…. . …select “Finance” from the Main Menu 22

Select “Approve Documents” 23

Make sure User ID is populated. Then you may enter the document number or select one of the other available options. Submit query 24

To view a document prior to approving or disapproving the document, click the document number 25

Shows requisition header information, i. e. requestor, ship to, vendor, etc. Shows commodity information Shows FUND, ORGN, ACCT, PROG, ACTV, accounting distribution 26

After reviewing the requisition, select “Approve Documents” to return to the previous menu 27

Click here to approve a document Click here to disapprove a document 28

You may type additional comments here. Click here to approve document 29

Select “Continue” to return to the “Approve Documents” menu 30

Click here to return to the Finance main menu or… … click here to EXIT 31
 Jackson state university finance department
 Double entry method
 Farm records and accounts
 New entry entrepreneurship
 Sap iisc
 Evacuated tube system materials
 Pembelian terus 1pp
 Vendror
 Easy pay payroll software
 Po life cycle
 Traveling requisition
 Requisition procedure step 1-7
 Form describes
 Requisition tracking system
 Efoncier
 Requisition
 Requisition
 Cos p-a
 Requisition
 Special entry access scheme monash
 Jweb jscc
 The online data entry control called preformatting is
 University of bath psychology entry requirements
 University of birmingham law entry requirements
 Post-approval stability protocol and stability commitment
 Neurotic needs
 New drug development and approval process
 Lsas fsis
 Lsas usda
 Label submission and approval system (lsas)
 Yerevan state university of architecture and construction
 Portland state university undergraduate tuition and fees

