Fermi IDM CAD Tony Parker May 2004 Initial
- Slides: 45

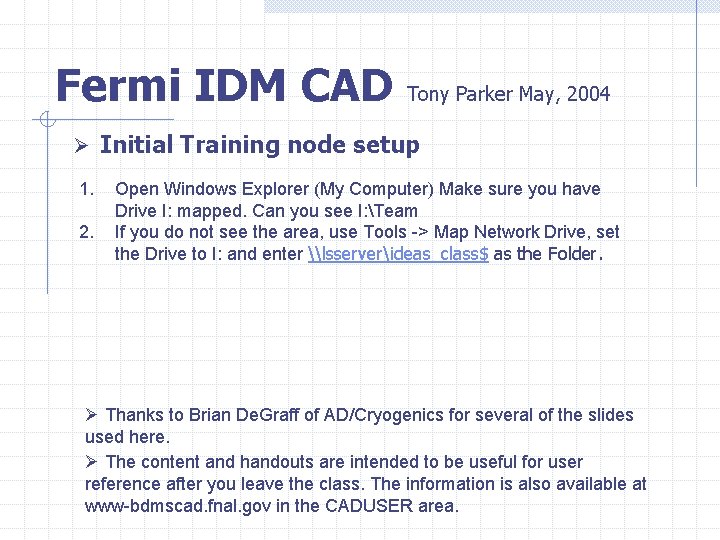
Fermi IDM CAD Tony Parker May, 2004 Ø Initial Training node setup 1. 2. Open Windows Explorer (My Computer) Make sure you have Drive I: mapped. Can you see I: Team If you do not see the area, use Tools -> Map Network Drive, set the Drive to I: and enter \lsserverideas_class$ as the Folder. Ø Thanks to Brian De. Graff of AD/Cryogenics for several of the slides used here. Ø The content and handouts are intended to be useful for user reference after you leave the class. The information is also available at www-bdmscad. fnal. gov in the CADUSER area.

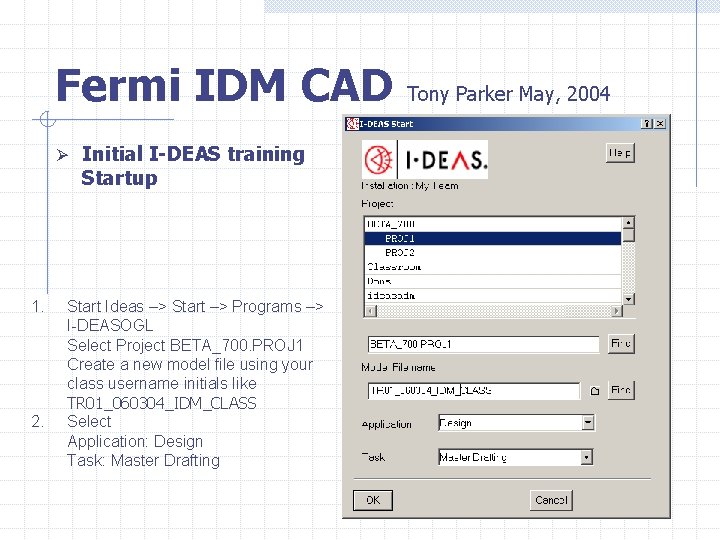
Fermi IDM CAD Tony Parker May, 2004 Ø Initial I-DEAS training Startup 1. 2. Start Ideas –> Start –> Programs –> I-DEASOGL Select Project BETA_700. PROJ 1 Create a new model file using your class username initials like TR 01_060304_IDM_CLASS Select Application: Design Task: Master Drafting

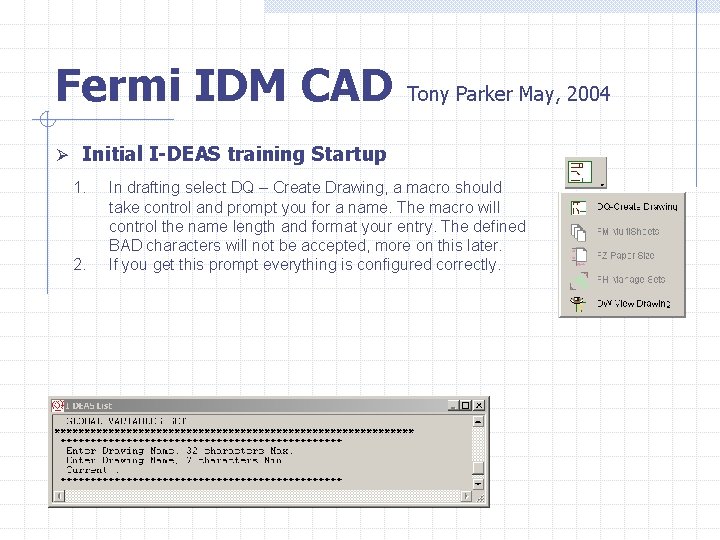
Fermi IDM CAD Tony Parker May, 2004 Ø Initial I-DEAS training Startup 1. 2. In drafting select DQ – Create Drawing, a macro should take control and prompt you for a name. The macro will control the name length and format your entry. The defined BAD characters will not be accepted, more on this later. If you get this prompt everything is configured correctly.

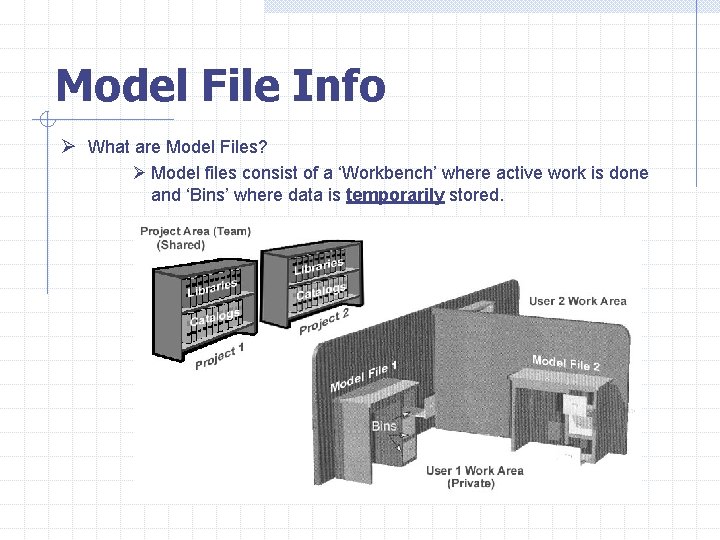
Model File Info Ø What are Model Files? Ø Model files consist of a ‘Workbench’ where active work is done and ‘Bins’ where data is temporarily stored.

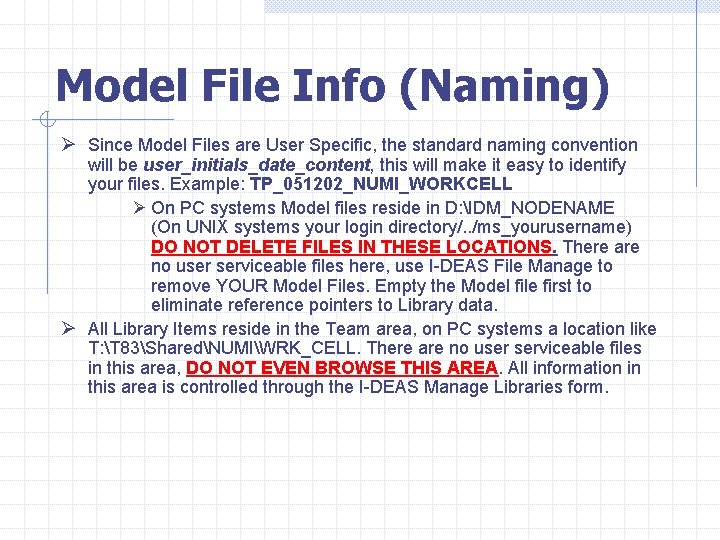
Model File Info (Naming) Ø Since Model Files are User Specific, the standard naming convention will be user_initials_date_content, this will make it easy to identify your files. Example: TP_051202_NUMI_WORKCELL Ø On PC systems Model files reside in D: IDM_NODENAME (On UNIX systems your login directory/. . /ms_yourusername) DO NOT DELETE FILES IN THESE LOCATIONS. There are no user serviceable files here, use I-DEAS File Manage to remove YOUR Model Files. Empty the Model file first to eliminate reference pointers to Library data. Ø All Library Items reside in the Team area, on PC systems a location like T: T 83SharedNUMIWRK_CELL. There are no user serviceable files in this area, DO NOT EVEN BROWSE THIS AREA. All information in this area is controlled through the I-DEAS Manage Libraries form.

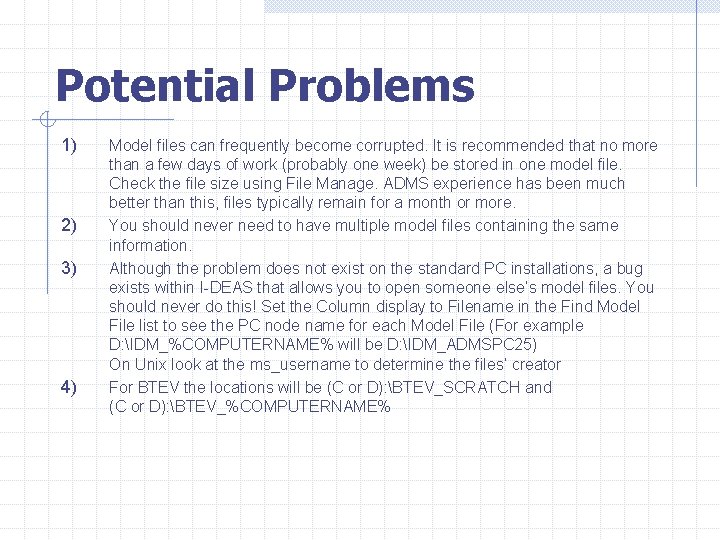
Potential Problems 1) 2) 3) 4) Model files can frequently become corrupted. It is recommended that no more than a few days of work (probably one week) be stored in one model file. Check the file size using File Manage. ADMS experience has been much better than this, files typically remain for a month or more. You should never need to have multiple model files containing the same information. Although the problem does not exist on the standard PC installations, a bug exists within I-DEAS that allows you to open someone else’s model files. You should never do this! Set the Column display to Filename in the Find Model File list to see the PC node name for each Model File (For example D: IDM_%COMPUTERNAME% will be D: IDM_ADMSPC 25) On Unix look at the ms_username to determine the files’ creator For BTEV the locations will be (C or D): BTEV_SCRATCH and (C or D): BTEV_%COMPUTERNAME%

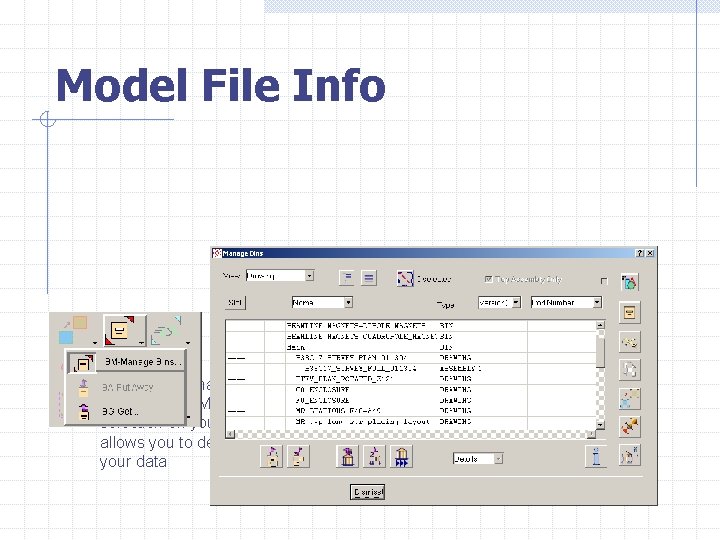
Model File Info Ø To manage what is IN your model files, use the ‘Manage Bins’ selection on your icon panel… this allows you to delete, rename, etc… your data

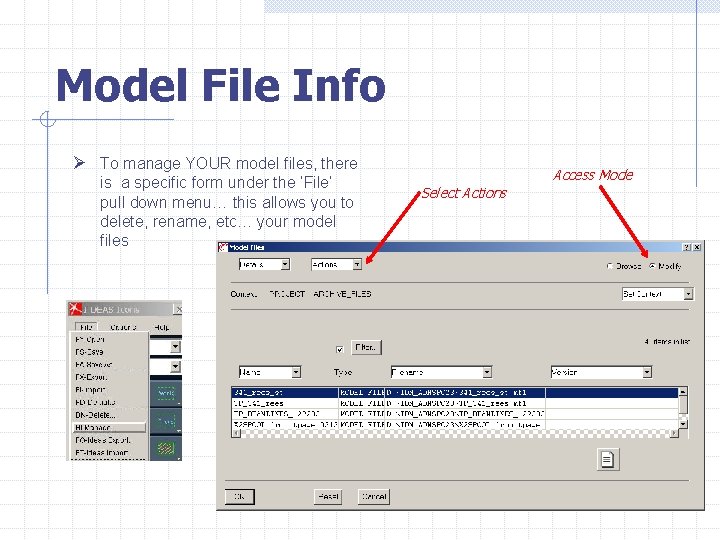
Model File Info Ø To manage YOUR model files, there is a specific form under the ‘File’ pull down menu… this allows you to delete, rename, etc… your model files Access Mode Select Actions

Important Definition “Model Files are like your underwear… Don’t share and change them often!” Quote from SDRC -> EDS -> UGS PLM Solutions -> UGS -> ? ? ? If you disagree with this underwear protocol… see someone immediately afterwards for HELP

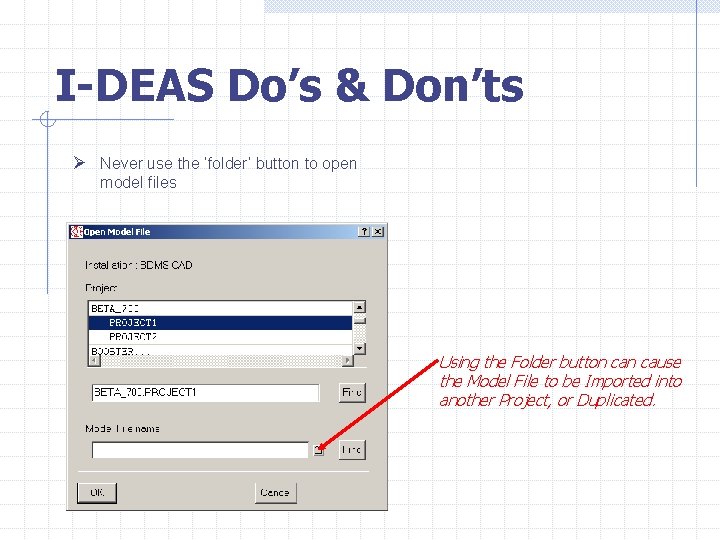
I-DEAS Do’s & Don’ts Ø Never use the ‘folder’ button to open model files Using the Folder button cause the Model File to be Imported into another Project, or Duplicated.

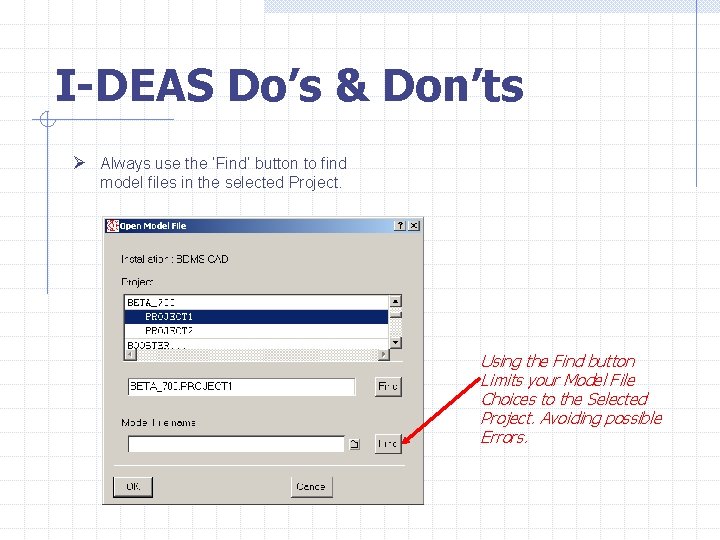
I-DEAS Do’s & Don’ts Ø Always use the ‘Find’ button to find model files in the selected Project. Using the Find button Limits your Model File Choices to the Selected Project. Avoiding possible Errors.

Fermi IDM CAD What is it ? Ø The primary goals of the system are Ø To structure and control the CAD environment so that all data is generated and documented in a standard and consistent format. Make future migration and updates much easier. Ø To provide CAD users with a set of utilities that cloak the complexity of the TDM database structure. Ø To provide user-controlled data entry wherever possible to minimize the entry of invalid or inconsistent information into the database. Minimize Garbage-in-Garbage-out. Ø To allow users quick and easy data entry and modification.

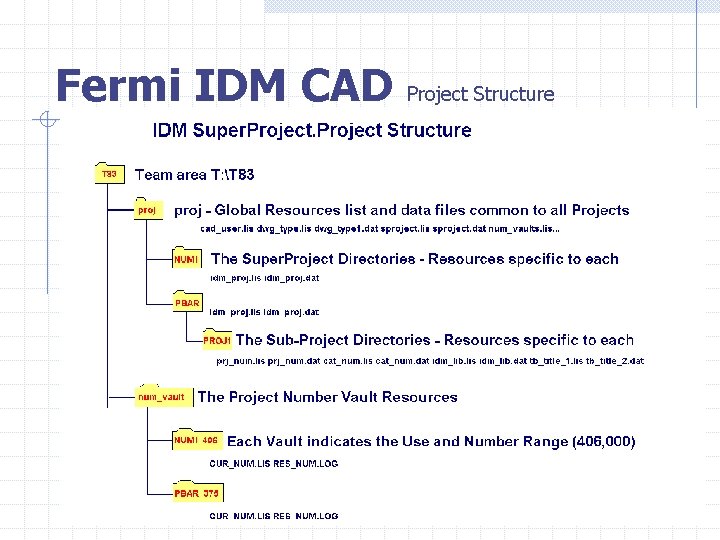
Fermi IDM CAD Project Structure

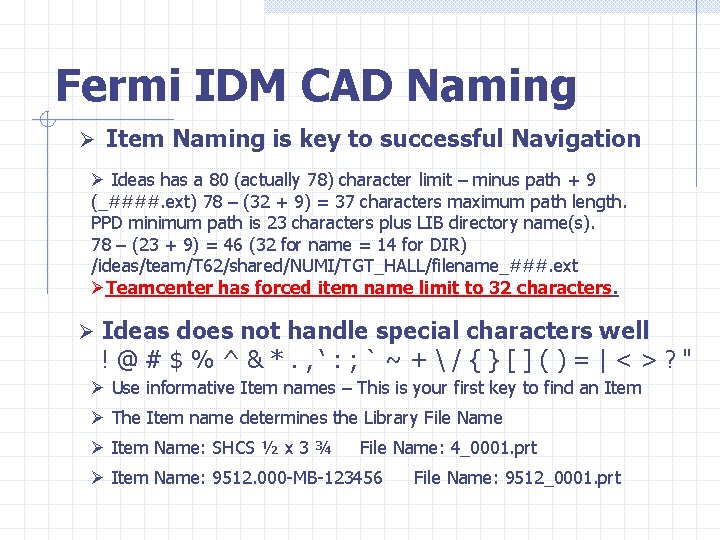
Fermi IDM CAD Naming Ø Item Naming is key to successful Navigation Ø Ideas has a 80 (actually 78) character limit – minus path + 9 (_####. ext) 78 – (32 + 9) = 37 characters maximum path length. PPD minimum path is 23 characters plus LIB directory name(s). 78 – (23 + 9) = 46 (32 for name = 14 for DIR) /ideas/team/T 62/shared/NUMI/TGT_HALL/filename_###. ext ØTeamcenter has forced item name limit to 32 characters. Ø Ideas does not handle special characters well !@#$%^&*. , ‘: ; `~+/{}[]()=|<>? " Ø Use informative Item names – This is your first key to find an Item Ø The Item name determines the Library File Name Ø Item Name: SHCS ½ x 3 ¾ File Name: 4_0001. prt Ø Item Name: 9512. 000 -MB-123456 File Name: 9512_0001. prt

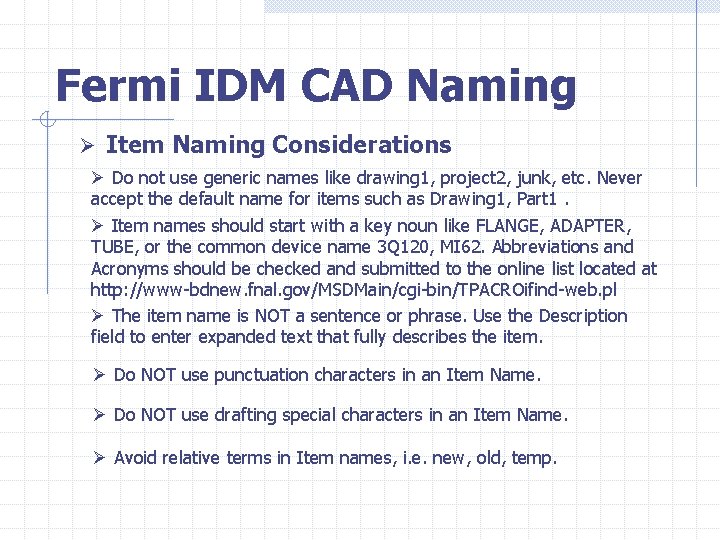
Fermi IDM CAD Naming Ø Item Naming Considerations Ø Do not use generic names like drawing 1, project 2, junk, etc. Never accept the default name for items such as Drawing 1, Part 1. Ø Item names should start with a key noun like FLANGE, ADAPTER, TUBE, or the common device name 3 Q 120, MI 62. Abbreviations and Acronyms should be checked and submitted to the online list located at http: //www-bdnew. fnal. gov/MSDMain/cgi-bin/TPACROifind-web. pl Ø The item name is NOT a sentence or phrase. Use the Description field to enter expanded text that fully describes the item. Ø Do NOT use punctuation characters in an Item Name. Ø Do NOT use drafting special characters in an Item Name. Ø Avoid relative terms in Item names, i. e. new, old, temp.

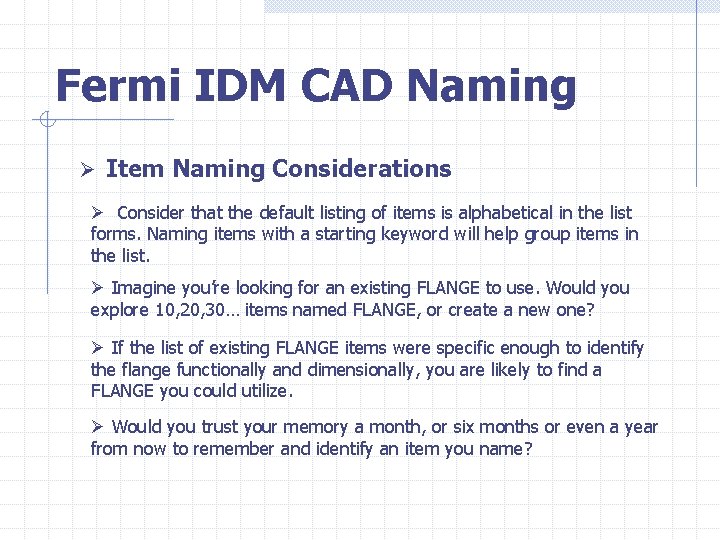
Fermi IDM CAD Naming Ø Item Naming Considerations Ø Consider that the default listing of items is alphabetical in the list forms. Naming items with a starting keyword will help group items in the list. Ø Imagine you’re looking for an existing FLANGE to use. Would you explore 10, 20, 30… items named FLANGE, or create a new one? Ø If the list of existing FLANGE items were specific enough to identify the flange functionally and dimensionally, you are likely to find a FLANGE you could utilize. Ø Would you trust your memory a month, or six months or even a year from now to remember and identify an item you name?

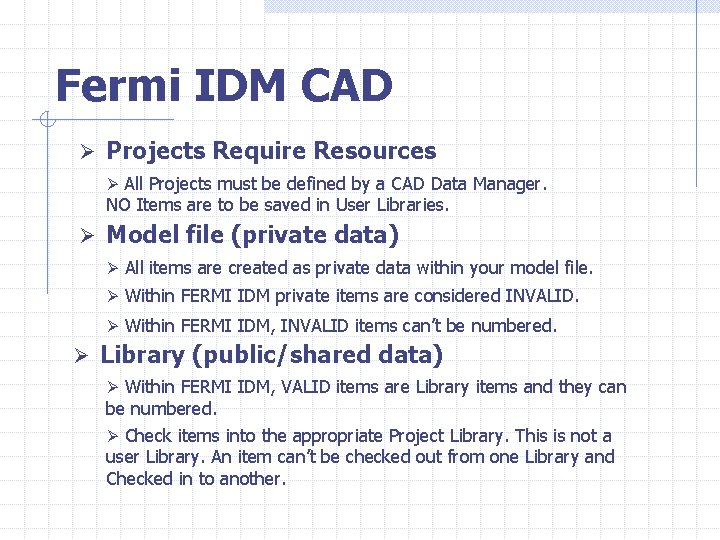
Fermi IDM CAD Ø Projects Require Resources Ø All Projects must be defined by a CAD Data Manager. NO Items are to be saved in User Libraries. Ø Model file (private data) Ø All items are created as private data within your model file. Ø Within FERMI IDM private items are considered INVALID. Ø Within FERMI IDM, INVALID items can’t be numbered. Ø Library (public/shared data) Ø Within FERMI IDM, VALID items are Library items and they can be numbered. Ø Check items into the appropriate Project Library. This is not a user Library. An item can’t be checked out from one Library and Checked in to another.

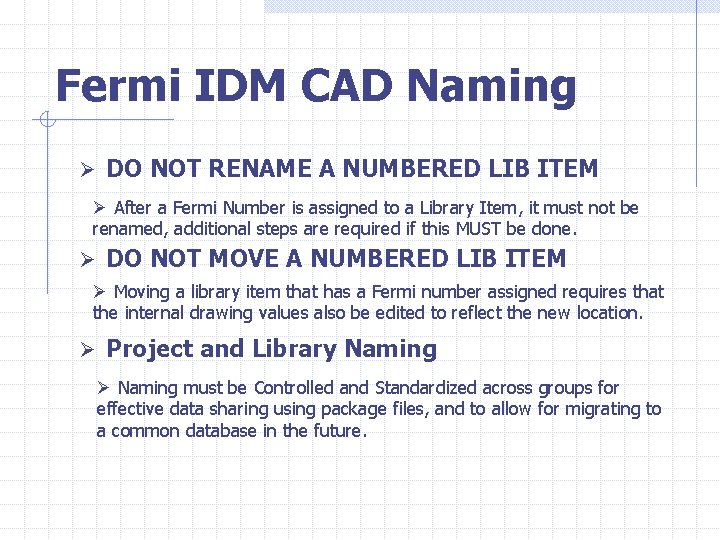
Fermi IDM CAD Naming Ø DO NOT RENAME A NUMBERED LIB ITEM Ø After a Fermi Number is assigned to a Library Item, it must not be renamed, additional steps are required if this MUST be done. Ø DO NOT MOVE A NUMBERED LIB ITEM Ø Moving a library item that has a Fermi number assigned requires that the internal drawing values also be edited to reflect the new location. Ø Project and Library Naming Ø Naming must be Controlled and Standardized across groups for effective data sharing using package files, and to allow for migrating to a common database in the future.

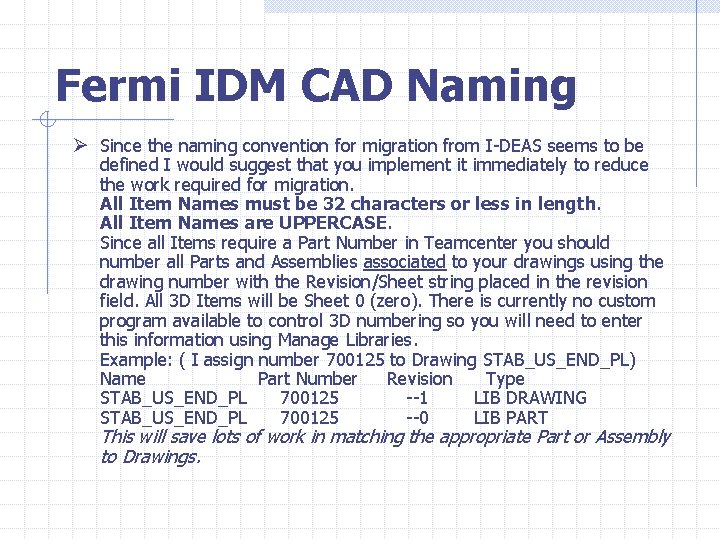
Fermi IDM CAD Naming Ø Since the naming convention for migration from I-DEAS seems to be defined I would suggest that you implement it immediately to reduce the work required for migration. All Item Names must be 32 characters or less in length. All Item Names are UPPERCASE. Since all Items require a Part Number in Teamcenter you should number all Parts and Assemblies associated to your drawings using the drawing number with the Revision/Sheet string placed in the revision field. All 3 D Items will be Sheet 0 (zero). There is currently no custom program available to control 3 D numbering so you will need to enter this information using Manage Libraries. Example: ( I assign number 700125 to Drawing STAB_US_END_PL) Name Part Number Revision Type STAB_US_END_PL 700125 --1 LIB DRAWING STAB_US_END_PL 700125 --0 LIB PART This will save lots of work in matching the appropriate Part or Assembly to Drawings.

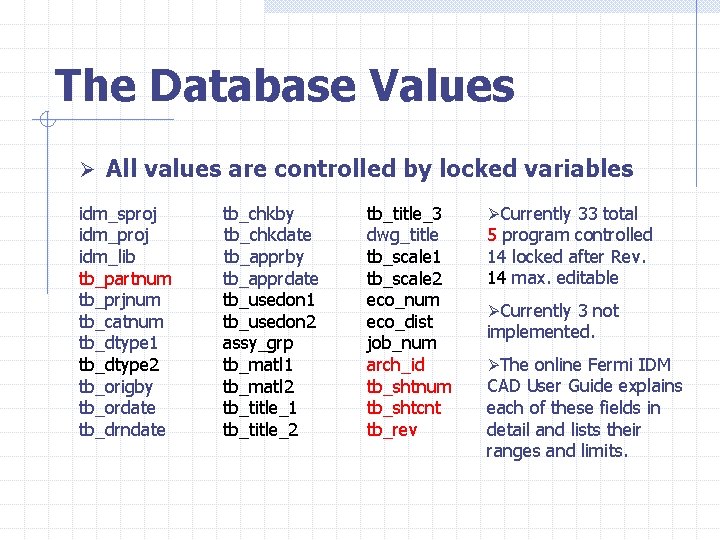
The Database Values Ø All values are controlled by locked variables idm_sproj idm_lib tb_partnum tb_prjnum tb_catnum tb_dtype 1 tb_dtype 2 tb_origby tb_ordate tb_drndate tb_chkby tb_chkdate tb_apprby tb_apprdate tb_usedon 1 tb_usedon 2 assy_grp tb_matl 1 tb_matl 2 tb_title_1 tb_title_2 tb_title_3 dwg_title tb_scale 1 tb_scale 2 eco_num eco_dist job_num arch_id tb_shtnum tb_shtcnt tb_rev ØCurrently 33 total 5 program controlled 14 locked after Rev. 14 max. editable ØCurrently 3 not implemented. ØThe online Fermi IDM CAD User Guide explains each of these fields in detail and lists their ranges and limits.

The Database Values Ø Ideas maintains variable values in memory. Ø You can utilize this to greatly reduce your data entry time by reusing the values. Ø We will interactively perform three methods 1. ) Create a reusable database template drawing. a. ) Utilizing Calculator mode (advanced user) 2. ) Utilize an existing Library Drawing. 3. ) Create a reusable macro. (advanced user)

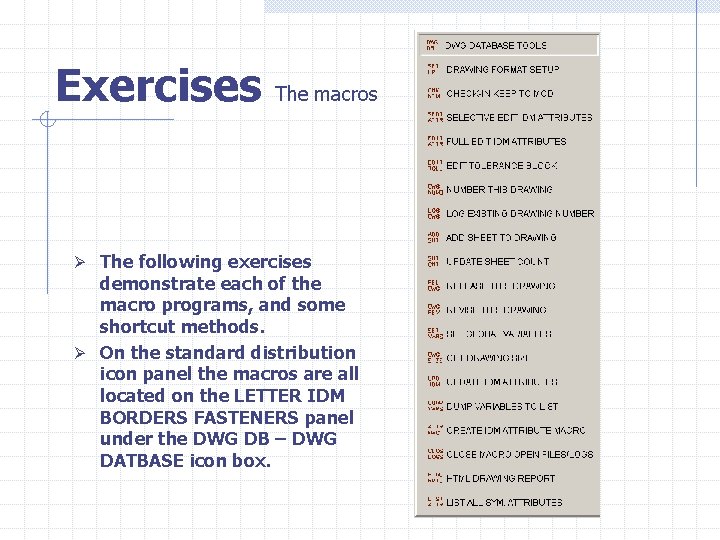
Exercises The macros Ø The following exercises demonstrate each of the macro programs, and some shortcut methods. Ø On the standard distribution icon panel the macros are all located on the LETTER IDM BORDERS FASTENERS panel under the DWG DB – DWG DATBASE icon box.

Macro Support - Important Ø All the functionally important macro programs create. log files of everything that occurred. Whenever a problem arises while running a macro, if prompted to Abort or Continue, Select Abort. Immediately run the CLOSE MACRO OPEN FILES/LOGS. (This is the only macro that you should enter Continue if prompted, since it will try and close all log files even if they are not open. ) Ø Look in your SDRC_SCRATCH directory for the macro. log file. Easiest to sort by Date, it should be one of the last files created. Zip this file to save it. If the problem can’t be resolved locally, e-mail me this file. If you don’t save the. log file, the next run of the macro will overwrite it and leave me without any information to track down the problem. Ø The release drawing macro creates a list of archive files written using the number-sht-rev (305200— 01. lis) if there is a problem this file will list the cause. Zip and save this file like it was a. log as listed above. To write the archive files, all associated drawing views MUST be Precise geometry.

Macro Support - Important Ø Just as I-DEAS leaves some files around to help debug errors, the macros also leave. log files, APPREC_#### (APPREC_1100), num_#####. out (num_32406. out), etc. in your SDRC_SCRATCH directory. These files may and should be safely removed when you are not in I-DEAS. Ø Depending on your plotting setup you may also find. pff and. plt files in your SDRC_SCRATCH area. These should also be removed when they are no longer needed. Ø When you are not in I-DEAS you should regularly clean up your SDRC_SCRATCH area. You can remove all ideas####. *, ferror####. out, output####. out, . STOP*, and the macro files listed above. Some of these can get very large.

Exercise 1 Create a reusable template drawing Ø You will create a new drawing and keep it in your model file as a database field Template. 1. Put away any drawing on your workbench 2. Select DQ – Create Drawing, and create a new drawing using 3. 4. 5. 6. one of the Template Drawings. Use TEMPLATE in the name. Now Select SELECTIVE EDIT IDM ATTRIBUTES and populate some fields. This drawing can now be used to preload the values you entered for any new drawing created by getting it to the workbench, using DQ – Create Drawing, and immediately Selecting UPDATE IDM ATTRIBUTES. Since the actual values are stored in locked variables, you can save this template file as a Drawing and use it anywhere. Another method is to create copy of the Database Template in your Bin which will contain the entered field data.

Exercise 1 a Utilizing Calculator Mode Ø Since all values are stored in variables, you can use Calculator mode to preset values. This is the non-preferred method. 1. Get your database Template drawing from Exercise 1 2. Zoom in to the Title Block area. 3. Enter Calculator mode #. variables ) ( enter l v to list all the current 4. Enter tb_title_3 = “TITLE CHANGED VIA CALCULATOR” 5. Select UPDATE IDM ATTRIBUTES. 6. NOTE: When using this method, it is YOUR responsibility to ensure that the data you enter is VALID. For example you could set PRJ_NUM to an incorrect value for the Project, or you could enter data that exceeds the field’s length limit. All the field limits are documented online.

Exercise 2 Utilize an existing Library Drawing Ø Reference out the Library drawing in BETA_700. PROJECT 1 – TEST_1 named EXERCISE 2_LIBRARY_DRAWING 1. Reference this drawing out and Get it from your bin. 2. Select DUMP VARIABLES TO LIST , Open the file C: IDM_SCRATCHEXERCISE 2_LIBRARY_DRAWING_var. lis and examine the values. 3. Select DQ – Create Drawing, and create a new drawing using one of the Template Drawings. Make sure to Select Yes when prompted to put away the current drawing. 4. Now Select UPDATE IDM ATTRIBUTES, your new drawing should be populated with all the database values in the drawing that was open. 5. If there a few values you need to change, Select the SELECTIVE EDIT IDM ATTRIBUTES, to modify only these fields.

Exercise 2 a Create an Attribute macro Ø Generate a reusable and editable macro program for attribute values using the current drawing. 1. Get an attributed drawing to the workbench 2. Select CREATE IDM ATTRIBUTE MACRO, Enter a name for the 3. 4. 5. 6. 7. new macro file (no extension). Open the file C: IDM_SCRATCHnew_macroname. mac in notepad and examine the values. Modify some of the values, noting the limits shown, and save the file. Back in Drafting Select File – Run Program – Set the filter to *. * (all files) and select your edited macro. Now Select UPDATE IDM ATTRIBUTES, your drawing should be populated with the database values from the macro file. If there a few values you need to change, Select the SELECTIVE EDIT IDM ATTRIBUTES, to modify only these fields.

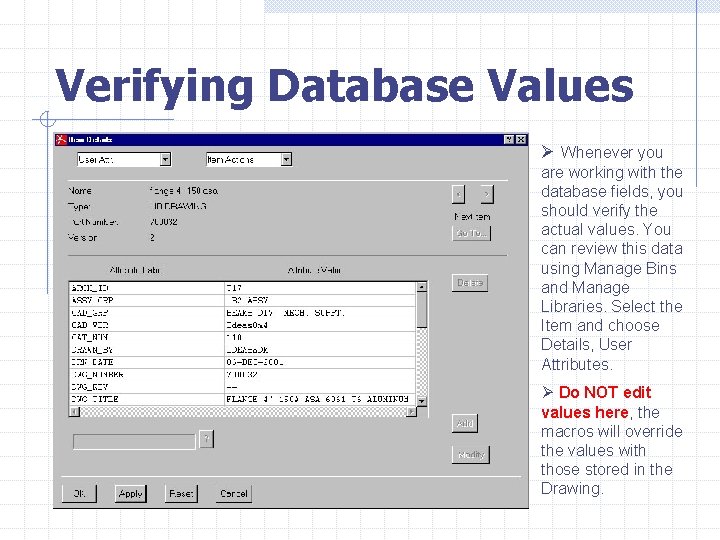
Verifying Database Values Ø Whenever you are working with the database fields, you should verify the actual values. You can review this data using Manage Bins and Manage Libraries. Select the Item and choose Details, User Attributes. Ø Do NOT edit values here, the macros will override the values with those stored in the Drawing.

Exercise 3 Drawing Format Setup Ø You will create a new drawing and use the DRAWING FORMAT SETUP macro. 1. Put away any drawing on your workbench 2. Select DQ – Create Drawing, and create a new drawing, make sure Use Template is OFF. 3. Now Select DRAWING FORMAT SETUP and the default format symbols will be imported and positioned. 4. This macro will work for any standard size drawing, INCH and METRIC. 5. This macro can be ran at any time to make sure all the drawing format symbols are current. Any attributes in old symbols will be preserved and used to populate the new symbols. 6. You can also utilize this macro to change drawing size. Modify the Paper View to the desired size, delete the instances of the Title Block, Tolerance Block, Border, Rev. Block, and run the macro. DO NOT DELETE THE IDM_TITLE##. SYM if you attempt to delete this symbol you will be warned. Cancel the Operation.

Exercise 4 Check in Keep to Modify Ø This is typically the most used Check in mode. You wish to secure your data via. The Library, or you need to share the Item with the Project Collaboration. You will retain modification control of the Item, others may Reference it. 1. With any drawing on the workbench 2. Select CHECK-IN KEEP TO MOD. 3. This macro will determine if the current drawing is a Library Item or not. If not you will be prompted for the Project and Library the Item should be Checked in to. 4. If the Item is already a Library file the macro will simply do the Check in for you. 5. Over the several years that this system has been in use, the number one user error has been checking items into the wrong library. This macro helps avoid this problem.

Exercise 5 SELECTIVE EDIT IDM ATTRIBUTES Ø This macro will present a list of editable IDM fields for you to choose. Only fields that are specifically selected will be modified. 1. With any drawing on the workbench 2. Select SELECTIVE EDIT IDM ATTRIBUTES. 3. Select any Field you wish to change and modify the value. 4. Select FINISHED to end the macro and make your edits take affect. 5. NOTE: Selecting QUIT means abort any changes you have made. 6. Select DWG_TITLE and try the USE_TBLOCK option which will concatenate three Title Block lines together. 7. Select DWG_TITLE and try the SPELL_CHK option which will open MS Word and allow you to spell check your entry. NOTE: Word MUST NOT be running when you invoke the SPELL_CHK function.

SPELL_CHK – WATCH YOUR SPELLING Ø The DWG_TITLE entry is the most commonly used field for queries. Try to make this entry as specific and informative as possible. I-DEAS forces the length limit on this field to 80 characters. Any character that appears on your keyboard may be used. DO NOT try and enter Drafting Special characters like | for (DIA) and ‘ for (DEGREE), you will not get the result you expect. DO NOT CONFUSE THIS WITH THE ITEM NAME (32 character field). Ø I just recently gathered all Fermilab drawing title information available for migration preparation, this is what it looked like. 159, 667 records 1, 162, 576 words 7, 671, 725 characters 14, 228 unique words Of the 14, 228, unique words 5, 111 were reported as correctly spelled, 9, 117 were reported as misspelled. ~36% correct ~46% incorrect, actually ~18% were numerical words so the actual reported spelling errors are closer to 28% (STILL VERY HIGH).

Exercise 6 FULL EDIT IDM ATTRIBUTES Ø This macro will cycle through ALL editable IDM fields, display the current values, and allow you to make any desired modifications. This macro is called by all of the macros that perform Library Check in. It’s primary use is for final review if ALL values. 1. With any drawing on the workbench 2. Select FULL EDIT IDM ATTRIBUTES. 3. Observe each value displayed in the list window. 4. Verify that all values are correct using this method since not all IDM fields are actually displayed in the Drawing. 5. This is the largest macro program and steps through all of the attributes. It’s also important since it’s your last chance to verify the values before committing them to the Library.

Exercise 7 NUMBER NEW DRAWING Ø This macro will assign a New Fermi Part / Drawing Number to the current Drawing. 1. The current drawing must be checked out from a Library. 2. The Item Name must be suitable and remain after the 3. 4. 5. 6. number is assigned, I. e. if the Item needs to be renamed, check it back in, keep as Ref. , Use Manage Bins and Delete your bin Item, Use Manage Libraries, Select the Item and under Details, Name, fix the Item Name. Now Check the Item out. Select NUMBER NEW DRAWING. The macro will prompt you to select the correct Number Vault and if there are numbers available it will assign the next sequential number. The macro will execute the FULL EDIT IDM ATTRIBUTES for you to review all the values. The macro will then perform a Check in, and Number the Item in the Library. The Numbered Drawing will be returned to the workbench.

Exercise 8 LOG EXISTING DRAWING NUMBER Ø This macro will allow you to log a Drawing with an existing Number. (see online help for Import / Log Existing Drawing No Attributes) 1. The current drawing must be checked out from a Library. 2. The Item Name must be suitable and remain after the number is 3. 4. 5. 6. assigned. Select LOG EXISTING DRAWING NUMBER. The macro will prompt you to select the correct Number Vault and to enter the existing number and revision level (all revisions are two character – through ZZ) if the number is available it will be logged. NOTE: DO NOT DUPLICATE RELEASED DRAWINGS, if the file was released in DCS or DWG_MGR, log it here as the next revision. The macro will execute the FULL EDIT IDM ATTRIBUTES for you to review all the values. The macro will then perform a Check in, Keep to Modify, and Number the Item. The Numbered Drawing will return to the workbench.

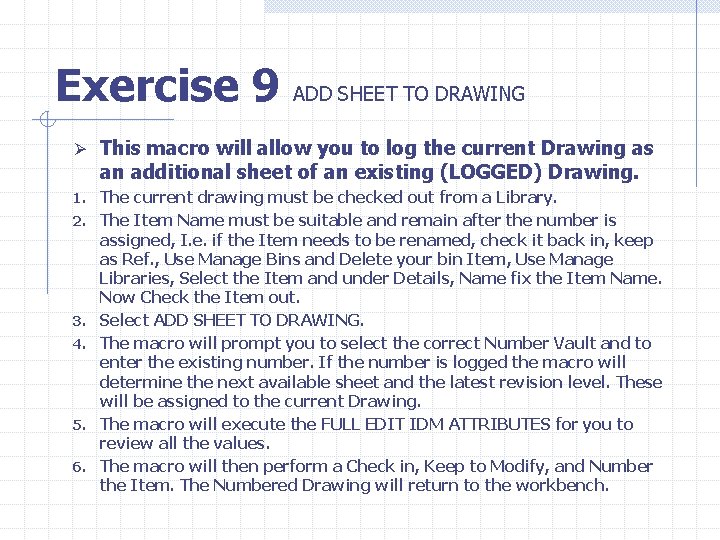
Exercise 9 ADD SHEET TO DRAWING Ø This macro will allow you to log the current Drawing as an additional sheet of an existing (LOGGED) Drawing. 1. The current drawing must be checked out from a Library. 2. The Item Name must be suitable and remain after the number is 3. 4. 5. 6. assigned, I. e. if the Item needs to be renamed, check it back in, keep as Ref. , Use Manage Bins and Delete your bin Item, Use Manage Libraries, Select the Item and under Details, Name fix the Item Name. Now Check the Item out. Select ADD SHEET TO DRAWING. The macro will prompt you to select the correct Number Vault and to enter the existing number. If the number is logged the macro will determine the next available sheet and the latest revision level. These will be assigned to the current Drawing. The macro will execute the FULL EDIT IDM ATTRIBUTES for you to review all the values. The macro will then perform a Check in, Keep to Modify, and Number the Item. The Numbered Drawing will return to the workbench.

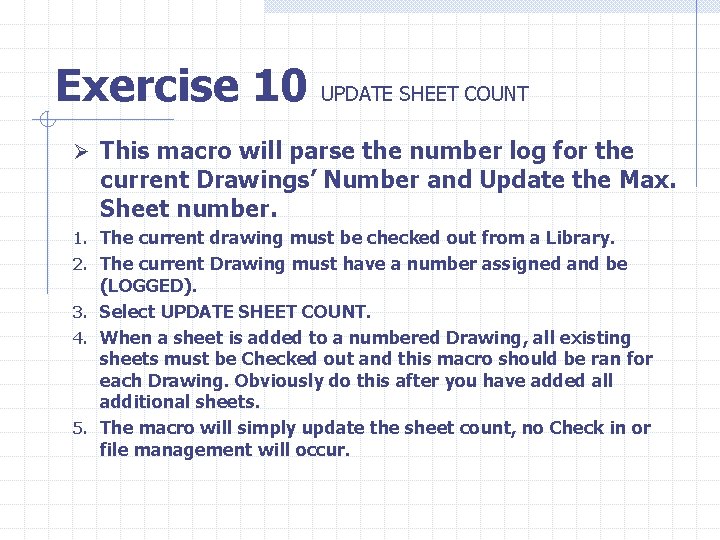
Exercise 10 UPDATE SHEET COUNT Ø This macro will parse the number log for the current Drawings’ Number and Update the Max. Sheet number. 1. The current drawing must be checked out from a Library. 2. The current Drawing must have a number assigned and be (LOGGED). 3. Select UPDATE SHEET COUNT. 4. When a sheet is added to a numbered Drawing, all existing sheets must be Checked out and this macro should be ran for each Drawing. Obviously do this after you have added all additional sheets. 5. The macro will simply update the sheet count, no Check in or file management will occur.

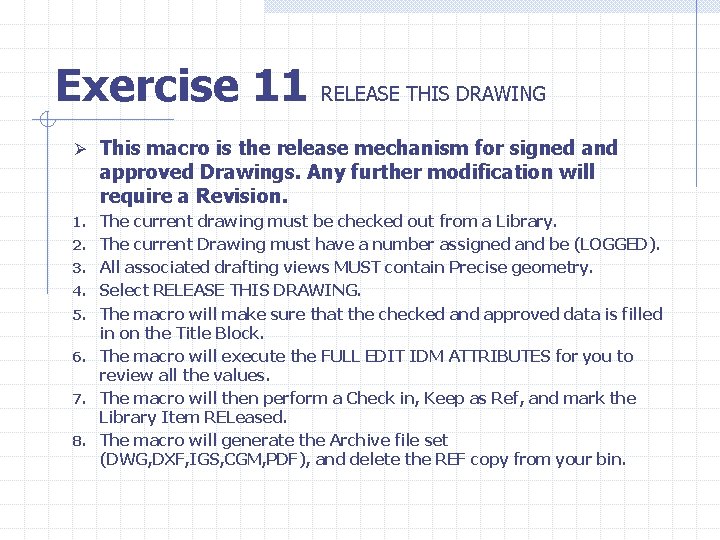
Exercise 11 RELEASE THIS DRAWING Ø This macro is the release mechanism for signed and approved Drawings. Any further modification will require a Revision. 1. The current drawing must be checked out from a Library. 2. The current Drawing must have a number assigned and be (LOGGED). 3. All associated drafting views MUST contain Precise geometry. 4. Select RELEASE THIS DRAWING. 5. The macro will make sure that the checked and approved data is filled in on the Title Block. 6. The macro will execute the FULL EDIT IDM ATTRIBUTES for you to review all the values. 7. The macro will then perform a Check in, Keep as Ref, and mark the Library Item RELeased. 8. The macro will generate the Archive file set (DWG, DXF, IGS, CGM, PDF), and delete the REF copy from your bin.

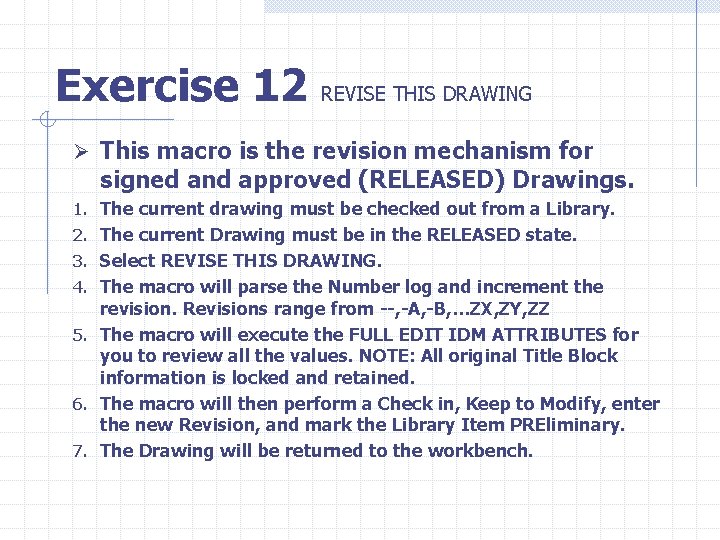
Exercise 12 REVISE THIS DRAWING Ø This macro is the revision mechanism for signed and approved (RELEASED) Drawings. 1. The current drawing must be checked out from a Library. 2. The current Drawing must be in the RELEASED state. 3. Select REVISE THIS DRAWING. 4. The macro will parse the Number log and increment the revision. Revisions range from --, -A, -B, …ZX, ZY, ZZ 5. The macro will execute the FULL EDIT IDM ATTRIBUTES for you to review all the values. NOTE: All original Title Block information is locked and retained. 6. The macro will then perform a Check in, Keep to Modify, enter the new Revision, and mark the Library Item PREliminary. 7. The Drawing will be returned to the workbench.

Exercise 13 UPDATE IDM ATTRIBUTES Ø This macro will update all database field values currently residing in memory. 1. The only Drawing requirement is to be on the workbench. 2. Refer to Exercise 1 and 2 for examples of how you can utilize this macro. 3. Select UPDATE IDM ATTRIBUTES. 4. The macro will update all editable database fields using the values currently loaded in memory. 5. The macro does not perform any Library function, the drawing will update and remain on the workbench.

Exercise 14 UTILITY FUNCTIONS Ø 1. 2. 3. 4. The macros, SET GLOBAL VARIABLES, GET DRAWING SIZE, and DUMP VARIABLES TO LIST are general utility functions used by many of the other macros. Each of these programs can be called interactively. SET GLOBAL VARIABLES – this is a utility that defines all the settings for your CAD environment, program locations, file paths, current date, your name for display on Drawings… GET DRAWING SIZE – does just what it says, gets the current drawing size and sets the DWG_SIZE variable. This macro will also inform you when a drawing size is incorrect for proper output on the standard plotting devices. DUMP VARIABLES TO LIST – this macro will write all current variables and their values to the Item. Name_vars. lis in your SDRC_SCRATCH directory. Useful to determine errors, and the output is also suitable for creating macro files to load the variables. All of these macros perform no Drawing modifications and can therefore be ran as often as required.

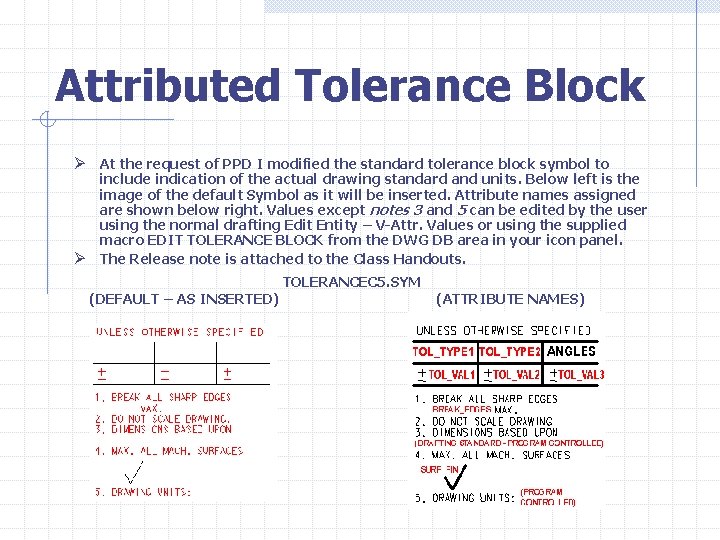
Attributed Tolerance Block Ø At the request of PPD I modified the standard tolerance block symbol to Ø include indication of the actual drawing standard and units. Below left is the image of the default Symbol as it will be inserted. Attribute names assigned are shown below right. Values except notes 3 and 5 can be edited by the user using the normal drafting Edit Entity – V-Attr. Values or using the supplied macro EDIT TOLERANCE BLOCK from the DWG DB area in your icon panel. The Release note is attached to the Class Handouts. (DEFAULT – AS INSERTED) TOLERANCEC 5. SYM (ATTRIBUTE NAMES)

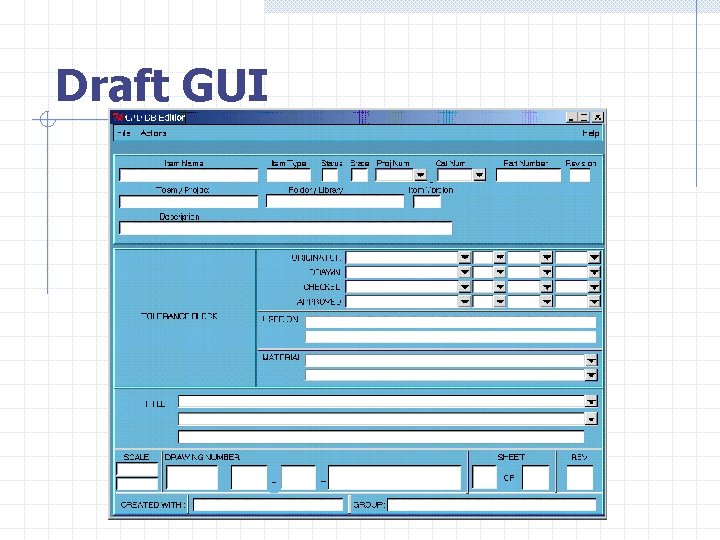
Enhancements TO DO LIST Ø These were the current list of planned enhancements. With the pending migration and elimination of I-DEAS they won’t occur unless strong user request is submitted. 1. Create a macro to help interactively capture Title Block information from imported Drawings. 2. Update the HTML Drawing Report for better collaboration routing. Improve the table appearance. 3. Create a GUI interface for FULL EDIT IDM ATTRIBUTES that will allow for much easier interaction, incorporating the Tolerance block fields. 4. Create a macro to edit the Tolerance Block, and incorporate the Drawing Standard as an attributed value. 5. User requests ? Any help or feedback from users would also be very welcome.

Draft GUI