Dial Caliper Description and Use Introduction to Engineering


- Slides: 32
Dial Caliper Description and Use Introduction to Engineering Design © 2012 Project Lead The Way, Inc.
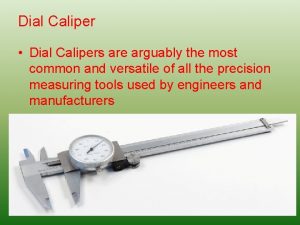
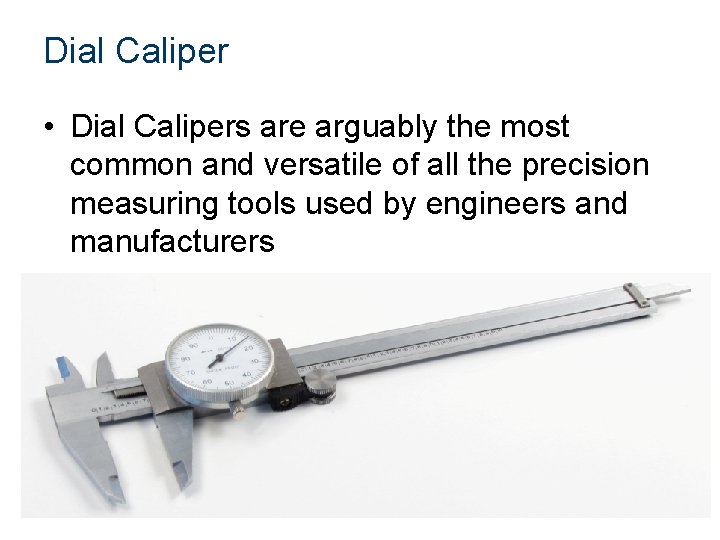
Dial Caliper • Dial Calipers are arguably the most common and versatile of all the precision measuring tools used by engineers and manufacturers
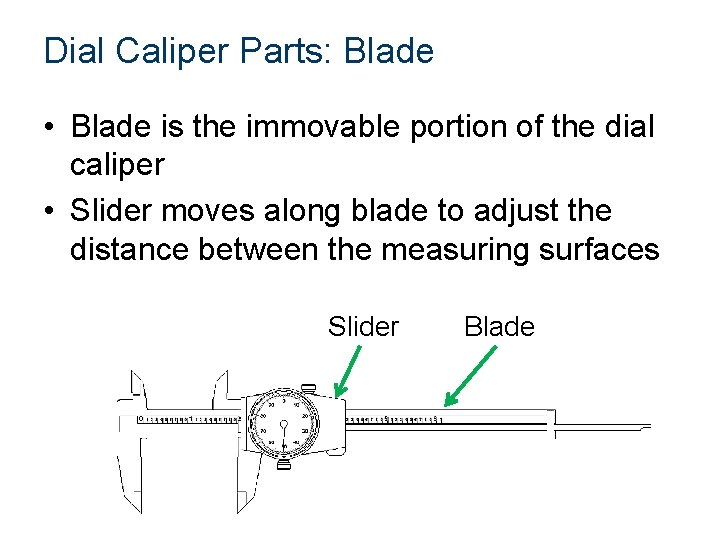
Dial Caliper Parts: Blade • Blade is the immovable portion of the dial caliper • Slider moves along blade to adjust the distance between the measuring surfaces Slider Blade
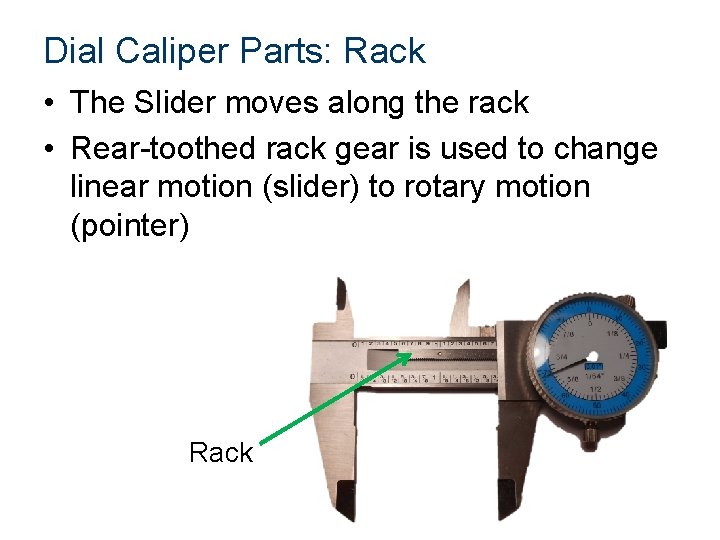
Dial Caliper Parts: Rack • The Slider moves along the rack • Rear-toothed rack gear is used to change linear motion (slider) to rotary motion (pointer) Rack
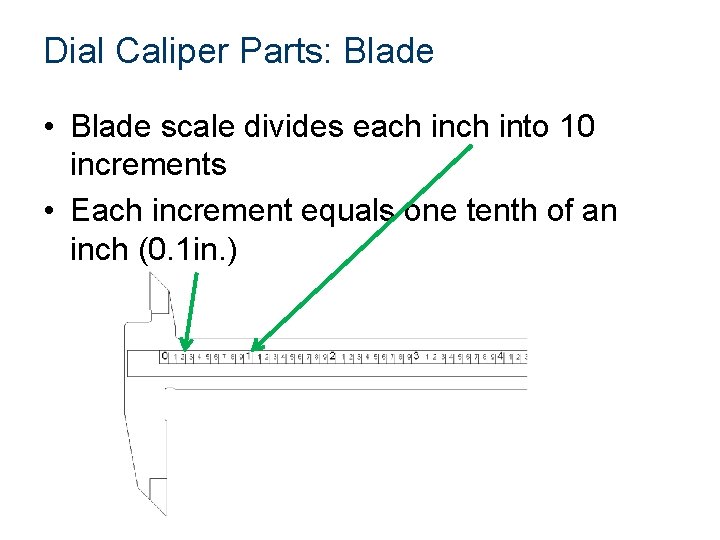
Dial Caliper Parts: Blade • Blade scale divides each into 10 increments • Each increment equals one tenth of an inch (0. 1 in. )
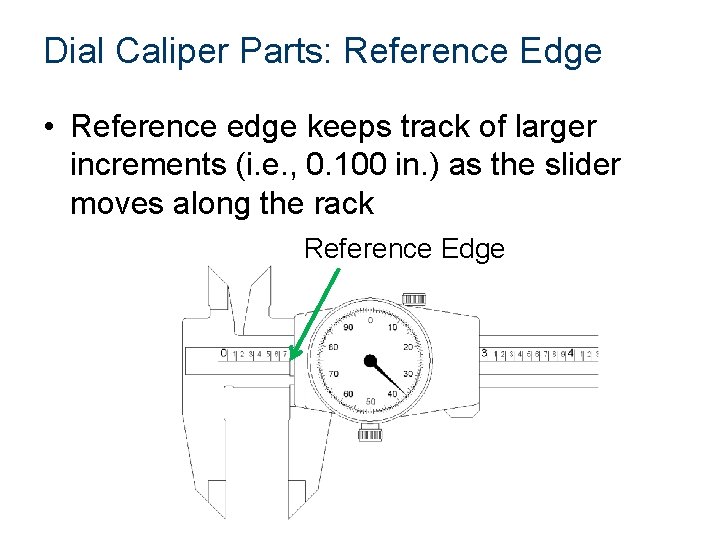
Dial Caliper Parts: Reference Edge • Reference edge keeps track of larger increments (i. e. , 0. 100 in. ) as the slider moves along the rack Reference Edge
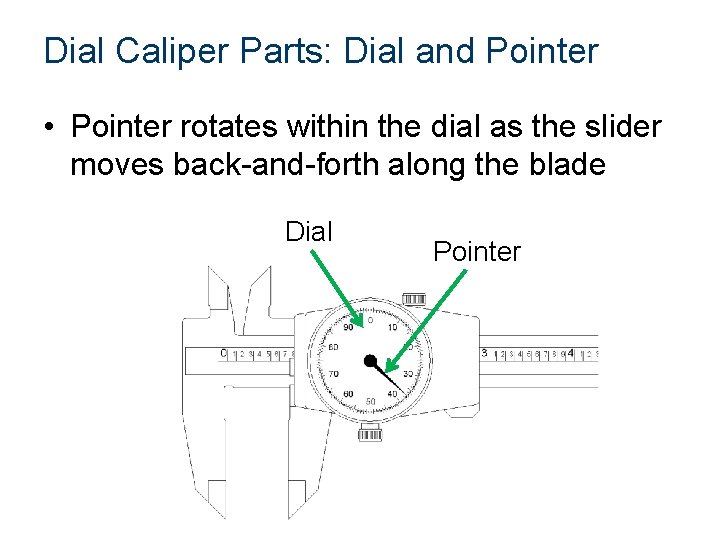
Dial Caliper Parts: Dial and Pointer • Pointer rotates within the dial as the slider moves back-and-forth along the blade Dial Pointer
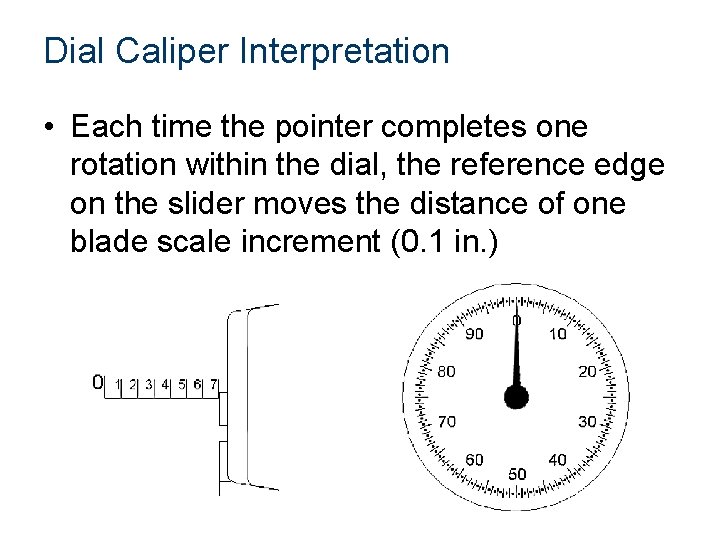
Dial Caliper Interpretation • Each time the pointer completes one rotation within the dial, the reference edge on the slider moves the distance of one blade scale increment (0. 1 in. )
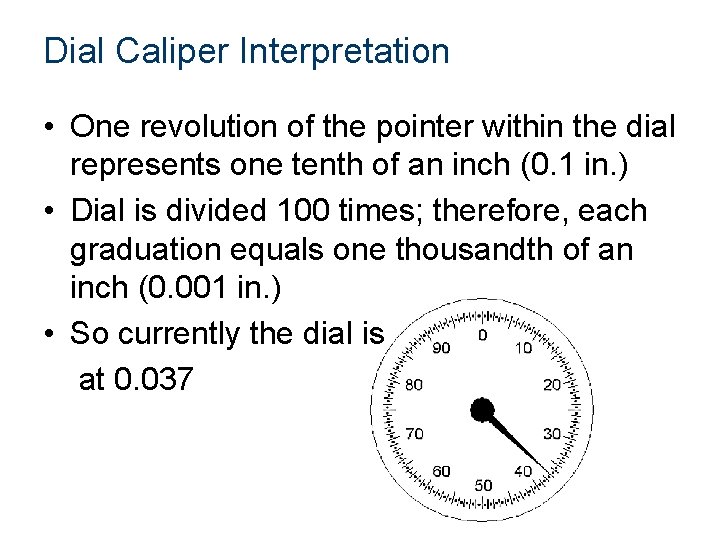
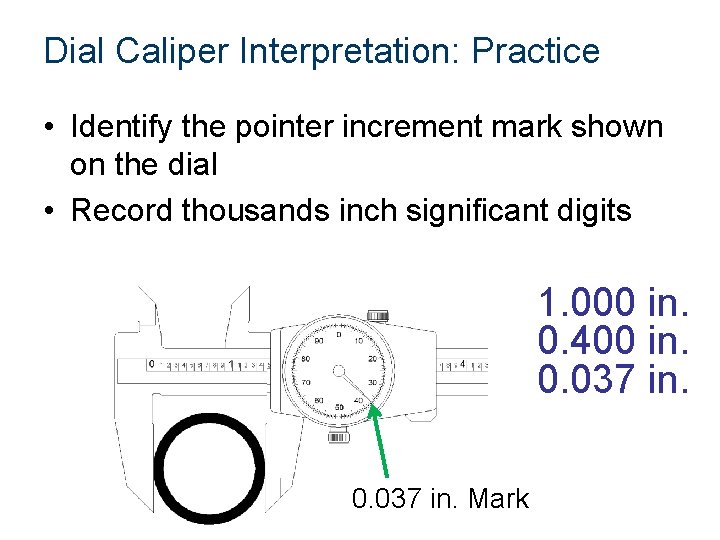
Dial Caliper Interpretation • One revolution of the pointer within the dial represents one tenth of an inch (0. 1 in. ) • Dial is divided 100 times; therefore, each graduation equals one thousandth of an inch (0. 001 in. ) • So currently the dial is at 0. 037
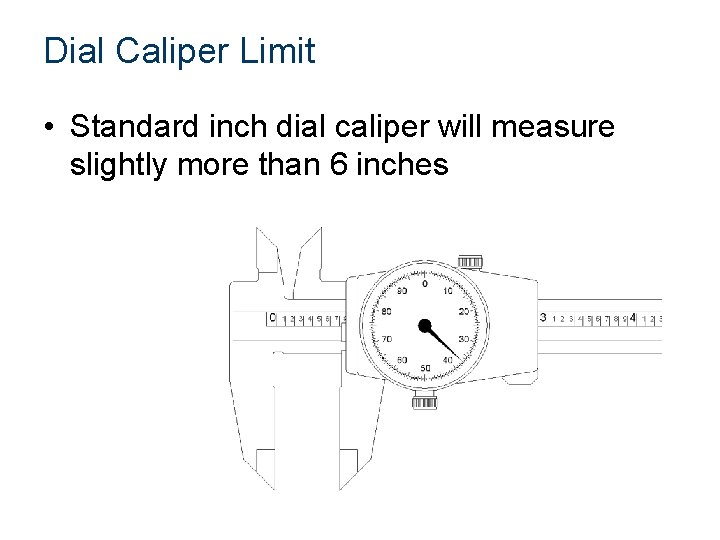
Dial Caliper Limit • Standard inch dial caliper will measure slightly more than 6 inches
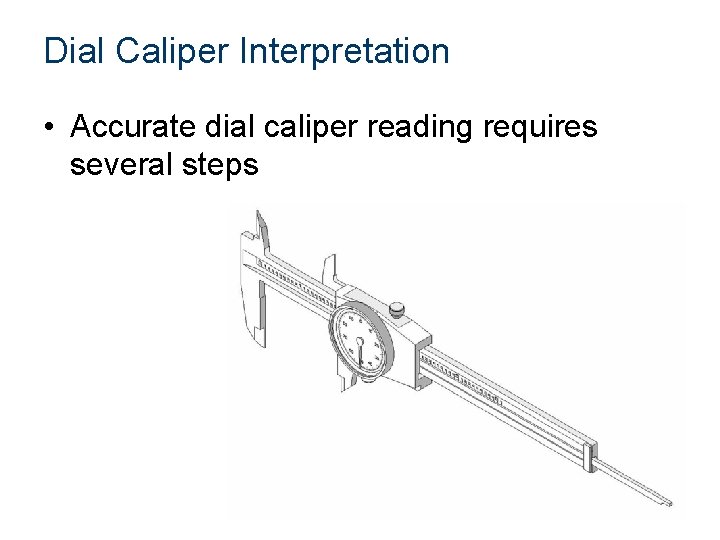
Dial Caliper Interpretation • Accurate dial caliper reading requires several steps
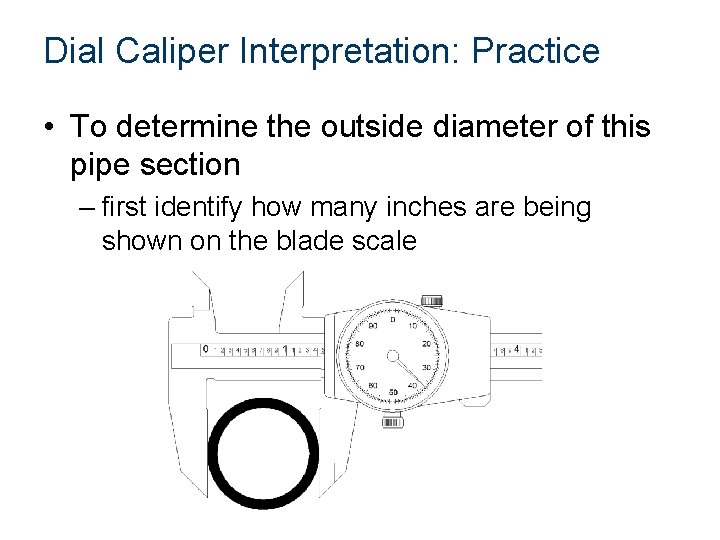
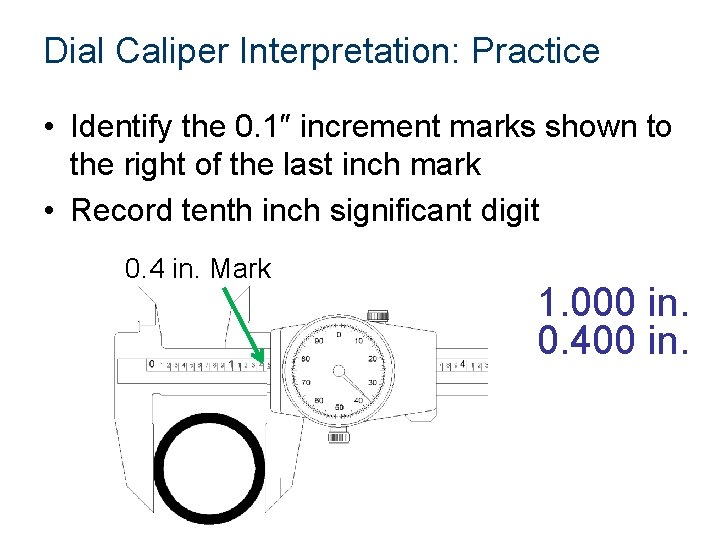
Dial Caliper Interpretation: Practice • To determine the outside diameter of this pipe section – first identify how many inches are being shown on the blade scale
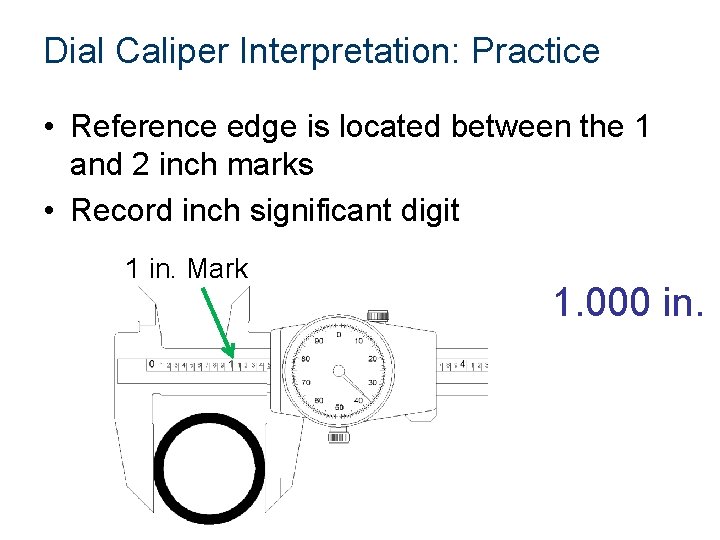
Dial Caliper Interpretation: Practice • Reference edge is located between the 1 and 2 inch marks • Record inch significant digit 1 in. Mark 1. 000 in.
Dial Caliper Interpretation: Practice • Identify the 0. 1″ increment marks shown to the right of the last inch mark • Record tenth inch significant digit 0. 4 in. Mark 1. 000 in. 0. 400 in.
Dial Caliper Interpretation: Practice • Identify the pointer increment mark shown on the dial • Record thousands inch significant digits 1. 000 in. 0. 400 in. 0. 037 in. Mark
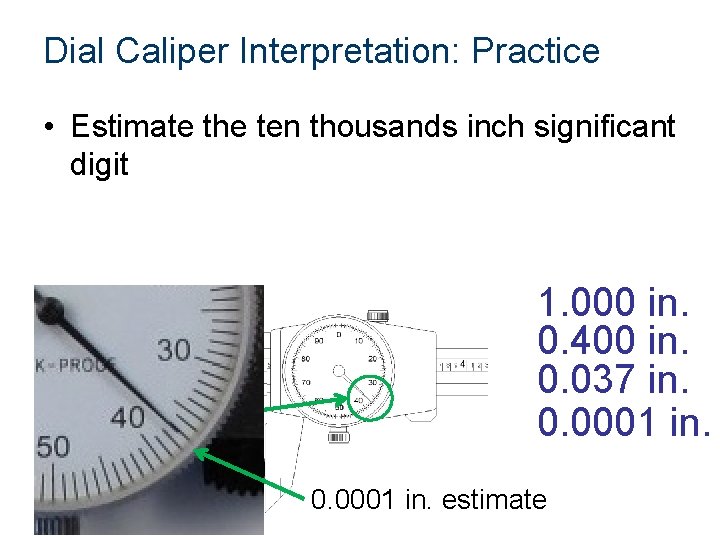
Dial Caliper Interpretation: Practice • Estimate the ten thousands inch significant digit 1. 000 in. 0. 400 in. 0. 037 in. 0. 0001 in. estimate
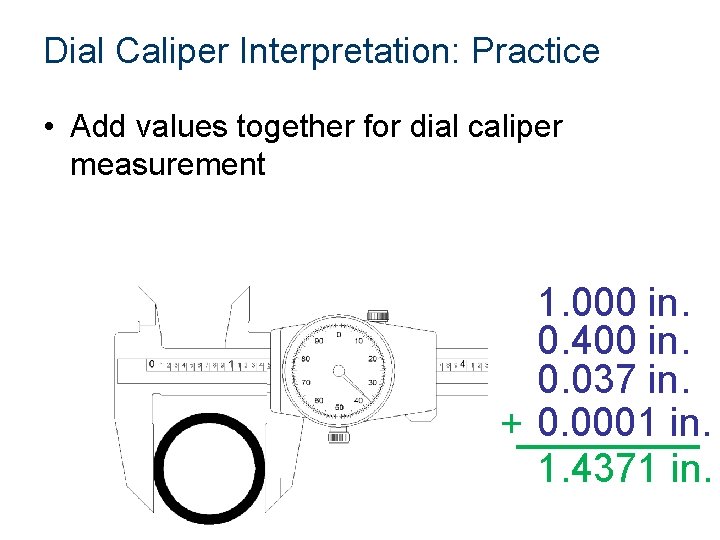
Dial Caliper Interpretation: Practice • Add values together for dial caliper measurement 1. 000 in. 0. 400 in. 0. 037 in. + 0. 0001 in. 1. 4371 in.
Dial Caliper Interpretation: Practice • How wide is the block? 1. 000 in. 0. 400 in. + 0. 002 in. 0. 0002 in. 1. 4022 in.
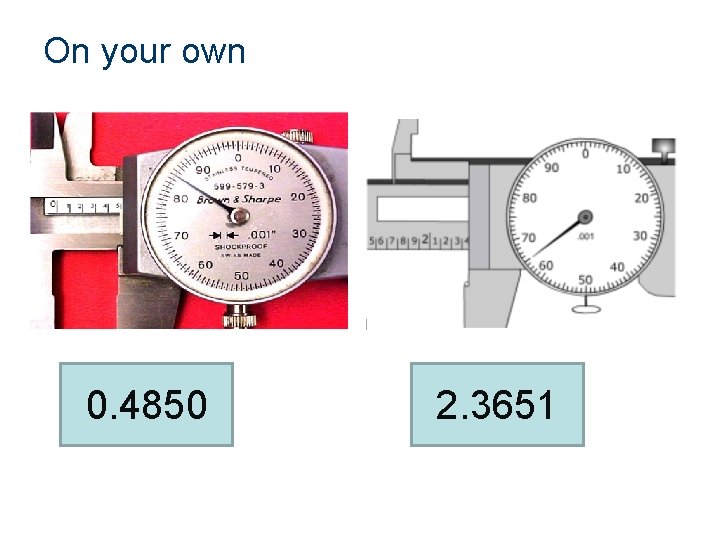
On your own 0. 4850 2. 3651
Give out dial calipers
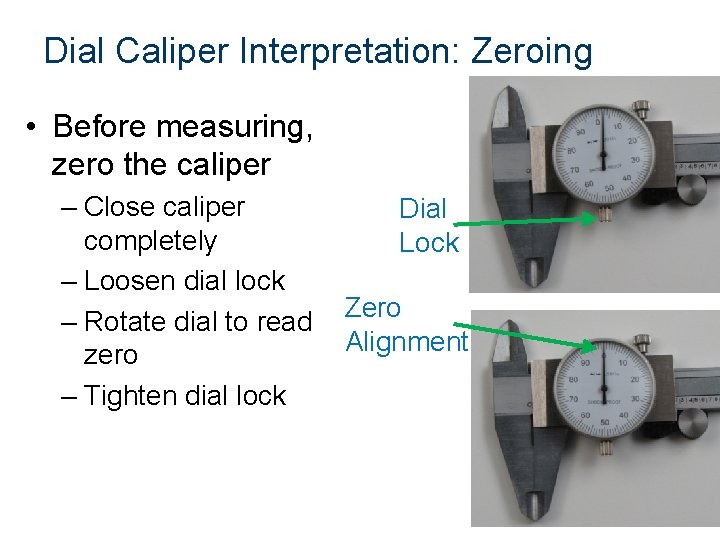
Dial Caliper Interpretation: Zeroing • Before measuring, zero the caliper – Close caliper completely – Loosen dial lock – Rotate dial to read zero – Tighten dial lock Dial Lock Zero Alignment
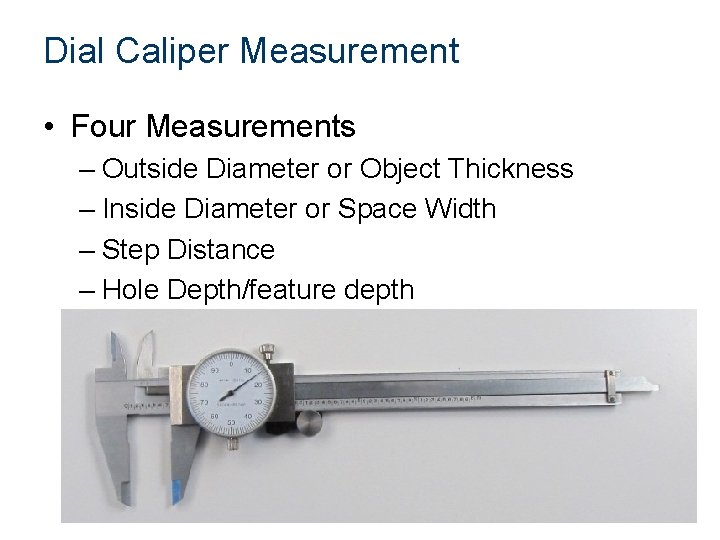
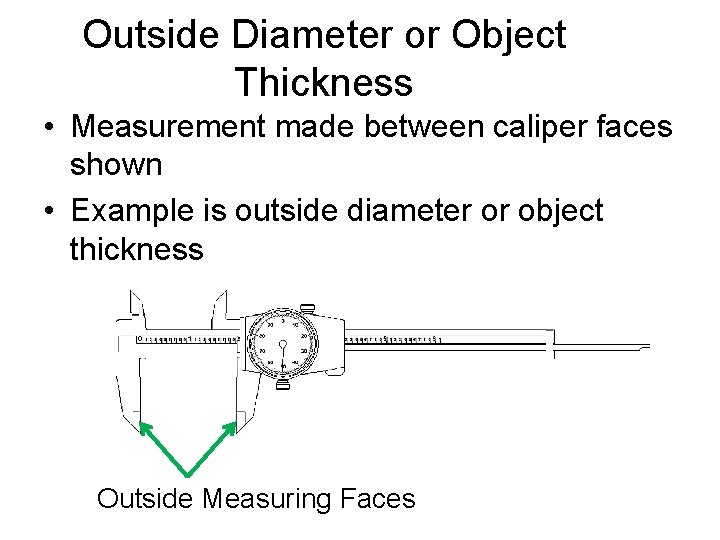
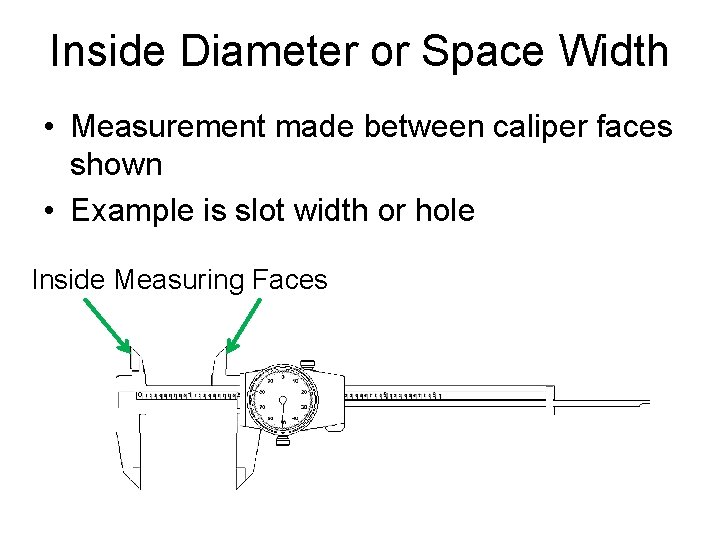
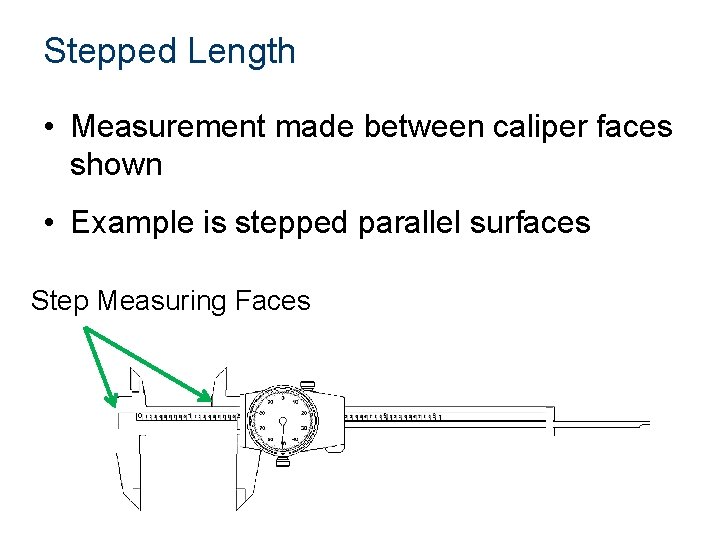
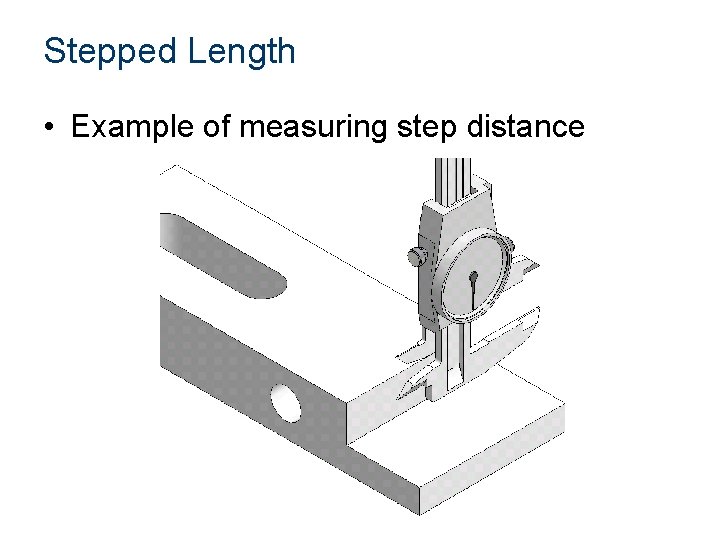
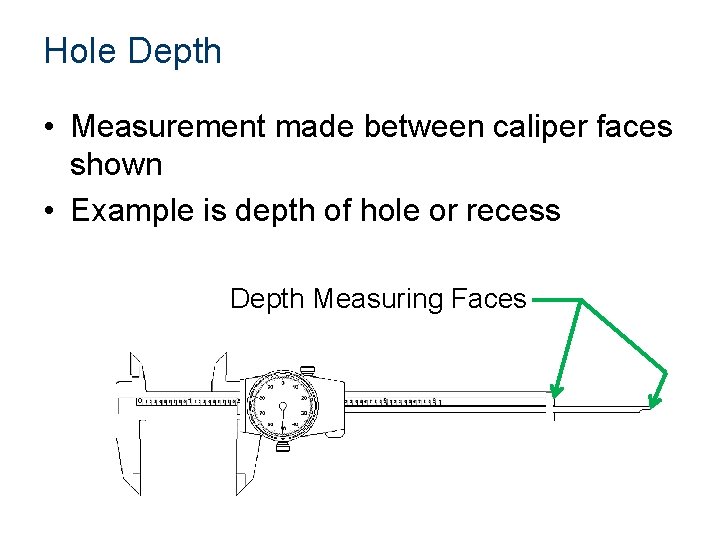
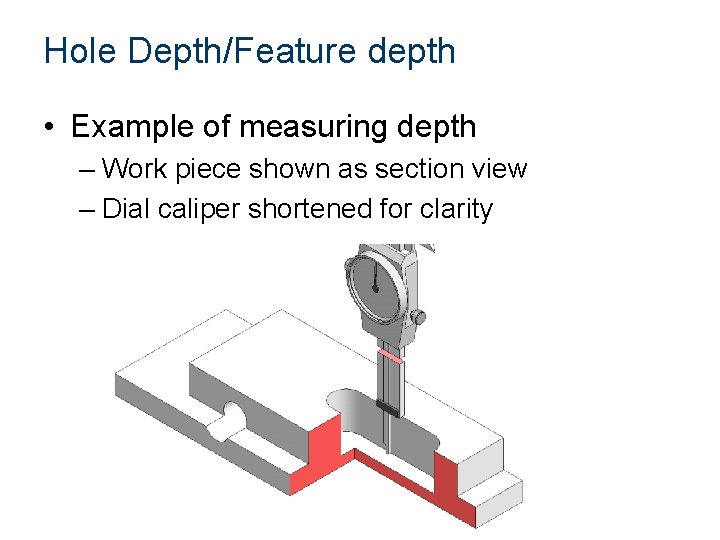
Dial Caliper Measurement • Four Measurements – Outside Diameter or Object Thickness – Inside Diameter or Space Width – Step Distance – Hole Depth/feature depth
Outside Diameter or Object Thickness • Measurement made between caliper faces shown • Example is outside diameter or object thickness Outside Measuring Faces
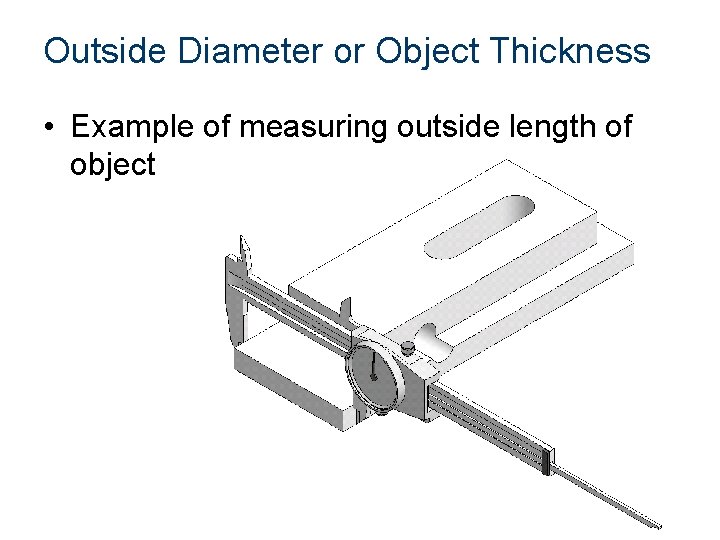
Outside Diameter or Object Thickness • Example of measuring outside length of object
Inside Diameter or Space Width • Measurement made between caliper faces shown • Example is slot width or hole Inside Measuring Faces
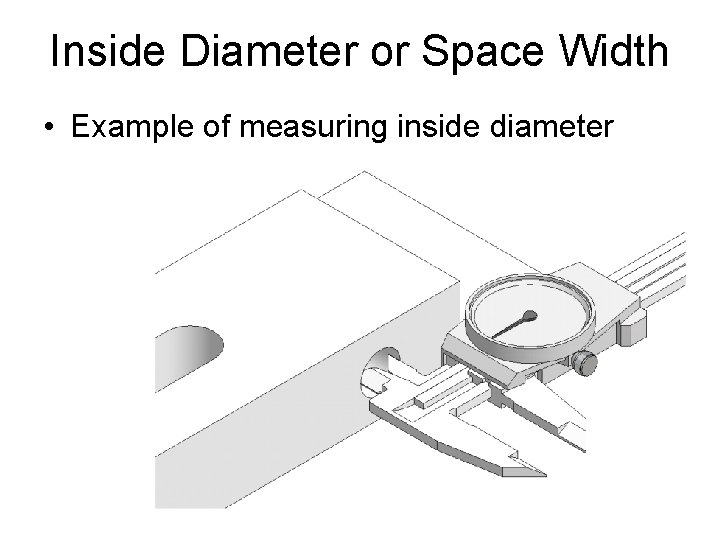
Inside Diameter or Space Width • Example of measuring inside diameter
Stepped Length • Measurement made between caliper faces shown • Example is stepped parallel surfaces Step Measuring Faces
Stepped Length • Example of measuring step distance
Hole Depth • Measurement made between caliper faces shown • Example is depth of hole or recess Depth Measuring Faces
Hole Depth/Feature depth • Example of measuring depth – Work piece shown as section view – Dial caliper shortened for clarity
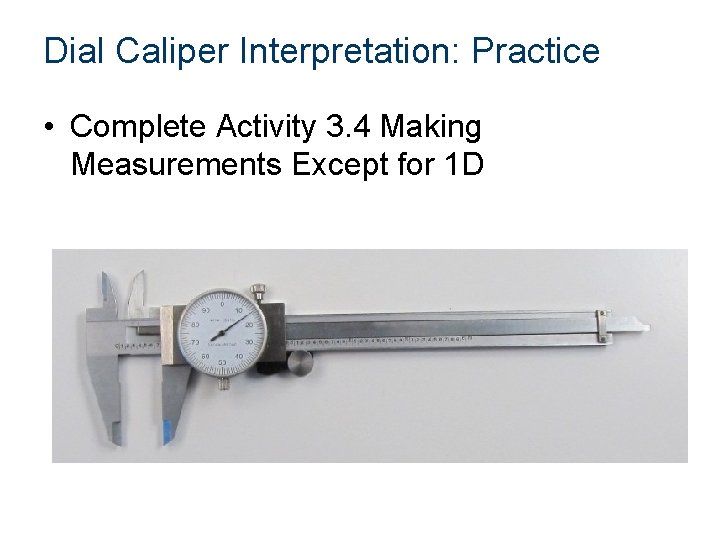
Dial Caliper Interpretation: Practice • Complete Activity 3. 4 Making Measurements Except for 1 D
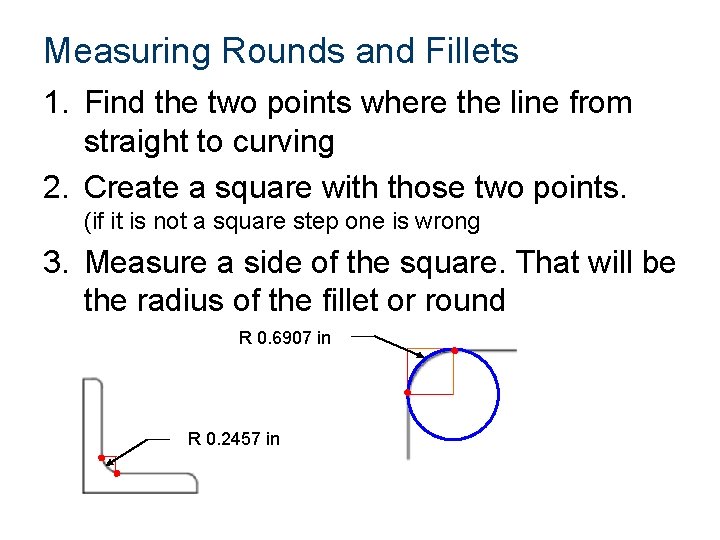
Measuring Rounds and Fillets 1. Find the two points where the line from straight to curving 2. Create a square with those two points. (if it is not a square step one is wrong 3. Measure a side of the square. That will be the radius of the fillet or round R 0. 6907 in R 0. 2457 in