Chapter 13 Statistical Quality Control Method Statistical Quality
- Slides: 26

Chapter 13 Statistical Quality Control Method

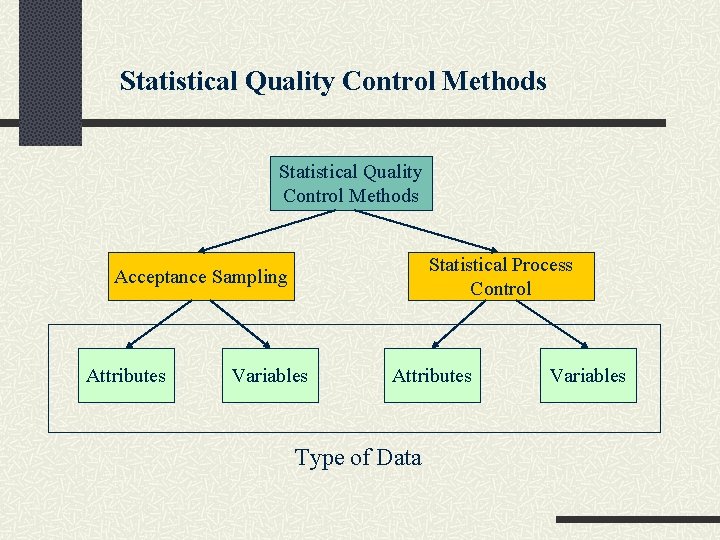
Statistical Quality Control Methods Statistical Process Control Acceptance Sampling Attributes Variables Attributes Type of Data Variables

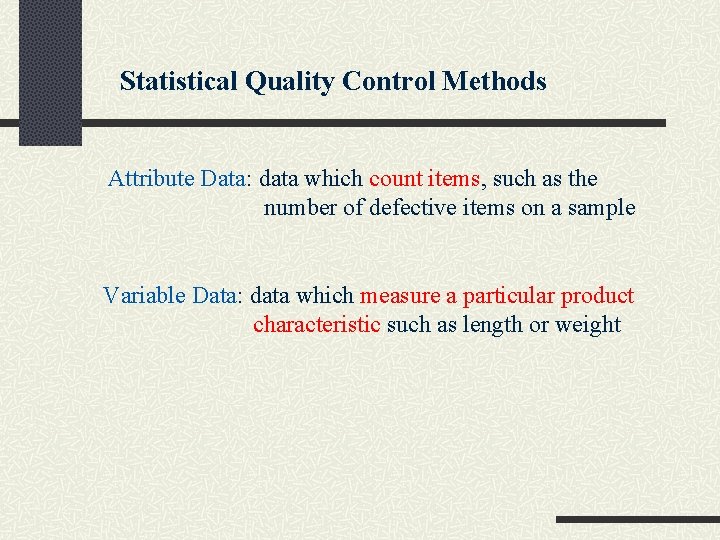
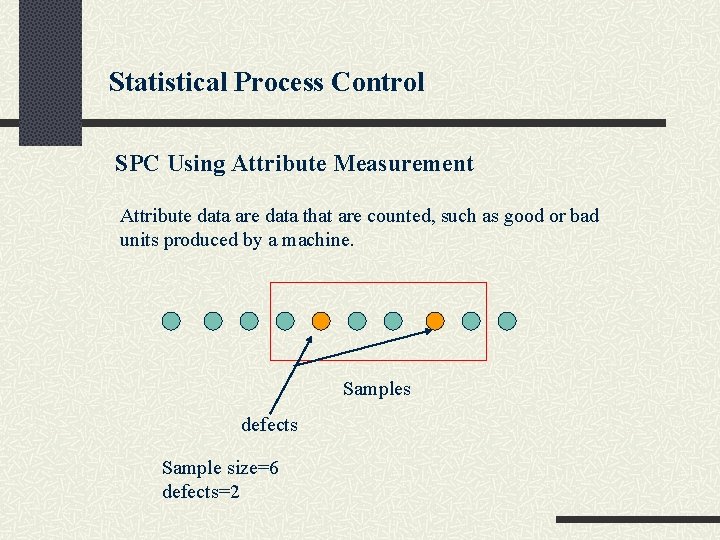
Statistical Quality Control Methods Attribute Data: data which count items, such as the number of defective items on a sample Variable Data: data which measure a particular product characteristic such as length or weight

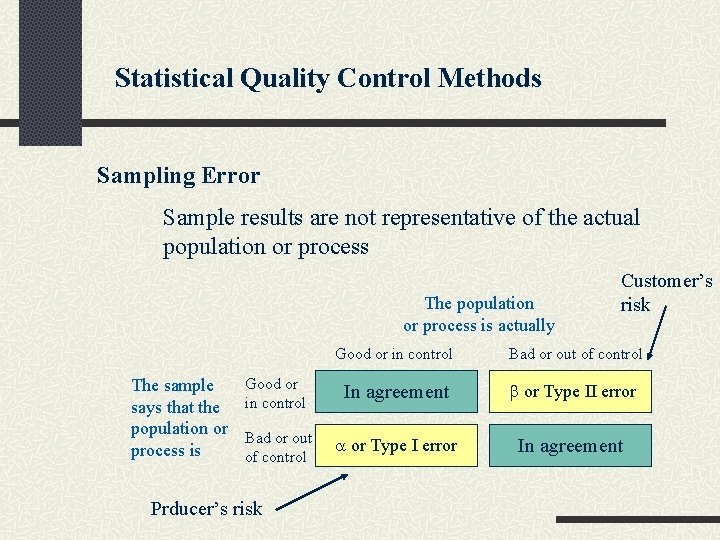
Statistical Quality Control Methods Sampling Error Sample results are not representative of the actual population or process The population or process is actually The sample says that the population or process is Customer’s risk Good or in control Bad or out of control Good or in control In agreement or Type II error Bad or out of control or Type I error In agreement Prducer’s risk

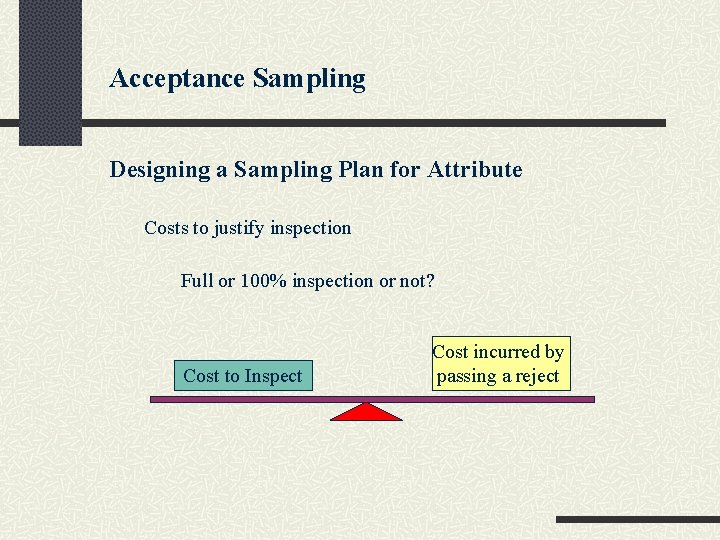
Acceptance Sampling Designing a Sampling Plan for Attribute Costs to justify inspection Full or 100% inspection or not? Cost to Inspect Cost incurred by passing a reject

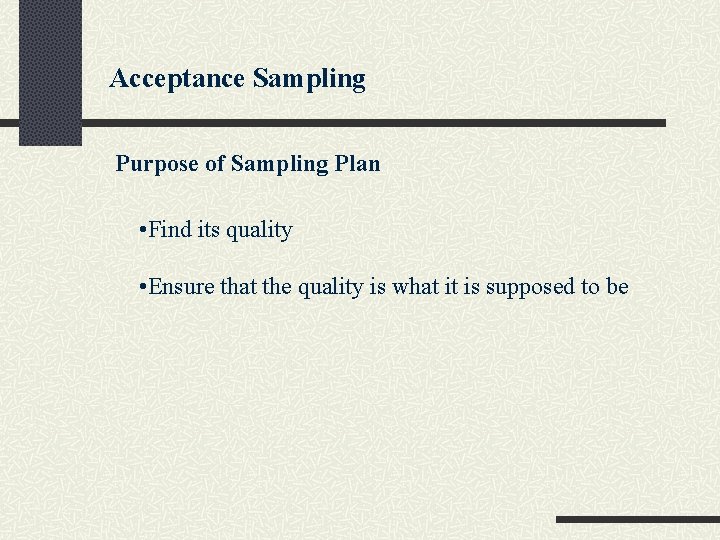
Acceptance Sampling Purpose of Sampling Plan • Find its quality • Ensure that the quality is what it is supposed to be

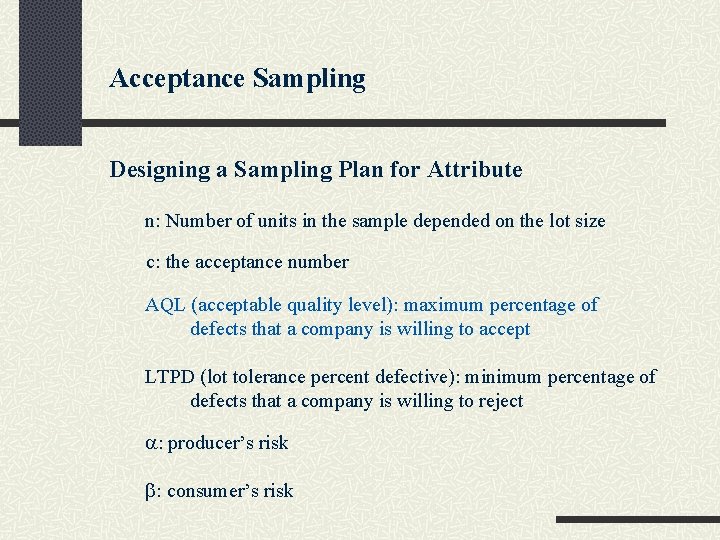
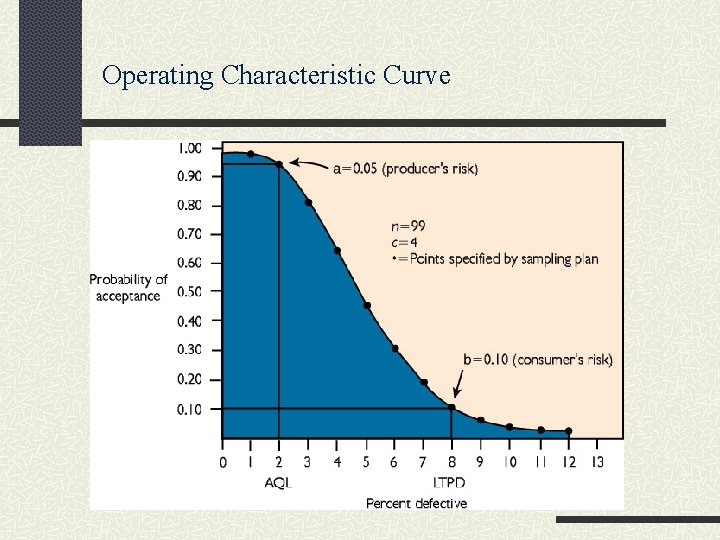
Acceptance Sampling Designing a Sampling Plan for Attribute n: Number of units in the sample depended on the lot size c: the acceptance number AQL (acceptable quality level): maximum percentage of defects that a company is willing to accept LTPD (lot tolerance percent defective): minimum percentage of defects that a company is willing to reject : producer’s risk : consumer’s risk

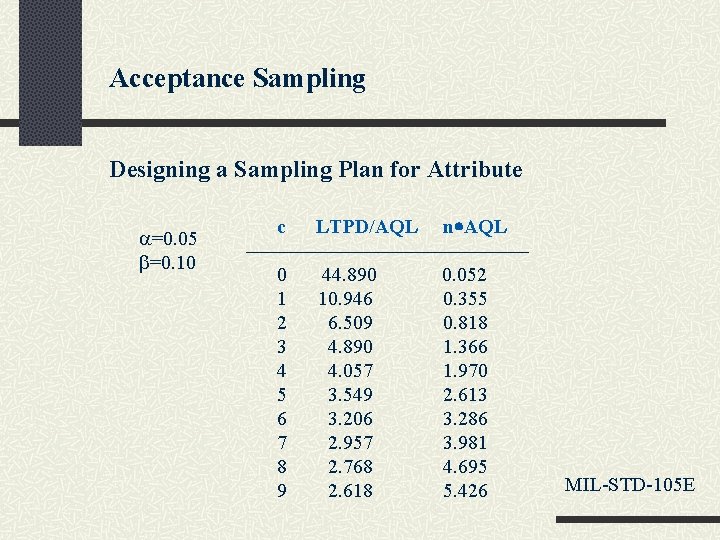
Acceptance Sampling Designing a Sampling Plan for Attribute =0. 05 =0. 10 c LTPD/AQL n AQL 0 1 2 3 4 5 6 7 8 9 44. 890 10. 946 6. 509 4. 890 4. 057 3. 549 3. 206 2. 957 2. 768 2. 618 0. 052 0. 355 0. 818 1. 366 1. 970 2. 613 3. 286 3. 981 4. 695 5. 426 MIL-STD-105 E

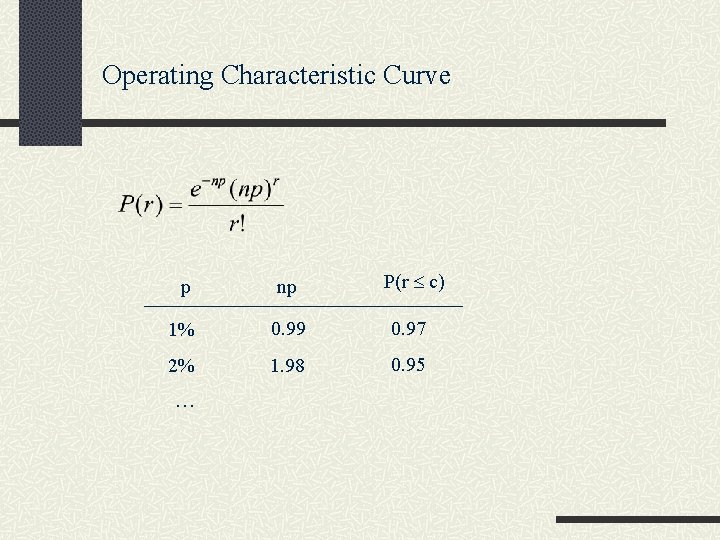
Operating Characteristic Curve

Operating Characteristic Curve p np P(r c) 1% 0. 99 0. 97 2% 1. 98 0. 95 …

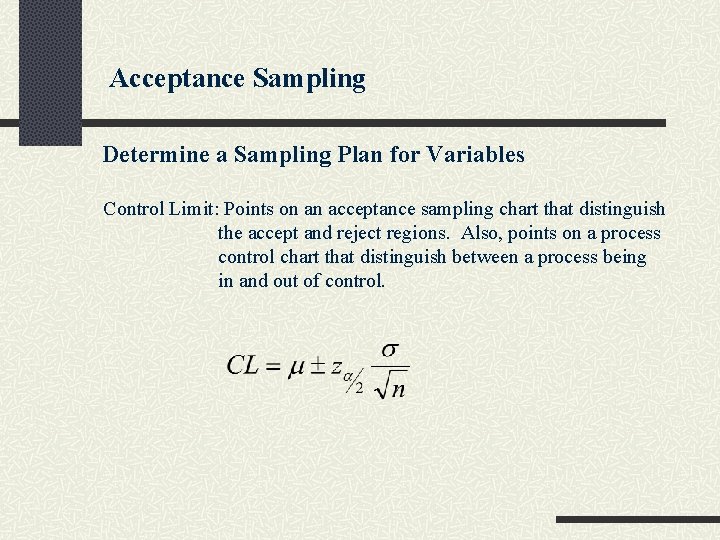
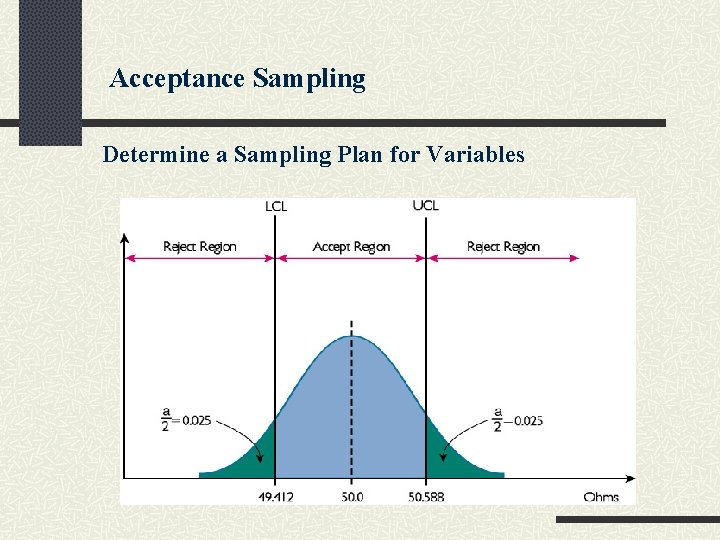
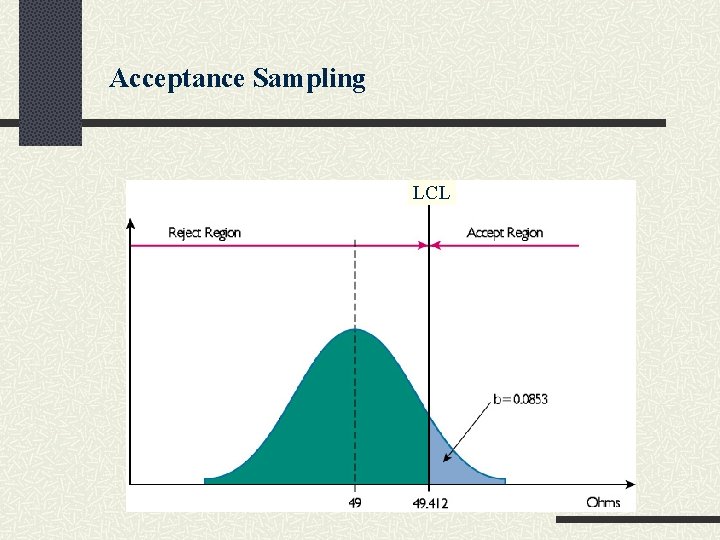
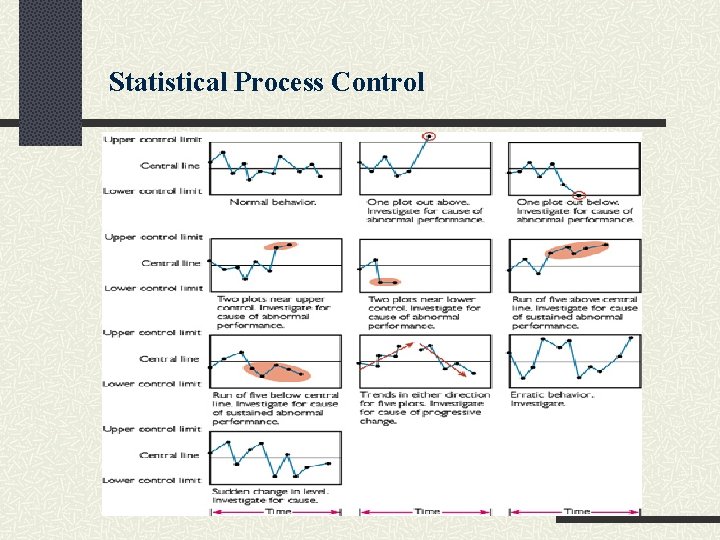
Acceptance Sampling Determine a Sampling Plan for Variables Control Limit: Points on an acceptance sampling chart that distinguish the accept and reject regions. Also, points on a process control chart that distinguish between a process being in and out of control.

Acceptance Sampling Determine a Sampling Plan for Variables

Acceptance Sampling LCL

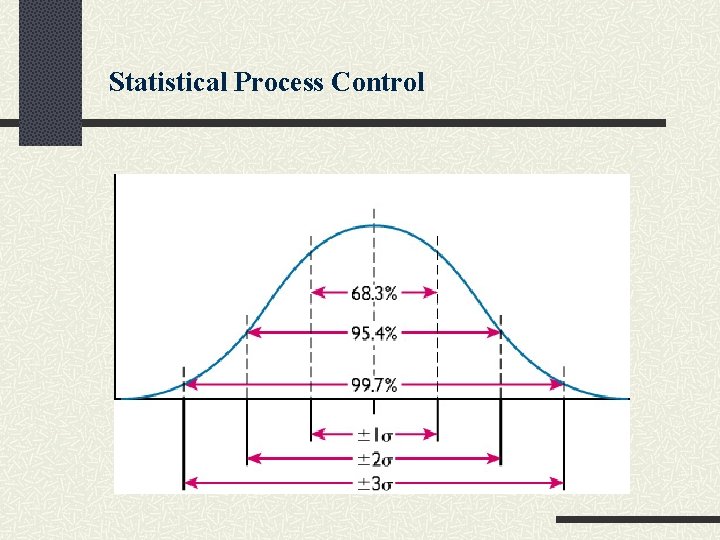
Statistical Process Control Statistical process control (SPC) Statistical method for determining whether a particular process is in or out of control. Central Limit Theorem

Statistical Process Control

Statistical Process Control

Statistical Process Control SPC Using Attribute Measurement Attribute data are data that are counted, such as good or bad units produced by a machine. Samples defects Sample size=6 defects=2

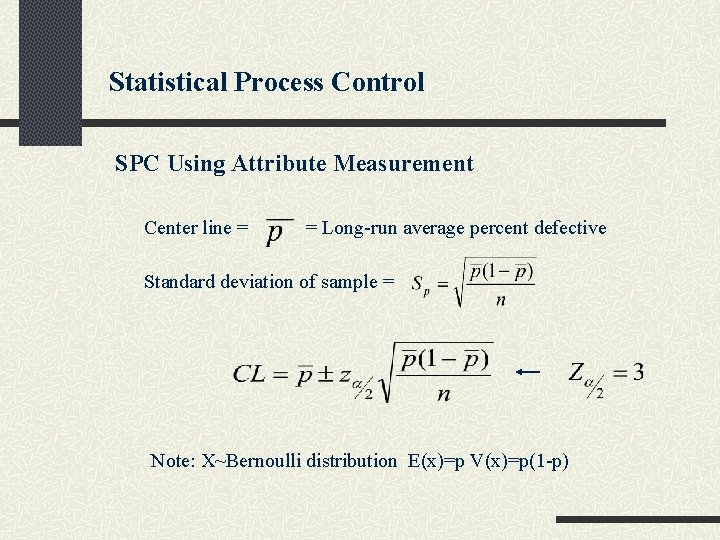
Statistical Process Control SPC Using Attribute Measurement Center line = = Long-run average percent defective Standard deviation of sample = Note: X~Bernoulli distribution E(x)=p V(x)=p(1 -p)

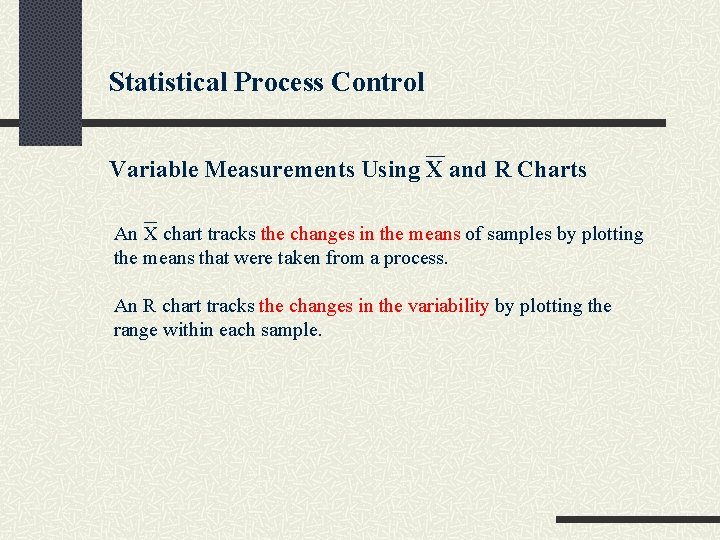
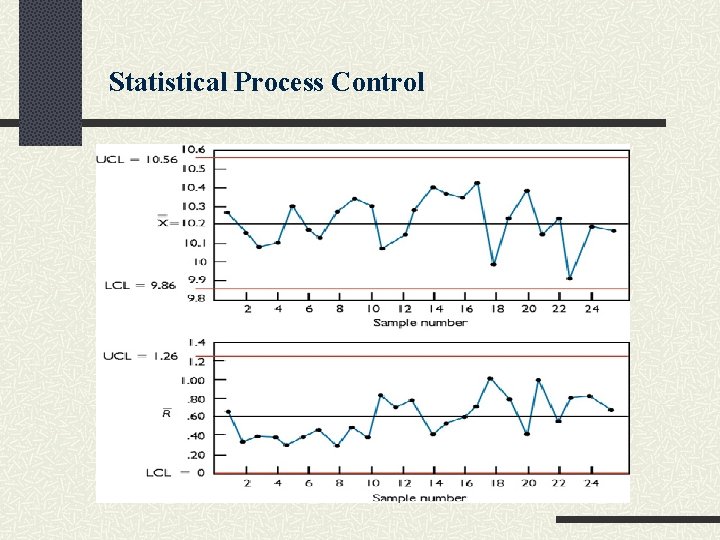
Statistical Process Control Variable Measurements Using X and R Charts An X chart tracks the changes in the means of samples by plotting the means that were taken from a process. An R chart tracks the changes in the variability by plotting the range within each sample.

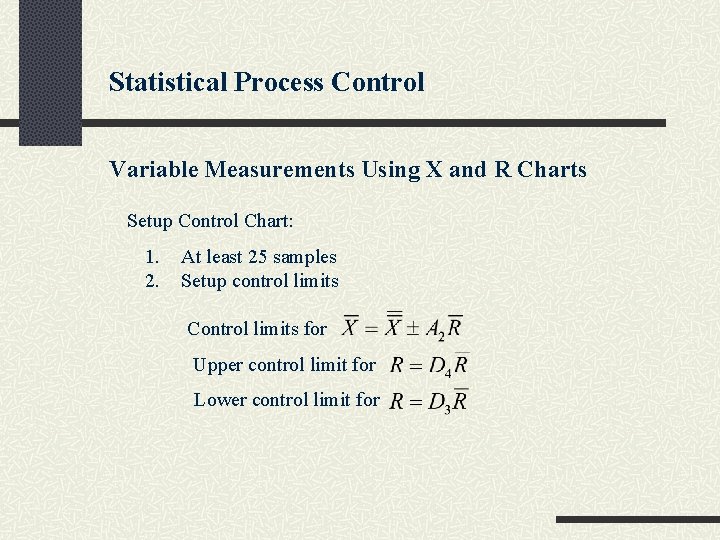
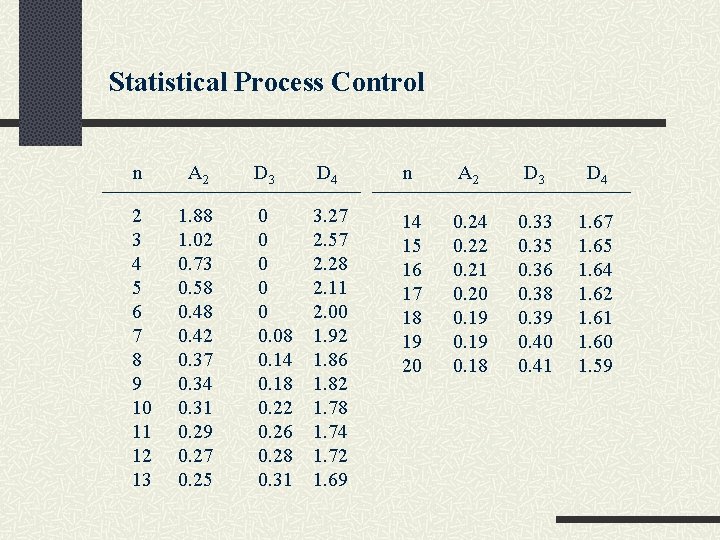
Statistical Process Control Variable Measurements Using X and R Charts Setup Control Chart: 1. 2. At least 25 samples Setup control limits Control limits for Upper control limit for Lower control limit for

Statistical Process Control n A 2 2 3 4 5 6 7 8 9 10 11 12 13 1. 88 1. 02 0. 73 0. 58 0. 42 0. 37 0. 34 0. 31 0. 29 0. 27 0. 25 D 3 D 4 n A 2 D 3 D 4 0 0 0. 08 0. 14 0. 18 0. 22 0. 26 0. 28 0. 31 3. 27 2. 57 2. 28 2. 11 2. 00 1. 92 1. 86 1. 82 1. 78 1. 74 1. 72 1. 69 14 15 16 17 18 19 20 0. 24 0. 22 0. 21 0. 20 0. 19 0. 18 0. 33 0. 35 0. 36 0. 38 0. 39 0. 40 0. 41 1. 67 1. 65 1. 64 1. 62 1. 61 1. 60 1. 59

Statistical Process Control

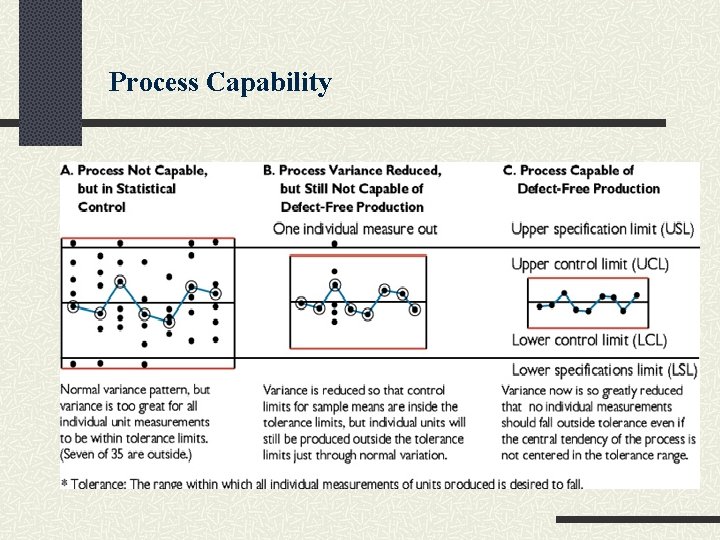
Process Capability

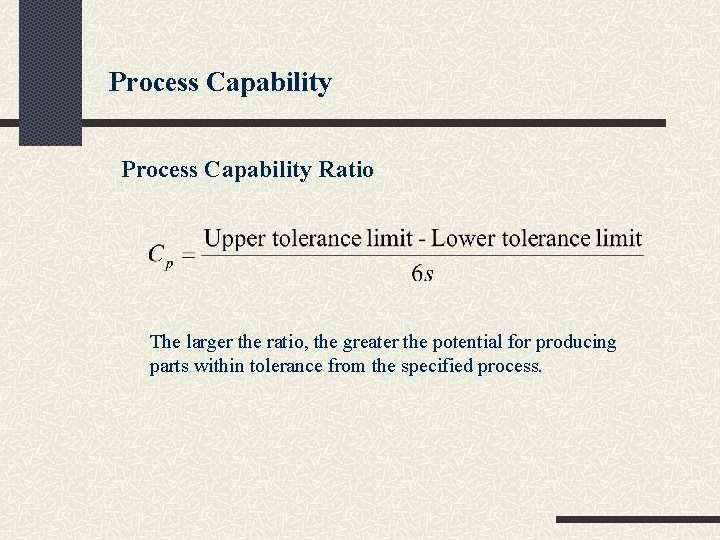
Process Capability Ratio The larger the ratio, the greater the potential for producing parts within tolerance from the specified process.

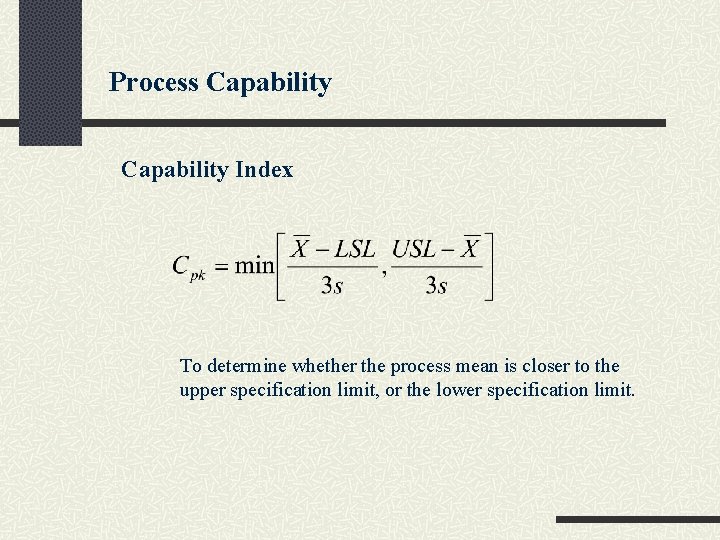
Process Capability Index To determine whether the process mean is closer to the upper specification limit, or the lower specification limit.

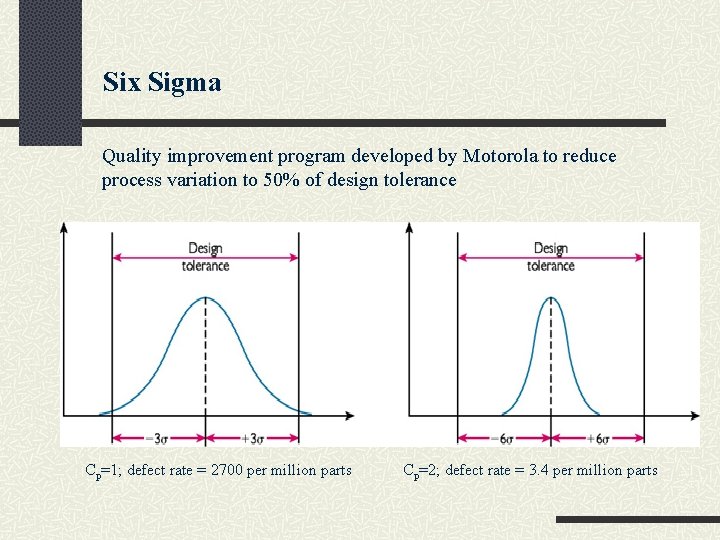
Six Sigma Quality improvement program developed by Motorola to reduce process variation to 50% of design tolerance Cp=1; defect rate = 2700 per million parts Cp=2; defect rate = 3. 4 per million parts