Still Life Still Life a painting or drawing


- Slides: 25
Still Life
Still Life • a painting or drawing of an arrangement of objects, typically including fruit and flowers and objects contrasting with these in texture, such as bowls and glassware
What We Will Be Doing • Create a still life with 5 complex objects around the classroom WITH PERMISSION. • 1 Glass • 1 Metal • 1 Wood • 1 Fabric • 1 Free Choice *Pro Tip- Take photo of arrangement so set up is easy the next day*
Why We Will Be Creating A “ Still Life” Drawing • Observational skills, to “see” like an artist • Shading skills • Proportion • 3 D Rendering with Tone
Using a View Finder
Use of View Finder • Observational skills, to “see” like an artist • Shading skills • Proportion • 3 D Rendering with Tone
What You Will Be Graded On • Observational skills, to “see” like an artist • Shading skill • Proportion • 3 D Rendering with Tone • Craftsmanship/ Time Management
Shading Practice
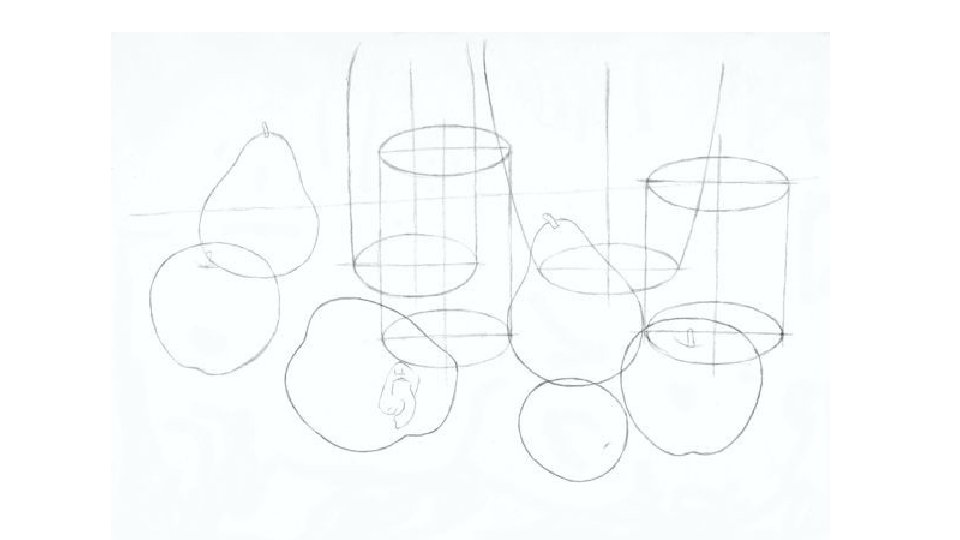
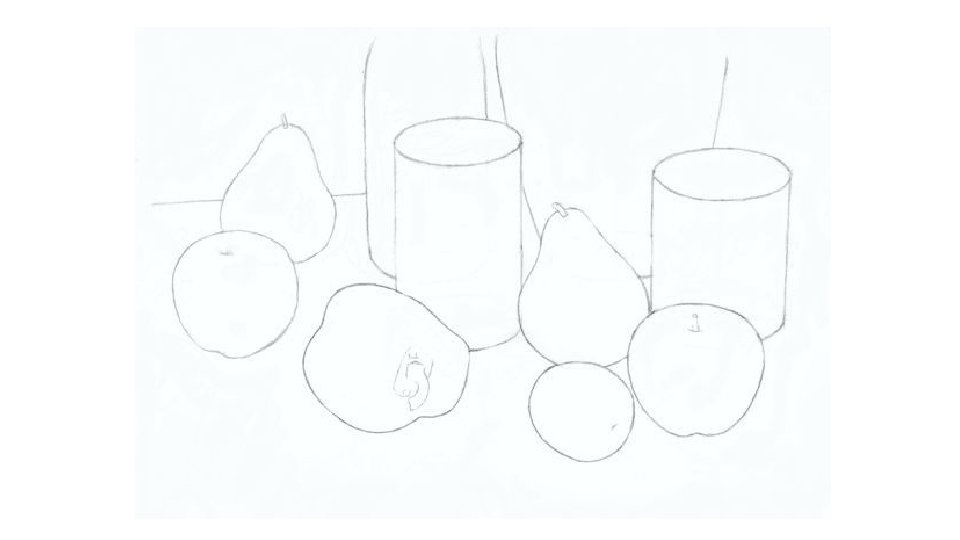
Day 1: Proportion. • Start with the large, simple shapes and “Block” them in. • Pay attention to Proportion (size relation) • Make sure drawing touches 3 edges of the paper
Day 1 Tips: • Draw COMPOSITION or LAYOUT as if you are “Zooming In” in order to fill page (off 3 edges) • Remember to draw what you SEE, not what you KNOW • Shapes: Ex. a Circle may look like an oval from a different angle • Proportion: A soda can is shorter than a bottle of water. BUT if the can is CLOSER to your view, it may appear BIGGER. • DON’T STACK TOO HIGH. You wont be able to go off 3 edges if the objects are stacked too tall.
Sighting Techniques Negative Space • Negative Space is the area AROUND an object. • Sometimes it helps to look at those shapes when “blocking in” your objects.
Sighting Techniques Thumbnail Measuring • Thumbnail measuring is using your thumbnail and pencil to check the proportions of different areas or objects within a still life. • Ex. See what should be EQUAL in size and adjust drawing accordingly. • Make sure your arm is locked into place. (if you move it, closer in or further out, it will measure size inaccurately)
Sighting Techniques Thumbnail Measuring • Thumbnail measuring is using your thumbnail and pencil to check the proportions of different areas or objects within a still life. • Ex. See what should be EQUAL in size and adjust drawing accordingly. • Make sure your arm is locked into place. (if you move it, closer in or further out, it will measure size inaccurately)
Day 2: Perspective • The art of drawing solid objects on a two-dimensional surface so as to give the right impression of their height, width, depth, and position in relation to each other when viewed from a particular point.
How To and Other Tips • Remember that some shapes change based on angle. • (Ex. A circle may only be a circle from the top view. It will flatten or stretch as the angle changes).
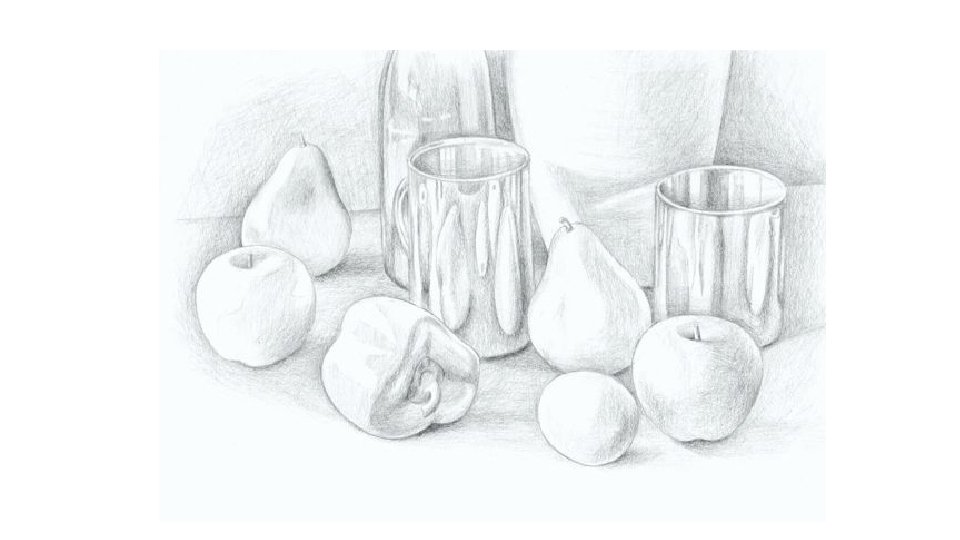
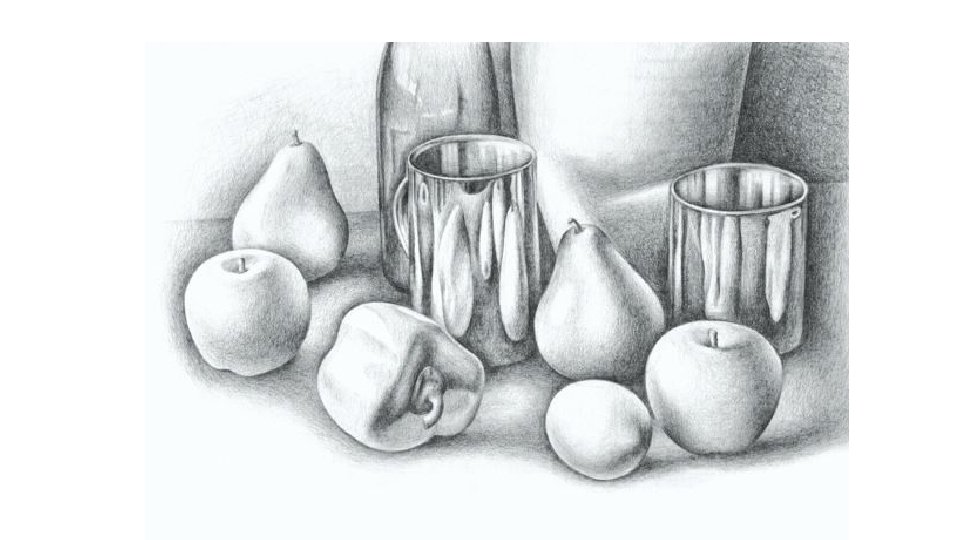
Day 3 -4: Shading • Shading- Pay attention to light source. • 2 H- Use for LIGHT shading • HB (#2 Pencil)- Use for MEDIUM shading • 4 B- Use for DARK shading • Start LIGHT, then LAYER. • You can always add more but can only take off so much.
Directional Mark-Making • As you continue shading, pay attention to the shape of the form (3 D Object) that you are drawing and use Directional Mark-Making – add shading or tiny lines to show bends and curves of objects
You Can Start with Contour Lines
Tortillions
Day 5: Double check