GESTURE DRAWING Gesture Drawing Gesture drawing is the


- Slides: 45
GESTURE DRAWING…
Gesture Drawing… • Gesture drawing is the easiest form of drawing there is. • A GESTURE is an EXPRESSIVE MOVEMENT. • The purpose of drawing gestures is to capture a feeling of motion.
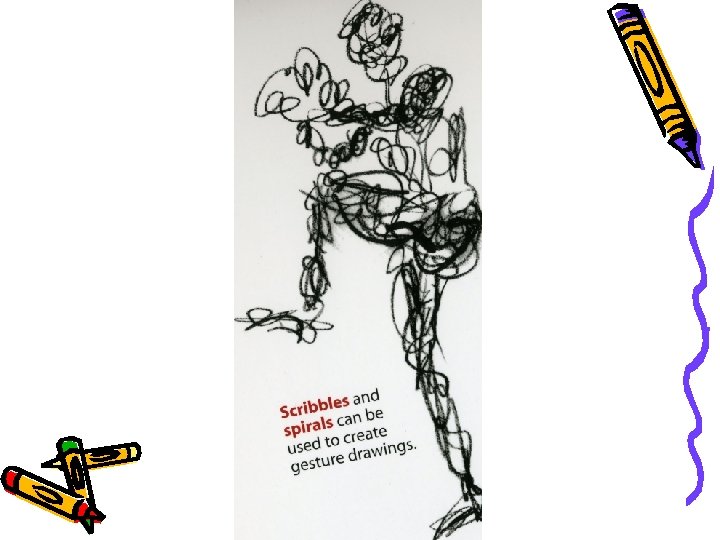
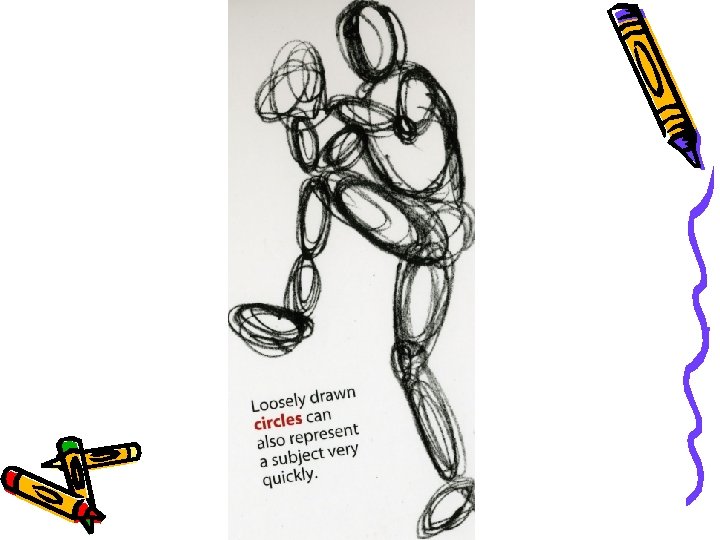
Gesture drawing is a quick method of representing a sense of movement and an object's mass with very loose marks. In your notes, draw this baseball player in quick gesture drawings. 1 scribble and 1 quick ovals
Gesture Drawing… • A gesture drawing does not use a lot of detail. • Lines showing gestures are quickly drawn and should be sketched freely and loosely in order to capture movement. • Don’t concentrate on drawing the outline of your object but concentrate on drawing the interior of your object.
Gesture drawing is a quick method of representing a sense of movement and an object's mass with very loose marks. In your notes, draw this baseball player in quick gesture drawings. 1 scribble and 1 quick ovals
Gesture drawing is a quick method of representing a sense of movement and an object's mass with very loose marks. In your notes, draw this baseball player in quick gesture drawings. 1 scribble and 1 quick ovals
Gesture Drawing… • Your gesture drawings may look like scribbles at first, that is ok. • Concentrate on MOVEMENT and POSITION. • Gesture drawing should show use of all ELEMENTS and PRINCIPLES!!!
Gesture drawing is a quick method of representing a sense of movement and an object's mass with very loose marks. In your notes, draw this baseball player in quick gesture drawings. 1 scribble and 1 quick ovals
Gesture drawing is a quick method of representing a sense of movement and an object's mass with very loose marks. In your notes, draw this baseball player in quick gesture drawings. 1 scribble and 1 quick ovals
Things to Remember when Gesture Drawing… • PROPORTION!!! Remember that the human figure is 7½ heads tall, your arms hang down to the middle of your thighs. • WHO CARES ABOUT DETAILS!!! Gesture drawing is used to show position and movement, so don’t worry about facial features, hair, or jewelry.
Head Height-1 Head Height-2 Head Height-3 Head Height-4 Head Height-5 Head Height-6 Head Height-7 1/2
More Things to Remember when Gesture Drawing… • SPACE!!! Be sure you use your SPACE well. Fill up your paper with your drawing and show the entire figure. • BE FLUID!!! Use your whole arm when drawing, loosen up and get away from drawing too tight.
MOST IMPORTANTLY… • GESTURE is a movement or position of the human form that expresses an emotion or idea. • So, your drawing should show the position and movement of your model. I want to see which way their feet are turned rather than what their shirt says.
La Ronde Picasso, Pablo 20 in x 26 in Your brain will capture the entire image. Let your pencil or pen quickly follow the content flashed to the brain. Keep your pencil in a constant circular and linear motion. Catch the form, not the details.
• You are to understand the flowing use of line, proportion, and realistic expression. • We will look at Henry Moore and Alberto Giacometti, both sculptors’ whose drawings have a bold approach that offers freedom of expression in a fluid linear style.
• The illusion of volume is expressed in their drawing by repeating lines.
• Many people think that the most difficult subject for art are human beings. • Humans are an incredibly complex for us to understand. • Look at your hand, it is something that you use everyday. • Do you know the actual size of your hand? • Most people draw their hands too small.
• Your hand is as long as your face! – Place the heel of your palm against your chin. – The end of your finger should reach to your hairline, or very close to it. – Spread your fingers. • Doesn’t your hand almost cover your face? • Besides being a very complicated form, the human body is also expressive. • We learn how to “read” a person’s feelings and emotions from the position of his or her body, and the expression on his or her features.
• We can move, walk run, jump, bend, leap, dance, and spin. • Look at this painting done by Duchamp who shows a simplified human form in motions walking down a staircase.
Henry Moore
• Family Group 1944 Watercol or wash, pencil, and crayon.
Alberto Giacometti
• Jean Genet • Oil on Canvas • 1955
• How do I draw someone moving about? And what do I use to record their movements –Use gesture drawings or quick sketches. –Do not record details. –Look only at the position of the body or gesture. –The drawings can be made by scribbling. –They are working drawings remember. –You only record the movement and position of the human form.
Okay, now what? ? • We will start by doing some exercises. • Quick two minute sketches of our model. – Geometric shapes draw regular lines – circular lines
• Remember to use loose lines like scribbling • Create bold and loose linear drawings of the human figure you are viewing. • Do not concentrate on the details, but with creating a sense of three-dimensional form and volume.
• This is supposed to be a quick linear exploration of form, you will spend 5 minutes on a loose pencil drawing as a guide.
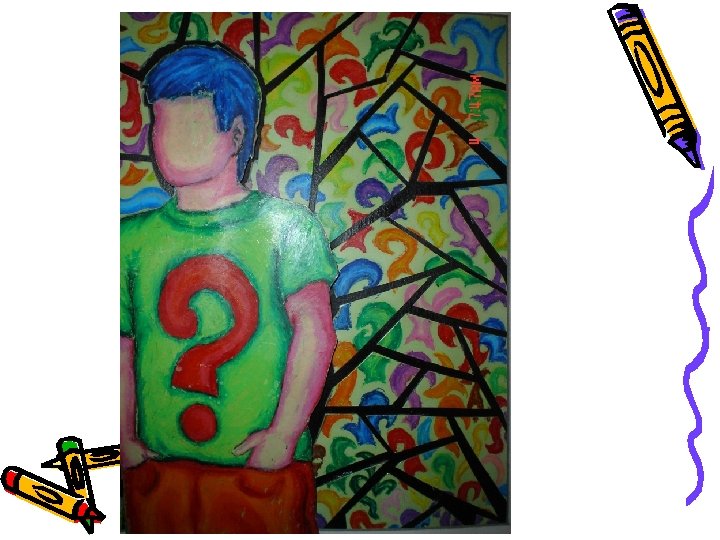
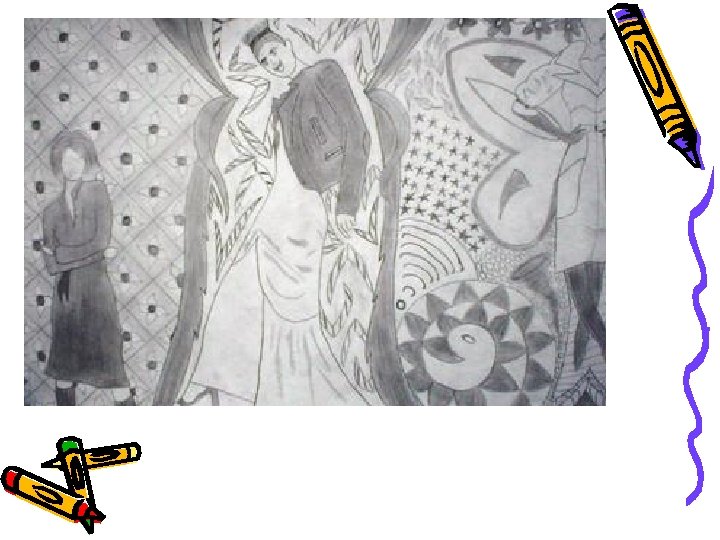
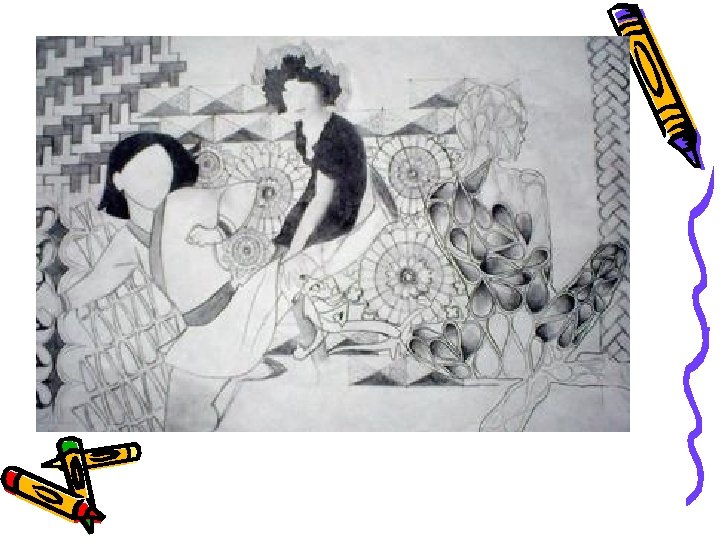
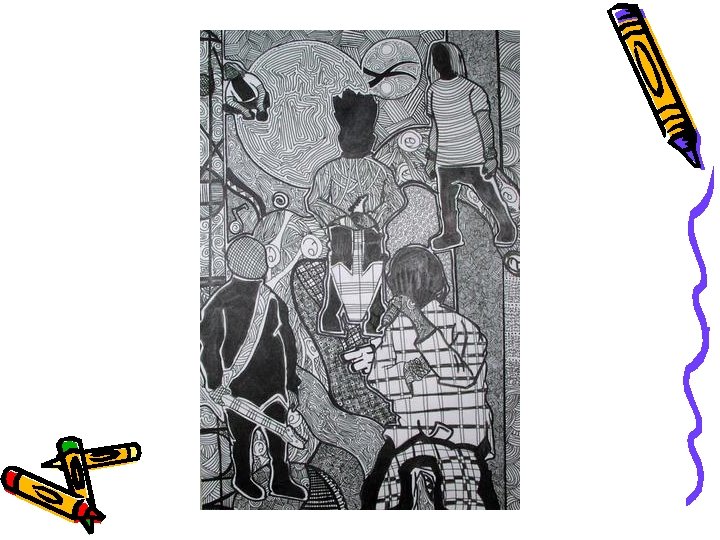
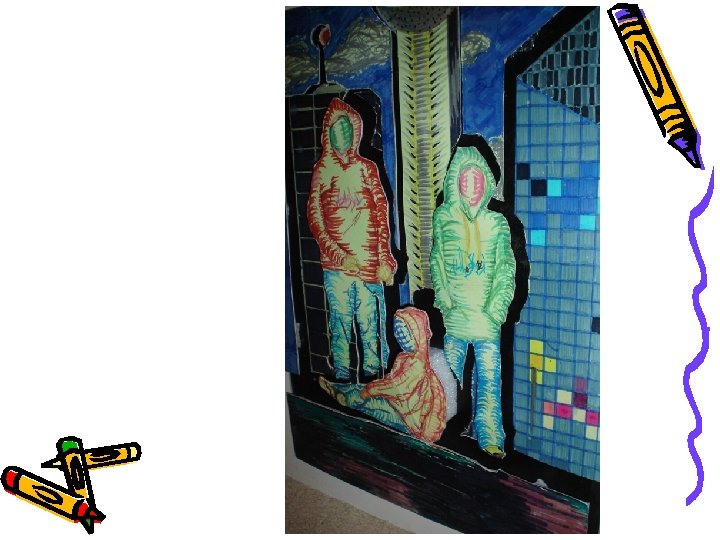
5 th Period • Draw the figure using proportional guidelines. • Create three drawn figures from a model using contour and gesture drawings. Compose artwork with figures and basic perspective. – Vary the size of the objects, overlap, have figures drawn off the page. – Design patterns to fill composition using ink.
• 1 figure must be in the foreground and must be larger and closer to the bottom of the page. • 1 figure must be in the middle of the page must be a medium size figure. • 1 figure placed at the top of the page drawn small. • At least 1 figure must overlap part of another. » Draw the Figure on a separate paper then transfer and enlarge onto your final composition.
• Draw at least 1 figure leaving the picture plane. • Divide the composition into several sections, aiming for asymmetrical balanced composition. • Using your imagination create patterns consisting of repeating shapes to fill in both figures and background attending to balance both the positive and negative space.
• Use different values with the ink. • Other Artist to look at for inspiration: Da. Vinci (proporiton) Klimt Haring Erte Britto
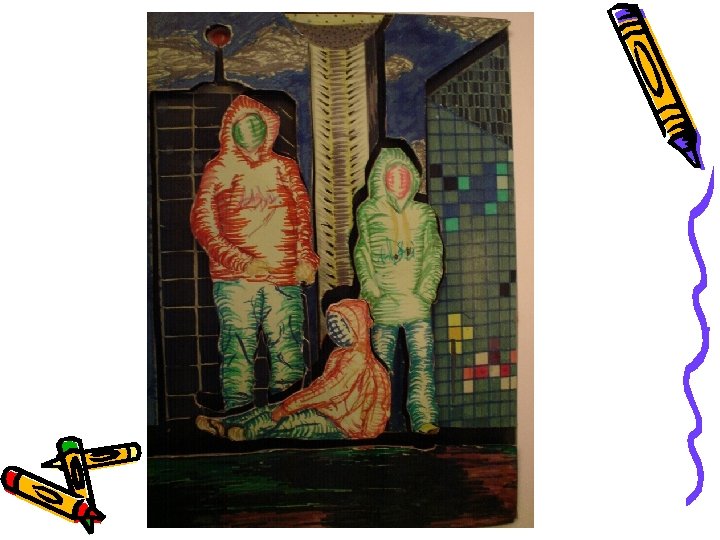
2 nd Period • You will look at the group of models and do several practice sketches then move to the illustration board. • I want you to capture the position of the model in your drawing. Develop a background for your models.
You will cut out your model from the illustration board and cut your background out. You will then raise your background and model into different levels. You model must look 3 Dimensional.