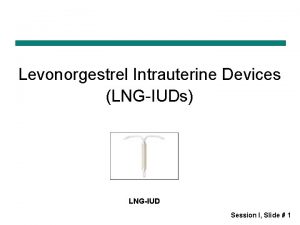
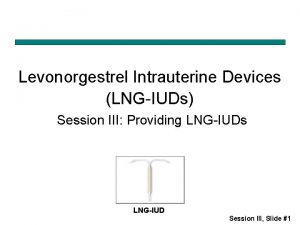
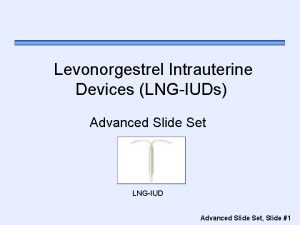
Levonorgestrel Intrauterine Devices LNGIUDs Session V LNGIUD Loading


- Slides: 22

Levonorgestrel Intrauterine Devices (LNG-IUDs) Session V: LNG-IUD Loading and Insertion Procedure Using One-Handed Inserter; Removal Procedure Session V, Slide #1

Session Objectives Participants will: • Describe infection prevention requirements during insertion and removal • Describe and demonstrate steps for LNG-IUD insertion procedure: • Describe steps to remove the LNG-IUD. • Demonstrate and practice LNG-IUD insertion and removal procedures on an anatomical model. Session V, Slide #2

Instruments and Supplies • IUD in an undamaged, sterile package • Bivalve speculum • Tenaculum • Uterine sound • Ring forceps • Sharp scissors with blunt tip • Narrow forceps (e. g. artery or Kelly) Session V, Slide #3

Instruments and Supplies (continued) • Light source to visualize cervix • Gloves (single use disposable, HDL, or sterile) • Bowl for antiseptic solution • Antiseptic solution • Sterile gauze/cotton balls • Drape/cloth to cover table and woman’s pelvic area Session V, Slide #4

One-Handed Inserter: Components Session V, Slide #5

Preventing Infection During Insertion • Wash hands thoroughly with soap and water before and after procedure • Put on examination/HLD/sterile gloves on both hands. • Use HLD/sterile instruments. • Have the woman wash her vaginal area if possible • Clean the cervix os and vaginal walls thoroughly with an antiseptic at least two times. • Load the LNG-IUD using “no-touch” technique Session V, Slide #6

Preventing Infection During Insertion (continued) • Use “no-touch” insertion technique to reduce contamination of the uterine cavity ( Described in next slide) • After the procedure, wipe reusable instruments with a wet cloth at point of use, thoroughly clean, rinse, Sterilize or HLD instruments. • Properly dispose of waste material as per guidelines (gauze, cotton, and disposable gloves). Session V, Slide #7

• The “no-touch” insertion technique is safest and means not letting the loaded LNG-IUD or uterine sound touch any unsterile surfaces. It involves: – Ensuring not to touch the vaginal wall or speculum blades with the uterine sound or loaded LNG-IUD inserter – Not passing both the uterine sound or the loaded LNG-IUD inserter more than once through the cervical canal Session V, Slide #8

Performing Pelvic Exam Pelvic exam is an essential part of IUD insertion procedure: • Do a bimanual pelvic exam to establish the size, shape and position of the uterus. • Do a speculum pelvic exam by gently inserting the HLD/sterile speculum to: – Visualize the cervix and check for signs of infection, such as purulent vaginal discharge, cervical discharge, ulcers, lesions or sores. – Clean the cervical os and vaginal walls thoroughly with antiseptic at least twice. Session V, Slide #9

Sounding the Uterus • Grasp the cervix with an HLD/sterile tenaculum and apply gentle traction. • Insert the HLD/sterile sound using “no-touch” technique. • Advance the sound into the uterine cavity until a slight resistance is felt. • Slowly withdraw the sound assess the level of mucus/blood to determine the depth of the uterus (average depth 6 -8 cm) Session V, Slide #10

LNG-IUD loading procedure Step 1: Open the sterile package • Open the sealed LNG-IUD package • Lift the handle of the sterile inserter from the sterile package Session V, Slide #11

LNG IUD loading procedure Step 2: Move slider all the way to forward position • Move slider all the way to forward position to load LNG-IUD • The tips of the LNG-IUD arms will meet to form a rounded dome that extends slightly beyond the insertion tube. • Maintain forward pressure with your thumb or forefinger on the slider to avoid releasing strings prematurely. Session V, Slide #12

LNG IUD loading procedure Step 3: Set the flange to uterine depth • While maintaining forward pressure on the slider, set the upper edge of the flange to correspond to the uterine depth (in centimeters) measured during sounding. Session V, Slide #13

LNG IUD insertion procedure Step 4: Advancing insertion tube • Apply gentle traction on the tenaculum to straighten the alignment of the cervical canal and uterine cavity • Maintaining the slider in forward position, advance the loaded LNG-IUD insertion tube through the cervical canal until the upper edge of the flange is 1. 5 -2. 0 cm. from the cervical os. Session V, Slide #14

LNG IUD insertion procedure Step 5: Release the arms of the LNG-IUD • While holding the inserter steady, move the slider down to the mark to release the arms of the LNG-IUD. • Wait 10 seconds for the horizontal arms to open completely. Session V, Slide #15

LNG IUD insertion procedure Step 6: Place IUD in fundal position • Advance the inserter gently towards the fundus of the uterus until the flange touches the cervix. – If you encounter fundal resistance do not continue to advance. • LNG IUD is now in the fundal position. Fundal placement is important to prevent expulsion Session V, Slide #16

LNG IUD insertion procedure Step 7: Release LNG-IUD and Withdraw Inserter • Holding the inserter firmly in place, release LNG-IUD by moving the slider all the way down • Keep holding the slider down while gently withdrawing the inserter from the uterus Session V, Slide #17

LNG IUD insertion procedure Step 8: Cut the threads • Using a sharp, blunt-tipped, scissors, cut the threads perpendicular to the thread length, leaving about 3 cm outside of the cervix, while strings ends are still in the inserter tube (cutting threads at an angle may leave sharp ends). • Do not apply tension or pull on the threads when cutting to prevent displacing the LNGIUD Session V, Slide #18

LNG-IUD Post-insertion Tasks Before removing gloves: • Wipe used instruments with a wet cloth or soaks them in a bucket of tap water for point of use cleaning. • Segregate and dispose of waste materials in appropriate leak proof containers with lids • Wipe surfaces that may have been contaminated with blood or discharges with 0. 5% chlorine solution. Take gloves off, wash hands thoroughly with soap and water, and dry them. Allow the woman to rest Session V, Slide #19

• Provide post-insertion instructions; remind client: – No protection against STIs; need to use condoms if at risk – Possible side effects, especially bleeding changes – When to return to the clinic • Complete the LNG-IUD reminder card and give it to the client. Explain that the user card shows the name of the LNG-IUD, the date of insertion, the clinic name, and the intended date of removal. • Complete the client record Session V, Slide #20

1. Follow infection prevention guidelines. 2. Counsel client that cramping/bleeding may occur 3. Gently insert the HLD/sterile speculum 4. Visualize the strings, and clean the cervical os and vaginal wall with antiseptic Session V, Slide #21

Session V, Slide #22
 Levonorgestrel
 Levonorgestrel/etinilestradiol
 Ukmec1
 Etiniestradiol
 Perbedaan single loading dan double loading
 Static class loading and dynamic class loading
 Intrauterine device
 Spaldings sign
 Hutchinson triad
 Intrauterine device
 Intrauterine
 Asymmetrical and symmetrical iugr
 Metricure intrauterine
 Small for gestational age causes
 Input output picture
 What are literary techniques
 Loading ...0%
 Loading dose of mi
 Loading gel
 Mould loading and unloading procedure
 Fel front end loading
 What is linking and loading
 Rumus dosis obat
