1 2 types of testing methods Destructive testing














- Slides: 57

1

• 2 types of testing methods, Destructive testing & Non. Destructive testing • Destructive testing-After testing the material looses its functionality, e. g. Chemical analysis, mechanical properties etc. • Non-Destructive testing-The soundness of material is tested without affecting its functionality. • NDT methods enhaneces the reliability of the components/product at manufacturing stage or in service. 2

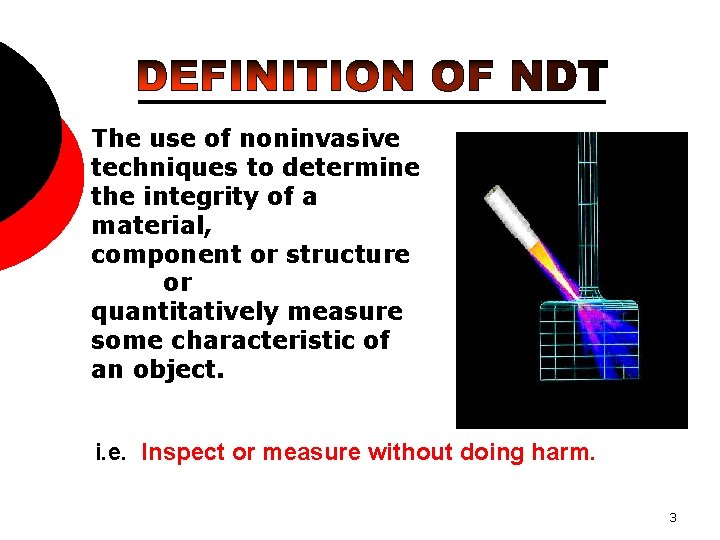
The use of noninvasive techniques to determine the integrity of a material, component or structure or quantitatively measure some characteristic of an object. i. e. Inspect or measure without doing harm. 3

• Visual inspection (VT) • Liquid penetration (PT) • Magnetic particle testing (MT) • Eddy current testing (ET) • Radiography (RT) • Ultrasonic testing (UT) 4

• Flaw Detection and Evaluation • Leak Detection • Dimensional Measurements • Structure and Microstructure Characterization • Estimation of Mechanical and Physical properties • Stress (Strain) and Dynamic Response Measurements • Material Sorting and Chemical Composition Determination 5

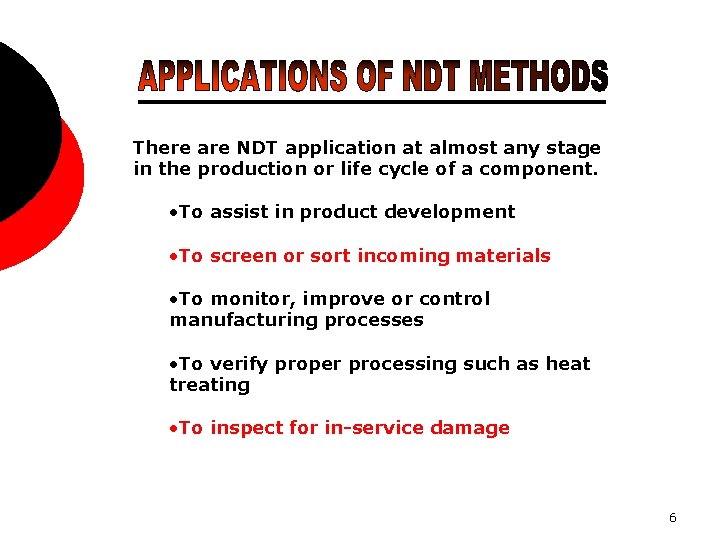
There are NDT application at almost any stage in the production or life cycle of a component. • To assist in product development • To screen or sort incoming materials • To monitor, improve or control manufacturing processes • To verify proper processing such as heat treating • To inspect for in-service damage 6


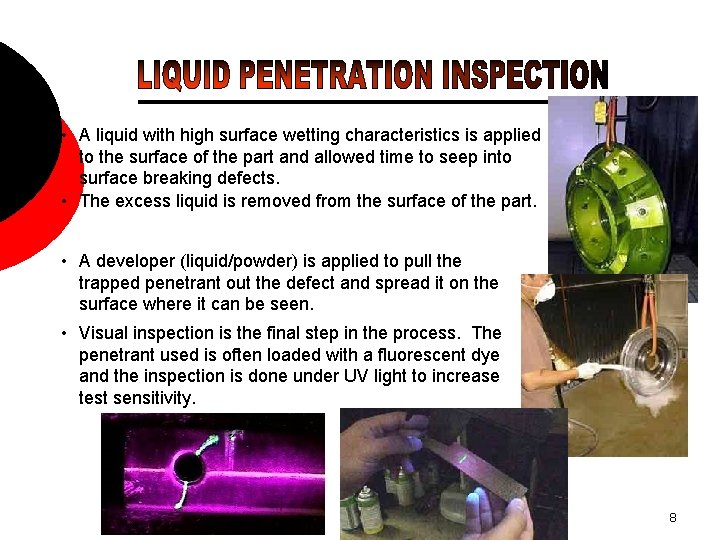
• A liquid with high surface wetting characteristics is applied to the surface of the part and allowed time to seep into surface breaking defects. • The excess liquid is removed from the surface of the part. • A developer (liquid/powder) is applied to pull the trapped penetrant out the defect and spread it on the surface where it can be seen. • Visual inspection is the final step in the process. The penetrant used is often loaded with a fluorescent dye and the inspection is done under UV light to increase test sensitivity. 8

The part is magnetized. Finely milled iron particles coated with a dye pigment are then applied to the specimen. These particles are attracted to magnetic flux leakage fields and will cluster to form an indication directly over the discontinuity. This indication can be visually detected under proper lighting conditions. 9


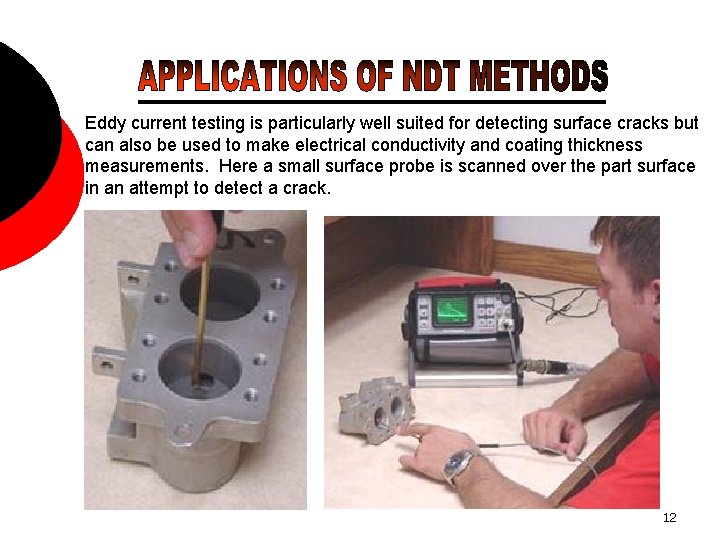
Eddy current testing is particularly well suited for detecting surface cracks but can also be used to make electrical conductivity and coating thickness measurements. Here a small surface probe is scanned over the part surface in an attempt to detect a crack. 12

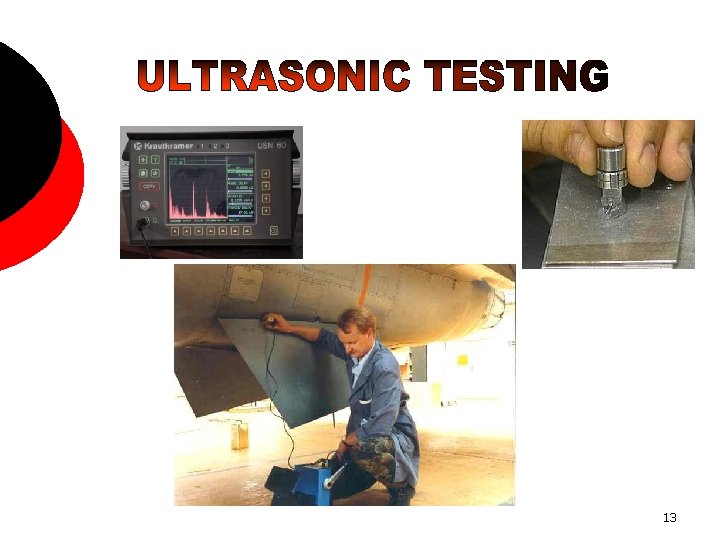
13

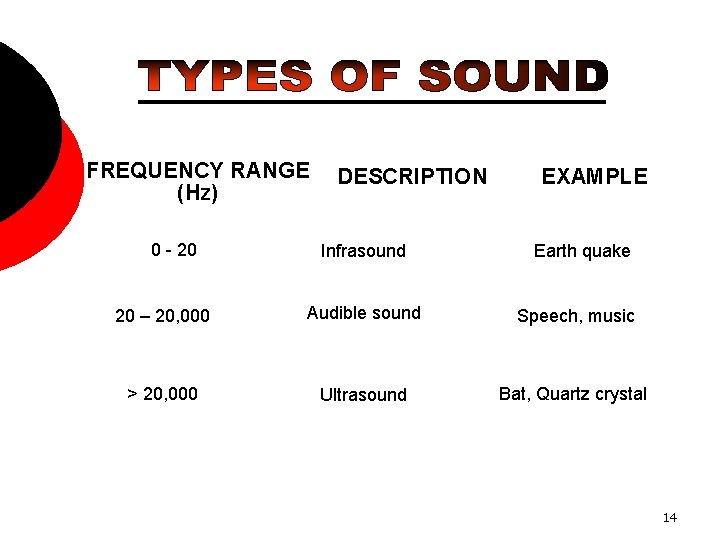
FREQUENCY RANGE (Hz) 0 - 20 DESCRIPTION Infrasound EXAMPLE Earth quake 20 – 20, 000 Audible sound Speech, music > 20, 000 Ultrasound Bat, Quartz crystal 14

• Sound frequency above human audible range is called ultrasonic sound • The ultrasonic principle is based on the fact that solid materials are good conductors of sound waves & reflected at interfaces. • Whereby the waves are not only reflected at the interfaces but also by internal flaws (material separations, inclusions etc. ) • A considerable amount of information about the part being examined can be collected, such as the presence of discontinuities, part or coating thickness; and acoustical properties can often be correlated to certain properties of the material. 15

• RESOLUTION: -The ability to detect nearby small defects separately • SENSITIVITY: -The ability to detect the smallest defect • ATTENUATION: -At a grain boundary the wave is partly absorbed, partly scattered & partly transmitted, so the sum of absorption & scattering is the attenuation of the wave • ACOUSTIC IMPEDANCE: -The resistance offered by the medium to he propagation of sound wave through it • HASH: -At times when the material is very coarse the waves are reflected from the grain boundaries & we get small echoes which are known as hashes or noise 16

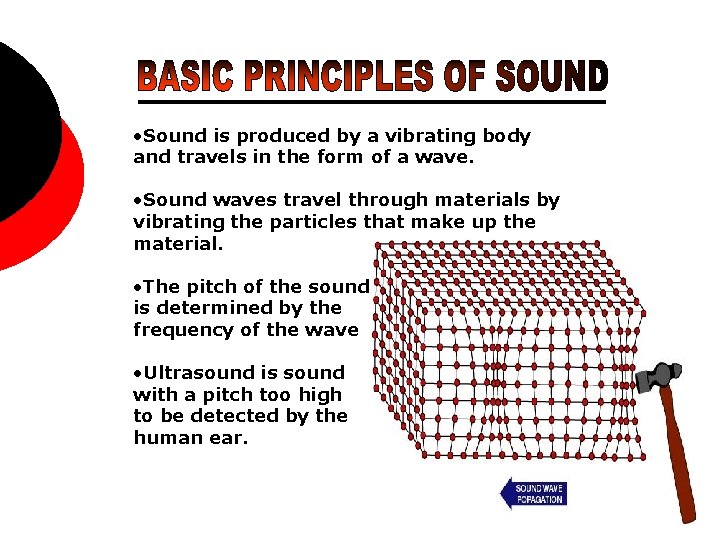
• Sound is produced by a vibrating body and travels in the form of a wave. • Sound waves travel through materials by vibrating the particles that make up the material. • The pitch of the sound is determined by the frequency of the wave • Ultrasound is sound with a pitch too high to be detected by the human ear. 17

• The measurement of sound waves from crest to crest determines its wavelength (λ). • The sound wavelength is inversely proportional to its frequency. (λ = 1/f) • Several wave modes of vibration are used in ultrasonic inspection. The most common are longitudinal, shear, and Rayleigh (surface) waves. • The velocity of sound in a given material is constant and can only be altered by a change in the mode of energy. 18

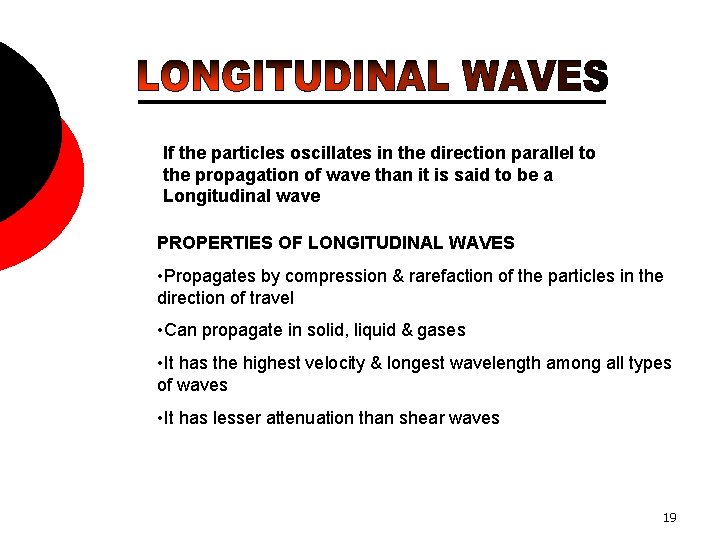
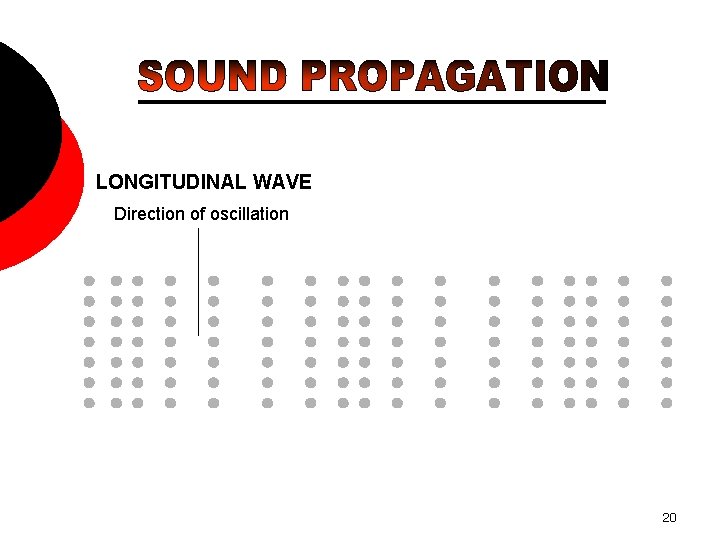
If the particles oscillates in the direction parallel to the propagation of wave than it is said to be a Longitudinal wave PROPERTIES OF LONGITUDINAL WAVES • Propagates by compression & rarefaction of the particles in the direction of travel • Can propagate in solid, liquid & gases • It has the highest velocity & longest wavelength among all types of waves • It has lesser attenuation than shear waves 19

LONGITUDINAL WAVE Direction of oscillation Direction of propagation 20

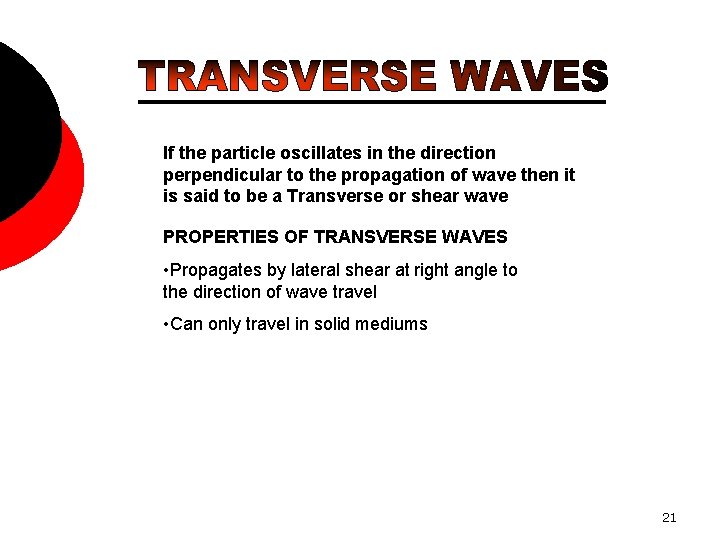
If the particle oscillates in the direction perpendicular to the propagation of wave then it is said to be a Transverse or shear wave PROPERTIES OF TRANSVERSE WAVES • Propagates by lateral shear at right angle to the direction of wave travel • Can only travel in solid mediums 21


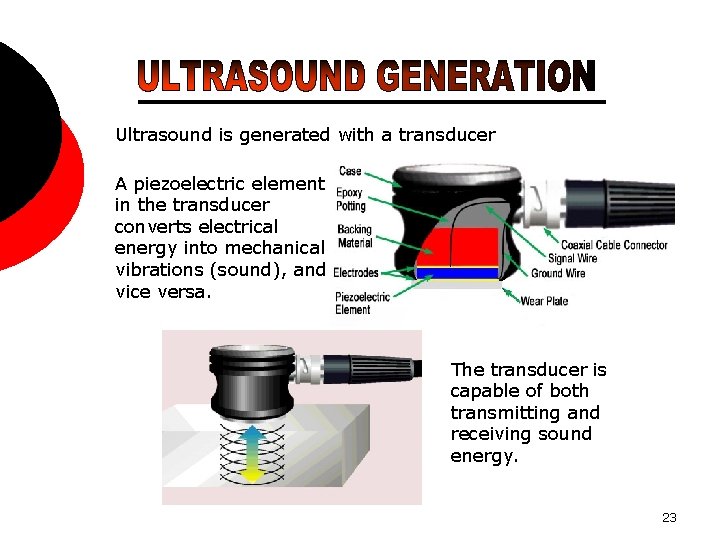
Ultrasound is generated with a transducer A piezoelectric element in the transducer converts electrical energy into mechanical vibrations (sound), and vice versa. The transducer is capable of both transmitting and receiving sound energy. 23

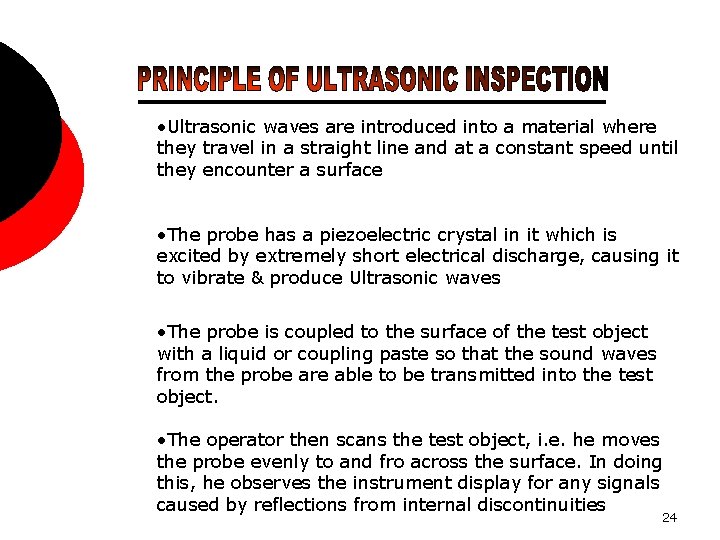
• Ultrasonic waves are introduced into a material where they travel in a straight line and at a constant speed until they encounter a surface • The probe has a piezoelectric crystal in it which is excited by extremely short electrical discharge, causing it to vibrate & produce Ultrasonic waves • The probe is coupled to the surface of the test object with a liquid or coupling paste so that the sound waves from the probe are able to be transmitted into the test object. • The operator then scans the test object, i. e. he moves the probe evenly to and fro across the surface. In doing this, he observes the instrument display for any signals caused by reflections from internal discontinuities 24

• At surface interfaces some of the wave energy is reflected and some is transmitted. • The amount of reflected or transmitted energy can be detected and provides information about the size of the reflector. • The travel time of the sound can be measured and this provides information on the distance that the sound has traveled. 25


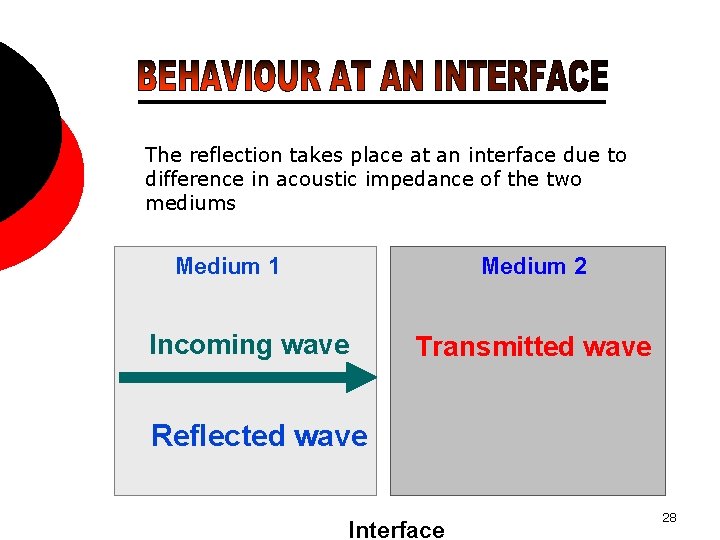
The reflection takes place at an interface due to difference in acoustic impedance of the two mediums Medium 1 Medium 2 Incoming wave Transmitted wave Reflected wave Interface 28

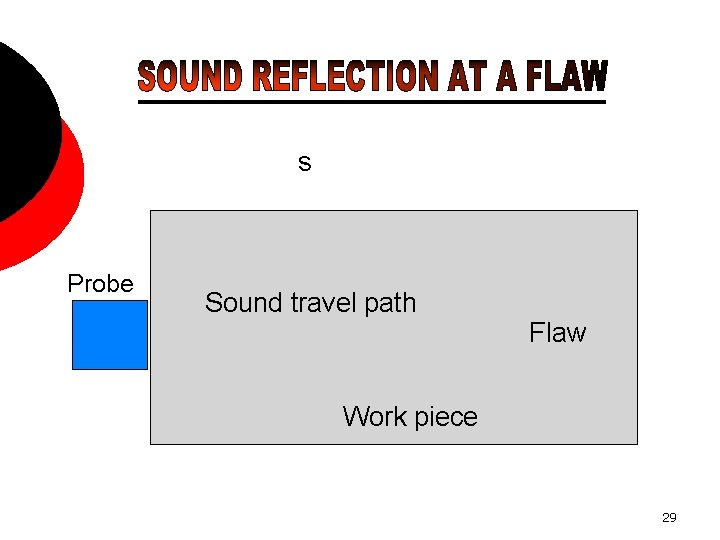
s Probe Sound travel path Flaw Work piece 29

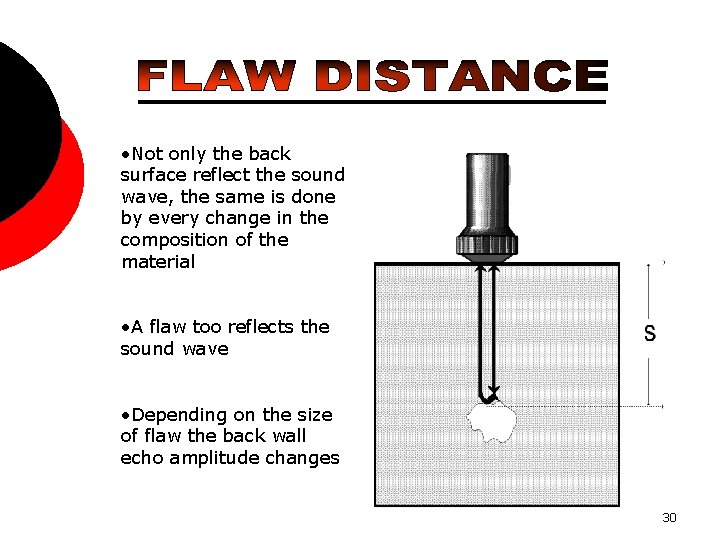
• Not only the back surface reflect the sound wave, the same is done by every change in the composition of the material • A flaw too reflects the sound wave • Depending on the size of flaw the back wall echo amplitude changes 30

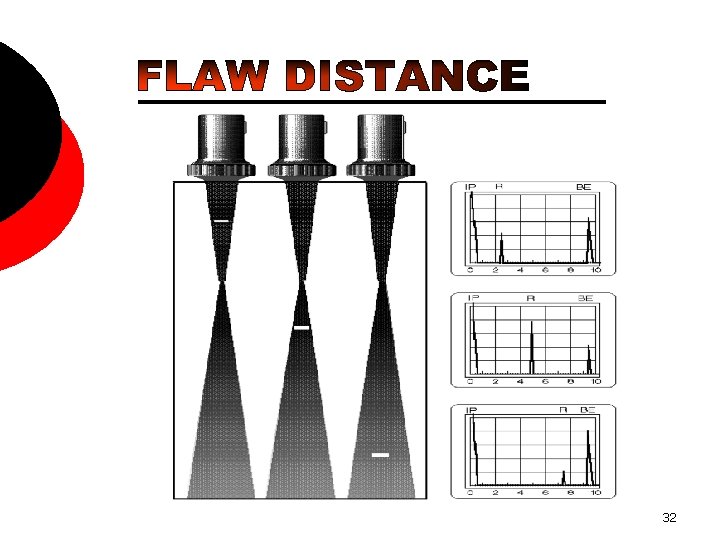
• Change in depth of flaw changes the position of defect echo on screen • When the flaw is near the probe the defect echo is near the initial pulse • As the flaw changes its position its defect echo also moves accordingly. • However the defect echo would always lie towards the left of the Back wall echo 31

32

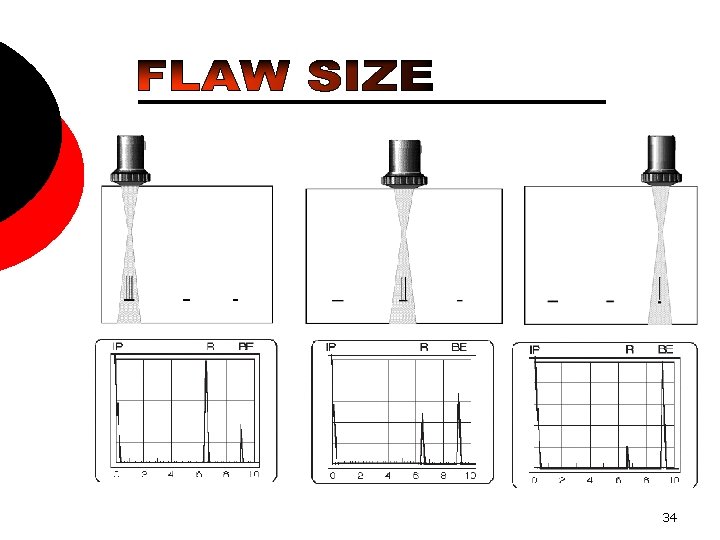
• As the size of flaw increases the amplitude of the defect echo also increases • And if the amplitude of the defect echo increases the amplitude of the back wall echo will decrease • If the flaw is capable of reflecting the whole sound wave then in such a case there would be no Back wall echo 33

34

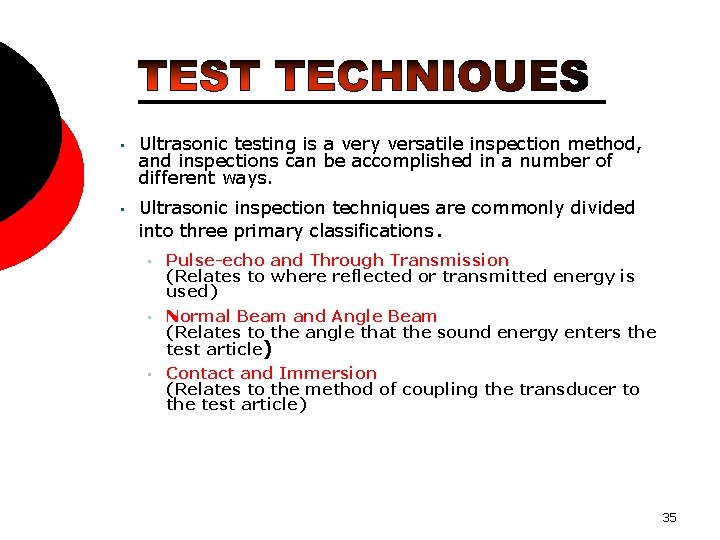
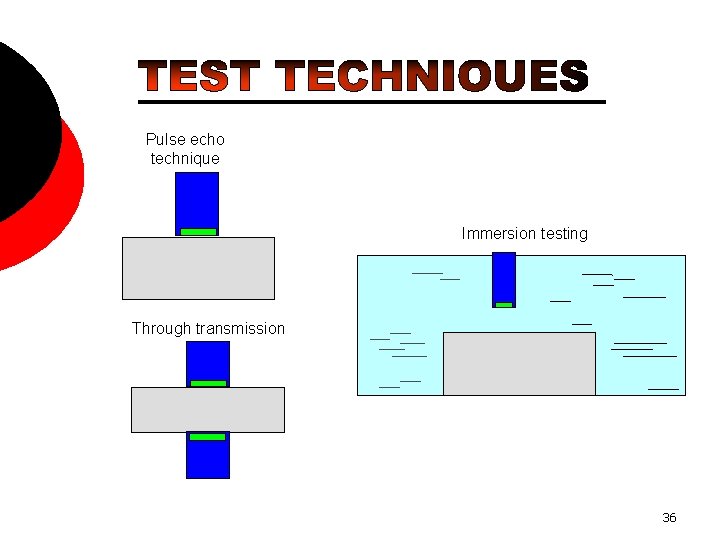
• Ultrasonic testing is a very versatile inspection method, and inspections can be accomplished in a number of different ways. • Ultrasonic inspection techniques are commonly divided into three primary classifications. • Pulse-echo and Through Transmission (Relates to where reflected or transmitted energy is used) • Normal Beam and Angle Beam (Relates to the angle that the sound energy enters the test article) Contact and Immersion (Relates to the method of coupling the transducer to the test article) • 35

Pulse echo technique Immersion testing Through transmission 36

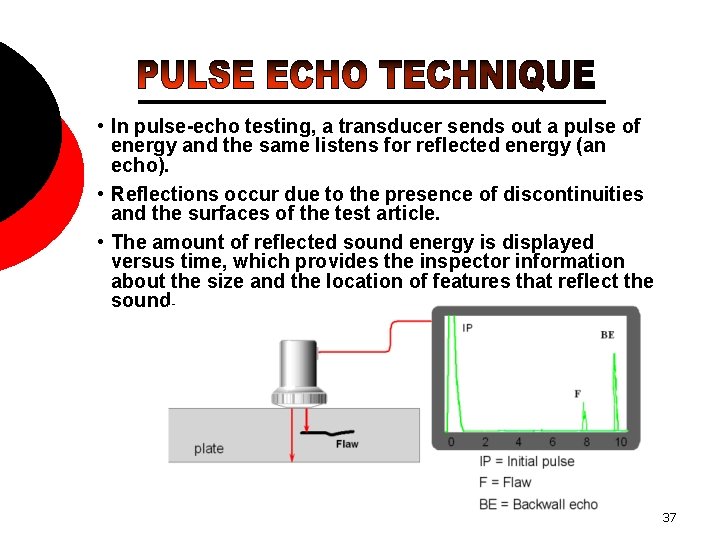
• In pulse-echo testing, a transducer sends out a pulse of energy and the same listens for reflected energy (an echo). • Reflections occur due to the presence of discontinuities and the surfaces of the test article. • The amount of reflected sound energy is displayed versus time, which provides the inspector information about the size and the location of features that reflect the sound. 37

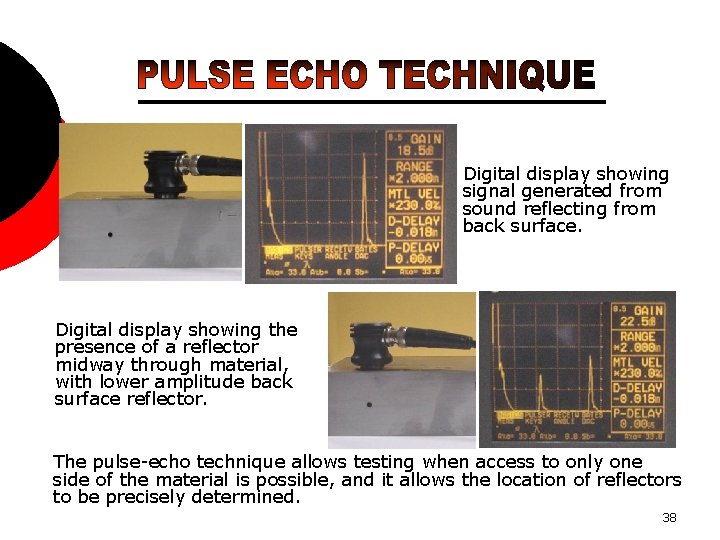
Digital display showing signal generated from sound reflecting from back surface. Digital display showing the presence of a reflector midway through material, with lower amplitude back surface reflector. The pulse-echo technique allows testing when access to only one side of the material is possible, and it allows the location of reflectors to be precisely determined. 38


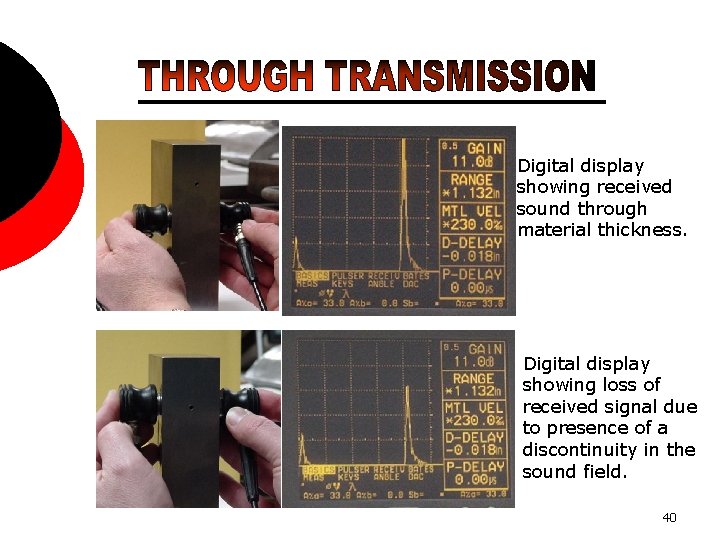
Digital display showing received sound through material thickness. Digital display showing loss of received signal due to presence of a discontinuity in the sound field. 40

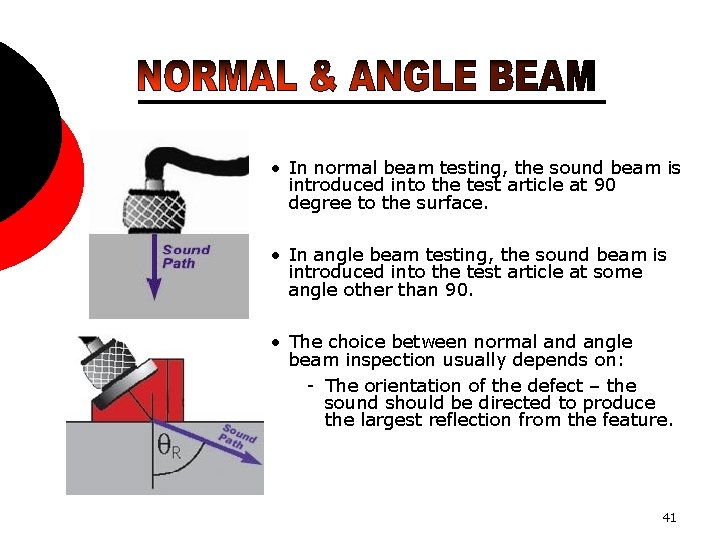
• In normal beam testing, the sound beam is introduced into the test article at 90 degree to the surface. • In angle beam testing, the sound beam is introduced into the test article at some angle other than 90. • The choice between normal and angle beam inspection usually depends on: - The orientation of the defect – the sound should be directed to produce the largest reflection from the feature. 41


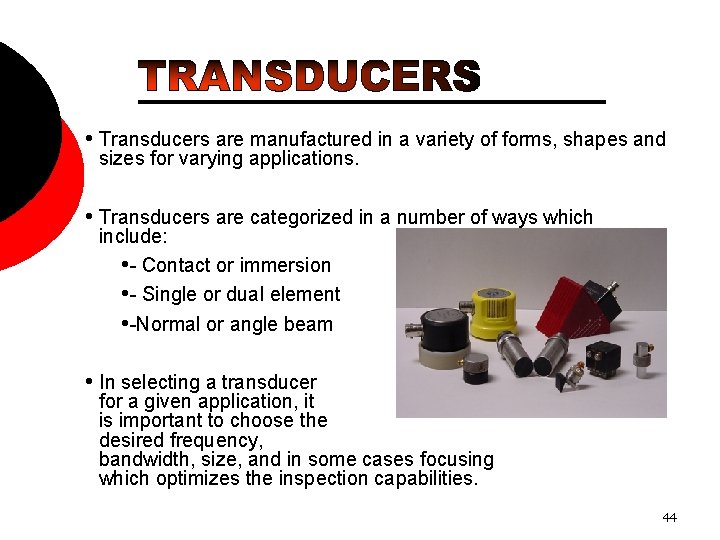
• Transducers are manufactured in a variety of forms, shapes and sizes for varying applications. • Transducers are categorized in a number of ways which include: • - Contact or immersion • - Single or dual element • -Normal or angle beam • In selecting a transducer for a given application, it is important to choose the desired frequency, bandwidth, size, and in some cases focusing which optimizes the inspection capabilities. 44

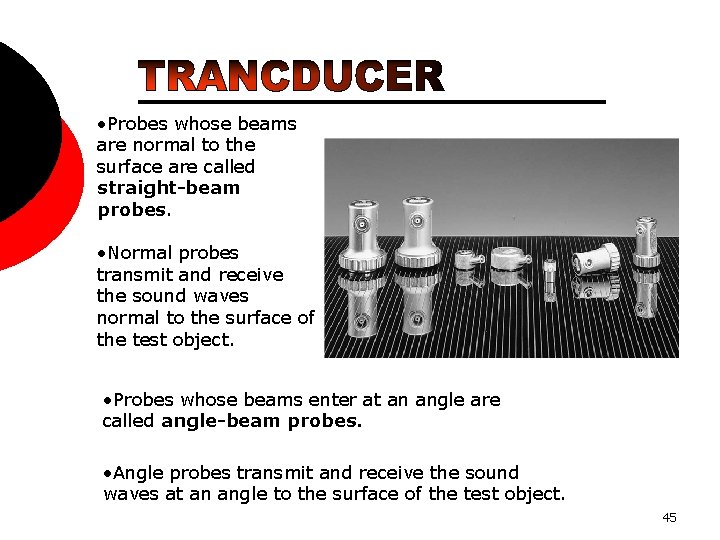
• Probes whose beams are normal to the surface are called straight-beam probes. • Normal probes transmit and receive the sound waves normal to the surface of the test object. • Probes whose beams enter at an angle are called angle-beam probes. • Angle probes transmit and receive the sound waves at an angle to the surface of the test object. 45

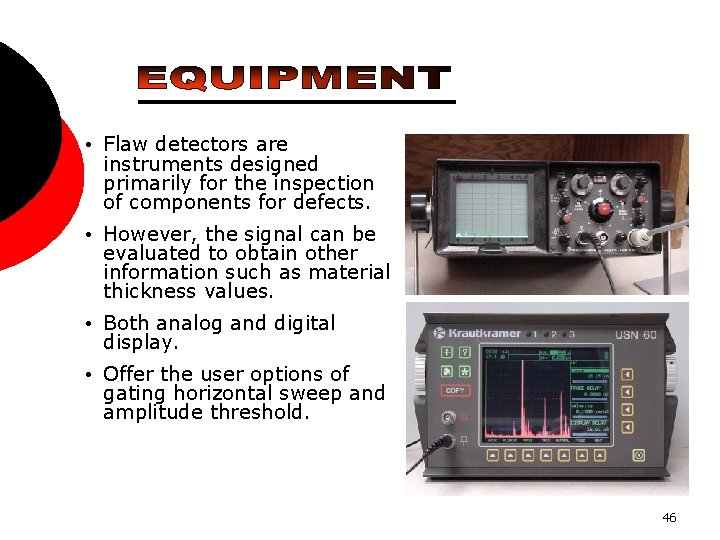
• Flaw detectors are instruments designed primarily for the inspection of components for defects. • However, the signal can be evaluated to obtain other information such as material thickness values. • Both analog and digital display. • Offer the user options of gating horizontal sweep and amplitude threshold. 46

• Information from ultrasonic testing can be presented mainly in three formats. A-scan B-scan C-scan 47


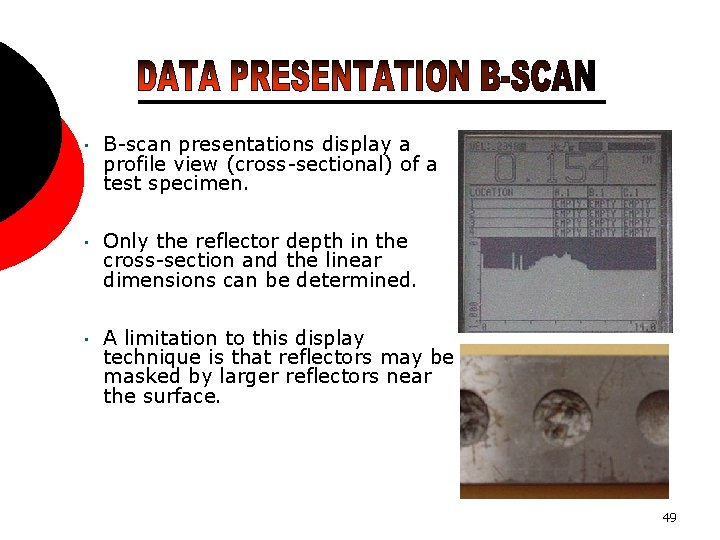
• B-scan presentations display a profile view (cross-sectional) of a test specimen. • Only the reflector depth in the cross-section and the linear dimensions can be determined. • A limitation to this display technique is that reflectors may be masked by larger reflectors near the surface. 49

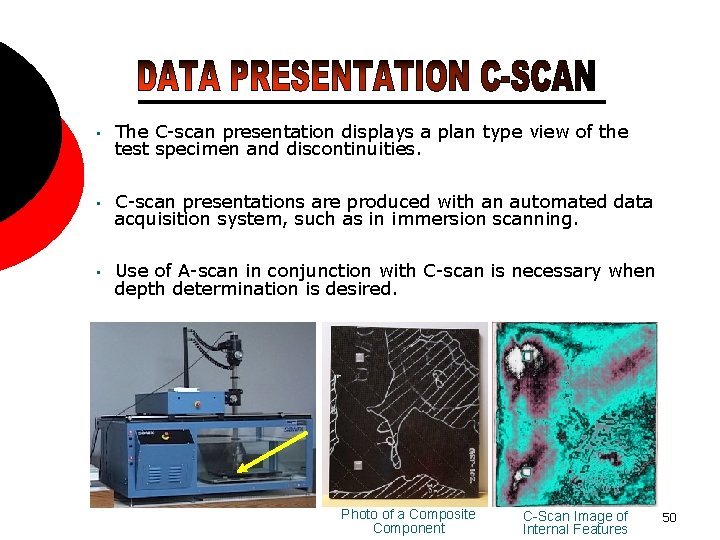
• The C-scan presentation displays a plan type view of the test specimen and discontinuities. • C-scan presentations are produced with an automated data acquisition system, such as in immersion scanning. • Use of A-scan in conjunction with C-scan is necessary when depth determination is desired. Photo of a Composite Component C-Scan Image of Internal Features 50

• Sensitive to both surface and subsurface discontinuities. • Depth of penetration for flaw detection or measurement is superior to other methods. • Only single-sided access is needed when pulse-echo technique is used. • High accuracy in determining reflector position and estimating size and shape. • Minimal part preparation required. • Electronic equipment provides instantaneous results. • Detailed images can be produced with automated systems. • Has other uses such as thickness measurements, in addition to flaw detection. 51

• • Surface must be accessible to transmit ultrasound. Skill and training is more extensive than with some other methods. Normally requires a coupling medium to promote transfer of sound energy into test specimen. Materials that are rough, irregular in shape, very small, exceptionally thin or not homogeneous are difficult to inspect. Cast iron and other coarse grained materials are difficult to inspect due to low sound transmission and high signal noise. Linear defects oriented parallel to the sound beam may go undetected. Reference standards are required for both equipment calibration, and characterization of flaws. 52

53

• A sound beam can be roughly divided into a convergent (focusing) area, the nearfield, and a divergent (spreading) part, the far field • The length N of the near-field (near-field length) and the divergence angle is dependent on the diameter of the element, its frequency and the sound velocity of the material to be tested • The center beam is termed the acoustic axis. 54


• Calibration is a operation of configuring the ultrasonic test equipment to known values. This provides the inspector with a means of comparing test signals to known measurements. • Calibration standards come in a wide variety of material types, and configurations due to the diversity of inspection applications. • Calibration standards are typically manufactured from materials of the same acoustic properties as those of the test articles. 56

• To select the appropriate NDT method we must consider the following Thickness of material to be tested Location of discontinuity Type of material to be tested Orientation of discontinuity Type of defect 57