PIKA Technologies Inc PADS for the PIKA WARP


- Slides: 22

PIKA Technologies Inc. PADS for the PIKA WARP Appliance March 2009

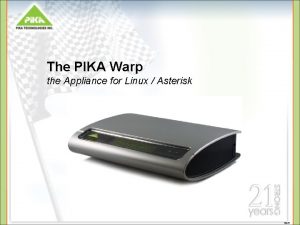
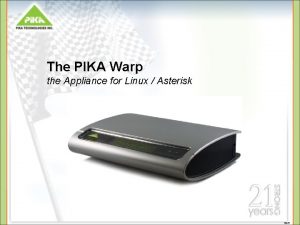
PIKA WARP Customization • PIKA WARP is a customizable platform • It can run stock Asterisk but it does not have to • Why customize? • Put my custom application on the appliance • Make a modification to the stock Asterisk • Ideal for applications like alert notification systems, IVRs and PBXs

What does the appliance offer to developers? • Hardware – a full computer • • Embedded processor Solid state memory USB, NIC, Audio ports Up to 9 analog ports • Software – many default packages • Full Pika suite of voice processing like tone detection and generation, play/record, Vo. IP and conferencing • Pre-loaded with operating system, drivers and tools • Initial SSH access and Asterisk • Database, web server, web language, common tools • With the ability to add any software package

Pre-loaded Software • • • Bootloader (u. Boot 1. 3) 2. 6. 26 linux kernel (stripped down) Pika’s All-on-Host and Grandprix drivers Asterisk 1. 4. 21 Asterisk. GUI Busybox 1. 8. 2 (binaries linux tools) SQlite 3 database Httpd webserver PHP 5 with support for SQLite, XML, PDO, etc. NTP, DHCP (client), TFTP (server and client), VLAN, DNS Dropbear (for ssh access)

What API will be available? • To access telephony hardware outside of Asterisk … • High level Grandprix API • the same used on standard PCs!! • Low level Ao. H API will also be available • Many sample of this on the web • Some additional APIs will be added to our SDK. • • For example, to control the audio in/out ports and the LCD (Note: In Asterisk, audio ports are referenced in the dialplan and the LCD is integrated in channel driver but can be changed)

Custom User Application /persistent /root Your Application /u-boot /kernel Grandprix LCD library HMP Linux Kernel Database server Configuration files PIKA Kernel Modules /persistent 1 Warploader Logs Busybox NTP /persistent 2 Dropbear Skeleton

Asterisk Application /persistent /root Asterisk Application /u-boot /kernel Channel PIKA (glue) Grandprix Linux Kernel Configuration files LCD library HMP /persistent 1 PIKA Kernel Modules Logs Busybox Warploader NTP /persistent 2 Dropbear Skeleton

Pika’s Development Kit • Pika Application Development Suite (PADS) • Software package – “framework” • Full development kit • The kit will provide a toolchain - compiler (for our processor), linker and debugger • Installed on independent Linux machine (distribution independent) • • • Host machine is used to bypass the resource limitation of the embedded device Attached through Ethernet Allows all software on the appliance to be built (kernel and user) Creates a Power. PC virtual environment Retrieved through svn Opens embedded development to Linux developers

PADS • Package – this is where makefiles are included to describe where to get the code and how to compile it • DL – this is where the source code is automatically downloaded • Build_warp – this is where the resulting power pc binaries reside after being compiled. (after ‘make’) • Images – this contains compressed binaries (after ‘make image’) • Bin – this folder contains utilities such as a Flash Burning tool

PADS diagram

Steps to Building – the 3 ‘makes’ 1) make menuconfig 2) make 3) make image

Step #1 – select packages • ‘make menuconfig’ allows you to select packages, tools and programs to include on the appliance through a package menu • Examples include Asterisk, webserver, etc.

Step #2 – compiling • ‘make’ cross-compiles all the selected packages • The PADS framework defines where to retrieve the code and how to build the code • The result is Power PC binaries that can be directly run on the appliance

Background - Memory • Four memory types • Small Flash (NOR) – 4 Mb • • Internal Flash (NAND) – 256 Mb • • • Compressed (read-only) • contains the kernel, tools and applications like asterisk and database • At runtime this image is uncompressed and run from RAM • Changes to this partition must be made through PADS (otherwise will be lost on reboot) Uncompressed (persistent read-write) • Initial creation through PADS • Contains configuration files, play prompts, etc. • Memory that acts like a hard disk • Changes to this partition are saved even after reboot SD card – up to 4 Gb • • Contains bootloader Quick boot-up Can not be written by developers Read-write Expands uncompressed persistent memory on the internal flash Good for heavy write tasks like voicemails, logs and backups RAM – 256 Mb • Run-time memory

Background – Memory (cont’d)

Step #3 – Creating and burning images • ‘make image’ creates three image types: • • • Core Kernel (filename -> cu. Image. warp) Applications (filename -> u. Ramdisk) Persistent (filename -> image. jffs 2) Persistent 1 (filename-> image 1. jffs 2) Persistent 2 (filename-> image 2. jffs 2) • Once happy with the images created by PADS they can be burnt to the flash on the appliance – this commits it to memory • An image file can be burnt to multiple appliances • Images can be burnt to appliance • • through Asterisk. GUI command line tool (Warploader) • • • Copy the file locally to the appliance (scp, wget or tftp) and then … warploader –p kernel cu. Image. warploader –p root u. Ramdisk warploader –p persistent image. jffs 2 warploader –p persistent 1 image 1. jffs 2 warploader –p persistent 2 image 2. jffs 2 • USB flash “hook”

Development approach • Burn new images when necessary • Run locally • Drop files on the persistent file system • Web pages • Binary libraries created using the Pika development framework or from the web • Good for when only making a small number of changes

Alternate approach – NFS • Optional –useful for large development projects • For development • • Quick, volatile Remotely mounted file system (in build_warp folder) Use NFS server to mirror appliance memory on development PC Changes made on remote machine but run by the processor on the appliance Run without flashing to reduce development time No code changes on the appliance Attached through Ethernet (initially setup by serial cable)

More Details on NFS

Adding packages • If a package is not included in the list … • Add a new folder in the ‘package’ directory • In this directory add: • Config. in – to make the new package appear in the package menu • Yourapp. mk – a makefile to tell PADS how to get and build your package • Some packages are available in pikawarp. org

Programming Considerations • Lots of resources for an embedded device!! • Be conscious of memory (256 Mb total) • Mallocs may fail • Be careful where logs go, etc. • Memory chips have life span • Be conscious of processing (1200 Mips total) • Speed optimizations are important • Big endian (not little endian) • Careful when communicating with other machine • C++ and threading is fine

Thank you for your time.
 Pika warp
 Analiza cvp
 Co to jest pika
 The perilous plight of the pika
 Albino pika
 Tte casting technologies inc
 Hamilton technologies, inc.
 Impetus technologies inc
 Kedar gupta dubai
 Add on technologies
 Waste management wheelabrator
 Jet global data technologies
 Qhr technologies inc
 Tech101 technologies inc
 Absorbent pads for skin folds
 Aed pads location
 Io outline
 I/o pads
 Pads logic
 Anteroposterior placement
 Financement pads
 Pacer pad placement
 Treax pads
