P 10511 Miniaturization of Xerography Derek Meinke ME


- Slides: 52

P 10511: Miniaturization of Xerography Derek Meinke (ME, PM) Matthew Liff (ME) Tony Zhang (EE) Zaw Htoo (ISE)

Project Description • The scope of P 10511 is to create a test fixture that will allow the use of various charging devices along with multiple diameters of photoreceptors. • Test affect of charge uniformity with various device configurations and input parameters. • Xerox test fixture is currently limited in versatility.

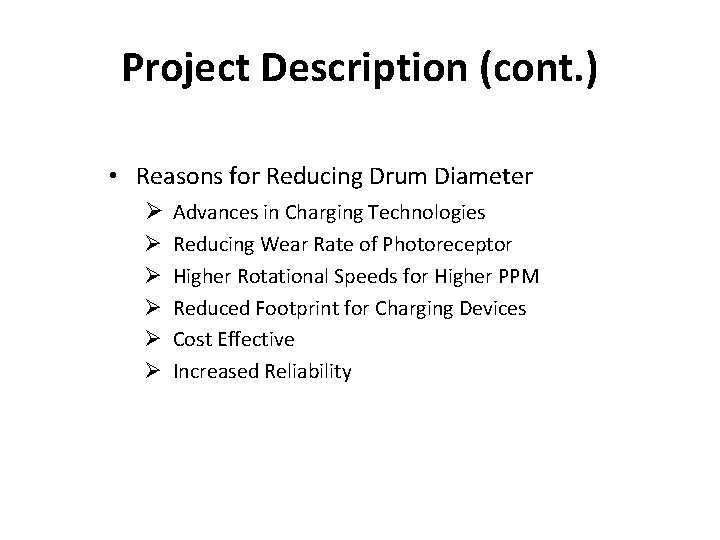
Project Description (cont. ) • Reasons for Reducing Drum Diameter Ø Advances in Charging Technologies Ø Reducing Wear Rate of Photoreceptor Ø Higher Rotational Speeds for Higher PPM Ø Reduced Footprint for Charging Devices Ø Cost Effective Ø Increased Reliability

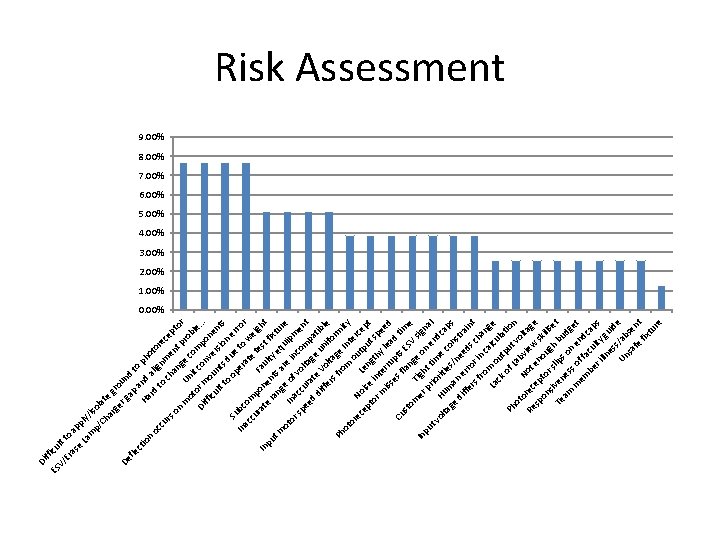
Di f ES ficu V/ lt Er to as a e pp La ly/ m p/ isol Ch ate ar ge gro r De ga und fle p to a ct Ha nd ph io n rd ali oto oc to gn r cu ch me ece rs pt o n a n t o n m Un ge c pro r ot bl o it Di or m co mp e. . . n o ffi cu oun ver nen s lt to ts d ion ts e u op S er e to rror In ubc ac at o e wei cu mp t F r e at on au st ght In e e pu lty fi n ra t m ng ts a eq xtur r u e e ot or Ina of e in ipm sp cc vo co e ee ura lta mp nt g d di te V e u atib ffe o n le rs lta ifor fr ge m Ph om In ity ot or o ter u ec No c L ep is en tpu ept e t to g r m inte thy spe iss rru lea ed es pt d Cu t s fl st an ES ime om ge V s T i In er igh o n gn pu p rio t tim en al t v d r H ol ta um itie e co cap s ge s n d an e /ne str iff e a r d i n er ro s f r i s ch t ro n c an La m o alcu ge ck ut o p la Ph f L ut tion v ot a o N bv ol Re rec ot iew tage sp ep en on to ou skill siv r sl gh se Te en ips bu t am es o d m s o n e get em f fa nd be cu cap r i lty s lln g es uid s Un /ab e sa se fe nt fi xt ur e Risk Assessment 9. 00% 8. 00% 7. 00% 6. 00% 5. 00% 4. 00% 3. 00% 2. 00% 1. 00% 0. 00%

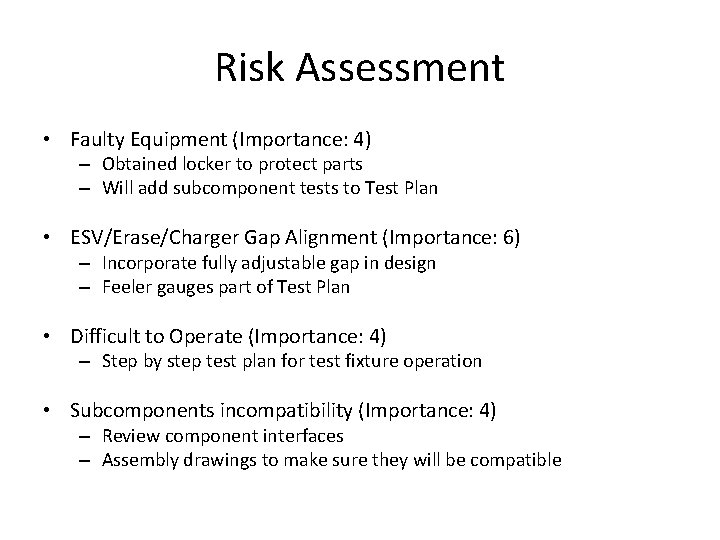
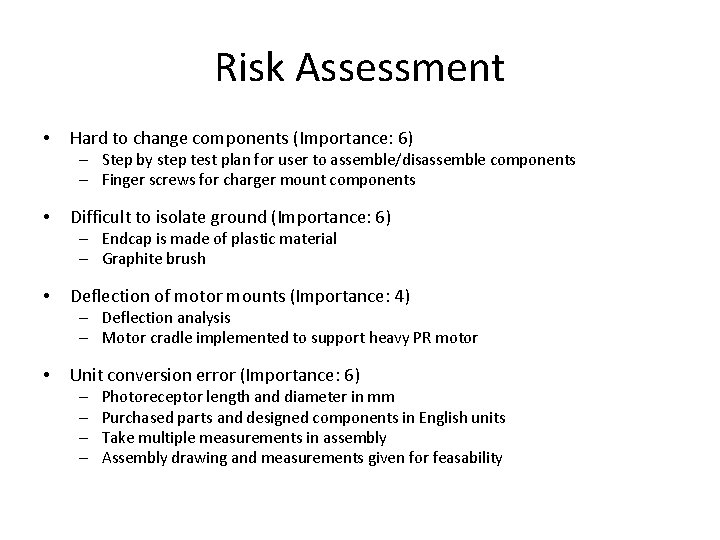
Risk Assessment • Risks have been reviewed since Systems Design Review • Modifications – Causes and effects added on initial risks – Lead time risk has reduced in severity • No parts have significant lead time – Added more risks after further design development

Risk Assessment • Faulty Equipment (Importance: 4) – Obtained locker to protect parts – Will add subcomponent tests to Test Plan • ESV/Erase/Charger Gap Alignment (Importance: 6) – Incorporate fully adjustable gap in design – Feeler gauges part of Test Plan • Difficult to Operate (Importance: 4) – Step by step test plan for test fixture operation • Subcomponents incompatibility (Importance: 4) – Review component interfaces – Assembly drawings to make sure they will be compatible

Risk Assessment • Hard to change components (Importance: 6) – Step by step test plan for user to assemble/disassemble components – Finger screws for charger mount components • Difficult to isolate ground (Importance: 6) – Endcap is made of plastic material – Graphite brush • Deflection of motor mounts (Importance: 4) – Deflection analysis – Motor cradle implemented to support heavy PR motor • Unit conversion error (Importance: 6) – – Photoreceptor length and diameter in mm Purchased parts and designed components in English units Take multiple measurements in assembly Assembly drawing and measurements given for feasability

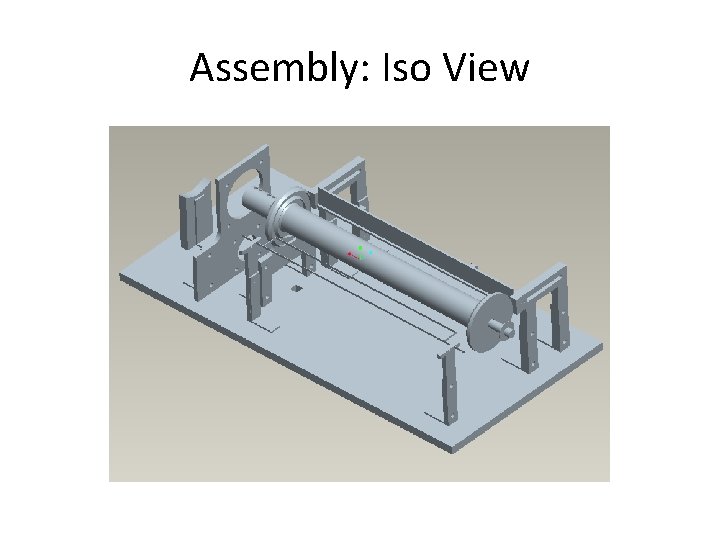
Assembly: Iso View

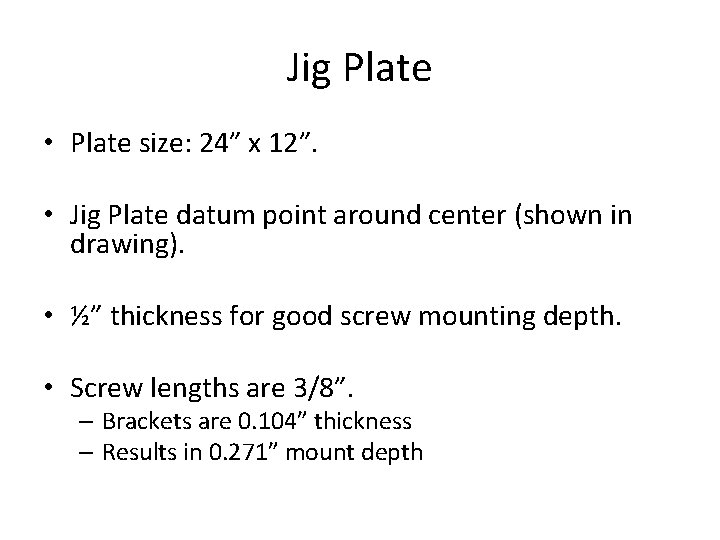
Jig Plate • Plate size: 24” x 12”. • Jig Plate datum point around center (shown in drawing). • ½” thickness for good screw mounting depth. • Screw lengths are 3/8”. – Brackets are 0. 104” thickness – Results in 0. 271” mount depth

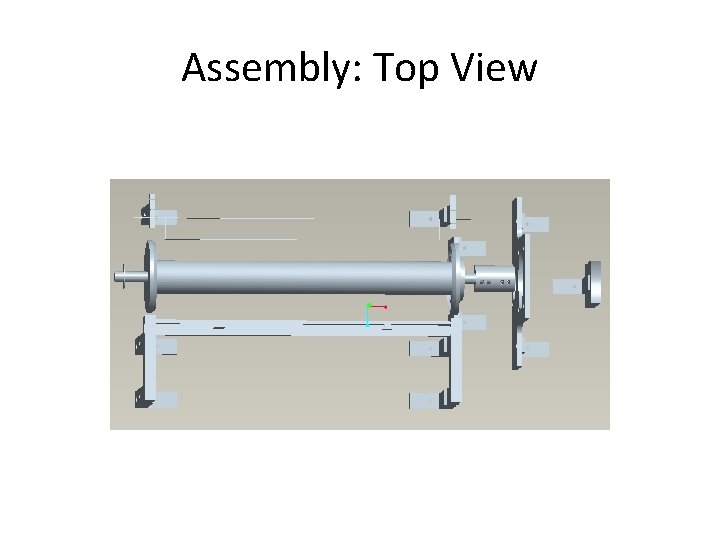
Assembly: Top View

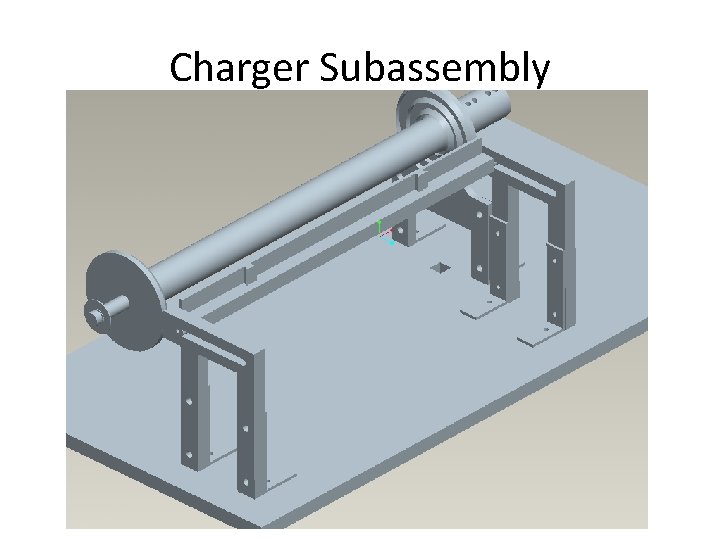
Charger Subassembly

Charger Mounting Design • Benefits – Stability of charger – Variable for: • Tangency with photoreceptor • Photoreceptor diameters • Charger variation • Tradeoffs – BCR charger requires touch condition • Charger sliding toward photoreceptor is limited • Depending on charger, depth is limited – 30 mm PR; 1. 41 inch gap – 40 mm PR; 1. 21 inch gap - 60 mm PR; 0. 81 inch gap - 84 mm PR; 0. 35 inch gap

Charger Bracket Analysis • Mounting bracket has a range of motion of 3 inches – Difference in max/min photoreceptor radii: • (42 mm – 15 mm) = 27 mm (1. 063 in) – The other 2 inches of freedom is for charger variation and gap distance • Mounting bracket is aligned with PR endcaps so charger will have no interference (reference assembly drawing). • Spacing of the brackets – 360 mm - (2 x 2 mm) = 356 mm (14. 0157 in)

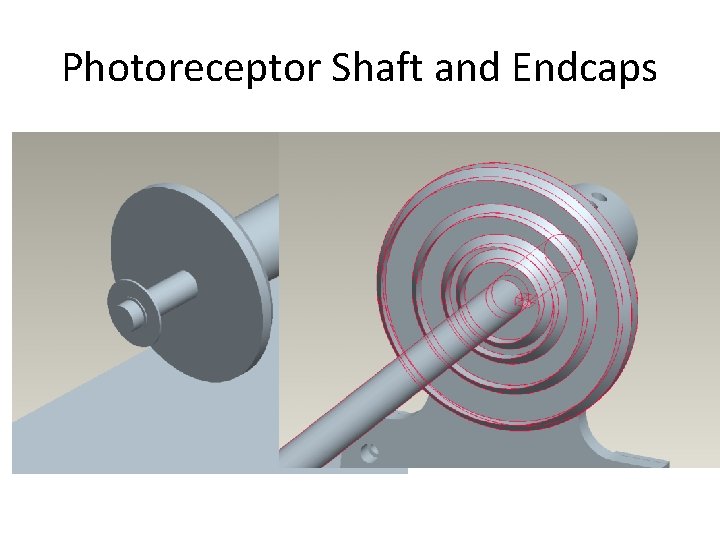
Photoreceptor Shaft and Endcaps

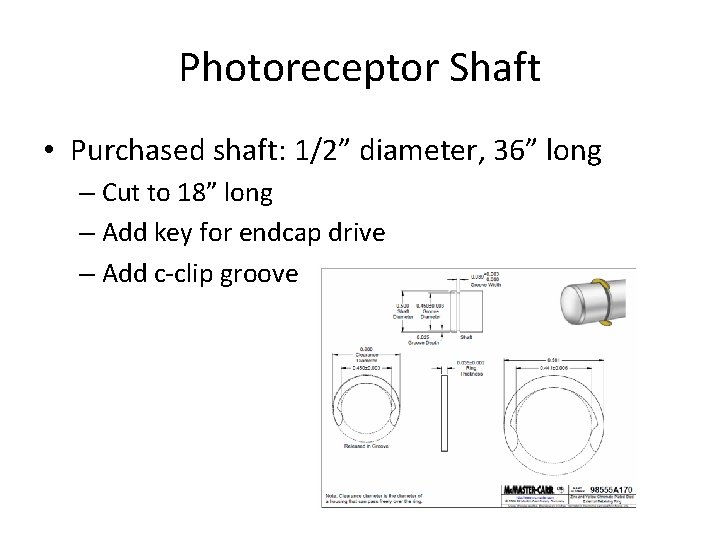
Photoreceptor Shaft • Purchased shaft: 1/2” diameter, 36” long – Cut to 18” long – Add key for endcap drive – Add c-clip groove

Photoreceptor Shaft Mounting Bracket • PR shaft centerline is 4. 9213” (125 mm) from ground plane. • PR shaft bearing is 1/4” thick, shaft mount plate designed to be flush on both sides. • Bearing load capacity of 1000 lb. carries photoreceptor cantilever weight easily.

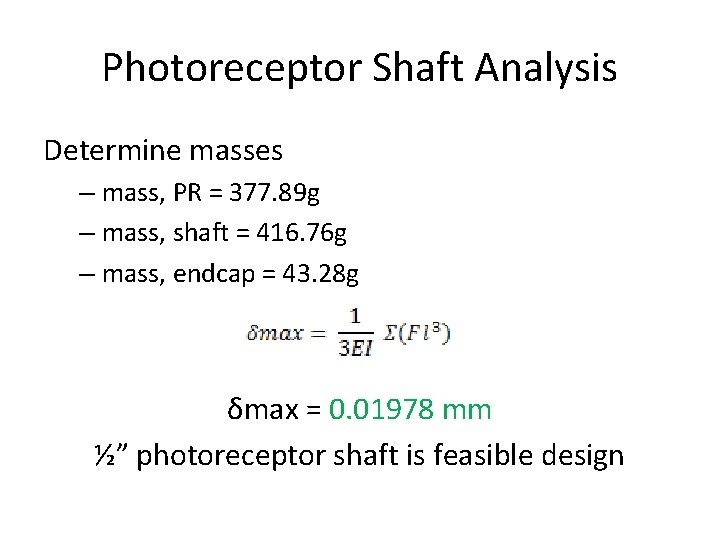
Photoreceptor Shaft Analysis Determine masses – mass, PR = 377. 89 g – mass, shaft = 416. 76 g – mass, endcap = 43. 28 g δmax = 0. 01978 mm ½” photoreceptor shaft is feasible design

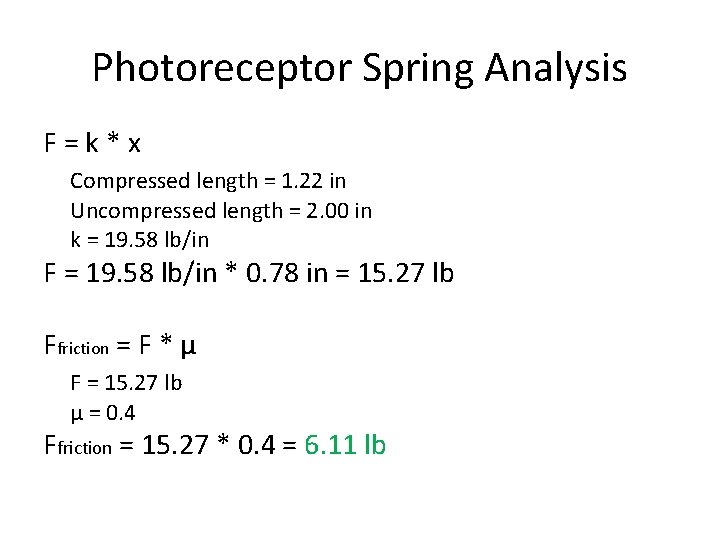
Photoreceptor Spring Analysis F = k * x Compressed length = 1. 22 in Uncompressed length = 2. 00 in k = 19. 58 lb/in F = 19. 58 lb/in * 0. 78 in = 15. 27 lb Ffriction = F * µ F = 15. 27 lb µ = 0. 4 Ffriction = 15. 27 * 0. 4 = 6. 11 lb

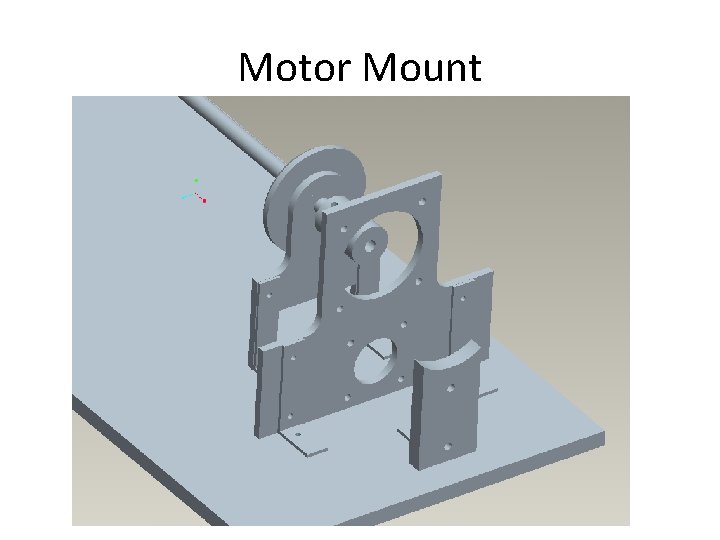
Motor Mount

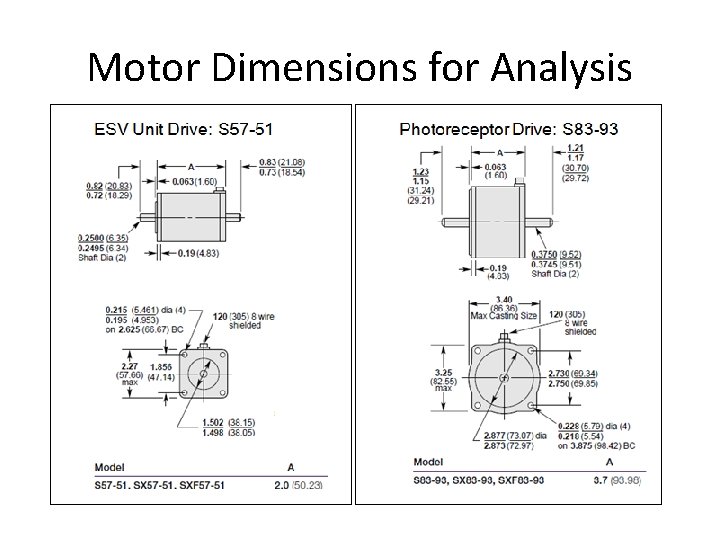
Motor Dimensions for Analysis

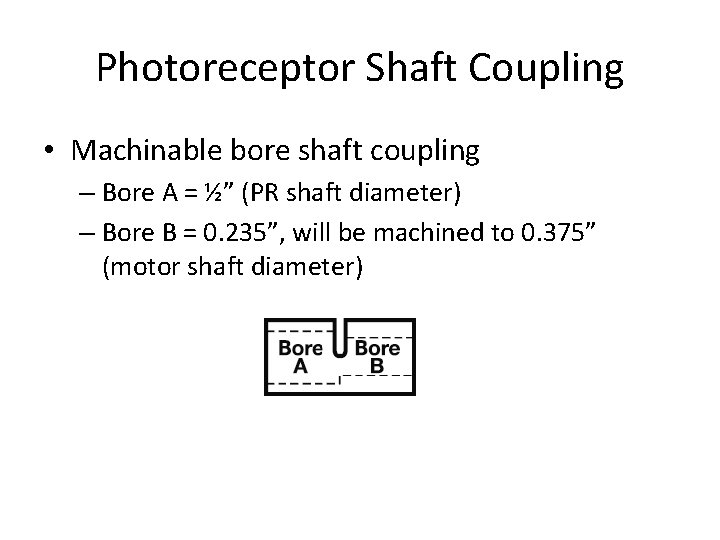
Photoreceptor Shaft Coupling • Machinable bore shaft coupling – Bore A = ½” (PR shaft diameter) – Bore B = 0. 235”, will be machined to 0. 375” (motor shaft diameter)

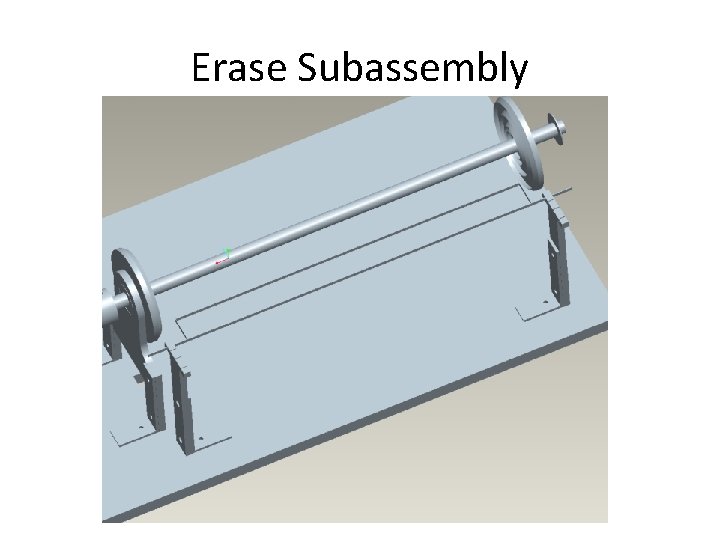
Erase Subassembly

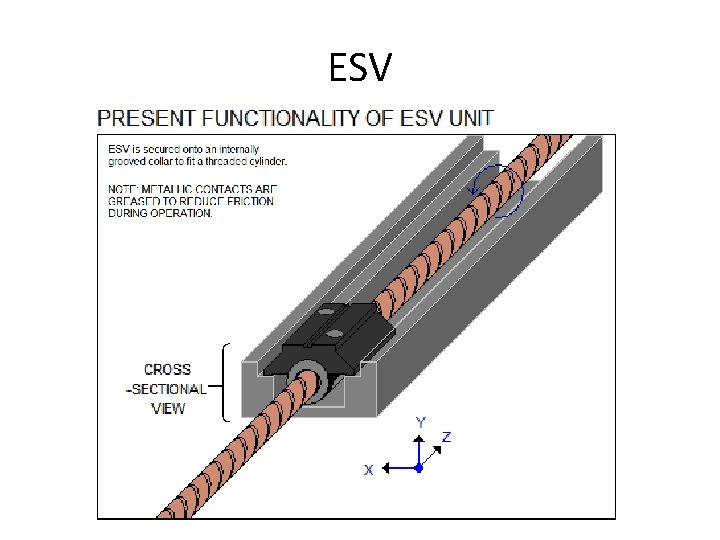
ESV

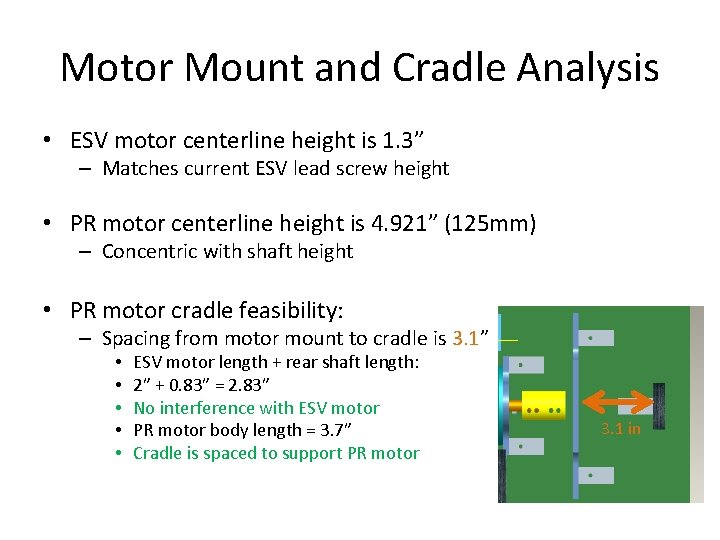
Motor Mount and Cradle Analysis • ESV motor centerline height is 1. 3” – Matches current ESV lead screw height • PR motor centerline height is 4. 921” (125 mm) – Concentric with shaft height • PR motor cradle feasibility: – Spacing from motor mount to cradle is 3. 1” • • • ESV motor length + rear shaft length: 2” + 0. 83” = 2. 83” No interference with ESV motor PR motor body length = 3. 7” Cradle is spaced to support PR motor 3. 1 in

Material Selection • ¼” Aluminum Plate: 12” x 12” (Qty. 2) – Motor Mount: 8” x 7” – PR Shaft Mount: 4. 25”x 5. 92” – Erase Mount (x 2): 1. 59” x 4. 98” • ½” Aluminum Plate: 12” x 12” (Qty. 1) – Charger Bracket (x 2): 5. 545” x 4” – PR Motor Cradle: 3. 55” x 2”

Material Selection • Aluminum Bar: 36” x 1. 5” x 0. 5” (Qty. 1) – Charger Mount: 14. 0157” x 1. 25” x 0. 42” – Charger Support Beam: 15. 0157” x 0. 5”

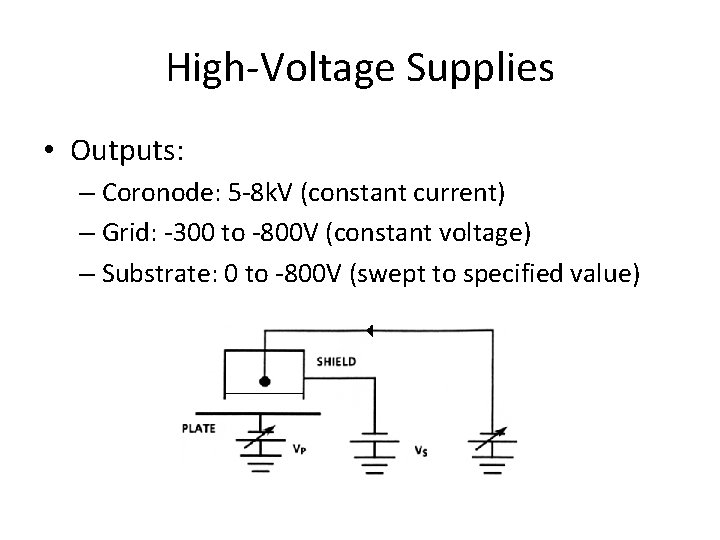
High-Voltage Supplies • Outputs: – Coronode: 5 -8 k. V (constant current) – Grid: -300 to -800 V (constant voltage) – Substrate: 0 to -800 V (swept to specified value)

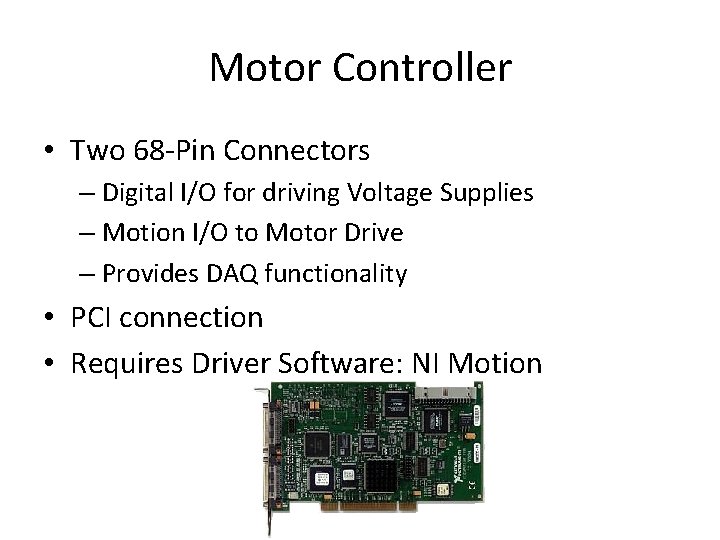
Motor Controller • Two 68 -Pin Connectors – Digital I/O for driving Voltage Supplies – Motion I/O to Motor Drive – Provides DAQ functionality • PCI connection • Requires Driver Software: NI Motion

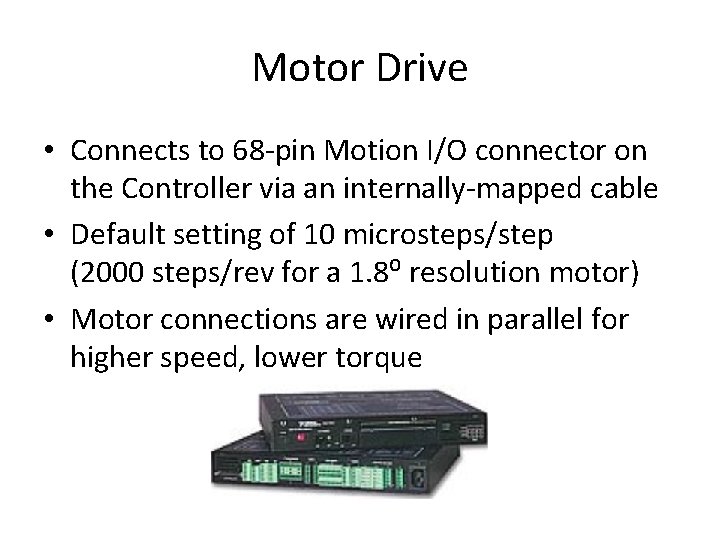
Motor Drive • Connects to 68 -pin Motion I/O connector on the Controller via an internally-mapped cable • Default setting of 10 microsteps/step (2000 steps/rev for a 1. 8⁰ resolution motor) • Motor connections are wired in parallel for higher speed, lower torque

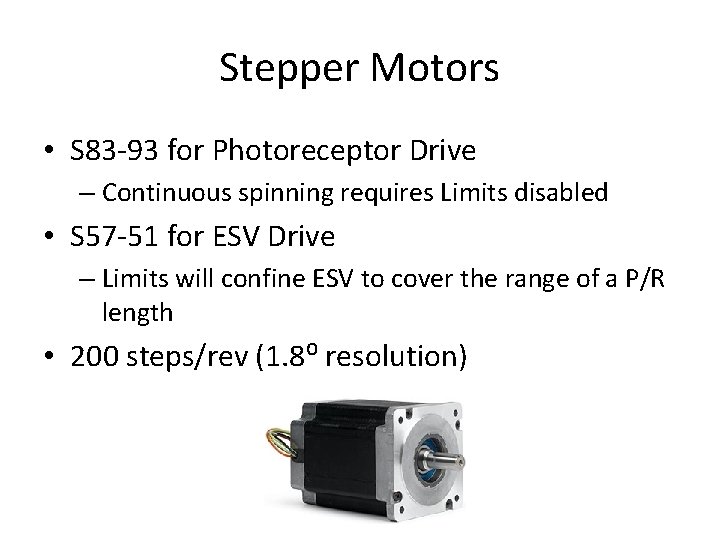
Stepper Motors • S 83 -93 for Photoreceptor Drive – Continuous spinning requires Limits disabled • S 57 -51 for ESV Drive – Limits will confine ESV to cover the range of a P/R length • 200 steps/rev (1. 8⁰ resolution)

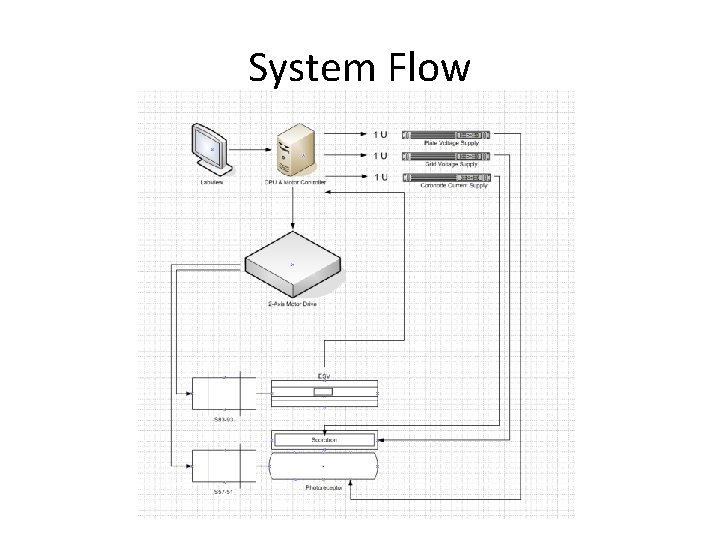
System Flow

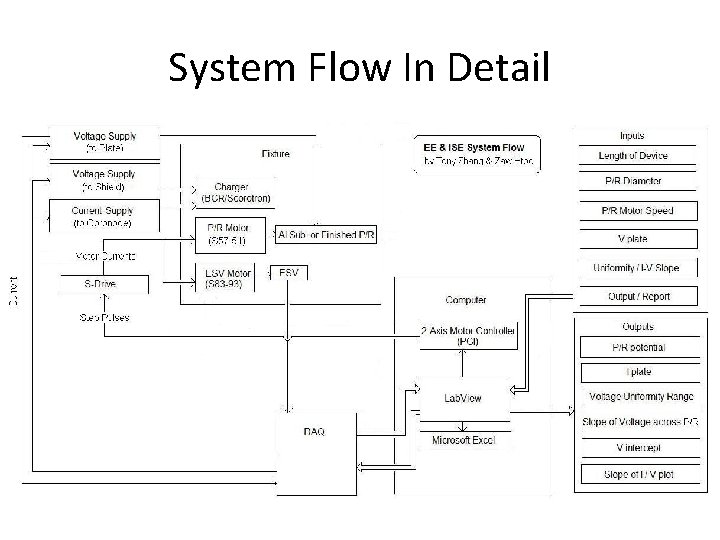
System Flow In Detail

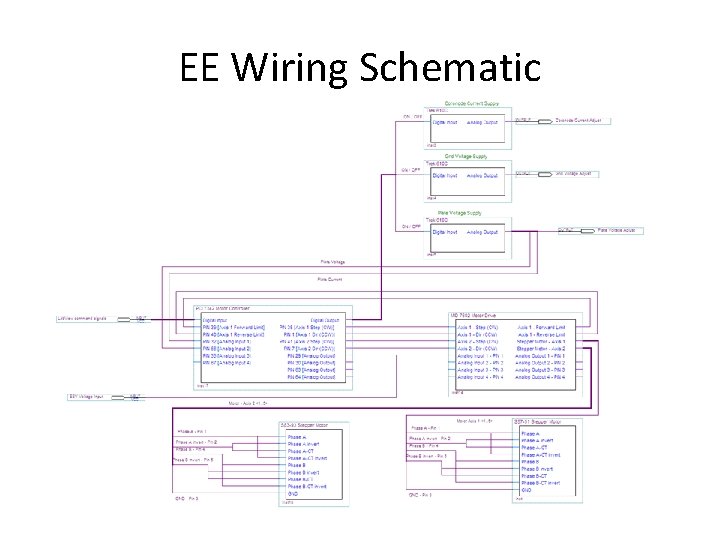
EE Wiring Schematic

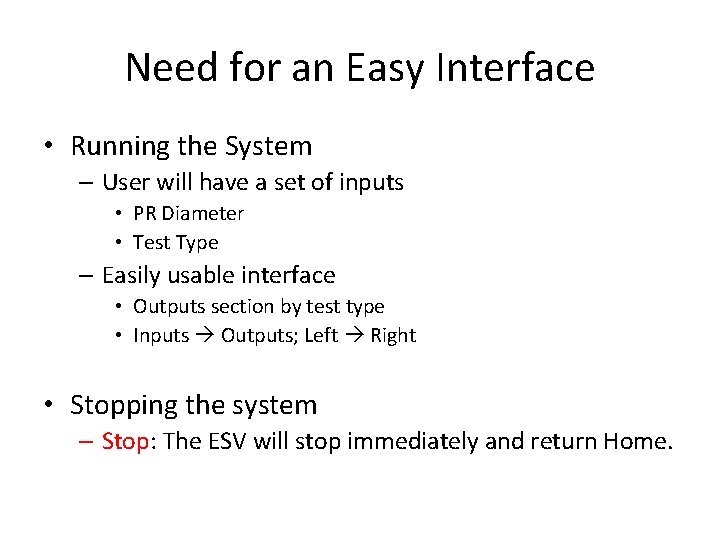
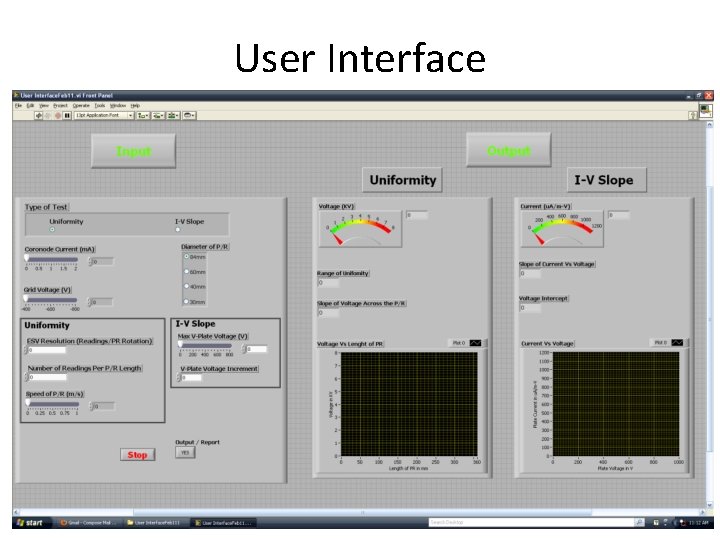
Need for an Easy Interface • Running the System – User will have a set of inputs • PR Diameter • Test Type – Easily usable interface • Outputs section by test type • Inputs Outputs; Left Right • Stopping the system – Stop: The ESV will stop immediately and return Home.

User Interface

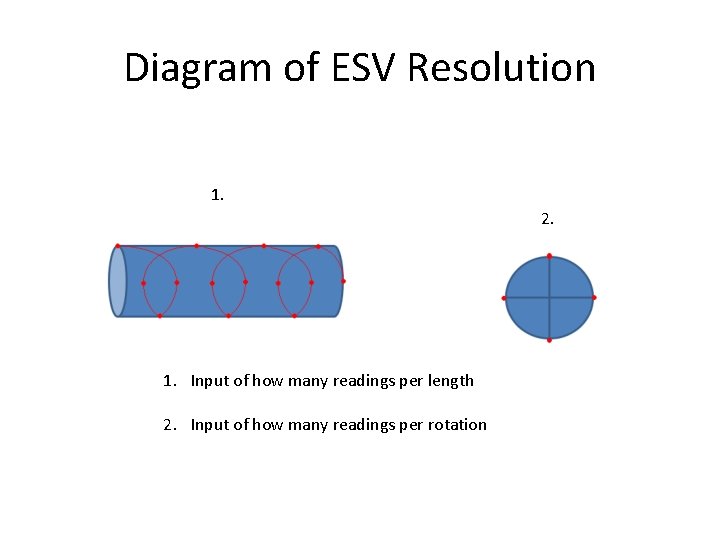
Diagram of ESV Resolution 1. 2. 1. Input of how many readings per length 2. Input of how many readings per rotation

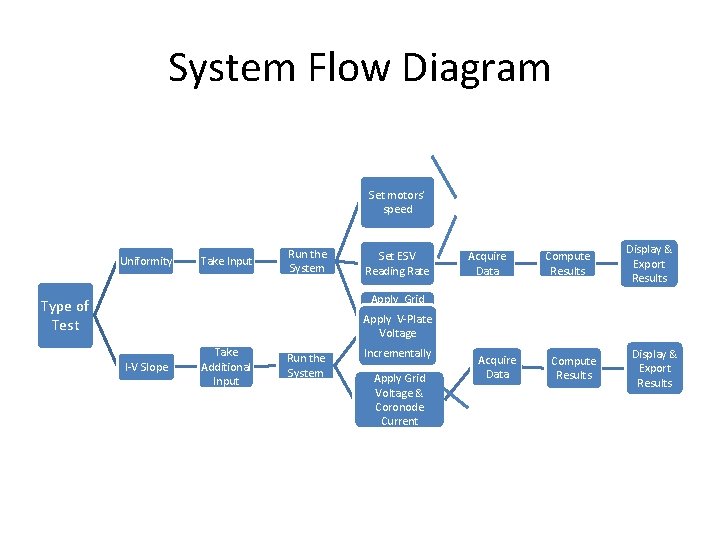
System Flow Diagram Set motors’ speed Uniformity Take Input Run the System Type of Test I-V Slope Take Additional Input Run the System Set ESV Reading Rate Apply Grid Voltage & Apply V-Plate Coronode Voltage Current Incrementally Apply Grid Voltage & Coronode Current Acquire Data Compute Results Display & Export Results

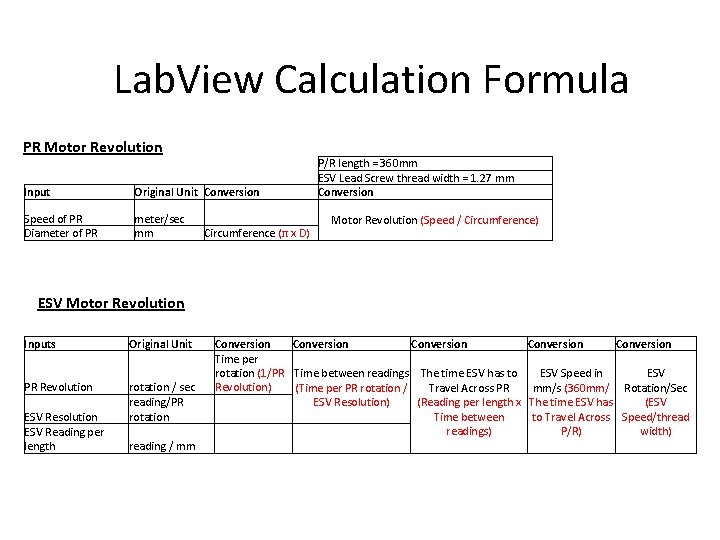
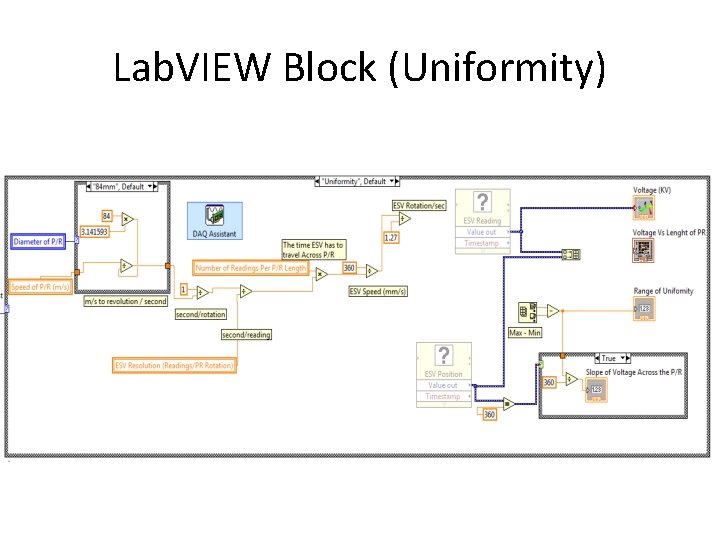
Lab. View Calculation Formula PR Motor Revolution Input Original Unit Conversion Speed of PR Diameter of PR meter/sec mm Circumference (π x D) P/R length = 360 mm ESV Lead Screw thread width = 1. 27 mm Conversion Motor Revolution (Speed / Circumference) ESV Motor Revolution Inputs Original Unit PR Revolution rotation / sec reading/PR rotation ESV Resolution ESV Reading per length reading / mm Conversion Time per rotation (1/PR Time between readings The time ESV has to Revolution) (Time per PR rotation / Travel Across PR ESV Resolution) (Reading per length x Time between readings) Conversion ESV Speed in ESV mm/s (360 mm/ Rotation/Sec The time ESV has (ESV to Travel Across Speed/thread P/R) width)

Lab. VIEW Block (Uniformity)

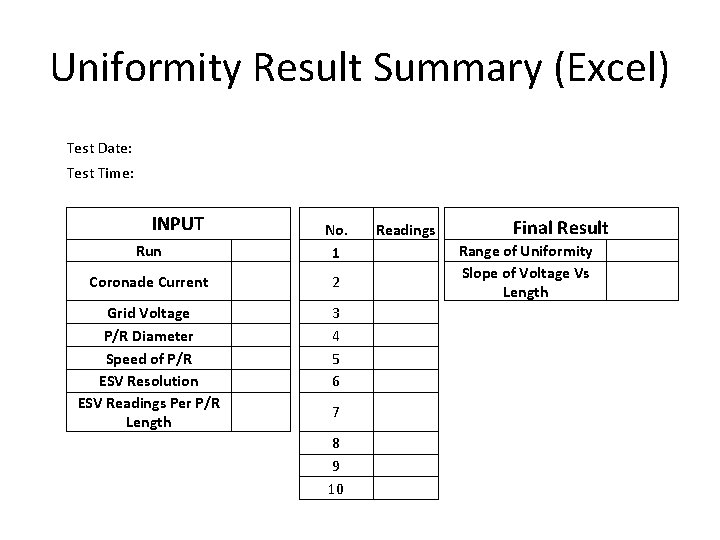
Uniformity Result Summary (Excel) Test Date: Test Time: INPUT Run No. 1 Readings Coronade Current 2 Grid Voltage P/R Diameter Speed of P/R ESV Resolution ESV Readings Per P/R Length 3 4 5 6 7 8 9 10 Final Result Range of Uniformity Slope of Voltage Vs Length

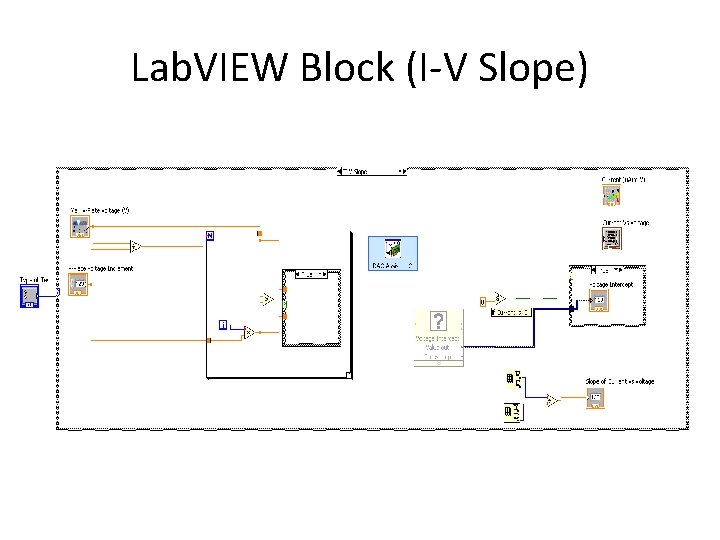
Lab. VIEW Block (I-V Slope)

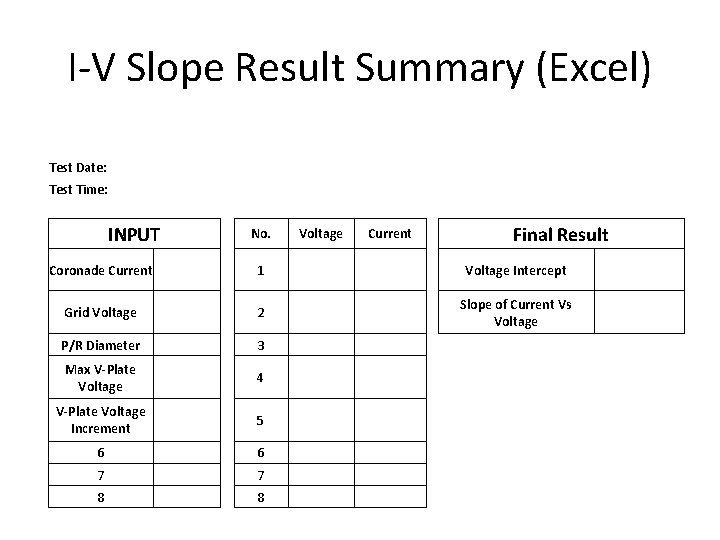
I-V Slope Result Summary (Excel) Test Date: Test Time: INPUT No. Voltage Current Coronade Current 1 Grid Voltage 2 P/R Diameter 3 Max V-Plate Voltage 4 V-Plate Voltage Increment 5 6 6 7 7 8 8 Final Result Voltage Intercept Slope of Current Vs Voltage

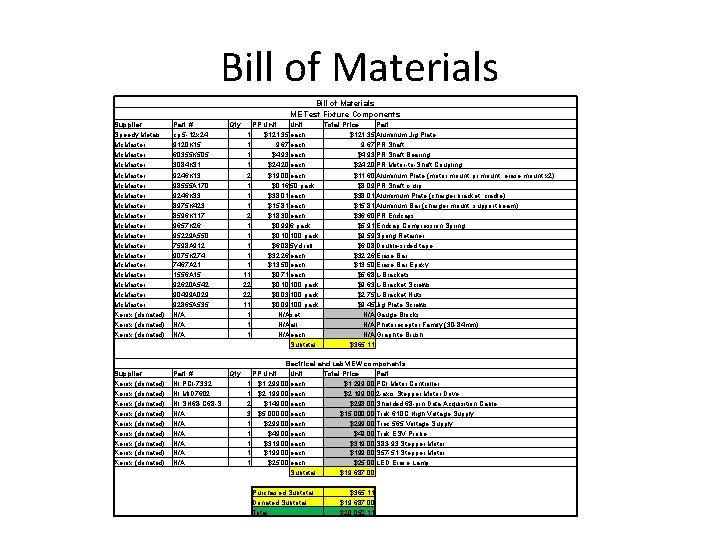
Bill of Materials ME Test Fixture Components Supplier Speedy Metals Mc. Master Part # cp. 5 -12 x 24 9120 K 15 60355 K 505 3084 K 31 Mc. Master Mc. Master Xerox (donated) 9246 K 13 98555 A 170 9246 K 33 8975 K 423 8596 K 117 9657 K 26 95229 A 550 7598 A 912 9075 K 274 7467 A 21 1556 A 15 92620 A 542 90499 A 029 92865 A 535 N/A N/A Supplier Xerox (donated) Xerox (donated) Xerox (donated) Part # NI PCI-7332 NI MID 7602 NI SH 68 -C 68 -S N/A N/A N/A Qty. 1 1 2 1 1 11 22 22 11 1 Qty. PP Unit $121. 35 each 9. 67 each $4. 93 each $24. 20 each $19. 00 each $0. 16 50 pack $38. 01 each $15. 81 each $18. 30 each $0. 99 6 pack $0. 10 100 pack $6. 08 5 yd roll $32. 26 each $13. 50 each $0. 71 each $0. 10 100 pack $0. 03 100 pack $0. 09 100 pack N/A set N/A all N/A each Subtotal Total Price Part $121. 35 Aluminum Jig Plate 9. 67 PR Shaft $4. 93 PR Shaft Bearing $24. 20 PR Motor-to-Shaft Coupling $11. 60 Aluminum Plate (motor mount, pr mount, erase mount x 2) $8. 09 PR Shaft c-clip $38. 01 Alumimum Plate (charger bracket, cradle) $15. 81 Aluminum Bar (charger mount, support beam) $36. 60 PR Endcaps $5. 91 Endcap Compression Spring $9. 59 Spring Retainer $6. 08 Double-sided tape $32. 26 Erase Bar $13. 50 Erase Bar Epoxy $5. 68 L-Brackets $9. 63 L-Bracket Screws $2. 75 L-Bracket Nuts $9. 45 Jig Plate Screws N/A Gauge Blocks N/A Photoreceptor Family (30 -84 mm) N/A Graphite Brush $365. 11 Electrical and Lab. VIEW components PP Unit Total Price Part 1 $1, 299. 00 each $1, 299. 00 PCI Motor Controller 1 $2, 199. 00 each $2, 199. 00 2 -axis Stepper Motor Drive 2 $149. 00 each $298. 00 Sheilded 68 -pin Data Acquisition Cable 3 $5, 000. 00 each $15, 000. 00 Trek 610 C High Voltage Supply 1 $299. 00 each $299. 00 Trec 565 Voltage Supply 1 $49. 00 each $49. 00 Trek ESV Probe 1 $319. 00 each $319. 00 S 83 -93 Stepper Motor 1 $199. 00 each $199. 00 S 57 -51 Stepper Motor 1 $25. 00 each $25. 00 LED Erase Lamp Subtotal $19, 687. 00 Purchased Subtotal Donated Subtotal Total $365. 11 $19, 687. 00 $20, 052. 11

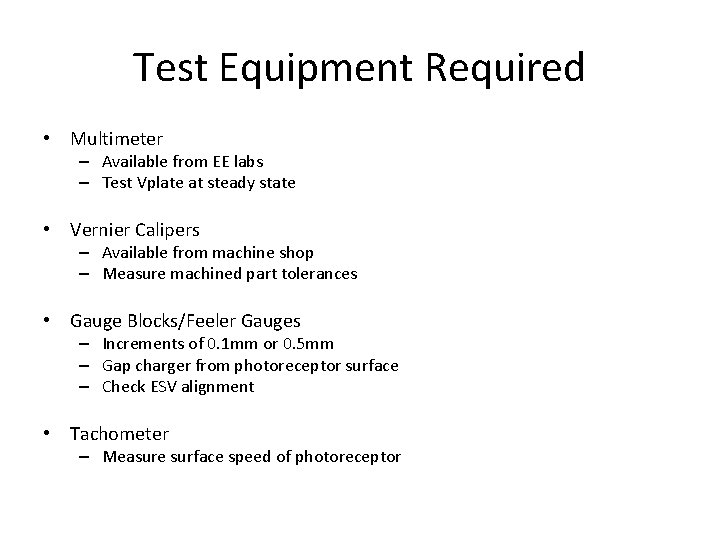
Test Equipment Required • Multimeter – Available from EE labs – Test Vplate at steady state • Vernier Calipers – Available from machine shop – Measure machined part tolerances • Gauge Blocks/Feeler Gauges – Increments of 0. 1 mm or 0. 5 mm – Gap charger from photoreceptor surface – Check ESV alignment • Tachometer – Measure surface speed of photoreceptor

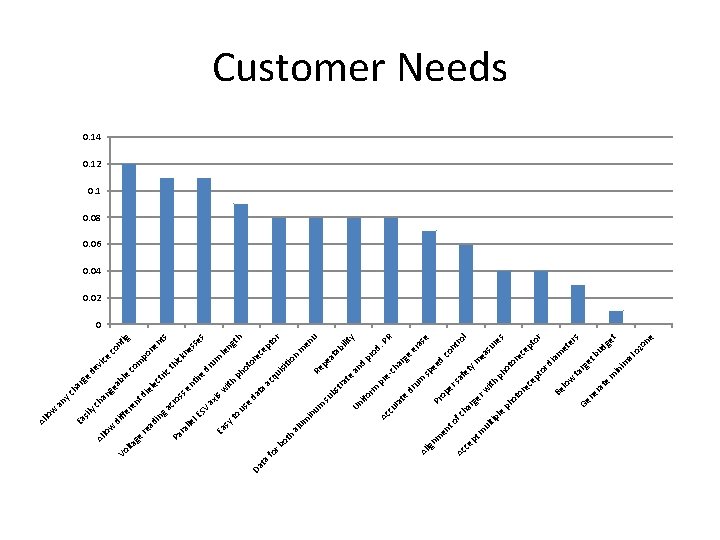
Da te ra ne Ge ne zo ud ge t s r s to er et o al in im m b et rg ta m w lo Be r d ia to ec ep or su re ea ro l nt se ra e d co y m ot p h ec ep or ot ith w er rg fe t sa er op Pr ee sp ge y R . P ilit ab u or en od pr ar -c h re p um dr rm e at pl e ph ul ti ha f c t o en m pt Ac ce ign m Al cu r Ac ifo d an te at pe Re m n io pt ce re s ss e ng th le m to sit ui cq tra bs su Un um in um al h ot r b fo ta a a at ho p ith w is d us e o Ea sy t ru d ire e nt s nt ne po ick ne th ric ct le ie ss ro ax SV l E lle ra Pa g a c in ig nf co ice co m e ev e d bl ea ng t d en d iff er ad re ge lta Vo lo w Al rg ha y c ha sil Ea an w lo Al Customer Needs 0. 14 0. 12 0. 1 0. 08 0. 06 0. 04 0. 02 0

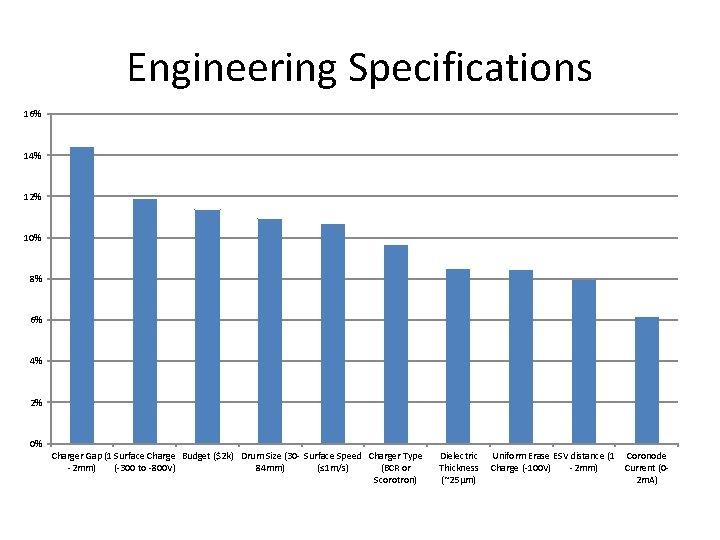
Engineering Specifications 16% 14% 12% 10% 8% 6% 4% 2% 0% Charger Gap (1 Surface Charge Budget ($2 k) Drum Size (30 - Surface Speed Charger Type -2 mm) (-300 to -800 V) 84 mm) (≤ 1 m/s) (BCR or Scorotron) Dielectric Thickness (~25µm) Uniform Erase ESV distance (1 Coronode Charge (-100 V) -2 mm) Current (02 m. A)

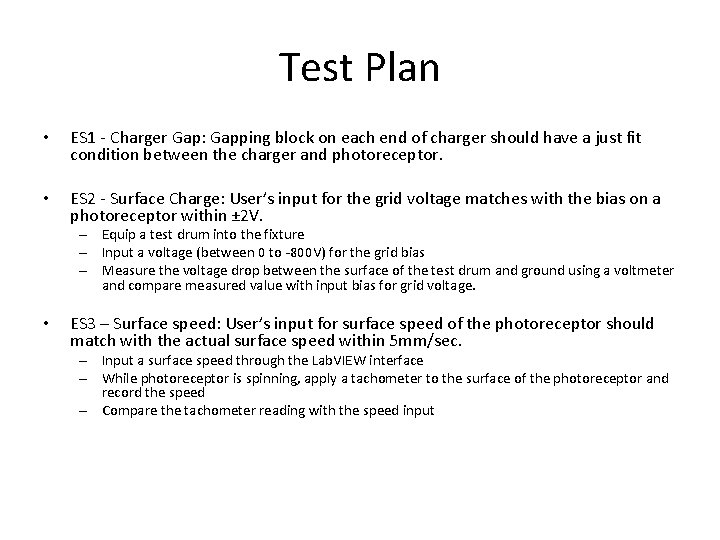
Test Plan • ES 1 - Charger Gap: Gapping block on each end of charger should have a just fit condition between the charger and photoreceptor. • ES 2 - Surface Charge: User’s input for the grid voltage matches with the bias on a photoreceptor within ± 2 V. – Equip a test drum into the fixture – Input a voltage (between 0 to -800 V) for the grid bias – Measure the voltage drop between the surface of the test drum and ground using a voltmeter and compare measured value with input bias for grid voltage. • ES 3 – Surface speed: User’s input for surface speed of the photoreceptor should match with the actual surface speed within 5 mm/sec. – Input a surface speed through the Lab. VIEW interface – While photoreceptor is spinning, apply a tachometer to the surface of the photoreceptor and record the speed – Compare the tachometer reading with the speed input

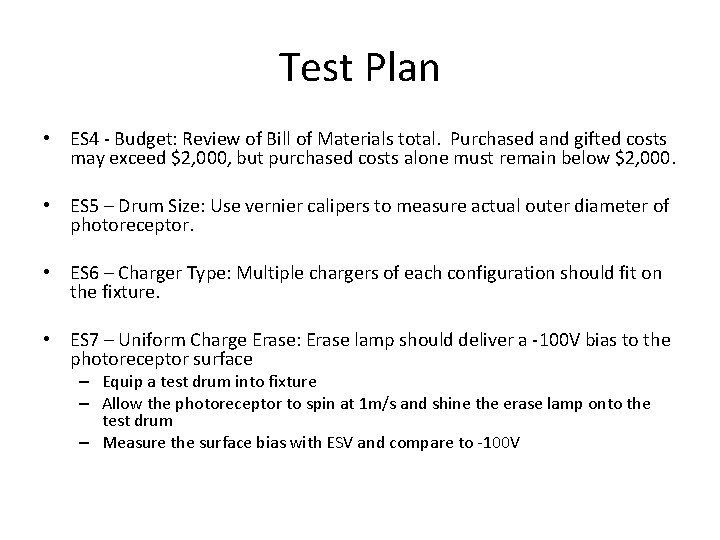
Test Plan • ES 4 - Budget: Review of Bill of Materials total. Purchased and gifted costs may exceed $2, 000, but purchased costs alone must remain below $2, 000. • ES 5 – Drum Size: Use vernier calipers to measure actual outer diameter of photoreceptor. • ES 6 – Charger Type: Multiple chargers of each configuration should fit on the fixture. • ES 7 – Uniform Charge Erase: Erase lamp should deliver a -100 V bias to the photoreceptor surface – Equip a test drum into fixture – Allow the photoreceptor to spin at 1 m/s and shine the erase lamp onto the test drum – Measure the surface bias with ESV and compare to -100 V

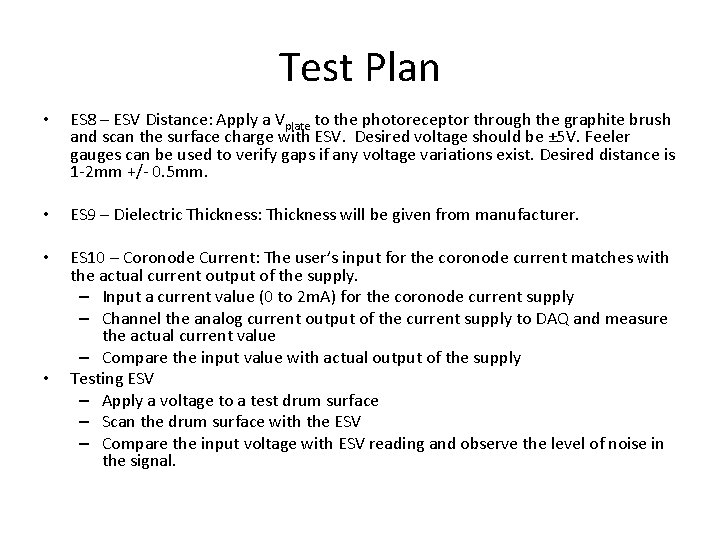
Test Plan • ES 8 – ESV Distance: Apply a Vplate to the photoreceptor through the graphite brush and scan the surface charge with ESV. Desired voltage should be ± 5 V. Feeler gauges can be used to verify gaps if any voltage variations exist. Desired distance is 1 -2 mm +/- 0. 5 mm. • ES 9 – Dielectric Thickness: Thickness will be given from manufacturer. • ES 10 – Coronode Current: The user’s input for the coronode current matches with the actual current output of the supply. – Input a current value (0 to 2 m. A) for the coronode current supply – Channel the analog current output of the current supply to DAQ and measure the actual current value – Compare the input value with actual output of the supply Testing ESV – Apply a voltage to a test drum surface – Scan the drum surface with the ESV – Compare the input voltage with ESV reading and observe the level of noise in the signal. •

Test Plan • Will use a light inhibiting enclosure during actual testing. – Will be sized for no interference with subcomponents

Action Items • Determine required length of ESV – Slide and lead screw will be shortened – Designed motor mount will mate with ESV slide • Add gap between photoreceptor endcap and shaft mount – C-clip and retainer/spacer

Questions?