MULTIVIEW DRAWING 3 02 Apply 2 D sketching


- Slides: 39

MULTI-VIEW DRAWING 3. 02 Apply 2 D sketching skills – Single & Multi-View Drafting I – Coach Pennington

What is Multi-View Drawing? A system that allow the construction of a two-dimensional (2 D) drawing of a threedimensional (3 D) object.

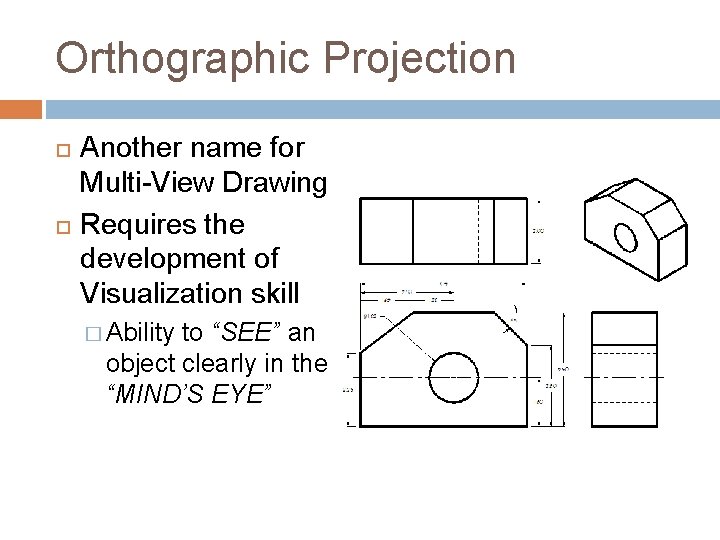
Orthographic Projection Another name for Multi-View Drawing Requires the development of Visualization skill � Ability to “SEE” an object clearly in the “MIND’S EYE”

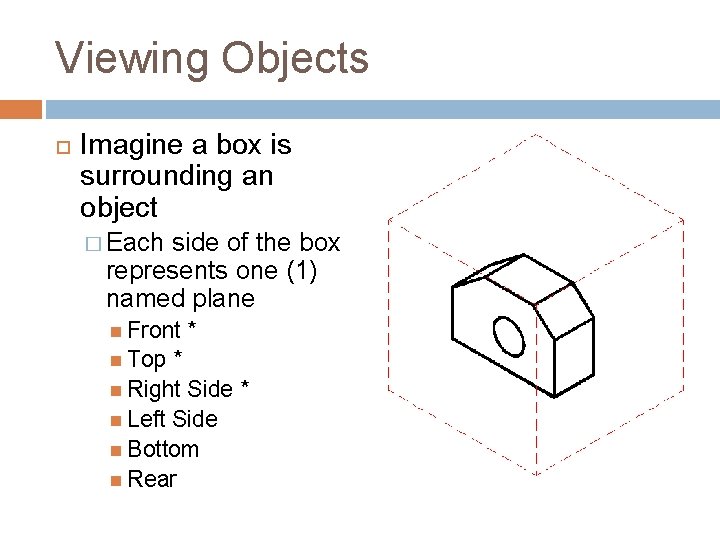
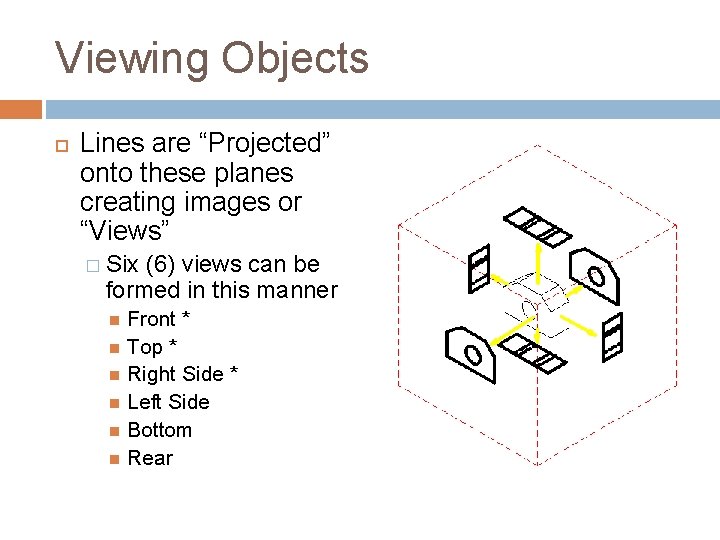
Viewing Objects Imagine a box is surrounding an object � Each side of the box represents one (1) named plane Front Top * * Right Side * Left Side Bottom Rear

Viewing Objects Lines are “Projected” onto these planes creating images or “Views” � Six (6) views can be formed in this manner Front * Top * Right Side * Left Side Bottom Rear

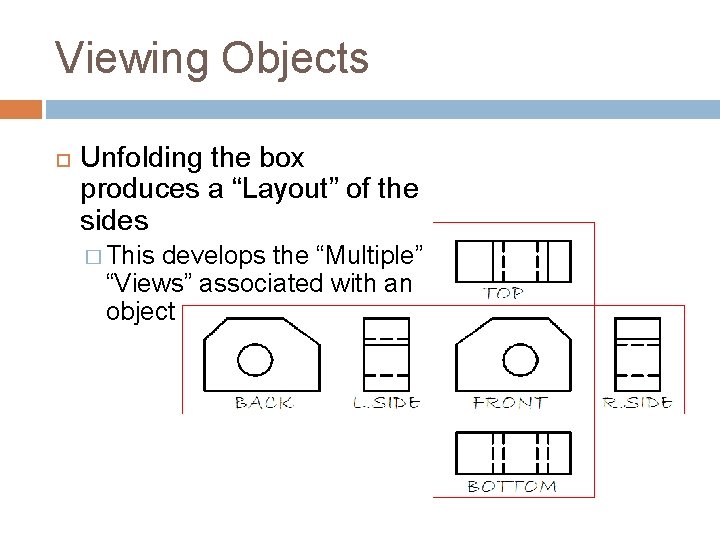
Viewing Objects Unfolding the box produces a “Layout” of the sides � This develops the “Multiple” “Views” associated with an object

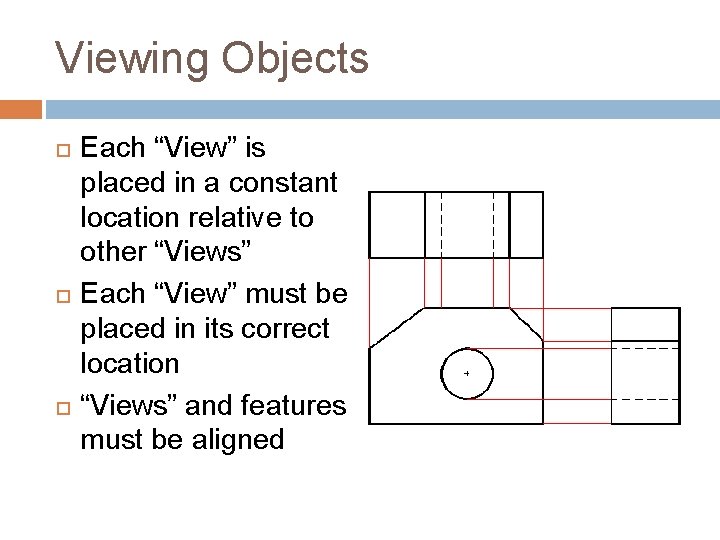
Viewing Objects Each “View” is placed in a constant location relative to other “Views” Each “View” must be placed in its correct location “Views” and features must be aligned

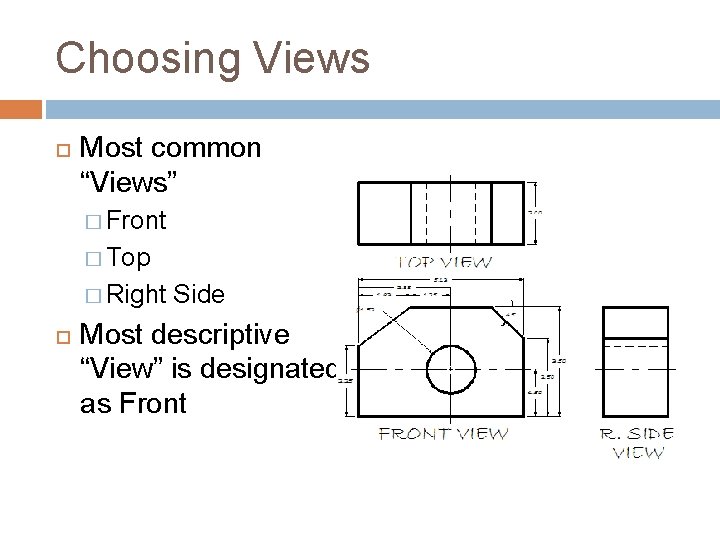
Choosing Views Most common “Views” � Front � Top � Right Side Most descriptive “View” is designated as Front

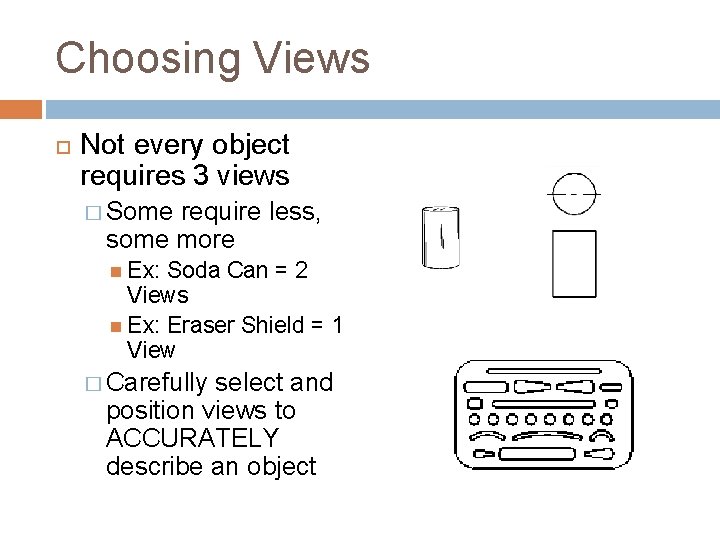
Choosing Views Not every object requires 3 views � Some require less, some more Ex: Soda Can = 2 Views Ex: Eraser Shield = 1 View � Carefully select and position views to ACCURATELY describe an object

Normal Surfaces Always appears as an Edge in two (2) of the standard views of an object

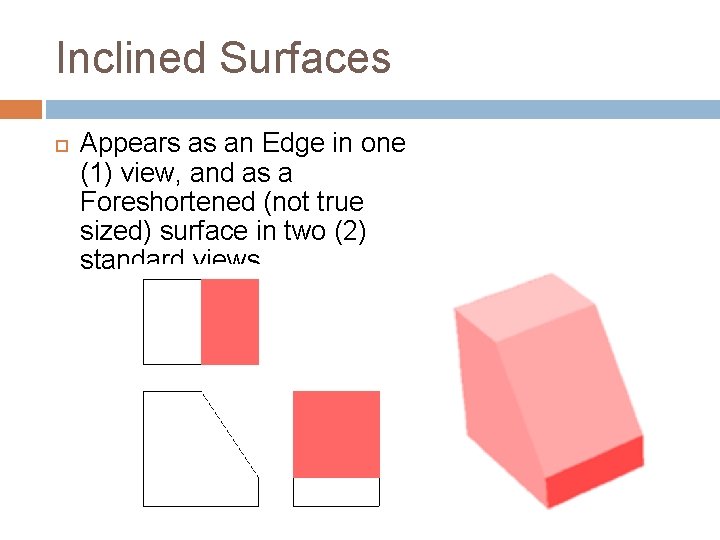
Inclined Surfaces Appears as an Edge in one (1) view, and as a Foreshortened (not true sized) surface in two (2) standard views

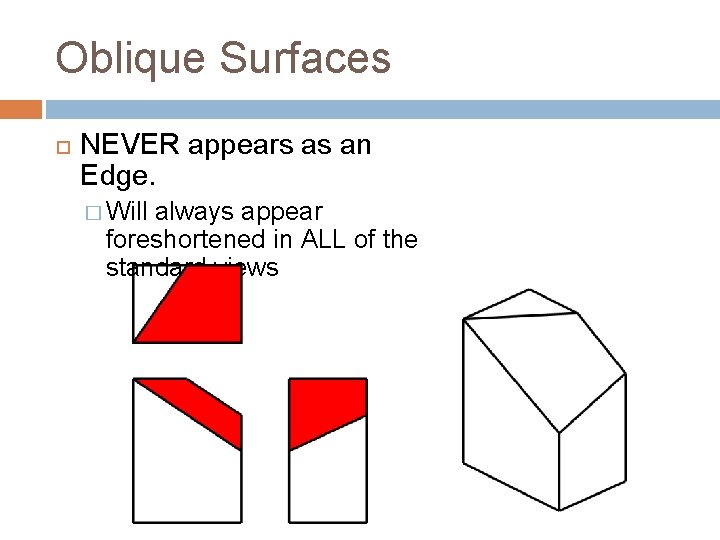
Oblique Surfaces NEVER appears as an Edge. � Will always appear foreshortened in ALL of the standard views

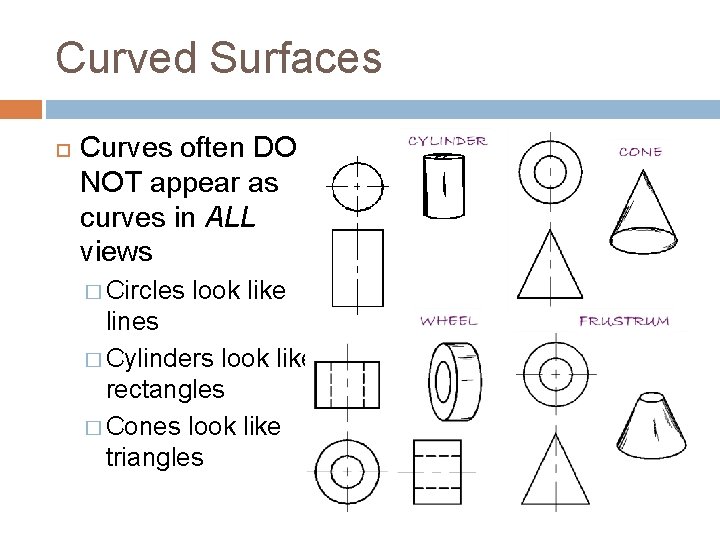
Curved Surfaces Curves often DO NOT appear as curves in ALL views � Circles look like lines � Cylinders look like rectangles � Cones look like triangles

Understanding & Reading the Views

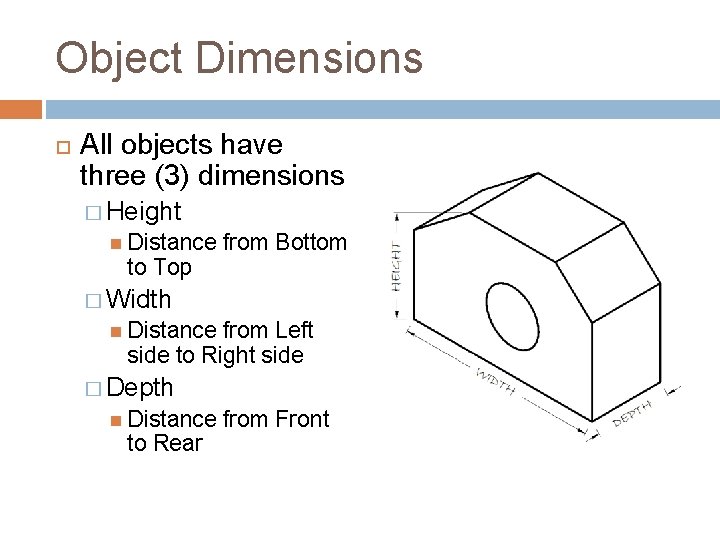
Object Dimensions All objects have three (3) dimensions � Height Distance to Top from Bottom � Width Distance from Left side to Right side � Depth Distance to Rear from Front

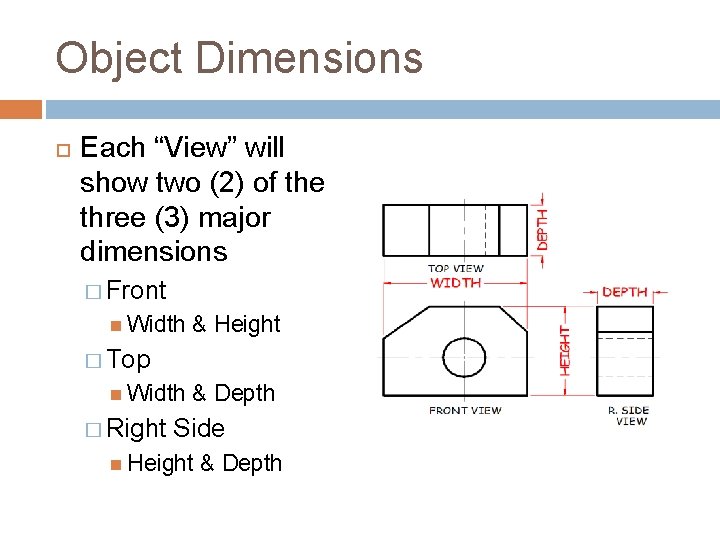
Object Dimensions Each “View” will show two (2) of the three (3) major dimensions � Front Width & Height � Top Width � Right & Depth Side Height & Depth

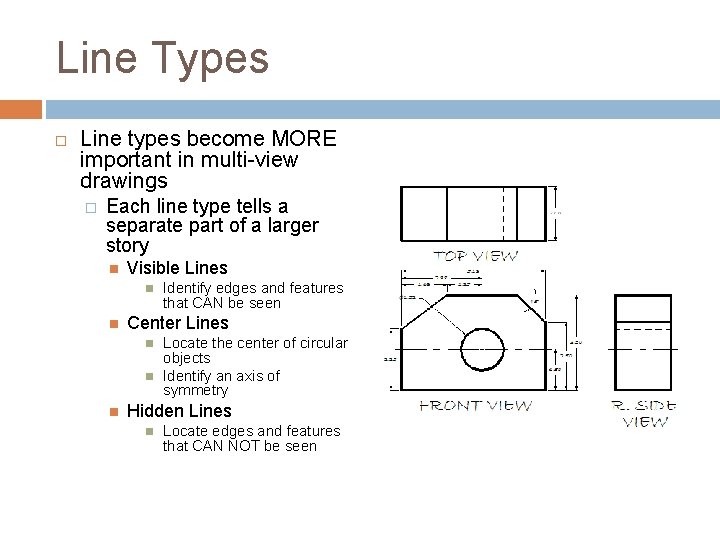
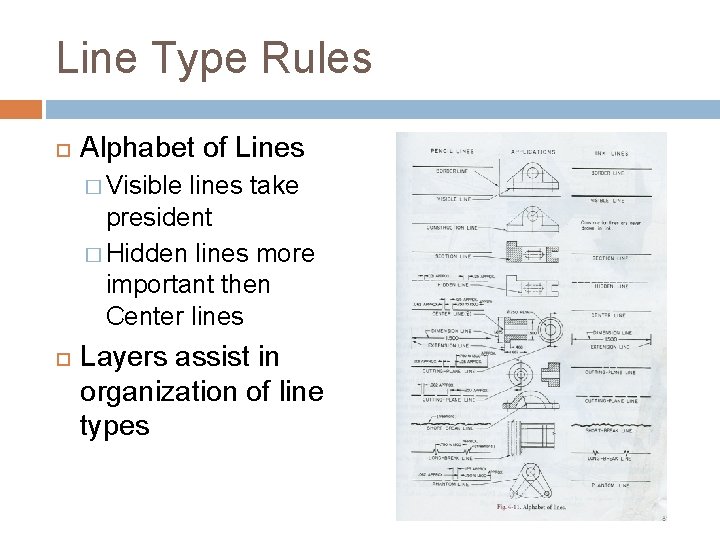
Line Types Line types become MORE important in multi-view drawings � Each line type tells a separate part of a larger story Visible Lines Center Lines Identify edges and features that CAN be seen Locate the center of circular objects Identify an axis of symmetry Hidden Lines Locate edges and features that CAN NOT be seen

Line Type Rules Alphabet of Lines � Visible lines take president � Hidden lines more important then Center lines Layers assist in organization of line types

Construction Process

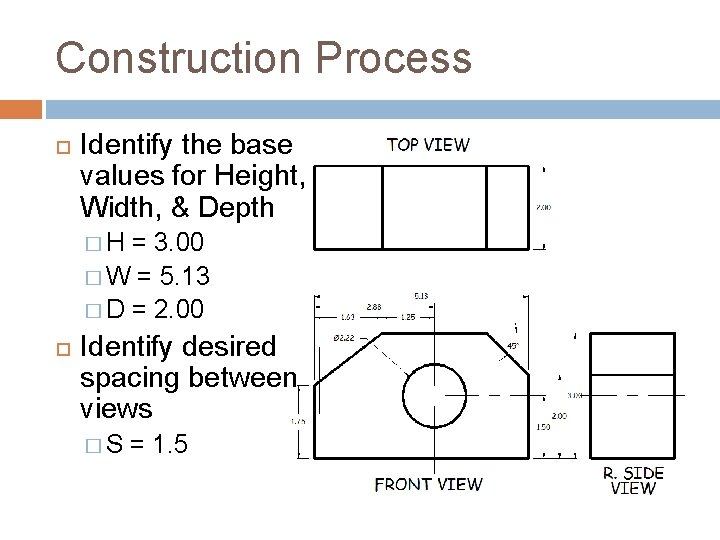
Construction Process Identify the base values for Height, Width, & Depth �H = 3. 00 � W = 5. 13 � D = 2. 00 Identify desired spacing between views �S = 1. 5

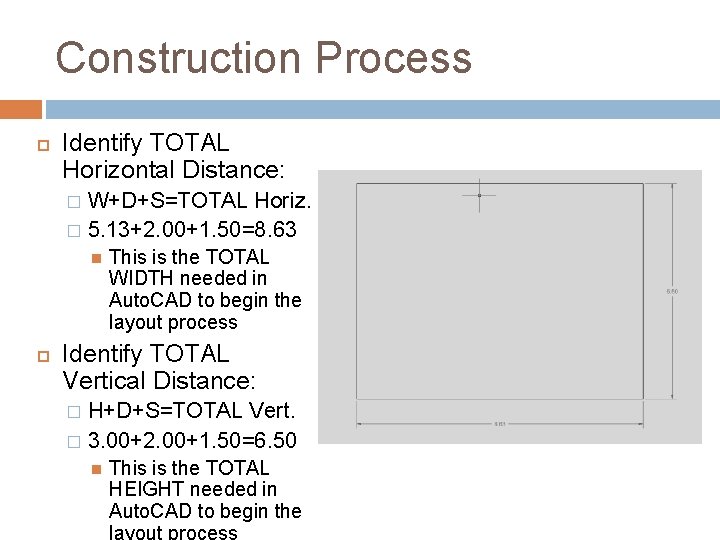
Construction Process Identify TOTAL Horizontal Distance: W+D+S=TOTAL Horiz. � 5. 13+2. 00+1. 50=8. 63 � This is the TOTAL WIDTH needed in Auto. CAD to begin the layout process Identify TOTAL Vertical Distance: H+D+S=TOTAL Vert. � 3. 00+2. 00+1. 50=6. 50 � This is the TOTAL HEIGHT needed in Auto. CAD to begin the layout process

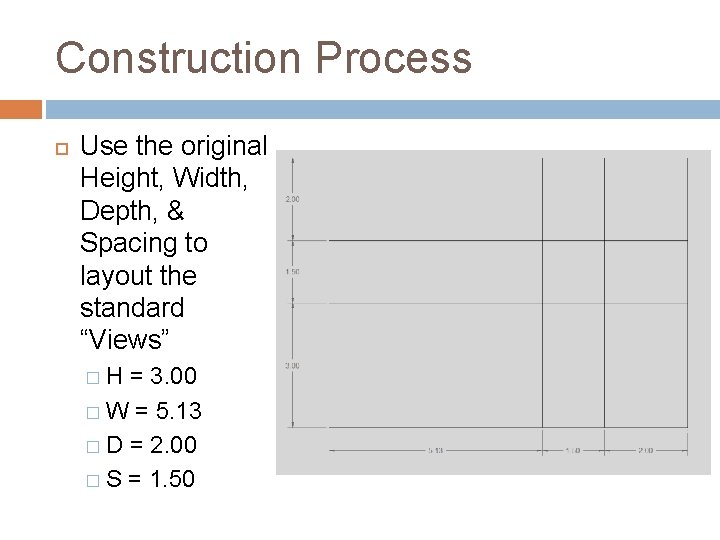
Construction Process Use the original Height, Width, Depth, & Spacing to layout the standard “Views” �H = 3. 00 � W = 5. 13 � D = 2. 00 � S = 1. 50

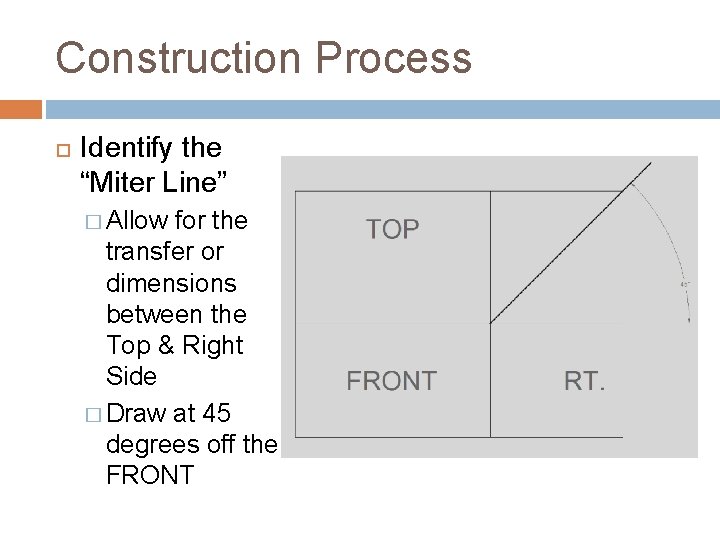
Construction Process Identify the “Miter Line” � Allow for the transfer or dimensions between the Top & Right Side � Draw at 45 degrees off the FRONT

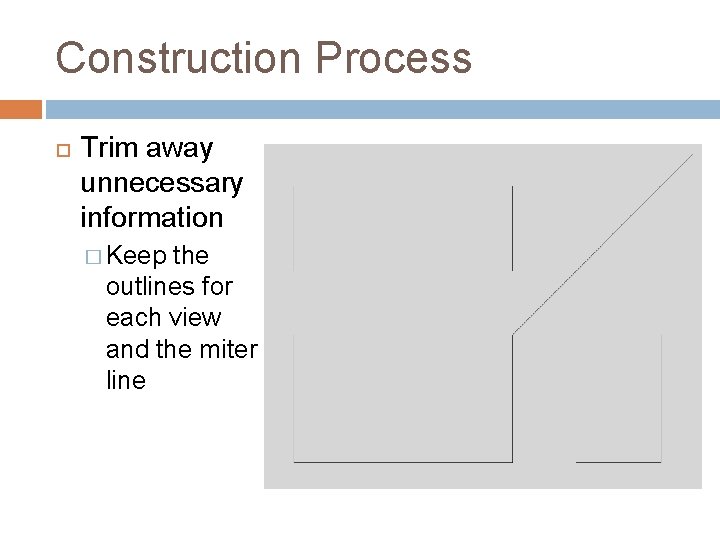
Construction Process Trim away unnecessary information � Keep the outlines for each view and the miter line

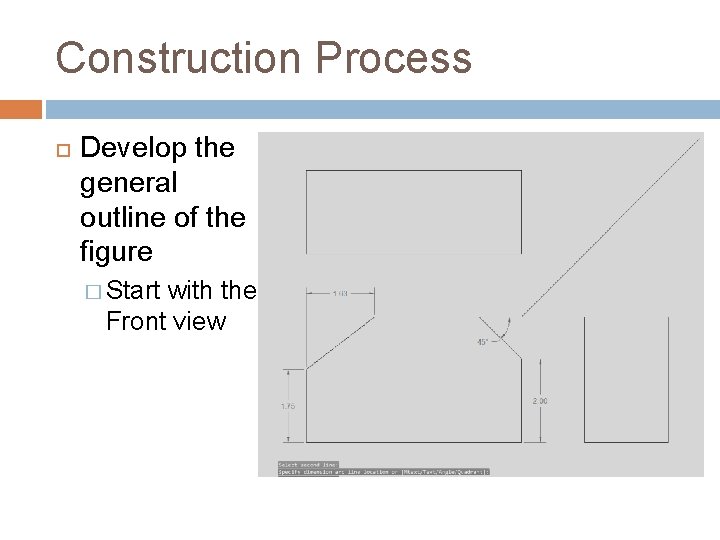
Construction Process Develop the general outline of the figure � Start with the Front view

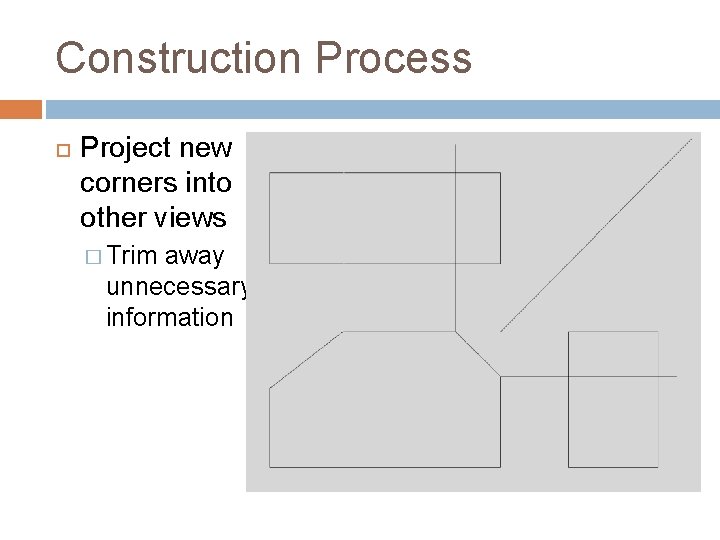
Construction Process Project new corners into other views � Trim away unnecessary information

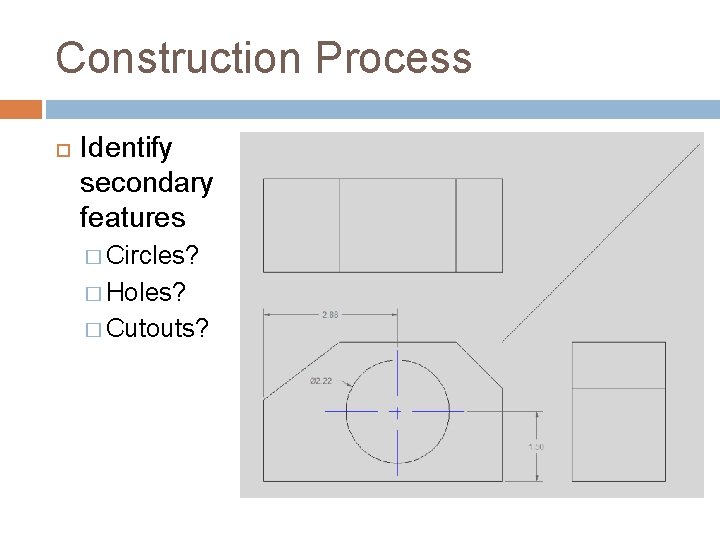
Construction Process Identify secondary features � Circles? � Holes? � Cutouts?

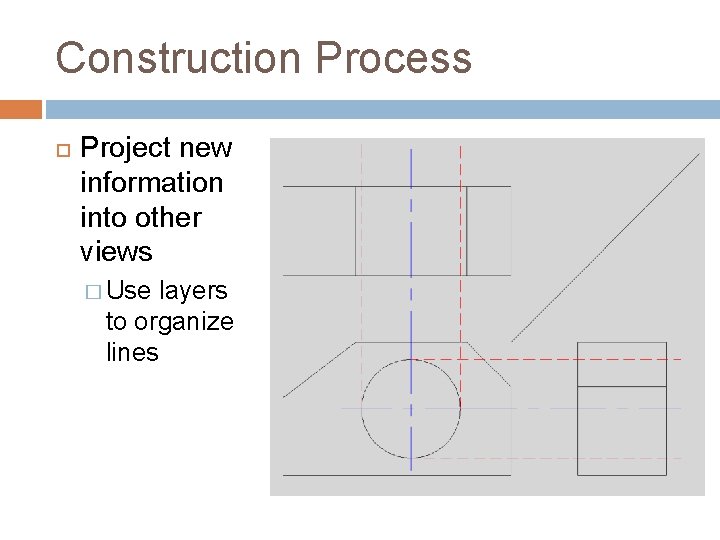
Construction Process Project new information into other views � Use layers to organize lines

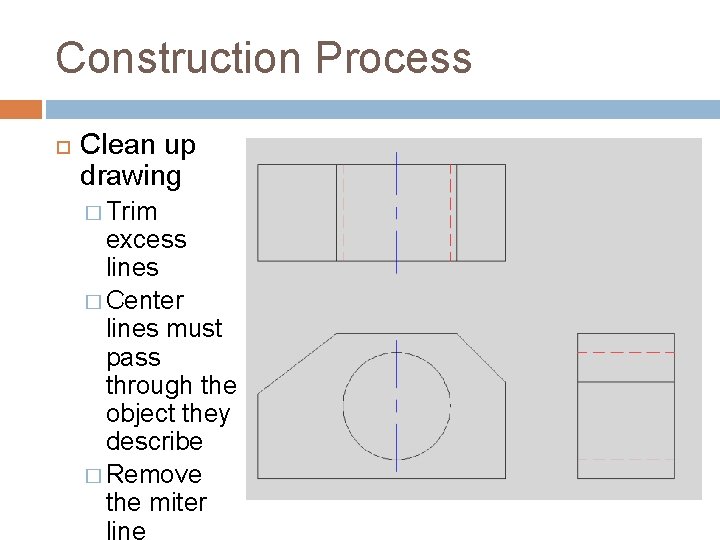
Construction Process Clean up drawing � Trim excess lines � Center lines must pass through the object they describe � Remove the miter line

Orthographic Projection

Orthographic Projection The term orthographic projection means to “throw forward at right angles and draw”. In the term “orthographic projection”, the “graphic” refers to be written or drawn. Orthographic projection involves the use of three planes, which are horizontal, frontal, and profile.

Orthographic Projection Steps to completing a Multiview Drawing �Open the Border �What are the 3 Dimensions that you have to know to make a Multiview Height Width Depth

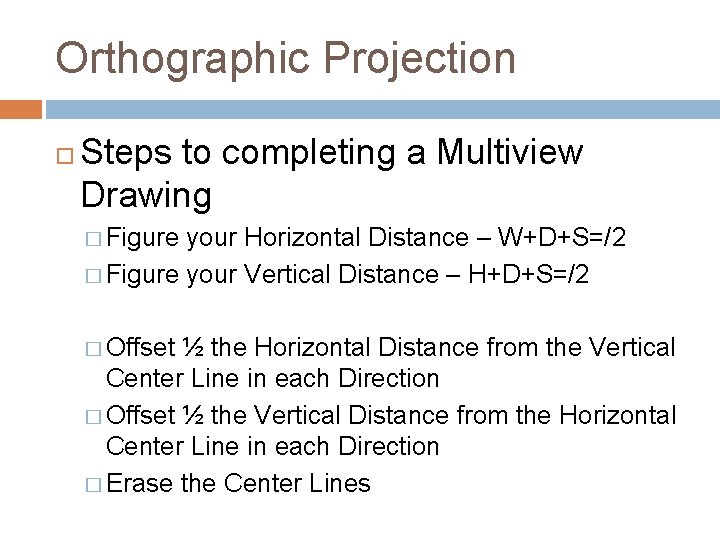
Orthographic Projection Steps to completing a Multiview Drawing � Figure your Horizontal Distance – W+D+S=/2 � Figure your Vertical Distance – H+D+S=/2 � Offset ½ the Horizontal Distance from the Vertical Center Line in each Direction � Offset ½ the Vertical Distance from the Horizontal Center Line in each Direction � Erase the Center Lines

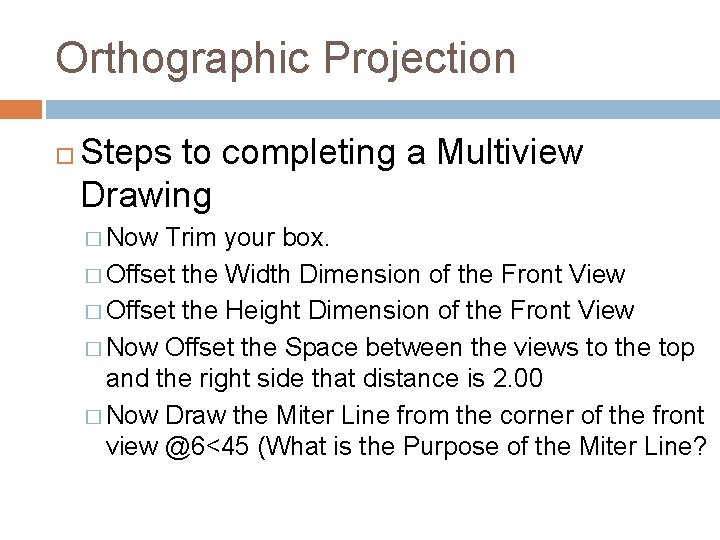
Orthographic Projection Steps to completing a Multiview Drawing � Now Trim your box. � Offset the Width Dimension of the Front View � Offset the Height Dimension of the Front View � Now Offset the Space between the views to the top and the right side that distance is 2. 00 � Now Draw the Miter Line from the corner of the front view @6<45 (What is the Purpose of the Miter Line?

Orthographic Projection Steps to completing a Multiview Drawing � Now you are ready to begin adding the features to your drawing. Start with the front view. � Remember Where ever there is a point in one view it must appear a line in another view. � Remember Center Lines must be ¼ inch outside the object lines

Complex & Tangent Surfaces

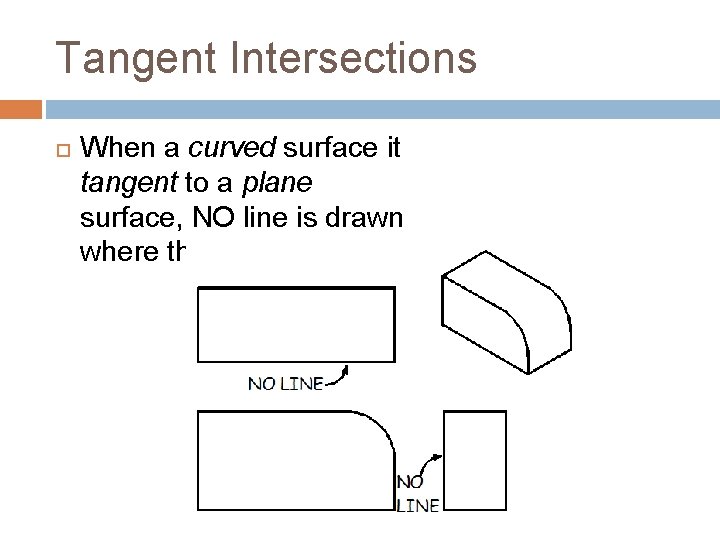
Tangent Intersections When a curved surface it tangent to a plane surface, NO line is drawn where they join.

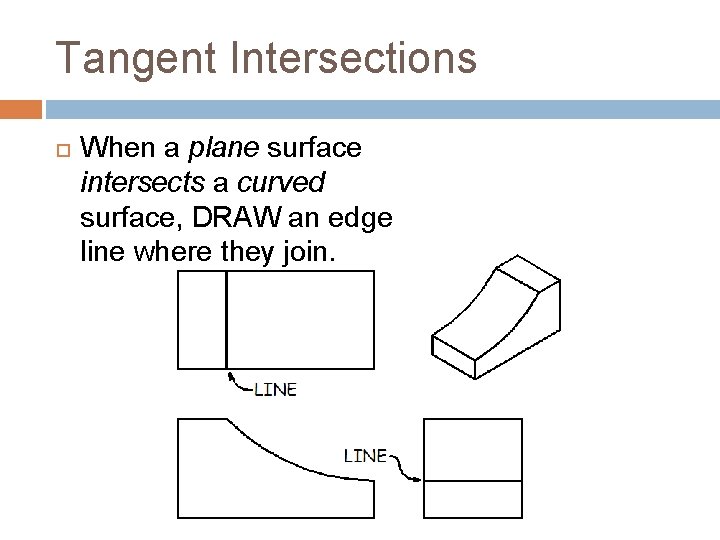
Tangent Intersections When a plane surface intersects a curved surface, DRAW an edge line where they join.

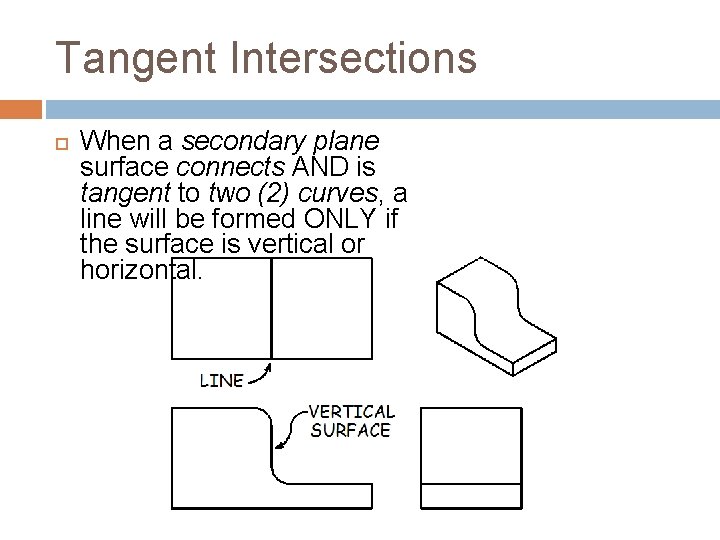
Tangent Intersections When a secondary plane surface connects AND is tangent to two (2) curves, a line will be formed ONLY if the surface is vertical or horizontal.