Lecture 9 Introduction to Arduino Topics Arduino Fundamentals


- Slides: 20

Lecture 9: Introduction to Arduino Topics: Arduino Fundamentals, Bean Date: Mar 22, 2016

References (study these) • https: //www. arduino. cc/en/Guide/Introduction • https: //www. arduino. cc/en/Tutorial/Foundations • https: //www. arduino. cc/en/Guide/Board. Anatomy • https: //www. arduino. cc/en/Tutorial/Digital. Pins • https: //www. arduino. cc/en/Tutorial/Analog. Input. Pins • https: //www. arduino. cc/en/Tutorial/PWM • https: //www. arduino. cc/en/Tutorial/Memory • https: //www. arduino. cc/en/Reference/Pin. Mode • https: //www. arduino. cc/en/Reference/Digital. Write • https: //www. arduino. cc/en/Reference/Digital. Read • https: //www. arduino. cc/en/Reference/Analog. Write

America’s Greatest Makers Premiering Tuesday, April 5 th, 2016 at 9: 00 pm ET/PT https: //www. youtube. com/watch? v=Ga. PMGSqxmu. Y

What is Arduino? • “Open-source prototyping platform based on easy to use HW and SW. ” • • Inexpensive Cross-platform Simple programming environment (IDE) Open-source SW and HW

Making Stuffs using Arduino • You can connect sensors and actuators, and program your Arduino to control them. Sensors (input) Actuators (output)

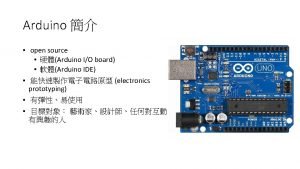
Arduino Uno Anatomy http: //arduinoarts. com/tag/anatomy/

Program Structure • setup() – executed once at the beginning. • loop() – it’s an infinite loop.

Arduino Language Reference • Almost the same as C with some new things: • • • setup() and loop() Constants: HIGH, LOW, INPUT, OUTPUT PROGMEM, EEPROM Digital/Analog input/output functions Library methods for – character, bits, interrupts, and communication. • https: //www. arduino. cc/en/Reference/Home. Page

Digital Read and Write • Digital IO: HIGH or LOW int led. Pin = 13; // LED connected to digital pin 13 int in. Pin = 7; // pushbutton connected to digital pin 7 int val = 0; // variable to store the read value void setup() { pin. Mode(in. Pin, INPUT); // sets digital pin 7 as input pin. Mode(led. Pin, OUTPUT); // sets digital pin 13 as output } void loop() { val = digital. Read(in. Pin); digital. Write(led. Pin, val); } // read the input pin (button) // sets the LED to the value

Analog Read • Arduino UNO has a 10 -bit analog-to-digital converter, so input voltage mapped to [0, 1023] int analog. Pin = 3; // potentiometer middle terminal connected to analog pin 3 outside leads to ground and +5 V int val = 0; // variable to store the value read void setup() { Serial. begin(9600); // setup serial } void loop() { val = analog. Read(analog. Pin); Serial. println(val); } // read the input pin // debug value

Analog Write (PWM) • Getting analog results with digital means. • Must be [0, 255], and it will mean “duty cycle”. pin. Mode(9, OUTPUT); int X = 123; analog. Write(9, X);

Memory TYPE SIZE (UNO) USE Volatile? Flash 32 K Program space No SRAM 2 K Variables Yes EEPROM 1 K Long term information No • Optimizing SRAM use: § Use a connected smartphone/computer to move data out for calculation. § Use smaller data types (byte if you don’t need an int. ) § Use Flash memory (PROGMEM keyword) § Use EEPROM (use EEPROM library)

Expanding Arduino with ‘Shields’ Arduino + GPS Shield Arduino + Joy Stick Shield Arduino + Xbee Shield

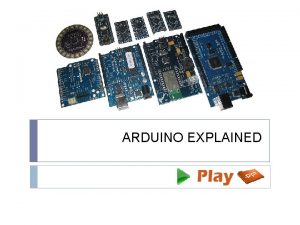
Variety of Arduino Boards

We will use a ‘Bean’ To get a Bean for free: https: //punchthrough. com/bean/guides/everything-else/free-bean/

Installation/Setup • Coding: • Install Arduino + Bean IDE Patch (for laptop) • Install Droid. Edit App (coding on the phone!) • Loading/Running Code on Bean: • Install Bean. Loader App (Phone or Laptop) https: //punchthrough. com/bean/guides/everything-else/downloads/

Coding and Loading: Way #1 Coding + Wireless loading Arduino studio + Bean patch + Beanloader (laptop)

Coding and Loading: Way #2 File Copy Arduino studio + Bean Patch Wireless Loading Android Bean. Loader App

Coding and Loading: Way #3 File Select Droid. Edit App Wireless Loading Android Bean. Loader App

Let’s see Bean. Loader in action
 Arduino topics
 01:640:244 lecture notes - lecture 15: plat, idah, farad
 Pearson education, inc
 Introduction to biochemistry lecture notes
 Introduction to psychology lecture
 Introduction to algorithms lecture notes
 Arduino powerpoint
 Https://www.arduino.cc/en/guide/introduction
 What is an arduino
 Intro paragraph outline
 Topics for writing articles for school magazine
 Year 9 persuasive writing examples
 Thematic paragraph
 Behavioural training topics
 Skill 24 anticipate the questions
 What is competency based interview
 Surprising reversal essay example
 What is the central idea of the great gatsby
 What is a thematic topic
 Table topics questions toastmasters
 Example of objective writing
